
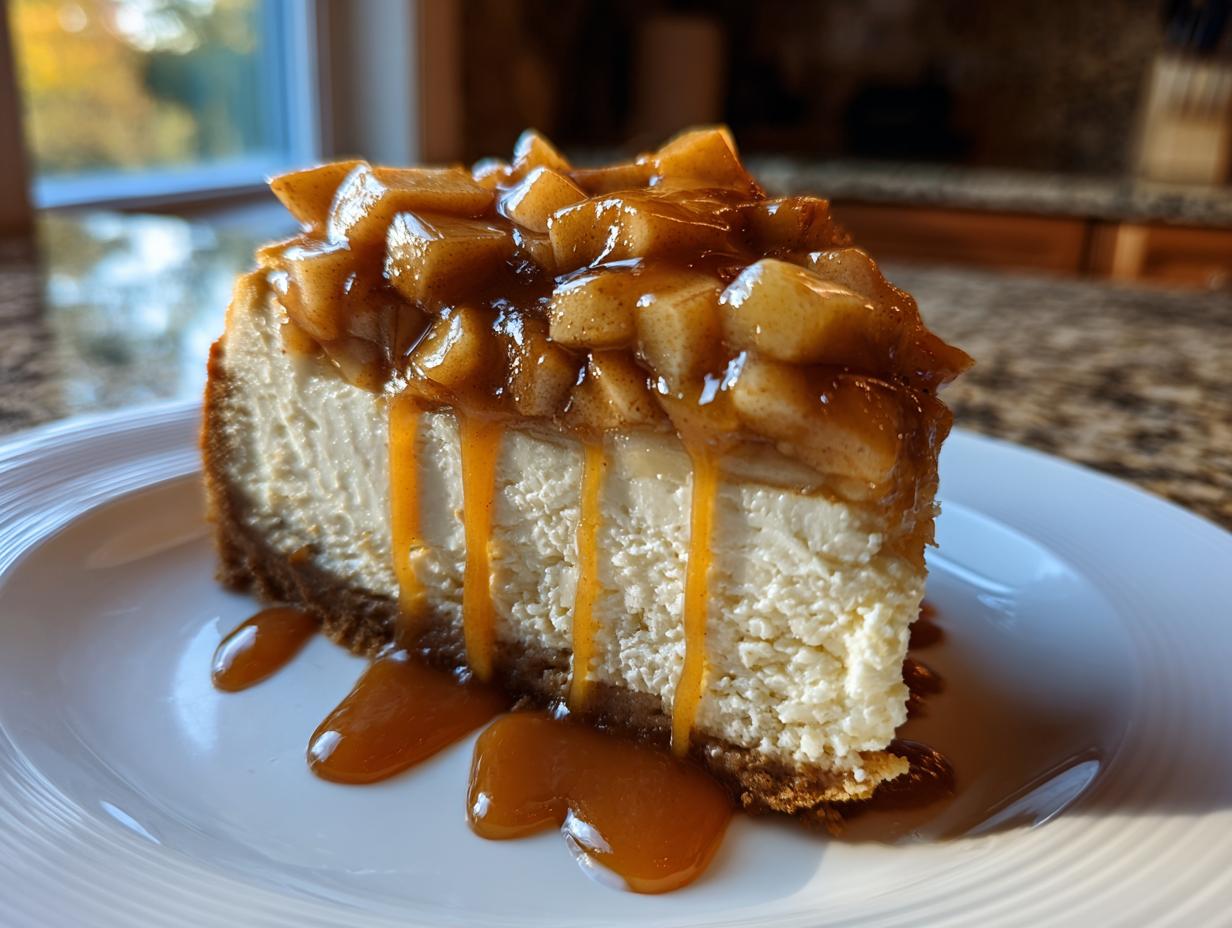
Oh, I just love when two of my favorite things decide to have a party in one dish! We all know that dessert mashups can sometimes be disasters, but trust me on this one: combining the spiced, sweet comfort of a classic apple pie with the luxurious, creamy tang of cheesecake is pure genius. This recipe for a baked apple pie cheesecake, finished with a rich, homemade salted caramel drizzle, is truly my ultimate showstopper, especially when the leaves start turning and the holidays roll around. Drawing on those Midwest baking traditions I learned growing up, I promise you this is a decadent treat that is surprisingly reliable and totally achievable, even if you’re in the middle of the evening school run rush. You know how much I love a good seasonal bake, like my pumpkin pecan cobbler, but this cheesecake feels extra special. Don’t be intimidated by the layers; we’re going to take it one simple step at a time!
- Why This Classic Baked Apple Pie Cheesecake Recipe Works
- Simple Ingredients for Your Apple Pie Cheesecake
- How to Prepare the Best Apple Pie Cheesecake
- Crafting the Salted Caramel Apple Cheesecake Drizzle
- Tips for Success with Your Apple Crumble Cheesecake
- Serving Suggestions for This Thanksgiving Dessert Recipes Favorite
- Storage and Reheating Instructions for Apple Pie Cheesecake
- Frequently Asked Questions About This Dessert Mashup Recipes
- Sharing Your Showstopper Cheesecake Experience
Why This Classic Baked Apple Pie Cheesecake Recipe Works
This isn’t just another dessert mashup; this apple pie cheesecake is built on reliability, which is so important when you’re busy. We get the best of both worlds here—that deep apple flavor we crave alongside that smooth, velvety base. My goal is always to give you a showstopper without the stress!
- The spices in the apples cut through the richness perfectly.
- We use a water bath to guarantee that signature creamy texture.
- That final salted caramel drizzle just elevates the whole thing into gourmet territory!
If you’re nervous about baking cheesecakes, check out my advice over on my creamy no-crack cheesecake guide—it really helps!
Achieving the Perfect Creamy Cheesecake Dessert Texture
The number one key to a successful baked cheesecake is patience with your ingredients. You simply must use room temperature cream cheese and eggs; that’s non-negotiable for a smooth base! Next, we rely on the gentle steam provided by the water bath. That slow, moist heat is what sets the exterior beautifully while keeping the center soft. It’s the secret to getting that truly luxurious Creamy Cheesecake Dessert experience every single time.
Simple Ingredients for Your Apple Pie Cheesecake
When I create a recipe for Rosa’s Tasty Kitchen, I always prioritize making sure you don’t have to hunt down specialty items. Honestly, the magic in this apple pie cheesecake comes from how we combine these basic pantry staples! We’ve broken the components down into three main groups: the buttery crust, the chunky spiced apple topping, and, of course, the heavenly cheesecake filling. This combination delivers exactly what you want in a showstopper dessert without needing a trip to a fancy market.
You’ll find the full, easy-to-follow ingredient list right below the instructions, but I wanted to chat quickly about why these components are so dependable. You’ll see that these are the most Simple Cheesecake Ingredients you can find, which means we can whip this up even on a busy weeknight! If you love this concept, you should check out my ultimate sheet pan apple pie bars recipe too!
Ingredient Clarity for the Graham Cracker Crust Cheesecake
We start with a foundation that’s sturdy enough to hold up to that glorious cheesecake layer. We aren’t fussy here; we’re using crushed graham crackers melted butter, and just a touch of sugar. This forms the perfect, crunchy base for your Graham Cracker Crust Cheesecake. Making sure your 6 tablespoons of fat are melted and mixed thoroughly with the crumbs is key so that you get that perfect, press-in base for your apple pie cheesecake.
Preparing the Spiced Apple Dessert Filling
This is where we nail that authentic apple pie flavor! I only recommend using tart Granny Smith apples here. If you use something too soft, they’ll turn to mush when cooked down, and we want texture! We dice them up, cook them briefly with brown sugar and spices—cinnamon and nutmeg are essential—and then we use a little cornstarch slurry to ensure the juices thicken up perfectly. This thick consistency is vital so the apples don’t weep water into our cheesecake batter. That’s the secret to keeping the cheesecake with apple topping firm and delicious!
How to Prepare the Best Apple Pie Cheesecake
Okay, this is where we roll up our sleeves! Getting that incredible texture in the Best Apple Pie Cheesecake comes down to managing three distinct stages: the base, the apples, and the filling. Follow my mixing rules, and you absolutely cannot go wrong. Remember, this is a dessert that tastes amazing, but it requires you to be gentle with those crucial steps to get that perfect, non-cracked surface we’re aiming for. I’ve made this so many times, it’s second nature now, but I’ll walk you through every detail! For more great fall apple ideas, don’t forget to check out my notes on how to make easy baked apples.
Step-by-Step Baked Cheesecake Tutorial
First up, preheat your oven—we’re starting at 350°F (175°C). Mix your crust ingredients and press that firmly into your springform pan, then give it a quick 10-minute bake. While that cools, hop over to the stovetop to cook your apples. You want them just starting to soften, and then you whisk up that cornstarch slurry—that’s just cornstarch and water—and stir it in until everything thickens up nicely. Now for the filling: Beat your cream cheese until it’s smooth as silk, then gently add the sugar. Here’s where you need to listen to me: Add the eggs one at a time, and I mean *one at a time*. Stop mixing the second they disappear! Overmixing is the enemy of a smooth texture, folks; that brings in too much air which leads to cracks later. We want minimal mixing for the Baked Cheesecake Tutorial!
Assembling and Baking the Apple Pie Cheesecake
Time to build this beauty! Pour half of your smooth cheesecake batter into the crust. Then, take half of the slightly cooled apple topping and spoon it gently over the batter. Now, pour the rest of the batter on top, followed by the remaining apples. Before it goes in the oven, we wrap the bottom of that springform pan tightly with heavy-duty foil—and I mean tight! We need to create a sealed barrier before placing it into a larger roasting pan. Carefully pour hot water into the roasting pan until it comes about halfway up the sides of your springform pan. This water bath is vital for even baking! Bake this gorgeous creation for 60 to 75 minutes. When it’s done, the edges should look set, but the center should still have a little jiggle. Don’t pull it out yet! Turn the oven off completely, prop the door open just a crack, and let it cool inside for a full hour. This slow descent is the secret to preventing that dreaded sinkhole!
Crafting the Salted Caramel Apple Cheesecake Drizzle
Now for the grand finale! We can’t have an amazing apple pie cheesecake without a little something extra drizzled on top for that gourmet finish, right? This homemade salted caramel is so much better than anything store-bought, and honestly, once you conquer making it, you’ll drizzle it on everything—just like my guide on caramelized onions taught you with savory things!
To start your Salted Caramel Apple Cheesecake sauce, you need a heavy-bottomed little pot. We melt the sugar and water together slowly until it turns a deep, rich amber color—like dark honey. Don’t stir it while it melts, just swirl the pan gently. The most important part is what comes next:
When you take it off the heat and slowly whisk in the heavy cream, watch out! It bubbles up intensely, so stand back a bit! You need to whisk quickly until it smooths out before adding the butter and that crucial pinch of sea salt. Let the whole mixture cool down slightly before you drizzle it over your perfectly chilled cheesecake. If you want to see another amazing version featuring this flavor profile, check out the details over at flavzu!
Tips for Success with Your Apple Crumble Cheesecake
Even though this recipe focuses on the spiced apple layers rather than a traditional oat crumble topping, the success of that apple element relies heavily on the final chilling steps. Honestly, I know waiting is the hardest part of baking, but you simply have to let this beauty set up properly. If you try to slice it too soon, you’re going to have a messy situation on your hands, and we definitely want clean slices for those holiday platters!
My biggest piece of advice, which I cover more in my general cheesecake baking tips, concerns the chilling time. This isn’t like a regular cake; cheesecake needs time for the structure to fully firm up around those cooked apples. You are aiming for a minimum of six hours in the fridge, but I am telling you right now, if you can resist and let it chill overnight, the flavor develops so much better. Those spices from the Apple Crumble Cheesecake-style apples meld perfectly into the creamy base overnight!
When it comes time to serve, forget sawing at it aggressively! The best way to get those picture-perfect slices is to use a long, thin knife dipped in hot water and wiped dry between every single cut. That hot blade glides right through the chilled cream cheese and the set apple layer without dragging or squishing. Trust me, running that knife under hot water makes slicing this rich dessert so much easier!
Serving Suggestions for This Thanksgiving Dessert Recipes Favorite
When you pull this glorious apple pie cheesecake out for your big fall gathering, you want to make sure the sides match its decadent vibe! Since this is already such a rich and complex dessert, I find you don’t need much fuss. Served slightly chilled, not ice-cold, is when the texture is just perfect—the cream cheese is firm but yielding. It’s absolutely divine on its own, but a tiny dollop of fresh whipped cream never hurts anyone! If you’re looking for another dependable holiday classic to serve alongside it, my easy pumpkin pie is always the perfect counterpoint to this creamy treat. This easily stands up as one of my top favorite Thanksgiving Dessert Recipes!
Storage and Reheating Instructions for Apple Pie Cheesecake
Since this apple pie cheesecake is such a labor of love, we definitely want to make sure we store it correctly so it tastes just as amazing the next day—or three days later! Cheesecake is just one of those amazing Comfort Food Desserts that actually tastes better after a night in the fridge, letting those apple spices really sink into that creamy base.
The main goal when storing any cheesecake is to guard against drying out and absorbing any weird fridge odors. So, once you’ve finished admiring your masterpiece and slicing the first piece, cover the entire remaining cake tightly with plastic wrap. If you have an airtight cake dome, even better! Keep it in the refrigerator. It should hold up beautifully for about three to four days.
Now, about freezing: While you *can* technically freeze cheesecake, I always tell folks that the texture changes just a little bit once thawed, especially with that apple layer in there. If you absolutely must freeze it, I recommend slicing it first. Wrap those individual slices tightly in plastic wrap, then slip them into a freezer bag. This helps reduce freezer burn. I’d strongly suggest foregoing the caramel drizzle before freezing, though!
Speaking of that delicious topping, remember that the rich, gooey salted caramel drizzle should always, always be added right before you serve it. If you cover the caramel in plastic wrap in the fridge, it will firm up and can become sticky or pull at the top of the cheesecake when you try to unwrap it. So, let the slice come (or the whole cake) sit on the counter for about 20 minutes to slightly warm up before you drizzle on that glorious sauce. That way, you get the perfect texture contrast: cold, firm cheesecake, slightly warm spiced apples, and flowing caramel!
Frequently Asked Questions About This Dessert Mashup Recipes
I totally get it; when you’re trying a big recipe like this apple pie cheesecake, you always have a few questions buzzing around! I’ve tried to incorporate all the best advice I’ve gathered over the years of making these delicious Dessert Mashup Recipes. If you’re curious about storage or making variations, I might have already covered it in my general easy cheesecake bars guide, but here are the quick answers for this specific bake!
Can I make a No Bake Apple Pie Cheesecake instead?
That’s a great question, especially when you’re short on oven time! While this particular recipe is designed to be baked—that’s how we get that rich, dense texture that holds up to the apples and caramel—you absolutely *can* make a no-bake version. You would skip the crust baking and the water bath entirely, of course. For the no-bake filling, you typically need to stabilize the cream cheese mixture with powdered sugar and maybe a little gelatin or softened whipped topping to help it set up firm in the fridge, rather than relying on eggs and heat. So yes, it’s possible, but this recipe is for that classic, creamy, baked experience you deserve!
What apples work best for the cheesecake with apple topping?
When it comes to the cheesecake with apple topping, texture is everything! I’m a firm believer in Granny Smith apples for this recipe. They are naturally tart, which is crucial because the cheesecake and caramel are so sweet—they need that acidic bite to balance everything out. Plus, they hold their shape beautifully when cooked down slightly. If you can’t find Granny Smiths, a firm Honeycrisp is a wonderful second choice. The key is firmness; avoid anything that bruises easily or they will completely melt into sauce instead of staying in nice, distinct pieces like we want for textural contrast!
Sharing Your Showstopper Cheesecake Experience
Well, darling, that’s it! You’ve made our Classic Baked Apple Pie Cheesecake with Salted Caramel Drizzle, and I am so proud of you for tackling such a spectacular dessert. Seeing your kitchen filled with the aroma of cinnamon and creamy tang is exactly what I live for here at Rosa’s Tasty Kitchen.
Now that you’ve sliced into this beauty and shared it with your family, I truly hope it brought as much joy to your table as it does to mine. If you loved how smooth and reliable this recipe turned out, please come back and let me know how it went! That feedback helps me keep developing recipes that work for busy homes like yours.
If you’re looking for even more simple yet impressive bakes, why don’t you browse through my collection of best homemade desserts? I’m always adding new favorites, many of which are perfect for those upcoming gatherings!
Don’t be shy—drop a comment below, or snap a picture of your finished cheesecake creation and tag me! Sharing the success makes the whole process sweeter!
PrintClassic Baked Apple Pie Cheesecake with Salted Caramel Drizzle

Make this showstopper dessert that combines creamy cheesecake with spiced apple pie filling and a rich salted caramel topping. This recipe is perfect for holidays or fall gatherings.
- Prep Time: 35 min
- Cook Time: 75 min
- Total Time: 8 hours 50 min
- Yield: 12 servings
- Category: Dessert
- Method: Baking
- Cuisine: American
- Diet: Vegetarian
Ingredients
- For the Crust: 1 1/2 cups graham cracker crumbs, 1/4 cup granulated sugar, 6 tablespoons unsalted butter, melted
- For the Apple Topping: 3 medium Granny Smith apples, peeled, cored, and diced, 1/4 cup packed brown sugar, 1 teaspoon ground cinnamon, 1/4 teaspoon ground nutmeg, 1 tablespoon lemon juice, 1 tablespoon cornstarch, 2 tablespoons water
- For the Cheesecake Filling: 3 (8 ounce) packages cream cheese, softened, 1 1/2 cups granulated sugar, 1 teaspoon vanilla extract, 1/4 teaspoon salt, 4 large eggs, 1/2 cup sour cream
- For the Salted Caramel Drizzle: 1/2 cup granulated sugar, 2 tablespoons water, 1/4 cup heavy cream, 2 tablespoons unsalted butter, 1/2 teaspoon sea salt
Instructions
- Prepare the Crust: Preheat your oven to 350°F (175°C). Mix graham cracker crumbs and 1/4 cup sugar. Pour in melted butter and mix until combined. Press the mixture firmly into the bottom of a 9-inch springform pan. Bake for 10 minutes. Set aside to cool slightly.
- Make the Apple Topping: In a medium saucepan, combine diced apples, brown sugar, cinnamon, nutmeg, and lemon juice. Cook over medium heat for 5 to 7 minutes until apples begin to soften. In a small bowl, whisk together cornstarch and water to create a slurry. Stir the slurry into the apples and cook until the mixture thickens, about 1 minute. Remove from heat and let cool.
- Prepare the Cheesecake Filling: In a large bowl, beat the softened cream cheese with an electric mixer until smooth. Gradually beat in 1 1/2 cups sugar, vanilla extract, and salt until just combined. Beat in the eggs one at a time, mixing only until each egg is incorporated. Mix in the sour cream. Do not overmix.
- Assemble and Bake: Pour half of the cheesecake batter over the cooled crust. Spoon half of the cooled apple topping evenly over the batter. Gently pour the remaining cheesecake batter over the apples. Top with the remaining apple mixture.
- Bake in a Water Bath: Wrap the outside bottom of the springform pan tightly with heavy-duty aluminum foil. Place the wrapped pan into a larger roasting pan. Carefully pour hot water into the roasting pan until it reaches halfway up the sides of the springform pan. Bake for 60 to 75 minutes, or until the edges are set but the center still jiggles slightly.
- Cool the Cheesecake: Turn off the oven, crack the door open, and let the cheesecake cool inside the oven for 1 hour. Remove from the water bath and let it cool completely on a wire rack. Chill in the refrigerator for at least 6 hours, or preferably overnight.
- Make the Salted Caramel Drizzle: In a small, heavy-bottomed saucepan, combine 1/2 cup sugar and 2 tablespoons water. Cook over medium heat without stirring until the sugar dissolves and turns a deep amber color. Remove from heat. Carefully whisk in the heavy cream (it will bubble vigorously). Whisk in the butter and sea salt until smooth. Let cool slightly before drizzling.
- Serve: Remove the cheesecake from the springform pan. Drizzle generously with the cooled salted caramel sauce before slicing and serving.
Notes
- For a perfectly smooth cheesecake, bring your cream cheese and eggs to room temperature before mixing.
- If you do not have a springform pan, you can use a 9-inch pie dish, but you will need to skip the water bath method.
- This dessert is excellent made one day ahead of time; the chilling period helps the flavors set.
Nutrition
- Serving Size: 1 slice
- Calories: 450
- Sugar: 45g
- Sodium: 300mg
- Fat: 28g
- Saturated Fat: 17g
- Unsaturated Fat: 11g
- Trans Fat: 0.5g
- Carbohydrates: 48g
- Fiber: 1g
- Protein: 7g
- Cholesterol: 110mg