
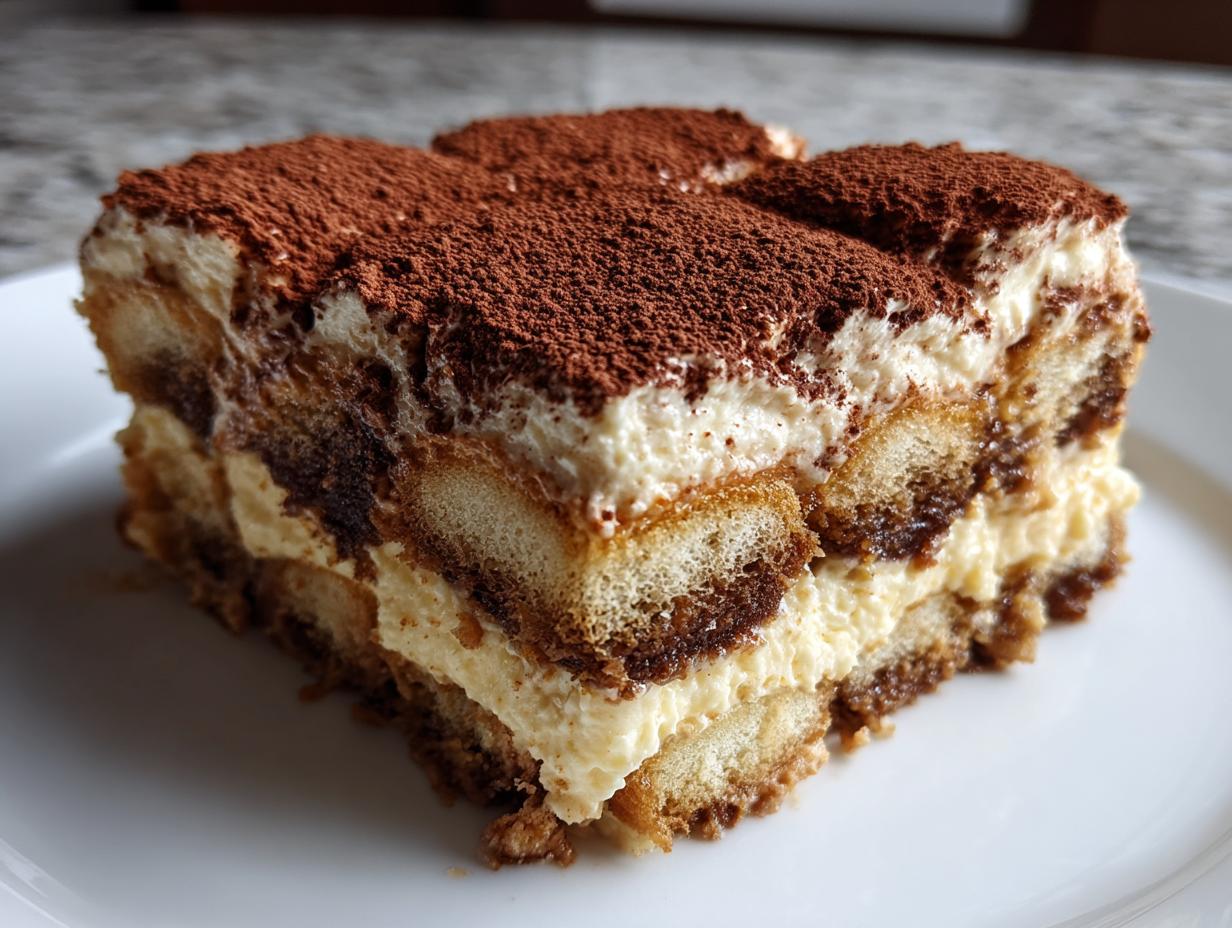
Oh, I know that feeling! You see those stunning, perfectly layered Italian desserts, and you just *have* to recreate that feeling right here in your own kitchen. But let’s be real, sometimes we don’t have hours to stand over a stove, right? That’s where my philosophy comes in: delicious food shouldn’t be complicated! I put together this tiramisu recipe because it delivers that incredible, bold espresso flavor and creamy texture without ever turning on the oven. It’s truly an easy, no-bake tiramisu that sets up beautifully in the fridge. This is the kind of classic Italian dessert Rosa Sterling loves to share—reliable, rich, and absolutely achievable even on your busiest weeknights.
- Why This Classic Tiramisu Recipe is Your New Go-To
- Gathering Ingredients for Your Authentic Tiramisu Instructions
- Step-by-Step: Mastering the No Bake Tiramisu Assembly
- Chilling and Finishing Your Rich Cocoa Dusting Dessert
- Expert Tips for the Best Tiramisu Recipe Results
- Serving Suggestions for This Party Dessert Ideas
- Storage and Reheating Instructions for Your Make Ahead Dessert
- Frequently Asked questions About This Simple Tiramisu Recipe
- Share Your Homemade Italian Sweets Experience
Why This Classic Tiramisu Recipe is Your New Go-To
When you need a showstopper dessert that doesn’t stress you out, this is the one. I promise you won’t miss the baking part one bit! We focus on those wonderful layers of cream and coffee. It’s simply the best way to get that luxurious taste into your dessert rotation. Be sure to check out my other reliable favorites in my best homemade desserts collection!
The Appeal of an Easy Tiramisu
This is the definition of an easy tiramisu. Since this is a no bake tiramisu, you skip any worry about oven temperatures or dry cakes. The magic is the assembly! It’s the ultimate make ahead dessert; in fact, it tastes better when you make it early. The chilling time allows those espresso-soaked ladyfingers to meld perfectly with the creamy mascarpone. It’s authentic Italian flavor made simple for your table.
Gathering Ingredients for Your Authentic Tiramisu Instructions
Okay, friend, let’s talk components! Even though this is a no bake tiramisu, the quality of your ingredients dictates how truly classic Italian dessert tasting this will be. Because we aren’t baking off any harsh edges, you need to treat your mascarpone and espresso with respect. Don’t worry about finding anything tricky; everything is standard grocery fare, but paying attention to detail here is key for that dreamy texture!
Essential Components for the Mascarpone Cream Dessert
Here’s what you need to pull together for this decadent layer cake:
- A generous measure of strong brewed espresso—and please make sure it’s completely cooled down before you dip!
- Just two large egg yolks, waiting patiently to be whisked with sugar until they get pale and perfectly thick.
- 8 ounces of mascarpone cheese; it needs to be softened up a bit so it folds in nicely.
- 1 cup of cold heavy whipping cream. Keep that chilled until the very last minute!
- 1 teaspoon of vanilla extract.
- One standard 7-ounce package of ladyfingers (the hard, dry kind—Savoiardi!).
- And finally, plenty of unsweetened cocoa powder for that lovely, rich dusting on top later.
Step-by-Step: Mastering the No Bake Tiramisu Assembly
This is where the magic happens and you finally see your beautiful tiramisu recipe come together! Since we aren’t baking, every layer counts. Don’t rush the chilling part—that’s crucial—but let’s get these components built first. It all comes down to gentle mixing, believe me! If you love creamy textures, you should also check out my recipe for creamy old-fashioned stovetop rice pudding, which shares that same dedication to silky smooth results.
Preparing the Coffee Mixture and Mascarpone Base
First things first, get your dipping liquid ready! Pour that cooled espresso and, if you’re using it, your coffee liqueur into a shallow bowl. Set that aside so it’s ready for the ladyfingers. Next, grab a bowl and get those egg yolks and granulated sugar going. You need to whisk this combination vigorously by hand or mixer for about three full minutes. You are looking for it to turn pale yellow and look distinctly thick—that’s how you know you’ve incorporated enough air. Once that’s done, fold in your softened mascarpone cheese. Gently! Seriously, just fold it until it’s smooth; overmixing those yolks can make the whole thing weep later on.
Creating the Creamy Layered Dessert Filling
Now for the lift! Take your very cold heavy cream and vanilla and beat it until you have stiff, beautiful peaks. This is what saves us from having a runny mess. Once you have your peaks, take about a third of that whipped cream and gently fold it into the mascarpone base. This lightens the base, making it easier to mix the rest in. Then, fold in the remaining whipped cream very carefully until it’s just combined. You want volume here, so think soft, light folding motions!
Assembling Your Tiramisu Recipe Layers
Time to dip! Take your ladyfingers and quickly dunk them into the espresso mixture one by one. Don’t let them linger! If you soak them too long, you end up with soggy cardboard, not a delightful creamy layered dessert. Arrange a single layer of those dipped fingers neatly in the bottom of an 8×8 inch dish. Now, spread half of that heavenly mascarpone cream right on top. Repeat that entire process—dip, layer the remaining fingers, and top with the last bit of cream. Smooth the top surface so it looks gorgeous when we dust it later!
Chilling and Finishing Your Rich Cocoa Dusting Dessert
Okay, we are assembled! But hold your horses—we aren’t done yet. This is the hardest part for me because it involves waiting, but trust me, this chilling time is non-negotiable for our make ahead dessert! Cover the entire dish tightly with plastic wrap. It needs to go into the refrigerator for a minimum of six hours, but honestly? Make it the night before. The longer it rests, the better the espresso soaked ladyfingers soften and the flavors just marry.
When you are ready to serve this glorious rich cocoa dusting dessert, pull it out. Use a fine-mesh sieve to dust the very top layer generously with unsweetened cocoa powder. Do not dust it while chilling, or the cocoa will actually absorb moisture and get patchy. Slice into those creamy squares, and enjoy the payoff!
Expert Tips for the Best Tiramisu Recipe Results
While this is inherently a very simple recipe, the difference between “good” and “amazing” usually comes down to a few little tricks I picked up along the way. Listen, I want this tiramisu recipe to be your absolute favorite, so let’s make sure we nail the flavor depth!
Ingredient Notes and Substitutions for This Tiramisu Recipe
First up: coffee. If you don’t have true espresso, don’t sweat it! Just make your coffee really, really strong—I mean double the grounds you normally use for the same amount of water. That intense brew is what cuts through the mascarpone richness. And about that optional liqueur? If you skip the coffee liqueur, grab about a teaspoon of dark rum or even some nice brandy and toss it into your espresso soak. It really adds that complex background note we are looking for in a Classic Italian Dessert. See how Sarah keeps her proportions perfect over at Tastes Better From Scratch? That attention to detail matters!
Also, don’t forget to make some homemade mayo sometime—it’s surprisingly easy and way better than the jarred stuff, just like this tiramisu is better than the quick-fix versions. You can find my reliable technique here: easy homemade mayonnaise.
Serving Suggestions for This Party Dessert Ideas
This creamy layered dessert truly shines when it’s the finale to a great meal. Because the flavor is so rich and coffee-forward, you don’t need much on the side! It’s fantastic served slightly chilled, maybe alongside some fresh, barely sweet berries—raspberries or sliced strawberries cut through the richness beautifully. Honestly, for parties, it’s a winner because you can make it ahead, check that off your list early! If you’re feeling extra indulgent, maybe serve it with a little homemade boozy hot chocolate after, which you can find my recipe for right here: boozy hot chocolate recipe. It makes everyone feel special!
Storage and Reheating Instructions for Your Make Ahead Dessert
One of the best things about this tiramisu recipe is how well it loves being made ahead! Remember how I said chilling is crucial? Well, that chilling time is also your best storage plan. Once assembled in that 8×8 dish—before you dust it with cocoa—cover it up REAL tight with plastic wrap. We want to keep out any fridge smells but also trap that moisture in.
You can absolutely keep this make ahead dessert chilling for a good 24 hours, and it’s even better on day two. The ladyfingers soak up all that lovely espresso, and the mascarpone cream firms up perfectly. It becomes this solid, sliceable, amazing block of heaven!
Now, here’s the final step tip: only dust with the cocoa powder right before you serve it. If you do it too early, like the night before, the cocoa sinks into the cream and disappears, which is a real tragedy. Wait until you’re pulling it out for guests, grab a fine sieve, and give it that beautiful, dark finishing coat. You can even look at how the folks over at My Home Made Dishes handle their chilling for that extra reassurance, but honestly? Covering it well is 90% of the battle!
Frequently Asked questions About This Simple Tiramisu Recipe
I get so many wonderful questions about this dessert—it shows how much you all love making impressive homemade Italian sweets! Since this tiramisu recipe is an assembly job, people sometimes worry about tricky bits, but I want to assure you this is one of the most straightforward party dessert ideas around.
Can I make this tiramisu recipe without eggs?
That is such a common question, especially for a no bake tiramisu! Yes, you absolutely can! In this version, we rely heavily on that stiffly beaten heavy cream to give the structure to our mascarpone cream dessert. The yolks in the original recipe add richness, but the cream does the heavy lifting for stabilization. If you feel more comfortable skipping them entirely, just add that extra splash of vanilla or perhaps a tiny bit more coffee liqueur to the soak for flavor depth. If you love other simple, no-bake recipes, you might adore my easy pumpkin fluff dip!
How long must the coffee flavored dessert chill?
This is the most important instruction, so listen closely! While you *could* rush it and serve after about four hours, that’s not really going to cut it for the best results. For this coffee flavored dessert to set up correctly—so you can get those beautiful, clean slices—you need a minimum of six hours in the fridge. If you want that truly melt-in-your-mouth, flavor-integrated experience where the flavors have truly melded together into the perfect authentic tiramisu instructions experience? Go for overnight. Seriously, it’s worth the patience!
Share Your Homemade Italian Sweets Experience
We did it! You’ve successfully navigated the world of espresso soaked ladyfingers and creamy mascarpone to create this unforgettable tiramisu recipe. Now, I truly want to know how it turned out for you! Seeing your pictures and hearing about those first bites—that’s the best part of what I do here at Rosa’s Tasty Kitchen.
Did everyone love this Classic Italian Dessert? Was it your secret weapon for the party? Drop a rating down below—five stars if it was a home run! Even better, snap a picture and tag me on social media. It means the world to me when you bring these achievable, delicious recipes into your own busy homes.
And while you’re thinking about making more wonderful things, don’t forget to try whipping up some soft, fluffy easy homemade naan bread next time you need a simple crowd-pleaser. Thanks for baking (or assembling!) with me today. For more inspiration on simple sweets, I always look to what Sarah is doing over at Sarah’s Best Recipes!
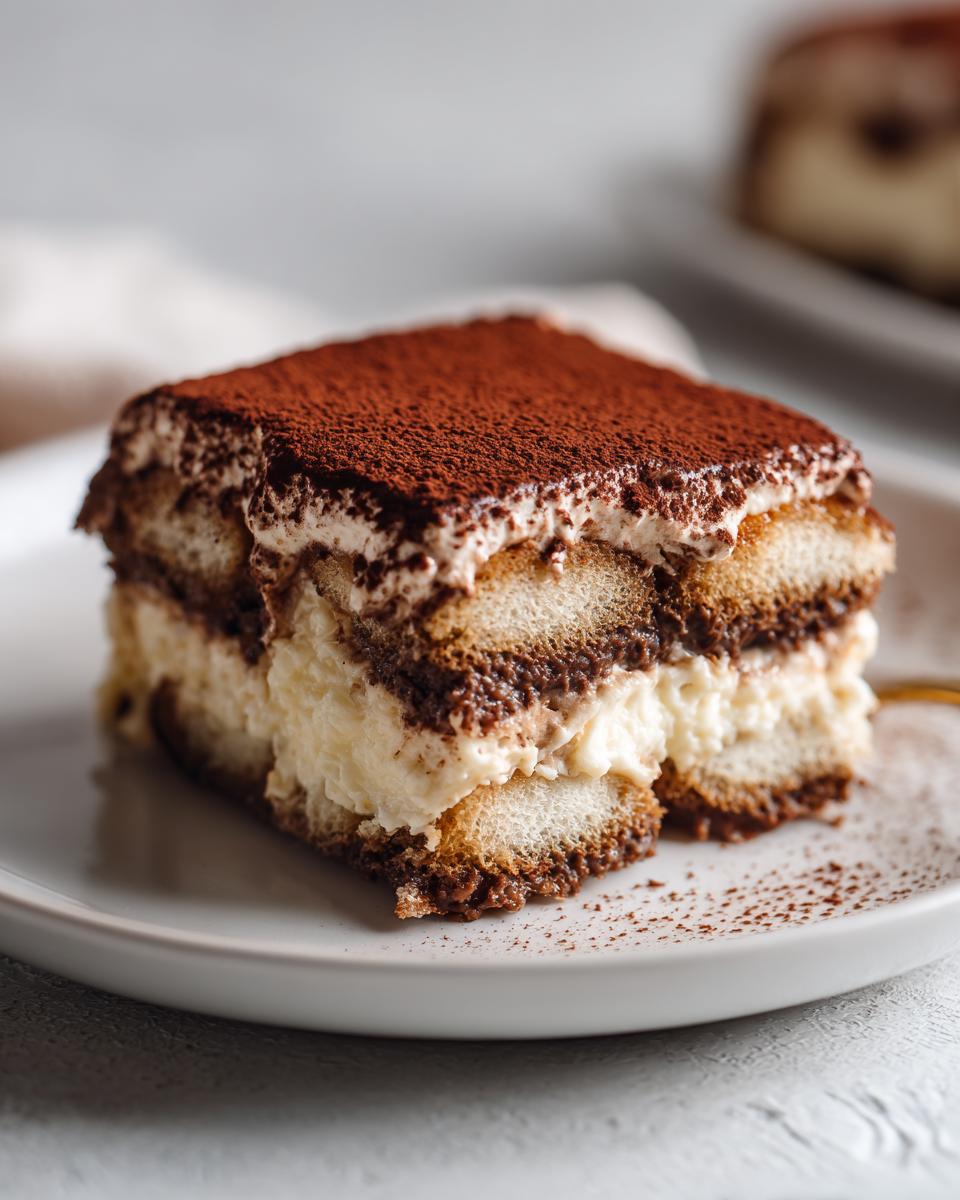
PrintClassic No-Bake Tiramisu Recipe
You can make this easy, classic Italian dessert at home. This no-bake tiramisu uses rich espresso-soaked ladyfingers and a creamy mascarpone mixture. It is a perfect make-ahead party dessert.
- Prep Time: 25 min
- Cook Time: 0 min
- Total Time: 6 hr 25 min
- Yield: 8 servings 1x
- Category: Dessert
- Method: No-Bake Assembly
- Cuisine: Italian
- Diet: Vegetarian
Ingredients
- 1 1/2 cups strong brewed espresso, cooled
- 1/4 cup coffee liqueur (optional)
- 2 large egg yolks
- 1/2 cup granulated sugar
- 8 ounces mascarpone cheese, softened
- 1 cup heavy whipping cream, cold
- 1 teaspoon vanilla extract
- 1 package (7 ounces) ladyfingers (savoiardi)
- Unsweetened cocoa powder, for dusting
Instructions
- Prepare the espresso mixture: In a shallow bowl, combine the cooled espresso and coffee liqueur, if using. Set aside.
- Make the mascarpone cream: In a medium bowl, whisk the egg yolks and granulated sugar together until the mixture is pale yellow and thick. This takes about 3 minutes.
- Gently fold the softened mascarpone cheese into the egg yolk mixture until just combined and smooth. Do not overmix.
- In a separate, clean bowl, beat the cold heavy whipping cream and vanilla extract with an electric mixer until stiff peaks form.
- Gently fold one-third of the whipped cream into the mascarpone mixture to lighten it. Then, fold in the remaining whipped cream until no streaks remain. You now have your creamy layer.
- Assemble the tiramisu: Quickly dip each ladyfinger, one at a time, into the espresso mixture. Do not let them soak too long, or they will become soggy.
- Arrange a single layer of dipped ladyfingers in the bottom of an 8×8 inch baking dish.
- Spread half of the mascarpone cream mixture evenly over the layer of ladyfingers.
- Repeat the process: Dip the remaining ladyfingers and arrange them over the cream layer. Top with the remaining mascarpone cream.
- Cover the dish tightly with plastic wrap. Chill the tiramisu in the refrigerator for at least 6 hours, or preferably overnight, to allow the flavors to blend and the dessert to set.
- Before serving, dust the top generously with unsweetened cocoa powder using a fine-mesh sieve. Slice and serve this easy tiramisu recipe.
Notes
- For a richer flavor, use freshly brewed, strong coffee instead of espresso.
- If you skip the coffee liqueur, add 1 teaspoon of dark rum or brandy to the espresso for depth.
- To make this a make-ahead dessert, assemble completely and keep it chilled for up to 2 days before dusting with cocoa.
Nutrition
- Serving Size: 1 slice
- Calories: 380
- Sugar: 22
- Sodium: 75
- Fat: 25
- Saturated Fat: 15
- Unsaturated Fat: 10
- Trans Fat: 0
- Carbohydrates: 30
- Fiber: 1
- Protein: 8
- Cholesterol: 150