
There is just something about comfort baking that feels like wrapping yourself in your favorite old quilt, isn’t there? It’s dependable, it’s warm, and it always hits the spot. Well, friends, I’ve cracked the code on a recipe that delivers pure nostalgic joy: the fudgiest, most perfectly marbled peanut butter swirl brownies you’ll ever make. Forget those dry, cakey disappointments you find sometimes! As a busy mom and former teacher, I promise you, this scratch brownie recipe is built for reliability. It requires simple steps but yields that decadent, bakery-style result we all crave on a Sunday afternoon. Trust me, these gooey chocolate peanut butter swirl bars will become your new go-to when you need a guaranteed win in the kitchen.
- Why You Will Make These Peanut Butter Swirl Brownies Again and Again
- Essential Ingredients for Fudgy Peanut Butter Swirl Brownies
- The Best Brownie Recipe: Step-by-Step Peanut Butter Swirl Technique
- Tips for Making Perfect Peanut Butter Swirl Brownies
- Ingredient Notes and Substitutions for Your Peanut Butter Swirl Brownies
- Serving Suggestions for This Decadent Chocolate Dessert
- Storage and Reheating Instructions for Homemade Brownies
- Frequently Asked Questions About Peanut Butter Swirl Brownies
- Nutritional Estimates for Your Chocolate Peanut Butter Swirl
- Share Your Favorite Classic Comfort Baking Creations
Why You Will Make These Peanut Butter Swirl Brownies Again and Again
When I test out a new recipe for the blog, I always ask myself: Is this worth making again next week? With these bars, the answer is a resounding yes! They’re just so satisfying to pull out of the pan.
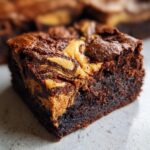
- Unbeatable Texture: These are truly fudgy brownies—gooey, moist, and chewy, never cakey.
- Perfect Ratio: The chocolate flavor is rich, but the peanut butter swirl cuts through it beautifully.
- Straightforward Process: They’re easy enough for a weeknight treat but special enough for guests.
- Crowd-Pleaser: Seriously, these peanut butter swirl brownies disappear faster than anything else I bake!
Essential Ingredients for Fudgy Peanut Butter Swirl Brownies
This is where Rosa’s philosophy really shines through, because you truly don’t need anything fancy! I developed this scratch brownie recipe using standards I always keep stocked, meaning you can likely whip these up right now. We aren’t hunting down expensive specialty chocolate here, just honest, everyday pantry staples for the best result. When the ingredients are this simple, the technique really matters, which is why we focus so much on that fudgy texture in the next steps!
Here is exactly what you’ll need for the base and that creamy swirl:
- 1/2 cup (115g) unsalted butter
- 1 cup (200g) granulated sugar
- 2 large eggs
- 1 teaspoon vanilla extract
- 1/3 cup (40g) unsweetened cocoa powder
- 1/2 cup (65g) all-purpose flour
- 1/4 teaspoon salt
- 1/4 teaspoon baking powder
- 1/2 cup (120g) creamy peanut butter
The Best Brownie Recipe: Step-by-Step Peanut Butter Swirl Technique
Now, let’s get to the fun part—making these incredible peanut butter swirl brownies! This method is tried-and-true, giving you that signature gorgeous marble without making you feel like you need a culinary degree. Remember, the key to fudgy brownies is knowing when to stop mixing!
Preparation and Mixing the Chocolate Base
First things first, we always set ourselves up for success. Preheat your oven right away to 350°F (175°C). I cannot stress this enough: line that 8×8 inch pan with parchment paper, letting the paper leave an overhang on two sides. Those flaps are your lifesavers later when you need to lift the whole batch out in one piece!
Go ahead and melt your butter in a saucepan over low heat. Take it off the heat and whisk in the sugar until it looks happy and combined. Then, beat in your eggs one at a time—give each egg a good mix before adding the next one, followed by that hint of vanilla.
In a separate bowl, whisk your dry ingredients: the cocoa powder, flour, salt, and baking powder. Now, this is critical for a gooey chocolate dessert: add those dry ingredients slowly to the wet mixture, stirring only until you see the flour streaks disappear. If you mix too much here, you develop gluten, and suddenly, you have cake instead of fudgy bars! Stop stirring early!
Preparing and Layering the Peanut Butter Swirl
We have half the chocolate batter in the pan, right? Good. Now for the filling. Take that creamy peanut butter and put it in a small bowl. I usually give it a quick 15 to 20-second zap in the microwave. It doesn’t need to be liquid, just soft enough that it drops easily off a spoon when you layer it.
Drop spoonfuls of that softened peanut butter evenly over the batter you already spread in the pan. Don’t try to cover every inch perfectly; we’ll fix that next. Once the peanut butter is dotted across the surface, pour the remaining chocolate batter right over the top of the peanut butter layer.
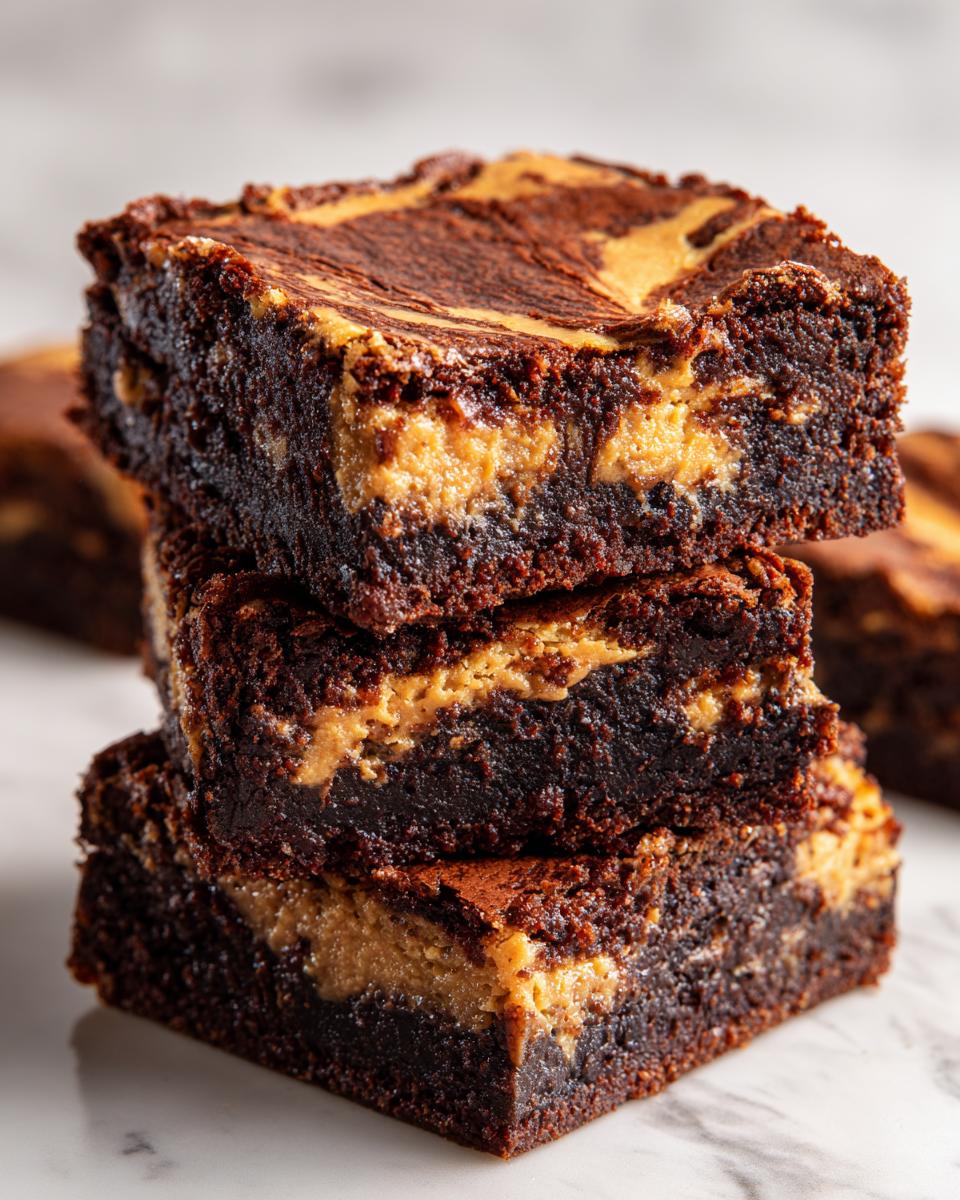
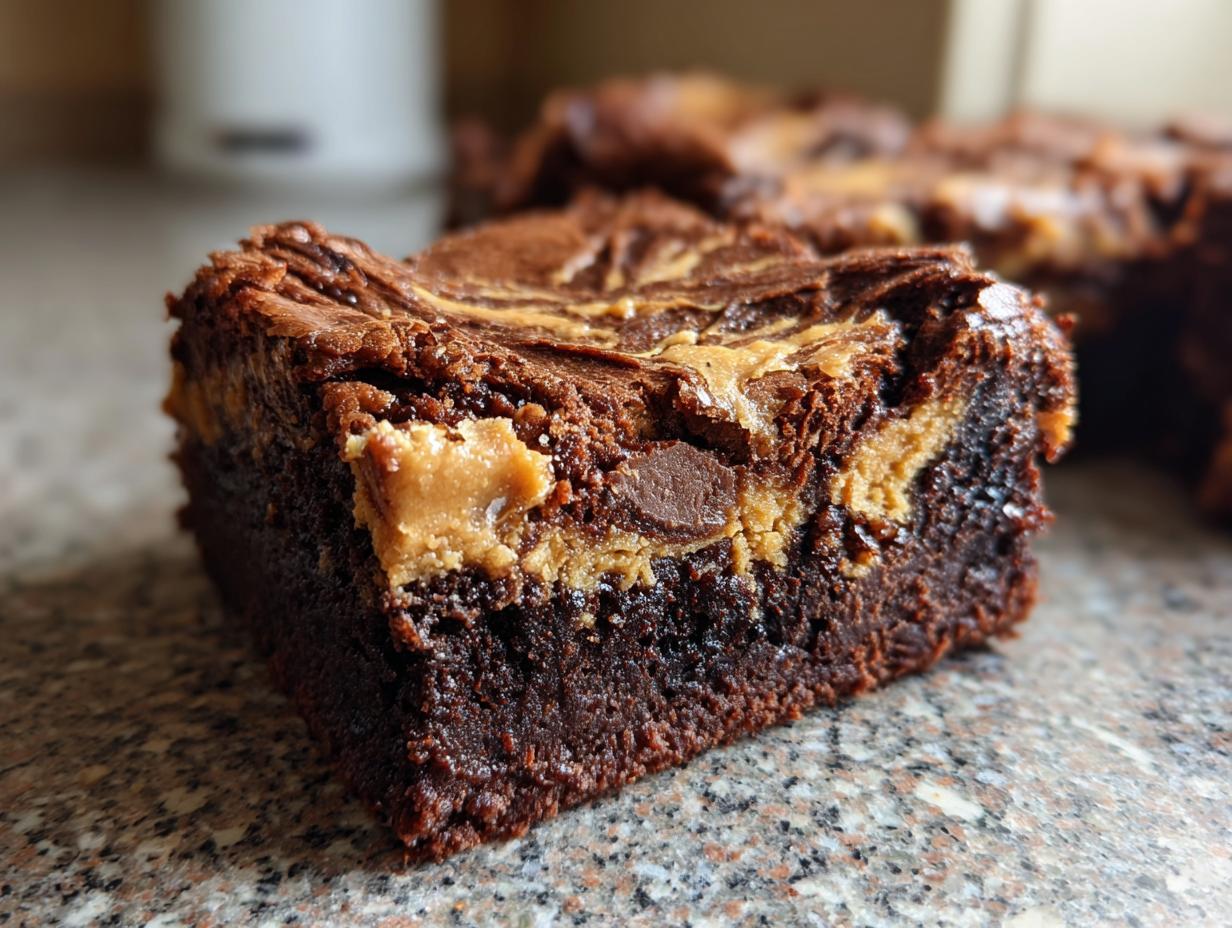
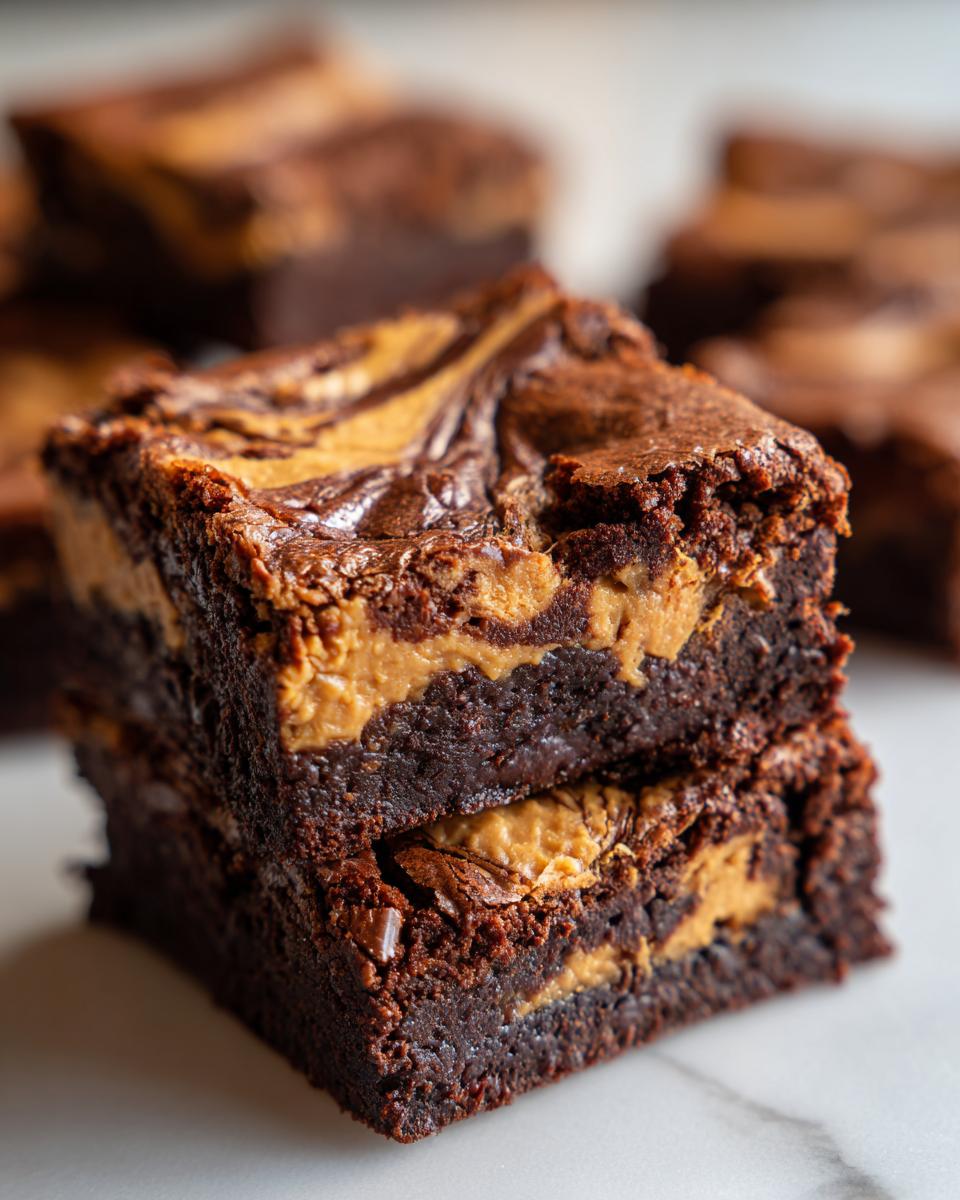
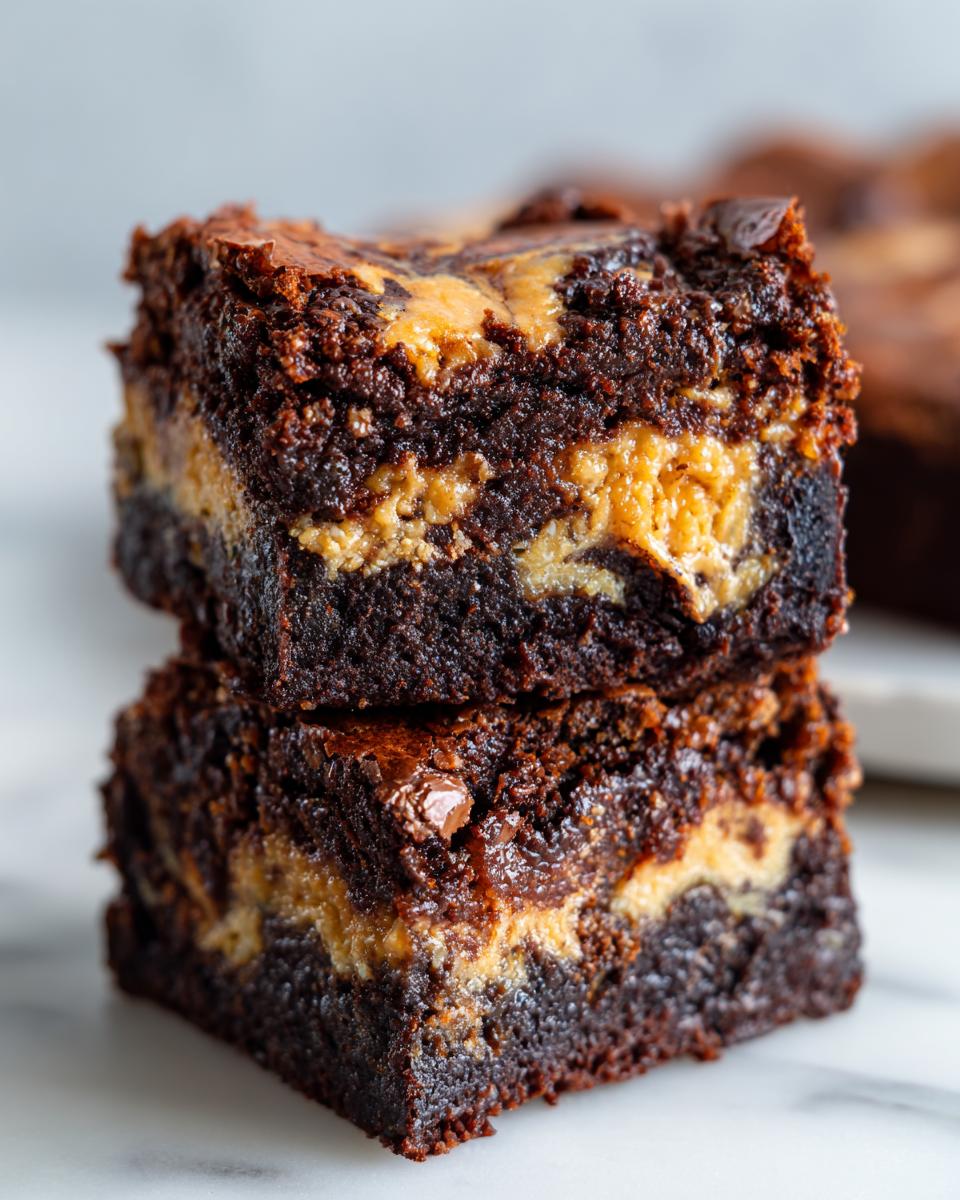
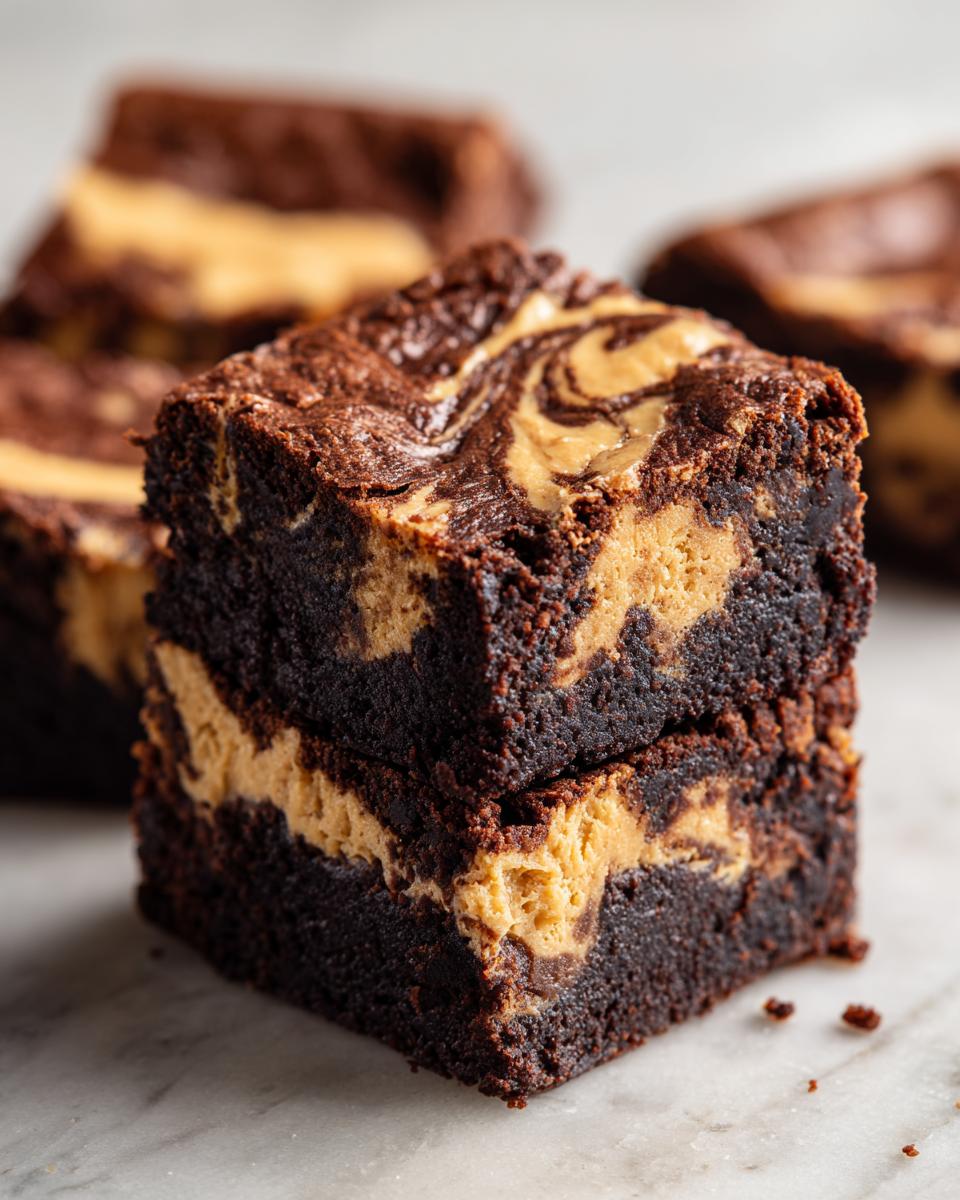
Achieving the Perfect Marbled Peanut Butter Swirl Technique
When you think about swirling, picture gentle waves, not a blender! Take a butter knife or a wooden skewer and gently cut through the layers a few times. Go in one direction, then maybe cross over lightly just once or twice. The goal is to create those beautiful, distinct ribbons you see in those fancy bakery-style brownies.
If you overdo it, all the colors merge, and you just end up with one muddy brown color. We want contrast! Stop when you see clear streams of peanut butter twisting through the chocolate base. That marbled look is exactly what we worked for!
Baking Times and Cooling for Gooey Chocolate Dessert
Slide those gorgeous bars into the preheated oven for about 25 to 30 minutes. Remember the rule for the best, moist brownie recipe: we don’t want a completely dry toothpick! You’re looking for the toothpick to come out with moist, sticky crumbs clinging to it—not wet, raw batter, but definitely not bone dry either. That slight residual moisture is what makes these fudgy.
When they come out, I know it’s hard, but you have to let them cool completely in the pan on a wire rack. If you try to cut them warm, they’ll smear everywhere, and you’ll lose all that beautiful marbling you worked so hard to achieve. Patience pays off, I promise!
Tips for Making Perfect Peanut Butter Swirl Brownies
Listen, even in my own kitchen, I’ve had near-disasters, so these little tips are things I learned the hard way! The absolute crucial thing for getting that amazing, fudgy texture is honestly the cooling step. I remember once, oh goodness, I pulled these out maybe ten minutes too early because the smell was just irresistible. They looked gorgeous, but when I tried to slice them, everything oozed out. It was still delicious, but it didn’t look like the picture!
To guarantee you get those perfect, clean squares and a truly moist brownie recipe result, you must wait until they are completely cool. Seriously, let them sit for at least two hours, or even better, chill them for 30 minutes before slicing.
Also, don’t mess with the cocoa powder measurement; if you use too much, it sucks up all the moisture. Stick to the recipe, and you’ll have bakery-style perfection every time. Check out how others are enjoying these decadent chocolate bars for inspiration over at this site!
Ingredient Notes and Substitutions for Your Peanut Butter Swirl Brownies
As we talk about these amazing peanut butter swirl brownies, I always get questions about substitutions. That’s totally normal! Baking is science, but figuring out what you have on hand is just part of the home cooking journey. My recipe is designed around specific things, but we can definitely work around a few ingredients.
First up: Peanut Butter Texture. The recipe calls for creamy peanut butter because we want that smooth, luxurious ribbon when swirling. It just melts beautifully into the batter. However, if you are a texture fanatic, go ahead and use crunchy peanut butter! It adds a great little nutty crunch right in the middle of that chocolate goodness. Just be aware that it won’t swirl quite as smoothly, but the flavor is still spot-on.
Next, let’s talk butter. I always specify unsalted butter, and there’s a good reason for that! Salt levels in butter brands can vary wildly, and since this recipe is so perfectly balanced for fudgy results, we need absolute control over the salt. If your only option is salted butter, skip adding the 1/4 teaspoon of salt listed in the dry ingredients. That way, we keep the salt content where it belongs!
Finally, a minor ingredient note: Don’t substitute the cocoa powder for Dutch-processed unless you adjust your baking powder, as they react differently. We need that classic, slightly acidic cocoa powder here to work with the leavening we have for the right structure. Keep these ingredients close, and you’ll nail that rich dessert bar every time!
Serving Suggestions for This Decadent Chocolate Dessert
Once these rich dessert bars have cooled completely—and I mean cool, cool—the fun of serving them begins! The beauty of these brownies is how great they are all on their own, but if you want to go the extra mile, you have options.
My first choice is always simple vanilla bean ice cream. The coldness against that fudgy texture is just divine! If you’re feeling fancy, try drizzling them with a little melted caramel sauce right before serving. They are also amazing warmed up slightly in the microwave for about 10 seconds alongside a tall glass of cold milk. It makes them extra gooey; enjoy!
Storage and Reheating Instructions for Homemade Brownies
One of the best parts about making a big batch of homemade brownies from scratch, besides eating them immediately, is knowing you have leftovers for dessert later in the week! Because we skipped over-baking them to keep them perfectly moist and gooey, storage is pretty simple, but there are a couple of things to keep in mind.
If you’ve managed to keep these peanut butter swirl brownies hidden from the family, they do great right on the counter. Store them in an airtight container at room temperature. Because of the fat content from the butter and peanut butter, they stay incredibly fresh for about three to four days. I highly recommend putting down a sheet of parchment or wax paper between the layers if you stack them—otherwise, the sticky tops might glue themselves together overnight!
Now, what if you made a double batch because, honestly, who wouldn’t? These freeze wonderfully! Once they are completely cooled and cut into squares, place them in a freezer-safe airtight container. Again, use that parchment paper to separate the layers. They are good in the freezer for up to three months. When you get a sudden craving, just pull one or two out and let them thaw on the counter for about 30 minutes. Sometimes, I even pop them back in the oven for just five minutes at 300°F, and they taste like they just came out of the pan!
Frequently Asked Questions About Peanut Butter Swirl Brownies
How do I ensure my brownies turn out fudgy and not cakey?
Oh, this is the most important question for any brownie lover! The secret to achieving those amazing fudgy brownies lies in two main things. First, you must resist the urge to mix that flour in for too long; overmixing develops gluten, which makes them puff up like a cake. Second, you absolutely have to underbake them just slightly. Remember what I said about the toothpick? If there are moist crumbs clinging to it, you are golden! Those crumbs bake up into pure gooey goodness once they cool outside the heat of the oven. That’s your ticket to the best brownie recipe!
Can I really use crunchy peanut butter instead of creamy?
Yes, you certainly can! While I prefer creamy peanut butter because it spreads so beautifully and creates those distinct, smooth ribbons for the perfect chocolate peanut butter swirl, using crunchy adds a fantastic textural surprise. If you opt for crunchy, just be aware that the swirling process might be a little bumpier. It won’t spread as easily as the heated creamy stuff, but the nutty flavor will still be incredible. It’s all about what you enjoy most in your decadent chocolate dessert!
What is the very best way to get that pretty swirl pattern?
It’s all about restraint! I know it’s tempting to really churn that knife through the batter hoping to mix them perfectly, but that ruins the marble effect. Think of it like painting a landscape. You want distinct sections of chocolate and peanut butter! After you layer the remaining batter over the peanut butter dots, take a thin butter knife and gently drag it across the surface just once or twice in an ‘S’ shape, and then maybe one quick cross-hatch. That’s it! Stop right there. You want clear, visible ribbons of peanut butter running through your rich dessert bars.
Will these homemade brownies keep well during the week?
They sure will! Because this is such a moist brownie recipe, they hold up really well. Since they are so rich, I find they stay perfectly fresh—and just as gooey—when stored tightly covered at room temperature for about four days. The sugar and fat act as natural preservatives, keeping them delicious. If you go longer than that, wrapping them tightly and putting them in the fridge will keep them fresh even longer! They are certainly among the wonderful easy peanut butter desserts that stand the test of time.
Nutritional Estimates for Your Chocolate Peanut Butter Swirl
Now, I always talk about how this recipe is about joy and comfort, not counting every little morsel, because that’s what good home baking is about! But I know some of you like to keep track, so I did run these peanut butter swirl brownies through the system to give you a rough idea.
Since we are using from scratch desserts here, remember that specific brands of peanut butter or cocoa powder can change these numbers just a tiny bit. These figures are just an estimate based on standard ingredient measurements, giving you a starting point for tracking your favorite decadent chocolate dessert.
Here is the breakdown per one brownie square:
- Calories: 220
- Sugar: 22g
- Fat: 13g (with 5g being saturated fat)
- Carbohydrates: 25g
- Protein: 4g
This looks pretty good for something this rich and satisfying! If you want to see how other great family recipes stack up, swing by the main recipe index. Enjoy these treats, knowing they are made with the best ingredients you have right in your own pantry!
Share Your Favorite Classic Comfort Baking Creations
Okay, home cooks, that’s really all there is to it! You now have my absolute favorite, foolproof recipe for the fudgiest peanut butter swirl brownies known to mankind. And believe me, making them from scratch is completely worth that little bit of extra stirring!
I truly hope you get to enjoy these rich, gooey bars with your family soon. When you do make them, please come back and tell me all about it! Did you manage to get those perfect ribbons? Did you sprinkle sea salt on top? Rate the recipe below so others know how reliable this recipe is when they are craving a good, decadent chocolate fix.
If you snapped a picture of your marbled masterpiece, I’d absolutely love to see it over on social media! Tag me so I can swoon over your beautiful work. You can find me sharing other easy, reliable weeknight cooking like classic strawberry shortcake and one-pan dinners over there too. Thanks so much for stopping by Rosa’s Tasty Kitchen. Happy baking, friends!
PrintThe Fudgiest Peanut Butter Swirl Brownies
Make rich, gooey, and moist peanut butter swirl brownies from scratch. This recipe delivers bakery-style results with a perfect chocolate and peanut butter marble.
- Prep Time: 15 min
- Cook Time: 30 min
- Total Time: 45 min
- Yield: 16 servings 1x
- Category: Dessert
- Method: Baking
- Cuisine: American
- Diet: Vegetarian
Ingredients
- 1/2 cup (115g) unsalted butter
- 1 cup (200g) granulated sugar
- 2 large eggs
- 1 teaspoon vanilla extract
- 1/3 cup (40g) unsweetened cocoa powder
- 1/2 cup (65g) all-purpose flour
- 1/4 teaspoon salt
- 1/4 teaspoon baking powder
- 1/2 cup (120g) creamy peanut butter
Instructions
- Preheat your oven to 350°F (175°C). Line an 8×8 inch baking pan with parchment paper, leaving an overhang for easy removal.
- In a medium saucepan, melt the butter over low heat. Remove from heat.
- Whisk the sugar into the melted butter until combined.
- Beat in the eggs one at a time, mixing well after each addition. Stir in the vanilla extract.
- In a separate bowl, whisk together the cocoa powder, flour, salt, and baking powder.
- Gradually add the dry ingredients to the wet ingredients, mixing only until just combined. Do not overmix.
- Pour half of the brownie batter into the prepared pan and spread evenly.
- In a small bowl, briefly microwave the 1/2 cup of creamy peanut butter for about 15-20 seconds until it is slightly softened and easily spreadable.
- Drop spoonfuls of the softened peanut butter evenly over the batter in the pan.
- Pour the remaining brownie batter over the peanut butter layer.
- Use a knife or skewer to gently swirl the peanut butter into the chocolate batter to create a marbled effect. Do not over-swirl; aim for distinct ribbons.
- Bake for 25 to 30 minutes. A toothpick inserted near the center should come out with moist crumbs attached, not wet batter, for fudgy results.
- Let the brownies cool completely in the pan on a wire rack before lifting out and cutting into squares.
Notes
- For the fudgiest brownies, avoid overbaking. The center should still look slightly underdone when you remove them from the oven.
- If you prefer a thicker peanut butter layer, slightly warm the peanut butter before swirling to make it easier to spread.
- You can use crunchy peanut butter for added texture if you prefer.
Nutrition
- Serving Size: 1 brownie square
- Calories: 220
- Sugar: 22g
- Sodium: 85mg
- Fat: 13g
- Saturated Fat: 5g
- Unsaturated Fat: 8g
- Trans Fat: 0g
- Carbohydrates: 25g
- Fiber: 1g
- Protein: 4g
- Cholesterol: 30mg