
If you think you know the chocolate chip cookie, I’m here to tell you to pause that thought right now. We’re about to take that classic favorite—the one we all crave—and give it a serious glow-up. Making incredible brown butter chocolate chip cookies isn’t something reserved for fancy bakeries, trust me. I’ve spent years in my kitchen adapting recipes, finding the quickest, most flavorful path to perfection for busy home cooks like us. This recipe nails that magical combination people dream about: truly chewy centers paired with satisfyingly crispy edges. It’s all about the flavor boost you get from browning the butter, and I’ll show you exactly how to nail that technique without burning a thing!
- Why This Brown Butter Chocolate Chip Cookies Recipe is the Ultimate Cookie Recipe
- Gathering Ingredients for Rich Buttery Cookies
- The Easy Brown Butter Technique for Brown Butter Chocolate Chip Cookies
- Mixing the Dough for Thick and Chewy Cookies
- Baking Your Brown Butter Chocolate Chip Cookies to Perfection
- Tips for Making Bakery Style Cookies at Home
- Storing and Reheating Your Homemade Cookies from Scratch
- Frequently Asked Questions About Browned Butter Cookies
- Sharing Your Next Level Chocolate Chip Cookie Success
Why This Brown Butter Chocolate Chip Cookies Recipe is the Ultimate Cookie Recipe
I call this my ultimate cookie recipe, and I don’t throw that title around lightly! When you swap out regular melted butter for brown butter, you are transforming the entire cookie experience from sweet and simple to deep and complex. That little bit of extra effort pays off tenfold in flavor. It’s the secret weapon in my arsenal against boring desserts.
Why switch to this method? Well, it means you get richer, more sophisticated depth in every single bite. I’ve simplified the process so that even on a chaotic Tuesday night, you can achieve something truly gourmet. This recipe isn’t just about taste; it’s about reliability.
- That glorious nutty rich, nutty flavor that comes from toasted milk solids.
- The perfect structural achievement: a superior balance between soft and crisp.
- It’s surprisingly quick to execute, even with the initial browning step!
Achieving Crispy Edge Soft Center Cookies Every Time
Listen, the texture balance is everything when it comes to the perfect chocolate chip cookie. The brown butter, combined with a slightly higher ratio of brown sugar in this batter, helps draw moisture inward while promoting those gorgeous, lacy, crispy edge soft center cookies on the outside. You get that satisfying crunch followed immediately by that warm, gooey center. It’s pure magic!
Gathering Ingredients for Rich Buttery Cookies
Before we get to the fun part—the browning—let’s talk about what you’ll need. One of the joys of my recipes, as you know, is that they rely on things you already have hanging around your pantry; we aren’t trekking to specialty shops! While the technique is gourmet, the ingredients are beautifully accessible. We are aiming here for truly rich buttery cookies, and the quality of that butter really makes the difference, even before we brown it.
Keep your list simple, but pay attention to the few details that push these over the top from good to great. You won’t need anything unusual, but these few pointers will ensure success.
Ingredient Notes and Substitutions for Brown Butter Chocolate Chip Cookies
Okay, note this: you absolutely must use unsalted butter here. Since we are adding salt separately, controlling the sodium content is key to nailing the flavor balance. If you mess up and only have salted, you’ll need to cut the kosher salt in the dry mix significantly, which is just an extra step I don’t want you taking!
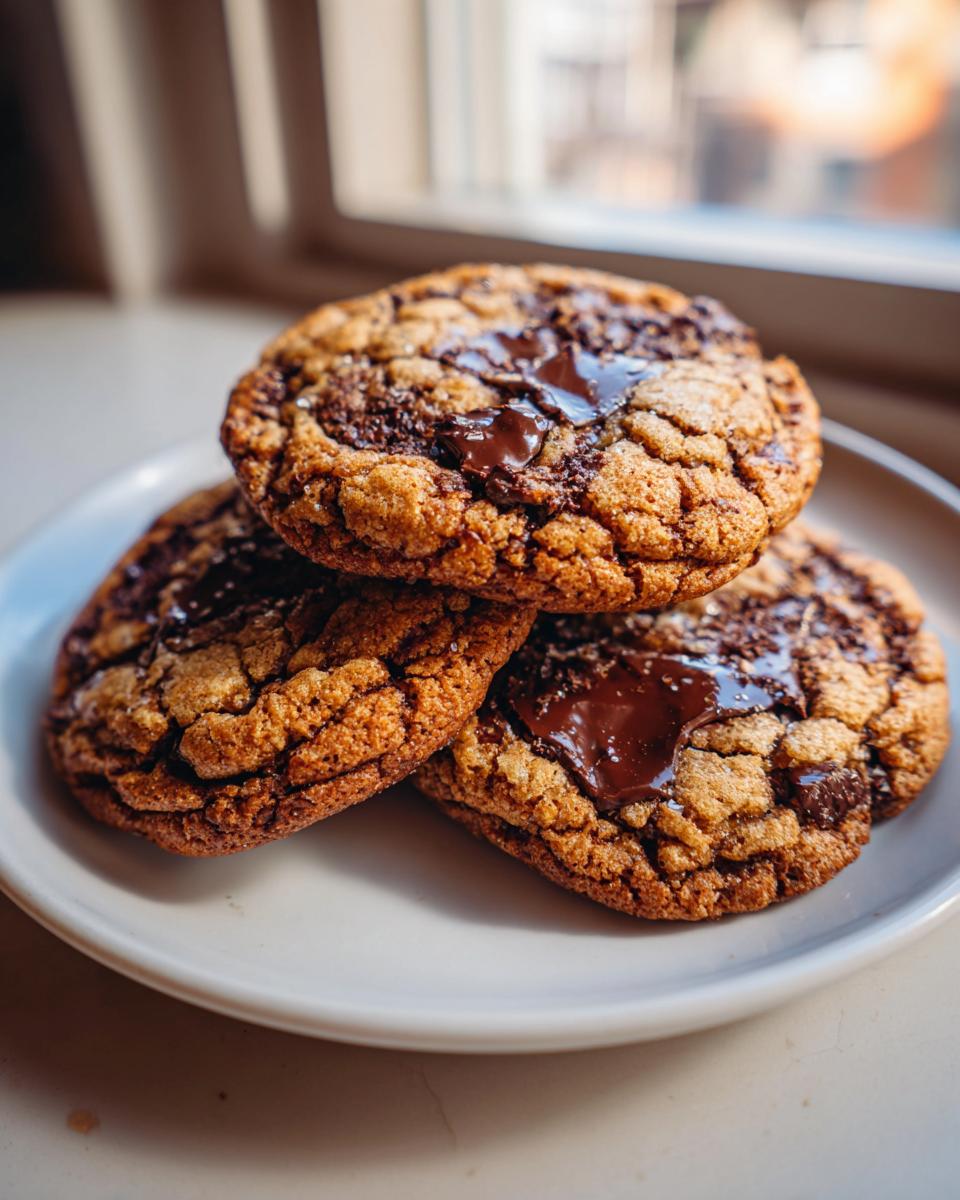
Also, if your eggs are cold, give them a quick warm bath for five minutes—room temperature eggs emulsify so much better into the cooled brown butter. And please, ditch those sad-looking chips if you can! Chopping up a good quality semi-sweet or dark chocolate bar creates those lovely pools of melted chocolate that just screams gourmet chocolate chip cookies. Finally, don’t skip the flaky sea salt sprinkled right on top. It’s the final, professional touch that makes the whole cookie shine.
The Easy Brown Butter Technique for Brown Butter Chocolate Chip Cookies
This is where the magic happens, friends! Browning butter sounds scary, like something only a professional chef can handle, but I promise you, it’s just paying attention for about seven minutes. This easy brown butter technique is totally doable, and it’s the key to creating those incredible caramelized flavor cookies. You control all the flavor here!
Grab a light-colored saucepan—you need to see those milk solids turning color! Set your heat to medium. First, the butter melts, then it starts to foam up like a bubbly bath. Keep swirling the pan gently; don’t walk away! Soon, you’ll notice those brown flecks sinking to the bottom, and the smell will change from creamy dairy to this wonderfully deep, nutty aroma. If you want to see how I manage other quick flavor boosters, check out my tips on caramelized onions cooking. That’s a different kind of caramel magic, but the principle of watching the process is the same.
That nutty smell is your cue! The absolute most important instruction? As soon as it smells nutty, you have to pour that butter, flecks and all, immediately into a heatproof bowl. If you leave it in the hot pan, it’ll keep cooking and burn in seconds. Let that gorgeous brown butter cool down for about 15 minutes before you mix it with your sugars. This cooling time is essential! If it’s too hot, it’ll melt your sugars weirdly, and we want creaminess, not melted sugar soup. Follow these cues, and you’ve got the best flavor base ever for your brown butter chocolate chip cookies.
Mixing the Dough for Thick and Chewy Cookies
Now that our brown butter has cooled down just perfectly—it should be warm to the touch, not hot—it’s time to build the body of these cookies. We’re aiming for that wonderful texture that makes people ask for the recipe right away: thick and chewy cookies that don’t flatten out into sad little puddles.
First, you’ll cream that cooled brown butter with both your light brown sugar and your granulated sugar. Beat it well until it looks lighter in color and feels fluffy. We are using the aeration that happens here to give us lift without being cakey. Then, add your eggs, one at a time. I mean it—one at a time! Beat it well after the first egg incorporates before you even think about adding the second. This is important for keeping a nice, stable emulsion for our brown butter chocolate chip cookies.
Once the wet ingredients are happy, it’s time for the dry stuff. Mix your flour, baking soda, and salt lightly in a separate bowl—we want them evenly distributed, but that’s it. Now, add the dry mix to the wet mixture in slow stages, mixing only on low speed until *just* combined. If you see a few little streaks of flour, STOP! Seriously, put the mixer down. Overmixing develops gluten, and gluten means tough cookies, not delicious, soft cookies. If you want to see how I handle dough management in other recipes, check out my tips on peanut butter cookies.
Finally, fold in your chocolate chips gently with a spatula. You want everything distributed, but nothing overworked. This careful approach ensures a tender crumb structure that supports all that amazing buttery flavor we worked so hard to create.
The Crucial Step: Chilling Dough for Caramelized Flavor Cookies
If you take one thing away from this whole recipe—please let it be this: You absolutely must chill the dough. I know, I know, the craving hits hard right now, but chilling is non-negotiable for two huge reasons. First, it lets the flour fully hydrate, which prevents spreading. Second, and this is my favorite part, it lets those wonderful nutty flavors concentrate, turning a good cookie into one of those truly memorable caramelized flavor cookies.
I recommend chilling for a minimum of two hours, but if you can hang tight for 24 hours, you’ll notice an astronomical improvement in depth. When I bake these for parties, I often mix the dough three days ahead of time! If you taste a little nibble (and who doesn’t?), you’ll notice the flavor really deepens after that first full day in the fridge. Seriously, patience rewards you immensely here. Don’t rush past resting your dough!
Baking Your Brown Butter Chocolate Chip Cookies to Perfection
Okay, team, the dough is rested—it’s time to bake! This is where we lock in that soft, molten middle we’ve been dreaming about. First things first: don’t forget to preheat your oven completely. I set mine to 375°F (190°C). If the oven isn’t fully hot, your cookies will start spreading before they set, and we definitely don’t want that!
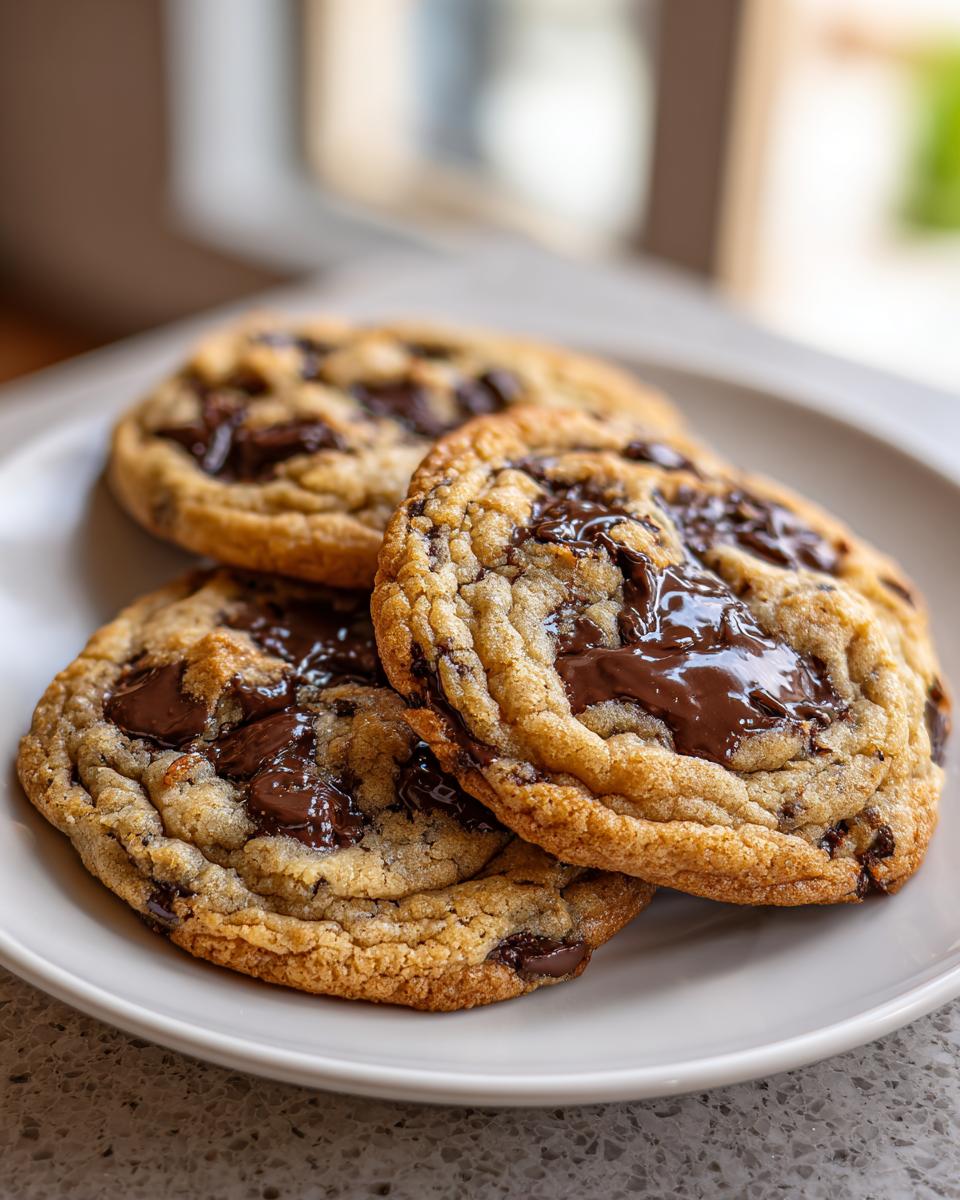
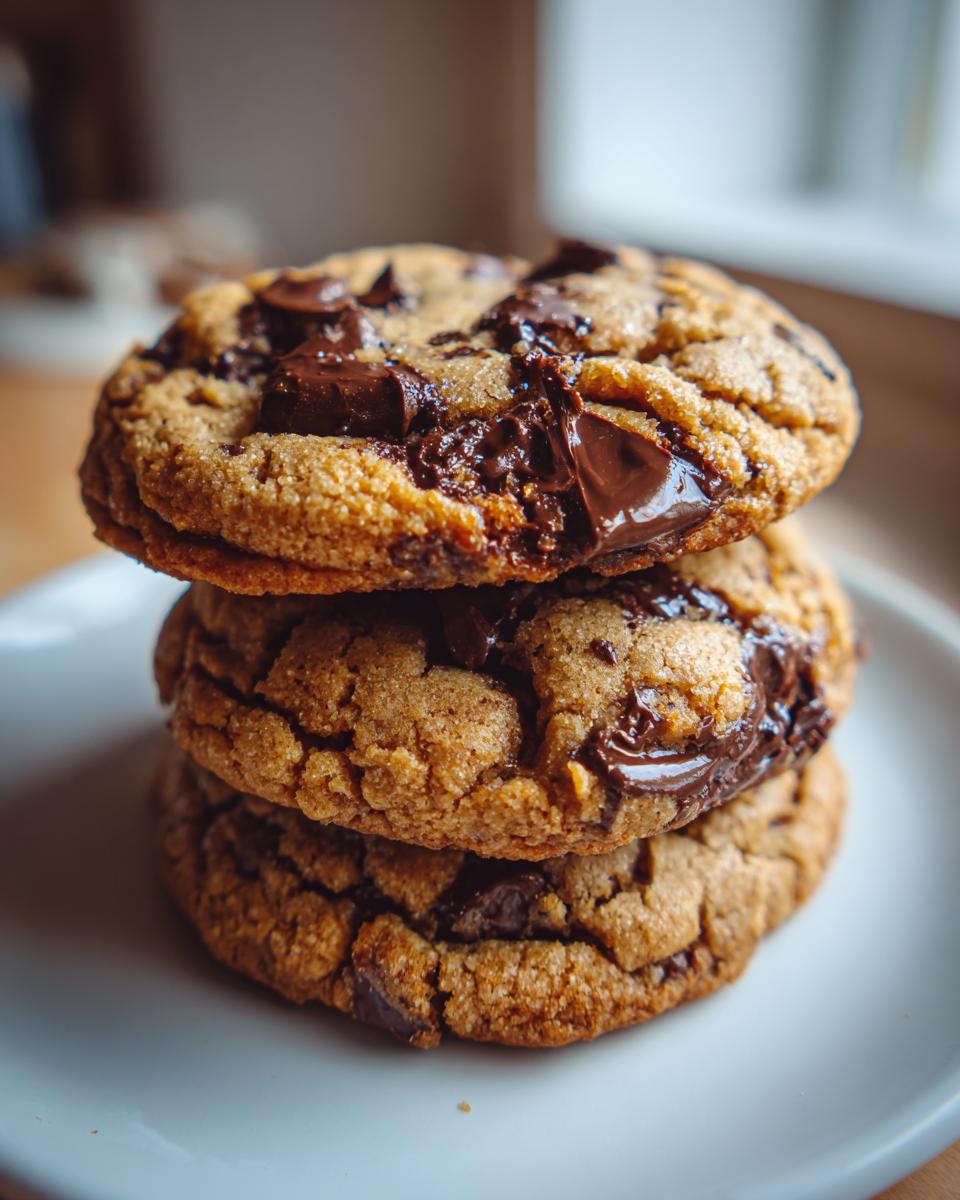
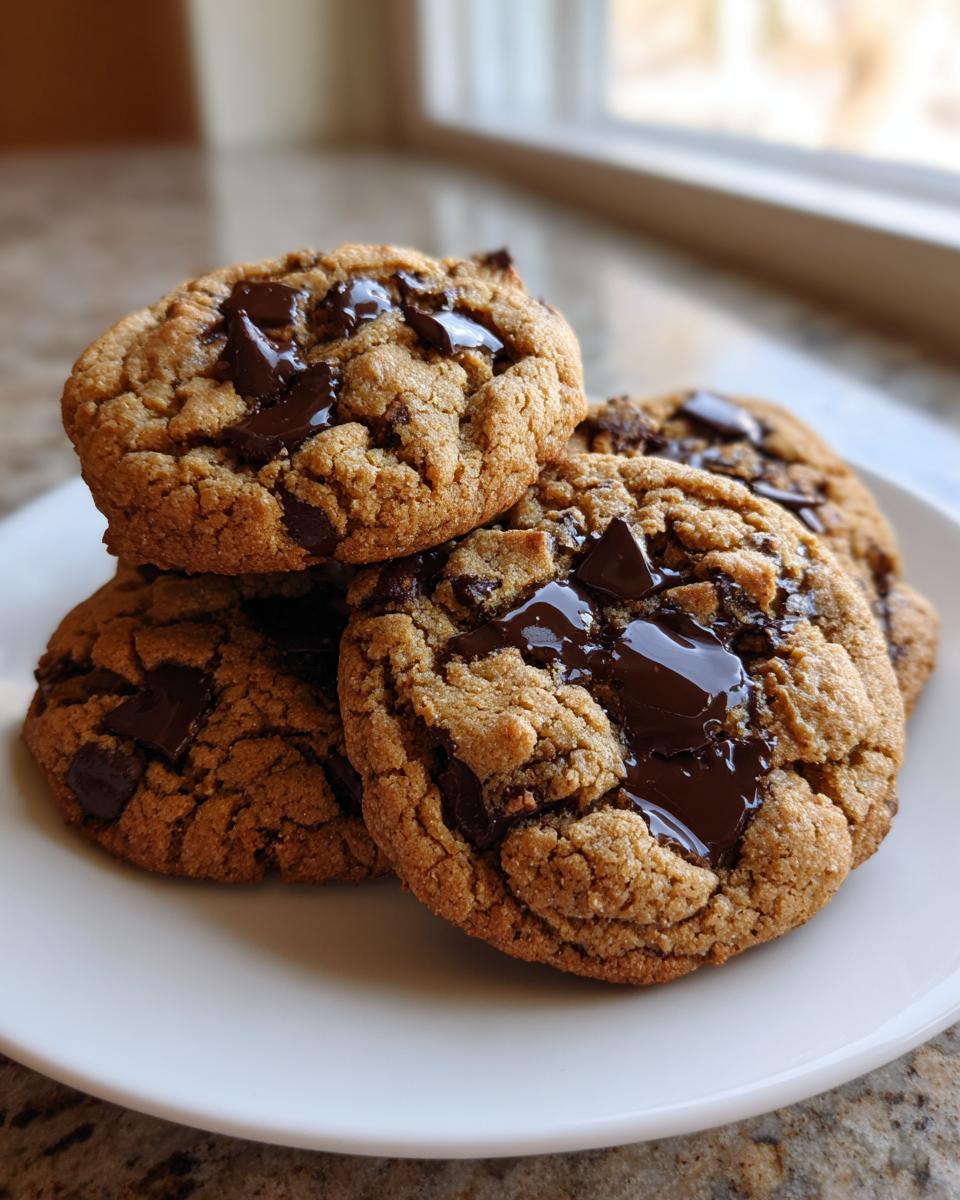
I always line my baking sheets with parchment paper. Why? Because cleanup is minimal, and it guarantees nothing sticks, even when dealing with something rich like these brown butter chocolate chip cookies. For scooping, I use a rounded tablespoon size. This keeps them thick, which is crucial for that gooey chocolate chip cookies center. Space them out generously on the sheet—about two inches apart—because they are going to spread just a little bit.
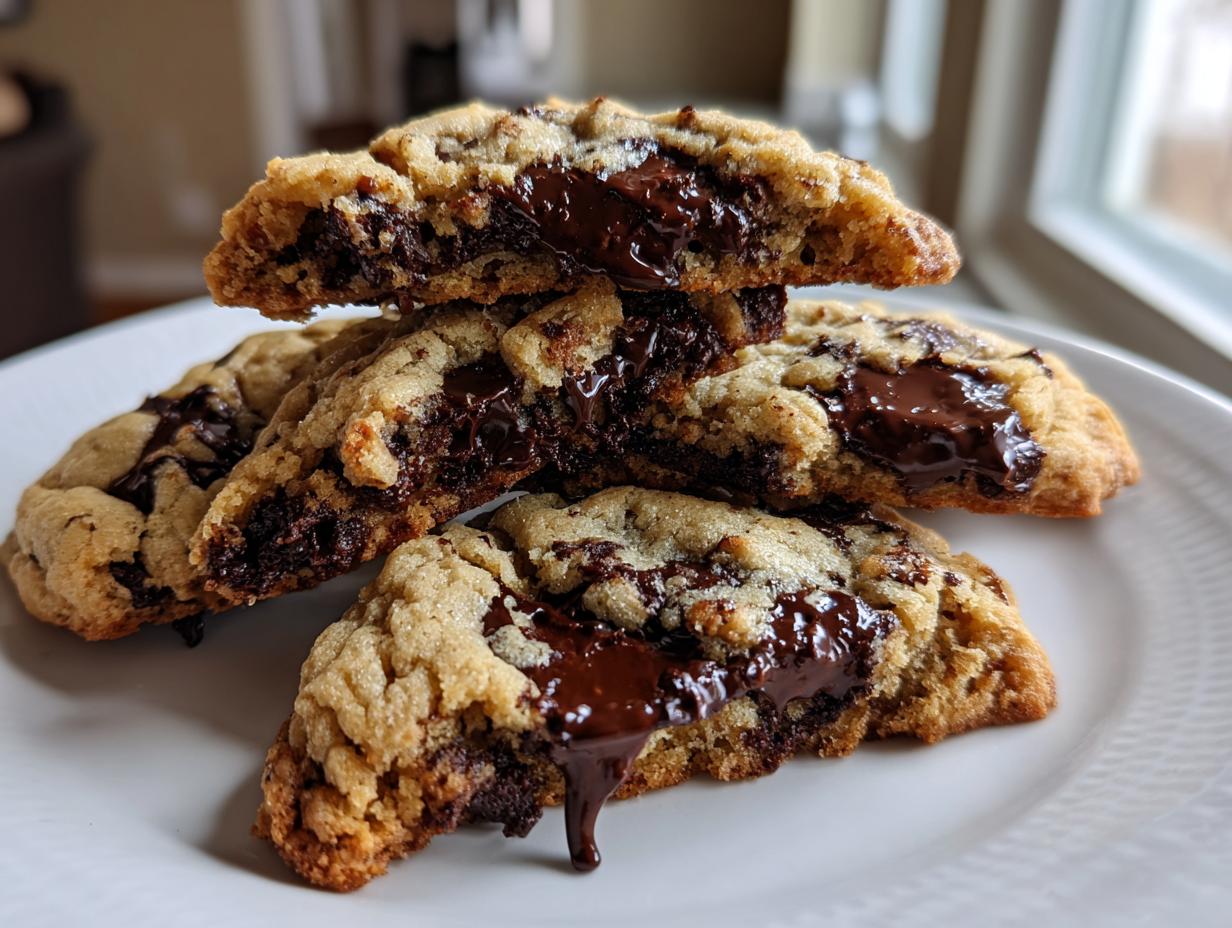
Now for the timing, which is what separates a good cookie from a fantastic one. You are looking for visual cues, not just setting a timer. Bake them for about 10 to 12 minutes. When they look done, they should have beautifully golden brown edges. But honestly, the centers should still look a tiny bit puffy and slightly underbaked. They firm up *so much* once they hit the cooling rack, so trust your eyes when they look slightly raw in the middle!
Do not touch them straight out of the oven! Leave them sitting right there on that hot pan for a full five minutes. That residual heat finishes baking the center gently without drying out the edges. Then, carefully slide that parchment onto a wire rack to cool completely. If you have a batch of double chocolate peppermint cookies cooling nearby, the aromas in your kitchen will be unbeatable!
Tips for Making Bakery Style Cookies at Home
I know you want these bakery style cookies to look like they came straight from a fancy shop, and that’s totally achievable! It’s not about fancy equipment; it’s about applying a couple of professional tricks to simple ingredients. My years adapting family recipes taught me that consistency comes from knowing the *how* and *why* behind each step.
The most important elevation tool is using room temperature eggs, which I mentioned earlier. When they are warm, they mix into the cooled brown butter mixture smoothly, creating a uniform emulsion. A stable emulsion means your dough holds together perfectly during baking. Seriously, don’t rush that step!
Also, think about your chocolate! While chips are easy, they contain stabilizers that help them keep their shape. For that gooey, melted look you see in bakeries, chop up a good quality bar of chocolate instead. You get gorgeous chunks and pools of melted chocolate that just ooze out when you bite in. That combination—the perfectly emulsified dough and the melted chocolate pools—is pure expertise showing in your homemade result!
Storing and Reheating Your Homemade Cookies from Scratch
We’ve made the absolute best brown butter chocolate chip cookies, and now the question is, how do we make sure they last? You’ll want to enjoy these treats all week long, but we certainly don’t want that perfect texture to vanish overnight! Luckily, because we were so careful with our chilling and baking times, these homemade cookies from scratch store beautifully.
For short-term storage—say, if you plan on eating them within three or four days—keep them in a completely airtight container right there on your counter. Do not put them in the fridge! Refrigeration actually dries out cookies faster because those sugars crystallize. I’ve had batches stay perfectly soft for nearly a week just tucked away in a cookie tin.
Tips for Freezing Brown Butter Chocolate Chip Cookies
If you are anything like me, you inevitably bake a massive batch! Freezing is your best friend here. The best method? Freeze the dough balls! Once you scoop the dough, place those balls on a sheet pan and pop them into the freezer until they are rock solid. Then, transfer them into a heavy-duty freezer bag. You can find some great organizational tips in my post on easy freezer jam recipes, even though we are applying it to cookie dough!
When you want a fresh cookie later, just pull a frozen dough ball out and bake it! You might need to add an extra minute or two to the baking time, but the texture will be just as phenomenal as when they were fresh. If you are freezing baked cookies, make sure they are completely cool first, place parchment paper between layers, and vacuum seal them if you have the setup, or just use a very good quality Ziploc bag.
Quick Reheat for That Fresh-From-The-Oven Texture
Did your cookies sit out a little too long and lose that initial melt? Here’s my favorite quick trick to bring them right back to their gooey best. If you want that center to soften up again, pop a cookie onto a microwave-safe plate for only about 8 to 10 seconds. Any longer, and you risk making them tough! This quick blast of heat brings back the gooey chocolate and softens the crumb just enough. It truly resurrects that warm, just-baked feeling!
Frequently Asked Questions About Browned Butter Cookies
I always get so many wonderful questions about these cookies once folks try them—it means you’re being adventurous in the kitchen, and I love that! Dealing with a new technique like browning butter can naturally bring up a few roadblocks. Don’t you worry one bit; we’re going to tackle the most common snags right here so your next batch of gourmet chocolate chip cookies is flawless!
Can I skip browning the butter and just use melted butter?
Oh honey, you *could*, but where’s the fun in that? If you do that, you end up with a standard chocolate chip cookie, not these deeply flavored ones. Browning the butter is what contributes the nutty, toasted flavor that makes this recipe special. Skipping it means missing out on that amazing caramelized flavor cookies depth we worked so hard for! You’d be better off using my standard recipe for those, but if you skip it here, you lose the point of making brown butter chocolate chip cookies.
Why did my cookies spread too much and turn flat?
This usually signals one of two things, and it’s almost always related to temperature! If the brown butter was still too warm when you mixed in the sugars and eggs, it melts the structure too much, causing a major spread. Or, it could mean your dough didn’t chill long enough—the fat hasn’t hardened back up, so it melts instantly in the hot oven. Remember, chilling isn’t just for flavor; it’s structural integrity for our cookies!
Can I use salted butter instead of unsalted for these browned butter cookies?
I strongly advise against it if you can manage it. When we brown butter, the milk solids toast, and the salt content concentrates right along with those solids. It becomes really hard to guess how much salt you’re actually adding to the dough, which can easily make your browned butter cookies taste way too salty. Stick to unsalted so you can control the salt using the kosher salt we add directly to the dry ingredients!
The secret to getting that nutty butter aroma?
You’re looking for the color change! The aroma comes right as the milk solids toast and start turning brown. You’re looking for the butter to go from foamy to golden, and then you’ll see tiny brown specks forming at the bottom of the pan. That sweet, nutty smell is your absolute signal to pour it out instantly. It happens fast once you see those specks, so keep your eye on that pan!
Troubleshooting Common Issues with Brown Butter Chocolate Chip Cookies
Let’s talk quick fixes for those dough disasters. If your finished cookies feel a little too cakey, more fluffy than chewy, chances are you added too much flour—always spoon the flour into the cup and level it off, don’t scoop directly from the bag! Or, you might have overworked the dough after the flour went in, which created too much gluten structure. Next time, mix just until the streaks disappear.
Conversely, if your brown butter chocolate chip cookies came out totally flat with thin edges, the butter was definitely too hot when you mixed the dough, or you didn’t chill the dough long enough. That chilling time is what gives us those desired thick centers. Make sure that butter is just warm before you start mixing the sugars, never hot!
If you ever have trouble getting help, please don’t hesitate to reach out through my contact page. We are a community here, and I want you to succeed!
Sharing Your Next Level Chocolate Chip Cookie Success
Well, my friends, we have done it! You’ve mastered the art of browning butter and now you have a batch of the most incredible, decadent cookies cooling on your rack. This is where the fun really starts for me—seeing your reactions to these next level chocolate chip cookies! I truly believe that making something this delicious from scratch is something worth celebrating.
I’m not going to rehash how amazing these taste—I know you’re already sneaking one (or three!). What I really want to know is how it went for you! Did that nutty aroma fill your whole house during the browning stage? Did you manage to stop yourself from eating the dough while it was chilling?
Please, if you made these, take a moment to rate the recipe right down below. When you leave a star rating, I instantly know how well the recipe worked for you on your first try. And if you have any little tips or tricks you discovered along the way—maybe you added a sprinkle of cinnamon or used a specific type of chocolate chunk—share it in the comments!
We are building this kitchen community together, and nothing makes me happier than getting photos of your amazing results. Tag me if you share a picture online! I love seeing my recipes living happily in your homes. If you want to know a little more about how I develop these easier, yet flavor-packed recipes, you can read all about my journey over on my About page. Happy baking, and enjoy every last, rich, chewy bite!
PrintThe Best Brown Butter Chocolate Chip Cookies: Chewy Centers and Crispy Edges
Make your new favorite cookies using the brown butter technique for a rich, nutty flavor. This recipe delivers bakery-style cookies with soft, gooey centers and perfectly crisp edges.
- Prep Time: 20 min
- Cook Time: 12 min
- Total Time: 2 hours 32 min
- Yield: About 2 dozen cookies 1x
- Category: Dessert
- Method: Baking
- Cuisine: American
- Diet: Vegetarian
Ingredients
- 1 cup (226g) unsalted butter
- 1 cup (200g) packed light brown sugar
- 1/2 cup (100g) granulated sugar
- 2 large eggs, room temperature
- 1 tablespoon vanilla extract
- 2 1/4 cups (270g) all-purpose flour
- 1 teaspoon baking soda
- 1 teaspoon kosher salt
- 1 1/2 cups (255g) semi-sweet chocolate chips or chopped chocolate
- Flaky sea salt for sprinkling
Instructions
- Place the butter in a light-colored saucepan over medium heat. Cook, swirling often, until the butter melts, foams, and then brown bits form at the bottom and the butter smells nutty. This takes about 5 to 8 minutes. Immediately pour the brown butter into a heatproof bowl and let it cool for 15 minutes.
- In a large bowl, whisk the cooled brown butter with the brown sugar and granulated sugar until combined.
- Beat in one egg at a time, mixing well after each addition. Stir in the vanilla extract.
- In a separate bowl, whisk together the flour, baking soda, and kosher salt. Gradually add the dry ingredients to the wet ingredients, mixing on low speed until just combined. Do not overmix.
- Fold in the chocolate chips.
- Cover the dough and chill in the refrigerator for at least 2 hours, or up to 72 hours, for the best flavor and texture.
- Preheat your oven to 375°F (190°C). Line baking sheets with parchment paper.
- Scoop rounded tablespoons of dough onto the prepared sheets, placing them about 2 inches apart. Sprinkle the tops with flaky sea salt.
- Bake for 10 to 12 minutes, or until the edges are golden brown and the centers look slightly underbaked.
- Let the cookies cool on the baking sheet for 5 minutes before transferring them to a wire rack to cool completely.
Notes
- Browning the butter is key; watch carefully so the milk solids toast to a deep amber color without burning.
- Chilling the dough develops the nutty flavor and prevents the cookies from spreading too much during baking.
- For a gourmet chocolate chip cookie experience, use a mix of dark and milk chocolate chunks instead of chips.
Nutrition
- Serving Size: 1 cookie
- Calories: 210
- Sugar: 18g
- Sodium: 150mg
- Fat: 12g
- Saturated Fat: 7g
- Unsaturated Fat: 5g
- Trans Fat: 0g
- Carbohydrates: 26g
- Fiber: 1g
- Protein: 3g
- Cholesterol: 35mg