
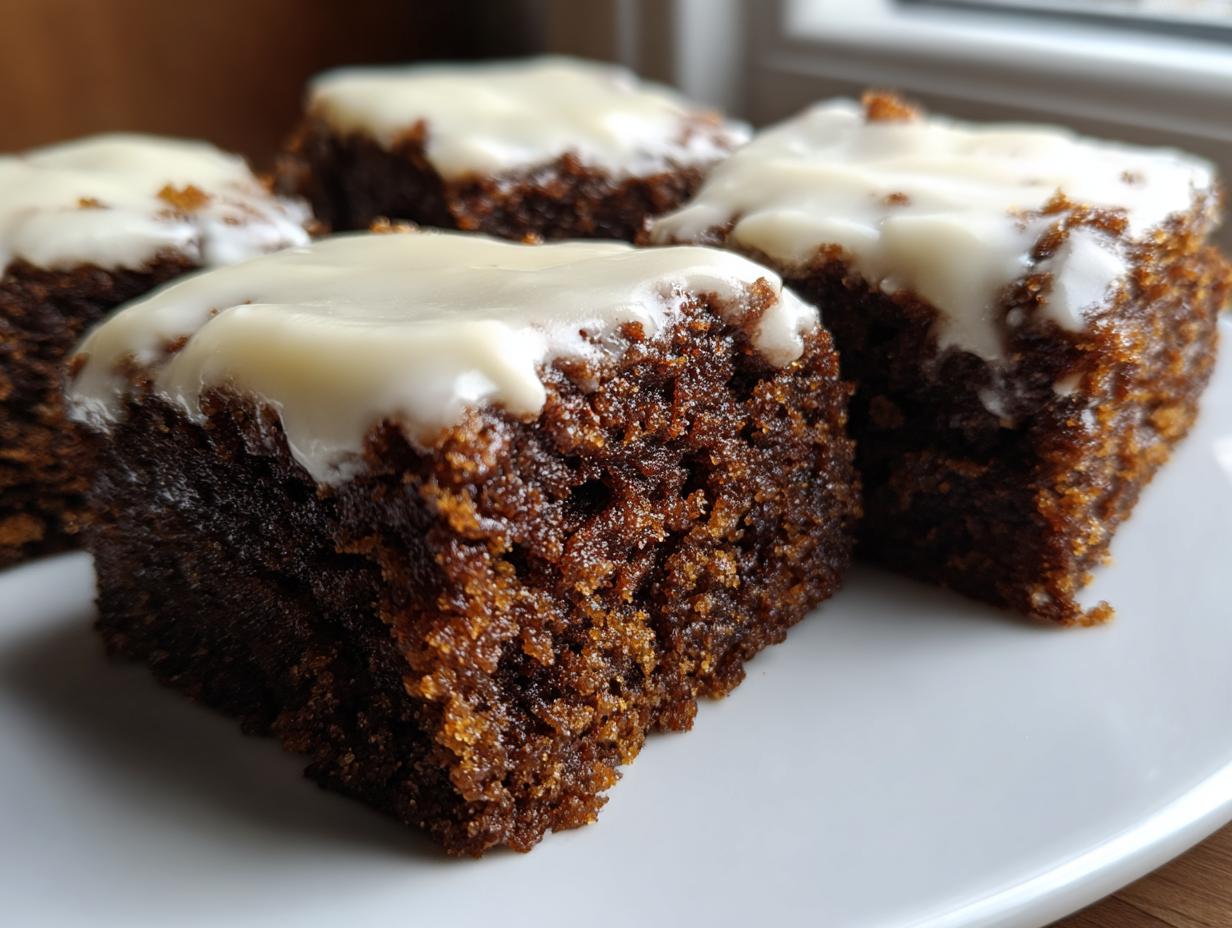
When that first chill hits the air, my mind immediately goes to the oven. There’s just nothing cozier than starting up some good homemade desserts when the days get shorter. This year, we’re leaving the plain cakes behind and diving hand-first into these incredible gingerbread brownies. Forget dry cookies; I wanted something rich, dense, and perfectly spiced. Trust me when I say this recipe delivers that impossible combination: a wonderfully fudgy texture kissed with all the warm ginger and molasses notes we love. It’s the ultimate hug in a square!
- Why You Will Love These Fudgy Gingerbread Brownies
- Essential Ingredients for Perfect Gingerbread Brownies
- How to Make Fudgy Gingerbread Brownies Step-by-Step
- Tips for Achieving the Best Chewy Gingerbread Bars
- Festive Variations for Your Gingerbread Brownies Recipe
- Serving Suggestions for These Frosted Holiday Brownies
- Storage and Reheating for Homemade Gingerbread Bars
- Frequently Asked Questions About Gingerbread Brownies
- Nutritional Estimates for Your Fudgy Holiday Brownies
Why You Will Love These Fudgy Gingerbread Brownies
I know you have a million holiday baking ideas swirling around, but seriously—stop what you’re doing and peek at these. This batch of gingerbread brownies is the perfect winter treat because it hits every single craving we have this time of year. They are absolutely foolproof!
- That Perfect Fudgy Texture: I’m not messing around; these aren’t cakey brownies! We use a method that guarantees a dense, rich, and gloriously gooey center. It’s what makes them so satisfying compared to a standard bar cookie.
- Explosion of Warm Spices: We pack in the ginger, cinnamon, nutmeg, and cloves. You get that genuine, cozy gingerbread flavor from the first bite to the last, especially balanced by that lovely molasses.
- Simple, One-Bowl Magic: Even though they taste fancy, these are actually incredibly easy. You melt the butter, whisk the wet stuff, stir in the dry stuff, and you’re done before you even need to clean up the mess!
- The Ultimate Garnish Vehicle: While they are delicious plain, they are the perfect base for festive toppings. Whether you use my bright eggnog glaze or just a simple dusting of sugar, they always look presentable for company.
- Ready in Under an Hour: Between prep and baking, you’re looking at maybe 50 minutes total before you just have to wait for them to cool down. That’s super fast for a show-stopping holiday dessert!
Essential Ingredients for Perfect Gingerbread Brownies
Okay, let’s talk about what goes into these gingerbread brownies! Since these are such strongly flavored squares, using quality ingredients really matters. You don’t need anything fancy for this recipe—it’s mostly pantry staples rearranged in a way that makes them taste like Christmas heaven. If you’re looking for the absolute best gingerbread recipe twist, the secret is in this short list right here.
Here is what you’ll need for the brownie base. Please make sure you measure that brown sugar correctly—it needs to be packed in tight!
- 1 cup unsalted butter, melted
- 1 cup packed brown sugar (Really pack it in there!)
- 1/2 cup granulated sugar
- 4 large eggs (Four! They help with that classic fudgy structure.)
- 1 teaspoon vanilla extract
- 1 cup all-purpose flour
- 1/2 cup unsweetened cocoa powder
- 1 tablespoon ground ginger (Don’t skimp here!)
- 1 tablespoon ground cinnamon
- 1/2 teaspoon ground nutmeg
- 1/2 teaspoon ground cloves
- 1/4 teaspoon salt
- 1/4 cup molasses (The star, honestly!)
And for the simple, festive topping:
- 1/2 cup powdered sugar
- 2 tablespoons milk or cream
- 1/4 teaspoon rum extract or vanilla extract
Ingredient Notes and Substitutions for Gingerbread Brownies
So you see that molasses up there? That isn’t optional! Molasses is the backbone of any great Molasses Brownies Dessert recipe, giving us that signature dark color and deep, slightly bitter warmth that perfectly cuts through the sugar. It also helps keep them gooey, which is exactly what we want!
A few quick notes so you can feel confident:
- Molasses Types: If you only have blackstrap molasses, your brownies will be much sharper in flavor. I actually prefer using standard unsulfured molasses first. If you want that punchier flavor, you can always thin the blackstrap with a half teaspoon of water before adding it to the wet ingredients.
- The Eggs: Every recipe I try that cuts back on the eggs ends up tasting like a cake. We need all four eggs to create that dense, rich, brownie texture, not a fluffy baked good.
- Spice Magnification: If you are someone who likes it really spicy, feel free to add an extra 1/2 teaspoon of ginger. It will still be balanced by the chocolate and sugar, but it really ups the cozy factor.
We’ll talk more about the glaze ingredients later, but just a heads up: if you don’t have rum extract for the eggnog flavor, just stick to vanilla extract, or even better, use a tiny squeeze of orange juice for a little bright zip! You can find great ideas for making these into a full one-bowl fudgy bake on my other post!
How to Make Fudgy Gingerbread Brownies Step-by-Step
Alright, here is where the real magic happens, and I promise, it’s ridiculously fun. We’re using a classic brownie structure, which means we are going to treat this batter gently. Think of it as a very delicate dance for the first few minutes until everything comes together. The goal here is to get that wonderful, Gooey Brownie Recipe feel, and you absolutely cannot achieve that if you beat the flour into submission! You can see the original source for this style of fudgy texture over at this great recipe if you want to compare notes!
First things first: get that oven to 350°F (175°C). I always line my 9×9 inch pan with parchment paper, making sure I leave those two ends hanging over the sides like little handles. Trust me, future you will thank me when it’s time to lift these beauties out after they cool.
- In a big bowl—and I mean big because we’ll be adding things—whisk together your melted butter, both sugars (brown and white), until it looks kind of uniform and smooth.
- Now, beat in those four eggs, one at a time. Make sure that first egg is really incorporated before you drop the second one in. Then, stir in your vanilla and that beautiful, dark molasses until everything is nicely combined and it’s starting to smell sweet and spicy already!
- In a separate, smaller bowl, just give a quick whisk to your flour, cocoa powder, all those lovely spices (ginger, cinnamon, nutmeg, cloves), and the salt. We just want to make sure everything is evenly distributed before it hits the wet stuff.
- This is the critical moment, honey! Gradually add those dry ingredients into the wet mixture. Mix only until you see the last little streaks of flour disappear. I usually stop mixing by hand with a rubber spatula when I still see tiny flecks of cocoa powder. That’s your cue! Overmixing develops gluten, and gluten gives you cake, and we want fudgy!
- Scrape that thick batter into your prepared pan and smooth the top with the back of the spatula. Because it’s thick, it takes a little persuading to spread evenly.
- Bake this dream for 30 to 35 minutes. Here’s my important test: when you put a toothpick near the center—and I mean near the center, not smack in the middle—you want to see moist, sticky crumbs clinging to the toothpick. If it’s completely clean, you’ve baked too long, and they’ll be cakey! If it’s wet batter, give it five more minutes.
- Let them cool completely! You absolutely have to do this before you try to glaze them or cut them. If you try cutting them warm, they’ll just smoosh and fall apart. Give them at least two hours on the counter, or even pop them in the fridge for an hour to firm up faster.
Preparing the Eggnog Glaze for Your Gingerbread Brownies
Once those gingerbread brownies are totally cool, we jazz them up with the eggnog glaze. This glaze tastes exactly like the holidays in a spoonful, and it sets up nicely without getting too hard.
You just need three things: powdered sugar, a liquid, and that little flavor pop. Put the powdered sugar in a bowl. Start by adding 2 tablespoons of milk or cream. Stir it up! It’s going to look like cement at first—don’t panic!
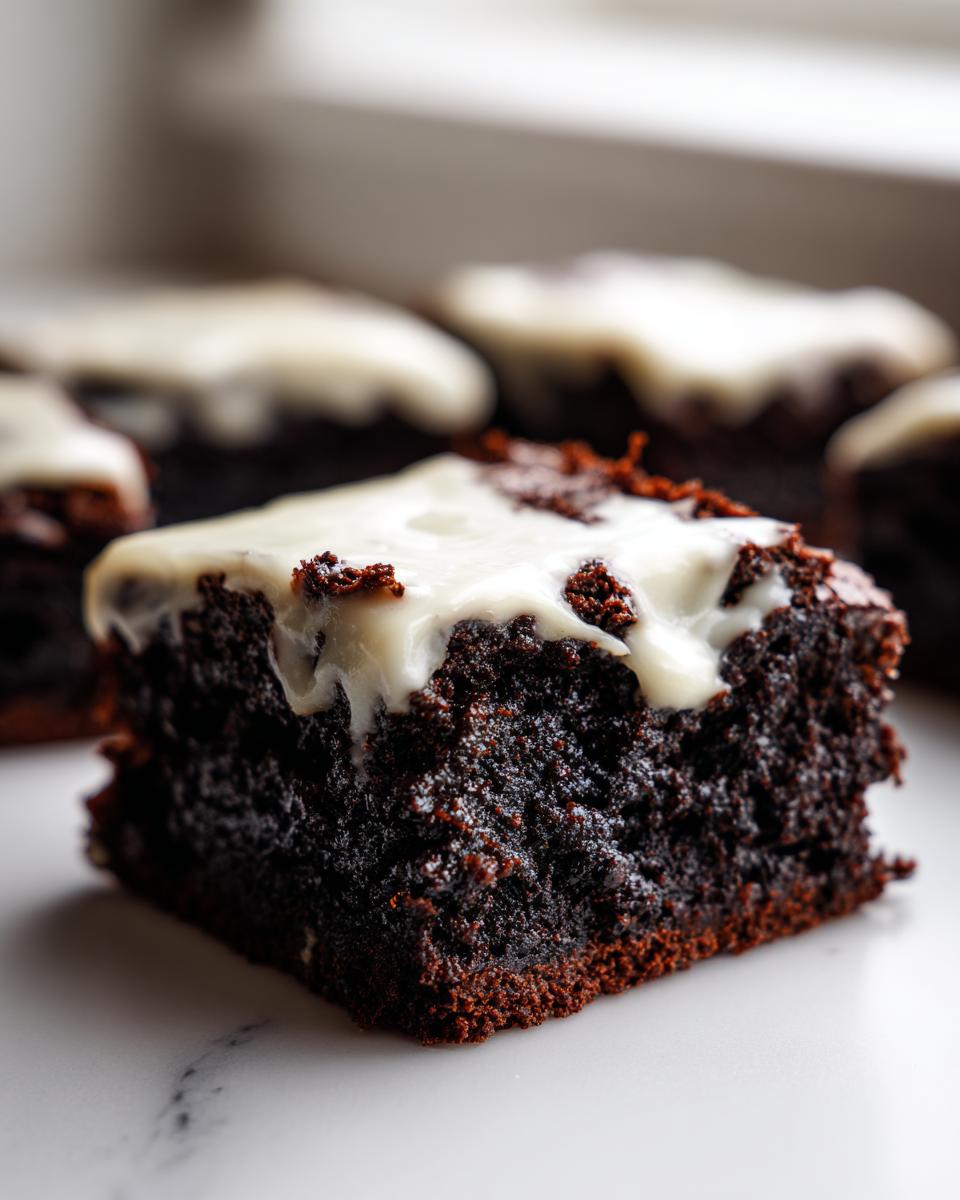
Slowly, and I mean slowly, add more liquid—a teaspoon at a time—until it’s thick enough to coat the back of a spoon but still pours easily enough to drizzle. Then, whisk in that 1/4 teaspoon of rum extract. If you’re skipping rum, just use vanilla. Once it’s looking glossy and perfect for pouring, gently drizzle it all over those cooled brownies. Let that glaze set up for about 20 minutes before you slice them into squares. It makes for such a wonderful presentation for any festive occasion!
Tips for Achieving the Best Chewy Gingerbread Bars
Listen, I learned this the hard way over many holiday baking failures: brownies live or die by the clock! If you want those incredible, dense, chewy results that make people sigh with happiness, you have to be strict about two things: temperature and timing. Don’t let these gingerbread brownies turn into slightly spicy little cakes on you!
Since we are aiming for that wonderfully gooey brownie recipe texture, the biggest trick is slightly underbaking them. Remember when I told you the toothpick should come out with moist crumbs? That’s your target! If I see zero crumbs, I feel like I’ve gone too far. I always pull mine when the center still looks a tiny bit wobbly. They firm up beautifully as they cool on the pan. If you want even more tips on getting that perfect texture in other recipes, check out my guide on soft and chewy cookies; the science is similar!
The spice balance is key, too. Ginger is strong, so you need enough fat (butter and egg yolks) to carry that warmth without letting the ginger scorch the flavor. Because these are so rich, they need time to settle. I’ve seen people try to glaze these warm brownies, and they just end up with a soupy, melted mess. Patience is a virtue, especially with holiday baking!
If you’re looking for the absolute best results, especially with the molasses, make sure your ingredients aren’t straight from a cold fridge. Room temperature eggs mix better, but the cooling process after baking is non-negotiable before the glaze goes on. If you want to see how another great cook handles their spicy squares, check out the techniques over at Clara’s Kitchen!
Festive Variations for Your Gingerbread Brownies Recipe
Now, I know the classic flavor profile in these gingerbread brownies is stellar, but sometimes you want to put your own little spin on things, especially when you’re making dessert for the same relatives year after year! Getting creative with a reliable base recipe is what home cooking is all about. You’ve got the perfect fudgy square; now let’s just dress it up a little!
The recipe card I gave you suggested adding chocolate chips, and I highly recommend following that advice! Chocolate and ginger are just fantastic together. It’s like making Spiced Chocolate Brownies but keeping the gingerbread spice front and center. Just toss about a half cup of semi-sweet or dark chocolate chips right into the batter when you fold in the dry ingredients. Don’t stir too much—just enough to distribute them evenly.
For something a little more dramatic, you could try layering in a swirl. This takes a tiny bit more finesse, but it’s worth it for holiday parties. You’ll need about 4 ounces of good quality dark or milk chocolate, melted smoothly. Once you pour the brownie batter into the pan, dollop small spoonfuls of the melted chocolate randomly over the top. Then, take a knife or a skewer and gently drag it through the batter just once or twice to create a beautiful, marbled effect. It looks so elegant once it chills!

If you’re feeling adventurous and want to lean into the chocolate even more, try my technique from my double chocolate cookies post! Mix a couple of tablespoons of instant espresso powder right into the cocoa powder before mixing the dry ingredients. Espresso doesn’t make it taste like coffee; it just deepens the chocolate flavor and makes the spice notes sing even louder. It’s a secret weapon for any rich, dark chocolate bake!
Serving Suggestions for These Frosted Holiday Brownies
When you finally get these beauties out of the pan and sliced, you want them to look as good as they taste, right? Presentation is everything during the holidays! These Frosted Holiday Brownies are showstoppers all on their own, especially with that glossy eggnog glaze, but sometimes you just need a little something extra to complete the holiday table.
The goal for serving them is comfort and elegance—the exact balance we aim for in the kitchen! Think about what makes a snack feel truly special when it’s cold outside. It usually involves something warm to drink alongside it.
Here are a few ways I love to serve them up during December gatherings:
- The Coffee Companion: These are intensely flavored because of the molasses and ginger. They pair unbelievably well with a strong black coffee or a creamy latte. The bitterness of the coffee just balances the spice and sweetness perfectly.
- Elevated Hot Cocoa: Why serve boring cocoa when you can serve something extra special? I love setting up a small station where people can grab a brownie and a mug of my whipped hot chocolate. It’s just festive enough without being too much work!
- The Ice Cream Scoop: This might sound crazy, but try a small scoop of good quality vanilla bean ice cream right next to a warm brownie square (especially if you tried one of the variations mentioned above!). The cool cream against that spicy square is absolutely divine. Or, if you want to stay on theme, plain vanilla is a good buffer against the strong ginger.
- Simple Dusting Finish: If you opted not to use the glaze, make sure you wait until they are completely cool. Dust them generously with powdered sugar right before serving. It looks exactly like fresh snow has fallen on your gingerbread brownies—so picture-perfect! I saw some gorgeous examples of this on another great home cook’s site that really nailed the simple look.
No matter how you serve them, make sure you have plenty of napkins ready. When they are this fudgy, they tend to be a little messy, but honestly, that’s part of the fun!
Storage and Reheating for Homemade Gingerbread Bars
The holidays are all about making things ahead of time, aren’t they? If you’re smart about it, you can bake these gingerbread brownies a few days before your big gathering, and they might even taste better! Because of that wonderful molasses content, these bars stay nice and moist, but we still have to treat them right so they don’t dry out before serving day.
If you’re just keeping them on the counter, make sure they are completely cooled—especially if you added that eggnog glaze! If the glaze is still slightly tacky, putting them in a plastic container will just make the glaze sweat and get sticky. I line my airtight container with a single sheet of wax paper, then layer the cooled bars on top, separated by another sheet of wax paper. They should be fantastic at room temperature for about three days.
If you’re storing them longer, or if your kitchen is just way too warm, a quick trip to the fridge is a good idea. Pop them in an airtight container and they should hold up beautifully for about a week. Just remember that when they get cold, they firm up a bit more, which is fine for the flavor but might make them seem less fudgy. When you pull them out of the fridge, let them sit on the counter for about 20 minutes before serving!
Making Gingerbread Brownies Ahead of Time: Freezing Tips
This is my biggest tip for surviving December: I bake everything I possibly can ahead of time! You can absolutely freeze these homemade gingerbread bars, and honestly, they freeze like a dream. This is great if you need them completely ready to go for a party next week. I actually wrote a whole post about making big batches ahead of time for my freezer jam prep, and the same rules apply here!
First, you must cut them into individual squares before wrapping them. If you freeze them in one big block, they become almost impossible to serve later without cracking everywhere!
- Once the brownies (glazed or unglazed) are completely cool, slice them into serving squares.
- Wrap each individual square tightly in plastic wrap. Get that plastic wrap snug around all the edges!
- Place the wrapped squares into a large, heavy-duty freezer bag. Make sure you press out as much air as you can before sealing it up tight.
They will keep perfectly well in the freezer for up to three months. When you need them, just pull out as many as you need the night before, unwrap them, and let them thaw on the counter overnight. They taste just as spiced and rich as the day they came out of the oven!
Frequently Asked Questions About Gingerbread Brownies
I know you might have a few lingering doubts about baking with molasses or getting that *perfect* texture, so I collected a few of the questions I get asked most often about making the Best Gingerbread Recipe twist! Don’t worry if you’ve never baked with gingerbread spices before; these answers should make you feel totally confident to get started.
How do I make sure these turn out fudgy and chewy, not cakey?
This is the most important question, honestly! To guarantee a wonderfully chewy texture, you have to follow two non-negotiables. First, do not overmix the batter once you add the flour and cocoa. Stop mixing the second you see the dry streaks disappear. Second, slightly underbake them! Pull them out when a toothpick inserted nearby still has moist, sticky crumbs attached. If the toothpick is totally clean, you’ve gone too far, and you’ll end up with something closer to a sheet cake than a decadent brownie.
Can I make these ahead of time for my holiday party?
Yes, please do! These are fantastic Easy Christmas Brownies to make ahead. Since they are so rich with molasses, they actually stay moist for days. I usually let them cool completely, then store them in an airtight container, separated by wax paper, at room temperature for up to three days. If you’re going a week out, they freeze beautifully—just make sure you wrap each individual square tightly before freezing, like I talked about in the storage section.
How strong will the ginger and spice flavor be in these brownies?
That’s entirely up to you, but I designed this Gingerbread Brownies Recipe to taste warmly spiced, not painfully spicy! We use a full tablespoon of ground ginger, which is assertive, but it gets beautifully balanced by the cocoa powder, the sweetness of the brown sugar, and that deep molasses. If you’re nervous about the ginger, start with just 2 teaspoons, and then next time, you can always increase it. They should absolutely taste like a holiday treat, not just a ginger cookie!
Do I have to use the eggnog glaze? Can I skip it?
You absolutely can skip the eggnog glaze if you prefer something simpler! I love the glaze because it adds a festive look and a creamy texture contrast, but these gingerbread brownies are incredible on their own. If you skip the glaze, I highly recommend giving the cooled, plain brownies a very generous dusting of powdered sugar right before you slice and serve them. It looks stunning and matches the cozy winter theme. For more tips on getting that perfect holiday presentation, take a look at my post about Easy Christmas Brownies!
What’s the best way to store leftovers if I have tons of rich and spiced desserts?
Because the molasses keeps them so moist, they keep well! If you have a very large batch, it’s best to store them in layers separated by wax paper inside an airtight container. We don’t want them sweating if they still have glaze on them! If you’re storing them for longer than three days, move that container into the fridge. They firm up when cold, which is fine, but let them sit on the counter for about 20 minutes before serving so they can soften back up to that ideal fudgy stage. For more great flavor combinations, check out some ideas over at Feast & Mint!
Nutritional Estimates for Your Fudgy Holiday Brownies
I always encourage people not to stress too much about the numbers when baking something this joyful, but I know some of you appreciate knowing what you’re working with! Since these are wonderfully rich, they are definitely a treat, and the final numbers can shift a bit based on the exact brand of molasses or cocoa powder you use.
Please keep in mind these are just **estimates** based on standard ingredient calculations for 16 servings. They are meant to give you a general idea of what’s in these Fudgy Holiday Brownies, so don’t hold me to these down to the last calorie!
- Serving Size: 1 square
- Calories: 280
- Fat: 15g (Mostly from that delicious butter!)
- Saturated Fat: 9g
- Carbohydrates: 35g
- Sugar: 28g (Yes, it’s a treat!)
- Protein: 4g
- Sodium: 110mg
If you are worried about the sugar count, remember that swapping that eggnog glaze for a simple dusting of powdered sugar—as my grandmother often did—will immediately shave off a few grams of sugar per square. Either way, baking is about love, and these gingerbread brownies are made with a whole lot of it!
PrintFudgy Gingerbread Brownies with Eggnog Glaze
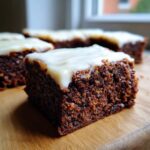
Make rich, fudgy gingerbread brownies packed with warm holiday spices like ginger, cinnamon, and molasses. Top these easy Christmas brownies with a simple eggnog glaze for a festive dessert.
- Prep Time: 15 min
- Cook Time: 35 min
- Total Time: 50 min
- Yield: 16 servings 1x
- Category: Dessert
- Method: Baking
- Cuisine: American
- Diet: Vegetarian
Ingredients
- 1 cup unsalted butter, melted
- 1 cup packed brown sugar
- 1/2 cup granulated sugar
- 4 large eggs
- 1 teaspoon vanilla extract
- 1 cup all-purpose flour
- 1/2 cup unsweetened cocoa powder
- 1 tablespoon ground ginger
- 1 tablespoon ground cinnamon
- 1/2 teaspoon ground nutmeg
- 1/2 teaspoon ground cloves
- 1/4 teaspoon salt
- 1/4 cup molasses
- 1/2 cup powdered sugar (for glaze)
- 2 tablespoons milk or cream (for glaze)
- 1/4 teaspoon rum extract or vanilla extract (for glaze)
Instructions
- Preheat your oven to 350°F (175°C). Line a 9×9 inch baking pan with parchment paper, leaving an overhang for easy removal.
- In a large bowl, whisk together the melted butter, brown sugar, and granulated sugar until smooth.
- Beat in the eggs one at a time, mixing well after each addition. Stir in the vanilla extract and molasses until combined.
- In a separate bowl, whisk together the flour, cocoa powder, ginger, cinnamon, nutmeg, cloves, and salt.
- Gradually add the dry ingredients to the wet ingredients, mixing only until just combined. Do not overmix to keep the brownies fudgy.
- Spread the batter evenly into the prepared baking pan.
- Bake for 30 to 35 minutes. A toothpick inserted near the center should come out with moist crumbs attached, not wet batter.
- Let the brownies cool completely in the pan on a wire rack.
- Prepare the glaze: Whisk together the powdered sugar, milk or cream, and rum or vanilla extract until smooth. Add more liquid, a teaspoon at a time, if the glaze is too thick.
- Once the brownies are cool, drizzle or spread the eggnog glaze over the top. Let the glaze set before cutting into squares for serving.
Notes
- For a chocolate gingerbread brownie variation, add 1/2 cup of chocolate chips to the batter before baking.
- If you prefer a simple finish, dust the cooled brownies with powdered sugar instead of using the glaze.
- To achieve a truly gooey brownie recipe texture, slightly underbake them by 2-3 minutes.
Nutrition
- Serving Size: 1 square
- Calories: 280
- Sugar: 28g
- Sodium: 110mg
- Fat: 15g
- Saturated Fat: 9g
- Unsaturated Fat: 6g
- Trans Fat: 0g
- Carbohydrates: 35g
- Fiber: 2g
- Protein: 4g
- Cholesterol: 75mg