
When you’re searching for a holiday centerpiece or just need something utterly unforgettable to end the week, you don’t want a fussy recipe. You want magic! That’s exactly what the Italian Love Cake delivers. This stunner looks like it took days of careful assembly, but trust me, it’s one of the simplest show-stoppers I have in my rotation. My mission here at Rosa’s Tasty Kitchen has always been to bring you recipes that impress without adding stress. This Italian Love Cake Recipe manages that beautifully, offering you that rich, Decadent Chocolate Cake texture combined with an impossibly creamy filling. It truly is an achievable joy for every home cook.
- What is Italian Love Cake and Why This Layered Ricotta Cake Works
- Ingredients for the Best Chocolate Italian Love Cake Recipe
- How to Prepare the No Fail Layered Italian Love Cake
- Tips for Success with Your Creamy Ricotta Filling Cake
- Variations on the Classic Italian Love Cake Recipe
- Serving Suggestions for This Show Stopping Dessert
- Make Ahead Dessert and Storage for Your Italian Love Cake
- Frequently Asked Questions About This Ricotta Pudding Cake
- Estimated Nutritional Data for Italian Love Cake
What is Italian Love Cake and Why This Layered Ricotta Cake Works
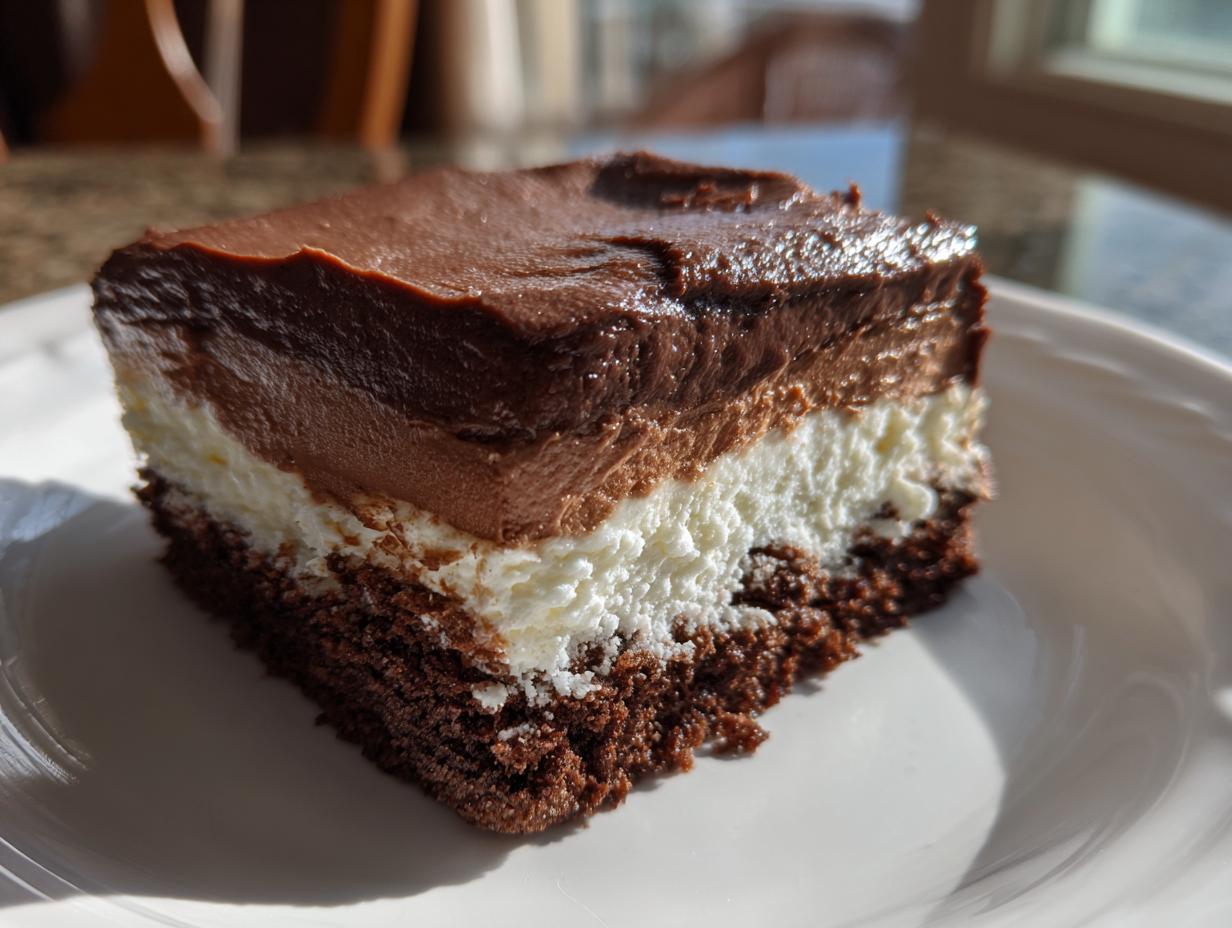
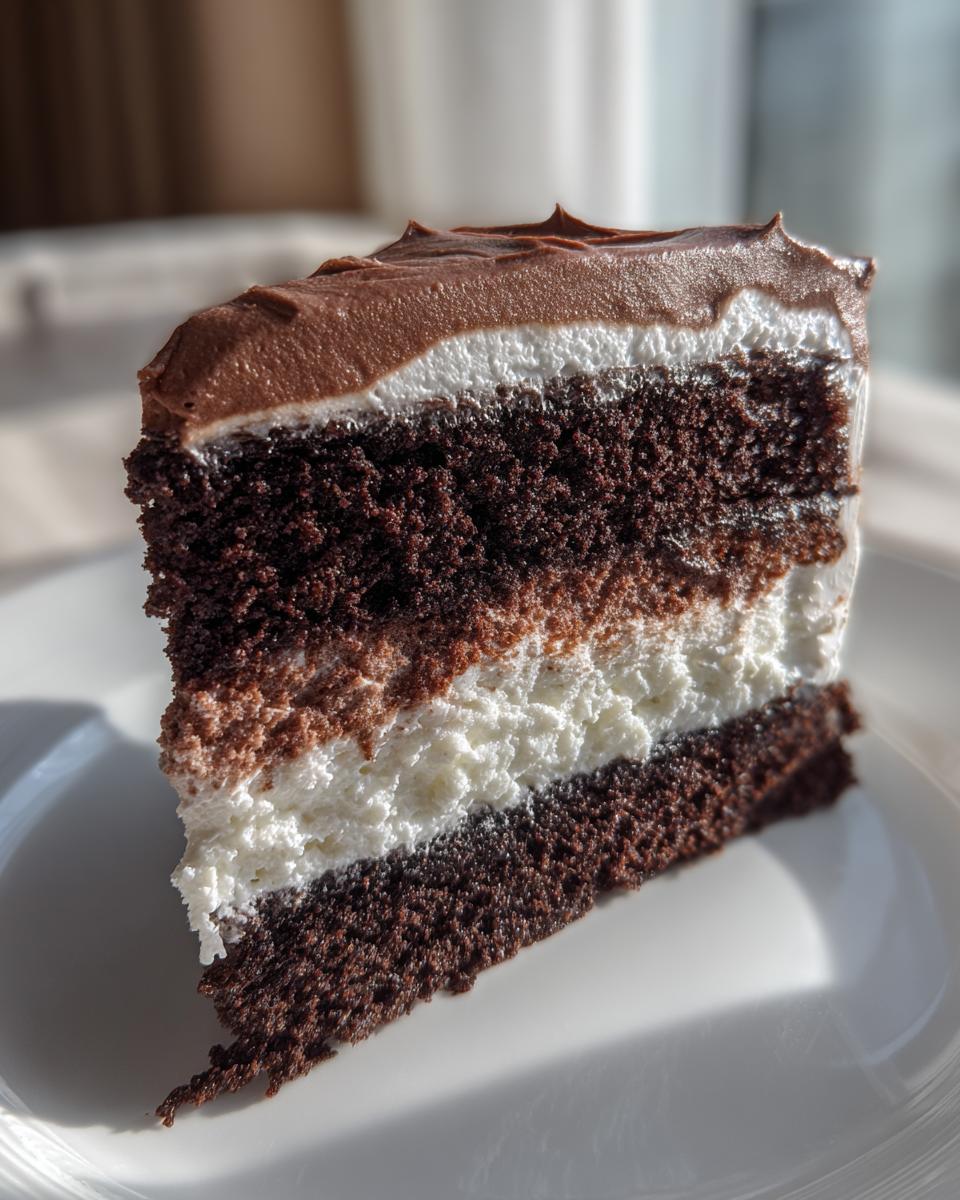
You might be wondering what exactly makes an Italian Love Cake so special. Is it the creamy texture? The hint of citrus? For me, it’s the way this cake completely bakes itself! It’s a traditional favorite, but by using a cake mix shortcut, my specific version simplifies the process while guaranteeing those distinct layers. I want to bring you recipes that look like they came from a fancy bakery but are actually easy enough for a busy weeknight. This Layered Ricotta Cake is a winner in that regard!
The magic comes down to density. The ricotta filling weighs down the lighter chocolate batter just enough so it sinks beautifully as it bakes. It’s a miracle dessert that lets us home cooks look like total wizards!
The Secret to the Magical Layered Italian Love Cake
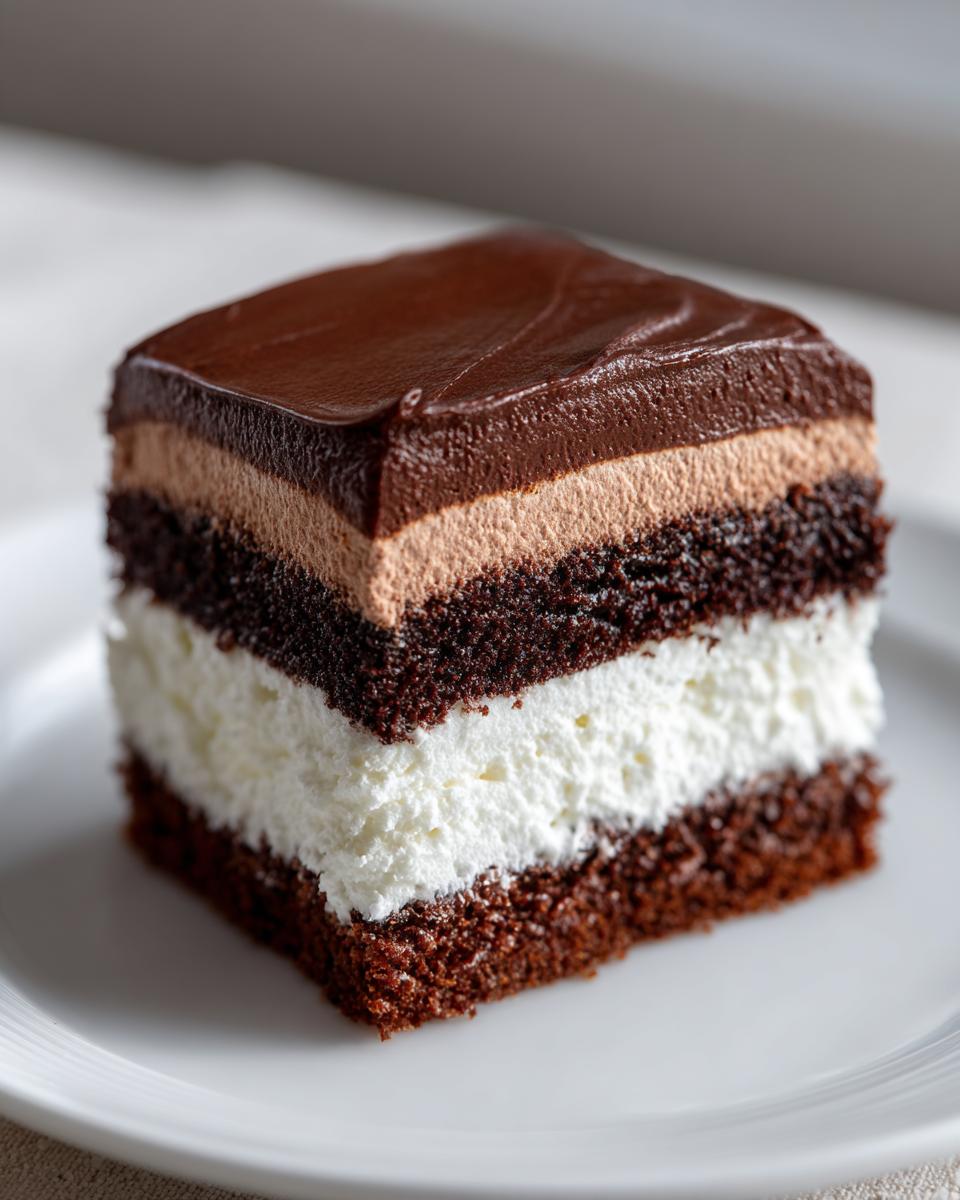
The technique is shockingly simple, which is why I love it. After pouring in your chocolate batter, you just gently spoon the ricotta mixture over the top—and that’s it for mixing! Don’t stir, don’t swirl! The difference in weight causes the ricotta part to settle right into the middle, creating that distinct, decadent custard layer underneath the top crust. It’s the ultimate make ahead dessert because the layers set up perfectly after chilling.
Ingredients for the Best Chocolate Italian Love Cake Recipe
Now we get to the good part—the supplies! When I first adapted this recipe for my own busy kitchen, I immediately knew I needed a bridge between a traditional, complex Italian dessert and something an everyday cook could whip up without running to specialty stores. That’s why this Italian Love Cake leans into a cake mix shortcut for our base. Don’t worry, we doctor it up plenty to make it taste homemade! This ensures we get that wonderful texture everyone talks about without all the fuss. Clarity is key when baking, so I’ve broken down exactly what you need for each component.
For the Chocolate Cake Base Ingredients
This is the bottom layer that gets wonderfully moist with the ricotta sinking into it. We are using a standard box size here, so grab that classic:
- 1 box (15.25 ounces) chocolate cake mix
- 1 cup all-purpose flour (this helps stabilize the batter)
- 1 cup granulated sugar
- 1 teaspoon baking powder
- 1/2 teaspoon salt
- 1 cup water
- 1/2 cup vegetable oil
- 3 large eggs, separated (we need the yolks here!)
- 1 teaspoon vanilla extract
For the Creamy Ricotta Filling Cake Layer
These ingredients introduce that characteristic Italian texture and flavor we’re known for. Pay close attention to the flavor extracts—these are crucial for that authentic taste!
- 1 container (15 ounces) whole milk ricotta cheese (Please use whole milk—it matters!)
- 1/2 cup granulated sugar
- 1 teaspoon lemon zest (Fresh is best, trust me!)
- 1/4 teaspoon almond extract
For the Chocolate Pudding Frosting
This isn’t a stiff buttercream; it’s a silky, dreamy topping that sets up beautifully on the chilled cake. It acts almost like a light cheesecake layer on top!
- 1 package (3.4 ounces) instant chocolate pudding mix
- 1 1/2 cups cold milk (Crucial for the pudding to set quickly!)
- 1 container (8 ounces) frozen whipped topping, thawed
How to Prepare the No Fail Layered Italian Love Cake
Okay, deep breaths! This is where all the magic happens, but I promise you, this No Fail Layered Cake is designed to look complicated while being incredibly straightforward. It’s all about adding things in the right order so the oven does the work for us. The key here is patience between steps, especially after it comes out of the oven. Let’s get this show on the road!
Mixing the Chocolate Batter and Preparing the Pan
First things first, get your house smelling great! Preheat that oven to 350°F (175°C) and make sure your 9×13 inch pan is well greased and floured. Now for the cake base: In a large bowl, combine all your dry cake mix ingredients—the mix, flour, sugar, baking powder, and salt. Give that a good whisk!
Next, add in the oil, water, and those three egg yolks we separated earlier. You need to beat this on medium speed for a solid 2 minutes. It needs that time to get incorporated. Stir in the vanilla extract last, then pour this mixture right into your prepared pan. That forms our lovely bottom layer for now.
Creating the Ricotta Layer and Layering the Italian Love Cake
Time for the creamy part! In a separate bowl, mix your ricotta, the extra 1/2 cup of sugar, lemon zest, and almond extract until it’s totally smooth—no lumps allowed! In a clean bowl, take those three reserved egg whites and beat them until they just hit soft peaks. Then, very gently, fold those whites into the ricotta mixture. You want to keep all that lovely air in there!
This is the big moment: Carefully spoon big dollops of the ricotta mixture evenly over the chocolate batter. Do not spread the dollops! Leave them right where they land. They’ll spread and sink on their own while baking. Trust the process; that’s how we get the layers!
Baking and Cooling Instructions
Pop the pan into that preheated oven and let it bake for 45 to 55 minutes. You’ll know it’s ready when the top looks set and a toothpick inserted near the middle comes out clean. The ricotta layer will look a little sunken—that’s the indicator that the magic separation has occurred. Let the cake cool completely on a wire rack. I mean it—*completely* cooled! Frosting a warm cake is just asking for a soupy, sad mess.
Making and Applying the Chocolate Pudding Frosting
While it cools, whip up the topping. Whisk the instant chocolate pudding mix with 1 1/2 cups of cold milk until it gets nice and thick—about five minutes of elbow grease. Once it’s set, gently fold that rich pudding into your thawed whipped topping until everything is just barely combined. You don’t want to deflate the topping too much.
Finally, spread that glorious frosting evenly over the completely cooled cake. Then, and this is essential—chill the whole thing for at least 2 hours before slicing. That chilling time lets all those layers firm up beautifully. If you have leftovers (ha!), they store great in the fridge. You can see more of my favorite make ahead dessert ideas in my full guide!
Tips for Success with Your Creamy Ricotta Filling Cake
Even with this amazing shortcut recipe, baking is still chemistry, right? When I first taught this recipe to my Sunday school class years ago, we had one little hiccup. One batch of the Creamy Ricotta Filling Cake mixture came out a little grainy, and guess what? The layers didn’t quite separate right! It still tasted good, but it was more like an uneven cake, not the clean layers we want. I realized then that little details make a huge difference in these ‘dump and bake’ miracles.
Here are the two big things I learned that guarantee your layers stack up just the way they should, turning this into a true show-stopper every single time. I always try to pass along these little bits of home cook wisdom!
Ingredient Temperature Matters for the Ricotta Layer
If your ricotta comes straight from the fridge, it’s cold and stiff. When you try to mix it with the sugar and zest, it fights you! That leads to lumps, and those lumps interfere with the density needed for the layer to sink properly. My advice? Take that container of ricotta out on the counter while you’re preheating the oven. Let it sit for about 20 minutes. It should be cool, but definitely not ice-cold. When it’s the right temperature, it blends into that silken smooth mixture we need so effortlessly.
Achieving the Perfect Chocolate Italian Cake Texture
This goes back to my very first baking lessons regarding cake mixes. You need to mix the dry and wet ingredients until they are *just* combined. Once you start adding the yolks, oil, and water to that cake mix base, you have to watch out for over-mixing! That’s how you develop gluten, and instead of a tender, moist chocolate base, you end up with something tough and bread-like. Stop mixing the second you don’t see any more flour streaks. A few small lumps are infinitely better than a tough cake. It proves you respected the batter!
Remember, this Italian Love Cake is forgiving, especially since the ricotta layer adds so much moisture. But giving these two components the attention they need ensures you succeed with that wonderful layered texture. I still love sharing this one; just check out my guide on other great homemade desserts if you’re feeling inspired!
Variations on the Classic Italian Love Cake Recipe
As much as I adore this rich chocolate version—and honestly, it’s my favorite for a truly impressive look—I know not everyone loves chocolate in their treats! That’s why I always keep notes on how to pivot the standard cake mix when building out a Classic Italian Cake Recipe. The lovely thing about this structure is that the ricotta and pudding layers are so strong in flavor that they really complement a white cake base just as well.
If you want to try a lighter version, or perhaps you are bringing this to a party where chocolate isn’t the main focus, these swaps work wonderfully and keep that magical layering intact. It’s all about respecting the structure even while we change the canvas flavor!
Switching to a Vanilla Base Italian Love Cake
If you want to swap out that boxed chocolate mix for something lighter, grab a box of white or yellow cake mix instead. It’s nearly a one-to-one swap, but I have one tiny addition that I think really elevates it, especially if you skip the chocolate pudding frosting later on. Instead of using the full cup of water required by the recipe, measure out 1/4 cup less water and substitute that missing liquid with 1/4 cup of strong, cooled brewed coffee.
Don’t worry, it won’t taste like coffee! That little bit of coffee depth works wonders brightening up the vanilla and complementing the ricotta filling, even if you stick with the suggested chocolate frosting. It lends a subtle maturity to the flavor profile, which I think is just lovely. Don’t forget to check out my notes on achieving a super moist crumb in my other cake recipes!
Boosting the Citrus or Almond Notes
The lemon zest and almond extract in the ricotta layer are what give this dessert that authentic Italian touch, and sometimes the standard amounts just aren’t loud enough for my taste. If you aren’t doing the vanilla swap and want the chocolate to sing a little louder, or if you just love that hint of brightness, try turning up the zest!
I often increase the lemon zest to a full teaspoon without feeling guilty. The slight tartness cuts through the richness of the chocolate cake and the heavy sweetness of the pudding topping beautifully. If citrus isn’t your favorite, try doubling the almond extract to 1/2 teaspoon. Just be careful—almond can overpower quickly! Mix that into the ricotta, blend it well, and you get a brighter flavor bomb in every single bite. It really transforms the entire experience!
Serving Suggestions for This Show Stopping Dessert
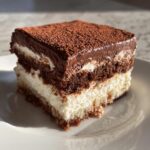
Honestly, this Italian Love Cake is so impressive looking all by itself that it barely needs anything else! If you are serving it right after dinner, I recommend letting it sit on the counter for about 20-30 minutes after taking it out of the fridge. Serving it slightly cooler than room temperature really lets that creamy ricotta layer shine. For an added touch, especially if you are brainstorming Valentine’s Day Cake Ideas, a light dusting of high-quality unsweetened cocoa powder or a few fresh raspberries on the plate elevates it instantly. It’s a visual treat!
Make Ahead Dessert and Storage for Your Italian Love Cake
When you’re hosting, the best thing you can do for yourself is get dessert done early. My secret weapon for any large gathering or holiday is always a proper make ahead dessert, and this Italian Love Cake is practically begging to be made in advance! Because of that wonderful, dense ricotta layer and the pudding frosting, this cake actually benefits from sitting in the fridge.
When you try to rush the chilling phase, the layers can still be a little soft, and slicing becomes messy. But if you give it time to settle, you get those clean slices that look so professional. It’s such a relief on party day to pull this gorgeous cake right out of the fridge and know you are done!
For optimal texture, I always recommend a minimum of 2 hours chilling time after frosting, as the recipe mentions. However, I think it tastes *best* when it sits overnight—up to 24 hours—in the refrigerator. Just cover it tightly with plastic wrap or a cake dome. The chilling process allows the flavors to truly meld together, and that pudding frosting firms up just the right amount.
Now, what about freezing? I’ve tested this! You can certainly freeze it, but you need to take a couple of precautions. Make sure the cake is completely cool and frosted. Wrap the entire thing (or individual slices, if you cut it first) very tightly in plastic wrap, and then place it inside a freezer-safe container or a heavy-duty zip-top bag. It keeps well in the freezer for up to 3 months. When you’re ready to eat it, transfer it to the fridge to thaw overnight. It will taste just as delicious as the day you baked it! For more tips on storing treats, check out my notes on my easy freezer jam recipe—freezing truly saves the day sometimes!
Frequently Asked Questions About This Ricotta Pudding Cake
I always get so many messages after people try this cake, and that’s the best part of sharing these recipes! Sometimes folks have little hiccups, or just want to know how to tweak things. Since this Ricotta Pudding Cake relies on that lovely density difference, questions about texture are super common. Don’t you worry one bit—I’m here to clear up anything that might be tripping you up! These questions pop up a lot, so I figured putting them right here would save everyone some time.
Can I use low-fat ricotta cheese in this Italian Love Cake Recipe?
This is a big one! Since the whole magic trick relies on the density of that filling layer sinking down, I really, really advise against using low-fat ricotta, or skim milk ricotta. Low-fat versions have much more water content and far less fat, which means they won’t set up with the same luxurious texture after baking. You won’t get that distinct, creamy component; it might just turn watery or blend right into the chocolate batter. Stick to the whole milk ricotta for the best results in this Italian Love Cake Recipe. It makes all the difference!
Why did my layers not separate correctly?
If your cake came out looking more like a single, dense chocolate cake studded with ricotta lumps instead of three clear layers, don’t panic! Usually, this happens for one of two reasons. First, you might have over-mixed the chocolate batter after adding the wet ingredients. Over-mixing develops gluten, making the base too tough to allow the lighter ricotta mixture to rise above it initially. The second common culprit is chilling the cake *too* quickly after baking. The layers need time to cool and settle at room temperature before being chilled. If you rush it to the fridge while still warm, the temperature shock can sometimes prevent that clean sink. Be patient, let it breathe, and it should work next time!
What is the difference between this and a traditional Italian cheesecake?
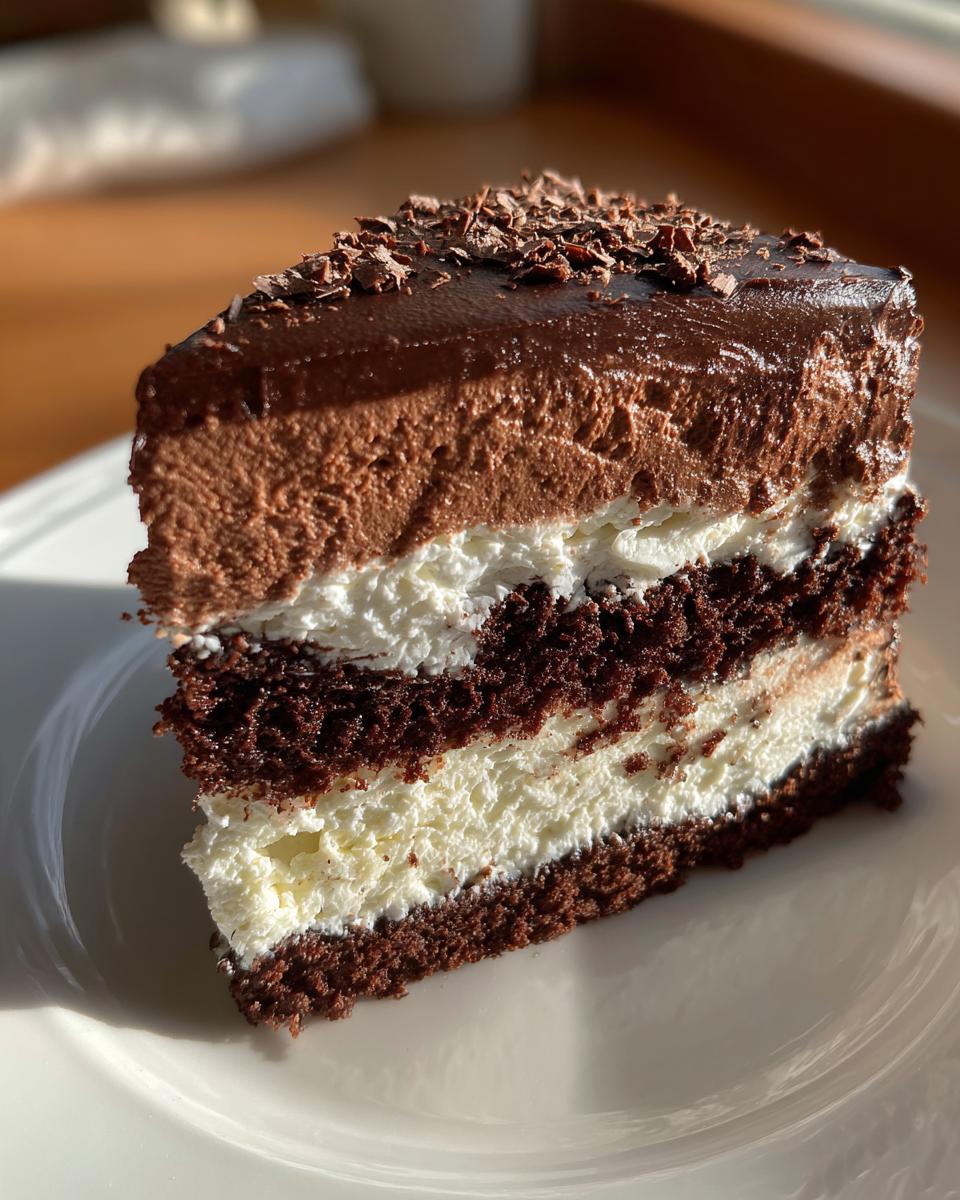
That’s a great question! While both use creamy ricotta, the texture payoff is completely different. A traditional Italian cheesecake—like a Pastiera or a baked cheesecake—is dense, firm, and uniform, structured mostly by heat setting the eggs and cheese mixture (often in a water bath). This Layered Ricotta Cake, however, is a hybrid. You have a light, fluffy cake layer, and then a separate, softer, almost pudding-like layer created by the sweetened ricotta mixture supported by those folded-in egg whites. It’s less structured than a true cheesecake—it’s looser, richer, and definitely softer, which is why it’s such a fantastic Show Stopping Dessert!
Estimated Nutritional Data for Italian Love Cake
Now, listen here, when you are whipping up a truly spectacular, multi-layered dessert like this Italian Love Cake, you shouldn’t stress over every little calorie. We bake with love, not with a calculator! However, because I promised that this kitchen brings you reliable information, I have included the estimated nutritional data below based on the ingredients used and the 12 servings this recipe yields.
Please remember, these numbers are just good estimates based on standard ingredient assumptions. If you swap out the cake mix or use non-fat whipped topping, the numbers will naturally change. This is meant to give you a ballpark idea, not a strict diet count. We’re aiming for joy, not precision, in this part of the process!
- Serving Size: 1 slice
- Calories: 410
- Sugar: 45g (Yes, it’s sweet, it’s a comfort cake!)
- Sodium: 320mg
- Fat: 20g
- Saturated Fat: 7g
- Carbohydrates: 55g
- Protein: 9g
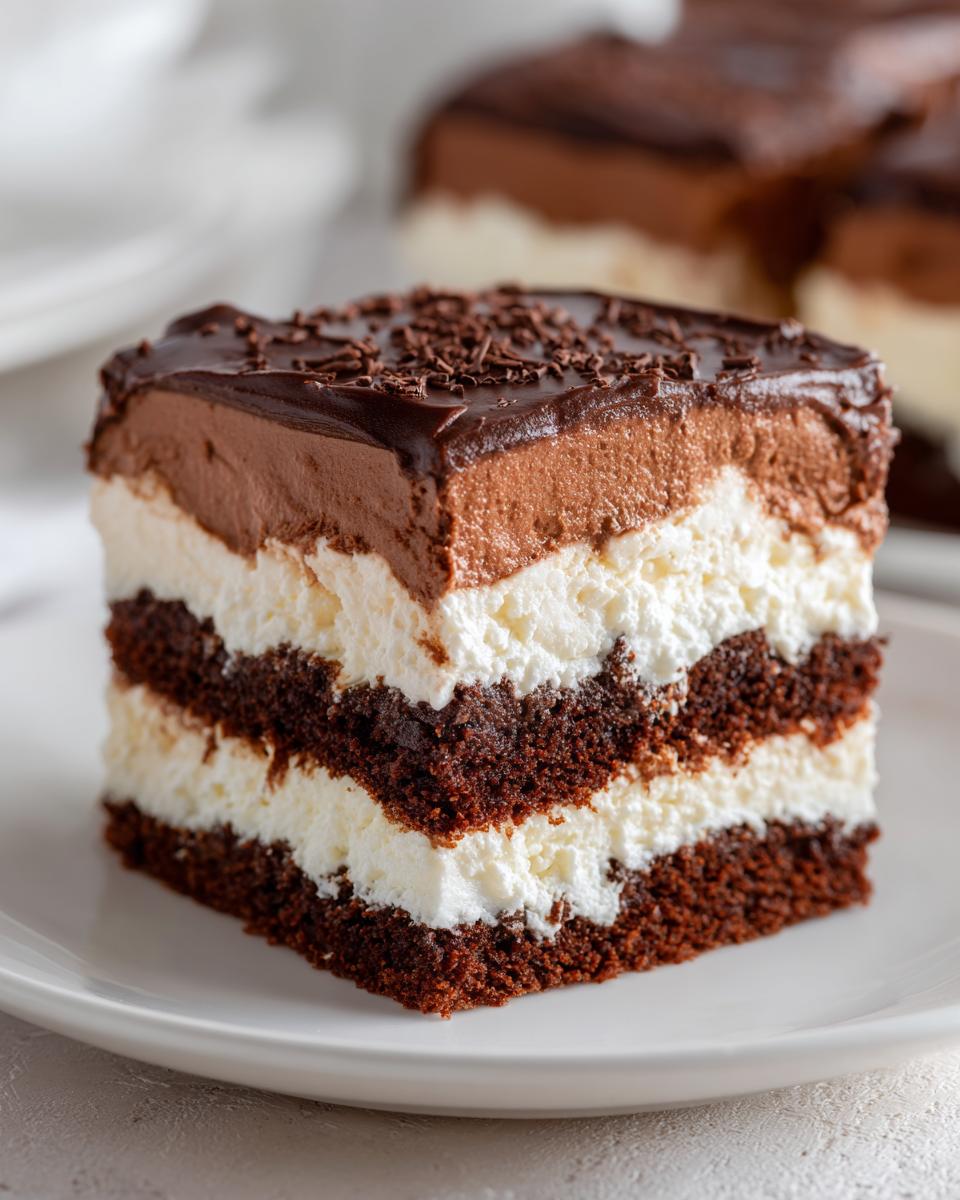
The Best Layered Chocolate Italian Love Cake Recipe
Make this show-stopping dessert that bakes itself into distinct layers. This recipe features a moist chocolate cake base, a creamy ricotta filling, and a decadent chocolate pudding frosting. It is an easy, make-ahead dessert perfect for Valentine’s Day or any special occasion.
- Prep Time: 20 min
- Cook Time: 50 min
- Total Time: 170 min
- Yield: 12 servings 1x
- Category: Dessert
- Method: Baking
- Cuisine: Italian-American
- Diet: Vegetarian
Ingredients
- 1 box (15.25 ounces) chocolate cake mix
- 1 cup all-purpose flour
- 1 cup granulated sugar
- 1 teaspoon baking powder
- 1/2 teaspoon salt
- 1 cup water
- 1/2 cup vegetable oil
- 3 large eggs, separated
- 1 teaspoon vanilla extract
- 1 container (15 ounces) whole milk ricotta cheese
- 1/2 cup granulated sugar
- 1 teaspoon lemon zest
- 1/4 teaspoon almond extract
- 1 package (3.4 ounces) instant chocolate pudding mix
- 1 1/2 cups cold milk
- 1 container (8 ounces) frozen whipped topping, thawed
Instructions
- Preheat your oven to 350°F (175°C). Lightly grease and flour a 9×13 inch baking pan.
- In a large bowl, combine the chocolate cake mix, flour, 1 cup sugar, and baking powder. Mix well.
- Add the water, oil, and 3 egg yolks to the dry ingredients. Beat with an electric mixer on medium speed for 2 minutes. Stir in the vanilla extract. Pour this batter evenly into the prepared baking pan.
- In a separate medium bowl, combine the ricotta cheese, 1/2 cup sugar, lemon zest, and almond extract. Mix until smooth.
- In a clean bowl, beat the 3 egg whites until soft peaks form. Gently fold the beaten egg whites into the ricotta mixture.
- Carefully spoon dollops of the ricotta mixture over the chocolate batter in the pan. Do not spread; the layers will separate during baking.
- Bake for 45 to 55 minutes, or until the top is set and a toothpick inserted near the center comes out clean. The ricotta layer will sink to the bottom, creating the magical layers.
- Let the cake cool completely on a wire rack.
- Prepare the chocolate pudding: Whisk the instant chocolate pudding mix and 1 1/2 cups cold milk together in a bowl until thickened, about 5 minutes.
- Gently fold the prepared pudding into the thawed whipped topping until just combined. This creates your chocolate pudding frosting.
- Spread the chocolate pudding frosting evenly over the cooled cake.
- Chill the cake for at least 2 hours before slicing and serving. This allows the layers to fully set.
Notes
- For a vanilla base instead of chocolate, use a white or yellow cake mix and substitute 1/4 cup of the water with 1/4 cup of strong brewed coffee for depth.
- This is a great make-ahead dessert; it tastes even better the next day after the layers have settled.
- If you prefer a stronger citrus note, increase the lemon zest to 1 full teaspoon.
Nutrition
- Serving Size: 1 slice
- Calories: 410
- Sugar: 45g
- Sodium: 320mg
- Fat: 20g
- Saturated Fat: 7g
- Unsaturated Fat: 13g
- Trans Fat: 0g
- Carbohydrates: 55g
- Fiber: 2g
- Protein: 9g
- Cholesterol: 110mg