
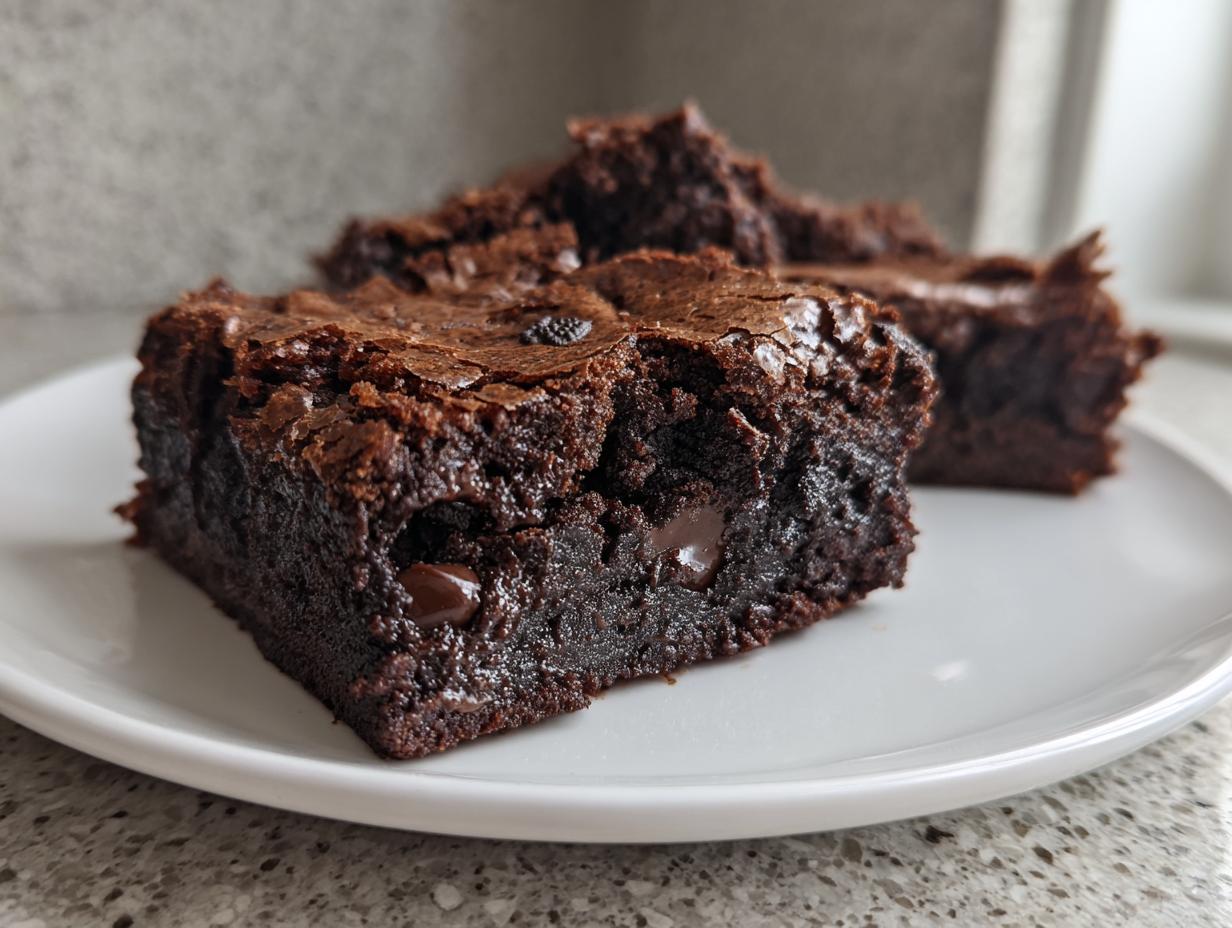
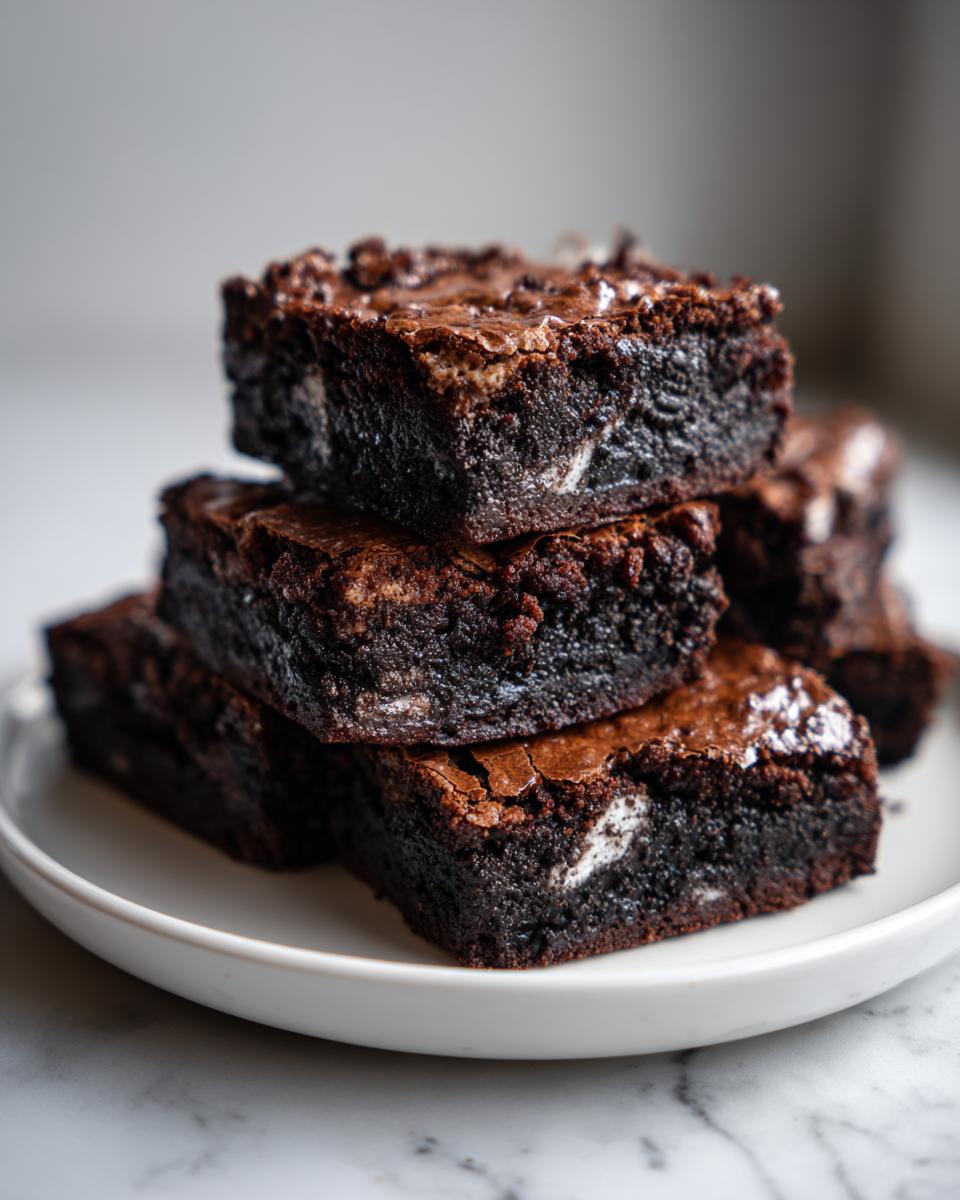
Oh, friend, are you having one of those days where only deep, dark, rich chocolate will fix it? I totally get it. When I need that perfect fix, I turn to the recipe I’ve tested and tweaked dozens of times right here in my busy kitchen. Forget dry, cakey squares; we are making the ultimate fudgy oreo brownies that boast that heavenly, shiny, crackly top everyone chases! At Rosa’s Tasty Kitchen, we believe the best baked goods—especially incredible treats like these oreo brownies—come from simple, reliable, from-scratch methods. You deserve something truly satisfying that works perfectly every time you bake it. Let’s get that chocolate craving sorted out!
- Why This is the Best Oreo Brownies Recipe You Will Make
- Gathering Ingredients for Your Oreo Brownies
- How to Prepare Ultimate Fudgy Oreo Brownies
- Tips for Perfect Oreo Brownies Every Time
- Storage and Make Ahead Tips for Oreo Brownies
- Variations on Classic Oreo Brownies
- Serving Suggestions for Your Oreo Brownies
- Frequently Asked Questions About Oreo Brownies
- Estimated Nutritional Overview for Oreo Brownies
- Share Your Ultimate Oreo Dessert Experience
Why This is the Best Oreo Brownies Recipe You Will Make
When you’re scrolling through endless dessert ideas, you need something that truly delivers. This recipe for Fudgy Oreo Brownies is my go-to guaranteed winner. Why? Because it checks off every box for that perfect homemade bar. Honestly, you’re not just making brownies; you’re making something bakery-style right in your own pan!
- They are intensely fudgy, not cakey—ever.
- The preparation is so fast, I can whip them up after school pickup.
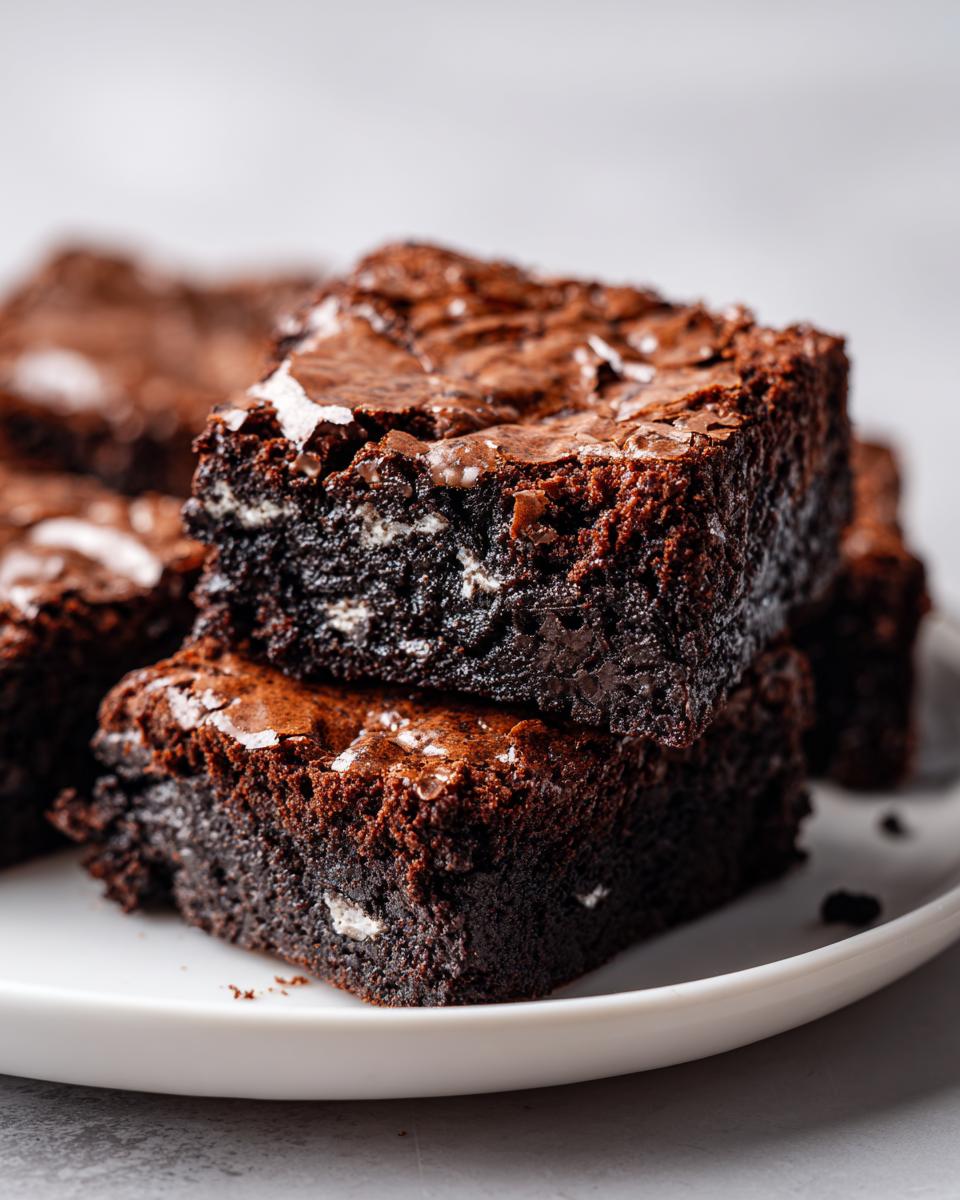
- We get that unbelievably desirable, shiny Crackly Top Brownies finish.
- Plus, hello, layers of whole Oreos!
If you want the absolute best texture, trust me and check out how similar recipes nail that texture over here, too.
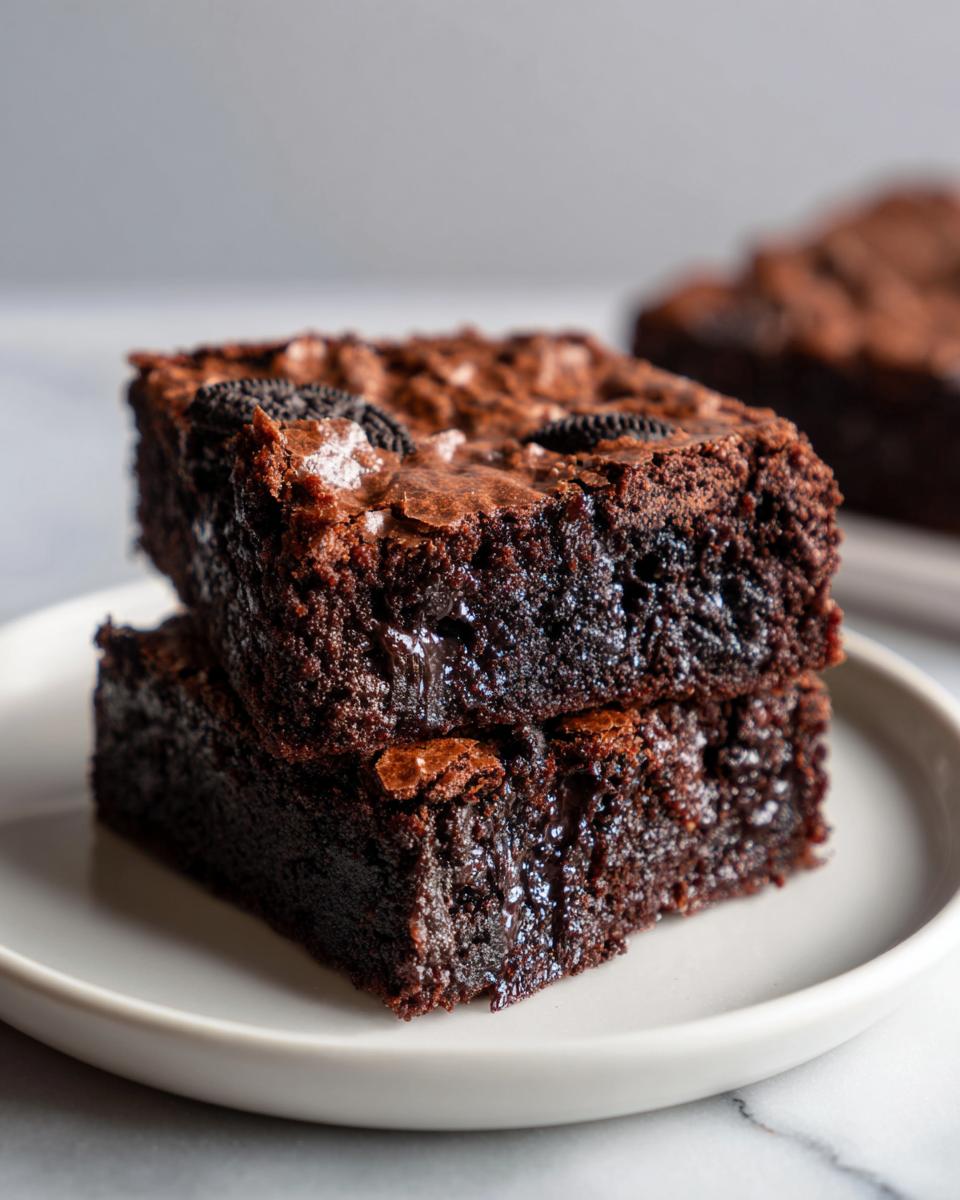
Achieving the Perfect Fudgy Texture
The secret to keeping these bars gloriously Gooey Brownies isn’t pulling them out early—it’s the ingredient ratio. We use a higher amount of melted butter compared to flour, which prevents that dry, crumbly texture from ever happening. That high-fat base keeps everything rich and deeply satisfying, just how a proper brownie should be.
The Secret to Shiny, Crackly Top Brownies
That amazing, glassy top happens right in step two when we mix the melted butter with both the granulated and brown sugars. You have to whisk those sugars into the fat really well, even before the eggs go in! That initial vigorous whisking dissolves the sugar just enough to form those beautiful, thin, crackly sheets as the brownies bake and cool. It’s pure magic.
Gathering Ingredients for Your Oreo Brownies
Okay, friend, let’s get organized! For these ultimate oreo brownies, we want to stick closely to the list below if we are aiming for that deep chocolate flavor and perfect fudgy chew. I’ve found that using good quality cocoa powder really makes a difference here. This recipe makes about 16 squares, which is perfect for sharing—or keeping hidden for yourself!
- 1 cup (2 sticks) unsalted butter
- 1 1/4 cups granulated sugar
- 1 cup packed light brown sugar
- 4 large eggs
- 1 tablespoon vanilla extract
- 3/4 cup unsweetened cocoa powder
- 1 teaspoon salt
- 1/2 teaspoon baking powder
- 3/4 cup all-purpose flour
- 1 cup semi-sweet chocolate chips
- 1 package (about 14.3 ounces) Oreo cookies, whole
- 1/2 cup crushed Oreo cookies for topping
If you want to dive into other rich desserts, you can check out my recipe for homemade cosmic brownies while the butter melts!
Ingredient Notes and Substitutions for Oreo Brownies
Using melted butter instead of softened butter is crucial here; it helps dissolve the sugars better, which is how we get that signature top! Also, please use unsweetened cocoa powder, not Dutch process, for the reaction we need with the baking powder to keep them chewy. If you only have dark chocolate chips on hand, go ahead and swap them in for semi-sweet! They give a lovely bitter counterpoint to all that sweet cookie goodness.
How to Prepare Ultimate Fudgy Oreo Brownies
Alright, this is where the magic happens! Getting the texture right requires just a tiny bit of focus during the mixing stage, but honestly, if you can stir, you can make these. First things first, get your oven nice and warm—350°F (175°C) is the sweet spot. I always line my 9×13 pan with parchment paper, letting the edges hang over like little handles. Trust me, you’ll thank me later when it’s time to lift these beauties out! You can find my favorite tools for easy baking right here: I love using my offset spatula for smoothing batter.
Mixing the Fudgy Oreo Brownies Batter
We start by melting the butter gently on the stove, then we whisk in both sugars until they’re totally combined. Next, whisk in those four eggs one at a time until everything looks smooth and shiny. Now, mix your dry ingredients—cocoa powder, salt, baking powder—in a separate bowl first. Gently fold that dry mix into the wet stuff. Pay attention here: mix only until you see no more white streaks! Overmixing is the enemy of the fudgy texture, so stop! Finally, fold in those chocolate chips so they are just distributed.
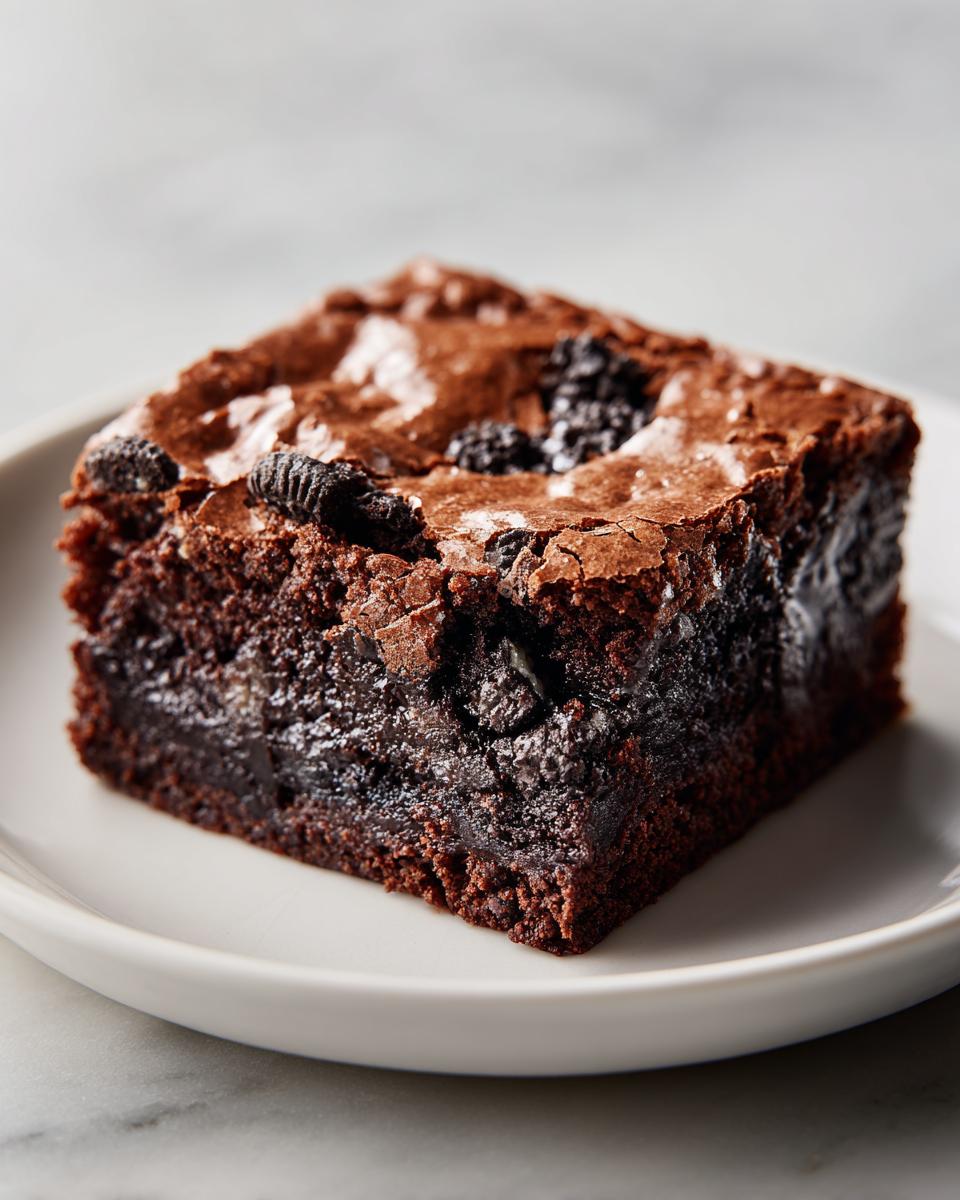
Layering and Topping Your Oreo Brownies
Time to build this tower of cookies and chocolate! Spread exactly half of that gorgeous batter into your prepared pan. Now for the fun part: arrange your whole Oreos across that first layer in a single snug row. Next, spoon the remaining batter over the top, gently spreading it around so the layer of cookies disappears underneath. Finish it all off by sprinkling those crushed Oreos right on top. They’ll bake right into that lovely crackly crust.
Bake these bad boys for about 30 to 35 minutes, but resist the urge to stick a toothpick in too early! We want moist crumbs clinging to that toothpick, not dry ones, remember? And please, please let them cool completely before you even think about slicing. That cooling time sets the super fudgy centers perfectly. If you need a great reminder before you start baking, check out some tips at this site!
Tips for Perfect Oreo Brownies Every Time
Listen, even the best recipe can get tripped up if we rush one tiny step, so I want to share the things I learned the hard way! Achieving that balance between deeply Chewy Brownie Dessert perfection and the famous crackly top is all about timing, especially at the end. Don’t be tempted to pull these oreo brownies just because the edges look done. If you do that, the center will collapse as it cools down—and that’s a tragic waste of chocolate!
The absolute number one tip involves patience: letting them cool completely. Seriously, I know you want a warm piece with ice cream right away, but if you slice them warm, you’ll get goo everywhere, and your whole beautiful Oreo layer might slide right out. The cooling process does almost as much work as the oven does, setting up that dense, fudgy structure. If you need a reminder on how to handle delicate baked items, I always look at how they handle cooling in my butter cookie recipes; the principle is the same!
Also, remember that toothpick test: you want moist crumbs, not wet batter. That small amount of residual wetness is what guarantees that ultimate fudgy texture once they set up fully on the counter.
Storage and Make Ahead Tips for Oreo Brownies
You know I love a good plan, especially when it comes to parties or big family get-togethers! The great news about these rich oreo brownies is that they are fantastic as a Make Ahead Chocolate Dessert. Once they’ve completely cooled—and I mean totally cooled, that’s important!—you just want to slice them up and pop them into an airtight container. I find that room temperature is actually the best place for them to hang out. They stay incredibly fudgy for about three to four days this way. No need to hide them in the fridge; that can sometimes dry out the chocolate base just a touch too much. If you need a fun non-bake treat idea for another day, you can always check out my bourbon ball recipe, too!
Variations on Classic Oreo Brownies
Even a perfect recipe needs room to play around, right? I love seeing how you all adapt my recipes! These rich chocolate bars are wonderful for experimenting. Since we are already making incredible Desserts with Oreos, why not try mixing up the filling? You can easily swap out those semi-sweet chips for white chocolate chips if you want a little extra sweetness, or grab those seasonal Mint Oreos for a cool, mint-chocolate punch!
Making Eggless Oreo Brownies
I get asked about egg substitutions a lot! If you need to swap out the four eggs in this great recipe, it’s quite easy for the fudgy texture. You can use a commercial egg replacer, or try making three “flax eggs” by mixing three tablespoons of ground flaxseed with nine tablespoons of water. Let it sit for five minutes to thicken before adding it in place of the eggs.
If you are looking for a truly specialized, already-tested recipe for that adjustment, you might want to look at this eggless version they have developed, too!
Or, if you’re in the mood for something completely different but just as fun to decorate, you have to check out my red velvet cake pops recipe next time!
Serving Suggestions for Your Oreo Brownies
These rich Chocolate Oreo Bars are flexible enough for any timing! While I swear they are best at room temperature after a long cool-down, sometimes you just need that warm, gooey center right away. If you slice them warm, serve them quickly with a big scoop of vanilla ice cream—the contrast is amazing. For a slightly fancier look, dust the cooled squares lightly with powdered sugar, or try a drizzle of hot fudge sauce! If you’re looking for another decadent dessert that mixes chocolate and cream, you should try my cheesecake trifle recipe next!
Frequently Asked Questions About Oreo Brownies
I know you might have a few lingering questions, because perfecting a dessert this good takes a little insider knowledge! I’ve gathered the most common things folks ask me when they are about to bake up a batch of these glorious oreo brownies. Quick, straightforward answers coming right up so you can get back to the oven!
How do I guarantee the crackly top on my oreo brownies?
Oh, that beautiful shine! It all comes down to vigorously whisking the melted butter with both types of sugar until they are completely smooth and shiny *before* adding the eggs. That action creates the meringue layer we all crave!
Can I use different cookies instead of Oreos in this recipe?
Absolutely! If you don’t have Oreos, you can certainly use other chocolate sandwich cookies. Just make sure they are roughly the same size to layer nicely. It’s a great way to get a fun twist on these chewy brownie dessert bars!
If you’re looking for other fast appetizer ideas while dinner cooks, you might want to check out my recipe for an easy beer cheese dip!
Estimated Nutritional Overview for Oreo Brownies
Now, I’m not a nutritionist, so please take these numbers with a little grain of salt! These figures are just my best estimate based on the ingredients I listed—we’re using plenty of butter and sugar to keep them fudgy, after all! These macros are calculated for one square slice.
- Calories: 320
- Total Fat: 18g
- Total Carbohydrates: 38g (Sugar: 30g)
- Protein: 4g
Remember, these are just guidelines for budgeting your snacking! If you need some inspiration for quicker weeknight meals to balance out all this chocolate goodness, you can always look over my weeknight dinner ideas!
Share Your Ultimate Oreo Dessert Experience
I truly hope these oreo brownies bring as much joy to your table as they do mine! If you managed to get that perfect fudgy texture and that shiny top, please tell me all about it in the comments below! I love seeing your bakes. Don’t forget to snap a picture and share your delicious creation so we can all admire your baking skills. You can see my favorites from other home cooks when you look at my best homemade desserts collection!
PrintUltimate Fudgy Oreo Brownies with Shiny Crackly Top
Make these irresistible, fudgy Oreo Brownies from scratch. They feature a rich chocolate base, whole Oreo cookies layered inside, and a desirable shiny, crackly top. This easy recipe is perfect for parties or a decadent chocolate fix.
- Prep Time: 15 min
- Cook Time: 35 min
- Total Time: 50 min
- Yield: 16 squares 1x
- Category: Dessert
- Method: Baking
- Cuisine: American
- Diet: Vegetarian
Ingredients
- 1 cup (2 sticks) unsalted butter
- 1 1/4 cups granulated sugar
- 1 cup packed light brown sugar
- 4 large eggs
- 1 tablespoon vanilla extract
- 3/4 cup unsweetened cocoa powder
- 1 teaspoon salt
- 1/2 teaspoon baking powder
- 3/4 cup all-purpose flour
- 1 cup semi-sweet chocolate chips
- 1 package (about 14.3 ounces) Oreo cookies, whole
- 1/2 cup crushed Oreo cookies for topping
Instructions
- Preheat your oven to 350°F (175°C). Line a 9×13 inch baking pan with parchment paper, leaving an overhang on the sides for easy removal. Lightly grease the paper.
- In a medium saucepan over low heat, melt the butter. Remove from heat.
- Whisk the granulated sugar and brown sugar into the melted butter until combined.
- Whisk in the eggs one at a time until fully incorporated. Stir in the vanilla extract.
- In a separate bowl, whisk together the cocoa powder, salt, and baking powder. Add this dry mixture to the wet ingredients and mix until just combined. Do not overmix.
- Gently fold in the chocolate chips.
- Spread half of the brownie batter evenly into the prepared pan.
- Arrange the whole Oreo cookies in a single layer over the batter.
- Spoon the remaining brownie batter over the Oreos, gently spreading to cover them as much as possible.
- Sprinkle the crushed Oreo cookies evenly over the top layer of batter.
- Bake for 30 to 35 minutes. The edges should look set, and a toothpick inserted near the center should come out with moist crumbs attached, not wet batter, for a fudgy texture.
- Let the brownies cool completely in the pan on a wire rack. Cooling is essential for achieving clean slices and the best texture.
- Once cool, use the parchment paper overhang to lift the brownies out of the pan. Slice into squares.
Notes
- For the best shiny, crackly top, do not overbake the brownies. The residual heat will finish cooking them as they cool.
- You can make these brownies ahead of time; they store well in an airtight container at room temperature for up to four days.
- If you prefer a gooey brownie, reduce the baking time by 3 to 5 minutes.
Nutrition
- Serving Size: 1 square
- Calories: 320
- Sugar: 30
- Sodium: 180
- Fat: 18
- Saturated Fat: 11
- Unsaturated Fat: 7
- Trans Fat: 0
- Carbohydrates: 38
- Fiber: 1
- Protein: 4
- Cholesterol: 65