

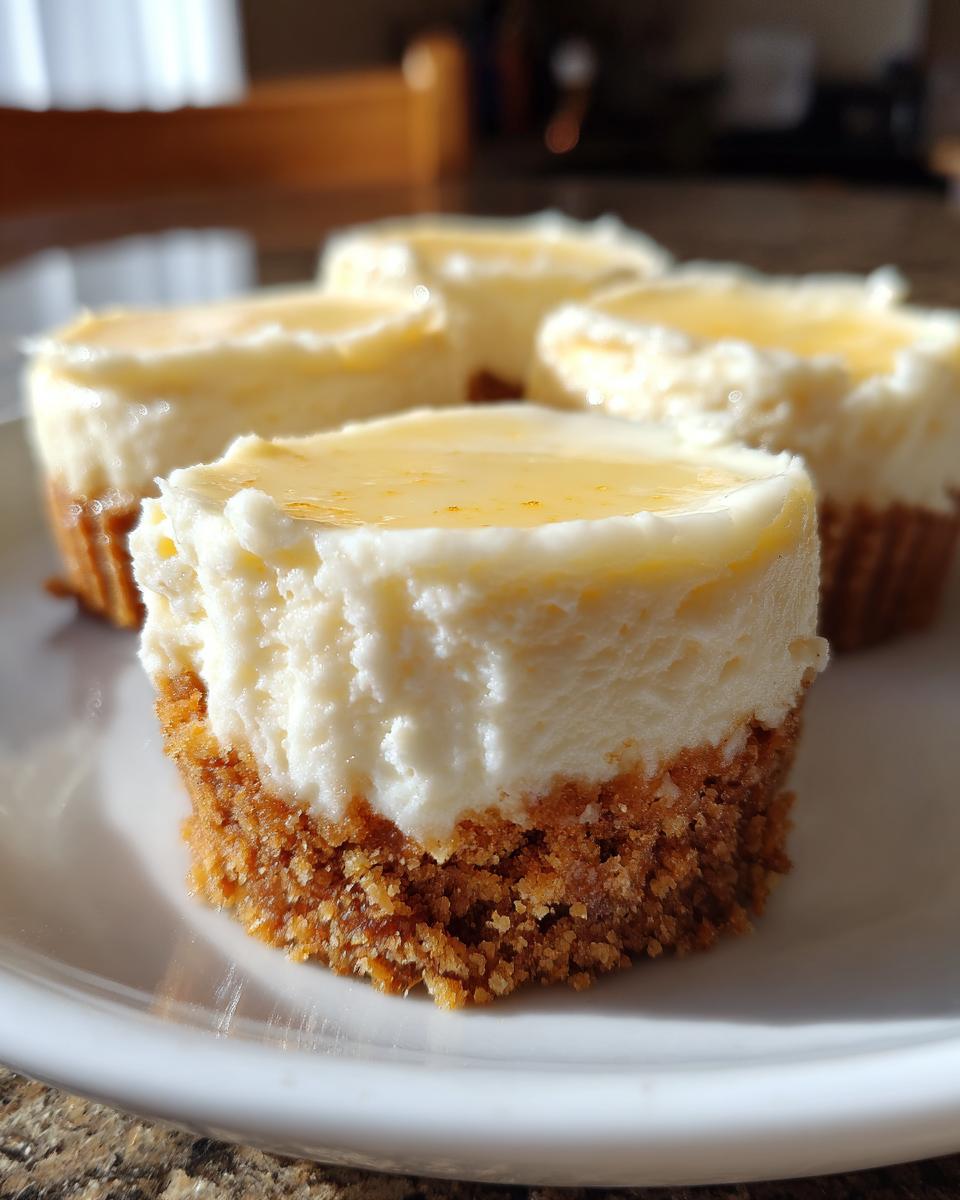
Sometimes you just need a dessert that feels special but doesn’t come with the drama of slicing a huge pie or cake, right? I totally get that! We all deserve a little bit of indulgence without the fuss. That’s why I’m so excited to share my recipe for Easy Creamy Cheesecake Cupcakes. These are little pockets of heaven, perfectly portioned and so unbelievably creamy.
When I was teaching full-time and juggling the kids, individual desserts were my trick for making any weeknight feel like a mini celebration. These cheesecake cupcakes deliver that rich, classic New York style flavor but in the cutest, most manageable little form. You don’t need a water bath or any fancy tricks here; these are built on the simple, reliable methods I developed right here in my busy home kitchen to make sure you get a perfect result every single time.
- Why These Easy Cheesecake Cupcakes Are Your New Favorite Single Serving Cheesecake
- Gathering Ingredients for Classic Cheesecake Cupcakes
- Step-by-Step Instructions for Easy Cheesecake Cupcakes
- Tips for Making the Best Cheesecake Cupcakes Every Time
- Flavor Variations for Your Cheesecake Cupcakes
- Serving Suggestions for Cheesecake Cupcakes
- Storage and Reheating Instructions for Cheesecake Cupcakes
- Frequently Asked Questions About Cheesecake Cupcakes
- Estimated Nutritional Data for Cheesecake Cupcakes
- Share Your Delicious Cheesecake Cupcakes Creations
Why These Easy Cheesecake Cupcakes Are Your New Favorite Single Serving Cheesecake
I’m not kidding when I say these are going to be your go-to for every single gathering. If you’re looking for an easy cheesecake recipe that never lets you down, stop looking right now. These little bites are everything my philosophy at Rosa’s Tasty Kitchen is about: big flavor, zero fuss.
- They give you that incredibly rich, homemade flavor we all love in cream cheese desserts, but they are totally crack-free.
- They are the definition of individual desserts—no messy slicing required! Just peel the liner and enjoy.
- They are easy to transport, which makes them perfect dessert party ideas.
Perfectly Portion-Controlled Cheesecake Bites
Honestly, the best part is the serving. No more wobbling slices! Since these are essentially cupcake size desserts, everyone gets a perfect little portion every time. Think about it: grabbing one delicious cheesecake bite instead of trying to cut a perfect square on a wobbly picnic table. Convenience is key here, friends!
Foolproof Creamy Texture Guaranteed
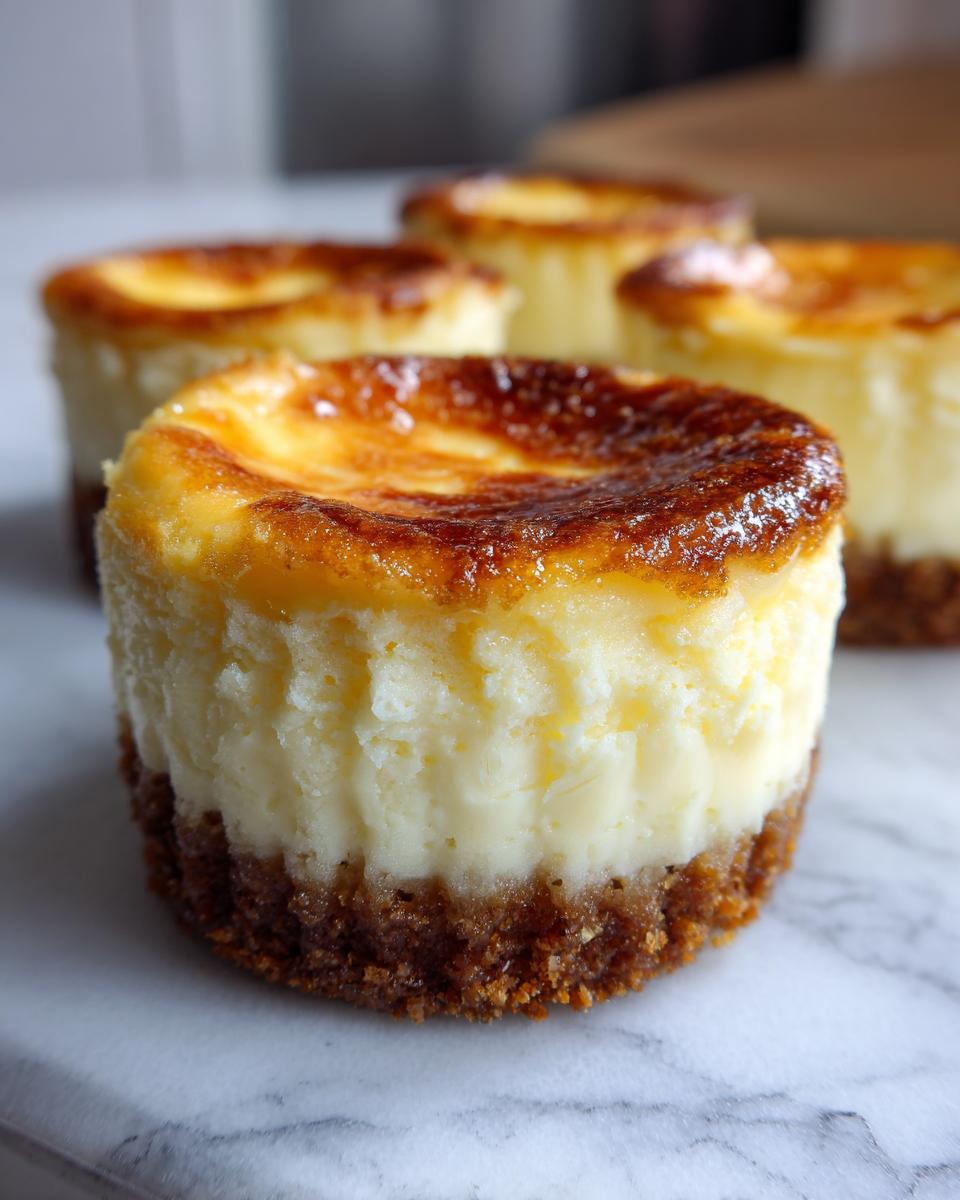
I know what you’re worried about: cracking! That’s the nightmare of every cheesecake baker. But trust me, because we bake them low and slow, and more importantly, cool them slowly right inside the oven door, these best cheesecake cupcakes stay perfectly smooth. That gentle transition is my secret weapon to stop any top from getting those unsightly fissures.
Check out more of my favorite simple treats over at my best homemade desserts collection!
Gathering Ingredients for Classic Cheesecake Cupcakes
One of the best things about these delightful cheesecake cupcakes—and something I always insist upon in my recipes—is that you probably have most of what you need sitting in your pantry already. We aren’t chasing down specialty items here! These are built on sturdy, recognizable ingredients that bake up into something truly special. If you’re following along with the recipe list below this section, you already have your shopping list sorted!
Before you even think about turning on the mixer, I have one crucial tip that applies to all cream cheese desserts: you absolutely must have room-temperature cream cheese. I cannot stress this enough! Cold cheese gives you lumps, and lumps mean you have to beat it longer, which brings in too much air. Make sure your cream cheese is soft enough to press an indent into easily.
Graham Cracker Crust Treats Components
We start simple with the base. For the crust, you’ll need about one and a half cups of graham cracker crumbs. You can crush them yourself, or if you’re feeling lazy (I totally get it!), buy the pre-made crumbs. Then we mix those crumbs with just a little bit of sugar and that all-important melted butter—about six tablespoons should do the trick to bind it all together. That’s it for our little graham cracker crust treats!
The Rich Filling for Your Cheesecake Cupcakes
The filling is where the richness comes in. We use a full 16 ounces of that softened cream cheese, which you’ve made sure is perfectly pliable, right? To keep things light—remember, we want creamy, not heavy—we add a little sour cream and vanilla extract. Finally, the eggs go in last. Remember, the goal here is smooth cheesecake cupcakes; we are gently combining, not whipping air into the mixture!
If you want to see the exact ratios for that perfect filling and crust, head over to my sugar cookie cheesecake recipe for a good example of how I balance my dairy and sugar levels!
Step-by-Step Instructions for Easy Cheesecake Cupcakes
Okay, this is where the magic happens! Even though these are simple, the process for perfect cheesecake cupcakes really relies on following the steps in order. I actually pulled this part of the recipe straight from my files for easy homemade desserts because keeping things straightforward is my absolute priority. Don’t rush the cooling part, though—that’s more important than anything!
Preparing the Graham Cracker Crust and Preheating
First things first, let’s get that oven ready for us. Preheat it to 325 degrees Fahrenheit right away. While it heats up, line your standard 12-cup muffin tin with paper liners. This is non-negotiable for easy removal later!
For the base, take your graham cracker crumbs, mix them with the quarter-cup of sugar, and pour in those six tablespoons of melted butter. You want to stir this up until it looks exactly like wet sand—moist enough that it holds together when you squeeze a bit between your fingers. Now, press about one tablespoon of that mixture firmly into the bottom of each liner. I like to use the back of a little measuring spoon for this part to really pack it down. Pop the tin into the oven for exactly five minutes. This gives the crust a nice little set before we add the creamy stuff. Pull them out and let them cool down just a touch.
Mixing the Creamy Cheesecake Cupcakes Batter
Now for the filling! Grab your soft cream cheese and that half-cup of sugar. You need to beat these together until they are completely smooth—I mean, velvety smooth—and scrape down the bowl sides at least once. This is your foundation for a great texture, so take your time getting it right!
Next, gently beat in the sour cream and the vanilla extract until everything just comes together. Here is the big rule: stop mixing when you add the eggs! Beat in your two large eggs one at a time, mixing only until you can no longer see any streaks of yolk or white. If you start whipping this batter now, you’re cooking air into it, and that air creates bubbles that turn into cracks later. We want smooth, creamy cheesecake cupcakes, not fluffy ones!
Baking and Crucial Cooling for Perfect Cheesecake Cupcakes
Once your batter is mixed, spoon it evenly over those slightly cooled crusts. Fill each liner only about three-quarters full. If you overfill, they might spill over the edges, and that’s just a sticky mess we want to avoid!
Bake them for 18 to 20 minutes. You’ll know they’re done because the edges will look set—firm to the touch—but the very center should still have a tiny, tiny jiggle when you gently tap the pan. Resist the urge to take them out! This is step one of preventing cracks. Once 20 minutes is up, turn the oven completely OFF. Crack the door open just a bit—maybe stick a wooden spoon in the jamb—and just leave them in there for 30 minutes.
Chilling Your Individual Desserts
After that half-hour slow cool-down inside the closed oven environment, you can take them out onto a wire rack to finish cooling to room temperature. Once they aren’t warm anymore, cover them loosely and move them into the refrigerator. They need a minimum of four hours to chill, but honestly, if you can leave these delightful individual desserts overnight, that’s best! Chilling is what magically transforms the batter into that perfectly firm, rich texture that makes cream cheese desserts so satisfying.
Tips for Making the Best Cheesecake Cupcakes Every Time
Even though this recipe is designed to be super friendly for the home baker, there are just a couple of things I always want to stress so you get the absolute best baked cheesecake cups possible. These little steps are the difference between a good dessert and one that people ask you to bring to every gathering!
Avoiding Cracks in Your Cheesecake Cupcakes
We talked about cooling, and I know I sound like a broken record, but it’s the truth! The biggest reason for cracks isn’t just the heat of the oven; it’s the temperature difference when you take them out. Always, always ensure your cream cheese and eggs are fully softened to room temperature before you start mixing the filling. No shortcuts there, or you risk lumps, which lead to uneven baking and, yep, cracks! The slow cool down in the turned-off oven is really your insurance policy for smooth tops.
Alternative: Simple No Bake Cheesecake Cups
Now, what if it’s a blazing hot day and you don’t want to heat up the kitchen? Good news! You can absolutely turn these into no bake cheesecake cups. You just skip the entire oven portion. Make your crust, press it into the liners, and then fill them with the unbaked batter. Instead of baking, pop those filled liners straight into the fridge. You need to let them chill for at least six hours, though, or even better, overnight. That long chill time firms them up beautifully, giving you a slightly different, but still wonderfully creamy, texture.
If you want to see more of my foolproof dessert tricks, you can always check out my collection of easy homemade desserts for more reliable favorites!
Flavor Variations for Your Cheesecake Cupcakes
While the classic vanilla flavor of these cheesecake cupcakes is perfect as is, sometimes you just need a little pop of sunshine or a bit of berry sweetness, don’t you? I love adapting my base recipes because it means we get more delicious cream cheese desserts out of one standard batch. Plus, adding flavors is a fantastic way to use up whatever fresh fruit I have lying around!
These adaptations are subtle because we don’t want to throw off that beautiful, reliable texture we worked so hard to achieve in the main recipe. Think of these as simple upgrades to your already amazing single serving cheesecake.
Adding Zest: Lemon Cheesecake Bites
If you’re looking for something bright and zingy, lemon is the perfect way to go. To turn these into amazing lemon cheesecake bites, all you need to do is add the zest of one whole, bright yellow lemon into the cream cheese mixture right when you add the vanilla extract. That zest releases all those gorgeous oils right into the fat, giving you massive flavor without adding any extra liquid.
If you’re feeling extra bold, you can substitute a tablespoon or two of the sour cream with fresh lemon juice. Just make sure you mix that juice in slowly after the eggs are incorporated, so your batter doesn’t curdle on you. That little bit of tartness cuts through the richness perfectly!
Topping with Fruit: Strawberry Cheesecake Mini Ideas
For those who prefer a fruit topping, these are wonderful as strawberry cheesecake mini treats. Once your cheesecake cupcakes are completely chilled—and I mean completely cold—that’s when you add the fruit. You can just slice up some fresh strawberries and arrange them nicely on top. How neat is that?

If you want something a little more elegant, I highly suggest using a simple cooked fruit topping. You can whip up a quick strawberry reduction, almost like a thin sauce. If you need inspiration on thickening fillings, I have a great guide on using how to make thick, juicy fillings that works perfectly for strawberries too, just swap the cherries out!
Serving Suggestions for Cheesecake Cupcakes
These cheesecake cupcakes really shine when they are served cold, straight from the fridge. They are just so handy for all kinds of get-togethers! If you’re planning a big event, these are fantastic for dessert party ideas because the individual portions make cleanup a breeze. They look so pretty lined up on a tiered stand, waiting for guests to grab one of these perfect single serving cheesecake treats.
I love bringing these to potlucks because they travel so well, especially covered tightly. If you’re serving them for a summer picnic, maybe pair one with a tall glass of my refreshing watermelon smoothie. It’s that perfect cool contrast to the rich, creamy texture!
Storage and Reheating Instructions for Cheesecake Cupcakes
Once you manage to keep your hands off these incredible cheesecake cupcakes long enough for them to set up in the fridge, the next question is always how to keep them perfect. The good news is that these cream cheese desserts hold up really well, much better than a full-sized cheesecake sometimes!
The absolute best way to serve these is straight from the refrigerator. They are designed to be eaten cold, where that texture truly sets up to be creamy and firm rather than soft. So, whatever you do, don’t try to reheat them! Warming them up will just melt that lovely texture we worked so hard to perfect during the slow bake and chill.
When you’re storing them, you need an airtight container—this is really important for mini cheesecakes, especially if you have anything else smelly in the fridge, like onions or strong leftovers. You want to line the bottom of your container with a paper towel first; this helps wick away any condensation that might form underneath the paper liners.
You can stack them if your container has enough room, but try not to press down on them! If you have multiple layers, use a piece of parchment paper between layers for safety. Kept stored properly like this, these baked cheesecake cups will stay fantastic for about five to seven days. They are so easy to make ahead of time, which is why I always recommend making a double batch!
Frequently Asked Questions About Cheesecake Cupcakes
I always get so many questions after people try this recipe because they want to know how to tweak it or how long these perfect little things last! It makes me so happy that you all are loving these cheesecake cupcakes so much that you’re planning them for future events! Here are some of the most common things I hear from readers.
Can I use a different crust besides graham crackers for these cheesecake cupcakes?
Oh, absolutely! Don’t feel chained to the standard graham cracker. If you don’t have those, you can easily swap them out! Vanilla wafers make a fantastic crust—they add a little boost of vanilla flavor that pairs beautifully with the cream cheese. Shortbread cookies work wonderfully too; they give you a more buttery, crumbly base for your graham cracker crust treats concept.
Just use the same ratio: crush them up, mix with a little sugar and melted butter, and press them into the bottom of the liner just like we did in the main recipe. It keeps things easy and fun!
What is the difference between these and Japanese Cotton Cheesecake Cupcakes?
That’s a great question that pops up a lot because the “fluffy” style is so trendy right now! The main difference is texture. These cheesecake cupcakes are deliberately dense, rich, and creamy—they hold their shape beautifully, almost like a tiny slice of a full baked cheesecake. They are built on butter and cream cheese.
Japanese Cotton Cheesecake Cupcakes, on the other hand, are famous for being incredibly light and airy, achieved by whipping egg whites into stiff peaks and folding them in gently. They are a true light and airy dessert! If you love that bouncy, cloud-like texture, that’s a different recipe, but if you want that classic, smooth, decadent bite, stick with this recipe!
How long are these mini cheesecakes good for in the fridge?
The best part about making mini cheesecakes ahead of time is that they actually taste even *better* the second day! Stored properly in an airtight container, these should stay perfectly fresh and delicious for about five to seven days in the refrigerator. Remember my tip about lining the container with a paper towel first to catch any moisture? That really keeps them tasting great all week long. You can find many of my favorite make-ahead tips in my guide to easy breakfast recipes, because making things ahead is always smart!
Estimated Nutritional Data for Cheesecake Cupcakes
Now, listen, I’m a home cook, not a registered dietitian! So, take these numbers as a very helpful, approximate starting point. When I put together these cheesecake cupcakes, I focus way more on the heart-warming flavor than the exact count, but it’s always good to have a rough idea!
The following data is an estimate per single serving, based on making 12 standard cupcakes and using the ingredients listed in the recipe. As you know, toppings can change things instantly, so if you add a big dollop of strawberry sauce or extra crust, you’ll need to adjust!
- Serving Size: 1 cupcake
- Calories: Around 250
- Total Fat: 17g (This is rich because we use real butter and cream cheese!)
- Saturated Fat: 10g
- Carbohydrates: 20g
- Sugar: 18g (Mostly from the cream cheese and added sugar)
- Protein: 5g
If you are counting macros or watching sodium, be sure to factor in the exact brands of graham crackers and cream cheese you use, as those can vary quite a bit. But generally speaking, these little cream cheese desserts pack a satisfying punch in a small package!
Share Your Delicious Cheesecake Cupcakes Creations
I put so much thought into making sure this recipe for cheesecake cupcakes is absolutely reliable for you, and honestly, seeing your results is the best part of running Rosa’s Tasty Kitchen! Did you make them? Did you try the lemon zest variation or stick to the classic creamy base?
If you did, please, please come back and let me know how they turned out! Leaving a quick rating—a full five stars if you loved them!—helps other home bakers know this is a recipe they can trust for dessert party ideas. Your feedback is what keeps this kitchen community feeling warm and welcoming.
Snap a picture of those beautiful mini cheesecakes! Tag me on social media so I can see your gorgeous presentations. Sharing what we make together is what cooking is really all about. If you have any questions that I missed in the FAQ section, you can always reach out to me directly through my contact page. Happy baking, friends!
PrintEasy Creamy Cheesecake Cupcakes with Graham Cracker Crust
Make rich, creamy cheesecake bites in individual cupcake form. This easy recipe uses simple ingredients for a foolproof dessert perfect for parties or a simple treat.
- Prep Time: 15 min
- Cook Time: 20 min
- Total Time: 4 hours 35 min
- Yield: 12 servings 1x
- Category: Dessert
- Method: Baking
- Cuisine: American
- Diet: Vegetarian
Ingredients
- 1 1/2 cups graham cracker crumbs
- 1/4 cup granulated sugar
- 6 tablespoons unsalted butter, melted
- 16 ounces cream cheese, softened
- 1/2 cup granulated sugar
- 1/2 cup sour cream
- 2 large eggs
- 1 teaspoon vanilla extract
Instructions
- Preheat your oven to 325 degrees Fahrenheit. Line a standard 12-cup muffin tin with paper liners.
- Prepare the crust: In a small bowl, mix the graham cracker crumbs, 1/4 cup sugar, and melted butter until combined.
- Press about 1 tablespoon of the crumb mixture firmly into the bottom of each cupcake liner. Bake the crusts for 5 minutes. Remove from the oven and let cool slightly.
- Prepare the filling: In a large bowl, beat the softened cream cheese and 1/2 cup sugar with an electric mixer until smooth. Scrape down the sides of the bowl.
- Beat in the sour cream and vanilla extract until just combined. Add the eggs one at a time, mixing only until each egg is incorporated. Do not overmix the batter.
- Spoon the cheesecake batter evenly over the cooled crusts, filling each liner about three-quarters full.
- Bake for 18 to 20 minutes, or until the edges are set but the centers still have a slight jiggle.
- Turn off the oven, crack the oven door open slightly, and let the cupcakes cool inside the oven for 30 minutes. This step helps prevent cracking.
- Remove the cupcakes from the oven and let them cool completely on a wire rack.
- Chill the cheesecake cupcakes in the refrigerator for at least 4 hours, or preferably overnight, before serving. Top with fruit or sauce if desired.
Notes
- For the smoothest filling, make sure your cream cheese is fully softened to room temperature.
- If you want to make these no bake cheesecake cups, skip the baking steps and chill the filled liners for at least 6 hours.
- These individual desserts travel well, making them great for potlucks.
Nutrition
- Serving Size: 1 cupcake
- Calories: 250
- Sugar: 18
- Sodium: 180
- Fat: 17
- Saturated Fat: 10
- Unsaturated Fat: 7
- Trans Fat: 0
- Carbohydrates: 20
- Fiber: 1
- Protein: 5
- Cholesterol: 55