
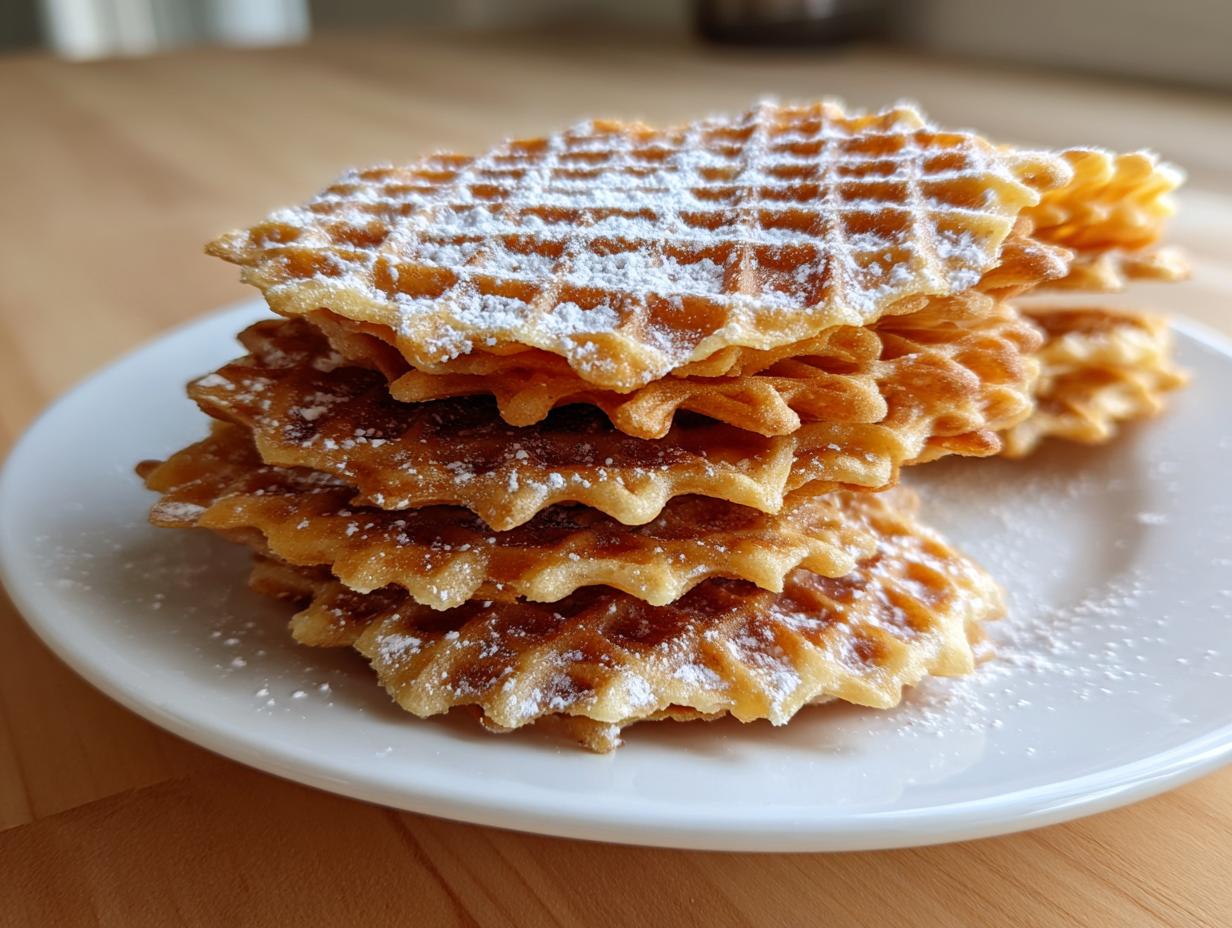
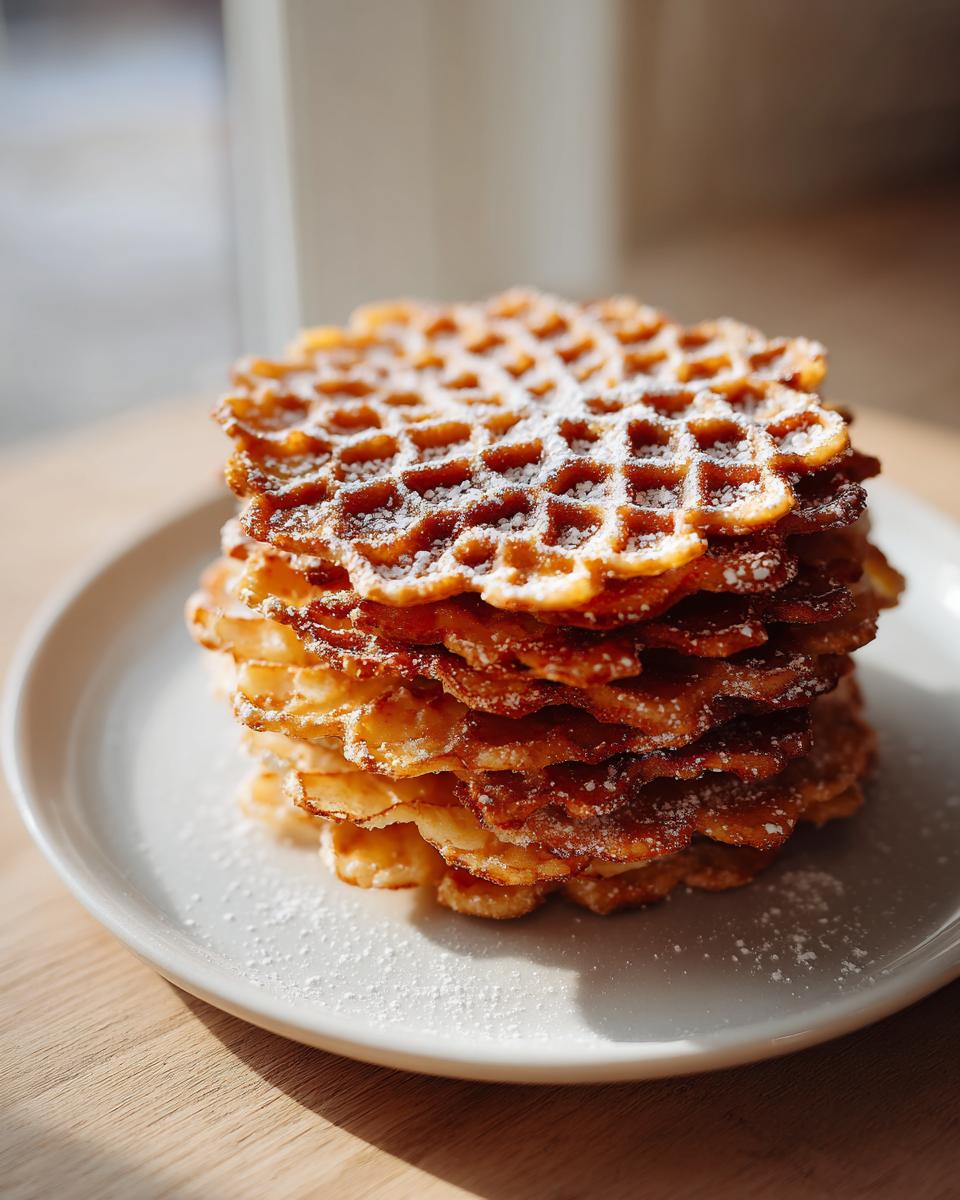
When the holidays roll around, I always think about my grandmother’s kitchen because that’s where the true magic of Italian baking happened. Forget fancy pastries; for us, it was always about the pizzelle. These **crispy pizzelle cookies** are woven into the very fabric of our celebrations, yet I learned quickly that you don’t need to be a pastry chef to nail them.
This recipe is my tried-and-true way to get that delicate crunch and authentic flavor of vanilla and a whisper of anise right here in the Midwest. I’ve adapted it over years of balancing school, family, and baking so you can trust that this simple process delivers that gorgeously patterned, wonderfully light Italian waffle cookie every single time. It proves that the most comforting flavors are often the easiest to achieve! If you love traditional Italian desserts, you simply have to see how I make my Italian Love Cake next!
- Why This is the Best Pizzelle Recipe Ever for Light and Crispy Pizzelle Cookies
- Gathering Ingredients for Your Traditional Pizzelle Recipe
- Essential Equipment for Perfect Pizzelle Cookies
- Step-by-Step Instructions for Easy Pizzelle Recipe Batter
- How to Cook Crispy Pizzelle Cookies on Your Iron
- Tips for Achieving Perfect Vanilla Pizzelle Cookies Texture
- Flavor Variations for Classic Italian Waffle Cookies
- Storing and Serving Your Holiday Pizzelle Cookies
- Frequently Asked Questions About Making Pizzelle Cookies
Why This is the Best Pizzelle Recipe Ever for Light and Crispy Pizzelle Cookies
I’ve tried a lot of methods, and I stand by this—this is the **Best Pizzelle Recipe Ever**. What makes it special isn’t some secret trick; it’s just reliable execution that guarantees results.
When you bake these, you’re getting:
- Guaranteed crispness that lasts! No more soft, sad cookies by morning.
- Simple ingredients—nothing fancy required from specialty stores.
- That perfect balance of rich butter, sweet vanilla, and traditional anise.
If you’re aiming for delicate, **Light and Crispy Italian Cookies**, this recipe uses the right ratios of flour and fats. It’s foolproof, even when you’re busy. Speaking of great texture, wait until you try my Brown Butter Chocolate Chip Cookies!
Gathering Ingredients for Your Traditional Pizzelle Recipe
The beauty of making **pizzelle cookies** at home, like many traditional Italian treats, is that the ingredient list is surprisingly short. You likely have most of this already in your pantry, which is why this is such an Easy Pizzelle Recipe to whip up when company drops by!
We need good quality basics here. Make sure your butter is nicely softened—not melted, but ready to yield when you press it. For the flavorings, I always use real vanilla extract. If you use anise, start small; it’s potent!
Here is what you need to measure out for about three dozen cookies:
- 1 cup unsalted butter, softened
- 1 cup granulated sugar
- 4 large eggs
- 1 teaspoon vanilla extract
- 1 teaspoon anise extract (Only if you want that classic Italian kick!)
- 2 teaspoons baking powder
- 1/4 teaspoon salt
- 2 1/2 cups all-purpose flour
That’s the core mix! Once you have these ready, you’re halfway to beautiful results. If you want more reliable buttery textures, check out my recipe for easy melt-in-your-mouth butter cookies.
Essential Equipment for Perfect Pizzelle Cookies
Okay, let’s talk tools. While we are trying to keep this accessible, you absolutely cannot make authentic pizzelle cookies without one specialized piece of gear: a pizzelle iron. Seriously, this isn’t a recipe you can cheat on with a waffle iron, as they just aren’t designed for how thin these need to be. Think of it as investing in a tradition!
You’ll need a standard one—electric models are easiest for home bakers like me. Other than that, just grab your usual mixing bowls, a whisk, and maybe a thin offset spatula to help ease the cookies off the hot iron. I prefer a nice sturdy wooden spoon for the initial creaming stage, too.
Pizzelle Cookie Maker Recipes: Getting Started
The most important thing you can do upfront is preheat that iron! Make sure it’s fully hot before the first dab of batter hits it. If you don’t wait long enough, the cookie will stick, and you’ll end up with a sad, lacy mess instead of perfect **pizzelle cookies**. Most irons need about 10 minutes to come up to temperature. Once hot, give it a quick brush with butter or a light spray of non-stick. Don’t overdo the grease, or the beautiful patterned detail won’t show up!
Step-by-Step Instructions for Easy Pizzelle Recipe Batter
Now that we have our ingredients ready, let’s get this batter mixed! This is where the magic for this Easy Pizzelle Recipe starts. Remember, we are aiming for light and delicate, which means we treat the butter and sugar right at the beginning.
First up, grab your largest bowl. Cream that softened butter and the sugar together until they look pale and fluffy. This takes a few minutes, but you are physically beating air into the batter, which is essential for that airy, non-dense texture we want in our Italian waffle cookies. Don’t rush this part!
Next, add those four large eggs, one at a time. Make sure you mix thoroughly after each one goes in before adding the next. Once those are fully incorporated, swirl in your vanilla and, if you’re using it, that punchy anise extract. Smells like Christmas, doesn’t it?
In a separate dish, whisk your dry stuff—the flour, baking powder, and salt—just to make sure everything is evenly distributed. Now, here is the most crucial moment: add the dry mixture to the wet mixture gradually. Mix only until it just comes together and you can’t see streaks of flour anymore. Seriously, stop mixing! Overmixing develops gluten, and that will make your pizzelle cookies tough instead of light. Trust me on this one; it’s easier than making homemade pretzel dogs!
How to Cook Crispy Pizzelle Cookies on Your Iron
This is the make-or-break moment for texture! Getting those perfect, **Crispy Pizzelle Cookies** depends entirely on how you handle the iron. Once your batter is ready, you move fast because once they hit that hot surface, they cook in a flash. Remember, the goal is to cook them until they stop steaming actively—that’s your cue that the moisture is gone and the crispness is setting in.
I remember my first time trying these years ago; I left them in for almost two full minutes, thinking they needed more time, and they came out slightly soft and stuck halfway to the rack. Oops! Now, I know 30 to 60 seconds is usually all it takes, depending on how powerful your iron is. Drop about one teaspoon of batter right in the center, close the lid gently but firmly, and don’t peek too early!
We have some amazing flavor options if you want to try Anise Flavored Cookies or maybe even dip them in chocolate like they do in some parts of Italy. For serving ideas, I think this Easy Baked Chicken Cheese Chimichangas recipe shows you how versatile dinner can be, but for these sweet treats, the possibilities are endless!
Shaping Your Homemade Pizzelle Cookies Immediately
The absolute second these cookies slide off that iron, they turn almost instantly brittle. This is fantastic if you want a flat, lacy cookie perfect for dusting and serving alongside coffee. But if you want something truly special, you have to work while they are still hot and pliable!
Have a cone mold or even just a wooden dowel handy. You gently lift the cookie with a thin spatula and quickly wrap it around the mold to create a beautiful cone shape. If you’re making cannoli shells, you roll them around a metal tube. If you skip this step, they just stay flat, which is still delicious, but shaping takes them to the next level. Don’t wait even thirty seconds, or they will crack!
Tips for Achieving Perfect Vanilla Pizzelle Cookies Texture
Listen, crispness is the name of the game when making **Vanilla Pizzelle Cookies**. If they come off the iron looking great but they go soft by the time they cool, we’ve failed! I learned from my nonna that you can’t stack these cookies while they are even slightly warm. They trap steam between the layers, and that steam turns your beautiful, lacy treat into something sadly floppy.
The secret, which is part of this **Traditional Pizzelle Recipe**, happens immediately after they leave the iron. You must place them individually on a wire cooling rack. Make sure there is air flowing underneath and around every single cookie. If you need to make a huge batch for gifts, just make sure they are completely cool and hard before putting them into an airtight container. For the absolute best texture, I sometimes sprinkle them with powdered sugar only once they are totally cool, like when I make my Iced Layered Strawberry Matcha Latte!
Flavor Variations for Classic Italian Waffle Cookies
One thing I love about this base recipe is how adaptable it is! While my heart belongs to the classic vanilla/anise combination, these **Classic Italian Waffle Cookies** take on new personalities beautifully. It’s so easy to pivot for different tastes or holidays without rewriting the whole dough mixture. We aren’t reinventing the wheel here; we’re just changing the paint job a bit, which is much simpler than making a full soft chocolate babka!
If you want to move away from the anise, you can easily swap in almond extract instead for a completely different vibe. Or, for a real crowd-pleaser, consider making a batch of chocolate ones! Many people adore dipping the finished, cooled cookie into melted chocolate, but you can dust the batter lightly with cocoa powder as well. You can find a great guide on simple swaps over at Unsophisticated Cook if you’re feeling adventurous!
Making Anise Flavored Cookies: The Traditional Way
When I talk about tradition, I mean that lovely, slightly licorice note that real Italian families expect. That comes from the anise extract. If you grew up with it, you know exactly what I mean; if you haven’t tried it, be brave! The recipe calls for one teaspoon, but you watch that measurement closely. For a subtle background flavor in your **pizzelle cookies**, stick right to that amount. If you want that strong, nostalgic anise quality that really sings, go ahead and bump that up to 1 1/2 teaspoons next time. Just taste your batter before baking if you’re nervous—it will taste exactly like the finished cookie!
Storing and Serving Your Holiday Pizzelle Cookies
Keeping these beautiful **Holiday Pizzelle Cookies** crisp is almost as important as baking them perfectly! Once they are completely cool—and I mean stone cold—you must transfer them into an airtight container immediately. If you leave them sitting out on the counter, they absolutely absorb humidity and lose that lovely snap. Don’t stack too many if you can avoid it; try to layer them with parchment or wax paper between layers, just to be safe.
Serving them is the best part! They look gorgeous simply dusted with powdered sugar, right? But they are absolutely divine alongside a good cup of coffee or espresso. If you’re looking for other great sweets to pair with your morning cup, check out my favorite dessert cookies for coffee roundup!
Frequently Asked Questions About Making Pizzelle Cookies
I know baking delicate, crispy things can bring up a few last-minute worries, so let me tackle the questions I always get asked before I send you off to enjoy your fresh batch!
Can I make these without a pizzelle maker?
Oh, honey, this is the big one. The short answer is no, not really, if you want an authentic pizzelle. These are essentially delicate Italian waffle cookies, and they require the unique patterned grooves and thin press of a dedicated iron to cook fast enough and spread thin. Trying to use a standard waffle maker just won’t give you the delicate texture because they cook too slow or the plate indentations are too deep. If you’re making **pizzelle cookies** for the first time, I strongly suggest investing in a simple electric iron—it’s worth it!
How do I keep my pizzelle cookies from getting soft?
This drove me crazy for years! As I mentioned, the cooling step is non-negotiable. They must cool completely, individually, on a wire rack so air circulates underneath them. Once they are totally cold and stiff, transfer them to a completely airtight container. For extra security, I like to put a paper towel in the bottom of the container to absorb any slight ambient moisture. Never store them stacked too high either!
Can I skip the anise extract?
Absolutely! This is your kitchen, after all. If you or your family aren’t fans of that slight licorice note—which is traditional but not mandatory—just leave it out. You can increase the vanilla extract to 1 1/2 teaspoons, or maybe even swap it entirely for almond or lemon extract for a bright flavor. These **pizzelle cookies** are delicious either way!
My batter seems too thick to spread properly. What should I do?
Sometimes flour measurements vary slightly, or maybe your butter wasn’t quite as soft as mine was. If your batter looks more like thick cake batter than a thin pancake batter, don’t panic! Don’t add more flour, though—that’s how they get tough. Just stir in milk, one teaspoon at a time, until the batter has enough flow to easily spread when you drop it onto the iron. It helps them release beautifully. I use this same sneaky thinning trick when I make my creamy pickle dip when the texture is just a bit off!
PrintClassic Crispy Italian Pizzelle Cookies (Vanilla and Anise)

Make authentic, light, and crispy Italian pizzelle cookies at home using this straightforward recipe. These traditional waffle cookies feature classic vanilla and anise flavorings, perfect for holidays or enjoying with coffee.
- Prep Time: 15 min
- Cook Time: 25 min
- Total Time: 40 min
- Yield: About 3 dozen 1x
- Category: Dessert
- Method: Waffle Iron Baking
- Cuisine: Italian
- Diet: Vegetarian
Ingredients
- 1 cup unsalted butter, softened
- 1 cup granulated sugar
- 4 large eggs
- 1 teaspoon vanilla extract
- 1 teaspoon anise extract (optional, for traditional flavor)
- 2 teaspoons baking powder
- 1/4 teaspoon salt
- 2 1/2 cups all-purpose flour
- Confectioners’ sugar, for dusting
Instructions
- Prepare your pizzelle maker according to the manufacturer’s directions and allow it to heat fully. Lightly grease the iron if necessary.
- In a large bowl, cream together the softened butter and granulated sugar until the mixture is light and fluffy.
- Beat in the eggs one at a time, mixing well after each addition. Stir in the vanilla extract and anise extract, if using.
- In a separate bowl, whisk together the baking powder and salt. Gradually add the dry ingredients to the wet ingredients, mixing until just combined to form a smooth batter. Do not overmix.
- Drop one teaspoon of batter onto the center of the hot pizzelle iron. Close the lid quickly. The batter will spread.
- Cook for 30 to 60 seconds, or until the steam stops escaping and the cookie is golden brown and crisp. Cooking time depends on your iron.
- Carefully remove the cookie using a thin spatula. If you want to shape the pizzelle (into cones or cannoli shells), do so immediately while it is hot and pliable.
- Place the finished pizzelle on a wire rack to cool completely. They will crisp up as they cool.
- Repeat with the remaining batter, placing cookies on the rack to cool. Dust with confectioners’ sugar before serving.
Notes
- For the crispiest pizzelle cookies, work quickly and place each cookie on a wire rack immediately after removing it from the iron. Do not stack them while warm.
- If you prefer a strong licorice flavor, increase the anise extract to 1 1/2 teaspoons. For a pure vanilla flavor, omit the anise completely.
- To make chocolate pizzelle variations, remove 1/2 cup of flour and replace it with 1/2 cup of unsweetened cocoa powder.
- If your batter seems too thick to spread easily, add one teaspoon of milk at a time until the desired consistency is reached.
Nutrition
- Serving Size: 1 cookie
- Calories: 105
- Sugar: 8
- Sodium: 35
- Fat: 5
- Saturated Fat: 3
- Unsaturated Fat: 2
- Trans Fat: 0
- Carbohydrates: 14
- Fiber: 0
- Protein: 2
- Cholesterol: 30