
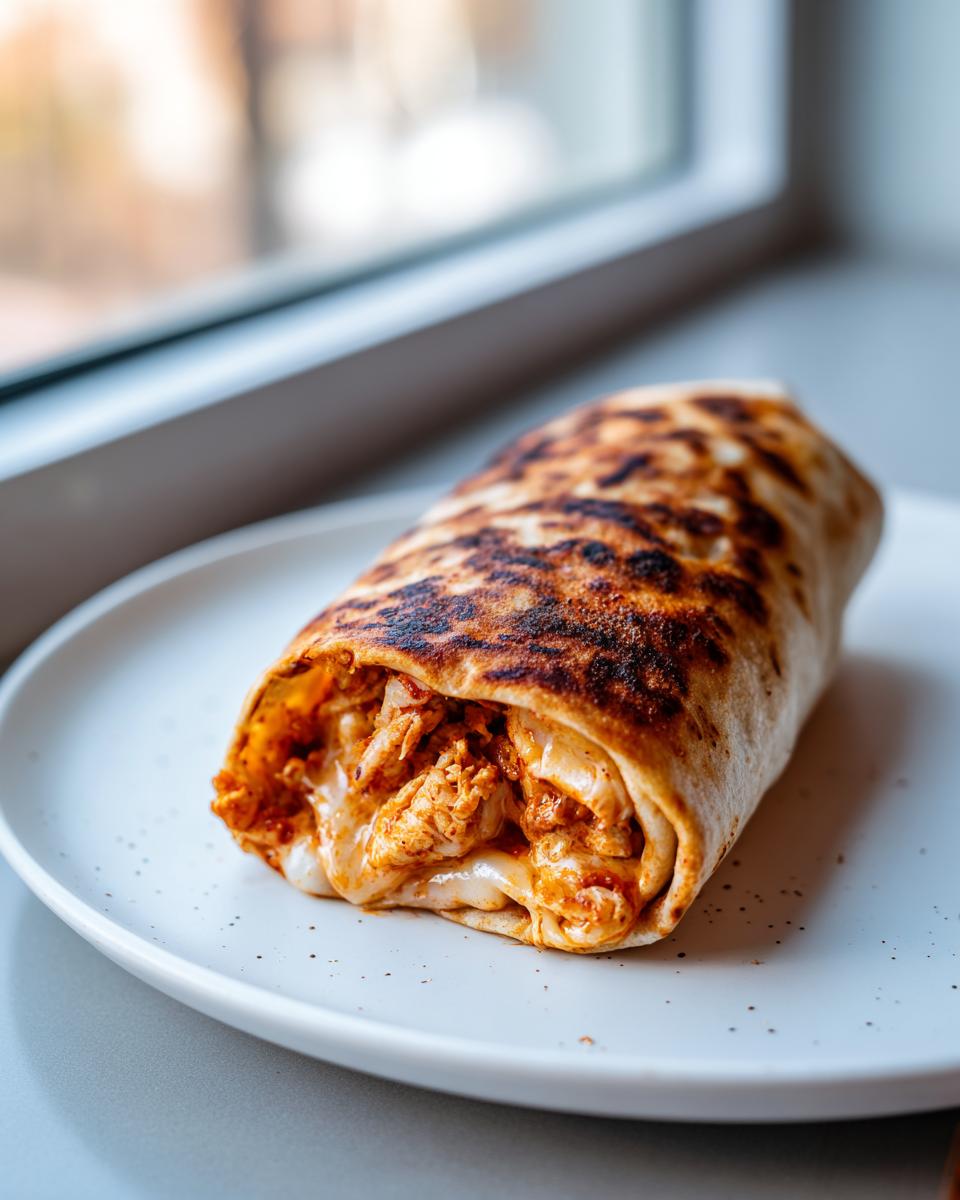
Oh, goodness, you know those nights when only that warm, salty, deep-fried Tex-Mex hug will do? I absolutely get it! Life gets busy, and while a traditional deep-fried burrito—or as we call these delicious rolled wonders, chimichangas—sounds fantastic, the cleanup afterwards? Not so much. That’s why in my kitchen, we adapted this classic. Forget the oil bath! Today, I’m sharing my recipe for Easy Baked Chicken and Cheese Chimichangas. Trust me, we are achieving that incredible golden crunch you crave, but by baking them up beautifully in the oven. This is exactly the kind of satisfying Tex Mex Dinner Idea I developed when I needed great flavor fast for the family.
- Why You Will Love These Easy Baked Chicken Chimichangas
- Essential Ingredients for Perfect Chimichangas
- How to Make Oven Baked Chimichangas Step-by-Step
- Expert Tips for Perfect Chimichangas Every Time
- Variations: Beyond Chicken and Cheese Chimichangas
- Serving Suggestions for Your Tex Mex Dinner Ideas
- Storage and Reheating Crispy Chimichangas
- Frequently Asked Questions About Chimichangas
- Share Your Homemade Chimichangas Experience
Why You Will Love These Easy Baked Chicken Chimichangas
When I first started adapting these amazing comfort food rolls for school nights, I needed them to be fast, flavorful, and honestly, a little healthier. These check every single box! You end up with that wonderful, satisfying crunch without standing over a hot fryer. That’s just good kitchen math, right?
-
Quick Prep for Weeknight Success
We are talking 15 minutes of active prep time, which means these are perfect for when you need a Quick Weeknight Tex Mex fix. Seriously, you can have these assembled before the kids even finish their homework!
-
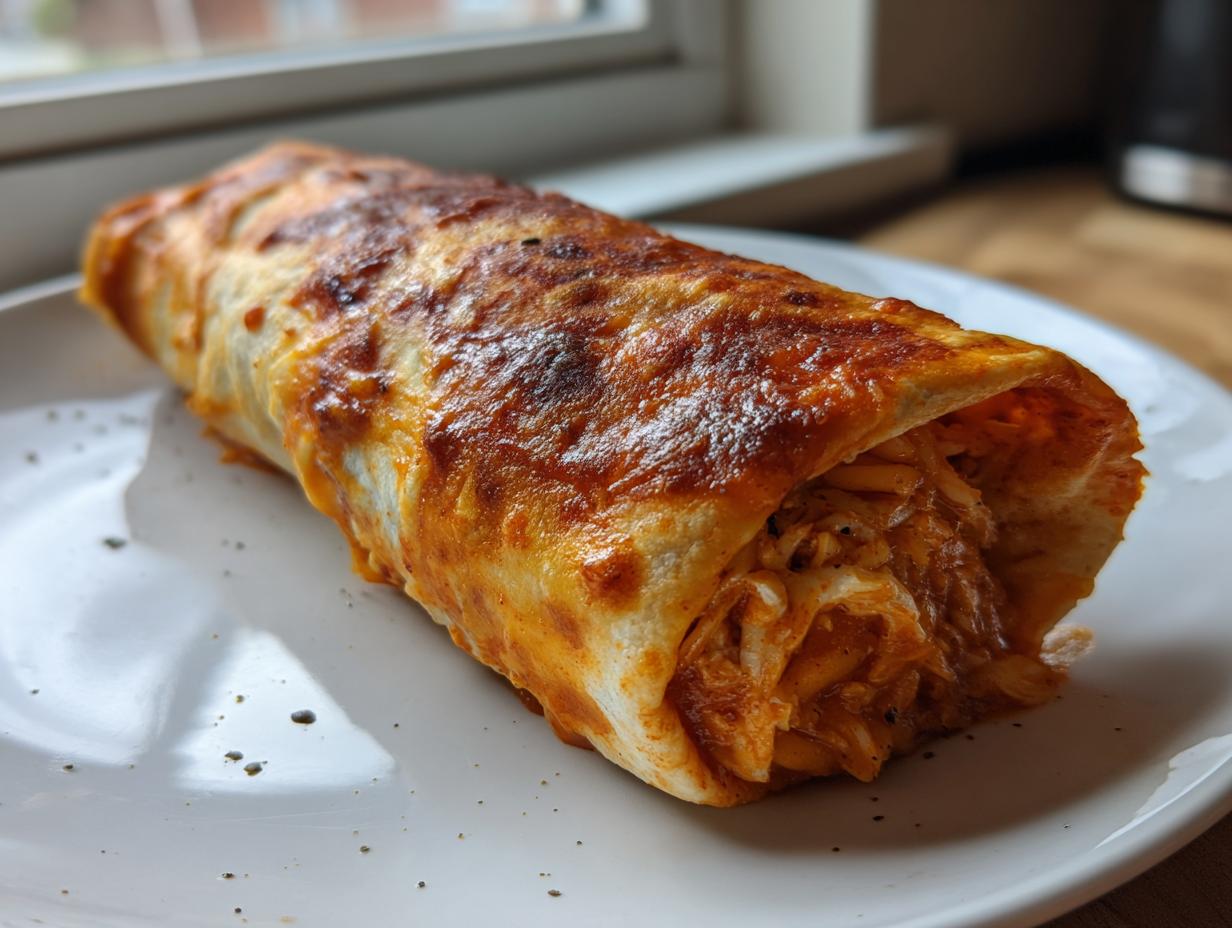
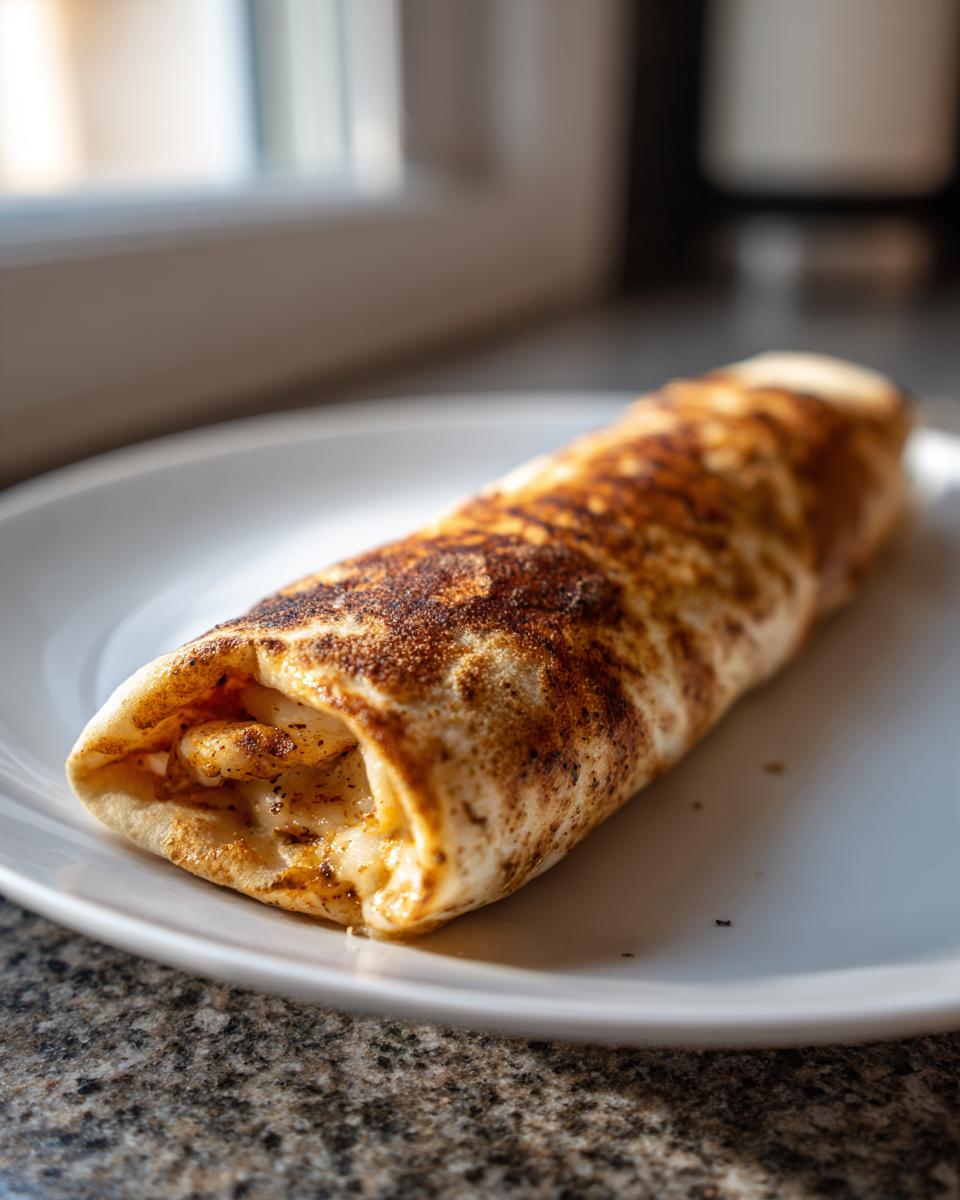
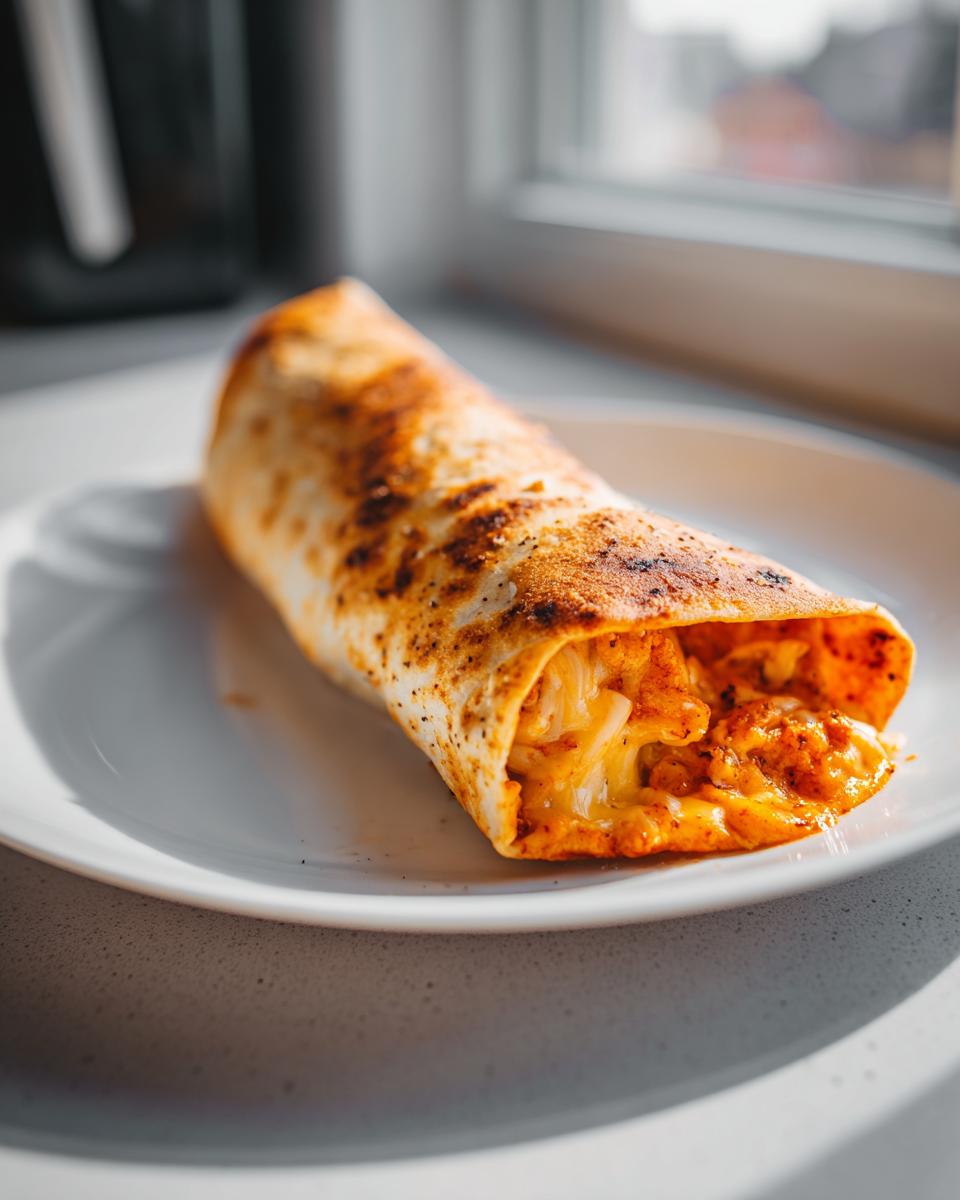
Achieving that Golden Crunchy Tortilla Rolls Texture
Don’t let the word ‘baked’ scare you if you’re craving crunch! A good spray of oil and a hot oven locks in the flavor while transforming the tortilla into those beautiful Golden Crunchy Tortilla Rolls. They are crispy, I promise!
Essential Ingredients for Perfect Chimichangas
When you’re looking for the best results in the kitchen, Rosa believes in keeping things simple and good. You’ll find every item on this list at your regular grocery store—no specialty runs required! Quality ingredients that you already know and trust are the building blocks for this recipe. We aren’t messing around with complicated stuff here; we are focusing on flavor that hits home. If you love dips and sauces as much as I do, you should check out my recipe for creamy queso for dipping later!
- 10 large flour tortillas
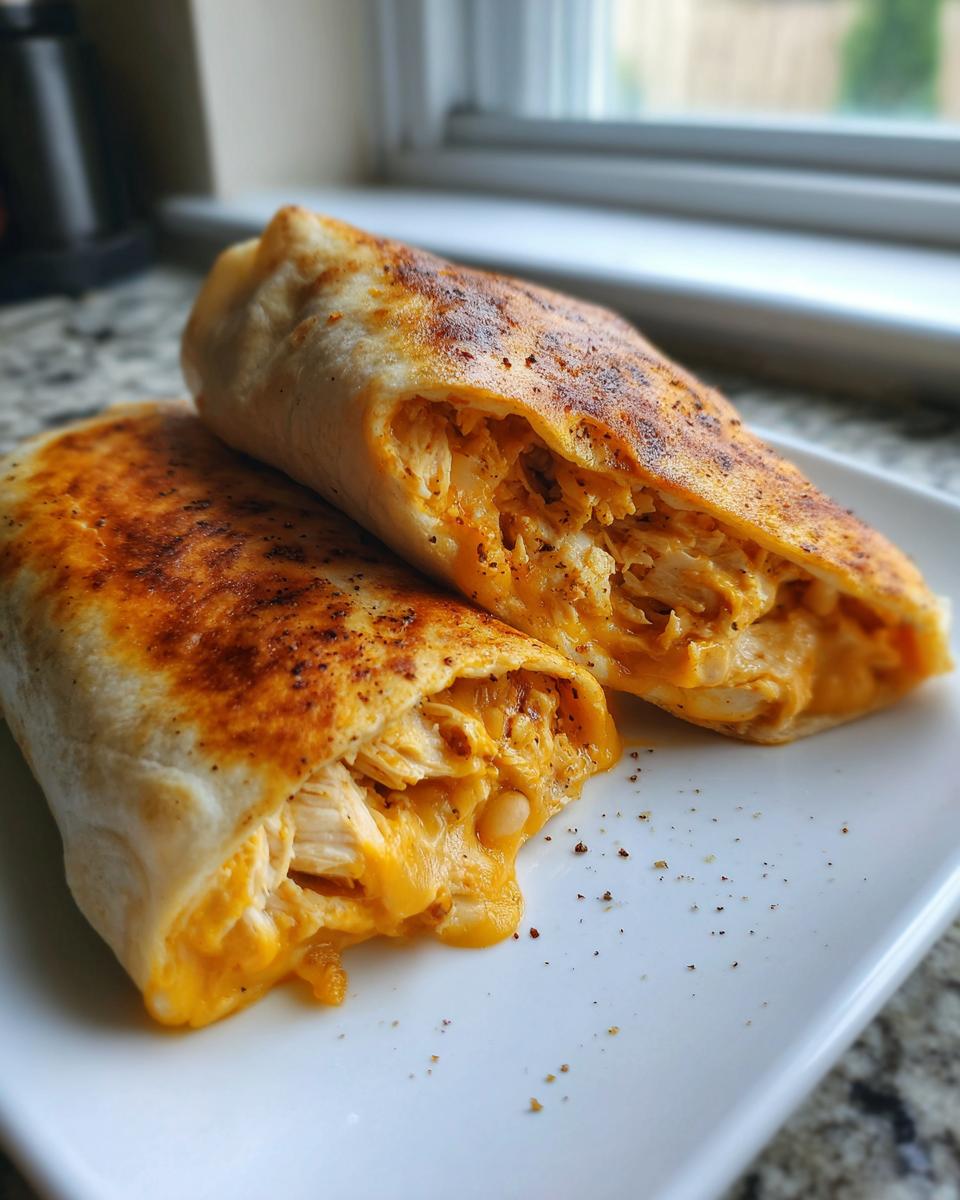
- 2 cups cooked, shredded chicken
- 1 cup refried beans (optional)
- 1 1/2 cups shredded Monterey Jack cheese
- 1/2 cup shredded cheddar cheese
- 1 teaspoon chili powder
- 1/2 teaspoon cumin
- 1/4 teaspoon garlic powder
- Cooking spray
- Optional toppings: Salsa, sour cream, guacamole, shredded lettuce
Ingredient Notes and Simple Substitutions
That cup of refried beans? Totally optional! If you skip it, you might just add a tiny bit more shredded chicken or cheese, or leave that space empty for a lighter roll. Also, about the cheese—I use Jack and Cheddar because they melt beautifully—but if you have a bag of Pepper Jack or Queso Fresco, go for it! If you are trying to make this an extra quick Easy Mexican Recipe, grab a store-bought rotisserie chicken and shred it up once you get home. Easy peasy!
How to Make Oven Baked Chimichangas Step-by-Step
Okay, friend, this is where the magic happens! We’re turning simple ingredients into Oven Baked Chimichangas that taste like they just came out of a fancy restaurant kitchen, but remember, we are using the oven, not buckets of oil. The whole process moves really fast once the oven is hot. Make sure you start by setting that temperature to 400°F (200°C) right away. Prep your baking sheet lightly—a quick spray of cooking spray goes a long way to stop sticking!
Preparing the Filling for Your Chimichangas
Grab a bowl; this is super easy. We need to mix up that shredded chicken with our flavor squad: the chili powder, cumin, and garlic powder. Mix it really well until every little piece of chicken is coated in spice. When it smells amazing, which it will, I want you to grab just a tiny pinch of that mix and taste it. Does it need a tiny bit more salt? Maybe a dash more cumin? Do that now! Once you roll these up, you can’t adjust the seasoning, so make sure this filling tastes perfect right when it’s ready.
Rolling Technique for Crispy Chimichangas
Tortillas need to be warm, or they will crack when you try to tuck them in. Just 15 seconds in the microwave does the trick. Line up your filling—chicken, optional beans, and that glorious cheese—down the center. Now, you fold like you mean it! Tuck in the sides first, just like you’re wrapping a present, and then roll it up tightly, burrito-style. The most important part? Place them seam-side down on that prepared baking sheet. This keeps them shut tight while baking! If you have extra time, you might want to look into hearty chili side dishes to go with these!
Expert Tips for Perfect Chimichangas Every Time
Even though these are super simple, a couple of little tricks I picked up over the years really take these Homemade Chimichangas from good to absolutely irresistible. Remember, I’m always trying to find ways to get dinner on the table without sacrificing that comforting, satisfying result. Don’t worry about complicated steps, though; these are all fast fixes!
If you want that super-golden, almost fried look without the mess, skip the simple cooking spray I mentioned earlier and instead use actual melted butter on top. Just brush it on evenly before they go into the oven. Wow, the color and flavor that butter adds is worth the extra 30 seconds! You can find my tips on making these ahead in my big post about Make Ahead Freezer Meals Mexican style dishes.
Speaking of making ahead, these are fantastic for freezing! Once you’ve rolled them up (seam-side down!), lay them flat on a baking sheet lined with parchment paper. Transfer the whole tray to the freezer until they are rock solid—that takes about an hour for me. Then, you just toss the frozen bundles into a freezer bag. When a craving hits later? Just add about 5 to 10 extra minutes on the baking time, and you are back in business!
Variations: Beyond Chicken and Cheese Chimichangas
The beauty of a big flour tortilla filled with goodies is how adaptable it is! While I adore this particular shredded chicken version—it’s such a reliable Family Dinner Favorite—sometimes the craving calls for something richer, or maybe you just have leftovers that need a new life. That’s when we start customizing! The baking method we’ve established works brilliantly for almost any savory filling you can think up. It keeps things lighter than frying but still delivers that amazing crunch everyone loves.
Trying Cheesy Beef Chimichanga Recipe Ideas
If you are deep into craving ground beef (and who isn’t sometimes?), swapping out the chicken for beef is super easy. You just need to make sure your beef filling is already fully cooked and seasoned before rolling. Take your favorite ground beef seasoning blend—maybe add some extra Worcestershire sauce or even a splash of salsa to keep it moist. If you love the sound of that savory meat wrapped up tight, you are making a great call on going for a Cheesy Beef Chimichanga Recipe. Just ensure the beef mixture isn’t too watery; too much liquid means the tortilla might get soggy before it gets crispy.
For meatless fun, you can make the most wonderful vegetarian versions, too! Try mixing those refried beans with corn, black beans, diced peppers, and maybe some green chiles. Just make sure you load up on the cheese between the layers. Check out some of my favorite ways to season ground meat over at my post about Ground Beef Dinner Ideas for seasoning inspiration!
Serving Suggestions for Your Tex Mex Dinner Ideas
Alright, the chimichangas are golden brown and crunchy—time for the fun part! These handheld deliciousness bombs are a complete meal on their own, truly, but they shine even brighter when served up alongside some fresh, vibrant sides. When you serve these as part of your Tex Mex Dinner Ideas rotation, you absolutely need fresh toppings to cut through that wonderful richness.
Don’t forget the holy trinity: creamy sour cream, chunky salsa, and, obviously, homemade guacamole. Trust me on this, if you have time, whip up a batch of my Mexican street corn salad to serve on the side. It adds the perfect pop of fresh flavor and color to the plate!
Storage and Reheating Crispy Chimichangas
One thing I absolutely love about finding a great Healthy Chimichanga Alternative like this baked version is how well they keep! When you’re cooking large batches for the week, or you just have leftovers from a big family dinner (and trust me, sometimes the next day’s chimichanga hits differently!), good storage is key. We want to keep that hard-earned crispiness intact, so we have to be smart about reheating.
For immediate storage, just let any leftovers cool completely on a wire rack first. Once they are at room temperature, wrap them tightly in plastic wrap or foil, or tuck them into an airtight container. These will keep beautifully in the refrigerator for about three to four days. That’s long enough to ensure you don’t waste a single rolled delicacy!
When it comes time to reheat, please, for the love of all things crunchy, avoid the microwave if you can! We learned from Grandma that texture is everything, and the microwave just turns things sadly pliable. If you really want that crunch back, the oven or the air fryer simply can’t be beaten. If you use an air fryer, you can check out a few tips I shared about reviving frozen foods over at my post on Air Fryer Frozen Shrimp—the technique is almost identical for reheating these rolls.
For the oven, set it to 350°F (175°C) and spread the chimichangas out on a baking sheet. Warm them for about 8 to 10 minutes, rotating halfway through. They heat all the way to the cheesy center and get that lovely exterior crispiness back. The air fryer is even quicker, setting it around 375°F for about 4 to 6 minutes, just watching closely so they don’t burn!
Frequently Asked Questions About Chimichangas
I always get so many wonderful questions about these rolled-up treats when people first try making them at home! It’s totally normal to wonder about the best ways to cook them or how they stack up against their softer cousins. My goal here at Rosa’s Tasty Kitchen is to make sure you feel confident tackling any Easy Mexican Recipe, whether you’re a beginner or a seasoned pro. Let’s clear up any confusion about making these Homemade Chimichangas perfectly crispy!
Can I use an Air Fryer for these Chimichangas Quick?
Oh, absolutely, yes! If you’re trying to get the crunch happening even faster than baking, the air fryer is your best friend. It’s fantastic for getting those beautiful results right away. For these Air Fryer Chimichangas Quick success, treat them like you would in the oven: spray them really well with oil. Set your air fryer to about 375°F and cook them for just 8 to 10 minutes total, making sure to flip them gently halfway through. They get wonderfully golden!
What is the difference between a Chimichanga and a Burrito?
That’s the age-old question! In the simplest terms, the difference comes down to presentation and texture. A standard burrito is usually a soft, steamed flour tortilla wrapper, folded up to hold its filling neatly for eating on the go. A chimichanga, on the other hand, is defined by heat preparation—it’s essentially a burrito that has been deep-fried or, like we do here, baked until it’s golden brown and wonderfully crispy. That exterior crunch is what makes a chimichanga a chimichanga!
Also, people often ask about the tortilla type. I always use large flour tortillas, which are sturdy enough to hold the filling and withstand the high heat without immediately falling apart. Corn tortillas are too small and tend to shatter when you try to roll them this tightly!
Share Your Homemade Chimichangas Experience
Now you have everything you need to conquer the crispy craving right from your own oven! Honestly, making these Homemade Chimichangas proves that delicious, comforting Tex-Mex doesn’t need to be complicated or oily to be amazing. I pour my heart into these recipes because I want you, the busy home cook, to feel successful and proud of what you put on the table.
I would just absolutely love to hear how they turned out for you! Did you stick with my chicken and cheese combo, or did you dive into making those delicious beef variations we talked about? Please leave a star rating for the recipe below, and don’t be shy—drop a comment and tell me what toppings you served them with! If you snapped a picture of your crunchy, golden rolls, please tag me on social media so I can share in your victory! If you ever have questions or suggestions for me, you can always reach out through my contact page. Happy cooking, friends!
PrintEasy Baked Chicken and Cheese Chimichangas
Make crispy, satisfying chicken chimichangas without deep frying. This oven-baked recipe delivers cheesy flavor and a golden crunch, perfect for a quick Tex-Mex dinner.
- Prep Time: 15 min
- Cook Time: 20 min
- Total Time: 35 min
- Yield: 10 servings 1x
- Category: Dinner
- Method: Baking
- Cuisine: Tex-Mex
- Diet: Vegetarian
Ingredients
- 10 large flour tortillas
- 2 cups cooked, shredded chicken
- 1 cup refried beans (optional)
- 1 1/2 cups shredded Monterey Jack cheese
- 1/2 cup shredded cheddar cheese
- 1 teaspoon chili powder
- 1/2 teaspoon cumin
- 1/4 teaspoon garlic powder
- Cooking spray
- Optional toppings: Salsa, sour cream, guacamole, shredded lettuce
Instructions
- Preheat your oven to 400°F (200°C). Lightly grease a baking sheet or coat it with cooking spray.
- In a medium bowl, combine the shredded chicken, chili powder, cumin, and garlic powder. Mix well to coat the chicken evenly.
- Warm the tortillas briefly in the microwave (about 15 seconds) to make them pliable and prevent tearing.
- Place about 1/4 cup of the seasoned chicken mixture down the center of each tortilla. If using, spread a thin layer of refried beans over the chicken.
- Sprinkle about 2 tablespoons of the mixed cheeses over the filling.
- Fold the sides of the tortilla inward over the filling, then tightly roll the tortilla up like a burrito. Place the seam-side down on the prepared baking sheet.
- Repeat with the remaining tortillas and filling.
- Spray the tops and sides of the rolled chimichangas generously with cooking spray to help them crisp up.
- Bake for 15 to 20 minutes, flipping halfway through, until the tortillas are golden brown and crispy.
- Remove from the oven and let them cool for a few minutes before serving immediately with your preferred toppings.
Notes
- For extra crispiness, you can brush the tops with melted butter instead of using cooking spray before baking.
- You can prepare these ahead of time. Assemble the chimichangas, place them seam-side down on a freezer-safe tray, and freeze until solid. Transfer to a freezer bag. Bake from frozen, adding 5-10 minutes to the cook time.
- Use pre-cooked rotisserie chicken to save time on weeknights.
Nutrition
- Serving Size: 1 chimichanga
- Calories: 320
- Sugar: 2
- Sodium: 450
- Fat: 12
- Saturated Fat: 6
- Unsaturated Fat: 6
- Trans Fat: 0
- Carbohydrates: 35
- Fiber: 3
- Protein: 18
- Cholesterol: 55