
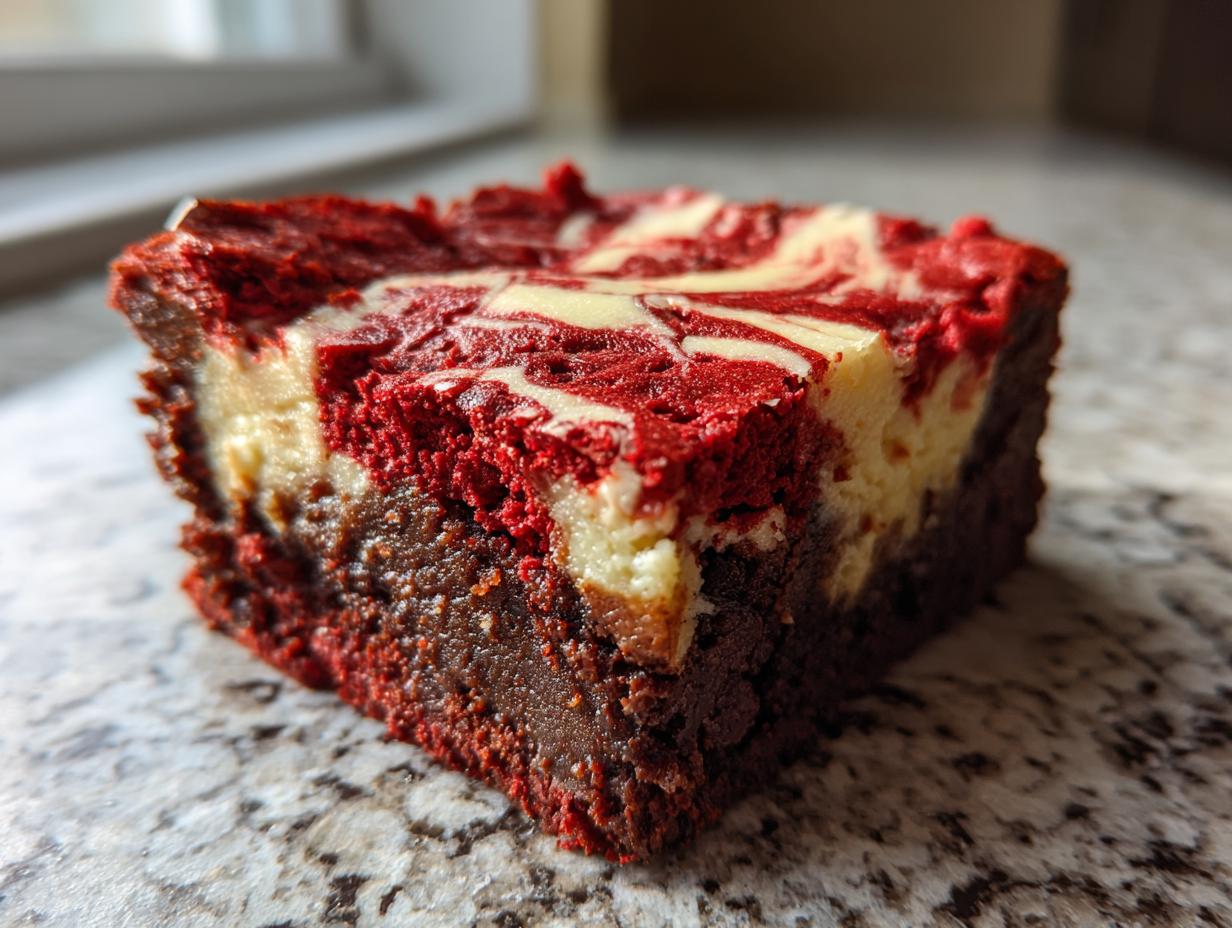
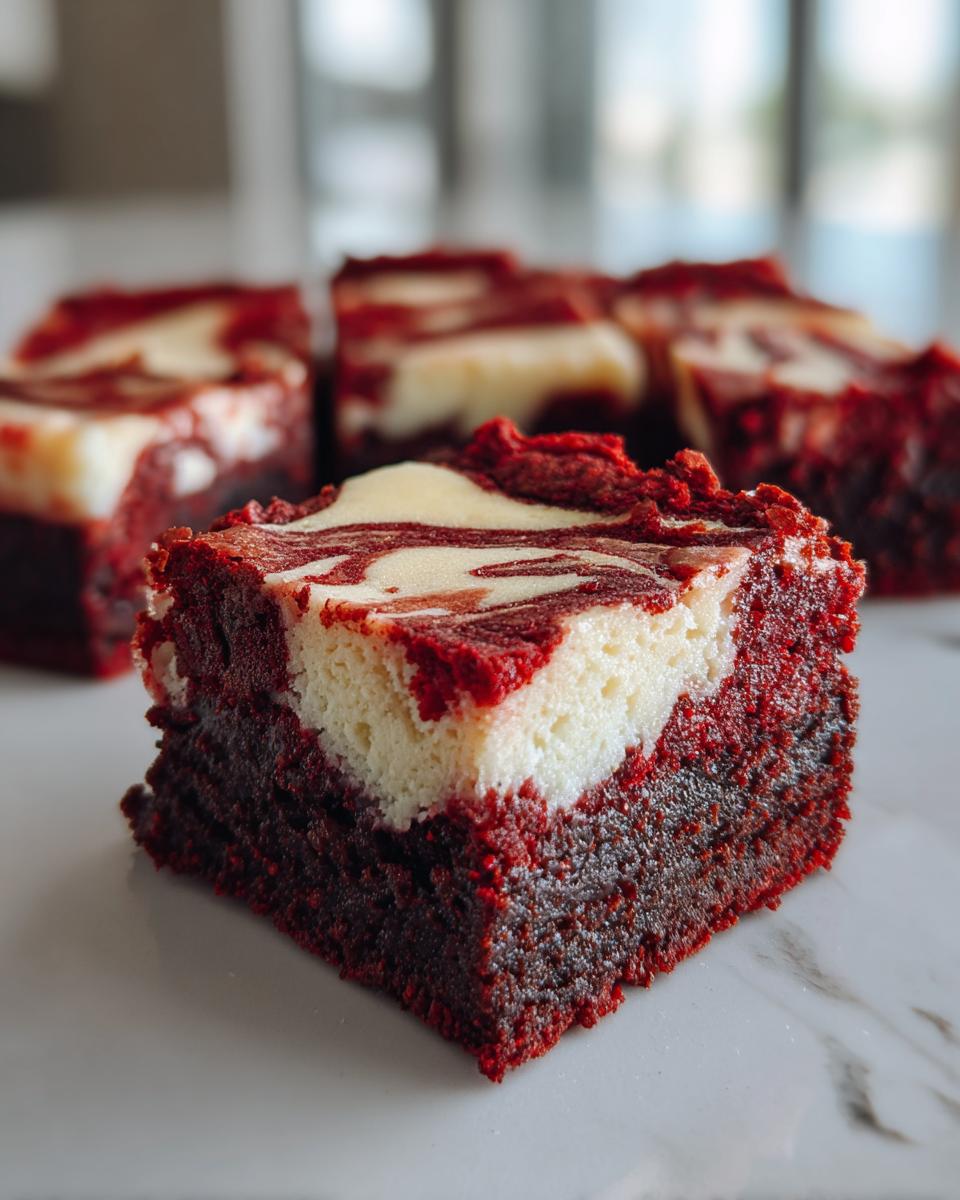
When I decided to tackle a truly decadent dessert that still fits into our busy week, I knew it had to be showstopping. You know, the kind of bake that makes everyone pause when you bring it out? That’s exactly how I landed on these incredible red velvet cheesecake brownies. I wanted that deep, rich, fudgy chocolate note you get from a good brownie, but cranked up with the velvet smoothness of cocoa and that signature red color. The real magic, though, is layering in that tangy, creamy cheesecake swirl right on top. It’s this perfect, rich and creamy dessert bars fusion I developed because I needed a dessert centerpiece that looked fancy but honestly came together faster than you think. Trust me, these are easier than they look!
- Why You Will Make These Red Velvet Cheesecake Brownies Again and Again
- Gathering Ingredients for Your Red Velvet Cheesecake Brownies
- Step-by-Step: How to Prepare Perfect Red Velvet Cheesecake Brownies
- Tips for Success Making Red Velvet Cheesecake Brownies
- Ingredient Notes and Substitutions for Your Red Velvet Baked Goods
- Storage and Reheating Instructions for Rich and Creamy Dessert Bars
- Frequently Asked Questions About Red Velvet Cheesecake Brownies
- Estimated Nutritional Data for Red Velvet Cheesecake Brownies
- Share Your Decadent Dessert Recipes Experience
Why You Will Make These Red Velvet Cheesecake Brownies Again and Again
I’m always looking for recipes that deliver on flavor without keeping me tethered to the kitchen all day. This one hits every single mark. You’re going to keep coming back to these because they are just that good, and honestly, it’s hard to mess up the swirl!
- The Ultimate Texture Combo: You get the fudgy, moist brownie tutorial base married perfectly with a silky, slightly tart cheesecake layer. It really is the best cheesecake brownies experience.
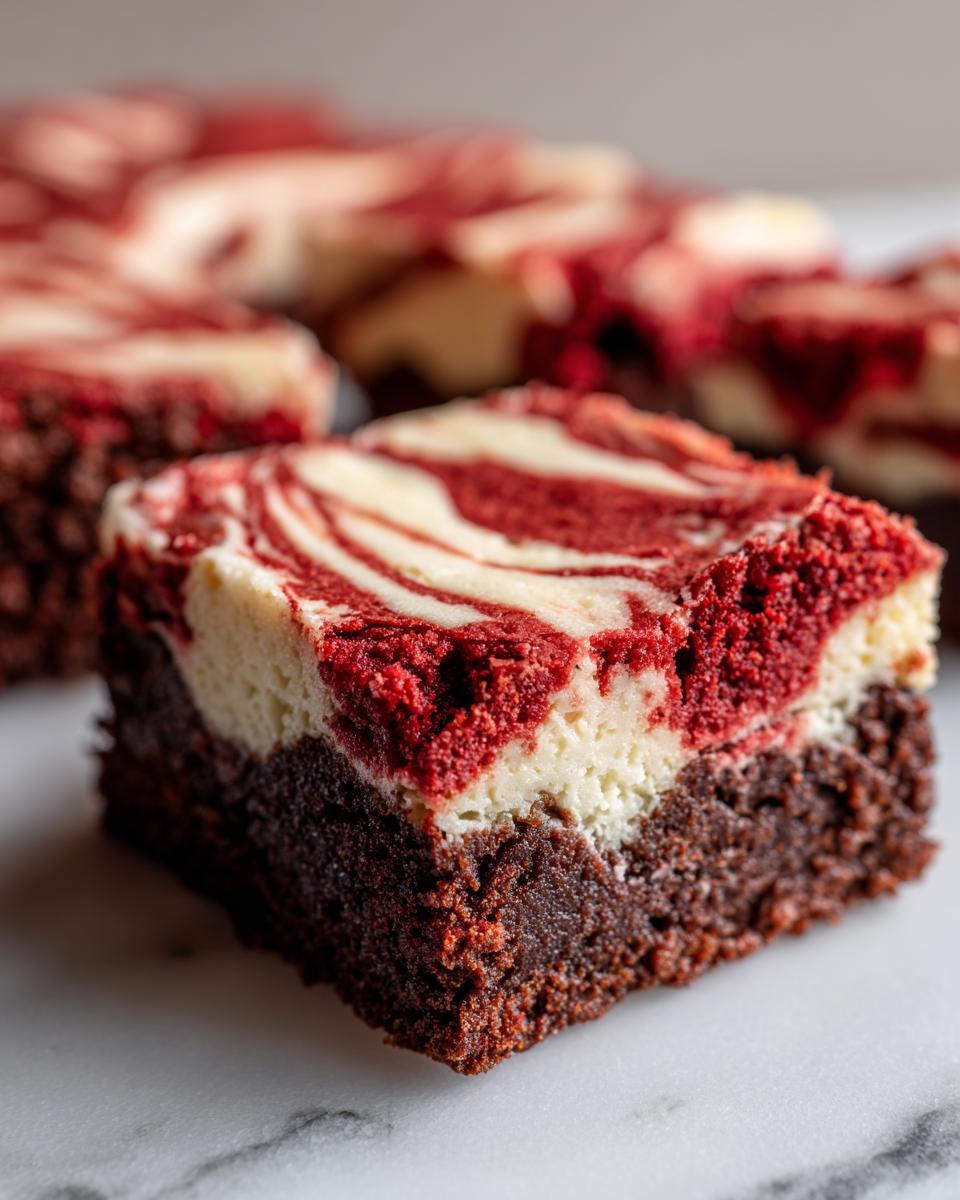
- Visually Stunning: That marbled effect makes these look like they came straight from a bakery case. They are definitely an impressive dessert for a crowd, especially popular around Valentine’s Day desserts.
- Surprisingly Simple: Despite looking fancy, this recipe uses basic pantry staples, and the swirling technique is very forgiving. It’s truly an easy red velvet bars recipe.
- Flavor Powerhouse: It delivers the classic red velvet baked goods taste—that slight tang often missing in just regular chocolate brownies—alongside creamy goodness.
- Perfect for Sharing: This recipe bakes up beautifully in a 9×13, giving you plenty of rich and creamy dessert bars to share (or save for yourself!).
- Make-Ahead Wonders: Like most good brownies, these taste even better the next day! You can wrap them up and head off to that holiday party knowing dessert is covered. If you love this combo, you might also want to check out my recipe for pumpkin cheesecake bars when the season changes!
Gathering Ingredients for Your Red Velvet Cheesecake Brownies
Okay, let’s talk ingredients. For me, baking great red velvet cheesecake brownies from scratch means laying everything out first. When you have two distinct layers like this, organization is everything. Don’t substitute wildly here—especially that cream cheese! If you follow these exact measurements, you’ll nail that perfect flavor contrast between the chocolatey red velvet and the bright, tangy cheesecake swirl.
For the Fudgy Red Velvet Brownie Base
This is the fudgy backbone of our whole operation. Mixing these up correctly ensures you get those wonderful, moist brownie tutorial results we talked about.
- 1 cup (2 sticks) unsalted butter, melted
- 2 cups granulated sugar
- 4 large eggs
- 1 teaspoon vanilla extract
- 1 teaspoon white vinegar
- 1 teaspoon red food coloring (or more for deep color—I usually add a touch extra for that showstopping red!)
- 1 1/4 cups all-purpose flour
- 1/2 cup unsweetened cocoa powder
- 1/2 teaspoon salt
- 1/2 teaspoon baking soda
For the Tangy Cream Cheese Swirl Recipe
This is the layer that cuts through the richness and gives the dessert that classic tang. Make sure your cream cheese is truly soft!
- 8 ounces cream cheese, softened
- 1/2 cup granulated sugar
- 1 large egg
- 1/2 teaspoon vanilla extract
Step-by-Step: How to Prepare Perfect Red Velvet Cheesecake Brownies
Alright, let’s get this wonderful, two-layer dessert assembled! I always tell people that success with red velvet cheesecake brownies comes down to two things: prepping your pan right and not overmixing the batter. Don’t worry if you’ve never done a swirl before; I’m going to walk you through making this impressive dessert for a crowd look like you spent all day on it.
Prep Work and Oven Setup
First things first, get your oven heated up to 350°F (175°C). Grab that 9×13 inch pan, and this is important: line it with parchment paper, making sure there’s an overhang on two sides. You’ll use those paper “handles” later to lift the whole thing out clean! Give that parchment a quick light grease—just a little spray or rub of oil.
Mixing the Moist Brownie Tutorial Batter
In a big bowl, whisk that melted butter with your 2 cups of sugar until they’re happy together. Now, beat in your eggs one at a time—really incorporate each one before adding the next. Then, stir in your vanilla, white vinegar, and all that fabulous red food coloring until the whole thing is a deep, uniform red. In a separate bowl, whisk your dry stuff: flour, cocoa powder, salt, and baking soda. Add those dry ingredients to the red wet mixture slowly. Mix it on low just until you see no streaks of flour left. Seriously, stop mixing there! Overmixing is the enemy of a fudgy texture.
Creating the Simple Swirled Cheesecake Recipe Layer
While your red batter rests, whip up the cream cheese layer. You want this really smooth, so use your mixer for the cream cheese and the 1/2 cup of sugar until it’s creamy. Then, beat in the last egg and vanilla until everything is totally incorporated. This layer is so simple, but it brings that perfect, simple swirled cheesecake recipe tang.
Assembling and Creating the Marbled Cheesecake Brownies
Now for the fun part! Spread about two-thirds of your red velvet batter into the prepared pan as the base layer. Next, drop spoonfuls of that cream cheese mixture over the top. Don’t worry about spacing them perfectly; that’s what the next step is for! Then, gently spread the last bit of red velvet batter over the cheesecake dollops. Take a butter knife, and run it through the layers in a gentle S-pattern. Stop when you see definition; you don’t want to over-swirl, or you’ll just end up with pink brownies! If you want more inspiration on getting the swirls right, check out how the folks at Cheff Recipes handle their assembly—it’s very similar!
Baking and Cooling for Clean Cuts
Pop that pan into the oven for about 30 to 35 minutes. You are looking for moist crumbs on a toothpick, not wet goo. The cheesecake should look pretty set, too. The hardest part of this whole process is waiting! You HAVE to let these cool completely on a rack. If you plan on serving them nicely sliced—those bakery style cheesecake brownies we talked about—wrap the whole thing up and chill them for at least two hours before cutting. Trust me, cold brownies slice perfectly! If you love this combo, you might also want to check out my recipe for making creamy, no-crack cheesecake when you need just the filling.
Tips for Success Making Red Velvet Cheesecake Brownies
Even though this recipe is built to be straightforward, there are a few little secrets I picked up over testing layers and swirls until my family thought I was obsessed! Getting that perfect presentation in your red velvet cheesecake brownies really comes down to temperature and technique. Follow these quick pointers!
Don’t Skip the Chill Time! I know, waiting is the absolute hardest part of baking, but for clean slices, you must let these chill. If you try to cut them warm, the cheesecake layer squishes out, and the brownie layer crumbles. Wrap the entire cooled slab tight in plastic wrap and pop it in the fridge for at least two hours, or even better, overnight! This makes cutting beautifully defined marbled cheesecake brownies so much easier.
The Secret to Warm Batter: You want that contrast for a better swirl definition. Try to get your cheesecake batter mixed up just before you finish your red velvet batter. If your red velvet batter has been sitting out getting warm while you clean up, that colder cheesecake mixture will hold its shape a little better when you start swirling. If you’re struggling with the swirl blending too much, try letting the red velvet layer sit for five minutes right before you dollop on the cheesecake!
How to Achieve That Fudgy Texture: Remember how I emphasized not overmixing the flour into the red base? That’s key to fudgy over cakey. Also, if you are looking for an even moister result, you can swap out a little bit of the butter for sour cream in the red velvet batter—it adds such a lovely, soft crumb! Speaking of moisture, I have a whole post on keeping things moist, like my recipe for moist coffee cake.
Get Inspired by the Experts: Sometimes it helps to see how others achieve that perfect look. For amazing visual ideas on getting the color and swirl just right, I often look at inspiration from sites like Savor Queen. Seeing their finished product always motivates me to get that swirl looking just right before it goes into the oven!
Ingredient Notes and Substitutions for Your Red Velvet Baked Goods
When we’re making something as specific as these beautiful red velvet cheesecake brownies, I always get questions about ingredients. That’s totally normal! Sometimes you’re missing one thing, or maybe you want to make a recipe work for someone with a mild sensitivity. I’ve tested tweaks on almost everything in my kitchen over the years, so let me clear up the biggest questions I get about making sure your red velvet layer comes out vibrant and delicious.
First off, let’s talk about that essential red color. Getting that stunning visual appeal is part of the fun, right? If you use liquid food coloring, you often have to use close to a whole teaspoon or more, and sometimes that extra liquid can mess with the texture just a tiny bit.
My definite preference, and what I recommend most highly, is using gel food coloring. It’s much more concentrated, so a little dab goes a very long way in achieving that deep, vibrant red without adding extra liquid to the fat and sugar base. You’ll get a better color payoff faster!
Now, about the vinegar. I know some people panic if they don’t see vinegar in the pantry! The vinegar, along with the baking soda, works with the cocoa powder to create that classic, slightly tangy flavor profile that distinguishes red velvet from plain chocolate. It also helps react with the red coloring to make it pop!
If you totally don’t have white vinegar, you can use apple cider vinegar. It works just as well, though it might offer the tiniest hint more in the tang department, which honestly, I don’t mind at all in these cheesecake brownies! If you absolutely cannot use any acid, you can skip it, but be warned: your red color might look a little duller, and the flavor won’t have that signature slight bite. It’s a small ingredient that makes a big difference in these layered dessert bars.
Storage and Reheating Instructions for Rich and Creamy Dessert Bars
Because these red velvet cheesecake brownies have that glorious cream cheese layer, we have to treat them a little differently than a standard, purely chocolate brownie. You definitely can’t just leave these sitting on the counter covered for days; the cheesecake wants to keep cool!
The best way to keep these beautiful, marbled cheesecake brownies fresh is in the refrigerator. Once they are completely cooled—and remember, completely cooled is the *only* way to get those perfect slices—layer them in an airtight container. I like putting a sheet of wax paper or parchment between the layers so they don’t stick together once they firm up in the cold. They stay wonderfully delicious and moist in the fridge for about four or five days this way.
If you happen to have an absolute ton of leftovers (which, let’s be honest, happens when I bake them!), you can freeze them too. Just follow that same layering method with parchment paper, wrap the whole container tightly in plastic wrap and then foil. They freeze beautifully for up to three months! If you’re planning ahead for parties, this freezer trick is a lifesaver. For more tips on long-term storage of homemade treats, you can check out my technique for easy freezer jam—the wrap method is very similar!
Now, reheating is key, especially if you like your brownie slightly soft! If you’re just grabbing one square straight from the fridge, you can let it sit on the counter for about 15 to 20 minutes, and it will come right back to that lovely, soft texture we aim for. If you’re in a rush, you can microwave a single square for just 10 to 15 seconds. Watch it closely, though; the cheesecake part heats up fast!
We want to avoid making the brownie layer hard or rubbery, so never try to reheat the entire pan, and definitely do not use high heat. Keeping them cool most of the time preserves that gorgeous contrast between the fudgy base and the creamy topping. Enjoy those rich and creamy dessert bars!
Frequently Asked Questions About Red Velvet Cheesecake Brownies
Can I skip the vinegar if I’m making these red velvet cheesecake brownies?
That’s a great question that comes up a lot! While you absolutely *can* skip it, I wouldn’t recommend it if you want that true, classic red velvet flavor profile. The white vinegar is crucial because it reacts with the baking soda and even the cocoa powder to give the brownie that distinct, slight tang that makes red velvet *red velvet*. Plus, it helps boost the richness of the color. If you’re out, apple cider vinegar is a fine swap. If you skip it entirely, the texture will be fine—you’ll still get delicious cheesecake swirl brownies—but the flavor won’t have that signature bite.
How do I get that vibrant, deep red color in my fudgy red velvet dessert?
This is where technique really matters, especially if you’re using standard supermarket dye! Liquid food coloring adds too much unnecessary moisture, which can thin out your batter. For the best results in these fudgy red velvet desserts, you need to use gel food coloring. Gel is highly concentrated. I usually start with one teaspoon of high-quality red gel, mix it into the wet ingredients, and then see where I am. You might need a little more to get that deep, showstopping hue, but you’ll use less overall, keeping your batter texture perfect. It really makes a difference for these homemade red velvet treats!
Can I cheat and use a box mix for the brownie layer?
Look, I’m all about making life easier for busy moms, and I even have recipes that hack store-bought items myself! However, for these specific red velvet cheesecake brownies, I have to advise against using a box mix for the base here. Why? Because these are essentially two-layer dessert bars, and the ratios are so specific to get that perfect fudgy texture around the cheesecake. Box mixes are designed to be cake-like; we want dense and fudgy here! If you want easy, focus on keeping the cheesecake layer really simple, as outlined in the recipe, but stick to making the red velvet base from scratch for the best texture.
What is the best pan size if I want thicker bars?
Since this recipe is written for a 9×13 pan to get those nicely portioned squares, if you want thicker, more decadent bars—almost like two-layer dessert bars stacked high—you should definitely halve the recipe and use an 8×8 inch pan instead. Halving the recipe will also mean you need to add about 10 to 15 minutes to the baking time since the batter is much deeper. Always check with that toothpick test! If you want to see how I modify recipes for smaller pans, you can check out my approach to making easy homemade naan bread—scaling is an art!
My swirl keeps sinking to the bottom. What did I do wrong?
Oh, that happens to everyone! If your cheesecake layer sinks completely below the red velvet layer, it usually means the red velvet layer was too thin or you didn’t use enough of it as the first base layer. Remember, we spread about two-thirds of the red batter down first, *then* dollop the cheesecake in. If the cheesecake batter is much runnier than the red batter, it will sink, too. Make sure your cream cheese mixture isn’t too warm when you place it on top. If you’re having trouble with consistency in general, for truly no-fail results, check out the tips over at Baking Whiz for handling different brownie consistencies.
Estimated Nutritional Data for Red Velvet Cheesecake Brownies
Now, I know some of you like to track everything, and while I focus more on heart-satisfying results than counting every single calorie, I always try to give you a baseline! Because these red velvet cheesecake brownies are incredibly rich—hello, cheesecake layer!—they are certainly a treat meant for special occasions, like Valentine’s Day desserts or Christmas gatherings.
Because I’m a home baker and not a certified nutritionist, I have to give you this important disclaimer: the values listed below are just estimates. They can change wildly based on whether you use full-fat cream cheese or reduced-fat, or exactly how much food coloring you sneak into that red velvet layer. Also, remember that a standard serving for these gorgeous marbled cheesecake brownies is one square, and if you cut them smaller (or bigger!), the numbers change!
You should rely on this data for a general idea of the makeup—definitely more of a rich and creamy dessert bars indulgence than a light snack. If you need precise data for dietary tracking, I always suggest running the final ingredient list through an online calculator to get the exact numbers for your specific bake.
Share Your Decadent Dessert Recipes Experience
Oh, I truly can’t wait until you try these! Baking is all about sharing, and honestly, seeing your beautiful creations is what keeps me inspired in the kitchen every single day. I’ve shown you how to get that perfect swirl and that incredibly fudgy texture for your red velvet cheesecake brownies, and now it’s your turn to play!
When you finally pull these out of the oven and get that first clean slice—I want to see it! Please snap a picture of your finished impressive dessert for a crowd and tag me on social media. There’s nothing better than seeing those vibrant red and cream swirls gleaming back at me.
Did you try serving these rich and creamy dessert bars warm, or did you manage to wait for that perfect chilled slice? Were they a hit at your family gathering? Did your kids love the two-layer effect? Don’t be shy! Leave a star rating right here on the recipe card!
Most importantly, drop a comment down below telling me about your experience making this recipe. Did you find it simple? What did you serve them with? I personally read every single comment, and feedback helps me fine-tune these family favorites for everyone. If you have any extra questions that weren’t covered in the FAQ, fire away! You can always reach me directly through my contact page as well. Happy baking, friends!
PrintDecadent Swirled Red Velvet Cheesecake Brownies (From Scratch)
Make rich, fudgy red velvet brownies topped with a tangy, creamy cheesecake swirl. This recipe delivers a showstopping, marbled dessert that is simple to prepare for any gathering.
- Prep Time: 20 min
- Cook Time: 35 min
- Total Time: 2 hours 55 min
- Yield: 16 servings 1x
- Category: Dessert
- Method: Baking
- Cuisine: American
- Diet: Vegetarian
Ingredients
- 1 cup (2 sticks) unsalted butter, melted
- 2 cups granulated sugar
- 4 large eggs
- 1 teaspoon vanilla extract
- 1 teaspoon white vinegar
- 1 teaspoon red food coloring (or more for deep color)
- 1 1/4 cups all-purpose flour
- 1/2 cup unsweetened cocoa powder
- 1/2 teaspoon salt
- 1/2 teaspoon baking soda
- For the Cheesecake Layer:
- 8 ounces cream cheese, softened
- 1/2 cup granulated sugar
- 1 large egg
- 1/2 teaspoon vanilla extract
Instructions
- Preheat your oven to 350°F (175°C). Line a 9×13 inch baking pan with parchment paper, leaving an overhang for easy removal. Lightly grease the paper.
- Prepare the Red Velvet Batter: In a large bowl, whisk together the melted butter and 2 cups of sugar until combined.
- Beat in the 4 eggs one at a time, mixing well after each addition. Stir in the vanilla extract, white vinegar, and red food coloring until the mixture is uniformly red.
- In a separate medium bowl, whisk together the flour, cocoa powder, salt, and baking soda.
- Gradually add the dry ingredients to the wet ingredients, mixing on low speed until just combined. Do not overmix the batter.
- Prepare the Cheesecake Layer: In another bowl, beat the softened cream cheese and 1/2 cup of sugar with an electric mixer until smooth. Beat in the remaining egg and 1/2 teaspoon of vanilla extract until fully incorporated.
- Assemble the Brownies: Spread about two-thirds of the red velvet batter evenly into the prepared pan.
- Dollop spoonfuls of the cheesecake mixture over the red velvet layer.
- Gently spread the remaining red velvet batter over the cheesecake layer.
- Create the Swirl: Using a butter knife or a skewer, gently run it through the layers in an S-pattern to create a marbled effect. Do not over-swirl, or the colors will blend completely.
- Bake for 30 to 35 minutes, or until a toothpick inserted near the center comes out with moist crumbs attached, but not wet batter. The cheesecake layer should be mostly set.
- Let the brownies cool completely in the pan on a wire rack before lifting them out using the parchment paper overhang.
- Cut into squares and serve.
Notes
- For the best marbled look, ensure your cheesecake batter is slightly warmer than the brownie batter before swirling.
- If you want a truly fudgy texture, slightly underbake the brownies by about 2 minutes.
- Chill the brownies for at least 2 hours before slicing for clean, bakery style cheesecake brownies cuts.
Nutrition
- Serving Size: 1 brownie square
- Calories: 350
- Sugar: 35
- Sodium: 210
- Fat: 22
- Saturated Fat: 13
- Unsaturated Fat: 9
- Trans Fat: 0.5
- Carbohydrates: 35
- Fiber: 1
- Protein: 4
- Cholesterol: 85