
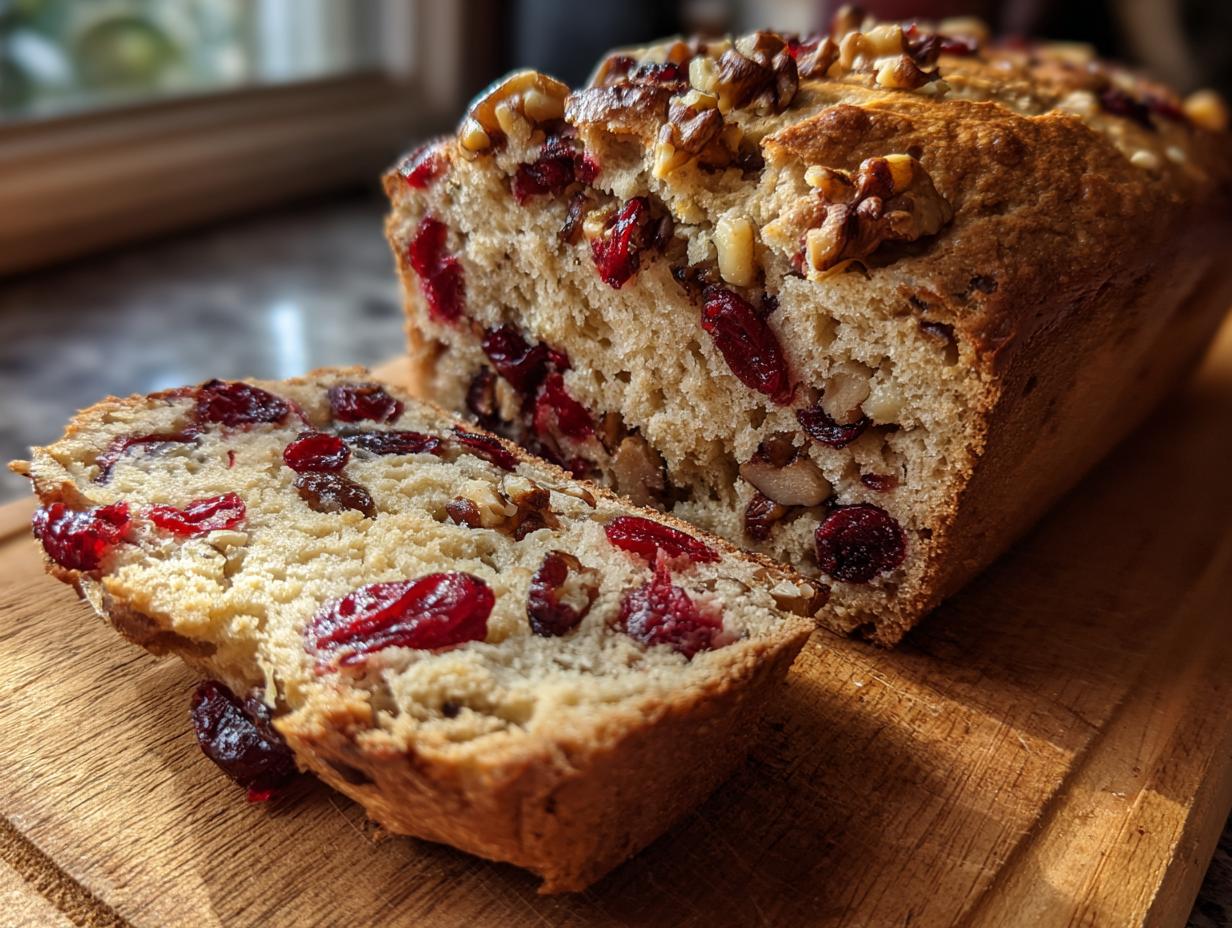
Oh, you know that smell? The one that just instantly makes your house smell like holiday warmth and pure comfort? That’s the magic of freshly baked bread filling your kitchen, and honestly, it doesn’t take a whole day of heavy lifting to get there! That’s why I’ve become obsessed with this Easy No-Knead Cranberry Walnut Bread recipe. I learned years ago, when juggling teaching and the kids, that if a recipe asks for too much elbow grease after a long day, it just won’t get made. This loaf is my answer to that struggle—it’s incredibly moist, delivers that perfect nutty crunch, and frankly, it proves that you don’t need complicated steps to achieve that gorgeous, rustic, artisan look. Trust me, this simple technique lets the ingredients do all the hard work for us!
- Why This Easy No-Knead Cranberry Walnut Bread Recipe Works (E-E-A-T)
- Gathering Ingredients for Your Cranberry Walnut Bread Recipe
- Step-by-Step Instructions for No Knead Cranberry Walnut Bread
- Tips for Making the Best Cranberry Walnut Bread Copycat
- Serving Suggestions for Your Freshly Baked Bread
- Variations on the Classic Cranberry Walnut Bread
- Storage and Reheating Instructions for Cranberry Walnut Bread
- Frequently Asked Questions About This Cranberry Walnut Bread Recipe
- Estimated Nutrition for Your Cranberry Walnut Bread
- Share Your Easy Bread Recipe Success
Why This Easy No-Knead Cranberry Walnut Bread Recipe Works (E-E-A-T)
When you see ‘no knead,’ you might think it’s a magic trick, but it’s really just smart baking! This method is perfect for us home cooks because it frees up your hands and lets time do the heavy lifting for flavor development. If you’re looking for that homemade artisan bread feel without the workout, this is your winner. It’s incredibly reliable, which is so important when we need a quick win in the kitchen.
- This method means you skip the messy kneading, making cleanup a breeze.
- The long fermentation time deepens the flavor profile of your dough beautifully.
- It’s the ultimate choice for anyone new to baking—a true beginner friendly baking solution!
Minimal Effort for Artisan Results
The secret here is patience, not physical work! We mix everything until it’s just combined, and then we walk away. That long, slow rise—usually overnight—is where the gluten structure develops naturally. It creates an airy network without me having to stand over the counter working the dough. This results in a wonderfully airy interior, making it an excellent **easy bread recipe** that looks like you spent hours on it.
Achieving a Moist Cranberry Loaf Texture
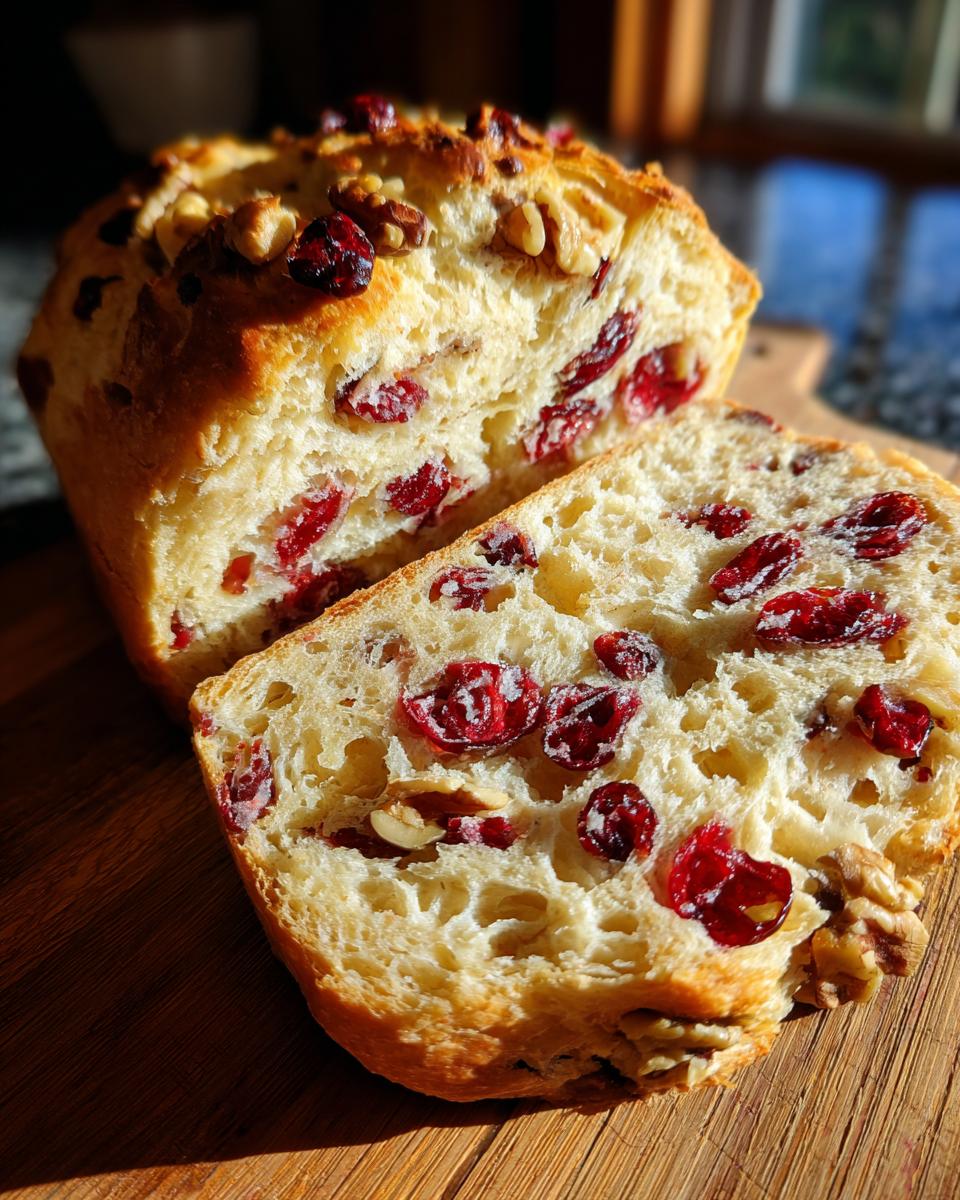
The beauty of any no-knead dough is that it’s super wet—we call that high hydration. Don’t be scared of that sticky dough in the bowl! That extra water is exactly what ensures you get that wonderfully soft, **moist cranberry loaf** texture after it bakes. Combining that moisture with the tartness of the cranberries means every slice of this **cranberry walnut bread** stays tender, not dry, even the next day.
Gathering Ingredients for Your Cranberry Walnut Bread Recipe
When we talk about a recipe being easy, it also means the ingredient list shouldn’t require a special trip to three different specialty stores! For this loaf, everything you need is probably already in your pantry or can be grabbed at the regular grocery store. Remember, building a great, flavorful loaf starts with ensuring your mix-ins are ready to go. We want that perfect balance of sweet fruit and savory nut in every single slice, so take a moment to measure everything out before we start mixing things up. It makes the whole process smoother!
Essential Components for This Sweet and Nutty Bread
- 3 cups all-purpose flour
- 1 teaspoon instant yeast
- 1 1/2 teaspoons salt
- 1 tablespoon granulated sugar
- 1 1/2 cups dried cranberries
- 1 cup chopped walnuts
- 1 1/2 cups warm water (about 105-115°F)
- 1 tablespoon orange zest (optional, for flavor)
Step-by-Step Instructions for No Knead Cranberry Walnut Bread
Okay, this is where we put our faith in the process! Since there’s no kneading, our work is actually super hands-off. The magic happens while you’re sleeping or running errands. Just remember, the timing here is crucial—it’s what transforms sleepy ingredients into an authentic, homemade artisan bread! That’s why knowing the steps precisely means you can count on this loaf every single time.
Mixing and Long Fermentation for Perfect Cranberry Walnut Bread
First things first, grab your big mixing bowl. Whisk all those dry things—flour, yeast, salt, and sugar—together. Then, stir in your cranberries, walnuts, and that optional splash of orange zest. When you add the warm water, be prepared! You just mix it with a wooden spoon until it barely comes together. Don’t worry if it looks like sticky, messy sludge; that’s exactly right for this **cranberry walnut bread recipe**. Cover that bowl tightly with plastic wrap and just leave it. We need 12 to 18 hours for that long, slow rise. Don’t peek too much; let the yeast work its wonders undisturbed!
Shaping and Preheating for the Rustic Loaf Recipe
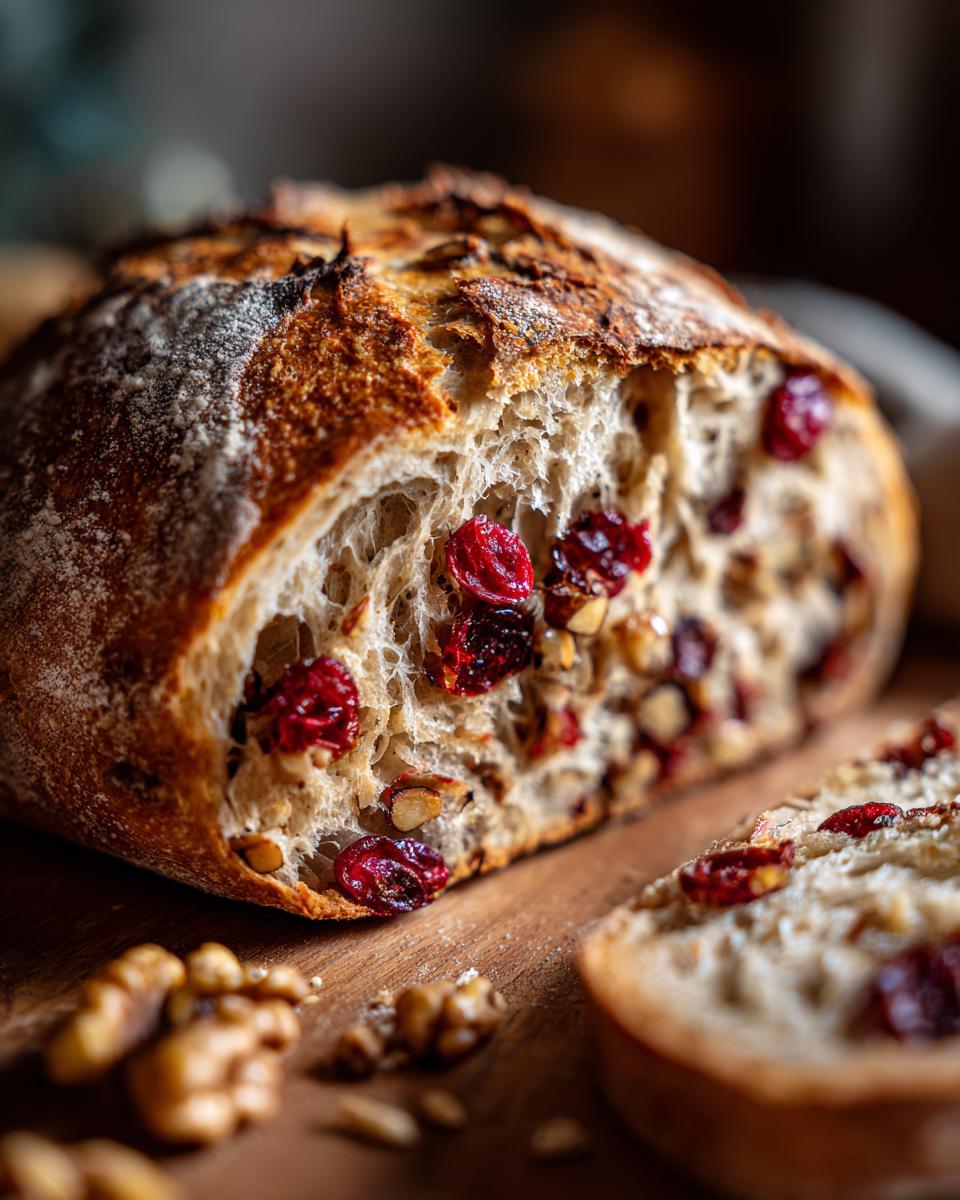
Once the dough is bubbly and risen, it’s time for the gentle part. Lightly flour your counter and gently scrape the dough right out. Please, whatever you do, do NOT punch it down! We want to keep those precious air bubbles we worked so hard to generate. Shape it very loosely into a ball and put it on a sheet of parchment paper. Now, cover it loosely and set it aside for a much shorter 30-minute rest. While that’s happening, slide your Dutch oven, lid and all, into the oven and crank the heat up to 450°F (232°C). Getting that pot screaming hot is the secret to a perfect crust on your **rustic loaf recipe**!
Baking Your Delicious Cranberry Walnut Bread
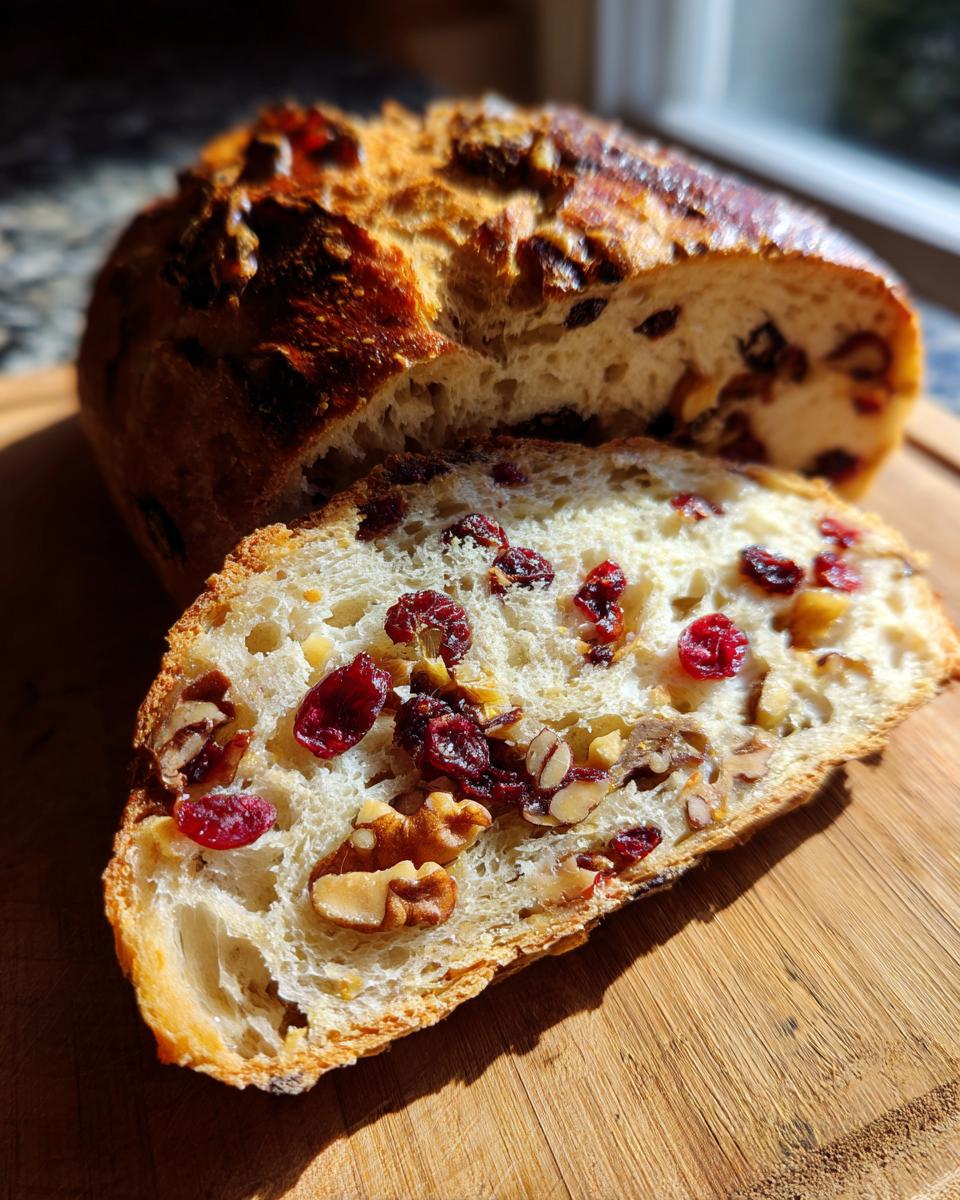
When that 30 minutes is up and the Dutch oven is hot enough to melt steel, carefully pull it out. Use that parchment paper as a sling to gently lower your dough ball right into that hot pot. Pop the lid on and bake it for 30 minutes. This trapped steam mimics a professional bakery environment, which is key for a great crust! After 30 minutes, take the lid off. Let it go for another 10 to 15 minutes until it’s deep golden brown all over. The hardest part? You must let this **moist cranberry loaf** cool completely on a wire rack before slicing. If you cut it hot, you’ll flatten that beautiful, tender crumb we aimed for!
Tips for Making the Best Cranberry Walnut Bread Copycat
You asked about getting that specific, wonderfully rich taste, and I can certainly help steer this loaf toward the bakery favorites! A lot of people email me asking how to nail that famous flavor profile, often chasing that **Costco cranberry walnut bread copycat** experience. Good news: we don’t need to complicate this simple **cranberry walnut bread recipe** to get there!
Based on my notes from tweaking things over the years, a couple of additions make a huge difference in replicating that richer taste. First, for that familiar sweetness we always associate with those big bakery loaves, add 1 teaspoon of vanilla extract right into the wet mixture before combining everything. It’s a small addition, but it truly rounds out the flavor!
Also, don’t skip the walnuts if you have a minute to toast them first. Toss them in a dry pan over medium heat for about five minutes until they smell fragrant. This simple step prevents them from tasting dusty and really amps up that nutty crunch in your final slice. I promise, these little touches elevate your **cranberry walnut bread** from good to absolutely amazing. You can check out my philosophy on shortcuts versus flavor depth in my chocolate chip banana bread recipe too, as the same approach applies!
Serving Suggestions for Your Freshly Baked Bread
Now that you have this gorgeous, rustic loaf cooling on the rack—and trust me, putting your hands on that crust when it finally cools is half the fun!—you might be wondering, when should I serve this masterpiece? Honestly, this bread fits right into any part of the day where you need a little something special. Think of this as your new favorite addition to your arsenal of breakfast bread ideas!
It is absolutely phenomenal sliced thick, lightly toasted, and served with just a smear of salted butter in the morning while you have your coffee. The cranberries get a little gooey when warmed up, and those walnuts just pop! But don’t stop there. Because this loaf is so hearty and beautiful, it makes a stunning centerpiece for any brunch spread. If you’re hosting a holiday meal, this is absolutely essential for your festive bread baking efforts.
I also love it as an afternoon snack. Slice up a piece and pair it with a sharp cheddar cheese or a mild creamy brie. The tartness of the fruit cuts through the richness of the cheese so beautifully. It transitions perfectly from a simple weekday treat to something you’re proud to put out when company drops by unexpectedly!
Variations on the Classic Cranberry Walnut Bread
One of the things I love most about this fundamental **cranberry walnut bread recipe** is how sturdy and adaptable it is. Once you master that basic no-knead dough, you can start playing around! I know a lot of you are curious about throwing in other fruits, and yes, you absolutely can!
If you want something a little brighter and sweeter, you might want to look into making an apricot cranberry walnut bread—the dried apricots add a wonderful chewiness that complements the walnuts beautifully. I haven’t tested that exact combo in this loaf yet, but the structure should handle it just fine!
But if you want a super simple twist using the recipe we just made, try this: during Step 2 when you add the fruit and nuts, throw in about half a teaspoon of ground cardamom along with your usual walnuts and cranberries. Cardamom pairs unbelievably well with citrus notes (especially if you used that optional orange zest), giving the whole loaf a cozy, almost pastry-like warmth. It takes your standard **cranberry walnut bread** and makes it feel extra special for a holiday morning. If you’ve already made my cranberry orange cheesecake, you know how good that spice combo is!

Storage and Reheating Instructions for Cranberry Walnut Bread
It’s truly a victory when you have leftovers of fresh bread, but the challenge is keeping that beautiful, tender crumb from drying out! Since this loaf has relatively low sugar compared to a cake, it doesn’t stay soft quite as long as, say, banana bread. My goal is always to keep that moist cranberry loaf quality intact for as long as possible.
Once the bread has cooled completely—and I mean completely, otherwise you trap moisture and encourage mold—wrap it tightly. I prefer using plastic wrap first, making sure I seal both ends really well to keep the air out. Then, I place that wrapped loaf inside a ziploc bag or an airtight container. Stored this way on the counter, it stays perfectly fresh for about three to four days.
If you manage to bake two loaves (which I always seem to do, oops!), or if you know you won’t eat this wonderful bread within four days, freezing is your best friend. Slice the whole loaf first before you wrap it up for the freezer. This way, you can pull out just one or two slices at a time, which is so much more practical for weekday mornings! You don’t even need to thaw them fully.
To reheat those frozen slices, I skip the microwave entirely—it always gives bread that tough texture. Instead, pop the slices straight from the freezer onto a baking sheet and into a warm oven, maybe 300°F (150°C), for about five to seven minutes. This lets the residual moisture steam gently inside the structure while warming the bread fibers up perfectly. You are honestly better off running those slices under a little water first, letting it absorb for just a second before putting them in the oven; that trick never fails to revive the tenderness!
Frequently Asked Questions About This Cranberry Walnut Bread Recipe
I always get so many messages after people try my recipes, and I love hearing what questions pop up while you’re in the kitchen! Baking bread, especially using the no-knead method, can sometimes feel a bit mysterious at first, but I promise it’s straightforward once you know the little secrets. Here are a few things I hear often when folks are making this wonderful loaf. If you’re looking for quick healthy lunch ideas, this bread sliced and maybe turned into a little grilled cheese is surprisingly fantastic!
Can I use fresh cranberries instead of dried in this cranberry walnut bread recipe?
That’s a great question about the fruit! You absolutely can use fresh cranberries, but you have to treat them differently. Fresh cranberries are much tarter and they hold a lot more liquid than the dried ones do. If you swap them one-for-one, you risk making your dough too wet, which can slow down that rise time dramatically. If you use fresh, I highly recommend giving them a rough chop—don’t let them go in whole unless they are tiny—and then adding them at the very end of the mix. You might also want to increase your initial sugar by just one extra tablespoon to balance out that fresh tartness! Other than that, it works beautifully.
What is the best way to get a darker crust on my homemade artisan bread?
If you are striving for that deep, rich, almost mahogany brown crust you see on bakery loaves, it almost always comes down to steam and time. Remember in the instructions where we put the lid on the Dutch oven for the first 30 minutes? That trapped steam is crucial for oven spring and initial crust setting. To darken it up further without burning the inside, try taking the lid off as directed, and then try reducing your oven temperature slightly—maybe drop it to 425°F (220°C)—and let it bake uncovered for the final 15 minutes. That little bit of extra time at a slightly lower temperature helps the outer crust caramelize deeply before the inside over-bakes. A hot Dutch oven really is the key to getting that amazing crust on your Cranberry Walnut Bread, too!
Is this truly a beginner friendly baking recipe?
Yes, yes, and a thousand times yes! If you’ve never made a loaf of bread in your life, start here! Seriously. The beauty of the no-knead method is that it takes away all the tricky parts that scare new bakers away—like timing the kneading, checking for windowpane, and developing gluten strength. Here, you just mix the ingredients into a shaggy mess, cover it, and forget about it for 18 hours. You’ll be shocked when you see that bubbly dough the next morning, and you’ll be even more shocked when you pull that beautifully round loaf out of the oven. It’s truly the most foolproof, **beginner friendly baking** option I have!
Estimated Nutrition for Your Cranberry Walnut Bread
I know that when we make something this delicious, we also want to have a general idea of what we’re eating! Since this is an honest, homemade loaf, the exact numbers depend on the brand of flour you grab or exactly how many walnuts end up in your slice. But I always like to give you a starting point so you can manage things for your family’s needs.
The nutrition breakdown below is calculated based on the ingredients in the recipe above, assuming the loaf yields 16 slices. Remember, these are only estimates, darling. If you use a lighter flour or skip the sugar, your numbers will change, but this gives you that ballpark figure for your **sweet and nutty bread**!
- Serving Size: 1 slice
- Calories: 240
- Sugar: 10g
- Sodium: 300mg
- Fat: 6g
- Saturated Fat: 1g
- Unsaturated Fat: 5g
- Trans Fat: 0g
- Carbohydrates: 43g
- Fiber: 2g
- Protein: 6g
- Cholesterol: 0mg
I hope this information helps you serve up your **cranberry walnut bread recipe** confidently. It’s amazing that we get this much goodness—with fiber and protein—out of something that tastes like dessert!
Share Your Easy Bread Recipe Success
Well, that’s it! You’ve successfully navigated the world of no-knead baking and now you have the most incredible, fragrant loaf of bread sitting on your counter. I truly hope this **cranberry walnut bread recipe** brings a little joy and comfort to your kitchen, just like it does for my family every time I make it.
Now, I absolutely live for hearing from you all! When you get a chance, please hop down to the comments below and tell me how it went. Did the long rise work perfectly for you? I encourage you to leave a star rating as well, so other home cooks know just how easy and delicious this loaf is!
The biggest question I always have is what you paired it with! Did you enjoy it just plain? Did you slather it with some good cultured butter? Maybe you made it part of a bigger spread—perhaps you whipped up one of my weeknight dinner ideas and served a slice alongside it? Let me know your favorite way to enjoy this sweet and nutty treat so I can get some ideas for my next batch!
PrintEasy No-Knead Cranberry Walnut Bread Recipe

Bake this easy, no-knead cranberry walnut bread for a moist, tender loaf perfect for breakfast, snacks, or holiday gatherings. This beginner-friendly recipe delivers artisan flavor with minimal effort.
- Prep Time: 15 min
- Cook Time: 45 min
- Total Time: 13 hours 0 min
- Yield: 1 loaf 1x
- Category: Breakfast
- Method: Baking
- Cuisine: American
- Diet: Vegetarian
Ingredients
- 3 cups all-purpose flour
- 1 teaspoon instant yeast
- 1 1/2 teaspoons salt
- 1 tablespoon granulated sugar
- 1 1/2 cups dried cranberries
- 1 cup chopped walnuts
- 1 1/2 cups warm water (about 105-115°F)
- 1 tablespoon orange zest (optional, for flavor)
Instructions
- In a large bowl, whisk together the flour, instant yeast, salt, and sugar.
- Stir in the dried cranberries and chopped walnuts until evenly distributed.
- Pour in the warm water and mix with a wooden spoon until just combined. The dough will be very sticky and shaggy; do not overmix.
- Cover the bowl tightly with plastic wrap and let the dough rise in a warm place for 12 to 18 hours. The dough should become bubbly and nearly double in size.
- Lightly flour a clean work surface. Gently scrape the dough out of the bowl onto the surface. Do not punch it down.
- Shape the dough loosely into a ball.
- Place the dough ball on a piece of parchment paper. Cover loosely with plastic wrap or a clean kitchen towel and let it rest for 30 minutes.
- About 20 minutes before the end of the rest time, place a Dutch oven (with the lid on) into your oven and preheat to 450°F (232°C).
- Carefully remove the hot Dutch oven from the oven. Use the parchment paper to lower the dough into the hot pot.
- Cover the Dutch oven with the lid and bake for 30 minutes.
- Remove the lid and continue baking for another 10 to 15 minutes, or until the crust is deep golden brown.
- Carefully remove the bread from the Dutch oven and let it cool completely on a wire rack before slicing.
Notes
- For a copycat version similar to Costco cranberry walnut bread, add 1 teaspoon of vanilla extract to the wet ingredients.
- Toasting the walnuts lightly before adding them deepens their flavor.
- If you prefer a slightly sweeter loaf, increase the sugar to 2 tablespoons.
Nutrition
- Serving Size: 1 slice
- Calories: 240
- Sugar: 10g
- Sodium: 300mg
- Fat: 6g
- Saturated Fat: 1g
- Unsaturated Fat: 5g
- Trans Fat: 0g
- Carbohydrates: 43g
- Fiber: 2g
- Protein: 6g
- Cholesterol: 0mg