

When the doorbell rings and you realize you totally forgot about the appetizer spread, what do you do? You grab the basics—the cream cheese and the cheddar—and you make magic! I know that frantic feeling all too well from my teaching days. Listen, you don’t need fancy gadgets or hours in the kitchen to create something unforgettable. This classic **cheese ball recipe** is my absolute gold standard anytime I have people over, whether it’s for a huge holiday party or just a casual Sunday football game. It’s a guaranteed crowd-pleaser, unbelievably reliable, and honestly, so satisfying to make. It’s the heart of simple entertaining, turning everyday ingredients into the star of the show. If you love easy party food that disappears fast, you absolutely must try my Million Dollar Dip right alongside this one. Trust me on this **cream cheese ball**; it never fails.
- Why This Classic Cheese Ball Recipe Works Every Time
- Ingredients for the Best Cheese Ball Recipe
- How to Prepare Your Classic Appetizer Recipe
- Make Ahead Appetizers: Preparing Your Cheese Ball Recipe in Advance
- Ingredient Notes and Simple Party Food Ideas Substitutions
- Serving Suggestions for Your Cheddar Cheese Ball Recipe
- Frequently Asked Questions About This Cheese Ball Recipe
- Storing and Reheating Your Simple Party Dips
- Share Your Cheese Ball Recipe Success
Why This Classic Cheese Ball Recipe Works Every Time
When it comes to a truly great **classic appetizer recipe**, simplicity is often the secret weapon. I’ve tried making cheese balls fluffy with goat cheese or using five different fancy soft cheeses, but honestly? Nothing beats the foundation of good, honest cream cheese mixed with sharp cheddar. The sharpness of the cheddar cuts through the richness of the cream cheese, creating that perfect balance of tangy and creamy. It makes for a truly satisfying, **quick savory snack**.
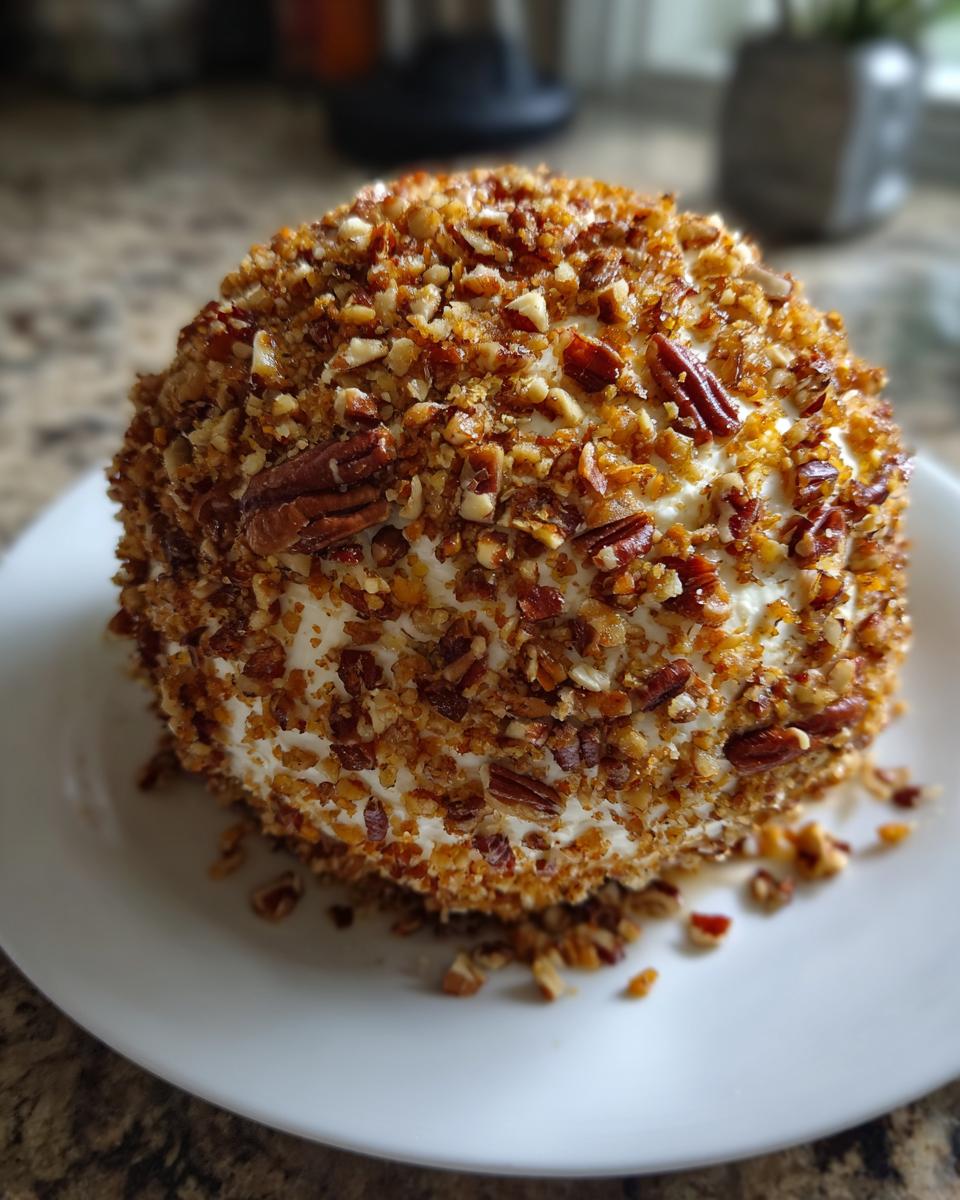
I remember one year—last minute—my husband’s company holiday party required us to bring something immediately. I whipped this up, chilled it while I got dressed, rolled it in pecans, and boom! Instant centerpiece. Everyone asked for the recipe. It’s reliable comfort food that always looks festive.
If you are looking for another guaranteed hit for your spread, you really have to check out my ultimate Sausage Rotel Dip recipe too—it’s for those times you need a hot option!
Details for Your Easy Cheese Ball Recipe
Setting expectations upfront makes entertaining so much easier. You can honestly trust these times because there’s no baking involved, just chilling time!
- Prep Time: 15 min
- Cook Time: 0 min
- Total Time: 1 hour 15 min (mostly fridge time!)
- Yield: 12 servings
- Method: No Bake
Ingredients for the Best Cheese Ball Recipe
I always tell folks that the beauty of this dish is how simple the ingredient list is. You likely have half of this stuff in your fridge right now! This isn’t the time for obscure imports; we are keeping it classic, real, and delicious. The key here is making sure your cream cheese is perfectly softened—no one wants a lumpy cheese ball, right? The sharp cheddar gives us that necessary bite, and the little bit of green onion just brightens everything up. If you choose to include the bacon, it takes this from a great snack to an absolute showstopper, but feel free to leave it out if you’re serving vegetarian friends!
- 8 ounces cream cheese, softened
- 8 ounces sharp cheddar cheese, shredded
- 1/4 cup finely chopped green onion (scallions)
- 1 teaspoon Worcestershire sauce
- 1/2 teaspoon garlic powder
- 1/4 teaspoon onion powder
- 1/4 teaspoon salt
- 1/4 teaspoon black pepper
- 1 cup finely chopped pecans or walnuts (for coating)
- Optional: 4 ounces crumbled cooked bacon (for mixing in)
How to Prepare Your Classic Appetizer Recipe
Okay, now we get to the fun part! This **classic appetizer recipe** comes together so fast, but you absolutely cannot skip one crucial step: chilling. Once you mix everything up, that soft cream cheese needs a little nap in the fridge to firm up. If you try to shape it when it’s warm? You’re going to end up with cheese all over your hands, not a neat ball. Don’t panic if it seems too sticky at first, that’s exactly why we chill!
I always make my base mixture the night before. It honestly tastes even better the next day because those savory seasonings really infuse into the cheese. Don’t forget that little splash of Worcestershire sauce; it’s the secret depth of flavor in this simple mix. I wish I had known about making homemade mayo when I was first teaching, but for this, we stick to the tried and true simple spice blends!
- In a medium bowl, combine the softened cream cheese, shredded cheddar cheese, green onion, Worcestershire sauce, garlic powder, onion powder, salt, and pepper. If you opted for bacon, mix that in until everything is evenly combined.
- Cover the bowl and chill the cheese mixture in the refrigerator for at least 1 hour. Seriously, this helps the mixture firm up, making it much easier to shape cleanly.
- Spread the chopped pecans or walnuts onto a shallow plate or piece of parchment paper.
- Remove the chilled cheese mixture from the refrigerator. Shape the mixture into a ball using your hands or a rubber spatula.
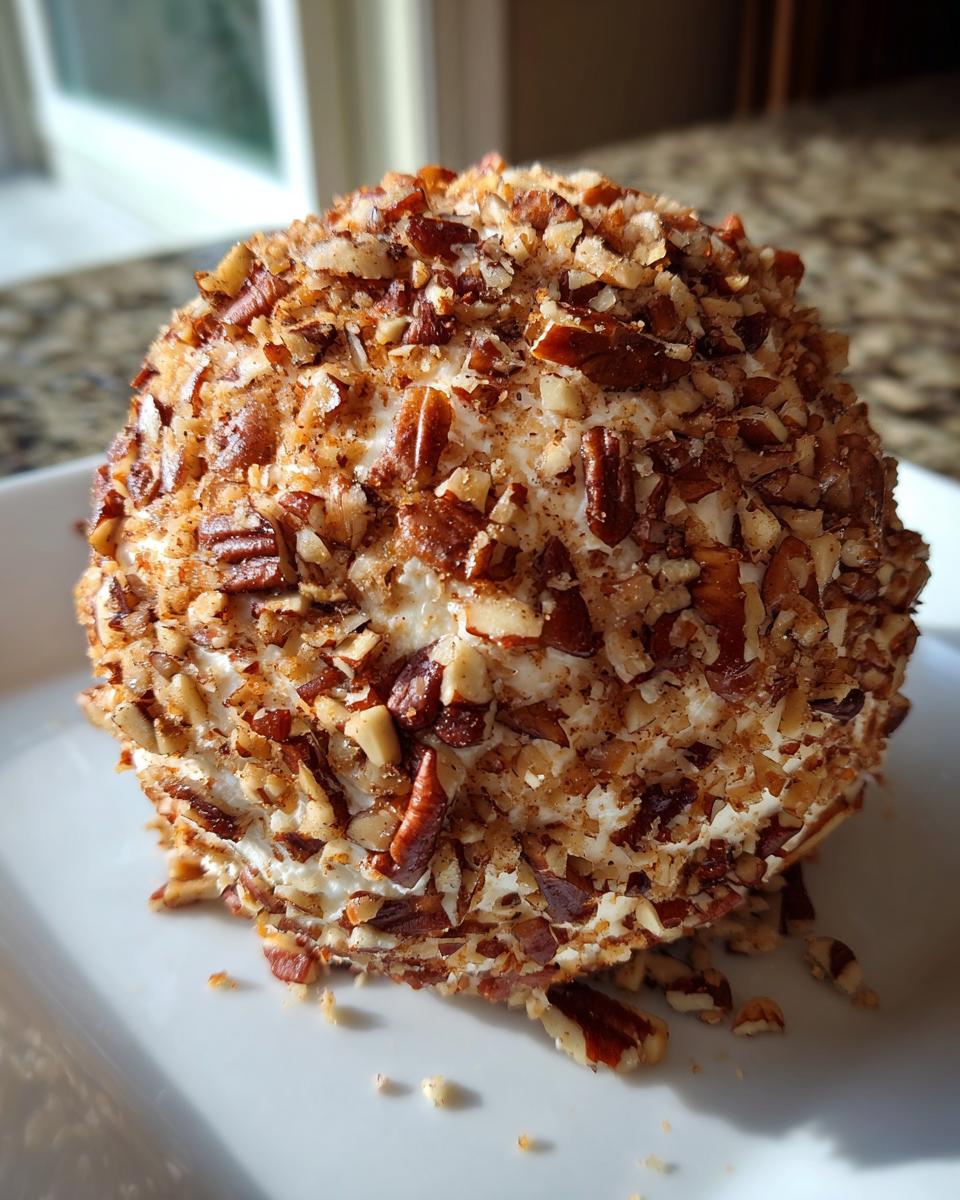
- Roll the cheese ball in the chopped nuts until it is completely coated. Press gently so the nuts adhere well.
- Return the finished cheese ball to the refrigerator for at least 30 minutes before serving to allow it to set completely.
- Serve your classic appetizer recipe cold with your favorite crackers, pretzels, or fresh vegetable sticks.
Tips for Shaping and Coating Your Cheese Ball Recipe
When you take the cheese out after that first hour of chilling, it should be firm enough to handle without getting too smushy. If your kitchen is unusually warm, or if you’re using softer cheeses as a variation, use slightly drier hands—a quick rinse and dry helps! If you start rolling and it feels like it’s melting onto you, just pop the partially formed ball back into the fridge for 15 minutes. No need to start over!
As you roll it in the pecans, try to keep the pressure even so your final **cheese ball recipe** looks beautiful as an appetizer centerpiece. Don’t be shy with the nuts; you want a thick, delicious crust!
Make Ahead Appetizers: Preparing Your Cheese Ball Recipe in Advance
This is where this classic really shines for us busy folks! If you’re planning a big party or just hate morning-of scrambling, you’ll be so thrilled to know this **cheese ball recipe** is one of the best **make ahead appetizers** out there. You can mix up the entire cheese base—before you roll it in the nuts—up to two full days in advance. Seriously! Just mix everything together, cover the bowl tightly with plastic wrap, and tuck it into the back of the fridge.
When you’re ready to serve—maybe it’s an hour before guests arrive—you just take it out, shape it into that perfect ball, and roll it in your pecans. If it’s been in the fridge for more than 24 hours, give it five minutes on the counter to soften just a tiny bit before you try shaping it, okay? That helps everything blend perfectly again.
For the absolute best results, you can even roll and coat the ball completely, then wrap that finished ball *very* tightly in plastic wrap one day ahead. This helps keep the coating fresh. If you want to learn some other great tricks for saving time in the kitchen, check out my tips for making easy freezer jam—it’s all about smart prep!
Ingredient Notes and Simple Party Food Ideas Substitutions
One of the best things about having a solid foundation like this one is how adaptable it is! I use the sharp cheddar base because I love that savory hit, but this is your kitchen, so make it yours! If you’re looking for different **party food ideas** or just need to swap something out because you ran out of cheddar, I have a few things I’ve tested over the years that work beautifully.
If you want to move away from the classic cheddar flavor profile, I highly recommend swapping half of that sharp cheddar for a Monterey Jack cheese. It melts beautifully into the cream cheese base and makes the texture even silkier! Or, if you’re looking for something with a little more punch, smoked Gouda is heavenly here. It gives the whole thing a gorgeous, slightly grown-up flavor profile.
Now, let’s talk seasoning variations because this is where you can really get creative. My notes mention adding dry ranch seasoning—and seriously, do it if you’re a ranch fan! Just toss 1 tablespoon of dry ranch mix right in with the garlic and onion powders. It turns this into a totally different, but equally addictive, **simple party dip**.
If you want to keep things interesting for your next holiday spread, consider mixing in finely chopped olives or sun-dried tomatoes instead of the optional bacon. Or, for a fun pop of color without changing the flavor too much, try thinly sliced chives!
Speaking of great swaps, if you ever need a fantastic side dish, my easy broccoli cheddar casserole recipe uses a similar sharp cheese base and is always a potluck hit!
Serving Suggestions for Your Cheddar Cheese Ball Recipe
We put all this effort into making the perfect, sturdy **Cheddar cheese ball recipe**, so we need to make sure we serve it up right! Honestly, presentation matters when you talk about appetizers for a party. It’s the centerpiece sitting there, beckoning everyone over before the main meal even starts. Serving it cold prevents any melty messes, which is exactly what we want for a perfect finger food experience.
Your coating of pecans just screams for something crunchy on the side. I always put out a huge basket filled with different textures. Get a mix of hearty crackers—the sturdy wheat kinds that won’t break when you try to scoop up that thick cheese.
But please, don’t forget the veggies! They add necessary freshness and balance out all that rich cheese. I usually slice up some crisp celery sticks and perhaps some colorful bell pepper strips. For something a little different, try serving those sturdy bagel chips or even some pretzel crisps. They hold up beautifully against the cheese and give you that classic salty-savory element.
If you need something bread-related to go with a dip, I whip up my easy skillet cornbread for potlucks, but for the cheese ball, stick to crackers and fresh crunch. It lets that cheesy flavor really be the star!
Frequently Asked Questions About This Cheese Ball Recipe
Okay, I know you might still have a few lingering thoughts floating around. That’s totally normal when you are relying on a tried-and-true recipe like this one! Most of the questions I get revolve around making it ahead or swapping out ingredients, which just proves how versatile this **cheese ball recipe** is.
Can I use different nuts besides pecans or walnuts?
Absolutely! Pecans are my first choice because they have a great buttery flavor that pairs well with the cheddar, but feel free to use what you have on hand. Almonds work great, just make sure they are finely chopped so they stick well to the ball. If you want to skip nuts entirely because of allergies, you can roll the ball in dried herb mixes, bacon bits if you didn’t mix them in, or even some crushed crispy fried onions for an awesome savory crust. It’s all about making this your perfect **easy cheese ball recipe**!
How long does this cheese ball actually last in the fridge?
This is why I love this as a **make ahead appetizer**! If you have leftovers (which I doubt will happen at a good party, ha!), a fully shaped and coated cheese ball wrapped tightly in plastic wrap will keep wonderfully in the refrigerator for about 5 to 7 days. After about a week, the texture starts to get a little firm, but it’s still edible. If you are worried about it drying out, skip the coating until right before you serve it, as I mentioned above.
Is this the same as a classic holiday cheese spread?
Oh yes, this *is* the classic! When people talk about a **holiday cheese spread**, nine times out of ten, they are picturing this exact combination of cream cheese and sharp cheddar, often coated in nuts. It’s the quintessential American holiday **finger food recipe for parties**, and it’s always reliable. If you are looking for inspiration for other holiday nibbles, check out my recipe for easy no-bake ice cream pie for a refreshing dessert option later!
Can I freeze this cheese ball recipe?
I generally advise against freezing the *finished* ball, especially after you’ve rolled it in the nuts. The thawing process can sometimes make the texture a little less smooth, and the nuts might get soft. However, you can absolutely freeze the plain cheese base before coating it! Mix the cheese base, wrap it tightly in plastic wrap, put it in a freezer-safe bag, and freeze it for up to two months. When you want to serve it, thaw it overnight in the fridge, then bring it out just long enough to shape and roll in the coating. For more great make-ahead tips, I always direct people toward the excellent advice from Spend With Pennies’ guide on classic applications!
Storing and Reheating Your Simple Party Dips
Since this is a **simple party dip** that relies on that lovely chilled structure, our main focus for storage is preservation—we want to keep that firmness until party time!
If you have leftovers after the party, or if you’re making it way ahead of time, refrigeration is your best friend. You have two options depending on how far out you’re preparing. If you are only storing it for a day or two, go ahead and roll it in those gorgeous pecans or walnuts first, then wrap that entire ball as tightly as you possibly can in plastic wrap. I usually go plastic wrap first, then sometimes a layer of foil, just to keep any fridge smells out. It’s going to stay perfect in the cold for almost a week.
Now, about reheating—you don’t really reheat a cheese ball! It’s meant to be served chilled or maybe just slightly cooler than room temperature, never warm, or you’ll have a puddle of cheese spread instead of a centerpiece. If you made it completely ahead of time and it feels rock hard after a couple of days in the fridge, just plan ahead. Take the wrapped ball out about 30 to 45 minutes before you plan to serve it. That little bit of sitting time on the counter lets the cream cheese soften just enough to be easily spreadable without losing its shape.
This gentle warming technique works perfectly for bringing out the best flavor without sacrificing the structure. If you are interested in another no-bake favorite that *does* need to come to room temperature before digging in, my easy pumpkin fluff is the perfect follow-up!
Share Your Cheese Ball Recipe Success
Well, that’s my tried-and-true method for making sure your next gathering features the best appetizer on the table. Now it’s your turn to get that cheese ball mixed up and ready for its close-up!
I honestly want to know how it goes! Did you stick to the classic pecans, or did you try something wild for your coating? Maybe you added that bacon mix-in after all? Let me know your tricks!
Please leave a star rating for this **cheese ball recipe** right down below in the comments section. Your honest feedback helps other home cooks feel confident trying it out. Knowing that you had success makes my day!
And hey, if you snapped a photo of your finished cheese ball centerpiece looking gorgeous on your party spread, tag us on social media! I always love seeing how you bring these simple recipes to life in your own kitchens. If you need to reach out with a specific question that the FAQ didn’t cover, you can always send me a note over on the Rosa’s Tasty Kitchen contact page. Happy snacking, friends!
PrintThe Best Classic Cheese Ball Recipe for Parties
Make this easy cheese ball recipe with cream cheese and cheddar. It is a classic appetizer perfect for holidays, game days, or any gathering. This no bake appetizer comes together quickly.
- Prep Time: 15 min
- Cook Time: 0 min
- Total Time: 1 hour 15 min
- Yield: 12 servings 1x
- Category: Appetizer
- Method: No Bake
- Cuisine: American
- Diet: Vegetarian
Ingredients
- 8 ounces cream cheese, softened
- 8 ounces sharp cheddar cheese, shredded
- 1/4 cup finely chopped green onion (scallions)
- 1 teaspoon Worcestershire sauce
- 1/2 teaspoon garlic powder
- 1/4 teaspoon onion powder
- 1/4 teaspoon salt
- 1/4 teaspoon black pepper
- 1 cup finely chopped pecans or walnuts (for coating)
- Optional: 4 ounces crumbled cooked bacon (for mixing in)
Instructions
- In a medium bowl, combine the softened cream cheese, shredded cheddar cheese, green onion, Worcestershire sauce, garlic powder, onion powder, salt, and pepper. If using, mix in the crumbled bacon until everything is evenly combined.
- Cover the bowl and chill the cheese mixture in the refrigerator for at least 1 hour. Chilling helps the mixture firm up, making it easier to shape.
- Spread the chopped pecans or walnuts onto a shallow plate or piece of parchment paper.
- Remove the chilled cheese mixture from the refrigerator. Shape the mixture into a ball using your hands or a rubber spatula.
- Roll the cheese ball in the chopped nuts until it is completely coated. Press gently so the nuts adhere well.
- Return the finished cheese ball to the refrigerator for at least 30 minutes before serving to allow it to set completely.
- Serve your classic appetizer recipe cold with your favorite crackers, pretzels, or fresh vegetable sticks.
Notes
- You can make this cheese ball up to two days ahead. Keep it tightly wrapped in plastic wrap in the refrigerator until you are ready to serve.
- For a different flavor, substitute half the cheddar cheese with Monterey Jack or smoked Gouda.
- If you want a ranch flavor, add 1 tablespoon of dry ranch seasoning mix to the cheese base.
Nutrition
- Serving Size: 1/12 of ball
- Calories: 180
- Sugar: 1
- Sodium: 250
- Fat: 16
- Saturated Fat: 8
- Unsaturated Fat: 8
- Trans Fat: 0
- Carbohydrates: 2
- Fiber: 0
- Protein: 7
- Cholesterol: 40