
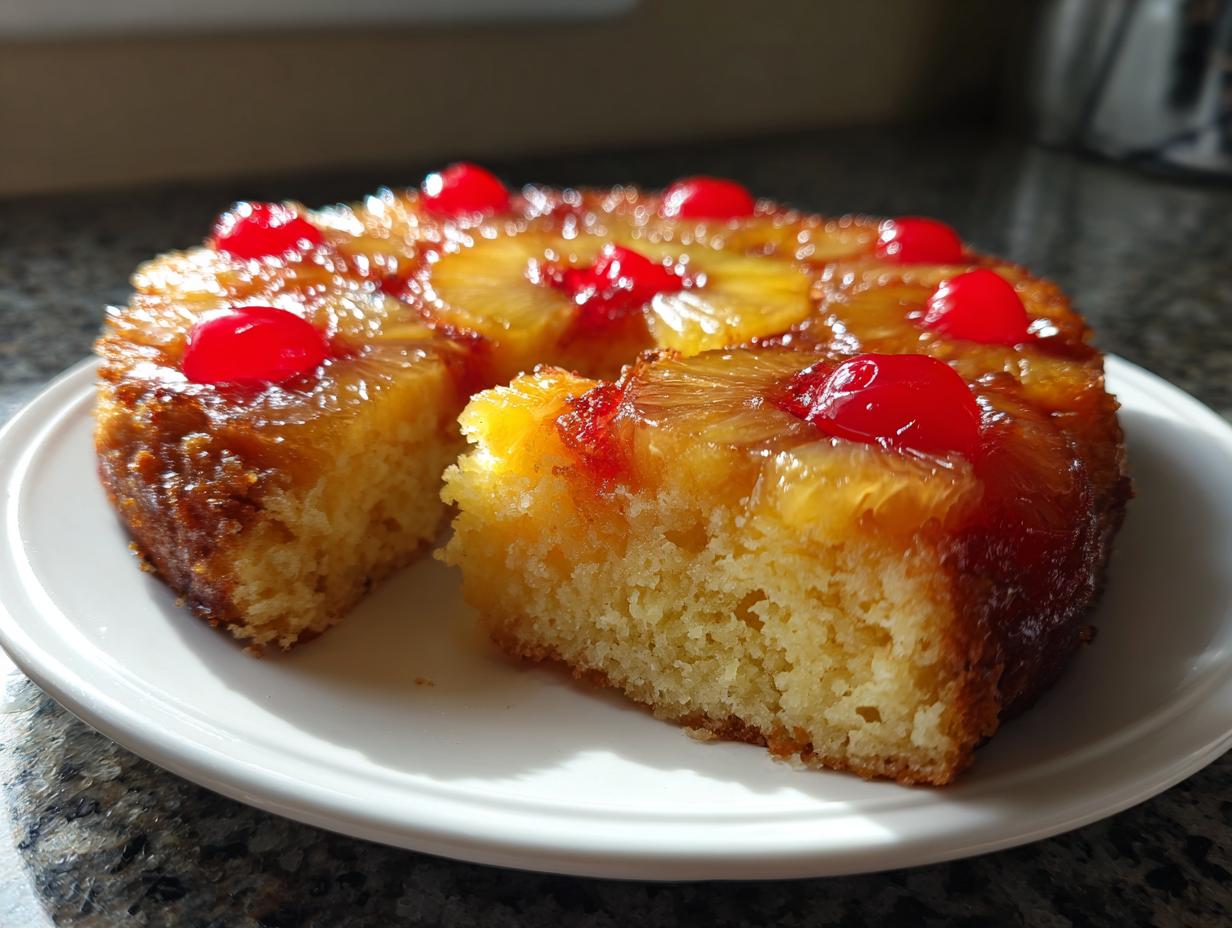
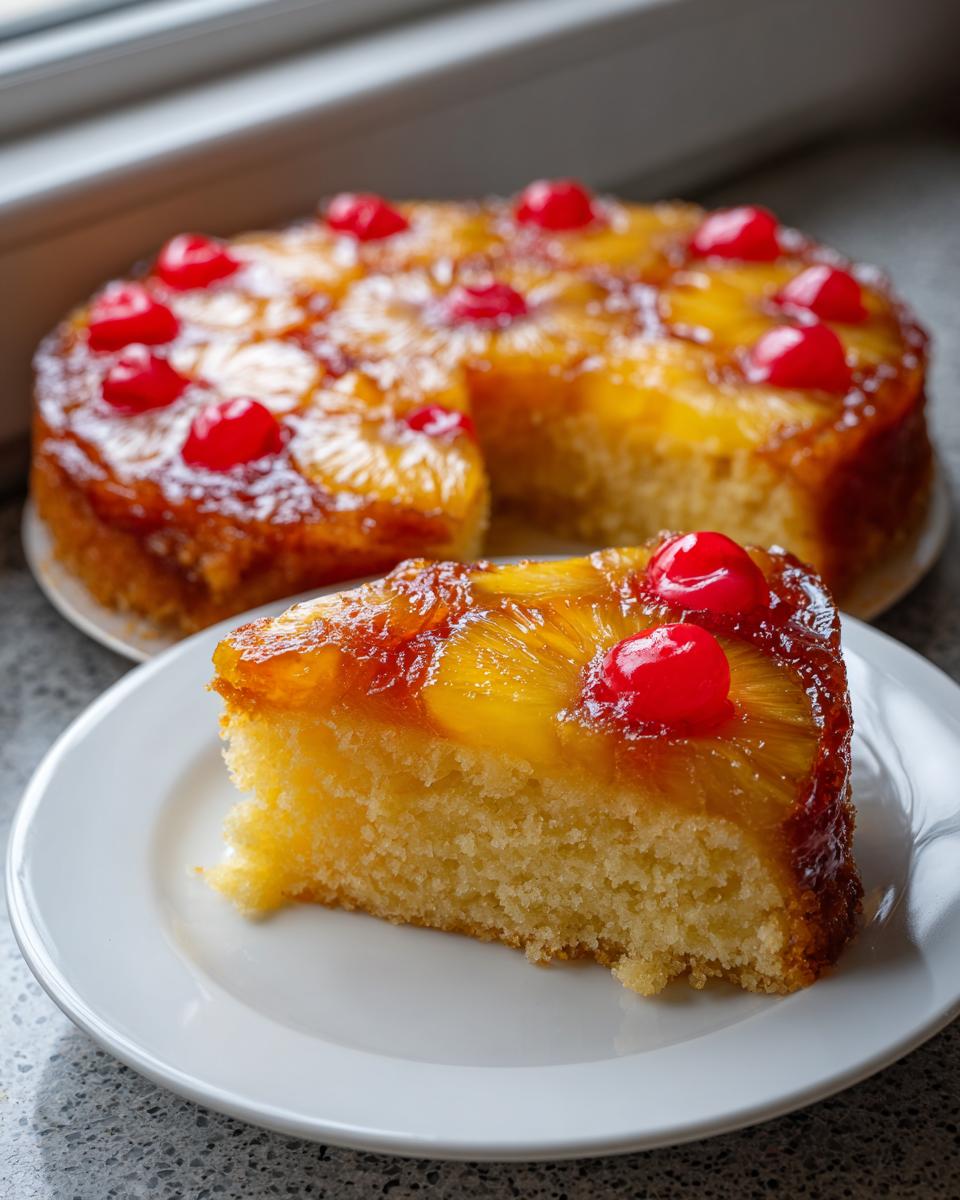
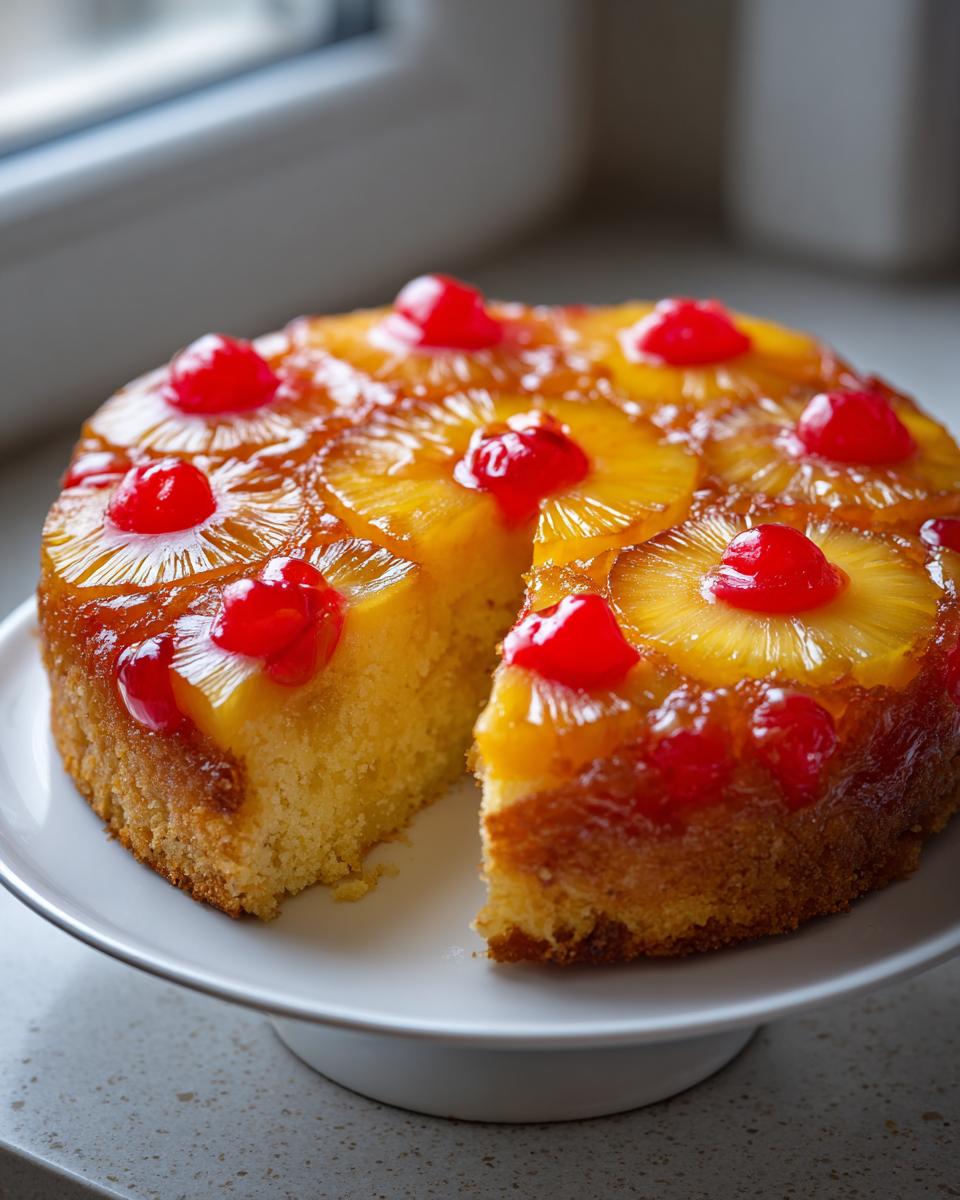
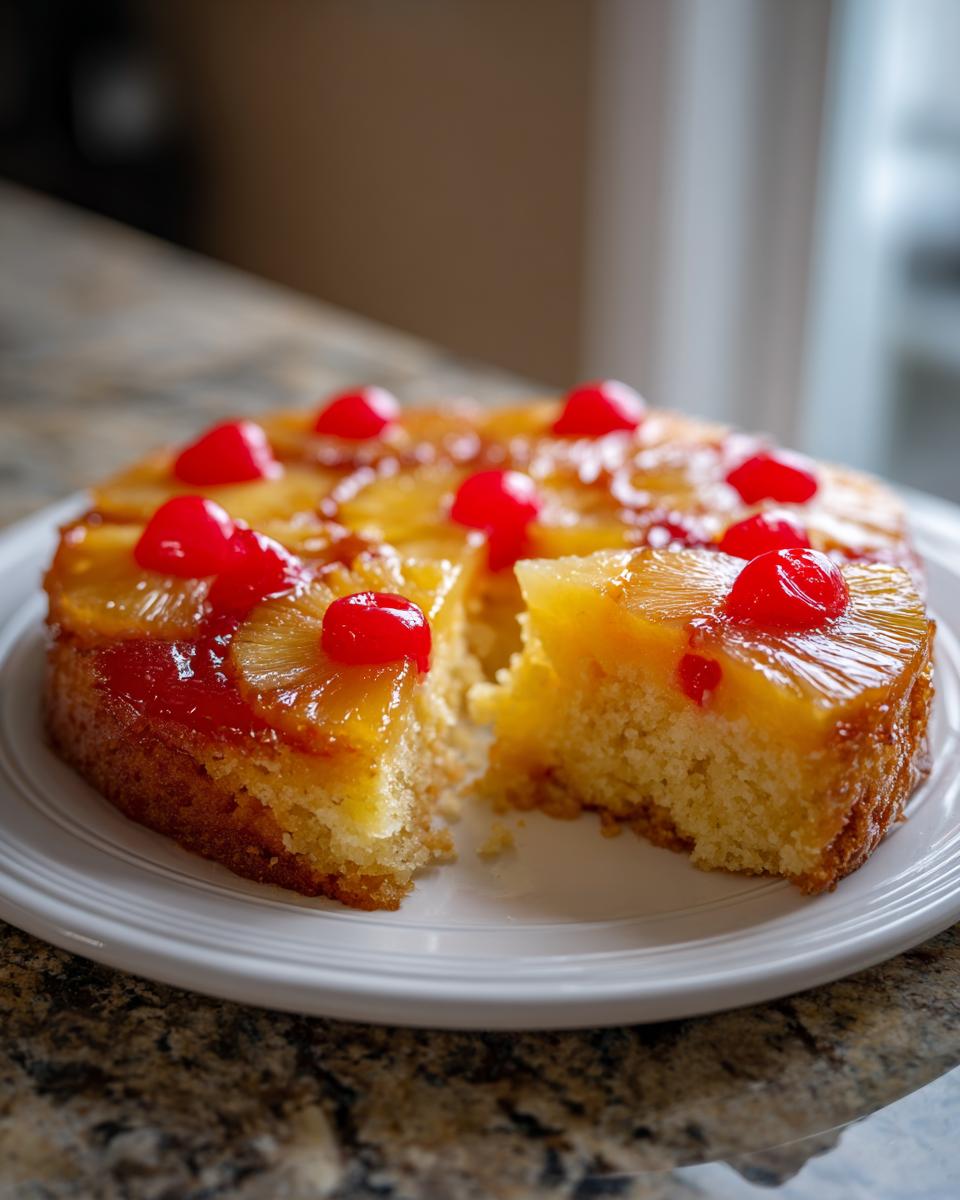
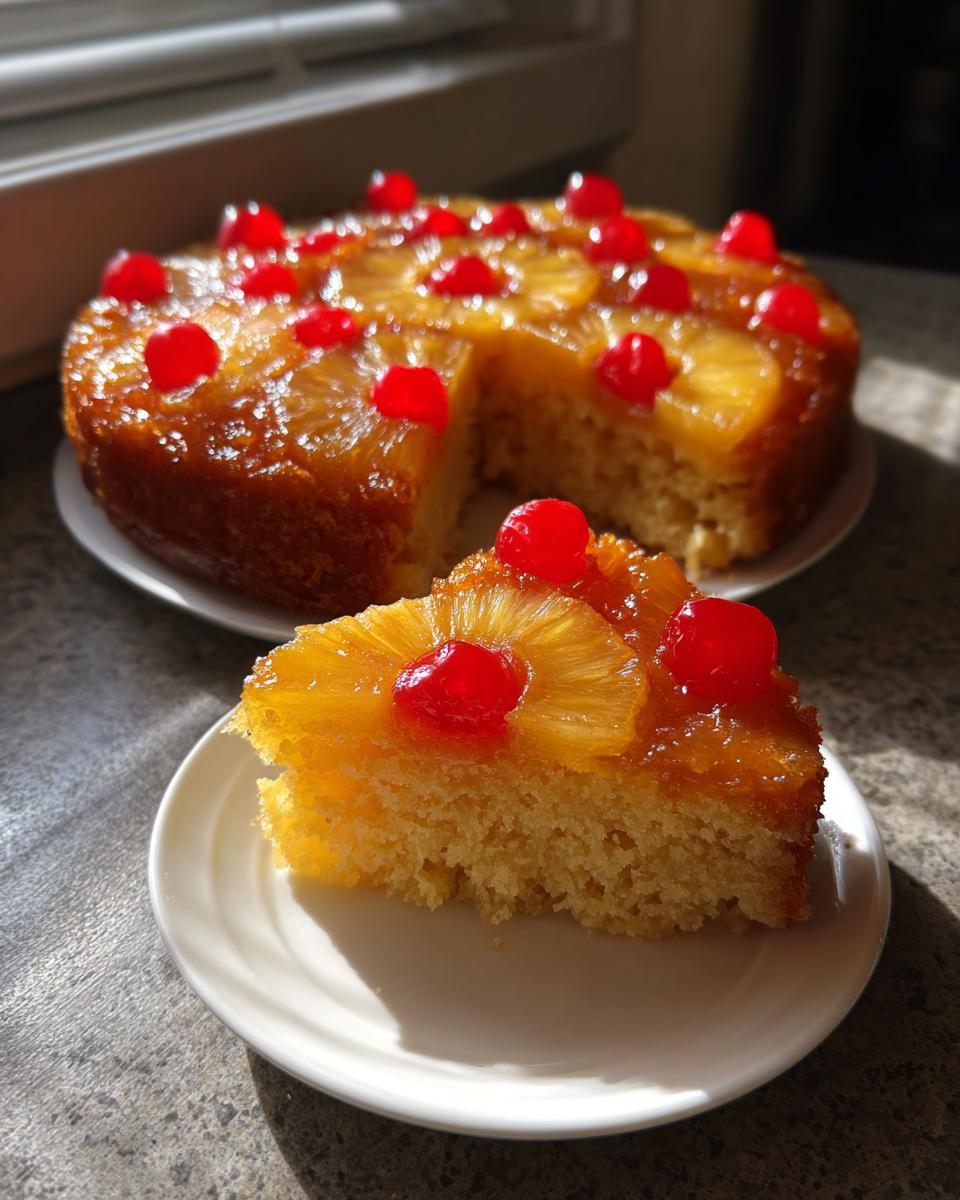
Oh, when that first hint of sweet, caramelized pineapple hits you—that’s the smell of pure vacation magic, isn’t it? Forget dry, sad cakes; I’m here today because I perfected what I firmly believe is the best hawaiian pineapple cake recipe out there. It’s the classic upside-down style, the kind where the topping turns into its own gooey, golden crown, and the cake underneath stays impossibly soft. My late mother-in-law used to bring this to every potluck, and honestly, it always disappeared first. It’s simple enough for a Tuesday night but fancy enough for a celebration. If you’re looking for a genuinely moist pineapple cake recipe that tastes like sunshine, stick with me. We’re not complicating things; we’re just making it right, the way the best desserts should be made. You might also love browsing some of my other favorite moist cakes, like my recipe for moist, fluffy Southern coconut cake!
- Why This Moist Pineapple Cake Recipe Stands Out
- Ingredients for Your Classic Hawaiian Pineapple Cake
- Step-by-Step Instructions for the Best Pineapple Upside Down Cake
- Tips for a Perfect Hawaiian Pineapple Cake Every Time
- Ingredient Notes and Substitutions for This Hawaiian Pineapple Cake Recipe
- Serving Suggestions for Your Tropical Vacation Desserts
- Storage and Reheating Instructions for Leftover Hawaiian Pineapple Cake
- Frequently Asked Questions About Hawaiian Pineapple Cake
- Share Your Amazing Hawaiian Pineapple Cake Results
Why This Moist Pineapple Cake Recipe Stands Out
When you’re rushing around the house, you need recipes you can trust. This isn’t just another cake; it’s built for success! Honestly, my standard for a moist pineapple cake recipe is high, and this one delivers every single time. Here is why I keep coming back to it:
- It’s quick enough to whip up after the kids are in bed.
- That rich, buttery brown sugar topping caramelizes perfectly without burning.
- The cake itself is unbelievably tender and never dry—that’s the pineapple magic at work!
You can find more great baking inspiration in my favorite homemade desserts collection!
Ingredients for Your Classic Hawaiian Pineapple Cake
Okay, let’s talk about what you need! This list looks a little long, but trust me, most of it is for that incredible topping. Remember, we’re making this from scratch pineapple cake, so using the can ingredients correctly is key. Make sure you have a 9-inch round pan ready to go. The biggest thing you have to remember is to drain that can of pineapple slices but please, please save that juice! That little bit of juice is going straight into our batter later, and it’s how we keep this classic moist. It really elevates the flavor profile compared to just using water or milk.
Here is the must-have list right here:
- 1/2 cup unsalted butter, softened (for the topping)
- 3/4 cup packed light brown sugar
- 1 (20 ounce) can pineapple slices in juice, drained (reserved the juice!)
- 10 maraschino cherries, stems removed
- 1 3/4 cups all-purpose flour
- 1 1/2 teaspoons baking powder
- 1/2 teaspoon salt
- 1/2 cup unsalted butter, softened (for the cake batter)
- 1 cup granulated sugar
- 2 large eggs
- 1 teaspoon vanilla extract
- 1/2 cup whole milk
- 1/4 cup reserved pineapple juice
If you’re ever looking for an easy alternative topping, some folks swap out the cherries for a dollop of sweet cherry pie filling, but the cherries really make the presentation pop!
Step-by-Step Instructions for the Best Pineapple Upside Down Cake
Alright, this is where the magic happens! Making the best pineapple upside down cake is all about layering correctly so that beautiful topping sets up just right. Don’t rush the mixing, and definitely don’t forget that crucial 10-minute cool-down before you flip it—that’s the secret to not sticking!
Preparing the Caramelized Pineapple Topping
First thing, get your oven set to 350 degrees Fahrenheit, and grab that 9-inch round pan. You’re going to carefully melt that first 1/2 cup of butter right in the baking dish itself over medium heat. Once it’s melted, pour it out, and then sprinkle that packed brown sugar evenly over the butter. Next, arrange your drained pineapple slices right on top of that sugar/butter layer. I usually put a maraschino cherry right in the hollow center of every single ring. It just looks so festive!
Mixing the Moist Pineapple Cake Batter
Now for the actual cake part! Take your dry stuff—flour, baking powder, and salt—and whisk them together in a bowl just to make sure everything is distributed well. Set that aside. In your main mixing bowl, cream the remaining 1/2 cup of softened butter with the granulated sugar until it’s really light and fluffy. Beat those eggs in one at a time, then stir in the vanilla. This is important: alternate adding the dry ingredients with the milk and that reserved pineapple juice. Always start and end with the dry stuff. Mix only until you stop seeing white streaks! Overmixing makes a tough cake, and we want this moist pineapple cake tender.
Baking and Inverting Your Hawaiian Pineapple Cake
Gently spoon that batter right over your pineapple topping, making sure to cover everything evenly. Pop it in the oven for about 40 to 45 minutes. You know it’s done when a wooden pick comes out clean. Here’s the critical bit: let it cool in the pan for exactly 10 minutes on a wire rack. Set a plate upside down over the pan, hold them tight, and flip! Lift that pan off gently. If a shy piece of fruit sticks, just use a little spatula to tuck it back where it belongs. You can find great tips for quick baking helpers, like my favorite stick-free breadstick recipe, that often work for cakes, too!
Tips for a Perfect Hawaiian Pineapple Cake Every Time
Listen, upside-down cakes can be tricky—we all know the disaster of the flip! If your bottom layer looks a little sticky when you check it early, don’t panic. That brown sugar/butter mixture is supposed to be melted and gooey, but if it seems too liquidy, just let it bake five more minutes, trusting the toothpick test instead of the look. Also, use crushed pineapple at your own risk if you want this structure; slices work best for presentation, but if you use crushed, make sure you really press that batter down firm so there aren’t any air pockets.
For the best presentation as a glazed pineapple dessert, I sometimes use slightly less butter in the bottom layer so the brown sugar thickens up more like a proper syrup when it bakes. If you want a little extra shine, brush the warm cake with a teaspoon of the reserved pineapple juice right after you flip it. It just locks in that tropical moisture. If you like baking with brown butter, check out a recipe I’ve been perfecting—my brown butter chocolate chip cookies are incredible!
Ingredient Notes and Substitutions for This Hawaiian Pineapple Cake Recipe
When you’re making a classic from scratch pineapple cake like this, the temperature of your ingredients truly makes a difference, especially the butter and eggs! I mention softening the butter, but I mean *softened*, not melted mush. If your butter is too soft, your cake won’t have that wonderful air structure we worked so hard to create by creaming! Don’t forget to keep that pineapple juice handy; it keeps the crumb tender.
Now, about the pineapple: slices give you the prettiest look, but if you only have crushed, go ahead and use it! You’ll just need to spoon the batter over it very gently, maybe even use a knife to swirl it a bit so it doesn’t all sink to the bottom. If you want a quick glazed pineapple dessert instead of just serving it warm, you can mix one cup of powdered sugar with about two tablespoons of the reserved juice until it’s drippy. It’s an easy finish, but this cake is perfect naked too! For a savory twist in the future, you might try my easy creamy horseradish sauce recipe, which works wonders on roast meats!
Serving Suggestions for Your Tropical Vacation Desserts
Honestly, this decadent pineapple cake is fantastic all by itself, warm from the pan! But if you’re serving it up as one of your show-stopping tropical vacation desserts after a big dinner, I highly recommend keeping the sides simple so that caramelized pineapple remains the star.
A big dollop of fresh, unsweetened whipped cream cuts through the richness just perfectly. Alternatively, a scoop of good quality vanilla bean ice cream melts right into those warm cake crevices. If you need a lighter refresher earlier in the day, you absolutely must try my watermelon smoothie recipe!
Storage and Reheating Instructions for Leftover Hawaiian Pineapple Cake
One thing I love about this cake is that it tastes even better the next day! If you have any of this Hawaiian pineapple cake recipe left, keep it covered tightly right on the counter for up to two days. Don’t worry about the fridge unless your kitchen is super warm. If you do refrigerate it, just give it a quick 10 seconds in the microwave before serving; it brings the moisture right back out. This cake is pretty sturdy, just like my easy no-bake bourbon balls, so leftovers are never a problem!
Frequently Asked Questions About Hawaiian Pineapple Cake
I always get so many questions after I post this recipe! It’s normal when you start messing with fruit layers. People want to know how to adapt it for different needs or pan sizes, and I’m happy to share what I’ve learned from my years of baking. Trying to solve dinner dilemmas after school is tough, but dessert shouldn’t be! If you need quick ideas for the main course first, check out my weeknight dinner ideas or my super reliable easy chicken and green beans dinner.
Can I use crushed pineapple instead of slices in this hawaiian pineapple cake recipe?
Yes, you absolutely can, but you lose that beautiful presentation of the rings! If you use crushed pineapple, skip the part where you carefully arrange the slices in the pan. You’ll melt the butter and brown sugar as usual, then just spoon the crushed pineapple (drained!) right over that layer and press it down gently. It will mix more into the cake batter when you pour it over, making the whole cake taste intensely pineapple-y, which isn’t bad at all! Just make sure you don’t stir it into the batter itself.
What is the best way to make a coconut cream frosting for pineapple cake?
Oh, the coconut addition is divine! If you’re aiming for a rich overlay, skip the simple drizzle I mentioned earlier and whip up a quick coconut cream frosting for pineapple cake. Beat 4 ounces of softened cream cheese with 1/2 cup of softened butter until creamy. Then, slowly beat in 2 cups of powdered sugar and about 1/4 cup of cream of coconut (the thick kind, not coconut milk) until it’s light and fluffy. It takes about five minutes and pairs perfectly with the tropical flavors!
Share Your Amazing Hawaiian Pineapple Cake Results
I genuinely hope this recipe brings that little bit of sunshine into your kitchen! Now that you’ve tried this Hawaiian pineapple cake recipe, I would absolutely love to hear what you thought. Did the flip go well? Was the brown sugar topping perfectly gooey? Don’t be shy! Head down to the comments below, leave a star rating so others know you loved it, and if you took a picture of your beautiful creation, please tag me! If you have any last-minute questions, you can always reach out through my contact page!
PrintClassic Hawaiian Upside-Down Pineapple Cake
Bake this moist Hawaiian pineapple cake featuring caramelized pineapple rings and a simple brown sugar glaze. This recipe delivers tropical flavor easily.
- Prep Time: 20 min
- Cook Time: 45 min
- Total Time: 65 min
- Yield: 8 servings 1x
- Category: Dessert
- Method: Baking
- Cuisine: American
- Diet: Vegetarian
Ingredients
- 1/2 cup unsalted butter, softened
- 3/4 cup packed light brown sugar
- 1 (20 ounce) can pineapple slices in juice, drained (reserve juice)
- 10 maraschino cherries, stems removed
- 1 3/4 cups all-purpose flour
- 1 1/2 teaspoons baking powder
- 1/2 teaspoon salt
- 1/2 cup unsalted butter, softened
- 1 cup granulated sugar
- 2 large eggs
- 1 teaspoon vanilla extract
- 1/2 cup whole milk
- 1/4 cup reserved pineapple juice
Instructions
- Preheat your oven to 350 degrees Fahrenheit. You will need a 9-inch round cake pan.
- Melt 1/2 cup butter in a small saucepan over medium heat. Pour the melted butter into the bottom of the prepared cake pan.
- Sprinkle the 3/4 cup brown sugar evenly over the melted butter.
- Arrange the drained pineapple slices on top of the brown sugar mixture. Place one maraschino cherry in the center of each pineapple ring.
- In a medium bowl, whisk together the flour, baking powder, and salt. Set this dry mixture aside.
- In a large bowl, cream together the remaining 1/2 cup softened butter and 1 cup granulated sugar until light and fluffy.
- Beat in the eggs one at a time, mixing well after each addition. Stir in the vanilla extract.
- Gradually add the dry ingredients to the wet ingredients, alternating with the milk and reserved pineapple juice. Begin and end with the dry ingredients. Mix until just combined; do not overmix.
- Gently spoon the cake batter over the pineapple and cherries in the pan, spreading it evenly.
- Bake for 40 to 45 minutes, or until a wooden pick inserted into the center comes out clean.
- Let the cake cool in the pan on a wire rack for 10 minutes.
- Place a serving plate upside down over the cake pan. Carefully invert the pan and plate together. Lift the pan off the cake. If any topping sticks, gently place it back onto the cake.
- Serve warm or at room temperature.
Notes
- For an extra moist pineapple cake, ensure your milk and juice are at room temperature before mixing the batter.
- If you prefer a thicker glaze, mix 1 cup powdered sugar with 2 tablespoons of the reserved pineapple juice until smooth, and drizzle over the warm cake.
- This recipe works well using a 10-inch cast iron skillet for baking, which helps create a nice crust on the bottom.
Nutrition
- Serving Size: 1 slice
- Calories: 350
- Sugar: 35
- Sodium: 210
- Fat: 17
- Saturated Fat: 10
- Unsaturated Fat: 7
- Trans Fat: 0
- Carbohydrates: 48
- Fiber: 1
- Protein: 4
- Cholesterol: 75