
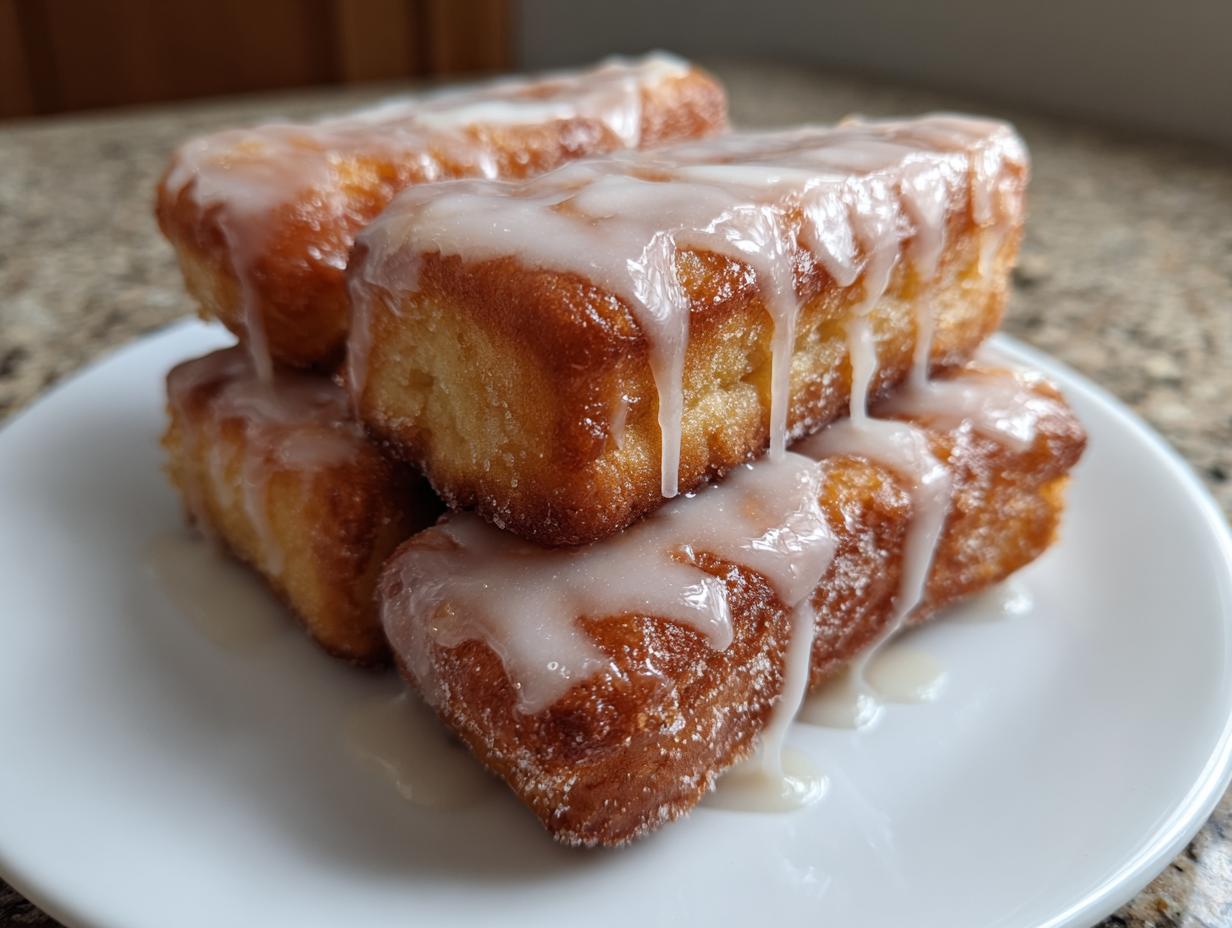
If you’re anything like me, weekends just aren’t complete without a truly decadent breakfast pastry. Forget those dry, store-bought versions; we’re talking about those towering, pillowy squares you usually only find at the very best bakeries. Well, get ready to ditch the drive, because I’m handing you my absolute best maple bar recipe! This version focuses on a soft, yeasted dough—think fluffy, soft raised donuts—paired with a glaze made from the richest, purest maple syrup you can find. As a former teacher who spent years juggling family life, I’ve taken this classic treat and perfected it to be reliable, just like all the recipes here at Rosa’s Tasty Kitchen. If you’re looking for more inspiration, check out my list of easy breakfast recipes! Trust me, these maple bars are worth the little bit of time required.
- Why This is the Best Maple Bar Recipe (Experience & Trust)
- Gathering Ingredients for From Scratch Maple Bars
- Step-by-Step Instructions for Homemade Maple Bars Recipe
- Mastering the Rich Maple Glaze for Your Maple Bars
- Tips for Success with This Classic Glazed Donuts Recipe
- Variations: Easy Baked Maple Bars Alternative
- Storing and Reheating Your Weekend Breakfast Pastries
- Frequently Asked Questions About Maple Bars
- Share Your Experience Making These Maple Bars
Why This is the Best Maple Bar Recipe (Experience & Trust)
I promise you, once you taste these, you won’t go back to the greasy cardboard versions! What sets this homemade maple bars recipe apart from everything else out there is the texture. We aren’t cutting corners or using cake mixes here; we’re doing it the traditional way to get that melt-in-your-mouth quality.
Achieving Soft Raised Donuts Texture
Getting that perfect, high rise means respecting the yeast. This dough process is very similar to making classic yeasted sweet rolls. After years of teaching and baking for my own hungry kids, I nailed the proofing times so you get that light, airy interior that just begs to be dunked in coffee. It takes patience, but Rosa’s method guarantees you won’t end up with flat discs!
The Secret to Authentic Maple Glaze
Flavor is king, and imitation syrup simply won’t cut it. I always insist on Grade A Dark or Very Dark pure maple syrup. That deep, earthy sweetness is crucial for the glaze. Knowing exactly how to make maple glaze correctly—balancing that rich syrup with powdered sugar—separates an okay pastry from something truly special.
Gathering Ingredients for From Scratch Maple Bars
Alright, let’s talk supplies! Because we are aiming for the best, we need quality ingredients, especially for our maple bars. Don’t skimp on the syrup; it truly makes the difference in the final flavor profile. Seriously, it’s worth heading to the store specifically for the good stuff before you start!
For the dough, you’ll use simple pantry staples: yeast, milk (make sure it’s warm, not hot!), eggs, butter, flour, sugar, and salt. Don’t forget we need vegetable oil for frying, or if you’re feeling adventurous, you can check out my thoughts on other coating fats.
But the real star, of course, is that pure maple syrup for the glaze. We’ll need about a cup of dark, robust syrup to coat all these fantastic treats.
Step-by-Step Instructions for Homemade Maple Bars Recipe
Now for the fun part! Making these maple bars from scratch is so satisfying, and honestly, it requires just a little bit of patience during the rising steps. Don’t let the yeast intimidate you; it’s the secret to that amazing, light texture. You’ll want to start this when you have about two and a half hours free, maybe on a slow Saturday morning? If you’re looking for other quick dough projects, you might enjoy checking out my easy breadsticks recipe while this yeast is working!
Preparing and Rising the Yeasted Dough
First things first: wake up that yeast! Combine your warm milk—it has to be between 105 and 115°F, which is just warm enough to feel comfortable on your wrist—with 1 teaspoon of sugar and the yeast. Give it five minutes to get foamy; if it doesn’t foam, your milk was too hot or too cold, and you’ll need to start over. Once it’s bubbly, mix in the remaining 1/4 cup of sugar, eggs, and melted butter. In another bowl, whisk your flour and salt. Add the dry stuff slowly to the wet mixture until it gets shaggy. Then, turn it out onto the counter and knead until it’s smooth and elastic, about 6 to 8 minutes, until you have a dough that feels wonderful under your hands. Pop it in an oiled bowl, cover it up, and let it double in size. This first rise takes about 1 to 1 1/2 hours in a warm spot.
Shaping and Second Proofing of Maple Bars
Once doubled, gently punch that air out! Dust your counter lightly, and roll the dough out until it’s exactly 1/2 inch thick. Now, use a sharp knife or a pizza cutter—I find pizza cutters work best for clean edges—to slice them into rectangular bars, roughly 4 inches by 2 inches. Place these sweet little shapes onto a sheet lined with parchment paper, leaving space between them, and cover them loosely for their second rise. This puffing time is important, taking about 30 to 45 minutes, but it ensures you get that light, airy interior that makes these soft raised donuts so famous.
Frying to Achieve Bakery Style Maple Squares
Time to heat the oil! Pour about 2 inches of vegetable oil into a deep, heavy pot or Dutch oven. Bring that oil up to exactly 350°F. You really need a thermometer for this step, trust me! Carefully drop your puffy bars in, working in small batches so you don’t crowd the pot. Fry them for just 1 to 2 minutes per side until they are a perfect golden brown—we want that classic bakery style maple squares look. Pull them out with a slotted spoon and place them on a wire rack set over paper towels to drain excess oil thoroughly before you go anywhere near that glaze.
Mastering the Rich Maple Glaze for Your Maple Bars
Okay, you’ve got the perfect fried dough, but the glaze is what seals the deal! This is where we focus on how to make maple glaze that actually tastes like maple and sets nicely. While the maple bars are still warm (not piping hot, mind you—just warm!), we glaze them. This helps the glaze melt just enough to stick beautifully.
In my bowl, I whisk together that gorgeous, dark pure maple syrup with the powdered sugar and a splash of heavy cream. Mix gently until it’s completely smooth. If you see any lumps, keep stirring! If it seems way too thick—like peanut butter—add cream a teaspoon at a time until it pours easily off your whisk. Too thin? Just whisk in a little more powdered sugar until it coats the back of a spoon. Drizzle it generously, and watch the magic happen as it sets into that perfect, sticky layer!
Tips for Success with This Classic Glazed Donuts Recipe
I’ve learned a few things over the years making these maple bars, and I want to save you from the classic pitfalls! The biggest mistake people make with any doughnut recipe with maple syrup is rushing the yeast. If your dough seems flat after the first hour, don’t just move on—it needs more time! Yeast is sensitive to temperature, so make sure your kitchen isn’t drafty. Under-proofed dough leads directly to those sad, dense spots in your otherwise beautiful classic glazed donuts.
Also, drain them properly! If you leave those freshly fried beauties sitting in a puddle of oil, the glaze won’t set right and they’ll taste heavy. After draining them on paper towels, I like to move them briefly to a wire rack before glazing. It really helps wick away any last bit of oil. If you’re looking for more quick morning ideas, you can always pop over and see my list of easy breakfast recipes!
Choosing the Best Uses for Pure Maple Syrup
Remember I said dark syrup is best? Let me elaborate! Lighter, Grade A Golden syrups are great for drizzling on pancakes, sure, but they lack the caramelized depth we need for these bars. You want the Grade A Dark or Very Dark syrups (sometimes called Robust Flavor). These syrups have been concentrated longer, which means they pack a massive maple punch that really shines through the powdered sugar. Using anything else in your glaze recipe just washes out that authentic, earthy sweetness we are trying so hard to achieve.
Variations: Easy Baked Maple Bars Alternative
Look, I totally get it—sometimes you want the flavor of homemade maple bars but you just aren’t feeling the whole deep-frying situation. I know I don’t always have time to manage hot oil, especially on a Tuesday morning!
If you’re looking for easy baked maple bars, the dough recipe is exactly the same, thankfully. You just skip the frying steps entirely. After the second rise, instead of dropping them into oil, just place them on your parchment-lined sheets and bake them at 375°F (190°C) for about 12 to 15 minutes. They won’t puff up quite as dramatically as the fried ones, but they will still be delicious and ready for that amazing glaze!
Storing and Reheating Your Weekend Breakfast Pastries
These maple bars are best eaten the day you make them, naturally! But if you have leftovers from your weekend breakfast pastries haul, you need to treat them right so they stay soft. Store them in a completely airtight container at room temperature—never the fridge, that dries them out fast. They’ll stay wonderfully soft for up to two days, max.
If you try to reheat them, be careful with the glaze! A quick 10 seconds in the microwave might soften the dough, but the glaze can get super sticky or melt right off. For next time, I suggest trying my weeknight dinner ideas if you need something less fussy!
Frequently Asked Questions About Maple Bars
I always get questions about making sure these maple bars turn out exactly like the bakery ones. Don’t feel silly asking! We’ve all been there when a yeasted recipe doesn’t cooperate. Here are the ones I hear most often when readers try this from scratch maple bar recipe for the first time.
Can I use instant yeast instead of active dry yeast?
Yes, you absolutely can! Instant yeast is great because you don’t have to proof it separately with warm milk and sugar. For this recipe, if you substitute instant yeast, just whisk it directly into your dry ingredients (flour and salt) first. You can skip Step 1 entirely. However, your first rise might be a little faster, so watch it closely!
Why are my maple bars flat and dense?
This is almost always one of two things, my friends. First, your yeast was dead, meaning the milk wasn’t the right temperature—too hot kills it, too cold makes it sluggish. Second, you skipped or rushed the second rise. Those puffy little rectangles need that second puff time to develop the air pockets that create a soft raised donut texture. Don’t cut that 30 to 45 minutes short!
Can I make this a cake-style version without yeast?
While I love a good cake, if you want true, authentic bakery style maple squares, you really need the yeast for that signature chewy, raised dough. If you are in a real pinch, you could try using a biscuit dough recipe, but it won’t have the same light structure as these yeasted rolls. For the best results, stick to the dough I laid out!
How do you store the bars to keep the glaze from getting too sticky?
Honestly, the glaze needs a little air to set correctly. If you seal them up too tightly right away, the moisture trapped inside keeps the glaze soft and tacky. I let the maple glaze set for at least 30 minutes on the rack before stacking them. After that, store them loosely covered at room temperature. If you want to keep them extra soft for a few days, you can try my storage tips for bread products—it helps!
Share Your Experience Making These Maple Bars
Now that you’ve experienced the joy of making these incredible maple bars from scratch, I want to hear all about it! Did that yeast cooperate? Did your glaze set perfectly? Don’t be shy—drop a rating below and tell me if you had any fun twists of your own. If you snapped a picture of your gorgeous bakery style maple squares, please share them! And if you ever need to reach out with a question, you can always contact me through my contact page. Happy baking!
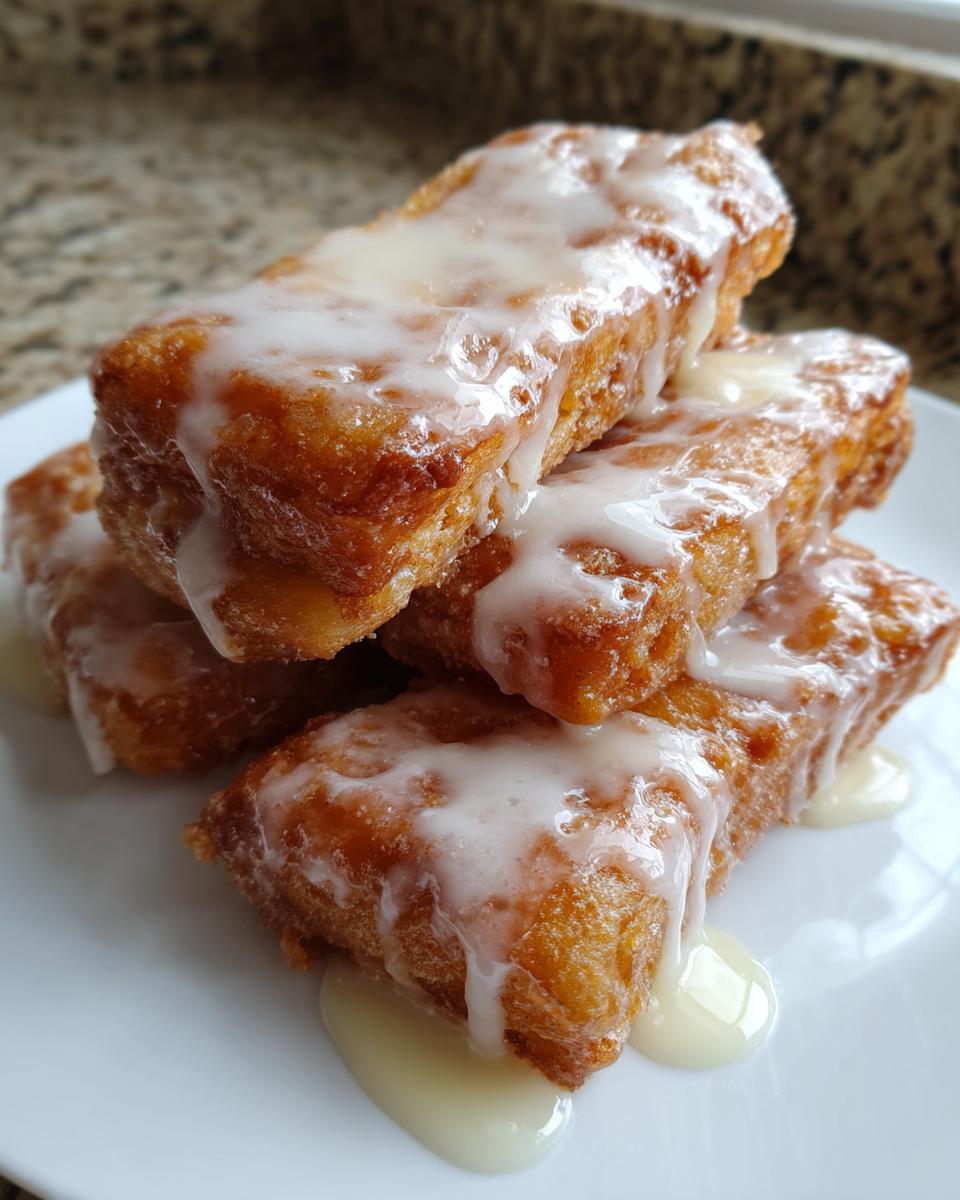
PrintAuthentic Homemade Maple Bars Recipe

Make bakery style maple bars from scratch using a soft, yeasted dough and a rich, pure maple syrup glaze. This is the best maple bar recipe for a weekend breakfast pastry.
- Prep Time: 30 min
- Cook Time: 20 min
- Total Time: 2 hours 50 min
- Yield: 12 servings 1x
- Category: Breakfast Pastry
- Method: Frying
- Cuisine: American
- Diet: Vegetarian
Ingredients
- 1 cup whole milk, warm (105-115°F)
- 2 1/4 teaspoons active dry yeast
- 1/4 cup granulated sugar, plus 1 teaspoon
- 2 large eggs, room temperature
- 1/4 cup unsalted butter, melted
- 3 1/2 cups all-purpose flour, plus more for dusting
- 1/2 teaspoon salt
- Vegetable oil, for frying
- 1 cup pure maple syrup (Grade A Dark or Very Dark)
- 2 cups powdered sugar
- 1/4 cup heavy cream or milk
- 1 teaspoon vanilla extract
Instructions
- Activate the yeast: In a large bowl, combine the warm milk and 1 teaspoon of sugar. Sprinkle the yeast over the top. Let stand for 5 to 10 minutes until foamy.
- Mix the dough: Add the remaining 1/4 cup sugar, eggs, and melted butter to the yeast mixture. Whisk briefly.
- In a separate bowl, whisk together the flour and salt. Gradually add the dry ingredients to the wet ingredients, mixing until a shaggy dough forms.
- Knead the dough: Turn the dough out onto a lightly floured surface. Knead for 6 to 8 minutes until the dough is smooth and elastic.
- First rise: Place the dough in a lightly oiled bowl, turning to coat. Cover the bowl with plastic wrap and let it rise in a warm place for 1 to 1 1/2 hours, or until doubled in size.
- Shape the bars: Gently punch down the dough. On a lightly floured surface, roll the dough out into a rectangle about 1/2 inch thick. Use a sharp knife or pizza cutter to cut the dough into rectangular bars, about 4 inches by 2 inches.
- Second rise: Place the cut bars on parchment-lined baking sheets, leaving space between them. Cover loosely and let rise for 30 to 45 minutes until puffy.
- Fry the bars: Pour 2 inches of vegetable oil into a deep, heavy-bottomed pot or Dutch oven. Heat the oil to 350°F (175°C). Carefully fry the bars in batches, turning once, for about 1 to 2 minutes per side, until golden brown.
- Drain: Remove the fried bars with a slotted spoon and place them on a wire rack set over paper towels to drain excess oil.
- Make the maple glaze: While the bars cool slightly, whisk together the pure maple syrup, powdered sugar, heavy cream, and vanilla extract in a medium bowl until smooth. If the glaze is too thick, add a few more drops of cream.
- Glaze the bars: Dip the tops of the warm maple bars into the glaze, or drizzle generously over them. Let the glaze set before serving.
Notes
- For the best flavor in your maple glaze, use high-quality, dark pure maple syrup. Avoid pancake syrup substitutes.
- If you prefer baked maple bars, you can bake the cut dough at 375°F (190°C) for 12 to 15 minutes until lightly golden, then glaze.
- To keep the bars soft, store them in an airtight container at room temperature for up to two days.
Nutrition
- Serving Size: 1 bar
- Calories: 350
- Sugar: 30
- Sodium: 180
- Fat: 15
- Saturated Fat: 4
- Unsaturated Fat: 11
- Trans Fat: 0
- Carbohydrates: 50
- Fiber: 1
- Protein: 5
- Cholesterol: 55