

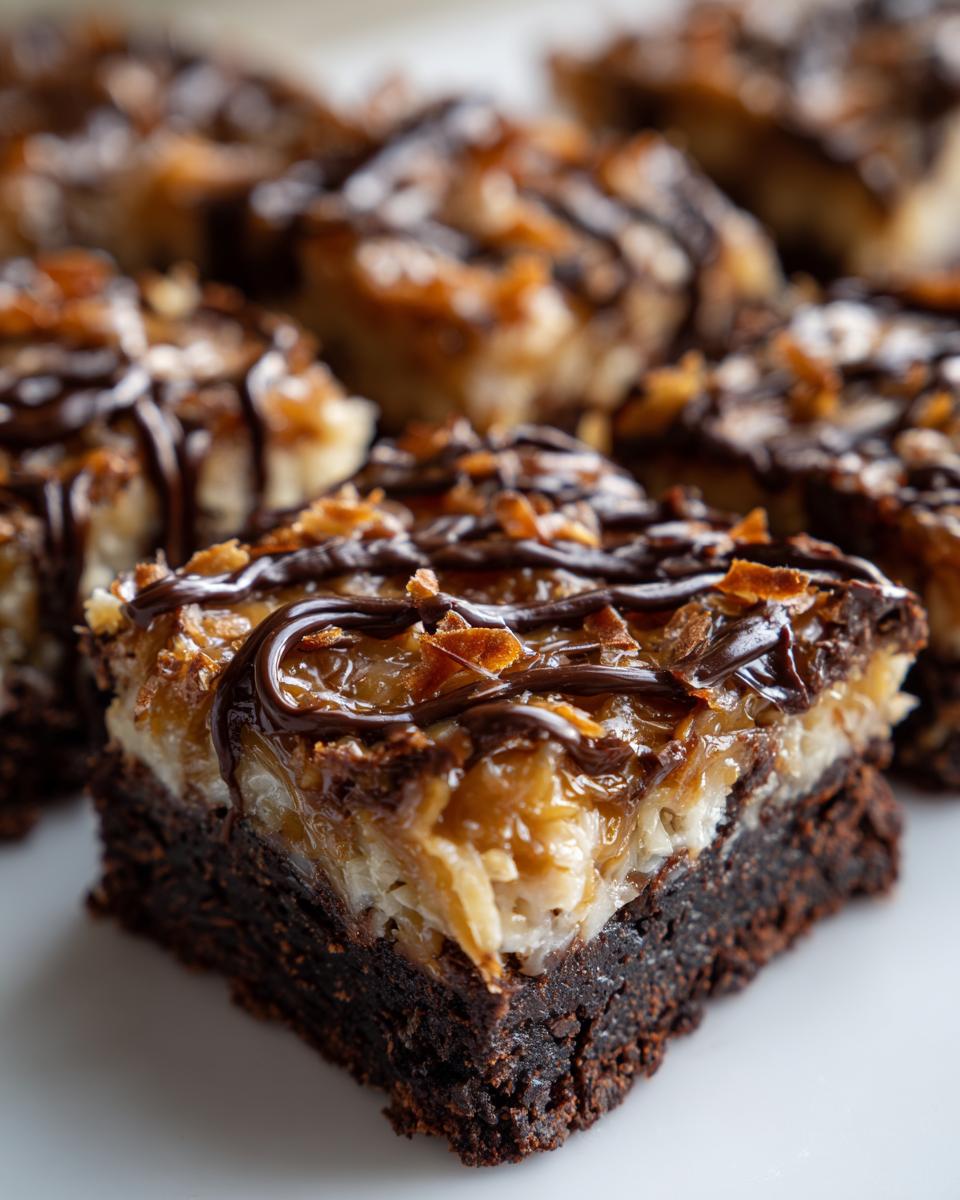
If you’re anything like me, sometimes you just need a dessert that shouts “celebration!” Boring chocolate bars just won’t cut it when you’re looking for that ultimate weekend treat. That’s why I spent months perfecting these Samoa Brownies. Seriously, these are the ultimate Caramel Coconut Brownies you’ll ever make, capturing every bit of that beloved cookie magic right here in a thick, gooey brownie form. Rosa Sterling knows that home baking should always be impressive but never stressful, and this layered recipe is proof! We’re stacking rich, fudgy chocolate with warm coconut and that signature salty-sweet caramel swirl. Trust me, bringing these to any gathering is going to stop people in their tracks.
- Why You Will Love These Samoa Brownies
- Gathering Ingredients for Perfect Samoa Brownies
- Step-by-Step Instructions: How to Make Samoa Brownies
- Tips for Success When Making Your Samoa Brownies
- Ingredient Notes and Substitutions for Caramel Coconut Brownies
- Storage and Reheating Instructions for Samoa Brownies
- Frequently Asked Questions About Samoa Brownies
- Serving Suggestions for Your Gourmet Brownie Ideas
- Nutritional Estimate for Homemade Samoa Cookies Brownie Style
Why You Will Love These Samoa Brownies
When I set out to create these, I wasn’t just making brownies; I was making an event! These aren’t your average afternoon snack, though they’ll certainly disappear fast if you leave them out. They are pure, unadulterated joy in bar form. You need these in your life because they hit every single sweet spot.
- Next-Level Texture: We nail that perfect middle ground—the base is unbelievably fudgy, almost dense, but the toppings stay soft and chewy. It’s a true Decadent Brownies experience, not cakey at all!
- Flavor Overload (In the Best Way): You get the deep, rich chocolate first, immediately followed by that wonderful toasted, nutty coconut flavor. Then, that blanket of gooey caramel ties it all together. It’s complex without being complicated, if that makes sense.
- The ‘Wow’ Factor is Guaranteed: These layered beauties look like they came straight out of a fancy bakery case, but you made them right on your kitchen counter. They are perfect for potlucks or when you just need to impress someone. You can check out some of my other favorite showstoppers here: the best homemade desserts.
- Totally Accessible Layers: While there are three distinct layers—brownie, coconut/caramel, drizzle—none of them require fancy pastry skills. It’s all about patient layering, which is easy even if you’re rushing!
Gathering Ingredients for Perfect Samoa Brownies
Okay, deep breath! Looking at the final product, you might think this requires a trip to a specialty store, but I promise you, every single item here should be sitting in your pantry or easily grabbed during your next regular grocery run. Because we are layering flavors, we have to be specific about what goes where. Getting the foundation right for these Layered Brownies makes everything else almost foolproof. Remember, achieving that deep, rich chocolate flavor relies on quality cocoa powder, so try to use a good unsweetened one if you can!
For the Fudgy Brownie Base
This base is pure, glorious chocolate foundation. No cakey textures here, just dense, rewarding fudginess. Make sure your butter is melted, not just soft, before you start mixing this part up.
- 1 cup (2 sticks) unsalted butter, melted
- 2 cups granulated sugar
- 4 large eggs
- 1 teaspoon vanilla extract
- 3/4 cup unsweetened cocoa powder
- 1 cup all-purpose flour
- 1/2 teaspoon salt
- 1/2 cup semi-sweet chocolate chips
For the Caramel Coconut Topping and Drizzle
This is where the Samoa cookie magic really comes to life! Using sweetened condensed milk is non-negotiable here; it helps the caramel set up nicely without getting too hard. And yes, you can absolutely use your favorite jarred caramel sauce—no shame in that shortcut!
- 1 (14 ounce) can sweetened condensed milk
- 1 1/2 cups sweetened flaked coconut
- 1 cup caramel sauce (store-bought or homemade)
- 1/2 cup semi-sweet chocolate, for drizzling
Step-by-Step Instructions: How to Make Samoa Brownies
Alright, let’s get baking! This recipe moves fast once the brownie batter is mixed, so have your ingredients ready to go. Remember, we need that parchment paper overhang in the 9×13 pan—it’s your built-in handle for lifting these luscious Layered Brownies out later. Don’t skip that step; seriously, it saves so much stress!
Preparing the Brownie Batter and Initial Bake
First things first, crank that oven up to 350 degrees Fahrenheit. Whisk your melted butter and sugar together until they look like best friends, then beat in the eggs one by one until everything is silky smooth. We’re going for that super rich, almost syrup-like texture. Now, mix your cocoa and flour separately, then introduce them to the wet ingredients slowly. Mix until you just can’t see any white streaks left—that’s it! Overmixing is the enemy of a Fudgy Brownie Recipe, so stop stirring once it’s combined. Fold in those chocolate chips and spread that glorious batter into your prepared pan. We’re only baking this once for now, usually 20 to 25 minutes. You want moist crumbs clinging to your toothpick, not wet batter!
Layering the Caramel and Coconut for Authentic Samoa Brownies
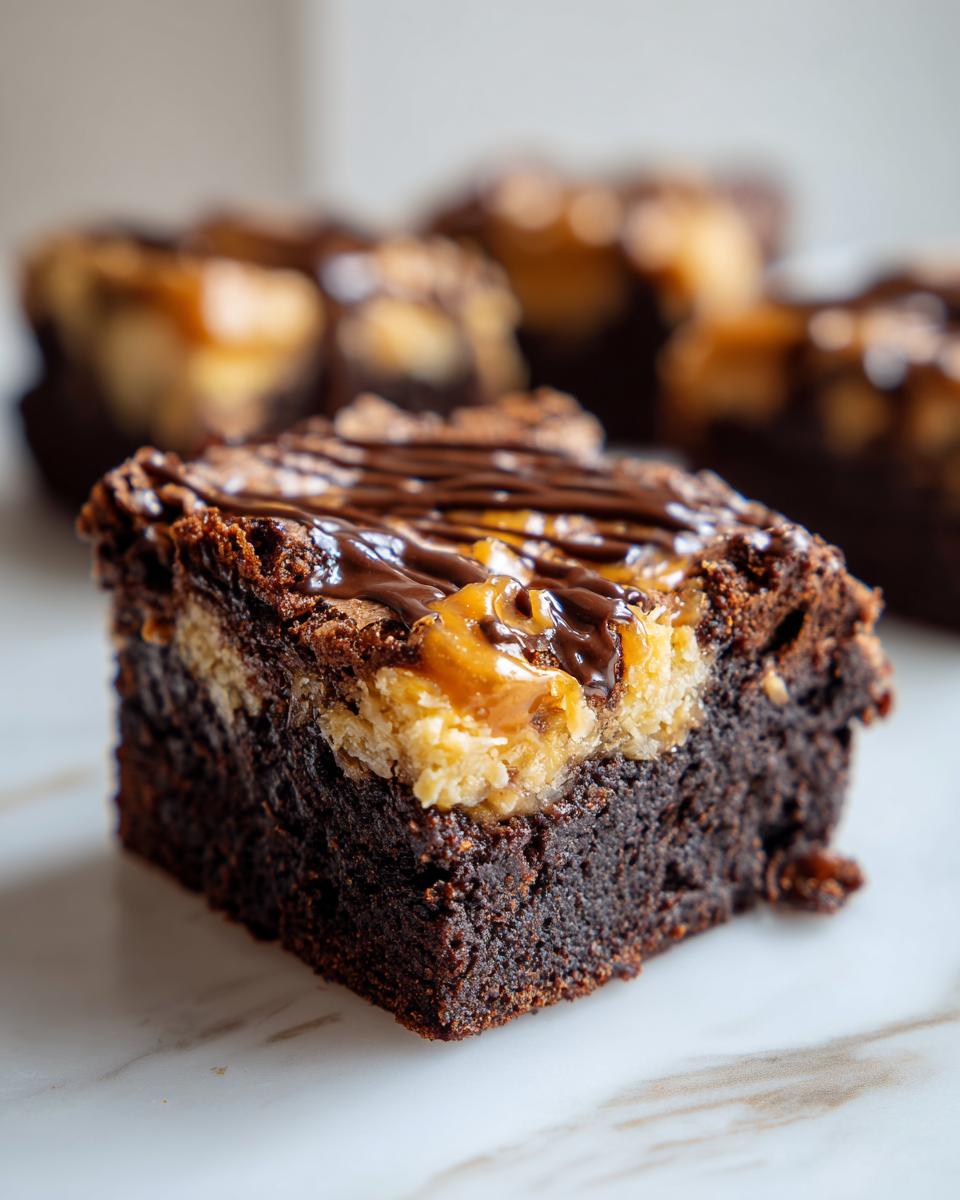
This is where the fun starts! As soon as you pull that warm base out, sprinkle your flaked coconut right over the top. Melted chocolate likes to hide things, but warm coconut loves to soak up sweet things! Next, drizzle that entire can of sweetened condensed milk evenly across the top. Take your cup of caramel sauce and drizzle it over the milk layer. Now for the swirl—take a butter knife or a skewer and gently drag it through the layers a few times. You don’t want to mix it all together; we just want little ribbons of caramel popping up for that perfect Samoa Inspired Dessert look.
The Final Bake and Cooling Process
Back into the oven it goes for another 10 to 15 minutes. You’re looking for the caramel to be bubbly and gorgeous, and the edges should look firm. Once they come out, resist the urge to touch them! Let them cool completely on a rack. And I mean *completely* cool—this is vital for clean cuts, trust me. Once they’ve chilled out, melt that last half cup of chocolate and drizzle it artfully over the top. Wait for that chocolate drizzle to set firm, then use your parchment paper handles to lift the whole slab out. Now you can slice into the best Chocolate Caramel Treats ever! Find recipes for other amazing things you can bake from scratch right here: Cosmic Brownies from Scratch.
Tips for Success When Making Your Samoa Brownies
I’ve made these Samoa Brownies so many times I could probably make them in my sleep! But even a few tiny tweaks can elevate this dessert from great to show-stopping. Remember, the goal here is that perfect balance of fudgy chew and gooey topping. We don’t want any hard spots!
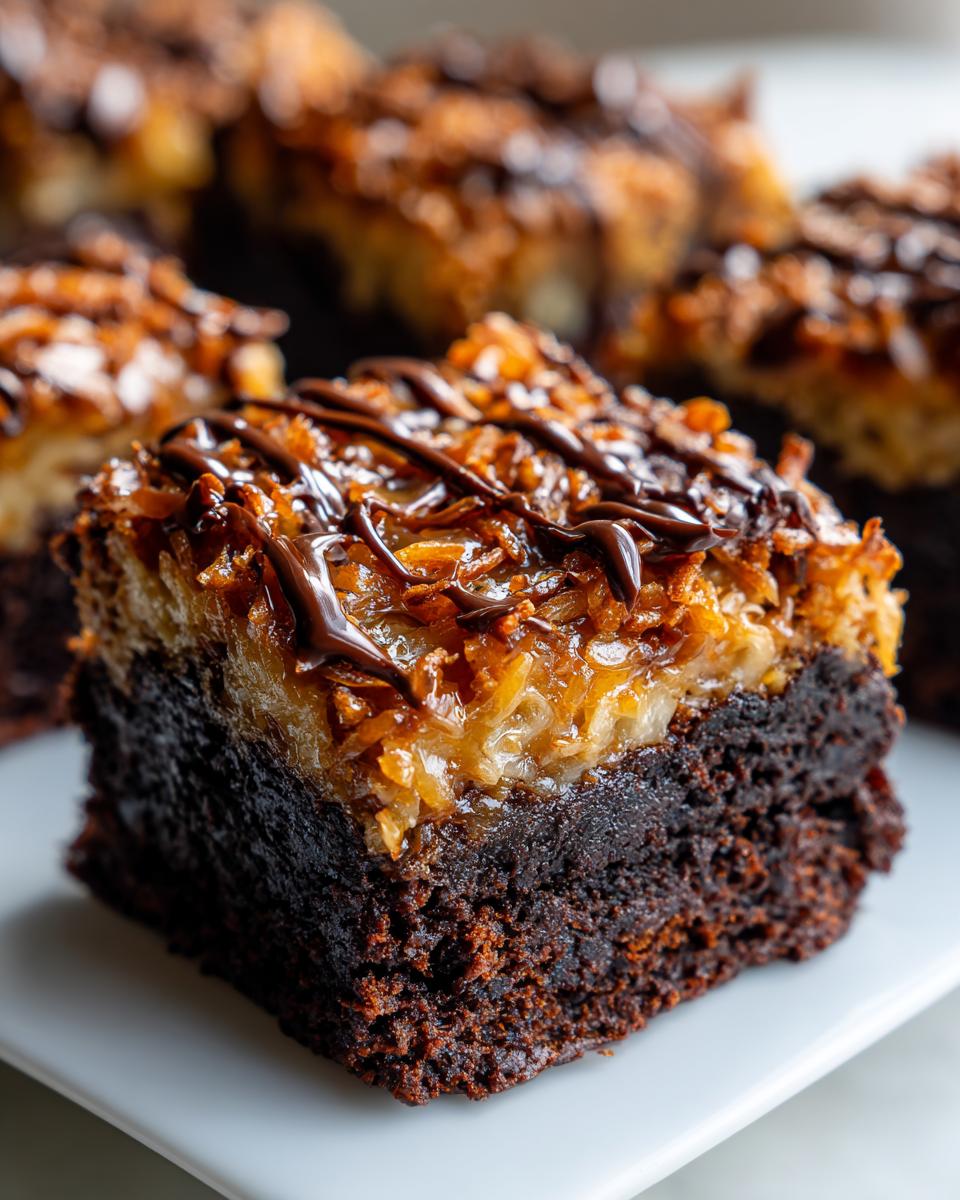
The biggest game-changer for me was fiddling with that coconut layer. While you *can* just sprinkle the raw sweetened coconut right on top of the warm brownie, it gives you a good texture. If you really want that distinct, nutty flavor that hits you when you bite into a Samoa cookie, you absolutely need to pre-toast it. It takes just five extra minutes, but those five minutes give you an incredible Toasted Coconut Topping.
Make Sure Your Coconut is Golden, Not Burned
Don’t just toss the coconut into the hot oven and walk away! That sweetened flaked coconut burns faster than popcorn. Spread it out thin on a dry baking sheet and tuck it into your 350-degree oven while you’re mixing the batter. Seriously, watch it like a hawk. As soon as you see little golden edges starting to appear—pull it out! It will continue to toast slightly when you sprinkle it onto the warm brownie base later, so pull it when it’s only lightly golden.
Don’t Rush the Cool Down
I know, I know. Waiting feels impossible when you smell chocolate and caramel mixing, but your patience pays off huge here. If you try to slice these beauties while they are even slightly warm, that fudgy base will smear, and the caramel will pull right out of the pan in one gooey mess. Let them cool completely on the counter. Better yet? Pop the whole thing into the fridge for about an hour after it cools on the rack. Chilling helps those layers firm up underneath that lovely drizzle. For more baking secrets that involve temperature control, take a peek at my tips for brown butter chocolate chip cookies.
Warming Up the Caramel Sauce is Key
If your caramel sauce is thick and stiff straight from the jar, drizzling it looks chaotic, not elegant. Before you pour it over that sweet condensed milk layer, just warm it up for about 15 seconds in the microwave. It doesn’t need to be hot, just relaxed enough to flow smoothly off the spoon. This ensures you get those beautiful, thin, zig-zag lines rather than big clumps of caramel sitting on top.
Ingredient Notes and Substitutions for Caramel Coconut Brownies
Look, when you’re making something this rich—these amazing Caramel Coconut Brownies—the ingredients matter. I’ve tested this recipe until my kitchen smelled like a candy shop for a week straight, so I know what little changes can completely throw the texture off. We want fudgy, not crumbly! Keep these notes in mind, especially around the caramel choice, because that’s a big one.
The biggest flexibility you have is the caramel sauce itself. If you have a favorite homemade recipe, go for it! That rich, salty flavor is fantastic. But honestly, a good quality store-bought caramel—the kind meant for ice cream topping—works perfectly for this recipe. Since we bake it a second time, it sets up beautifully anyway. Don’t worry about making it from scratch if you’re short on time!
Choosing Your Chocolate Wisely
For the brownie base, I really prefer semi-sweet chocolate chips because they hold their shape a bit better during that first bake. If you use milk chocolate chips in the batter, they might melt too much and make your base greasier, pushing it toward a cake texture we are trying to avoid. For the final drizzle, however, you can use milk chocolate if you like a sweeter, softer finish, or stick to semi-sweet for a richer contrast.
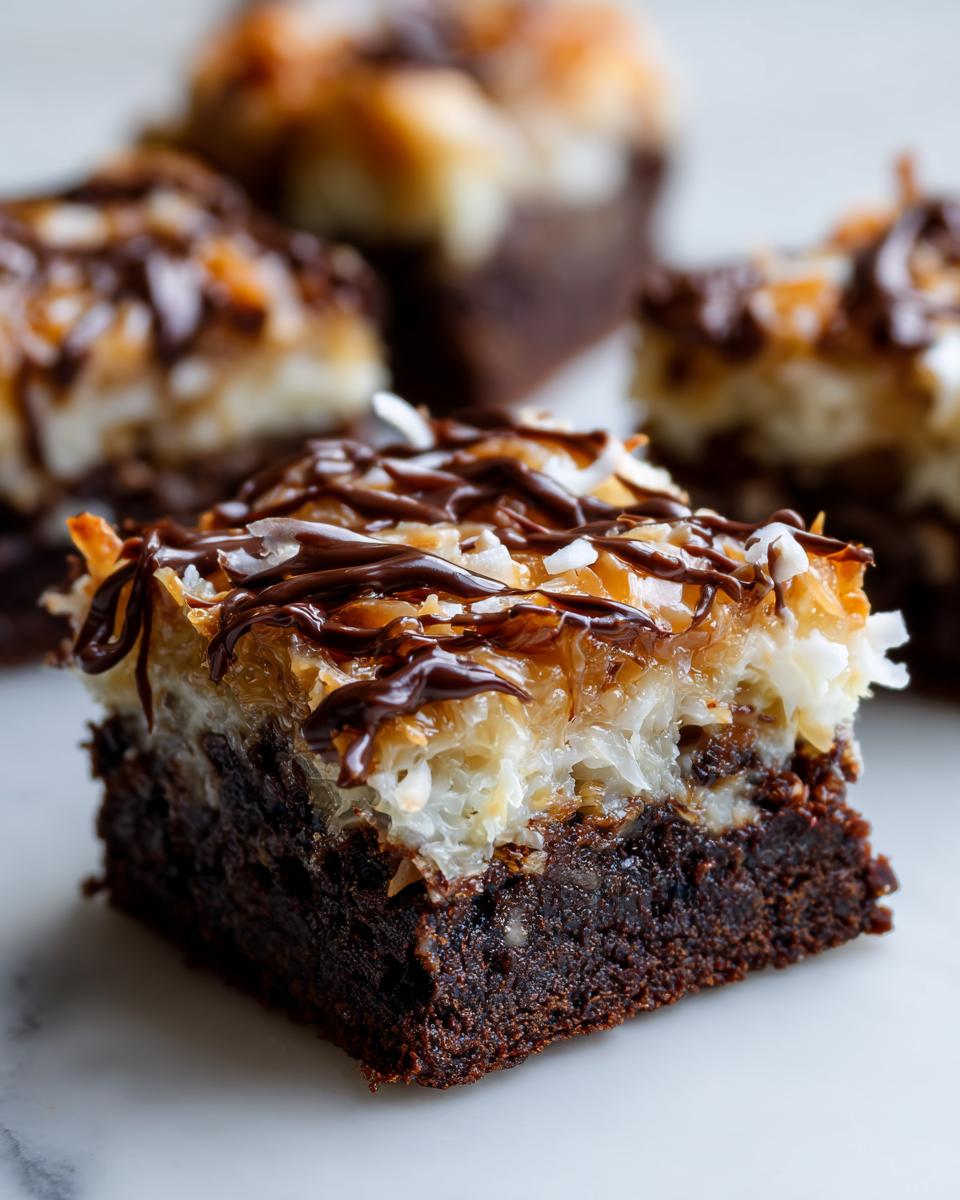
The Difference Between Sweetened and Unsweetened Coconut
This is crucial, people! We absolutely must use sweetened flaked coconut for the topping. Why? Because the sweetened coconut mixes beautifully with the sweetened condensed milk, creating that gooey, saturated texture that makes Samoa Brownies famous. If you use unsweetened coconut, the topping will taste flat and dry, no matter how much caramel you add. Stick to the sweetened flakes!
Can I Use Different Nuts Instead of Coconut?
Well, you *could* try! But if you swap out the coconut for something like pecans or walnuts, you are officially making a different dessert, aren’t you? You’d have to adjust the amount slightly, usually sticking to about 1 1/4 cups of toasted nuts. If you go that route, just know you are moving toward a general Gourmet Brownie Idea, and you’ll lose that copyrighted, iconic Samoa flavor profile. Stick with coconut for this specific recipe, okay?
Storage and Reheating Instructions for Samoa Brownies
These Chocolate Caramel Treats are simply too good to eat all in one day—though I certainly understand the temptation! The good news is that these layered bars keep incredibly well, which is great for batch baking. The topping layers actually help lock in moisture in that fudgy base, keeping them tasting fresh for days.
The main thing you have to remember when storing is that we need to keep the chocolate drizzle firm and the caramel soft, which can be a balancing act. If you live in a really warm place, refrigeration might be better, but if you keep your kitchen cool, room temperature is my go-to method for maintaining that perfect soft chewiness.
Keeping Them Fresh at Room Temperature
For the best texture—that perfect mix of set, soft, and fudgy—store the cut squares in an airtight container right on your counter. Make sure they are fully cooled before you put the lid on, or you’ll end up with sugary condensation inside, and nobody wants soggy coconut!
I find that they stay fantastic like this for about three to four days. If you are storing them longer, or if your kitchen is humid, move them to the fridge. You can easily double the lifespan this way if you keep them tightly sealed. I wrote up some easy tips for storing other treats, too, so check them out if you have leftovers from a big bake: easy no-bake bourbon balls recipe.
The Gentle Reheat Trick for Softeing the Caramel
If you did chill your Samoa Brownies, they will obviously be a bit firmer, and that caramel layer might feel sturdy. Don’t try to eat them rock hard straight from the fridge! You absolutely can reheat them, but you have to be gentle, especially because of all that sticky goodness.
The easiest way is microwaving them one square at a time. Give it about 10 to 15 seconds on medium power. This warms the chocolate base just enough so it gets gooey again, and it softens that caramel layer right up. If you want to serve them warm for dessert, they are absolutely divine served with a scoop of vanilla bean ice cream!
Why We Wait to Drizzle the Chocolate
Just a reminder here: the final chocolate drizzle is best added right before you serve them OR right before you store them. If you drizzle the chocolate and then try to stack the brownies heavily on top of each other for storage, that beautiful design will smear right off. Keeping them separated either with parchment paper sheets or just keeping the top layer unwrapped until they are stable is the key to presentation!
Frequently Asked Questions About Samoa Brownies
I hear from so many folks who just have to try this! It’s natural to run into little snags when you’re dealing with different layers, so I wanted to tackle a few common questions right here so you feel totally confident tackling these Chocolate Caramel Treats. Baking should always be a joy, not a guessing game!
Can I make these Samoa Brownies ahead of time?
Oh yes, and I actually recommend it! Making them ahead lets those layers really settle and meld together overnight. The only thing I strongly suggest you hold off on is that final chocolate drizzle. Bake them, let them cool completely, swirl the caramel, and store them airtight for up to two days without the chocolate on top. Pour that final drizzle on maybe an hour before serving. That way, the chocolate is perfectly set and shiny for when you cut into them!
What is the secret to achieving a fudgy texture in these Layered Brownies?
This is something Rosa is very particular about! For the best Fudgy Brownie Recipe experience, you need to respect the fat-to-starch ratio. The secret isn’t just high butter content; it’s low flour and not overpaying attention to the mixing bowl. Once you add the cocoa powder and flour mixture, mix *only* until the streaks disappear. I mean it! If you see a little white flour left, stop stirring and gently fold it in a couple of times with a spatula. Overmixing develops gluten, and gluten equals cakey, which is the opposite of what we want in these chewy bars.
Are these Caramel Coconut Brownies difficult to cut cleanly?
They definitely *can* be messy if you rush it, because we are working with warm caramel and gooey condensed milk, which is delicious but sticky! The absolute, non-negotiable key to clean cuts for any Copycat Cookie Dessert with soft layers is cooling. Seriously, you must let them cool completely at room temperature. If you’re desperate to slice them faster, chilling them in the fridge for an hour after they’ve cooled on the counter solidifies everything up beautifully. Then, use a large, sharp knife, maybe wiping the blade clean between cuts, and they should slice like a dream. If you have any other burning questions about ratios or ingredients, feel free to reach out on my contact page!
Serving Suggestions for Your Gourmet Brownie Ideas
We’ve made these incredible Samoa Brownies, and while they are perfectly happy sitting alone on a plate, why stop there? When you put this much love into a dessert, you want to put it center stage! These aren’t shy treats; they demand a supporting cast that can handle all that chocolate, chewy coconut, and gooey caramel. I love setting up a little dessert bar when company comes over, and these are always the star attraction.
For me, the secret to making any bar dessert feel truly special is the temperature contrast. A warm center with cold toppings is just heaven on earth. I highly recommend serving these slightly warmed—just zap an individual square for 10 seconds—and adding a scoop of something cool right on top.
Think about pairing them with something creamy. A scoop of high-quality vanilla bean ice cream is the classic choice because it melts slowly over that warm caramel drizzle, creating its own little sauce pool. If you like things a little brighter, try a scoop of salted caramel ice cream for an extra flavor bump, though that’s for the true dessert daredevils!
If you’re serving these as part of a larger spread, maybe for a party where you have other light things out, these rich bars need a palate cleanser nearby. If I’m making a big batch of these rich Chocolate Caramel Treats, I will always balance it out with something light and fresh, like a tall glass of water or maybe even a refreshing drink recipe I’ve shared over here: watermelon smoothie recipe, easy summer drinks. It’s all about balance when you’re serving up this much decadence!
Honestly, though? Sometimes, the best accompaniment for these Dessert Bar Recipes is just a strong cup of black coffee. The bitterness cuts right through the richness of the layers, and it lets you savor every single bite of that coconut and caramel combo.
Nutritional Estimate for Homemade Samoa Cookies Brownie Style
Now, look, I’m Rosa, and I’m all about making joy in the kitchen, not counting every single calorie! When you’re whipping up something this ridiculously good—these Samoa Brownies are loaded with sugar, butter, and chocolate goodness—the numbers are going to be respectable, let’s just say that. But hey, this is a treat, not your Tuesday night dinner, right? You deserve this level of decadence!
I’ve pulled together the estimated nutrition based on the specific items in the recipe above, like using standard sweetened condensed milk and semi-sweet chips. It gives us a starting point for these rich Chocolate Caramel Treats when cut into 24 squares. Do keep in mind that if you use extra premium caramel sauce or maybe switch to dark chocolate, these estimates will shift a little. It’s just an approximation, but it helps manage expectations for these glorious Homemade Samoa Cookies Brownie Style bars!
- Serving Size: 1 square
- Calories: 280
- Sugar: 35
- Sodium: 110
- Fat: 15
- Saturated Fat: 9
- Unsaturated Fat: 6
- Trans Fat: 0
- Carbohydrates: 35
- Fiber: 1
- Protein: 4
- Cholesterol: 55
So, enjoy responsibly! If you skip the final chocolate drizzle, you’ll knock a few calories off, but honestly, why would you do that? These are meant to be an indulgence, and that’s exactly what they are!
PrintDecadent Samoa Brownies with Caramel Coconut Topping
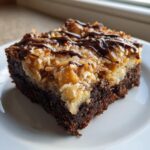
Make rich, fudgy brownies topped with a layer of sweet caramel, toasted coconut, and a chocolate drizzle, capturing the flavor of your favorite cookie.
- Prep Time: 20 min
- Cook Time: 40 min
- Total Time: 60 min
- Yield: 24 servings 1x
- Category: Dessert
- Method: Baking
- Cuisine: American
- Diet: Vegetarian
Ingredients
- 1 cup (2 sticks) unsalted butter, melted
- 2 cups granulated sugar
- 4 large eggs
- 1 teaspoon vanilla extract
- 3/4 cup unsweetened cocoa powder
- 1 cup all-purpose flour
- 1/2 teaspoon salt
- 1/2 cup semi-sweet chocolate chips
- 1 (14 ounce) can sweetened condensed milk
- 1 1/2 cups sweetened flaked coconut
- 1 cup caramel sauce (store-bought or homemade)
- 1/2 cup semi-sweet chocolate, for drizzling
Instructions
- Preheat your oven to 350 degrees Fahrenheit. Line a 9×13 inch baking pan with parchment paper, leaving an overhang on the sides for easy removal.
- In a large bowl, whisk together the melted butter and granulated sugar until combined.
- Beat in the eggs one at a time, mixing well after each addition. Stir in the vanilla extract.
- In a separate bowl, whisk together the cocoa powder and flour. Gradually add the dry ingredients to the wet ingredients, mixing until just combined. Do not overmix.
- Fold in the 1/2 cup of chocolate chips. Spread the brownie batter evenly into the prepared pan.
- Bake the brownies for 20 to 25 minutes, or until a toothpick inserted near the center comes out with moist crumbs attached. Remove from the oven.
- While the brownies are still warm, sprinkle the flaked coconut evenly over the top.
- Pour the sweetened condensed milk over the coconut layer. Drizzle the caramel sauce over the condensed milk layer. Use a knife or skewer to gently swirl the caramel and condensed milk together slightly.
- Return the pan to the oven and bake for an additional 10 to 15 minutes, until the caramel is bubbly and the edges are set.
- Remove from the oven and let cool completely in the pan on a wire rack.
- Once cooled, melt the remaining 1/2 cup of chocolate chips. Drizzle the melted chocolate over the top of the cooled brownies.
- Once the chocolate drizzle is set, use the parchment paper overhang to lift the brownies out of the pan. Cut into squares.
Notes
- To toast the coconut faster, you can spread the coconut on a baking sheet and bake it at 350 degrees Fahrenheit for 5-8 minutes, watching closely until golden brown, before sprinkling it onto the warm brownie.
- For a fudgier texture, reduce the flour by 2 tablespoons.
- If you prefer a thicker caramel layer, warm the caramel sauce slightly before drizzling it over the condensed milk.
Nutrition
- Serving Size: 1 square
- Calories: 280
- Sugar: 35
- Sodium: 110
- Fat: 15
- Saturated Fat: 9
- Unsaturated Fat: 6
- Trans Fat: 0
- Carbohydrates: 35
- Fiber: 1
- Protein: 4
- Cholesterol: 55