
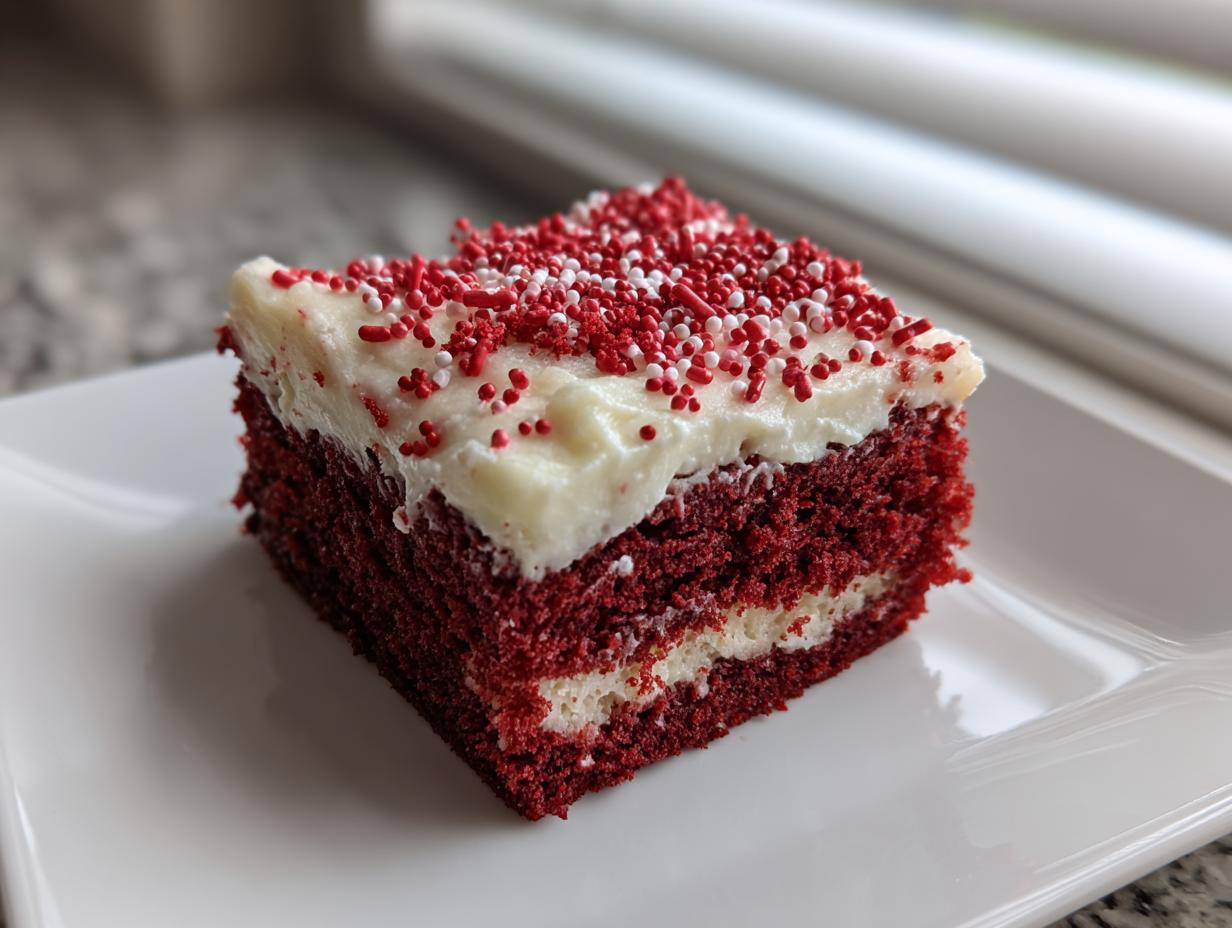
When the holidays approach or a spontaneous celebration pops up, you need a showstopper that doesn’t require you to spend all day in the kitchen. I have just the thing! This Ultra-Moist red velvet poke cake is my go-to when I need something guaranteed to make everyone happy, and it’s shockingly easy. Many home cooks, like myself when balancing teaching and mothering, need reliable recipes, and this one delivers that deep, velvety texture every time. Forget complicated layering; this dessert is all about soaking in that creamy goodness right when the cake is warm. It’s truly the ultimate, fuss-free festive treat.
- Why This red velvet poke cake Is Your New Favorite Celebration Dessert
- Gathering Ingredients for Your red velvet poke cake
- Simple poke cake instructions for a Creamy Layered Cake
- Tips for Success with Your red velvet poke cake
- Make-Ahead and Storage for the red velvet poke cake
- Serving Suggestions for this festive red desserts
- Frequently Asked Questions about the red velvet poke cake
- Nutritional Estimates for Your red velvet poke cake
- Share Your Experience Making This red velvet poke cake
Why This red velvet poke cake Is Your New Favorite Celebration Dessert
You know I’m all about reliability, and this recipe is proof that you can get a huge ‘wow’ factor without all the fuss. If you want a quick celebration cake that tastes like you spent all day fussing over it, this is it. This doesn’t just taste good; it’s designed to be the easiest, most impressive dessert on your table.
- It’s incredibly moist—no dry edges here, ever!
- It utilizes simple steps, perfect for the weeknight rush.
- The vibrant color makes it perfect for any festive spread, especially those winter holiday baking nights.
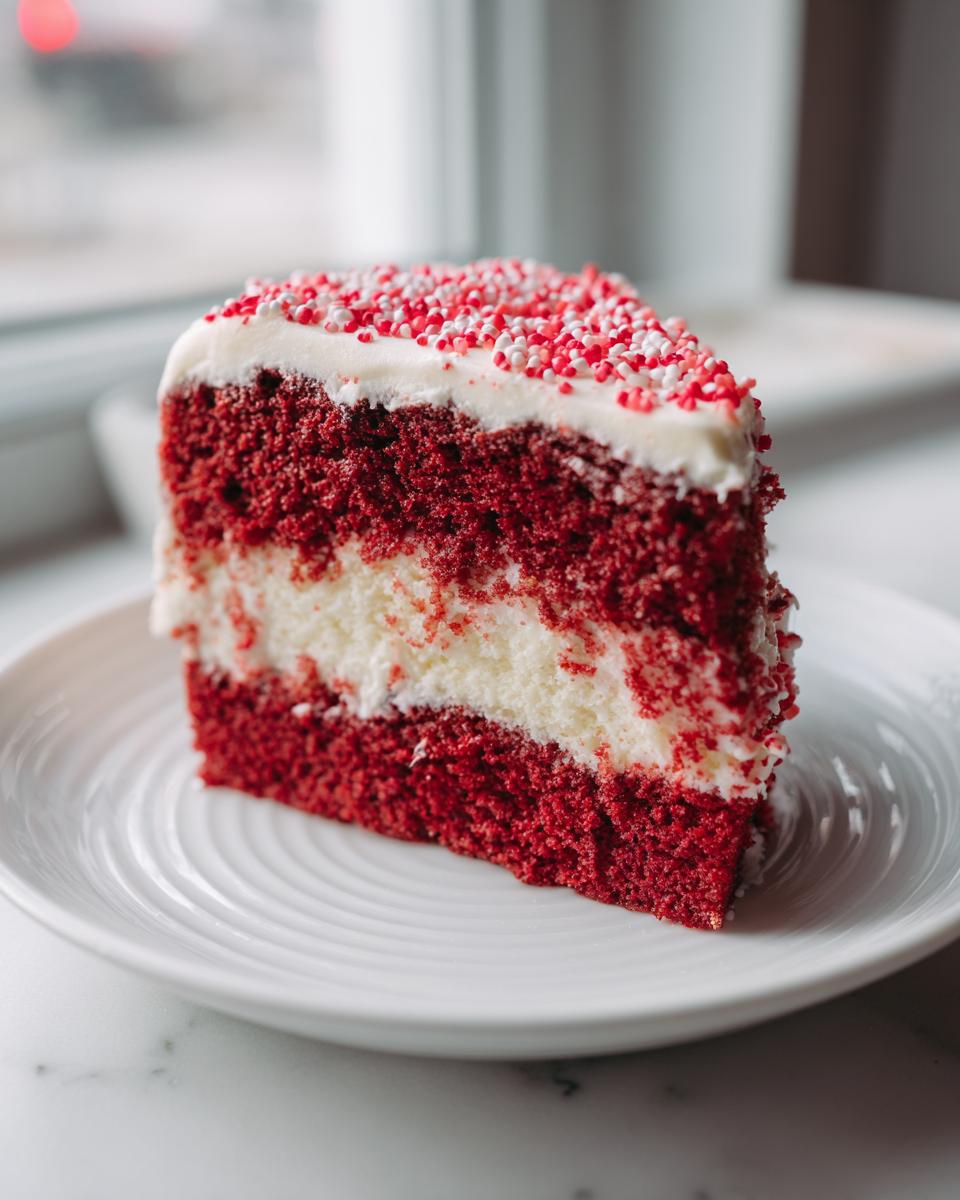
- It delivers that gorgeous, dense and velvety texture cake we all crave in a red velvet.
Achieving the Ultimate Poke Cake Flavor
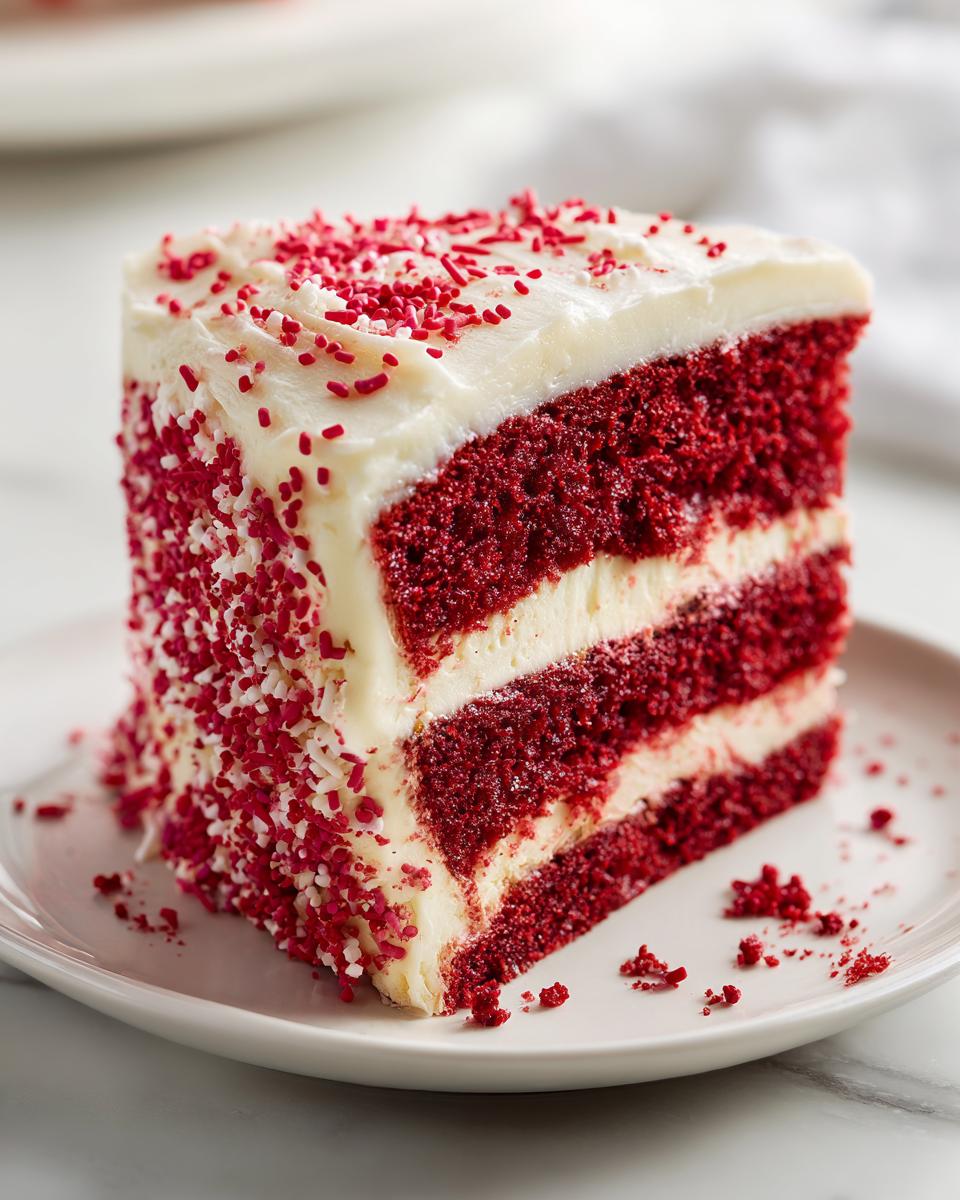
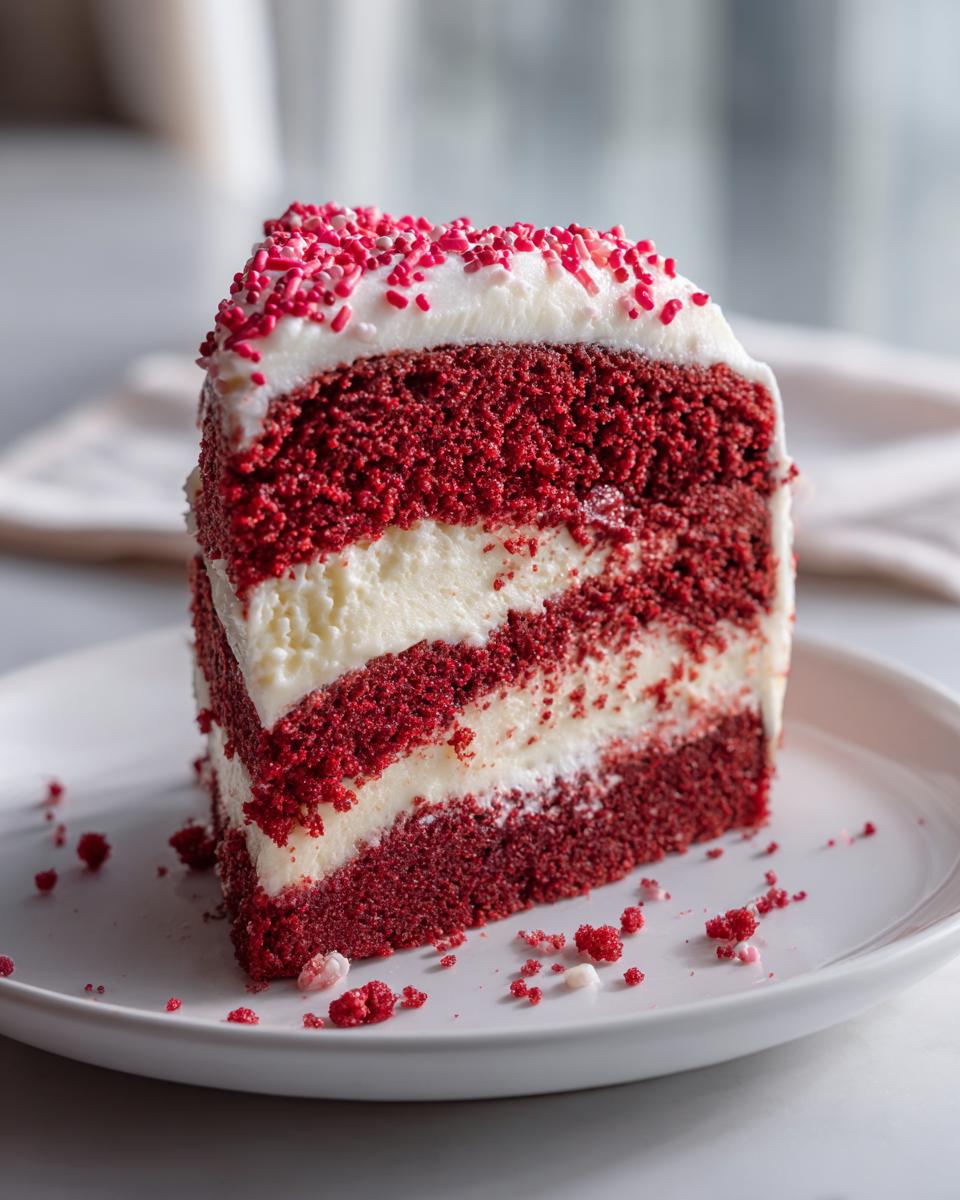
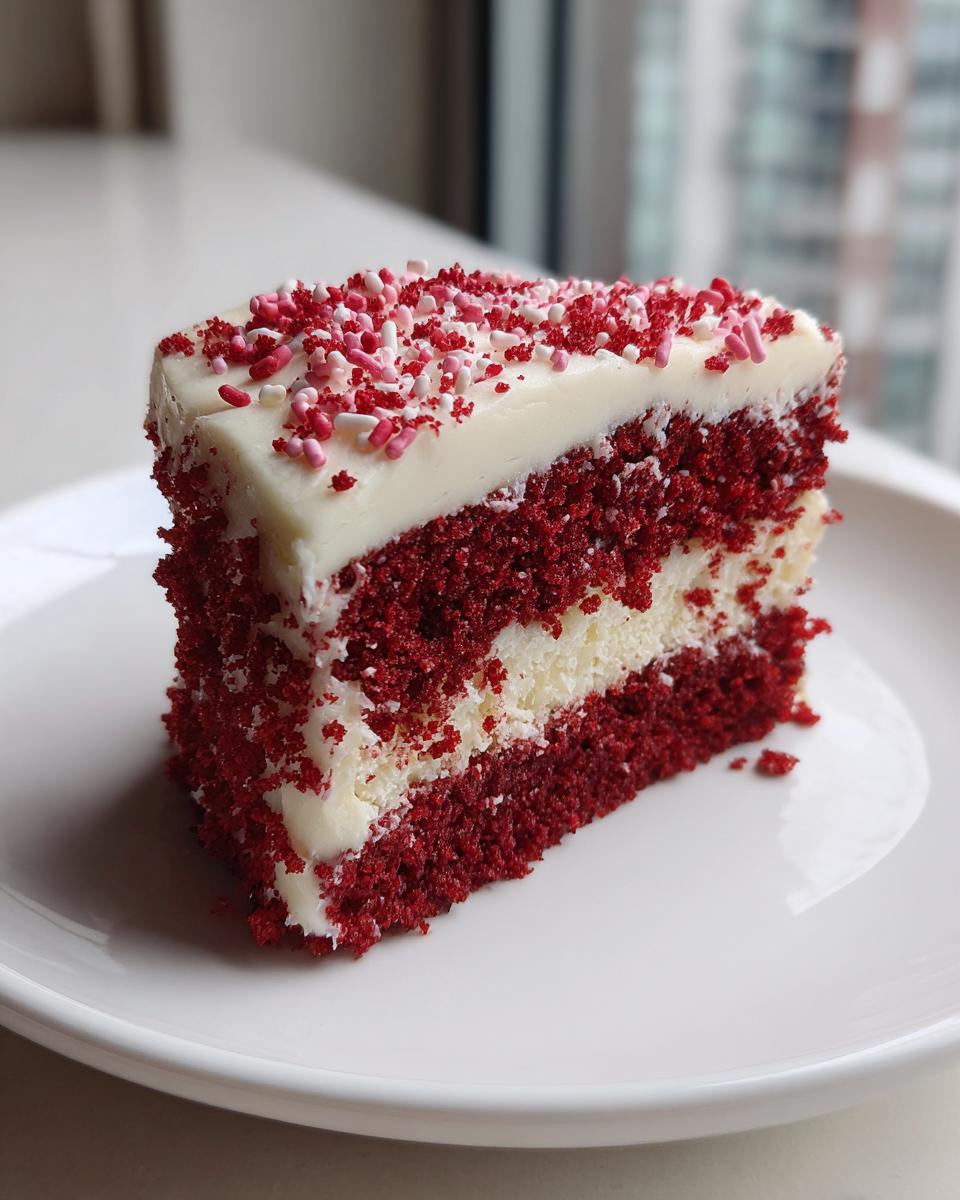
The main trick here is the liquid bath! We bake the cake first, but before it even cools completely, we poke holes. That blend of sweetened condensed milk and instant pudding is poured straight in. Trust me, those holes suck up all that creamy sweetness, guaranteeing a truly moist red velvet cake recipe quality from edge to edge. It’s the secret to that melt-in-your-mouth satisfaction.
Gathering Ingredients for Your red velvet poke cake
Alright, let’s talk supplies! Since we are aiming for that ultimate poke cake with condensed milk experience, you need to have your players lined up. I listed the full rundown below. Because we rely on a cake mix for ease, this part is super straightforward, but pay attention to how things need to be prepped!
- 1 box red velvet cake mix (plus whatever ingredients the box calls for—usually eggs, oil, and water, standard stuff!)
- 1 (14 ounce) can sweetened condensed milk
- 1 package (3.4 ounce) instant vanilla pudding mix
- 2 cups cold milk for the pudding mixture
- 1 tub (8 ounce) whipped topping, thawed (make sure it’s fully thawed!)
- 8 ounces cream cheese, softened to room temp
- 1/2 cup powdered sugar
- 1 teaspoon vanilla extract
- Red sprinkles for topping (you can’t forget the festive color!)
Ingredient Notes and Substitutions for red velvet poke cake
A couple of quick notes from my years of experimenting here. First, always use the *instant* vanilla pudding mix. We need it to thicken up fast when whisked with the cold milk and condensed milk so it sets up nicely inside those holes quickly. If you try to cook it on the stove, you’ll wait forever, and the whole point of a moist red velvet cake recipe is speed combined with moisture!
Also, for the topping, the recipe calls for thawed whipped topping—that’s the easy route, and it works beautifully. But if you’re feeling ambitious, you absolutely can swap that for homemade whipped cream, or even go straight for traditional cream cheese frosting if you want something richer! Either way, you get that beautiful, creamy finish that makes this such a top-tier holiday red velvet recipes pick.
Simple poke cake instructions for a Creamy Layered Cake
Okay, this is where the magic happens! Following these simple poke cake instructions ensures you nail that texture every single time. Don’t rush the cooling time; that’s critical for success! This recipe is just as easy as some of those no-bake desserts I love, like my easy no-bake ice cream pie, but better!
- First up, whip up and bake that red velvet cake mix according to the box directions in your 9×13 pan.
- Once it’s out of the oven, let it cool just a bit—about 10 minutes is perfect. We want it warm, but not lava hot.
- Now, grab your tool and start poking holes all over!
- While that’s happening, whisk your sweetened condensed milk and vanilla pudding mix in a separate bowl until it’s smooth.
- Pour that glorious liquid right over the warm cake, making darn sure it sinks into every little hole you made.
- Pop it into the fridge for at least 30 minutes so that filling starts to set up inside the crumb.
- Next, prepare the cream cheese glaze—beat that softened cream cheese, powdered sugar, and vanilla until it’s wonderfully smooth and creamy.
- Spread that lovely glaze evenly across the top.
- Finish it off with the thawed whipped topping and a shower of those red sprinkles!
- Get it chilling for at least an hour before slicing. Seriously, don’t skip the final chill!
Poking and Filling: The Key to a Moist red velvet poke cake
When you go to poke those holes, forget a chopstick—it’s too thin and might make tears in the bottom of your pan! I always grab the handle of a wooden spoon or even a thick straw. You need a decent-sized hole so that filling bath really gets down deep. Remember, you aren’t trying to stab through the bottom, just deep enough to create channels for the condensed milk mixture. If you check out how they do it over at The Lazy K Kitchen, they show a great way to do this without tearing the whole structure. Once poured, watch it disappear—that’s the sign you did it right!
Preparing the Cream Cheese Frosting Cake Topping
When you make the topping/glaze, the goal is always creamy perfection! Take your softened cream cheese and beat it on its own first until it looks dreamy, like nothing lumpy remains. Then add your powdered sugar and vanilla. You need to beat this mixture until it is genuinely smooth and creamy—no gritty sugar bits allowed! If it seems stiff, add just a tiny splash of milk, but honestly, keep it thick so it sits nicely on top of the whipped topping layer without running everywhere.
Tips for Success with Your red velvet poke cake
Even though this is an easy recipe, a few little secrets can take your cake from good to absolute perfection. The biggest pitfall I see with any moist red velvet cake recipe involving a liquid soak is patience! You absolutely must poke those holes while the cake is still warm—not piping hot, but warm enough that the liquid goes right in. If it cools down too much, the condensed milk mixture just sits there on the surface.
And about chilling: this is crucial, especially if you want those beautiful, clean slices for a party. Don’t try to serve it straight after topping it! You need that full hour, minimum, for the chilling time. This lets the pudding inside firm up and binds the whole thing together, which is what makes this recipe such a fantastic example of a successful poke cake with condensed milk. If you skip the chill, you’ll have delicious mush, not slices! When I nail a creamy dessert—like my cheesecake recipe—it always comes down to letting it set properly.
For cleaner cutting, dip your serving knife into hot water between each slice, wipe it dry, and then cut. It keeps the frosting and the filling from dragging. You can see the results of this solid technique when you check out other great holiday ideas on Recipe Kind, too. A little extra step goes a long way!
Make-Ahead and Storage for the red velvet poke cake
This is actually one of my favorite things about making this red velvet poke cake—it’s practically *better* the next day! When you’re planning for a big holiday dinner or a party, knowing you can pull a dessert out of the fridge that is already perfect is a lifesaver. The recipe notes mention it tastes best cold, and I completely agree with that.
Since we use those creamy elements like the pudding mixture and the whipped topping, this cake absolutely has to stay in the refrigerator. You can totally make this the day before your event, and it holds up beautifully. In fact, the extra time in the cold lets the condensed milk and pudding mixture fully marry with the cake crumb—that’s how you get maximum moisture!
When you store it, make sure it’s covered tightly with plastic wrap or put it in an airtight container in the fridge. It stays fantastic for about three or four days. We usually don’t have leftovers that long, though, because everyone inhales it! Don’t even think about trying to warm this one up, though. This is a cold dessert through and through. If you’re looking for make-ahead tips for other things, check out my thoughts on easy freezer jam—it uses similar make-ahead logic!
Serving Suggestions for this festive red desserts
Because this red velvet poke cake is such a rich, creamy centerpiece, you need things around it that balance that out! When I make this for Christmas, I always pair it with something bright. A simple winter fruit salad is wonderful—that tartness cleanses the palate between bites of that velvety cake.
If you want to stick with sweet things, contrast the rich cream cheese with something light, like a soft sugar cookie instead of a heavy chocolate dessert. If you need inspiration for other holiday red velvet recipes, just remember to balance the heaviness!
Frequently Asked Questions about the red velvet poke cake
These are the questions I get asked most often when folks first try making one of my easy poke cake ideas! Don’t worry if you’re new to this—I’ll walk you through the specifics of how to make poke cake successfully every time.
Can I use a different type of pudding in this red velvet poke cake?
Oh, absolutely! While vanilla pudding is the classic pairing because it lets that rich red color pop, you have total freedom here. If you want to kick up that velvety texture cake, try swapping in instant cheesecake pudding mix—it pairs beautifully with the cream cheese topping! Chocolate pudding is also fun if you want a deeper dessert flavor, but you might lose a little of that classic red velvet vibe. Go wild, but remember the vanilla/cheesecake offers the best balance for the ultimate poke cake flavor!
How do I ensure my red velvet poke cake stays extra moist?
Moisture is non-negotiable, right? This is where step-by-step timing matters! The first secret is pouring that pudding and condensed milk mixture over the cake when it is **still warm**. Warm cake opens up its crumb so it sucks in all that liquid goodness. The second secret, which I cannot stress enough, is chilling! You must let this cake chill completely—we’re talking at least an hour after the final topping goes on. Chilling lets that absorbed liquid settle in and bind everything together. If you serve it warm, it just falls apart; if you chill it, you get that perfect, firm, yet ridiculously moist slice!
Nutritional Estimates for Your red velvet poke cake
I know some of you are tracking everything, and I totally get that! When I was busy teaching and running around with the kids, knowing the basics helped me plan the rest of the menu. Keep in mind, because we’re using a cake mix, condensed milk, and cream cheese frosting, this is definitely a treat, not an everyday bake!
These numbers are just estimates based on standard preparation using the ingredients listed. You know how it is—if someone uses extra sprinkles or a different brand of whipped topping, things shift a little! But this gives you a really good baseline for your celebrations.
- Serving Size: 1 slice
- Calories: 410
- Sugar: 45g
- Sodium: 350mg
- Fat: 20g
- Saturated Fat: 10g
- Unsaturated Fat: 10g
- Trans Fat: 0.5g
- Carbohydrates: 55g
- Fiber: 1g
- Protein: 4g
- Cholesterol: 35mg
If you’re looking for lighter ideas for other parts of the day, make sure you swing by my thoughts on easy breakfast recipes! But for this gorgeous red velvet poke cake, just make sure you have a big glass of milk ready and enjoy every single bite!
Share Your Experience Making This red velvet poke cake
Now that you’ve got the ultimate recipe for a moist red velvet cake recipe that tastes like you worked for days, I’m dying to know how it turned out for YOU!
That’s the fun part about making recipes from my kitchen—they are tested by real families in real life. Did you manage to resist slicing into it right away? Did you use a simple dusting of powdered sugar or go all out with extra sprinkles?
Please take a second, tell me how it went in the comments below. I always read every single one, and your feedback helps the entire community know what worked best for their situation. If you tried a fun twist, like using chocolate pudding, tell us about it! If you snapped a picture of your beautiful, festive layers, I’d absolutely love to see it! You can tag me over on Facebook—I always share reader photos when I can, like the one from that amazing reel.
If you have any questions at all before you bake, use the contact page, and I’ll try my best to hop on and help you troubleshoot!
PrintUltra-Moist Red Velvet Poke Cake with Cream Cheese Glaze

Make this ultra-moist red velvet poke cake for your next celebration. This easy recipe uses simple steps to create a rich, creamy dessert that is always a crowd-pleaser, perfect for holidays.
- Prep Time: 15 min
- Cook Time: 35 min
- Total Time: 2 hours 50 min
- Yield: 12 servings 1x
- Category: Dessert
- Method: Baking
- Cuisine: American
- Diet: Vegetarian
Ingredients
- 1 box red velvet cake mix (plus ingredients listed on the box)
- 1 (14 ounce) can sweetened condensed milk
- 1 package (3.4 ounce) instant vanilla pudding mix
- 2 cups cold milk
- 1 tub (8 ounce) whipped topping, thawed
- 8 ounces cream cheese, softened
- 1/2 cup powdered sugar
- 1 teaspoon vanilla extract
- Red sprinkles for topping
Instructions
- Prepare and bake the red velvet cake mix according to package directions in a 9×13 inch baking pan.
- Remove the cake from the oven and let it cool for 10 minutes.
- Use the handle of a wooden spoon or a thick straw to poke holes evenly across the entire surface of the warm cake. Make the holes deep but do not go through the bottom.
- In a medium bowl, whisk together the sweetened condensed milk and the instant vanilla pudding mix until smooth.
- Slowly pour the pudding mixture over the cake, ensuring the liquid seeps into all the poked holes.
- Refrigerate the cake for at least 30 minutes to allow the filling to set slightly inside the cake.
- Prepare the cream cheese glaze: Beat the softened cream cheese, powdered sugar, and vanilla extract together until the mixture is smooth and creamy.
- Spread the cream cheese glaze evenly over the cooled, filled cake.
- Top the cake with whipped topping and then cover with red sprinkles.
- Chill the finished red velvet poke cake for at least 1 hour before slicing and serving for the best creamy texture.
Notes
- For an extra festive look, use white or cream cheese frosting instead of whipped topping for the final layer.
- If you prefer a richer filling, substitute the pudding mix and milk with one cup of heavy cream mixed with one package of cream cheese frosting mix.
- This cake tastes best when served cold, making it an excellent make-ahead holiday dessert.
Nutrition
- Serving Size: 1 slice
- Calories: 410
- Sugar: 45g
- Sodium: 350mg
- Fat: 20g
- Saturated Fat: 10g
- Unsaturated Fat: 10g
- Trans Fat: 0.5g
- Carbohydrates: 55g
- Fiber: 1g
- Protein: 4g
- Cholesterol: 35mg