
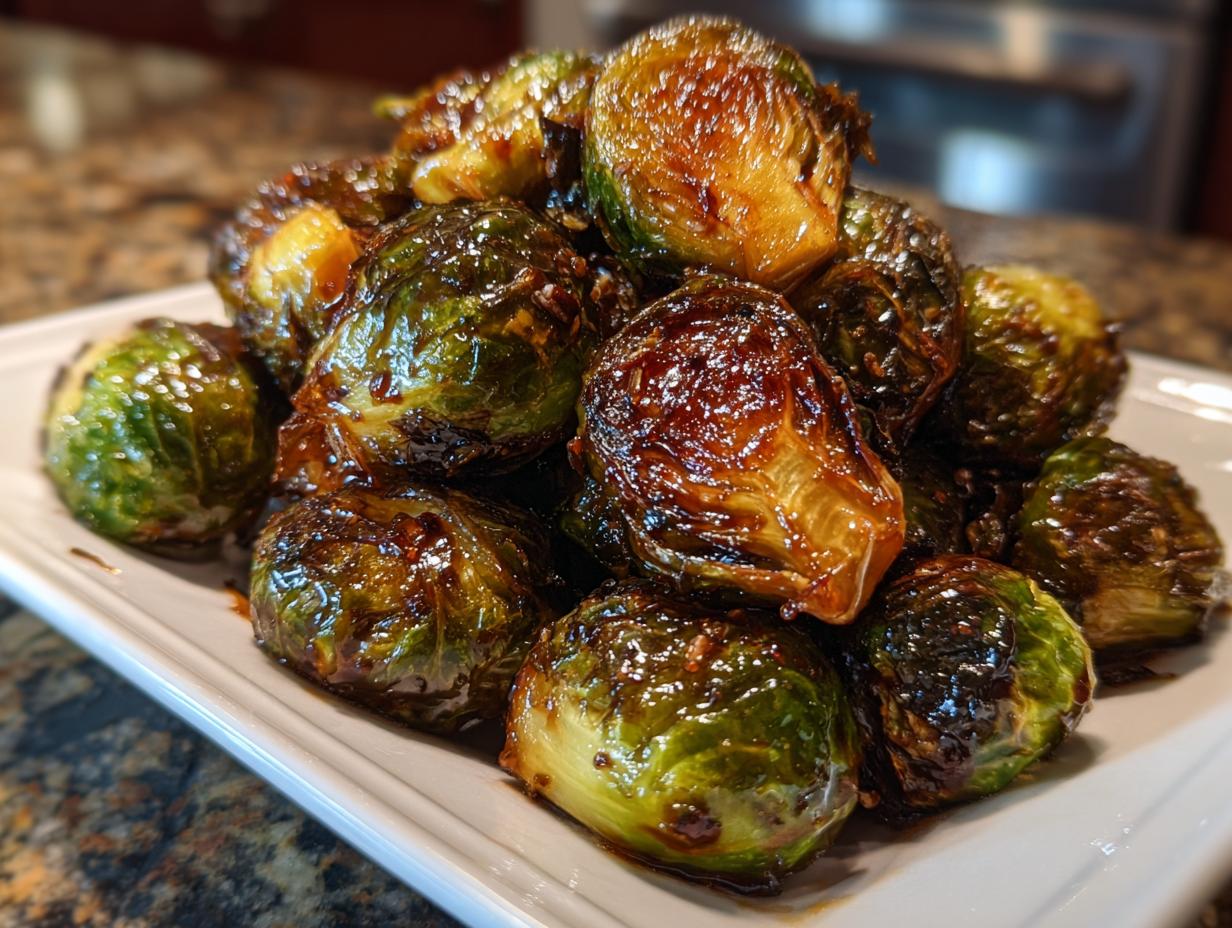
If you think Brussels sprouts are boring, I am here to change your mind forever! Honestly, transforming those little green cabbages from ‘meh’ to ‘must-have’ is all about the coating. Today, we’re diving into my absolute favorite creation: the ultimate recipe for a Sticky Brussels Sprouts Glaze that caramelizes just right every single time. You know how I feel about weeknight meals—they should taste incredible without needing a culinary degree. That’s what Rosa Sterling built this kitchen on, right? Making complex flavors achievable. This sweet, savory glaze is so good, people will forget they aren’t eating candy. Trust me, you need this sauce in your life; it’s a total game-changer for boosting your veggie game. Click over here if you need more inspiration for those busy nights: weeknight dinner ideas!

- Why This Sticky Brussels Sprouts Glaze Recipe Works (EEAT Focus)
- Ingredients for the Perfect Sticky Brussels Sprouts Glaze
- Step-by-Step Guide to Making Your Sticky Brussels Sprouts Glaze
- Three Ways to Apply the Best Glaze for Roasted Brussels Sprouts
- Tips for Success with Your Sticky Brussels Sprouts Glaze
- Storage and Reheating Instructions for Extra Glaze
- Serving Suggestions for Glazed Sprouts Side Dish
- Frequently Asked Questions About Sticky Brussels Sprouts Glaze
- Nutritional Estimate for This Glazed Sprouts Side Dish
Why This Sticky Brussels Sprouts Glaze Recipe Works (EEAT Focus)
The secret to getting that perfect, slightly crunchy, almost lacquered coating comes down to science mixed with a little bit of my own stubbornness! If you just boil maple syrup, you’ll end up with something that hardens right up when it cools, or worse, it burns before your sprouts are even done. That’s no good.
We use a balancing act here. The maple syrup and brown sugar give us that deep sweetness and beautiful molasses flavor, but the real game-changer is the cornstarch slurry. Mixing the cornstarch with cold water creates a smooth paste, and when you whisk that into the hot reduction, it immediately stabilizes everything.
This technique ensures you get that thick glaze for roasted vegetables that clings beautifully, delivering the ultimate sweet and savory Brussels sprouts glaze. You get the saltiness from the soy sauce and the tang of the balsamic cutting through that rich sweetness. It’s culinary magic achieved stovetop, and I promise, it’s reliable every single time!
Ingredients for the Perfect Sticky Brussels Sprouts Glaze
When you’re going for something truly special, you can’t skimp on the quality or the precision of your ingredients. This sticky Brussels sprouts glaze is a recipe where the measurements really matter because we’re trying to nail that perfect clingy texture. Don’t worry about finding fancy stuff; everything here is easily grabbed from your local grocery run. If you need some ideas on how to incorporate more veggies into your rotation easily, check out what I’m making for dinner tonight: easy chicken and green beans dinner!
Glaze Components
These measurements build our beautifully balanced, thick glaze for roasted vegetables. Remember, the cornstarch and water are a team working to make sure that sauce doesn’t run off your sprouts!
- 1/4 cup pure maple syrup (sweetness anchor!)
- 1/4 cup low-sodium soy sauce (salt balance is key)
- 2 tablespoons balsamic vinegar (that little bit of necessary tang)
- 1 tablespoon brown sugar, packed firmly (this adds depth!)
- 1 teaspoon fresh ginger, grated super finely
- 2 cloves garlic, minced very small
- 1 teaspoon cornstarch (our secret weapon for thickness)
- 1 tablespoon water (to mix with the cornstarch)
Brussels Sprouts (For Application Reference)
You’ll need a good amount of sprouts ready to be coated once your sauce comes together! We plan for about this much when making a full batch of the glaze.
- 1 pound Brussels sprouts (trimmed and halved if you like them crispy!)
Step-by-Step Guide to Making Your Sticky Brussels Sprouts Glaze
Okay, now that you have your ingredients measured out, let’s talk technique. This stovetop process is fast, so have everything ready to go before you turn on that heat! If you’re rushing this, you risk burning the sugars, and nobody wants bitter sprouts. We’re keeping this simple, but precision is important when we’re learning how to make sticky Brussels sprouts that taste professional.
Combining the Base Ingredients
Grab a small saucepan—nothing too wide, we want a nice, concentrated heat for reducing this sauce slightly. Toss in your maple syrup, soy sauce, balsamic vinegar, packed brown sugar, grated ginger, and the minced garlic right away. Set the heat to medium and just stir gently until you see that sugar melt completely into the liquids. Once it starts to bubble happily, let it simmer for about three minutes. That little simmer is what marries the ginger and garlic flavors into the syrup base.
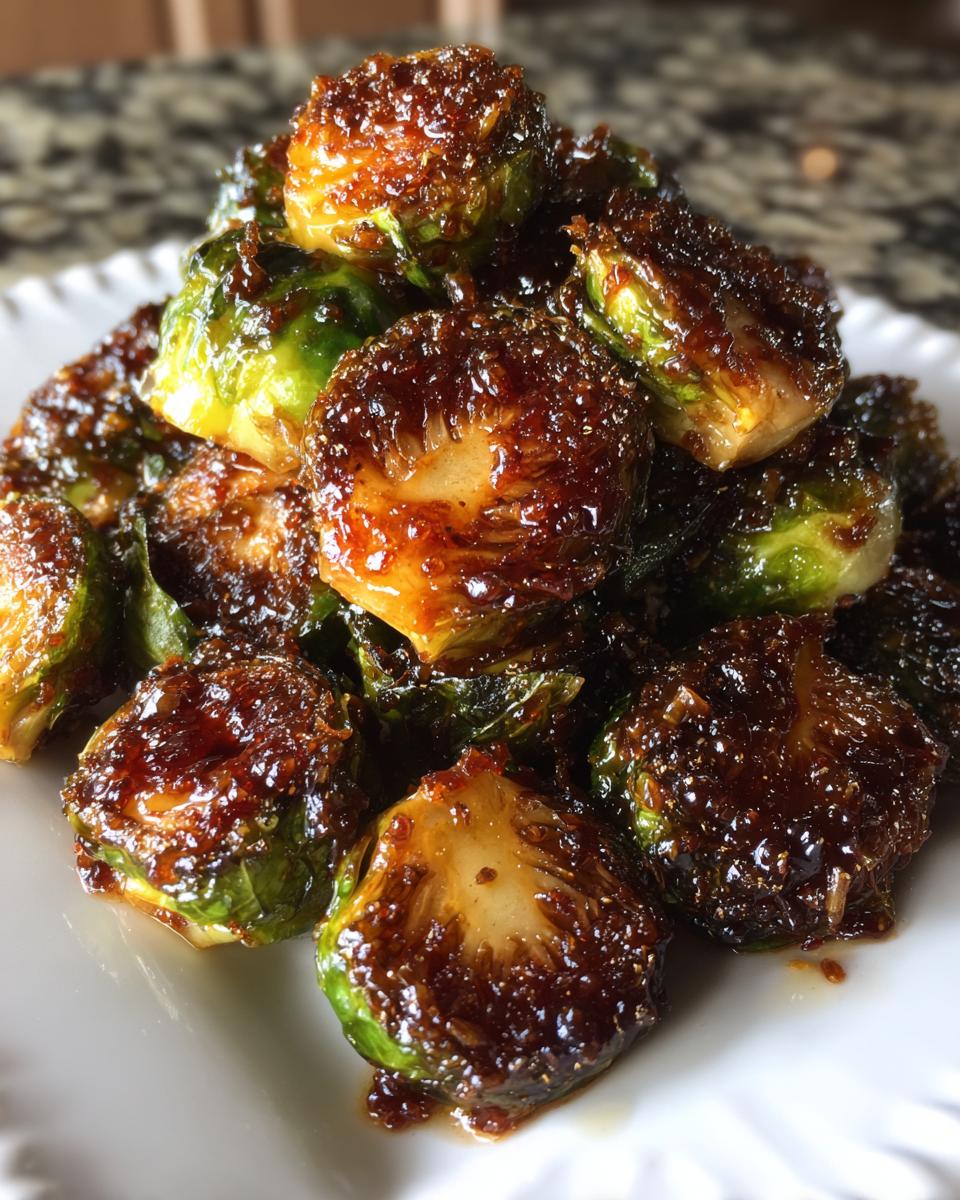
Achieving the Sticky Brussels Sprouts Sauce Consistency
This next part is what separates a thin, watery sauce from a gorgeous, clingy coating. We need to make a slurry—seriously, don’t skip this! In a separate tiny bowl, whisk that teaspoon of cornstarch right into the tablespoon of cold water until it looks like milky paint, totally smooth. Now, keep that heat steady on your simmering sauce, and while whisking vigorously (don’t stop!), slowly pour that slurry in a thin stream. Keep whisking for another minute or two. You’ll see it go from liquid to this beautiful, thick glaze for roasted vegetables almost instantly. When you pull your whisk out, the sauce should coat the back of it perfectly. That’s your cue to take it off the heat; it’s now the perfect sticky Brussels sprouts sauce.
If you want to see my go-to method for easy appetizer dips that pair well with savory sides like this, I’ve got a great recipe right here! easy homemade pretzel bites.
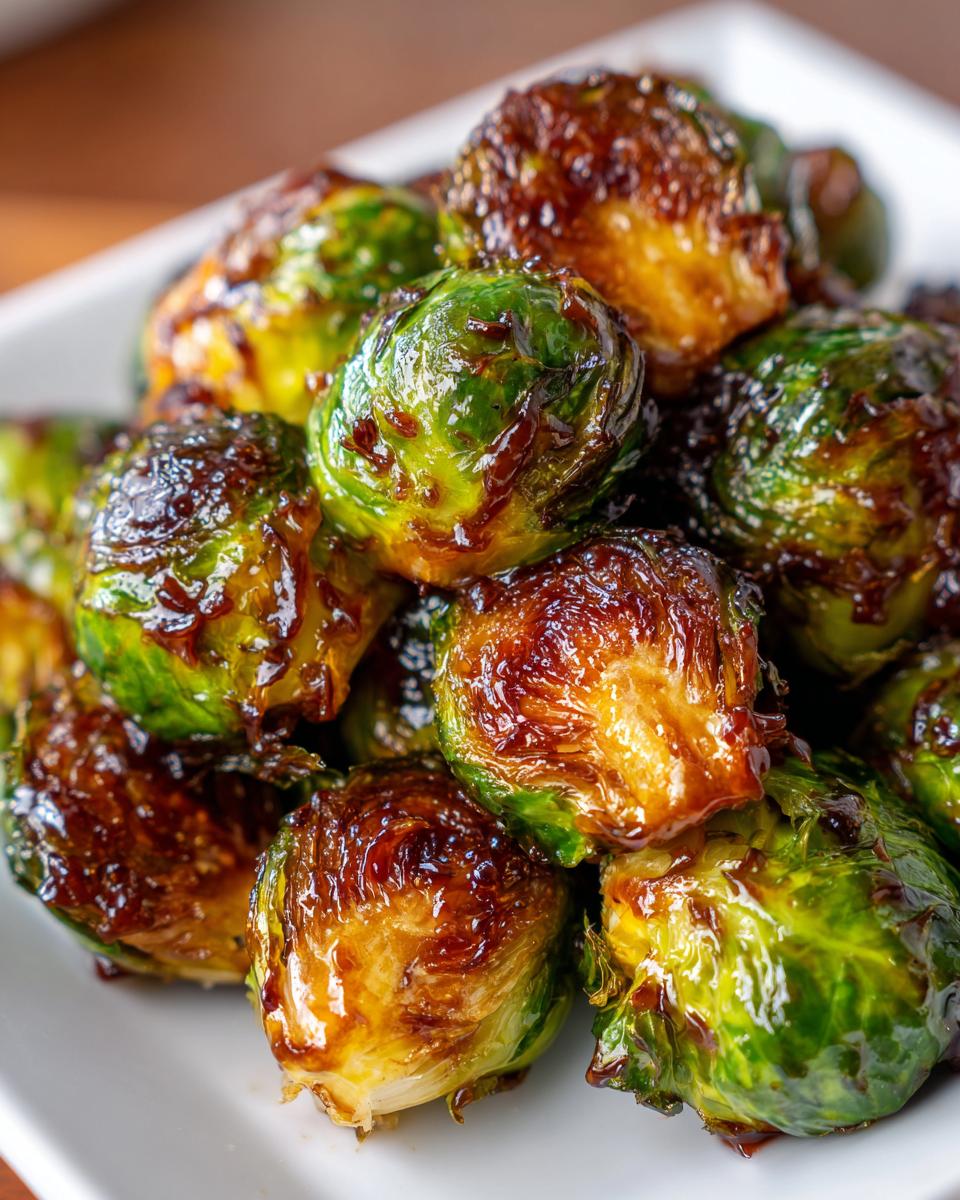
Three Ways to Apply the Best Glaze for Roasted Brussels Sprouts
Having this incredible sticky Brussels sprouts sauce ready is only half the battle! How you get it onto your sprouts matters just as much, especially if you want that gorgeous, caramelized finish without burning the maple syrup. I’ve tried tossing them halfway through roasting, but honestly, I think the texture is best when the glaze goes on at the end. This keeps the sugars from scorching during the main cook time. This is the technique that delivers the best glaze for roasted Brussels sprouts, giving you that appetizing shine.
I’ve got a fantastic full recipe for mixed roasted veggies that you can use this glaze on, too! Check out my garlic herb roasted veggies inspiration if you’re planning a big veggie spread.
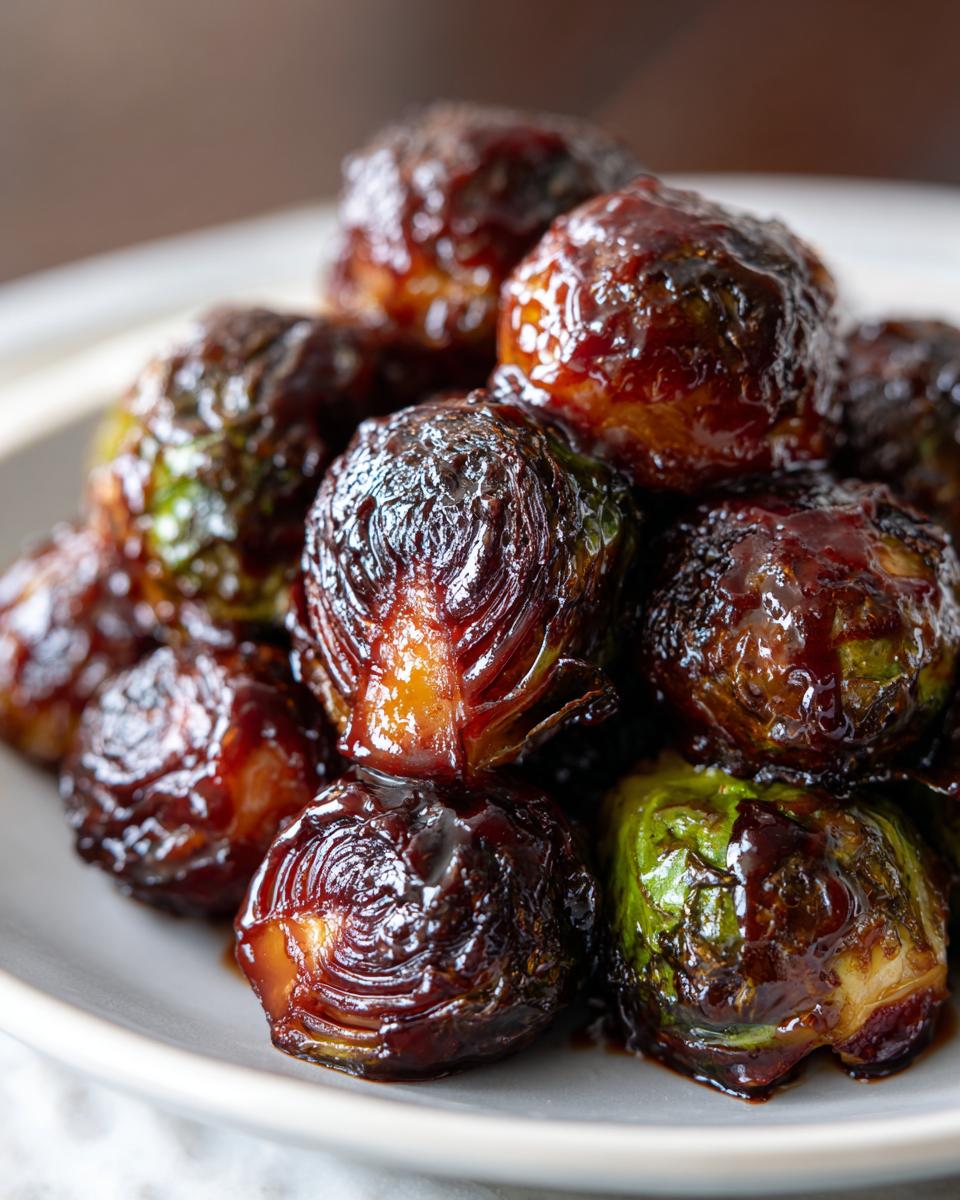
Method 1: Caramelized Finish After Roasting
This is my absolute favorite way to do it. Roast your sprouts first—tossed just in a little olive oil, salt, and pepper—until they’re tender on the inside and nice and crispy on the edges. I usually do about 20 minutes at 400°F, depending on how big I cut my sprouts. Once they come out, let them cool for just a minute until you can handle them, then toss them in a big bowl with half of your warm glaze. Don’t drown them, just coat them lightly!
Then, here’s the E-E-A-T professional touch: spread those glazed sprouts back onto a baking sheet and pop them back into the hot oven—still at 400°F—for just 3 to 5 minutes. Watch them like a hawk! This short blast will set that glaze so it’s perfectly sticky and not drippy, giving you that incredible caramelized texture.
Method 2: Pan-Toss for Perfectly Coated Brussels Sprouts
If you’re pan-frying or air-frying your sprouts, this method is lightning fast. Cook your sprouts completely until they’re tender-crisp using your preferred high-heat method. When they are done, drain off any excess oil in your skillet. Turn the heat right down to low—we are talking the lowest setting here!
Pour the warm glaze over the sprouts in the pan and toss constantly. You only need 60 seconds max! The residual heat will warm the glaze enough to make it flow smoothly, ensuring you get those perfectly coated Brussels sprouts without burning. If you leave them on medium heat for even 30 seconds too long, that sugar content means instant charring, so keep things low and moving!
Tips for Success with Your Sticky Brussels Sprouts Glaze
We’ve made the thick glaze, and now we know how to coat the sprouts beautifully, but I always want to give you extra insider knowledge so you never fail! Kitchens are all about experimenting safely, right? Keeping the base of this recipe—the sweet, salty, and the thickener—is how we maintain reliability, but tweaking the other components can totally change the vibe of your sticky Brussels sprouts sauce.
I think of this glaze like a foundation for a house; we don’t move the foundation, but we can choose the paint colors! Don’t forget that if you need a fantastic savory dip to go alongside your veggies, I’ve got my easy creamy horseradish sauce recipe that comes together in minutes.
Ingredient Swaps for a Different Sticky Brussels Sprouts Sauce
If you’re out of maple syrup, don’t panic! You can swap it out with honey measure-for-measure. Just know that honey tends to be a little sweeter and might develop a slightly different, maybe darker color when it caramelizes because of its natural fructose content. Keep an eye on it if you use honey!
Also, remember the balsamic vinegar? That’s there to give us that necessary little acidic punch to keep the glaze from tasting overwhelmingly sweet. If you want to lean into a sharper flavor profile, you can absolutely sneak in a teaspoon of apple cider vinegar along with the balsamic. That extra brightness really makes my version of appetizer vegetable glaze ideas pop on a platter!
Making a Vegan Sticky Glaze Sprouts Batch
I get asked this a lot, especially since this recipe is naturally vegetarian, but we need to make sure it’s fully plant-based if you’re cooking for vegan friends! The good news is that this recipe is incredibly easy to keep vegan. The maple syrup is already great, but the one thing you *must* always double-check is your soy sauce. Not all commercial soy sauces are created equal; some can contain trace ingredients you don’t want.
If you are aiming for vegan sticky glaze sprouts, just confirm your soy sauce is pure. If you’re worried, you can substitute it with tamari, which is often naturally gluten-free and vegan, though you might have to adjust salt levels slightly depending on the brand. That’s all it takes to make sure your batch of glazed sprouts side dish is truly plant-friendly!
Storage and Reheating Instructions for Extra Glaze
Alright, let’s face it—sometimes I make a huge batch of this delicious sticky Brussels sprouts glaze because I know I’ll use the leftovers later! It’s just too good to pour down the sink, even if you only used half of it on your sprouts tonight. Planning ahead is smart cooking, and this stuff stores beautifully.
If you have any leftover sauce, pop it into a clean, airtight container immediately after you finish coating your vegetables. It keeps really well in the refrigerator for up to a week. Don’t be alarmed, though; when this glaze chills, it’s going to turn into a solid block of sugary goodness. That’s just the maple syrup and sugar locking up tight, which is totally normal for a sauce this thick!
When you want to bring it back to life—say, you’re making your final batch of crispy Brussels sprouts topping for lunch tomorrow—you’ll need to reheat it gently. I just transfer the amount I need back into a small saucepan over very low heat. You need to stir it constantly as it warms up. It will melt back down into that glossy, pourable consistency you loved when it was fresh, usually within two or three minutes. You don’t want a rolling boil, just enough warmth to loosen those sugars again.
If you happen to have extra and want to keep it handy for other dishes, like drizzling over pork chops or even using it as a base for dipping sauces (my easy breadsticks recipe would love a side of this!), store it in smaller portions so you don’t have to reheat the whole block every time. It really does save time later in the week!
Serving Suggestions for Glazed Sprouts Side Dish
Now that we have mastered the art of the perfect sticky coating, the next question is always: what do I serve these incredible gems with? Seriously, this glazed sprouts side dish is so flavorful, it deserves a show-stopping main course next to it!
Because the glaze is rich—salty, sweet, and tangy—it pairs beautifully with simple, hearty proteins. I often make this when I’m serving up something that benefits from a bit of savory contrast. Think roasted chicken or pork tenderloin. If you want something fun and hands-off for a weekend meal, try my recipe for easy baked chicken cheese chimichangas; the sweet glaze on the sprouts balances the spicy chicken filling perfectly.
Honestly, you can serve this alongside almost any weeknight meal, but leaning into roasted or grilled meats really lets the side dish shine. It transforms a simple plate into a serious meal!
Frequently Asked Questions About Sticky Brussels Sprouts Glaze
I know sometimes when you’re cooking, you run into little snags, or maybe you just need to know if you can cheat a little bit! Don’t stress—that’s why I put together answers to the questions I get most often about creating this perfect coating. You should feel totally confident making this glaze for your next side dish. If you need a hearty, comforting dish to round out your meal, my easy tortilla soup recipe stovetop chicken is always a winner!
Can I make the Sticky Brussels Sprouts Glaze ahead of time?
Yes, you absolutely can! I mentioned this a bit above, but it bears repeating. You can prepare the entire batch of the sticky Brussels sprouts glaze, let it cool completely, and store it in an airtight little jar in the fridge. It will solidify, which is completely normal because of all that good sugar and maple syrup we used. When you’re ready to use it, just take out the amount you need, pop it into a mini saucepan, and warm it over low heat, stirring gently until it loosens back up into that perfect sauce consistency. It saves so much time on a busy night!
What is the best way to prevent the glaze from burning?
This is the most common panic when dealing with glazes—we want sticky, not charcoal! The trick here is pure timing. You should never apply this glaze to raw sprouts and stick them in the oven for the full 20 or 30 minutes. This high-sugar mixture will burn long before your vegetables are tender. For the best result, cook your Brussels sprouts completely first using roasting, air frying, or pan-frying until they are tender-crisp. Then, and only then, toss them with the warm glaze right at the very end, maybe giving them just three to five minutes of final heat exposure just to set the stickiness.
Can I use honey instead of maple syrup in this recipe?
You certainly can substitute honey for maple syrup, and it makes a wonderful version of the sweet and savory Brussels sprouts glaze! Remember that honey is primarily composed of fructose and generally tastes a shade sweeter than maple syrup. If you use honey, I recommend either reducing the added brown sugar by half a tablespoon or keeping a close eye on the mixture during the simmering stage. Honey can sometimes brown slightly faster than maple syrup, so just make sure your heat stays medium-low when dissolving that sugar.
Nutritional Estimate for This Glazed Sprouts Side Dish
Listen, I’m a home cook, not a registered dietitian, so please take this information with a grain of salt! I pull these numbers together just to give us a general idea of what we’re working with when we drench those sprouts in our delicious, sticky sauce. But really, when it comes to Brussels sprouts, we know they are fantastic for us, so a little bit of sweet glaze won’t hurt!
This estimate is based on a serving size of just two tablespoons of sticky Brussels sprouts glaze itself, meaning the nutrition of the sprouts themselves isn’t factored in here. I’ve used the standard ingredients in this recipe, and the nutrition calculation assumes no salt was added during the initial cooking of the vegetables. This data helps you understand the glaze component when thinking about your overall meal planning.
- Serving Size (of glaze only): 2 tablespoons glaze
- Calories: 85
- Sugar: 16g (That’s where the sticky comes from!)
- Sodium: 350mg
- Fat: 0g
- Carbohydrates: 21g
- Protein: 1g
The main thing to notice is the sugar content, which is what creates all that wonderful caramelization. Because we are using this as a coating rather than pouring a huge amount over everything, keeping the serving size small helps manage those sweet notes wonderfully. It’s all about balance, right?
PrintThe Ultimate Sticky Brussels Sprouts Glaze Recipe (3 Ways to Use It)
Learn how to make a thick, sweet, and savory sticky glaze perfect for coating roasted or pan-fried Brussels sprouts. This recipe delivers caramelized flavor and a perfect sticky texture.
- Prep Time: 10 min
- Cook Time: 10 min
- Total Time: 20 min
- Yield: About 1 cup of glaze (enough for 1.5 lbs sprouts) 1x
- Category: Side Dish
- Method: Stovetop Glazing
- Cuisine: American
- Diet: Vegetarian
Ingredients
- 1/4 cup maple syrup
- 1/4 cup low-sodium soy sauce
- 2 tablespoons balsamic vinegar
- 1 tablespoon brown sugar, packed
- 1 teaspoon fresh ginger, grated
- 2 cloves garlic, minced
- 1 teaspoon cornstarch
- 1 tablespoon water
- 1 pound Brussels sprouts (for application methods)
Instructions
- Prepare the glaze base: In a small saucepan, combine the maple syrup, soy sauce, balsamic vinegar, brown sugar, grated ginger, and minced garlic.
- Heat the mixture over medium heat, stirring until the brown sugar dissolves and the mixture begins to simmer gently. Cook for 3 minutes.
- Make the slurry: In a separate small bowl, whisk together the cornstarch and water until completely smooth.
- Thicken the glaze: Slowly pour the cornstarch slurry into the simmering sauce while whisking constantly. Continue to cook and whisk for 1 to 2 minutes until the glaze thickens significantly and coats the back of a spoon. This creates your thick glaze for roasted vegetables.
- Remove the saucepan from the heat. This is your sticky Brussels sprouts sauce.
- Application Method 1 (Roasting): Toss cooked, roasted Brussels sprouts with half of the glaze just before serving. For extra caramelization, return the glazed sprouts to the oven for 3-5 minutes at 400°F (200°C).
- Application Method 2 (Pan-Frying): After pan-frying or air-frying your sprouts until tender-crisp, toss them directly in the warm glaze in the skillet over low heat for 1 minute until perfectly coated Brussels sprouts result.
- Application Method 3 (Tossing): Use the glaze as a finishing sauce for any cooked Brussels sprouts side dish.
Notes
- For a vegan sticky glaze sprouts option, confirm your maple syrup is pure and your soy sauce does not contain animal products.
- If you prefer a tangier flavor, substitute 1 teaspoon of the balsamic vinegar with apple cider vinegar.
- This glaze works well as a crispy Brussels sprouts topping for other roasted root vegetables too.
Nutrition
- Serving Size: 2 tablespoons glaze
- Calories: 85
- Sugar: 16
- Sodium: 350
- Fat: 0
- Saturated Fat: 0
- Unsaturated Fat: 0
- Trans Fat: 0
- Carbohydrates: 21
- Fiber: 0
- Protein: 1
- Cholesterol: 0