
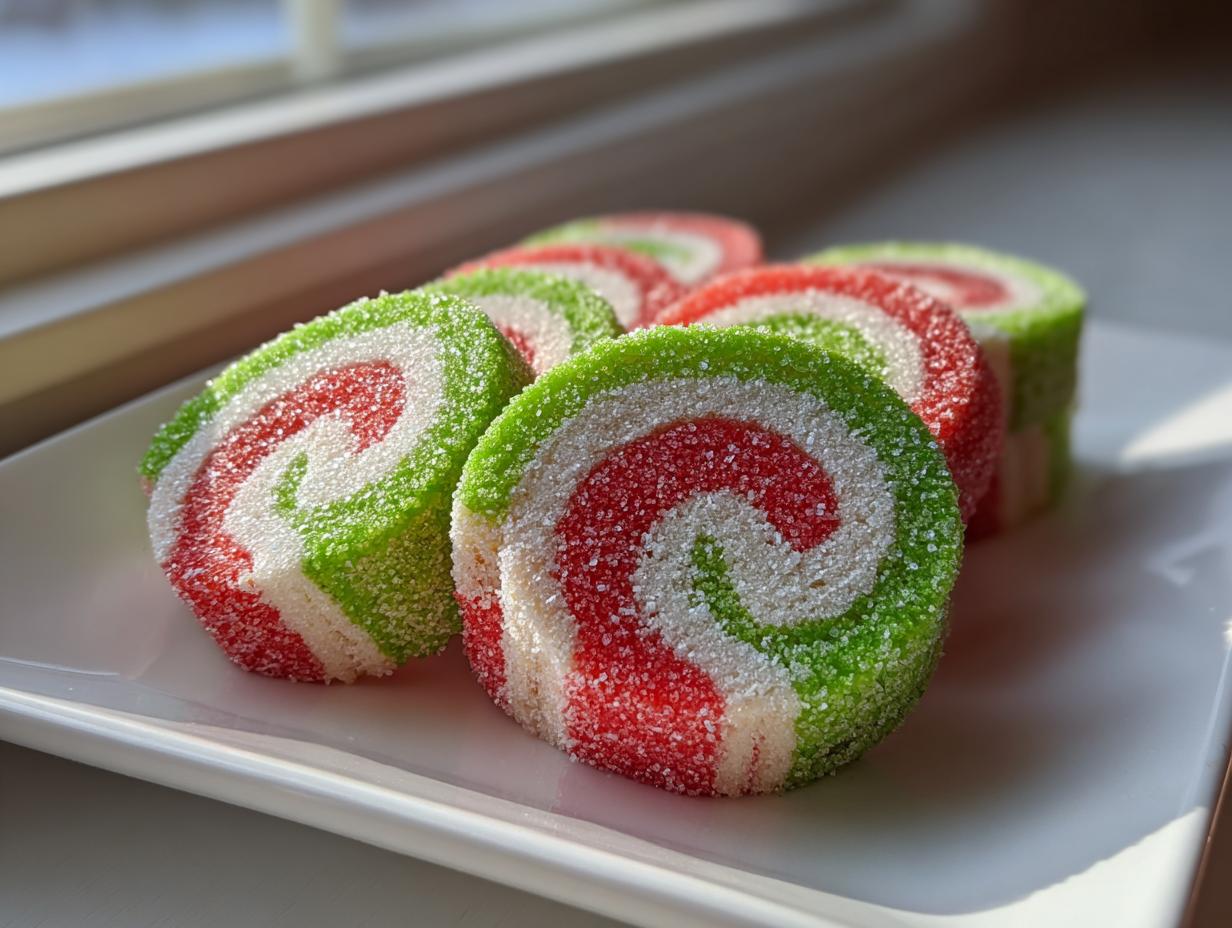
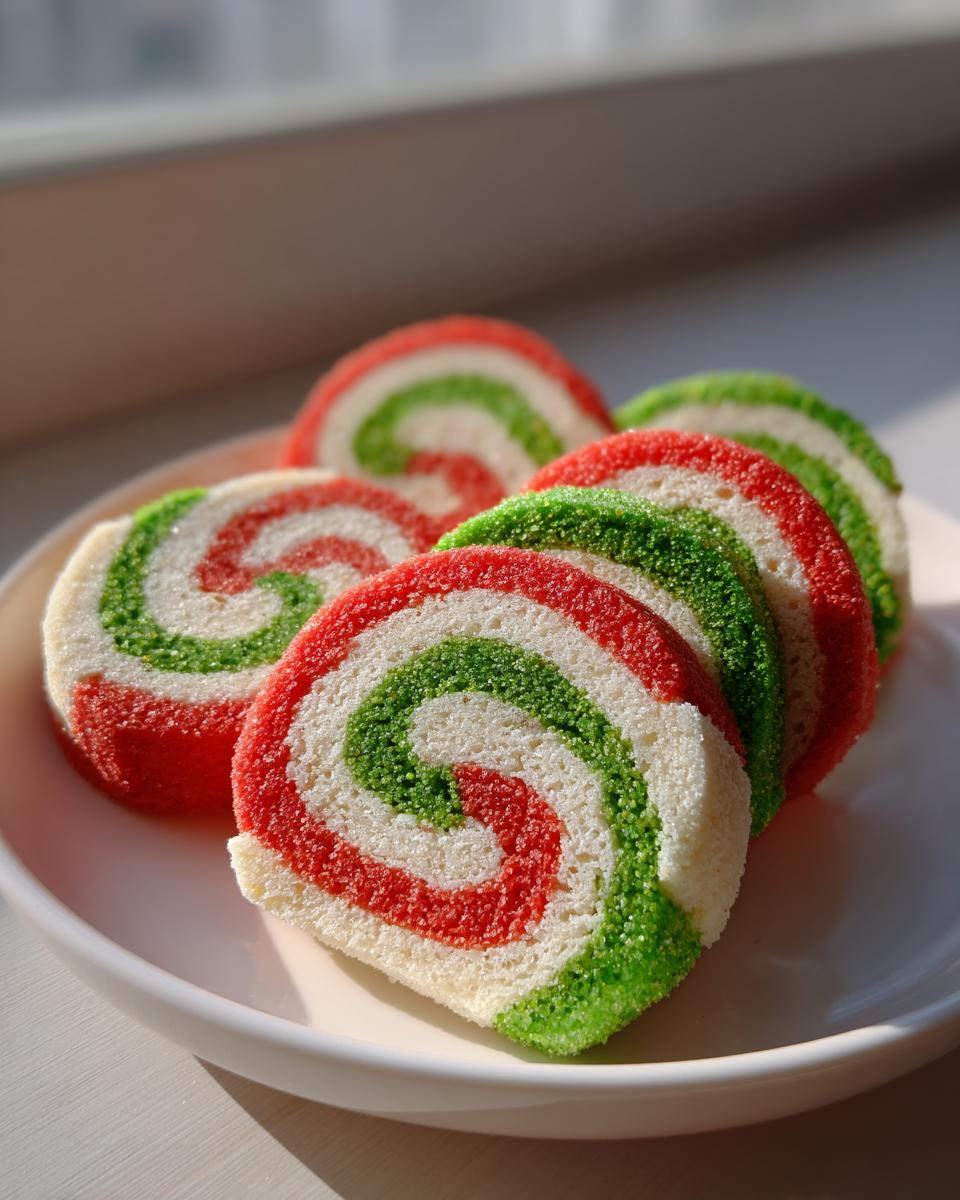
The air gets that certain crispness around Thanksgiving, and suddenly, my kitchen turns into Santa’s workshop! If you’re anything like me, you’re eyeing that jam-packed Christmas cookie tray and thinking, how can I make that look amazing without spending all day rolling dough? Well, I’ve got the perfect answer for you. These beautiful, vibrant pinwheel cookies are my go-to solution. They look incredibly fancy with their red and green swirls, but honestly, they are secretly the easiest slice and bake cookies you will ever make. After years of balancing teaching and family life, I learned that holiday baking needs to be reliable and gorgeous, and these always deliver!
- Why You Will Love These Classic Christmas Pinwheel Cookies
- Essential Ingredients for Perfect Pinwheel Cookies
- Step-by-Step Instructions: How to Make Pinwheel Cookies
- Expert Tips for Perfect Pinwheel Cookies Every Time
- Ingredient Notes and Variations for Pinwheel Cookies
- Make Ahead Holiday Baking: Storing Your Pinwheel Cookies Dough
- Serving Suggestions for Your Colorful Spiral Cookies
- Frequently Asked Questions About Pinwheel Cookies
- Storing Leftover Pinwheel Cookies
- Share Your Festive Pinwheel Cookies Creations
Why You Will Love These Classic Christmas Pinwheel Cookies
I just know these cookies are going to become part of your family’s holiday routine. They tick every single box for easy, stunning Christmas baking. Trust me, they look like they took hours, but they fly off the cookie sheet!
- They are the definition of slice and bake cookies perfection. You make the dough once, chill it, and slice off as many cookies as you need!
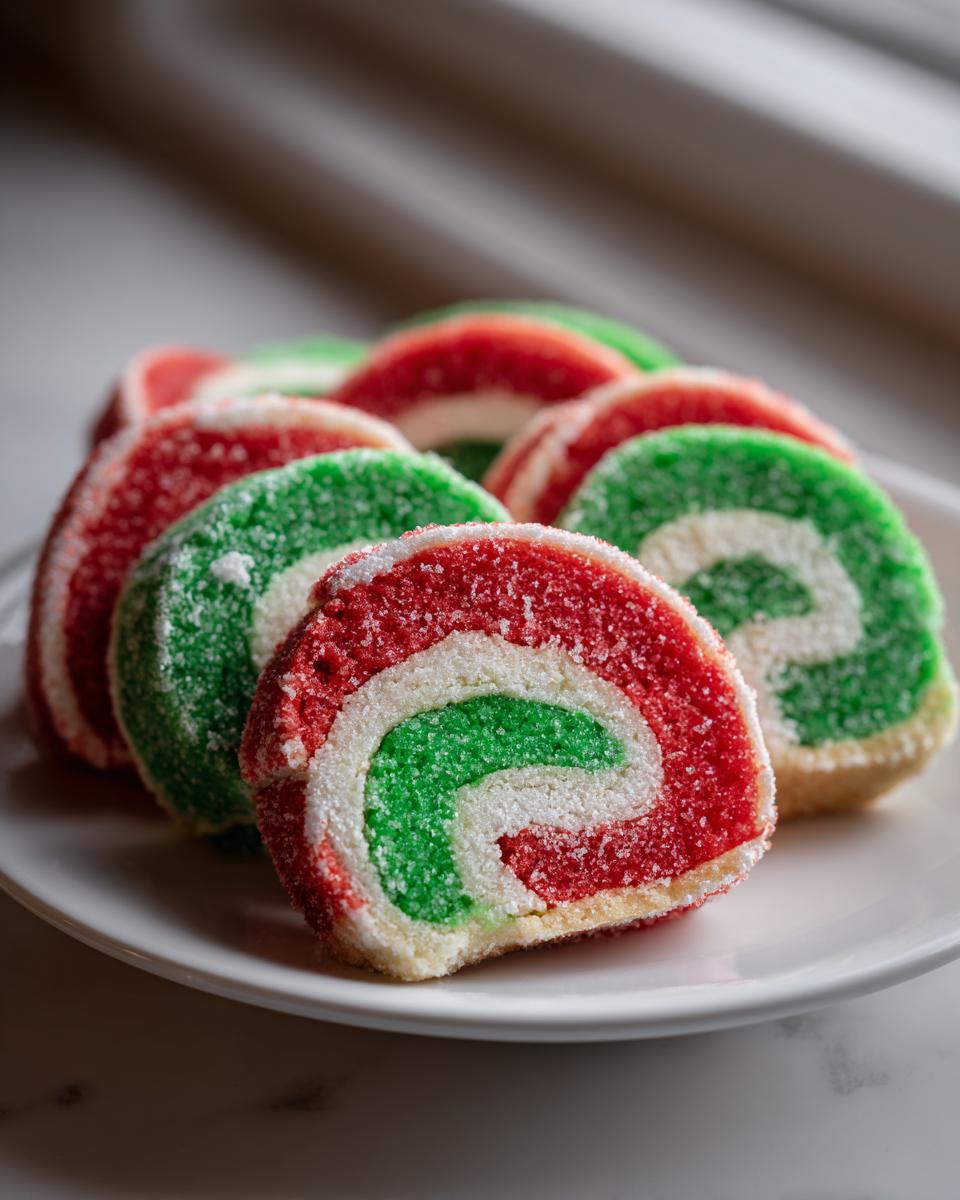
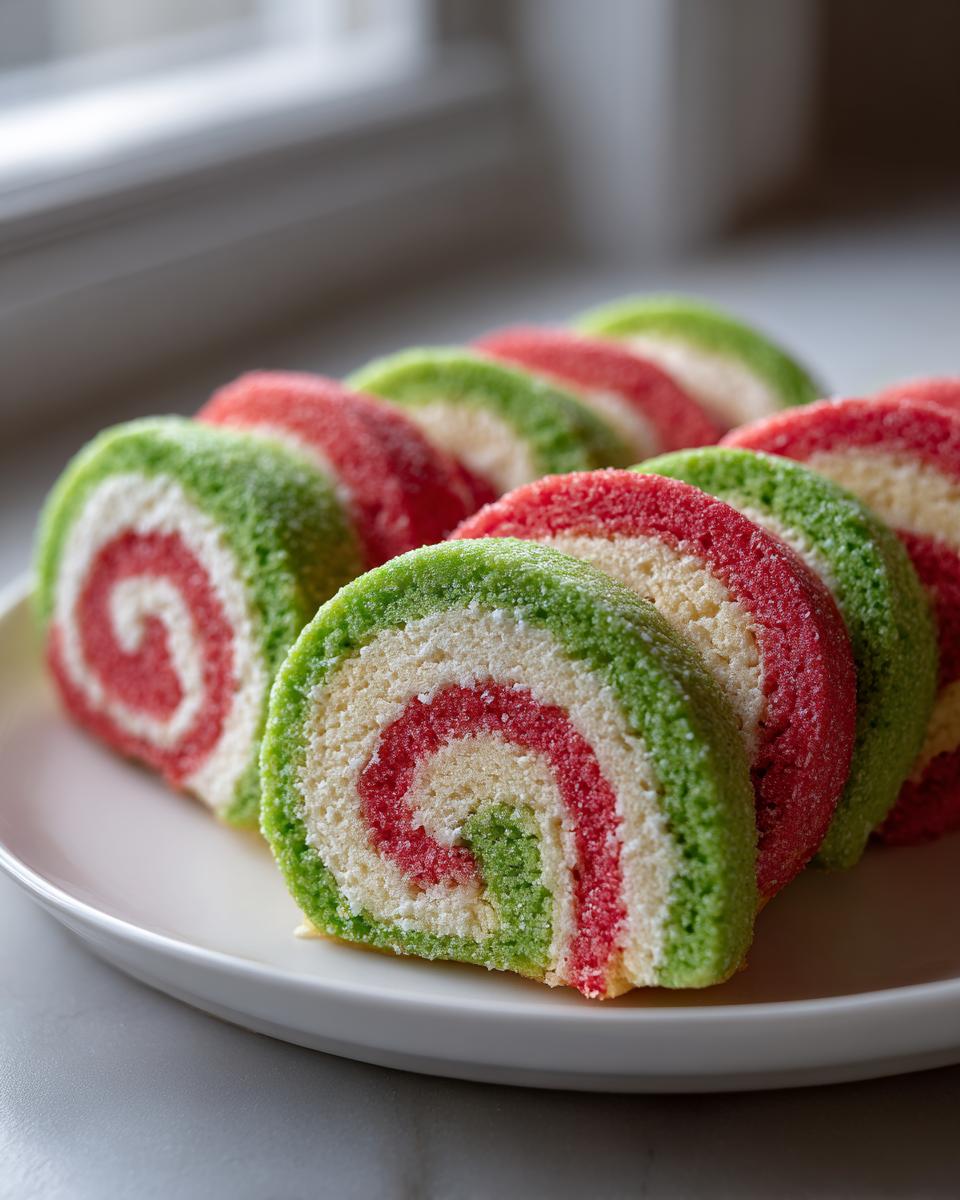
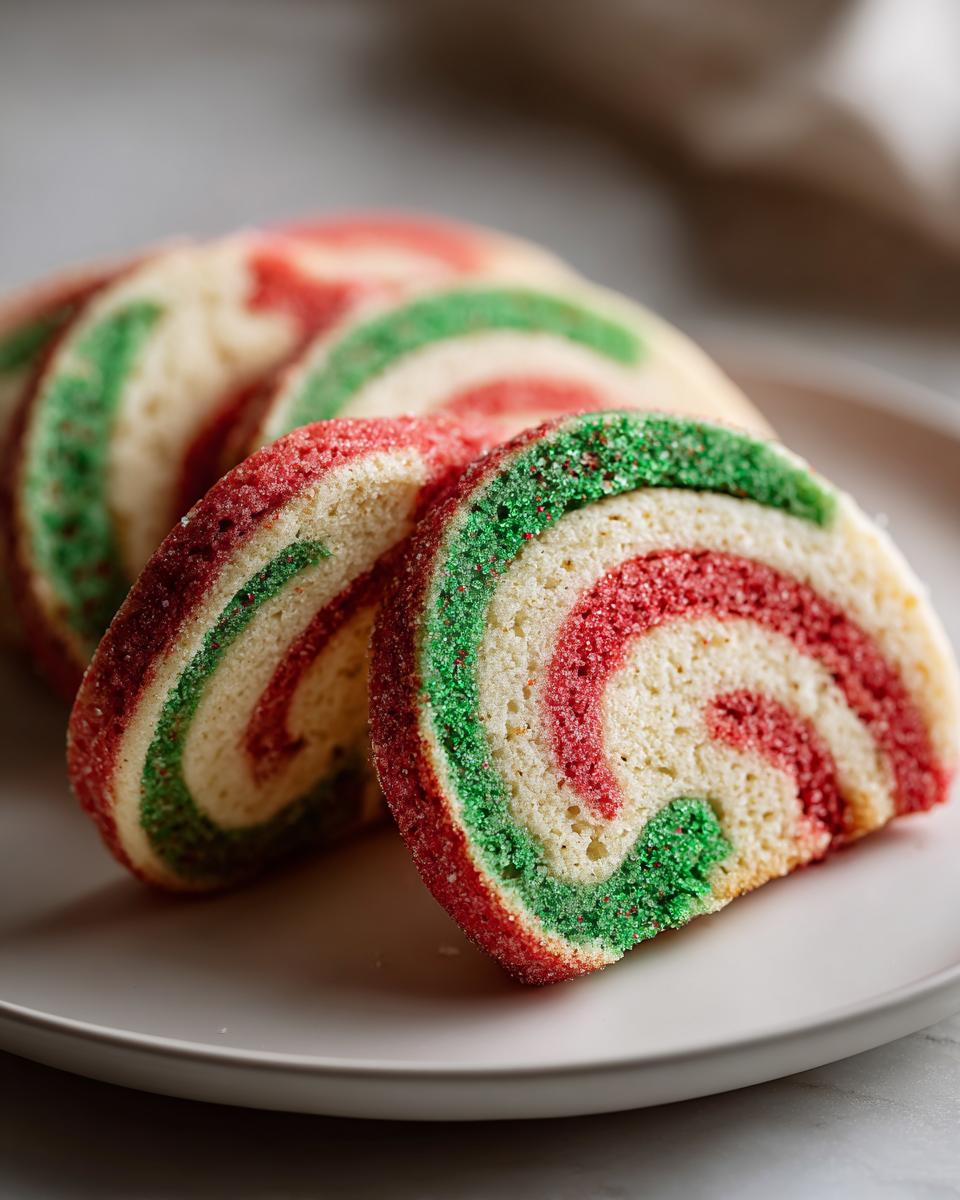
- The vibrant red and green swirls create truly colorful spiral cookies that look spectacular on any platter. They are guaranteed showstoppers at your next holiday cookie exchange ideas.
- Since the dough logs chill so well, this is the ultimate make ahead holiday baking recipe. You can prep them weeks in advance!
- These buttery cookies have a soft, slightly chewy center, making them some of the best festive sugar cookies you’ll ever skip the drop-scoop for.
- They are wonderfully kid-friendly! My little ones absolutely love helping me divide and roll the colored dough layers together.
- They are very adaptable! You can easily swap the colors for brown and white for a classic vanilla and chocolate swirl cookies look anytime of year.
Essential Ingredients for Perfect Pinwheel Cookies
When it comes to these buttery beauties, the simplicity of the ingredients is what makes them shine. You likely have everything you need in your pantry right now! Just make sure that butter is softened—we aren’t melting anything here.
- 1 cup unsalted butter, softened
- 1 cup granulated sugar
- 1 large egg
- 1 teaspoon vanilla extract (use the good stuff!)
- 3 cups all-purpose flour
- 1 teaspoon baking powder
- 1/2 teaspoon salt
- 1/4 teaspoon red food coloring (gel is best, if you have it!)
- 1/4 teaspoon green food coloring
- 1/4 cup granulated sugar (for rolling)
- 1/4 cup red and green nonpareil sprinkles (totally optional, but makes them festive!)
That’s it! No complicated extracts or expensive additions needed for these staple festive sugar cookies. The magic happens in how we treat this basic shortbread foundation.
Step-by-Step Instructions: How to Make Pinwheel Cookies
Okay, this is where the fun starts and the magic happens! We’re taking a simple sugar cookie base and turning it into these gorgeous pinwheel cookies. Remember, the secret to great slice and bake cookies is patience during the chilling phase.
Preparing the Base Dough
First things first, get a big bowl. You need to cream that softened butter with the granulated sugar until it’s light and fluffy—this whips air into the dough, which is crucial. Then, beat in your egg and vanilla extract until they are perfectly combined. Next, whisk your dry ingredients—the flour, baking powder, and salt—in another bowl. Add the dry mixture to the wet mixtures slowly, mixing only until you can’t see the flour streaks anymore. Seriously, stop mixing right there! Overmixing is how you lose that tender bite.
Coloring and Layering the Pinwheel Cookies Dough
Now, carefully divide that stiff dough evenly into three separate bowls. One bowl stays white (that’s our vanilla base). Add the red food coloring to the second bowl and mix until you have a uniform, bright color. Do the same with the green coloring in the third bowl. Flatten each colored dough portion into a separate rectangle, aiming for the same thickness—about half an inch thick works wonderfully.
Layer them up like a sandwich! Place the red rectangle right on top of the white one, and then place the green one on top of the red. Press them gently so they stick together.
Chilling and Slicing Your Swirl Cookie Recipe
Starting on one of the long sides, you need to roll this layered dough up as tightly as you possibly can. Think of it like rolling a jelly roll—you want a tight, dense spiral so you get those defined lines in the final product. Wrap that log securely in plastic wrap. It needs to chill in the fridge for at least two hours. If it’s too warm when you slice it, you just get mush, not beautiful colorful spiral cookies!
Once chilled solid, preheat your oven to 375°F (190°C) and line those baking sheets. If you want that extra sparkle, roll the log in a mix of fine sugar and sprinkles first. Then, use a sharp knife to slice the log into rounds about 1/4-inch thick.
Baking and Cooling the Pinwheel Cookies
Lay your slices onto the parchment-lined sheets, leaving an inch or so between each one because they will spread just a tiny bit. Bake these vibrant beauties for 8 to 10 minutes. I watch the edges like a hawk; you want them just starting to turn a whisper of golden brown. If you leave them in too long, they lose that soft, buttery feel that makes these festive sugar cookies so amazing. Let them set on the hot pan for about five minutes before carefully moving them to a wire rack to cool off completely.
Expert Tips for Perfect Pinwheel Cookies Every Time
I’ve made batches of these that got completely messed up because I got lazy on one little step. When you’re making something as pretty as these pinwheel cookies, attention to detail really pays off! Here are the things I learned the hard way so you don’t have to.
First off, let’s talk color. I used regular liquid food coloring for years, and honestly, you have to use so much to get that deep red or green that it ruins the texture of the dough. Trust me, if you can swing it, switch to gel food coloring. You only need a tiny toothpick amount, and you get that super vibrant color without adding extra liquid to your recipe. It keeps the dough perfect for those tight rolls.
My biggest mistake? Trying to rush the chill time. I once thought 45 minutes in the freezer was enough. Nope! I ended up with mushy, squashed-out blobs that looked more like smeared watercolors than sharp spirals. If you want those amazing, crisp swirl cookie recipe lines, you need that dough *rock solid*. I stick to a minimum of two hours in the fridge, or I wrap the logs tightly and forget about them in the freezer for a week. Seriously, chilling is everything!
When you are flattening those three dough layers before stacking, use parchment paper on top of the dough before you roll it. This keeps your hands clean and helps you get that uniform thickness I mentioned earlier. If one layer is thicker than the others, your log won’t roll neatly, and that’s how you end up with a slightly wobbly pinwheel.
Finally, use a very sharp, thin knife to slice the logs. A dull knife tends to compress the dough log instead of cutting cleanly through it. You want a clean slice so the pattern stays intact right up until it hits the baking sheet. It just makes the whole presentation better!
Ingredient Notes and Variations for Pinwheel Cookies
The base recipe I gave you is my tried-and-true method, perfect for those bright red and green festive batches, but I always want you to feel empowered to switch things up! That’s the beauty of a good, buttery sugar cookie recipe—it takes direction so well. We don’t need to reinvent the wheel, we just need small tweaks to create entirely different, delicious pinwheel cookies.
If you are looking to ditch the holiday colors and aim for a delicious two-tone effect, try making vanilla and chocolate swirl cookies. It’s so easy! Simply take one-third of the dough that you would usually color green and instead mix in about two tablespoons of unsweetened cocoa powder until thoroughly combined. You get that nice, rustic brown swirl instead of a bright color, and it tastes fantastic!
Now, what about those glorious winter flavors? If you are craving a little minty zing—and who isn’t during the holidays—you can easily transform these into peppermint pinwheel cookies. Here’s the trick: once you have divided your dough into three sections, leave the white dough as is, but reduce the vanilla extract in that portion to just 1/2 teaspoon. Then, add 1/2 teaspoon of peppermint extract to that white dough. For the red dough, you can either leave it plain vanilla or swap the red coloring for a tiny bit of black or brown coloring if you want a candy cane look. The mint flavor pops beautifully against the butter cookie!
And for those who love a throwback treat, remember my notes mentioned date-filled ones? While that requires a slightly different wrapping technique, you can always make a batch of vanilla dough and switch out the food coloring for a drizzle of pure maple syrup in one portion for a richer, earthy flavor. Don’t forget, the dough is sturdy enough that you can even try a little espresso powder in one section if you want a coffee kick!
Make Ahead Holiday Baking: Storing Your Pinwheel Cookies Dough
This is truly where these pinwheel cookies save your bacon during the ridiculous holiday rush, isn’t it? The best part about this recipe is that the chilling step isn’t just for structure once, you can actually use it as your secret weapon for amazing make ahead holiday baking!
Once you’ve made those beautifully layered, brightly colored logs—before you roll them in the sprinkles or slice them—get them wrapped up tight. I mean tight. Use at least two layers of plastic wrap, pressing out all the air you can, and then wrap the whole thing again in foil. This locks out any freezer smells!
You can stick these frozen dough logs right in the freezer for up to three months! Can you imagine? In the middle of December, when you’re suddenly asked to bring 5 dozen cookies to a party, you just pull out a log and you are halfway done. It’s cheating, but in the best way possible!
When you’re ready to bake, don’t try to slice them rock solid, or you’ll crack your knife! Just move the frozen log from the freezer to the refrigerator for about 3 to 4 hours. That’s usually enough time for it to soften just slightly. You want it firm enough to slice cleanly—remember what I said about a sharp knife?—but soft enough that it doesn’t crumble under the pressure. Once they are sliced, bake them exactly the same way. See? Total game-changer for stress-free Christmas cookie trays!
Serving Suggestions for Your Colorful Spiral Cookies
Now that you have these stunning, buttery pinwheel cookies ready to go, the fun part is showing them off! Since these are such wonderful colorful spiral cookies, you don’t need to do much extra to make them shine on your holiday spread.
When assembling your Christmas cookie tray recipes, think about contrast. If you have a tray loaded with dark chocolate cookies or rich gingerbread, the brightness of these red and green swirls will really pop! Try placing them near something white, like a meringue kiss or a simple powdered sugar-dusted shortbread. It makes the colors jump off the platter.
Presentation-wise, I love using silver trays or even just a nice white platter for these. If you didn’t roll them in sprinkles earlier—no problem! You can tuck a little bit of green or red ribbon around the edge of the serving plate, or just sprinkle a few festive sprinkles directly onto the empty platter space before setting the cookies down. It gives that professional, highly decorated look without any extra baking time.
And what do you serve them with? They are the perfect companion to a hot cup of coffee or, for the grown-ups at the party, a mug of hot cocoa topped with whipped cream. If you are making a dessert bar, you could set them next to something creamy like my Christmas tree cheesecake recipe. The buttery cookie texture holds up beautifully next to creamy desserts, making them sturdy additions to any holiday snack table. I also saved this recipe idea from holiday pinwheel cookies recipe source if you need extra inspiration for color combos!
Frequently Asked Questions About Pinwheel Cookies
I know sometimes the beautiful photos make you nervous that the process is too fiddly, but these recipes are meant for real kitchens! Here are some quick pointers I get asked almost every year about these festive treats.
Why are my pinwheel cookies not swirling properly?
Oh, this usually comes down to one of two things, honey: temperature or technique. If your dough is too warm when you go to roll it up, it gets sticky and mushy, and the layers just slide instead of stacking neatly. That’s why that chilling time is non-negotiable! Also, make sure you are rolling the layers as tightly as you can without squishing the dough flat. It’s a roll, not a gentle fold. If the layers aren’t snug, you end up with gaps instead of those sharp, colorful spirals when you slice them.
Can I make these without food coloring for a simple vanilla and chocolate swirl cookies look?
Absolutely! That’s one of the best parts about this base recipe—it’s so adaptable. If you don’t want the big red and green Christmas look, just skip the coloring entirely in two of the dough portions. Then, follow the instructions I gave you in the variations section: swap out the coloring in one bowl for cocoa powder to make beautiful vanilla and chocolate swirl cookies. They look rustic and taste just as buttery!
How long do slice and bake cookies like these last?
Because these are buttery sugar cookies and not overly soft like a cake cookie, they hold up really well! If you keep your baked pinwheel cookies in an airtight container at cool room temperature, they are perfectly delicious for a good week. Around day eight or nine, they might firm up a little bit, but they’re still great for dipping in milk. Remember, if you froze the log correctly, you have fresh cookies ready whenever you need them!
Do I have to chill the dough twice for the best pinwheel cookies?
You don’t *have* to, but I highly, highly recommend it if you have the time. The first chill is mandatory—that’s what lets you slice it cleanly. But if you slice the log and then bake them right away, they spread out quite a bit in the oven, and you lose the definition of that swirl. If you slice the cold log, place the raw slices on the baking sheet, and then pop the sheet into the freezer for 15 minutes before baking? That second chill acts like a little defense shield against spreading. It keeps the edges crisp and the swirl tight!
Storing Leftover Pinwheel Cookies
I swear some years we bake more dough than we actually end up eating right away—though I have no idea how that happens! The nice thing about these buttery shortbread-style pinwheel cookies is that they store like champs. They aren’t like super delicate frosted cookies that go stale in two days because they just have that simple, sturdy butter base.
The best way to keep them fresh is simply to let them cool down completely after baking. Don’t seal them up while they are even warm, because that trapped steam will turn your lovely crisp edges a little soggy. Once they are totally cool, transfer them to a truly airtight container. I prefer the clear plastic ones with the snap lids—you know the ones, they make you feel organized!
Stored well like that, I find these cookies stay wonderfully fresh at room temperature for about a week, sometimes even ten days. They hold their flavor beautifully. They might firm up a tiny bit after day five, but that’s actually perfect if you like Dunkers!
If you ever find they feel a little too hard after the first week, don’t toss them, please! You can revive them! Just pop two or three cookies on a microwave-safe plate and give them about 8 to 10 seconds on low power. It just softens that butter right up and makes them taste like they just came off the cooling rack. It’s a little trick for when you’re sneaking one last cookie after the holidays are officially over!
Share Your Festive Pinwheel Cookies Creations
Seeing your beautiful, colorful kitchen creations truly means the world to me! These pinwheel cookies are all about bringing that cozy, joyful feeling to the holidays, and I love seeing how you decorate them.
If you made this recipe, please stop by the comments section and leave a star rating—it helps other home cooks find reliable Christmas cookie ideas! And if you snap a photo of your vibrant spirals, tag me on social media. I can’t wait to admire your work!
Check out this gorgeous example of holiday baking here for a little extra inspiration!
PrintClassic Christmas Pinwheel Cookies: Easy Slice and Bake Recipe

Make these beautiful, festive red and green pinwheel cookies using a simple slice and bake method. This classic Christmas cookie recipe is perfect for holiday cookie exchanges and cookie trays.
- Prep Time: 30 min
- Cook Time: 10 min
- Total Time: 160 min
- Yield: About 3 dozen cookies 1x
- Category: Dessert
- Method: Baking
- Cuisine: American
- Diet: Vegetarian
Ingredients
- 1 cup unsalted butter, softened
- 1 cup granulated sugar
- 1 large egg
- 1 teaspoon vanilla extract
- 3 cups all-purpose flour
- 1 teaspoon baking powder
- 1/2 teaspoon salt
- 1/4 teaspoon red food coloring
- 1/4 teaspoon green food coloring
- 1/4 cup granulated sugar (for rolling)
- 1/4 cup red and green nonpareil sprinkles (optional)
Instructions
- In a large bowl, cream together the softened butter and 1 cup of sugar until light and fluffy. Beat in the egg and vanilla extract.
- In a separate bowl, whisk together the flour, baking powder, and salt. Gradually add the dry ingredients to the wet ingredients, mixing until just combined to form a stiff dough.
- Divide the dough evenly into three separate bowls. Leave one bowl plain (white dough). Add red food coloring to the second bowl and mix until the color is uniform. Add green food coloring to the third bowl and mix until the color is uniform.
- Take the white dough and flatten it into a rectangle about 1/2 inch thick. Repeat this process with the red dough and the green dough, making three separate rectangles of the same size.
- Place the red dough rectangle directly on top of the white dough rectangle. Place the green dough rectangle on top of the red dough. Gently press the layers together.
- Starting with one of the long edges, tightly roll the layered dough into a log. Wrap the log tightly in plastic wrap. Chill the dough log in the refrigerator for at least 2 hours, or until firm.
- Preheat your oven to 375°F (190°C). Line baking sheets with parchment paper.
- If using sprinkles, pour the 1/4 cup of sugar and the sprinkles onto a flat plate. Roll the chilled dough log in the sugar and sprinkle mixture until coated.
- Use a sharp knife to slice the log into 1/4-inch thick rounds. Place the slices onto the prepared baking sheets, leaving about 1 inch between cookies.
- Bake for 8 to 10 minutes, or until the edges are lightly golden. Do not overbake; the centers should remain soft.
- Let the cookies cool on the baking sheet for 5 minutes before transferring them to a wire rack to cool completely. These slice and bake cookies are best made ahead.
Notes
- For the most vibrant Christmas cookie tray, use gel food coloring instead of liquid for richer red and green colors.
- You can freeze the dough log for up to 3 months, making this a great make ahead holiday baking recipe.
- If you want vanilla and chocolate swirl cookies instead, omit the food coloring and add 2 tablespoons of unsweetened cocoa powder to one portion of the dough.
Nutrition
- Serving Size: 1 cookie
- Calories: 130
- Sugar: 10g
- Sodium: 55mg
- Fat: 7g
- Saturated Fat: 4g
- Unsaturated Fat: 3g
- Trans Fat: 0g
- Carbohydrates: 16g
- Fiber: 0g
- Protein: 2g
- Cholesterol: 25mg