
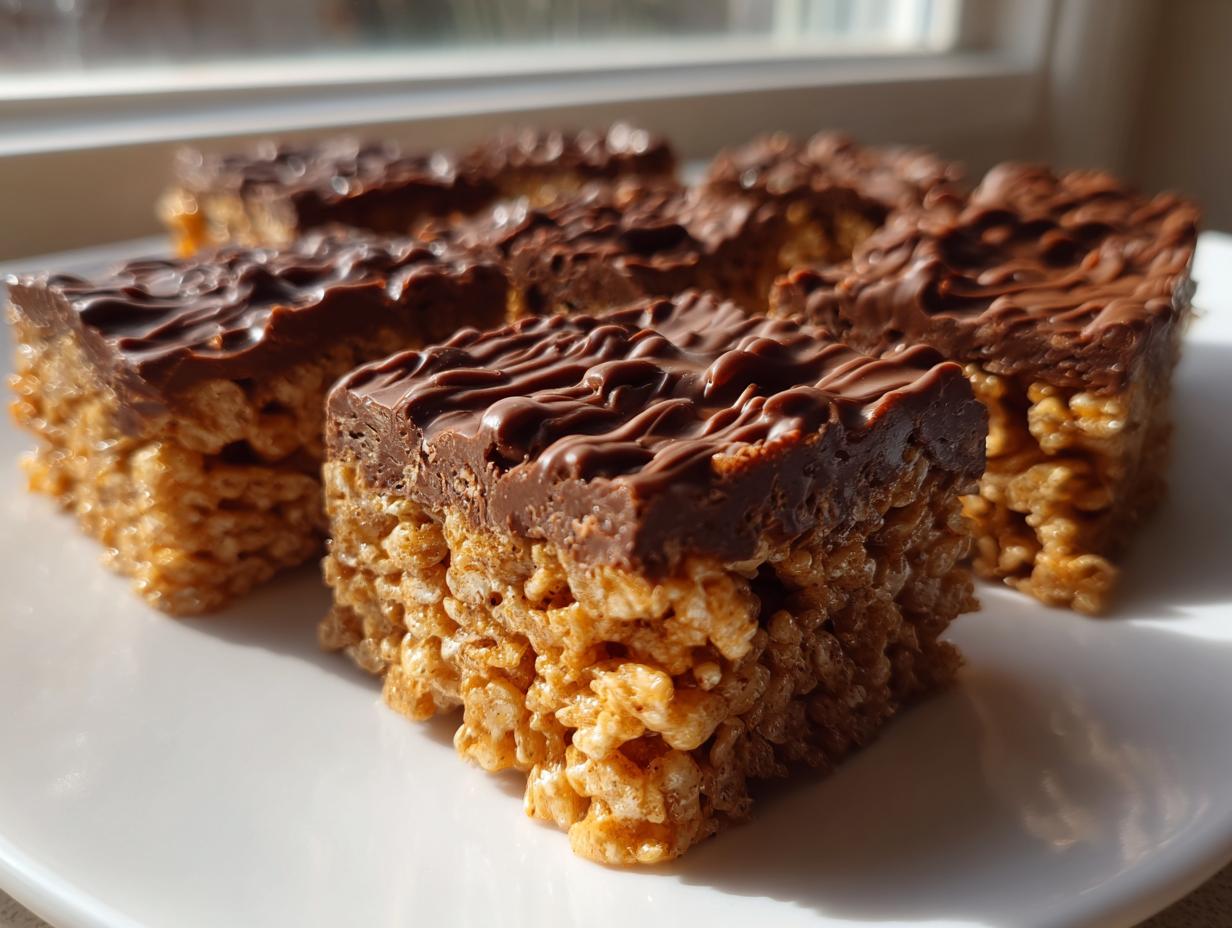
Oh, I know that feeling well—it’s 4 PM, everyone is already asking what’s for dessert, and you haven’t even thought about turning on the oven. When those sweet cravings hit, you need a reliable answer, and for my family, nothing beats the sheer nostalgic joy and speed of homemade peanut butter rice krispie treats. This isn’t just any puffed rice recipe; this is the ultimate, fudgy, no-bake solution I perfected while juggling teaching and carpool duty. In my kitchen, we rely on those tried-and-true recipes that deliver huge flavor without huge effort, and these bars are the reigning champion for quick sweet snack ideas. Trust me, once you try this gooey, comforting version, it’ll be the only way you make them from now on!
- Why Our Ultimate Peanut Butter Rice Krispie Treats Are a Must-Make
- Gather Your Ingredients for Peanut Butter Rice Krispie Treats
- Step-by-Step Guide to Making Peanut Butter Cereal Treats
- Tips for Perfect Gooey Peanut Butter Goodies
- Variations: Making Scotcharoos Recipe Easy Style
- Storing Your Homemade Peanut Butter Rice Krispie Treats
- Serving Suggestions for These Party Snack Recipes Easy
- Frequently Asked Questions About Peanut Butter Marshmallow Squares
- Sharing Your Best Peanut Butter Rice Krispie Recipe
Why Our Ultimate Peanut Butter Rice Krispie Treats Are a Must-Make
I’ve tried every marshmallow square under the sun, and I promise you, these are different. They hit that perfect crossroads of easy prep and incredible payoff. When I say easy, I mean it—we aren’t even touching the oven here! These bars deliver on pure, comforting flavor.
- Texture perfection: Seriously gooey and perfectly chewy, never hard.
- The peanut butter integration is seamless, adding richness without weighing things down.
- They are foolproof, which is exactly what a busy weeknight demands.
Quick Sweet Snack Ideas Ready in Minutes
If you need something sweet *right now*, this is your recipe. We’re talking about an absolute rush job! You are going from pantry to pan in fifteen minutes flat. This fits perfectly into my list of go-to quick sweet snack ideas when an unexpected craving hits me or the kids. They bake up beautifully because they don’t bake at all!
Kid Friendly Desserts No Oven Required
Safety first, always! Since this is a complete no-bake dessert, you can get the little ones right in the kitchen helping you stir the melted fluff. They love watching the cereal get coated. It keeps the kitchen cool and worry-free, which is exactly what I need after a long day of teaching.
Gather Your Ingredients for Peanut Butter Rice Krispie Treats
Now, don’t panic when you see the list; these are all the good staples we always have tucked away! Getting the proportions right is the secret to that perfect, non-crumbling bar. I’ve made sure this recipe uses standard measurements, drawing on my favorite simple pantry dessert ideas. You’ll need about 15 minutes of active time to get everything measured and ready to melt down.
For the Crispy Cereal Base
- 6 cups crispy rice cereal
- 1 cup creamy peanut butter
- 1 cup (2 sticks) unsalted butter
- 1 (10 ounce) package marshmallows
- 1 teaspoon vanilla extract
For the Chocolate Peanut Butter Topping
This is where we get fancy, but it’s still super simple! We use a mix here to get that classic swirl flavor, often called Scotcharoo style. You will need:
- 1 cup semi-sweet chocolate chips
- 1/4 cup butterscotch chips
Step-by-Step Guide to Making Peanut Butter Cereal Treats
This is where the magic happens, and honestly, it’s more like assembling than cooking! We are keeping that heat low and gentle because high heat makes marshmallows tough, and we absolutely need chewy, gooey perfection here. Follow these steps closely so you get the best peanut butter rice krispie recipe results every time.
Melting the Base Ingredients
First thing, make sure that 9×13 pan is greased up—I use a little cooking spray or butter. Pop your butter into the biggest saucepan you have and let it melt over low heat. Once it’s liquid, toss in all those marshmallows. You have to stir constantly now, and I mean *constantly*, until it’s one smooth, shiny puddle. Don’t let it brown! As soon as it’s totally melted, yank that pan right off the burner. This is my expert tip: The residual heat is enough to finish the job without scorching the peanut butter, so take it off the heat before adding your peanut butter and vanilla. Stir until that peanut butter disappears completely into the fluff.
Coating the Cereal and Pressing the Bars
Now, gently fold in your 6 cups of crispy rice cereal. I use a rubber spatula and fold, fold, fold until that cereal stops looking dry. Resist the urge to mix aggressively! We want to coat every piece, but we don’t want to crush the air out of the cereal. Once it’s mixed, dump it into your waiting pan. Here’s the most important part for chewy treats: Do not, I repeat, do not press this mixture down hard! Just use the back of a greased piece of wax paper or your lightly buttered hands to gently coax it into an even layer. We want loft for chewiness!
Preparing and Setting the Chocolate Topping
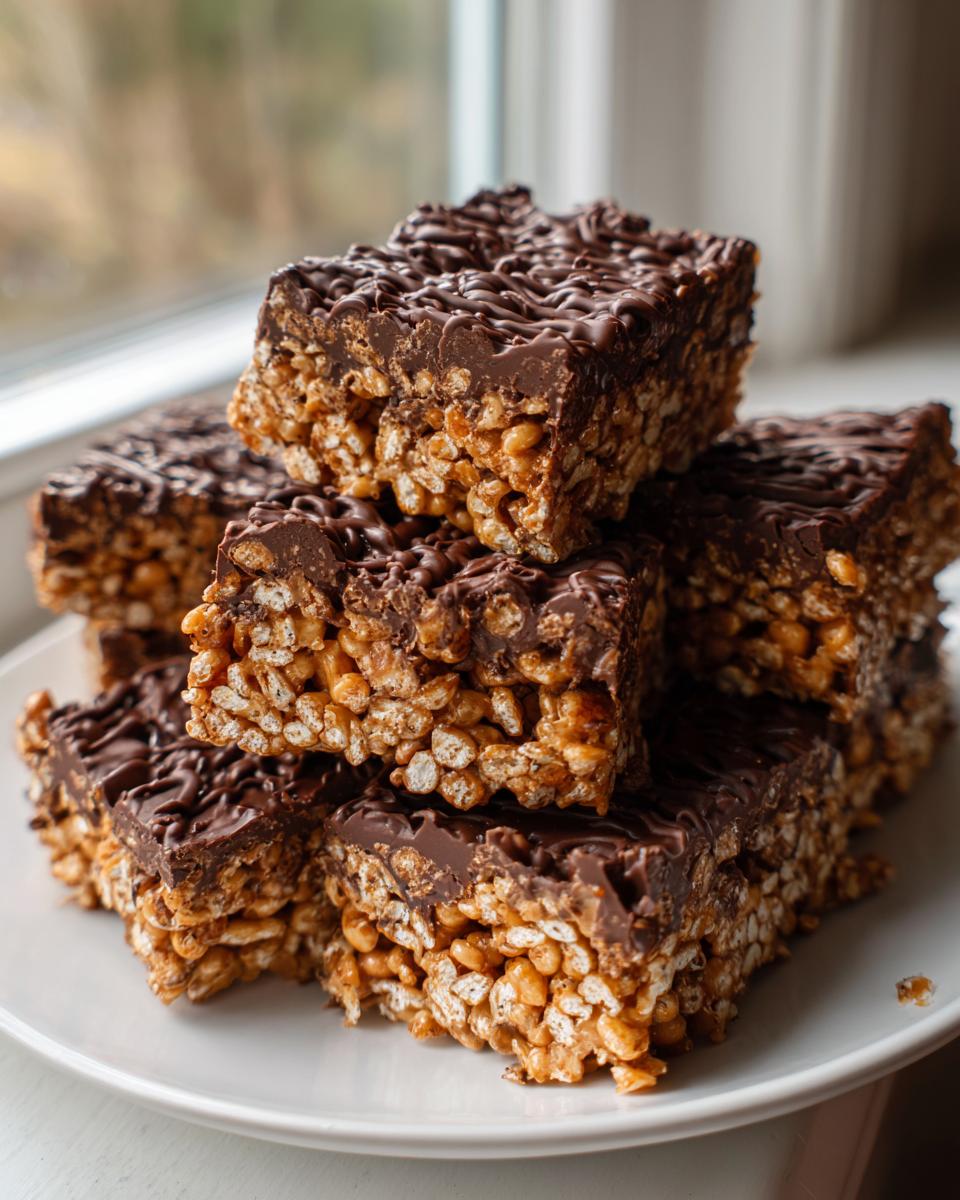
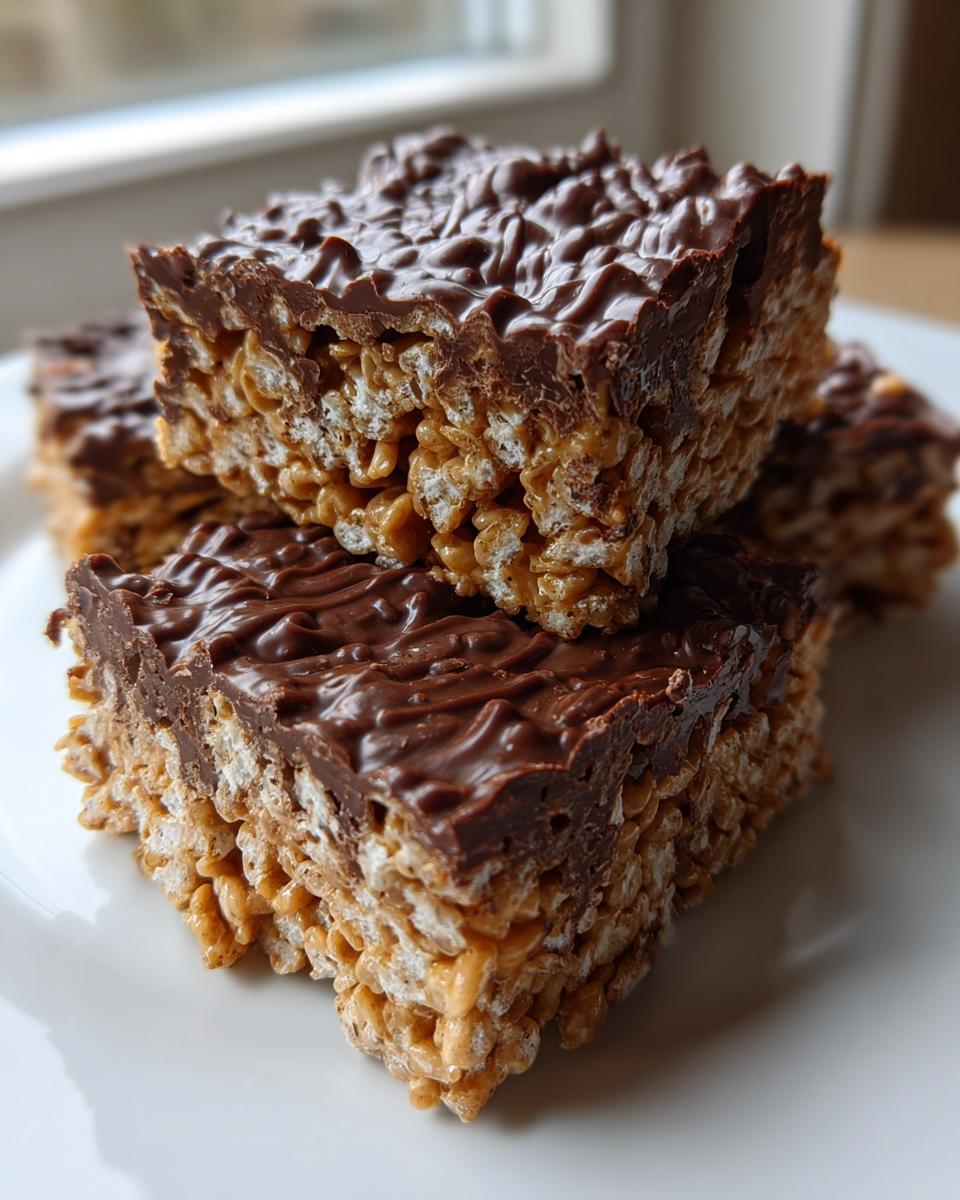
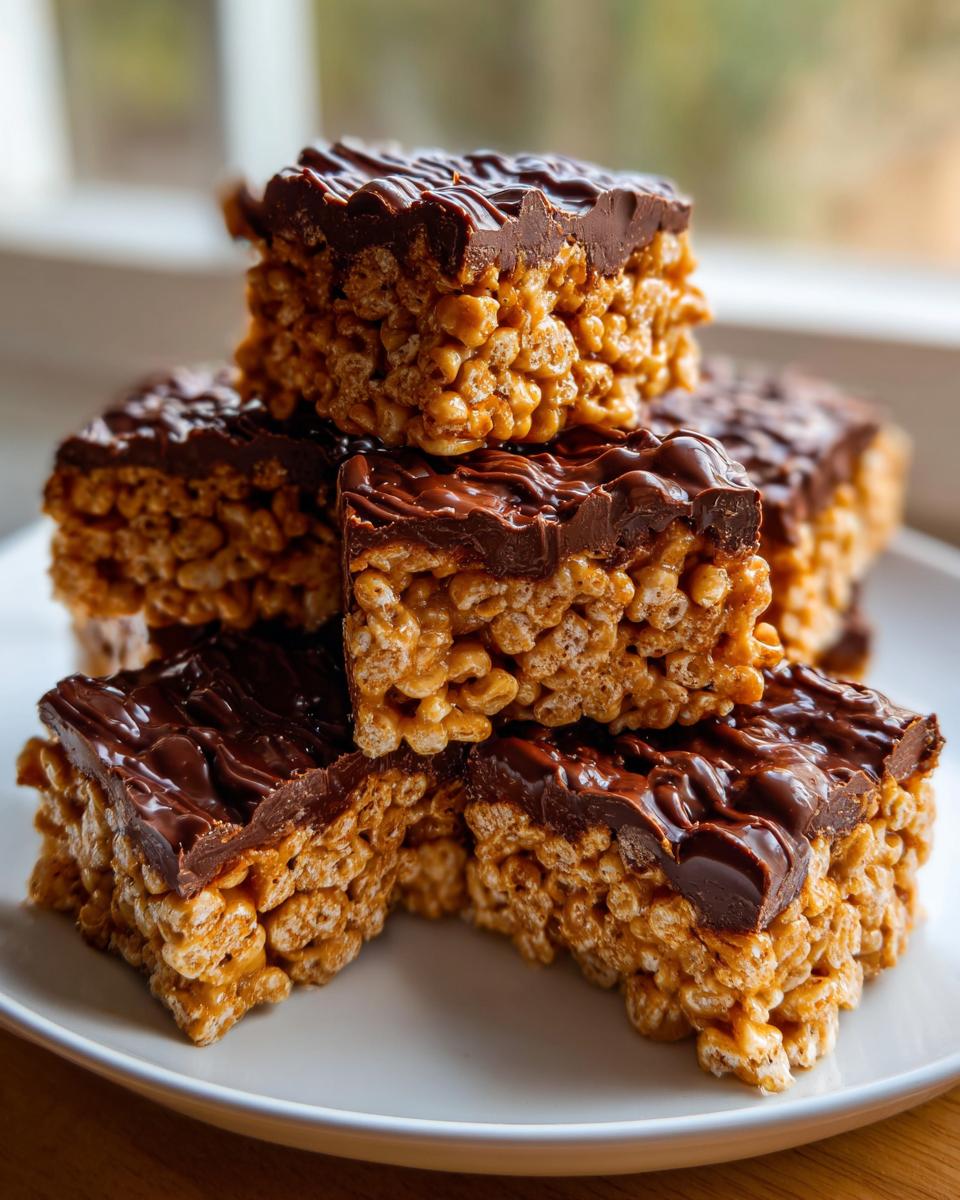
While the base cools just a touch, it’s topping time! This creates the delicious easy rice krispie bars recipe variation everyone loves. Toss your chocolate chips and butterscotch chips into a microwave-safe bowl. Microwave in short 30-second bursts, stirring vigorously between each one. It’s shocking how fast this mixture goes from solid to runny, so don’t walk away! Pour that melted topping evenly over your base—I sometimes swirl it with a knife if I’m feeling extra fancy, making a great presentation for a party snack recipe easy to pass around. Let it set up for about an hour on the counter, or pop it in the fridge for 20 minutes if you’re in a real hurry. Then, cut and serve!

Tips for Perfect Gooey Peanut Butter Goodies
You’ve made your bars, and now you want them to stay soft and that perfect shade of sticky-chewy forever, right? I get it! That’s why I always turn to my little stockpile of insider knowledge—the sort of things I learned after making batches that came out like little peanut butter bricks. If you love rich, buttery flavor, you might also adore my recipe for penuche fudge, which uses a similar low-and-slow melting method!
When I first started, I used the stale marshmallows from the back of the pantry, and oops! The result was stiff and honestly a waste of good peanut butter. My rule now is simple: for those incredibly chewy marshmallow squares you dream about, use the freshest marshmallows you can find. They melt smoother and incorporate air better.
Ingredient Quality for Chewy Marshmallow Squares
If you’re planning a huge party and know you need thicker treats, pay attention to this: You can absolutely use a smaller pan, like a 9×9 inch square pan, instead of the 9×13. Remember, the smaller the pan, the deeper the mixture sits, and the longer heat takes to work its way through. This gives you those wonderfully thick, decadent bars that almost require a napkin to eat!
My final little secret for keeping the goo factor high? Never cover them airtight right away! I leave them uncovered on the counter for about an hour after topping until that chocolate is just set. Sealing them up too soon traps steam, which can make them sticky in a messy way rather than that perfect, manageable chewiness. We are aiming for comfort food bliss here, not a sticky mess for later!
Variations: Making Scotcharoos Recipe Easy Style
Okay, so while my recipe features a chocolate swirl, I know so many of you absolutely adore the classic Scotcharoos flavor profile, which is where the butterscotch chips really shine! If you want that authentic, super-rich flavor that makes these peanut butter rice krispie treats legendary, here is the fast track. For a true Scotcharoos recipe easy version, you can skip the semi-sweet chocolate chips entirely.
Just melt the full cup of butterscotch chips with the 1/4 cup of butter. That’s it! You get that distinct, slightly caramelized flavor that balances the peanut butter base perfectly. If you’re like me, though, you just can’t resist that chocolate kick, so mixing half and half keeps it the best of both worlds. It’s a simple swap that satisfies every chocolate and peanut butter craving you might have!
Storing Your Homemade Peanut Butter Rice Krispie Treats
Part of making these the perfect sweet snack is knowing you can make them ahead of time! The best place to keep these gooey peanut butter goodies is honestly right on the counter. If they are stored airtight at room temperature, they stay wonderfully soft and chewy for about three to four days, which is great for impromptu celebrations. If you seal them up too tightly immediately after making them, you risk trapping steam which can make the chocolate topping look a little dull or sticky.
Make-Ahead and Freezing Instructions
If you’re aiming for ultimate make-ahead success, freezing is definitely the way to go. I usually wait until the chocolate topping has fully set—give it at least an hour or two at room temperature, or quick chill them! Then, cut the bars, but here’s the trick: separate every single layer with squares of wax paper before stacking them in an airtight container. This stops them from fusing into one giant peanut butter brick! If you’re planning ahead for a big event, you can even look at my wonderful recipe for easy freezer jam recipe no canning to see my favorite airtight storage solutions. These bars freeze like a dream for up to four weeks. When you want one, just let it thaw on the counter for maybe 20 minutes—perfection!
Serving Suggestions for These Party Snack Recipes Easy
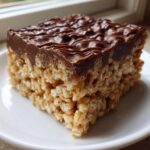
These party snack recipes easy to make are such crowd pleasers! Because they are so rich, I usually cut them into smaller, two-bite squares—that way people feel less guilty grabbing a second one, haha. I love presenting them on a simple white platter so the colors of the peanut butter and chocolate really pop. They pair perfectly with a cold glass of milk for the kids, or honestly, a strong cup of coffee for the grown-ups after dinner. They look so inviting layered like that!
Frequently Asked Questions About Peanut Butter Marshmallow Squares
I always get a ton of great questions when I share a recipe this popular, especially since everyone wants their peanut butter rice krispie treats to turn out perfectly chewy! Don’t worry if you’ve had a kitchen mishap before; these quick troubleshooting tips usually solve any issue you run into. I want your next batch to be the absolute best batch of peanut butter marshmallow squares you’ve ever made! If you’re looking for other fast fixes, check out my thoughts on quick healthy lunch ideas for mid-day energy.
Why are my peanut butter rice krispie treats hard instead of chewy?
Oh, that’s the worst! If your treats turn out hard, nine times out of ten, it’s because of one of two things. First, did you press them down into the pan really firmly? If you pack them tight, you crush all the air bubbles right out of those pillows we worked so hard to incorporate, leading to a dense, hard square. Second, check how long you cooked the marshmallows. If you cook them past the point where they are just melted and smooth, they start to seize up, and that cooks out the moisture you need for that signature chew. Lesson learned: Low and slow on the melt, and gentle, gentle pressing!
Can I use crunchy peanut butter in this No Bake Peanut Butter Dessert?
You absolutely can, and it’s a great way to change up the texture if you prefer a little more crunch throughout! However, you should know that creamy peanut butter is what gives you that smooth, rich mouthfeel that blends beautifully with the melted marshmallow. If you switch to crunchy, the texture of the bar base will be slightly more coarse and crumbly right away. It’s delicious either way, but if you are chasing that super smooth, gooey texture, stick to creamy for the base, and maybe sprinkle a few tablespoons of crunchy peanut butter on top just before adding the chocolate!
What is the best way to cut these bars cleanly?
Cutting these decadent bars cleanly, especially when they are super fresh and gooey, can be a real challenge—the knife often drags everything right along with it! My simple trick is refrigeration. Once you’ve poured the chocolate topping on, let the whole pan set up until it’s firm. I usually leave them on the counter for an hour, but they firm up beautifully in the fridge for just 20 minutes. When you go to cut them, wipe your sharp knife with a bit of flavorless oil or cooking spray between every two or three slices. That little bit of lubrication prevents sticking beautifully.
Sharing Your Best Peanut Butter Rice Krispie Recipe
Now it’s your turn, friend! I’ve shared my most reliable technique for making these irresistible peanut butter rice krispie treats, and I truly hope they bring a bit of that Midwest comfort into your hectic day. I put a lot of love into making sure these steps are clear, especially around the melting and pressing phases, because getting that chew just right is everything!
I absolutely love seeing what you all whip up in your own kitchens. Did you stick to my classic chocolate swirl, or did you go full Scotcharoo and use just butterscotch? Please don’t be shy! Hop down to the comments below and let me know how they turned out. Rating my recipe helps other busy folks know they can trust this simple dessert too. If you made a batch, I’d be thrilled if you snapped a picture and shared it! Happy baking—or should I say, happy *no-baking*!
PrintUltimate No-Bake Peanut Butter Rice Krispie Bars with Chocolate Drizzle
Make these easy, gooey peanut butter Rice Krispie treats. This no-bake dessert combines creamy peanut butter with crispy cereal and is topped with a simple chocolate layer for a quick sweet snack.
- Prep Time: 15 min
- Cook Time: 5 min
- Total Time: 20 min
- Yield: 24 bars 1x
- Category: Dessert
- Method: No-Bake
- Cuisine: American
- Diet: Vegetarian
Ingredients
- 6 cups crispy rice cereal
- 1 cup creamy peanut butter
- 1 cup (2 sticks) unsalted butter
- 1 (10 ounce) package marshmallows
- 1 teaspoon vanilla extract
- 1 cup semi-sweet chocolate chips (for topping)
- 1/4 cup butterscotch chips (for topping)
Instructions
- Lightly grease a 9×13 inch baking pan. Set aside.
- In a large saucepan, melt the butter over low heat.
- Add the marshmallows to the melted butter. Stir constantly until the marshmallows are completely melted and smooth. Remove the pan from the heat.
- Stir in the peanut butter and vanilla extract until fully combined.
- Add the crispy rice cereal to the marshmallow mixture. Fold gently until the cereal is evenly coated.
- Press the mixture evenly into the prepared baking pan. Do not press too firmly to keep the treats chewy.
- In a microwave-safe bowl, combine the chocolate chips and butterscotch chips. Microwave in 30-second intervals, stirring between each, until smooth.
- Pour the melted chocolate mixture over the cereal base. Spread evenly or create a swirl pattern with a knife.
- Let the bars set at room temperature for about 1 hour, or chill in the refrigerator for 20 minutes until the topping is firm.
- Cut into squares before serving.
Notes
- For the chewiest treats, use fresh marshmallows.
- If you prefer a thicker bar, use a 9×9 inch pan instead of a 9×13 inch pan.
- You can substitute peanut butter chips for the butterscotch chips if you want a stronger peanut butter flavor in the topping.
Nutrition
- Serving Size: 1 bar
- Calories: 210
- Sugar: 18g
- Sodium: 120mg
- Fat: 11g
- Saturated Fat: 5g
- Unsaturated Fat: 6g
- Trans Fat: 0g
- Carbohydrates: 27g
- Fiber: 1g
- Protein: 4g
- Cholesterol: 10mg