
Oh, when it comes to classic desserts, nothing beats the sheer joy of a perfect slice of lemon meringue pie, right? It seems simple, but getting that towering meringue right can be an absolute battle! Well, I want to save you the heartache. What I’m sharing today is Rosa’s secret recipe—the one I learned from watching my own grandmother—for the absolute **No-Fail, Weep-Free Lemon Meringue Pie From Scratch with Tall Meringue**. Trust me, this recipe conquers the shrinking and sweating that plagues other pies. It’s the showstopper you need for your next gathering!
- Why This is the Best lemon meringue pie Recipe You Will Ever Make
- Gathering Ingredients for Your Homemade lemon meringue pie
- Step-by-Step Instructions for the Classic lemon meringue pie
- Tips for Success with Your lemon meringue pie
- Storage & Cooling for the Perfect lemon meringue pie
- Serving Suggestions for this Showstopping Dessert
- Frequently Asked Questions about lemon meringue pie Recipe
- Estimated Nutritional Data for this lemon meringue pie
- Share Your Experience Making Rosa's Classic lemon meringue pie
- Estimated Nutritional Data for this lemon meringue pie
- Share Your Experience Making Rosa's Classic lemon meringue pie
Why This is the Best lemon meringue pie Recipe You Will Ever Make
I’ve seen so many beautiful pies ruined by weeping meringue or a soggy bottom crust, and honestly, it breaks my heart! This isn’t just another recipe; this is my blueprint for the absolute lemon meringue pie you’ll ever put on a table. We tackle those tricky spots head-on so you can proudly serve a **showstopping dessert** without stress. If you love the best homemade desserts, this is your new favorite!
Making this entirely from scratch ensures every layer is perfect, from the foundation up.
Achieving the Perfect Flaky Pie Crust Recipe
You simply cannot cut corners on a good base. For my **flaky pie crust recipe**, the secret is keeping that butter icy cold. When cold butter melts in the oven, it creates steam pockets, which gives you those beautiful, airy layers. This part really proves why going with a **from scratch pie recipe** is always worth the extra step!
The Secret to Tangy Lemon Custard
We want that filling to *sing*—bright, zesty, and deeply flavorful. That’s why we load up on fresh lemon juice and zest for that signature punch. My grandmother taught me that tempering the egg yolks slowly is the only way to get a smooth, velvety **tangy lemon custard** without ending up with scrambled eggs in your filling. It’s a little patience for a huge payoff in flavor, friends.
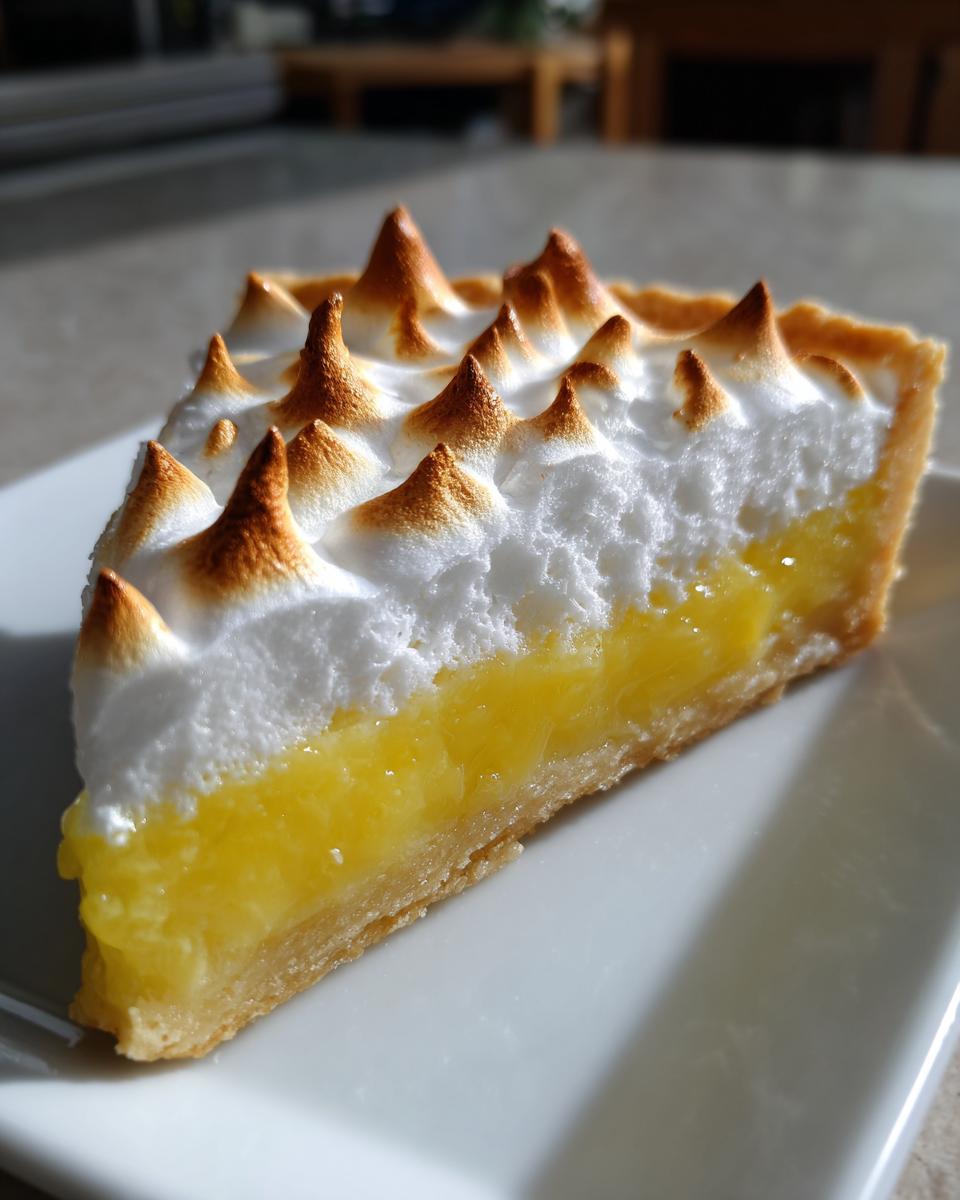
Mastering the Tall, No Weep Meringue Topping for Your lemon meringue pie
This is the big triumph! Achieving that gorgeous, **tall meringue pie** top that stays put requires two things. First, a tiny bit of cream of tartar stabilizes those egg whites right from the start, giving you incredible structure. Second, and this is critical for a **no weep meringue**, you absolutely must spread the meringue over that hot lemon filling right away. Don’t let it sit uncovered; we seal in the moisture!
Gathering Ingredients for Your Homemade lemon meringue pie
Okay, now that we know *why* this recipe works so magically, let’s talk about the players! You’ll notice that Rosa’s version of a **lemon meringue pie** is broken into three clear acts: the crust, the filling, and the lofty topping. I made sure to list exactly what you need for each part below, because when you’re working with something this iconic, you can’t just throw things in hoping for the best!
Remember, this is a complete scratch experience, so make sure you pick up a few things that aren’t always in the pantry first!
For the Buttery Crust Recipe
This foundation needs love, and that means focusing on temperature. We need everything as shockingly cold as possible here for that flakiness we talked about.
- 1 1/4 cups all-purpose flour
- 1/2 teaspoon salt
- 1/2 cup (1 stick) **cold unsalted butter**, cut into small cubes—seriously, keep it cold!
- 3 to 5 tablespoons **ice water**—use just enough to bring the dough together, no more.
For the Zesty Lemon Filling
This is where the tang comes in! Don’t even think about using bottled lemon juice here; the flavor just isn’t the same for this **zesty lemon dessert**.
- 1 1/2 cups granulated sugar
- 1/3 cup cornstarch
- 1/4 teaspoon salt
- 1 1/2 cups cold water
- 4 large egg yolks, lightly beaten (save those whites for later!)
- 1/2 cup **fresh lemon juice** (trust me, grab an extra lemon or two just in case)
- 1 tablespoon **lemon zest**
- 2 tablespoons unsalted butter
For the Mile-High Meringue
This topping needs protection to stand tall, and these ingredients are non-negotiable for keeping that meringue glossy and firm.
- 4 large egg whites, **room temperature** (this is key for volume!)
- 1/4 teaspoon **cream of tartar**—our structural insurance policy!
- 1/2 cup granulated sugar
- 1 teaspoon vanilla extract
Step-by-Step Instructions for the Classic lemon meringue pie
This is where the magic happens, and I promise, if you follow these steps exactly, you’ll see why people call this the **best lemon meringue pie recipe** they’ve ever tried. We’re mixing flaky pastry, zesty curd, and clouds of sweet meringue. Don’t rush the chilling or the heating—those little things make all the difference in our classic lemon meringue pie recipe. You can also check out this great resource from Savoring Italy for other classic baking inspiration here!
Preparing and Blind Baking the Flaky Pie Crust
First things first: the crust needs a good chill time to relax those gluten strands. Once your dough is wrapped up and happy in the fridge (at least 30 minutes!), go ahead and preheat that oven to 375 degrees F. Roll out the dough gently—we want flakiness, not toughness! Line your 9-inch plate and crimp those edges nicely—make them pretty, it’s going to be a showstopper!
Now, grab parchment paper and fill it up with pie weights or even dried beans if you don’t have weights. Blind baking is essential so your crust doesn’t get soggy later. Bake it for 15 minutes with the weights in. Pull the paper and weights out, and give it another 5 to 7 minutes until you see a nice, light golden color starting to peek through. Let that beauty cool completely before we add anything else!
Cooking the Tangy Lemon Custard Filling
Time for the heart of the pie! In a saucepan, get your sugar, cornstarch, and salt whisked before adding the cold water—this prevents lumps! Cook this over medium heat, stirring constantly, until it bubbles hard and thickens up. You need to boil it for a full minute while stirring, no cheating! This cooks out that starchy taste and sets up our **perfect lemon pie filling**.
Now, the crucial tempering step: take about a cup of that hot sugar mix and slowly drizzle it into your lightly beaten egg yolks while you whisk like mad. Don’t stop! This warms up the yolks so they don’t seize up when you add them back in. Pour that tempered mixture back into the saucepan. Heat it gently again until it thickens once more and just starts to bubble. Off the heat, stir in that butter, lemon juice, and zest until everything is smooth and glossy. Pour this hot filling straight into your completely cooled, pre-baked crust!
How to Make Meringue with Stable Peaks
Remember those 4 egg whites we saved? Make sure they are totally at room temperature—this is the foundation of our **how to make meringue** success dream! Get your clean, grease-free bowl out. Start beating those whites with the cream of tartar on medium speed. Once you see soft, fluffy clouds forming, start adding that half-cup of sugar, just a tablespoon at a time. Don’t pour it all in at once, or you’ll deflate everything!
Keep beating on high once the sugar is in. You are done when you can lift the whisk and the meringue stands up straight and shiny—we’re talking stiff, glossy peaks that won’t droop. That’s it! It should look like bright white marshmallow fluff, ready for action.
Assembling and Baking the lemon meringue pie
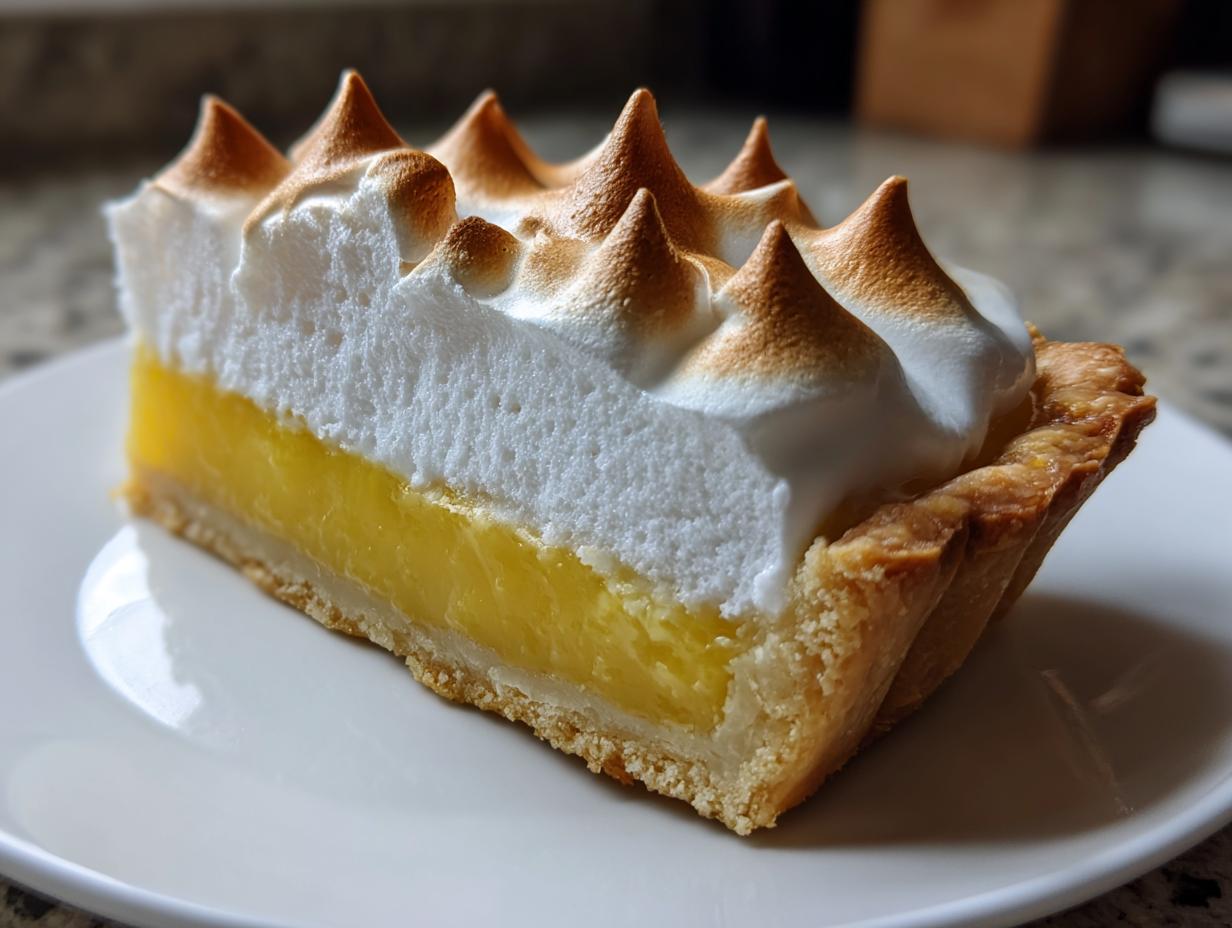
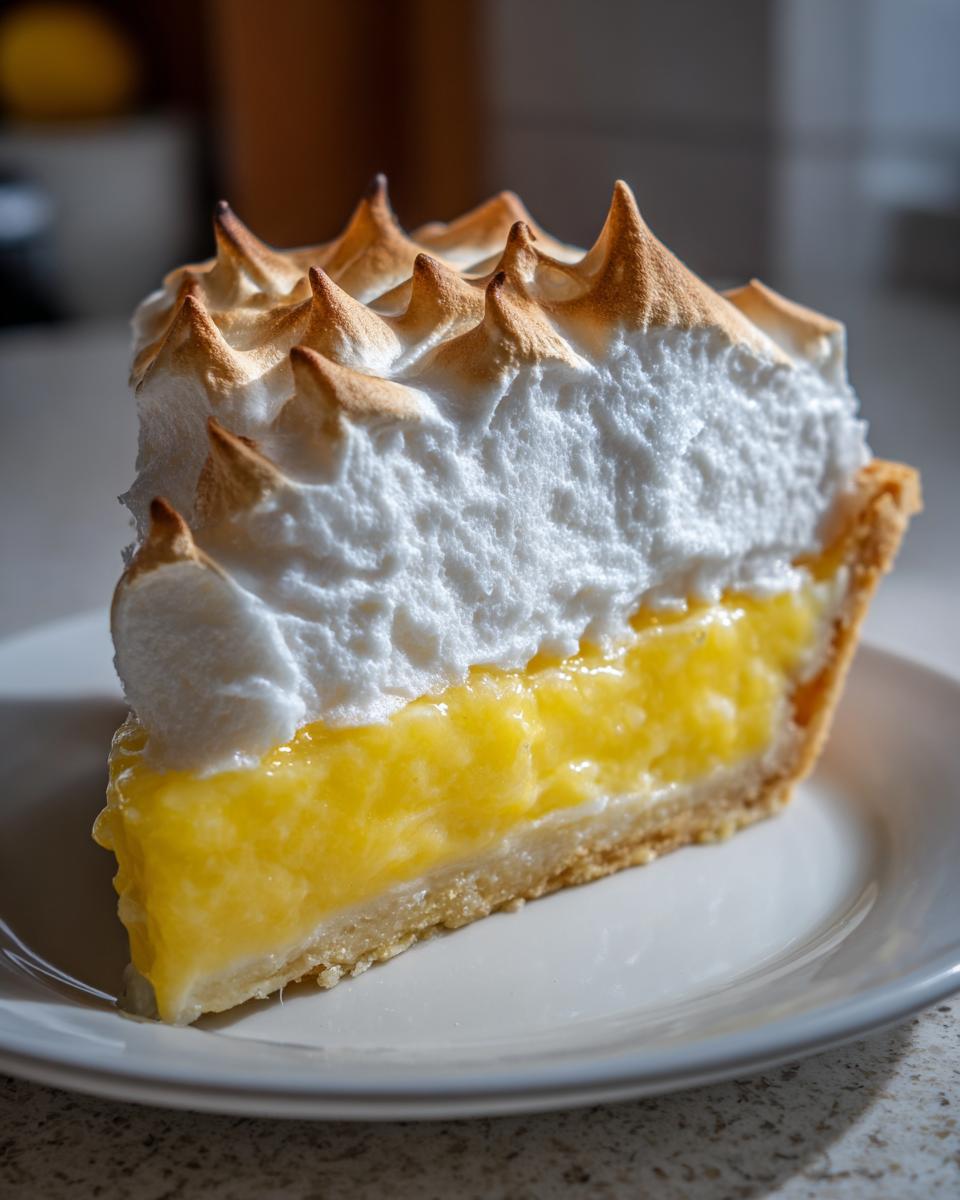
This step is non-negotiable if you want that **no weep meringue**! As soon as the filling is in the crust, you need to get the meringue on top immediately while the filling is still hot. This heat helps set the bottom layer of the meringue so it doesn’t separate later. Spread it all the way to the edges of the crust, making sure you seal it completely—this prevents shrinking! Use the back of a spoon to make some fun peaks and swirls on top.
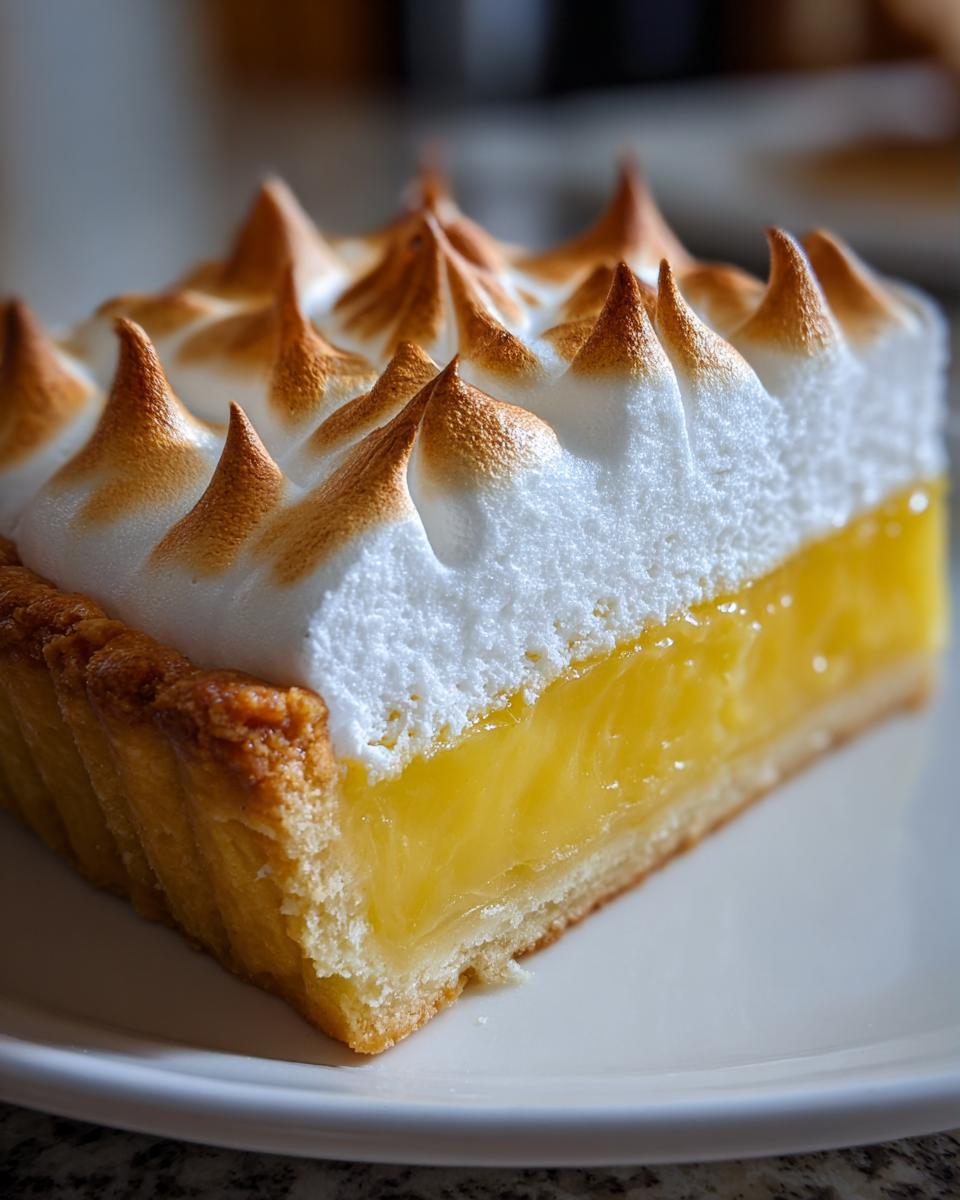
Slide that assembled **lemon meringue pie** into a 350-degree oven for about 10 to 15 minutes. You just want the tips to get beautifully golden brown. We’re careful not to overbake. Once they are lightly toasted, pull it out!
Tips for Success with Your lemon meringue pie
I’ve spent years perfecting this, and I want you to skip my early mistakes! Dealing with a gorgeous pie only to have the meringue leak moisture all over the counter called ‘weeping’ is just a tragedy. Don’t let it happen to you! These little bits of wisdom are the true secrets from my kitchen, ensuring you get every bit of that tall, impressive look we aim for. And for other super moist bakes, make sure you check out my tips for an easy, moist lemon loaf—sometimes you just need a speedy citrus fix!
Preventing Meringue Weeping
If there is one thing you remember about this recipe, let it be this: temperature contrast is your friend, but only for a minute! You need to spread that beautiful, stiff meringue onto the lemon filling while the filling is still hot from the stove. That immediate contact starts to cook the bottom layer of the egg whites, bonding it to the custard. This creates a seal. Also, make sure you spread that meringue all the way to the crust edge—use the back of your spoon and really press it against the baked pastry sides. If you leave a gap, the moisture trapped inside will try to escape, and it usually ends up looking like tears running down your perfect pie!
Slicing Your Tall Meringue Pie Neatly
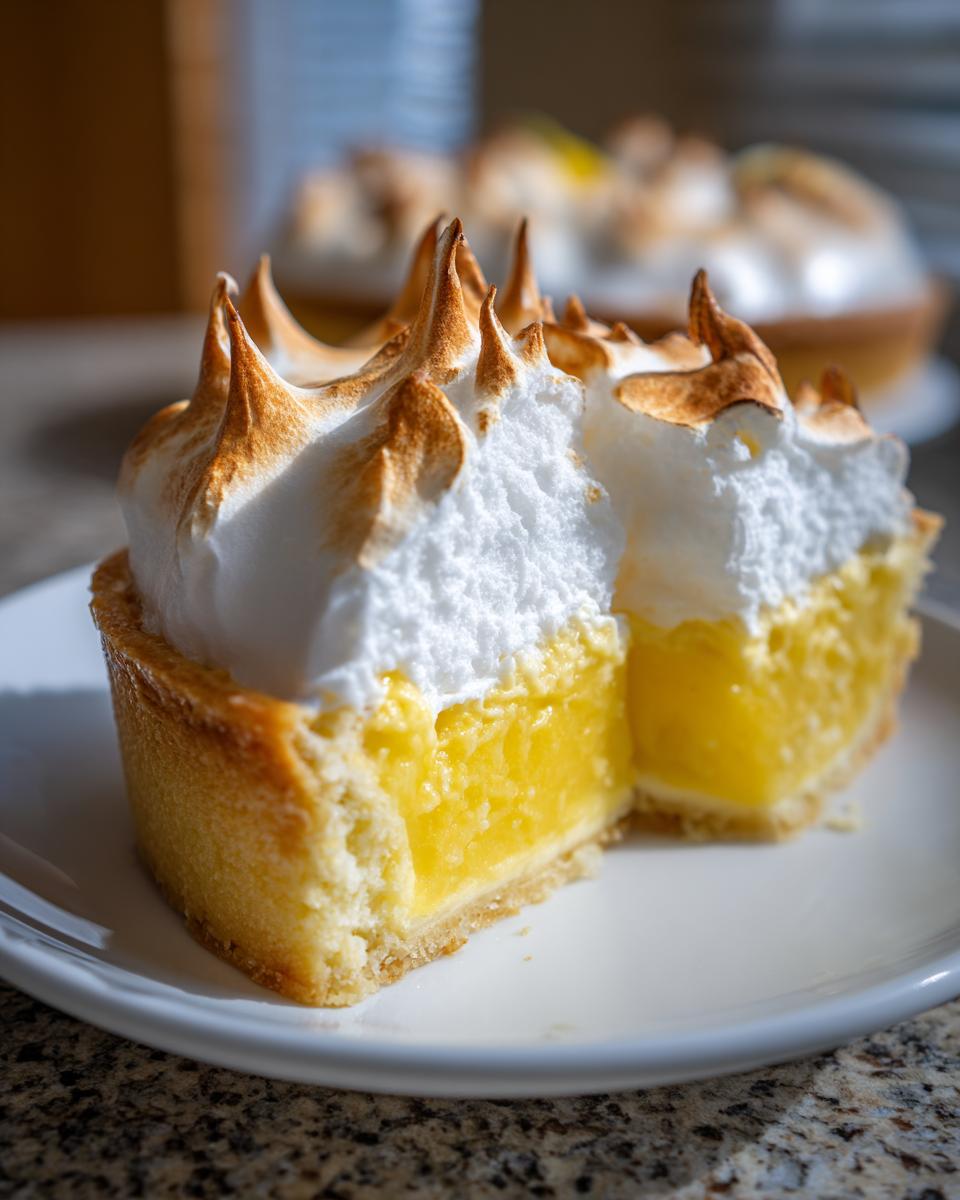
Okay, you’ve baked it, it’s cooled (slowly, correctly!), and now it’s time to serve this masterpiece. But how do you get those Instagram-worthy, clean slices? If you just use a regular knife, the filling sticks, and the meringue rips, making a mess. Here’s the easiest trick you’ll ever learn: before every single cut, dip your sharpest knife into a tall glass of hot water. Wipe the water off just slightly, and *then* slice. The heat of the water melts just enough sugar on the edge of the knife to glide right through the filling and the **tall meringue pie** topping without sticking or dragging. Honestly, this makes serving this spectacular dessert so much easier. You can check out some great baking inspiration on stabilizing these structures here, too!
Storage & Cooling for the Perfect lemon meringue pie
One of the final, yet most nerve-wracking, steps in making the **best lemon meringue pie** is letting it cool down. If you rush this, sweet friend, all that work you did to prevent weeping can be undone! The key here is patience; we need a slow, gentle handshake between the hot filling and the cool room air, not a super cold shock from the fridge immediately.
Take that baked pie straight off the hot oven rack and set it on a wire cooling rack. You need to let it cool down completely at room temperature first. I usually let mine sit undisturbed for at least three or four hours. It sounds like forever when you’re staring at that big, beautiful pie, but this gradual cooling allows everything to set up properly without massive condensation forming.
Once the pie has lost its aggressive heat and is just slightly warm or room temperature, *then* you can carefully move it to the refrigerator. This keeps the filling firm and happy for slicing later. If you are making this for a party, leftovers are generally best eaten within the first day or two. Meringue, bless its fluffy heart, just doesn’t stay crisp forever once it gets that fridge chill. Don’t cover it tightly, though—trapped moisture is the meringue’s enemy! You can loosely tent it with plastic wrap or even just leave it uncovered on a cake stand if your kitchen isn’t too exposed. For even more classic wisdom on keeping pies perfect, you can check out Grandma’s tips on Allrecipes, too!
Serving Suggestions for this Showstopping Dessert
Now that you’ve mastered the **lemon meringue pie** and created this absolute masterpiece, you need the perfect accompaniment, right? This pie is so vibrant and has such a wonderful zip, it really shines when paired correctly. It stands beautifully on its own as the grand finale to any meal, especially perfect for those bright **spring desserts** or big summer picnics!
Because the filling is so intensely tangy, I love serving it alongside something that offers a bit of creamy contrast or a very light texture that doesn’t compete with the meringue. It’s so popular it even makes an appearance during our heavier winter meals, proving it’s truly one of the best **holiday pie recipes**!
When we serve this for Thanksgiving, instead of a heavy side, I usually make sure we have something to wash it down with, like my super easy cranberry punch—that tartness is just magnificent together! Sometimes, if the meal was rich, all you need is a tiny dollop of unsweetened, lightly whipped cream right next to that slice to balance out the citrus zing. Simple, clean, and lets that beautiful, tall meringue do all the talking!
Frequently Asked Questions about lemon meringue pie Recipe
I get so many emails asking about little fiddly bits of this recipe, and that’s totally fair! Working with custard fillings and meringue can feel like walking on eggshells sometimes, even when you follow directions to the letter. I’ve rounded up the most common things people wonder about when they’re aiming for the **best lemon meringue pie** results. Hopefully, this helps you feel super confident before you even turn on the stove!
Can I make the lemon pie filling ahead of time?
Yes, you absolutely can! That tangy lemon custard is quite sturdy once it sets up, which is handy if you’re planning a big holiday feast. After you pour that hot filling into the cooled crust and let it set for maybe an hour at room temperature, go ahead and cover it loosely with plastic wrap and pop it into the fridge. The key rule here is that you *do not* top it with the meringue until you are ready to bake and serve it that day. Meringue absolutely hates sitting on cold filling for too long; it’s a recipe for guaranteed shrinking and sweating. So, filling one day, meringue the next!
What if I want an easier lemon meringue pie?
Look, I totally get it—sometimes life is just too crazy, and you want that bright citrus flavor without making every single component from scratch. If you’re in a real pinch, you can certainly use a good quality, store-bought, pre-baked pie shell to save time. If you go that route, you’ve already knocked out the hardest part of the whole process! However, I must tell you, nothing compares to the slight salty, buttery flakiness of my **buttery crust recipe**. If you use store-bought, please promise me you’ll still make the filling and the meringue yourself? That’s where all the amazing flavor for this **easy lemon meringue pie** really comes from!
Let me know if you have other questions! I learned the hard way so you don’t have to. If you are looking for something savory to serve alongside this masterpiece, my easy chicken and green beans is a perfect weeknight pairing!
Estimated Nutritional Data for this lemon meringue pie
Now, I am no nutritionist—I’m a cook, plain and simple! But since I know some of you are tracking macros or watching sugar intake, I put together these general estimates for one standard slice of this rich **lemon meringue pie** based on the full ingredient list. Please keep in mind these numbers are approximations and can swing depending on the exact size of your lemons or the brand of butter you use.
- Serving Size: 1 slice
- Calories: 420
- Sugar: 45g (That meringue adds up!)
- Fat: 22g
- Carbohydrates: 55g
- Protein: 6g
It’s definitely a treat, but what a showstopper it is! Enjoy every single bite!
Share Your Experience Making Rosa’s Classic lemon meringue pie
I put my heart and soul into making sure this recipe for **classic lemon meringue pie** is foolproof, and now it’s your turn to take the wheel! Honestly, seeing your gorgeous, towering pies is the best part of my week. Did you manage to get those perfect stiff peaks? Did the filling set up exactly how you hoped? Don’t be shy!
You know the drill: leave a star rating right below this section, and then drop a comment telling me how it went! I read every single one, and your feedback helps other home cooks feel brave enough to tackle baking a truly magnificent dessert. We’re building a community here, and sharing our successes (and maybe even our little oopsies!) is what makes cooking so much fun. If you are looking for another great family favorite, check out how I make my creamy horseradish sauce for steak night!
PrintRosa’s No-Fail Lemon Meringue Pie From Scratch

Make the best lemon meringue pie with a buttery crust, intensely tangy lemon custard, and a tall, fluffy meringue topping that resists weeping. This classic recipe delivers showstopping results for any gathering.
- Prep Time: 45 min
- Cook Time: 40 min
- Total Time: 5 hours 25 min
- Yield: 8 servings 1x
- Category: Dessert
- Method: Baking
- Cuisine: American
- Diet: Vegetarian
Ingredients
- For the Flaky Pie Crust (9-inch):
- 1 1/4 cups all-purpose flour
- 1/2 teaspoon salt
- 1/2 cup (1 stick) cold unsalted butter, cut into small cubes
- 3 to 5 tablespoons ice water
- For the Tangy Lemon Filling:
- 1 1/2 cups granulated sugar
- 1/3 cup cornstarch
- 1/4 teaspoon salt
- 1 1/2 cups cold water
- 4 large egg yolks, lightly beaten
- 1/2 cup fresh lemon juice (about 3 lemons)
- 1 tablespoon lemon zest
- 2 tablespoons unsalted butter
- For the Tall, No-Weep Meringue:
- 4 large egg whites, room temperature
- 1/4 teaspoon cream of tartar
- 1/2 cup granulated sugar
- 1 teaspoon vanilla extract
Instructions
- Prepare the Crust: In a large bowl, whisk together the flour and salt. Cut in the cold butter using a pastry blender or your fingers until the mixture resembles coarse crumbs with some pea-sized pieces of butter remaining. Gradually add ice water, one tablespoon at a time, mixing until the dough just comes together. Form into a disk, wrap, and chill for at least 30 minutes.
- Preheat your oven to 375 degrees F. On a lightly floured surface, roll out the chilled dough and fit it into a 9-inch pie plate. Crimp the edges. Line the crust with parchment paper and fill with pie weights or dried beans. Bake for 15 minutes. Remove the weights and paper, then bake for another 5-7 minutes until lightly golden. Cool completely.
- Make the Lemon Filling: In a medium saucepan, whisk together the sugar, cornstarch, and salt. Gradually whisk in the cold water until smooth. Cook over medium heat, stirring constantly, until the mixture thickens and comes to a boil. Boil for 1 minute, stirring constantly. Remove from heat.
- Temper the Egg Yolks: In a separate bowl, whisk the egg yolks. Slowly pour about 1 cup of the hot sugar mixture into the yolks while whisking constantly to temper them. Pour the tempered yolk mixture back into the saucepan with the remaining hot mixture.
- Return the saucepan to medium heat. Cook, stirring constantly, until the mixture thickens again and just begins to bubble. Remove from heat immediately. Stir in the lemon juice, lemon zest, and 2 tablespoons of butter until smooth. Pour the hot filling into the cooled, pre-baked pie crust.
- Make the Meringue: In a clean, grease-free bowl of a stand mixer fitted with the whisk attachment (or using a hand mixer), beat the room temperature egg whites and cream of tartar on medium speed until soft peaks form.
- Gradually add the 1/2 cup of sugar, one tablespoon at a time, while beating on high speed. Continue beating until stiff, glossy peaks form. Beat in the vanilla extract during the last minute. This technique helps create stable peaks.
- Top the Pie: Immediately spread the meringue over the hot lemon filling, making sure to spread the meringue completely to the inner edge of the crust to seal it. This prevents shrinking. Create decorative swirls with the back of a spoon.
- Bake the Meringue: Bake at 350 degrees F for 10 to 15 minutes, or until the meringue peaks are lightly golden brown.
- Cool: Cool the pie completely on a wire rack at room temperature for at least 4 hours before slicing. Avoid placing it in the refrigerator immediately, as rapid cooling can cause the meringue to weep.
Notes
- For the best, weep-free results, spread the meringue over the hot lemon filling immediately after making it. The heat from the filling helps set the bottom layer of the meringue.
- If you want a truly mile-high meringue, use a large bowl and ensure your egg whites are completely free of any yolk or grease residue.
- When slicing, dip your knife in hot water and wipe it clean between each cut for clean servings.
Nutrition
- Serving Size: 1 slice
- Calories: 420
- Sugar: 45g
- Sodium: 180mg
- Fat: 22g
- Saturated Fat: 12g
- Unsaturated Fat: 10g
- Trans Fat: 0.5g
- Carbohydrates: 55g
- Fiber: 1g
- Protein: 6g
- Cholesterol: 110mg