
Oh, the glorious, towering, zig-zagged beauty of a perfect **lemon meringue** pie! If you’ve ever wrestled with a sadly deflated topping or a puddle of sugary syrup weeping all over your counter, you know the deep frustration. Forget those pitiful recipes that rely on dusty powder pouches; we are making the real deal here. This is my guide to a completely classic, homemade lemon pie from scratch, built on the rock-solid foundations of vintage baking wisdom passed down through generations.
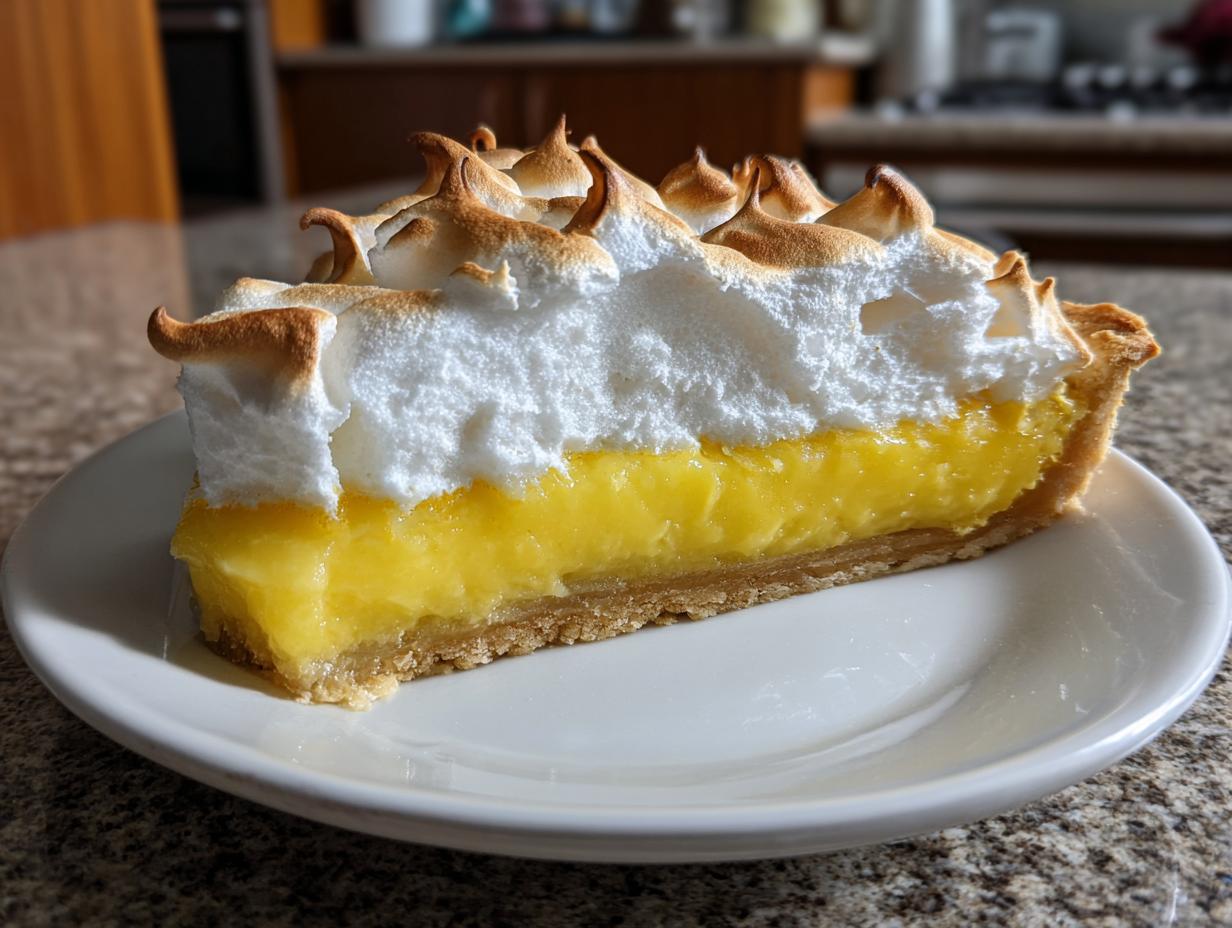
My goal for you today is sheer perfection: a brilliantly buttery crust holding a zesty, vibrant lemon custard that snaps back at you, all crowned with a marshmallow-like, ridiculously stable meringue. Trust me when I say that the secrets for keeping that meringue peaky and proud aren’t complicated—they just require respecting tradition. When you follow these steps for making a truly spectacular **lemon meringue** pie, you aren’t just baking a dessert; you’re making a showstopper that everyone will talk about!
- Why This Classic Lemon Meringue Pie Recipe Works (E-E-A-T Focus)
- Ingredients for Your Homemade Lemon Pie From Scratch
- Step-by-Step Instructions for the Lemon Meringue
- Tips for Success with Your Easy Lemon Meringue Recipe
- Variations on the Lemon Meringue Theme
- Serving Suggestions for Your Classic Lemon Pie
- Storage and Reheating Instructions for Lemon Meringue
- Frequently Asked Questions About Lemon Meringue Pie Recipe
- Estimated Nutritional Data for This Lemon Meringue Dessert
Why This Classic Lemon Meringue Pie Recipe Works (E-E-A-T Focus)
There’s a reason people still hunt down old-fashioned recipes, and it’s because they work! This isn’t some fly-by-night trend; this is a time-tested creation that stands up gloriously year after year. That’s the beauty of relying on recipes that have been proven reliable over decades, the kind you learn about over at the story of Rosa’s kitchen.
When I first tried making a proper **classic lemon pie**, my filling was runny, and my meringue collapsed faster than a house of cards. I realized the boxed stuff hides too many sins! This recipe demands attention to detail, which is why it delivers that incredible, tart-and-sweet balance. It’s truly a **showstopper dessert** because you put in the honest effort.
Achieving the Perfect Buttery Pie Crust Tutorial
You simply cannot cheat the foundation of a brilliant **lemon meringue** pie, so investing time in the crust is non-negotiable. Forget soggy bottoms; we want that incredible flaky texture. Trust me on this: you must execute a perfect **buttery pie crust tutorial**—and that means letting it cool. Completely. If that crust is even slightly warm when that vibrant, hot lemon filling hits it, you’re asking for trouble, and the crust might just steam itself right into a soggy mess. Patience here saves the entire experience!
Ingredients for Your Homemade Lemon Pie From Scratch
I know staring at ingredient lists can feel overwhelming, but I promise you, every single item here is important for making this **lemon meringue** pie the classic it should be. We aren’t using any shortcuts here; this is all about maximizing that bright, zesty flavor you deserve. Remember, if you want a truly spectacular **homemade lemon pie from scratch**, you need top-tier components.
For the Buttery Pie Crust
This needs to be pre-baked and cooled before anything else happens, so get this ready first!
- 1 recipe for Buttery Pie Crust (for one 9-inch pie) – Make sure it’s flaky!
For the Zesty Lemon Filling (Lemon Curd Recipe)
These are the heroes of the tartness! Buy fresh lemons, please—the bottled stuff just doesn’t have the same punch for this **lemon curd recipe**.
- 1 1/2 cups granulated sugar
- 1/4 cup cornstarch
- 1/4 teaspoon salt
- 1 1/2 cups cold water
- 3 large egg yolks, lightly beaten (save those whites!)
- 1/2 cup fresh lemon juice (must be fresh!)
- 1 tablespoon lemon zest
- 2 tablespoons butter
For the Fluffy Meringue Topping
This is where we lock in structure. The temperature of your egg whites matters more than you think for achieving that **fluffy meringue topping**.
- 4 large egg whites, at room temperature (seriously, no cold whites!)
- 1/4 teaspoon cream of tartar (this helps them stand tall)
- 6 tablespoons granulated sugar (for the meringue)
Step-by-Step Instructions for the Lemon Meringue
Okay, deep breaths! This is where we bring it all together. Making the filling while you keep the crust cool is key to a successful **lemon meringue** pie, and honestly, the trickiest part is making sure those egg yolks don’t curdle when they meet the heat. Don’t worry, I’m going step-by-step so you nail this every time and achieve that beautiful sweet and tangy pie.
Preparing the Crust and Lemon Filling
First things first, step one: that crust has to be ready to roll. Your 9-inch pie crust needs to be blind-baked and, crucially, completely cool. Set it aside on a wire rack. Now for the zesty filling! In a saucepan, whisk your sugar, cornstarch, and salt, then add the cold water. Heat this until it’s boiling and thick—this step cooks out the starch so your filling sets up nicely for that satisfying **homemade lemon pie from scratch** experience.
Next, take those three yolks and whisk them gently. This is the tempering part! Slowly drizzle about a cup of that hot sugar mixture into the yolks while whisking constantly. Don’t rush this! If you dump it all in, you’ll end up with lemon scrambled eggs, which is, well, a disaster. Once tempered, pour the yolk mix back into the main saucepan. Stir it constantly over medium heat until it thickens again and just starts to bubble—just a quick bubble is fine! Take it off the heat immediately. Stir in your lemon juice, zest, and that final bit of butter until everything melts smooth. Pour that hot, glorious filling right into your cooled crust.
Creating the Perfect Fluffy Meringue Topping
Time for the cloud topping! Before you even touch the egg whites, make sure your bowl and whisk are absolutely sparkling clean. Any grease, even a tiny speck, ruins the whole batch. We want a **fluffy meringue topping**! Beat your 4 room-temperature whites with the cream of tartar on medium speed until they just start getting foamy and hold soft peaks. Now, add that final 6 tablespoons of sugar slowly, bit by bit, making sure it incorporates before adding the next spoonful. Turn the mixer up to high and beat until those peaks are stiff and glossy. You should be able to hold the bowl upside down without fear!
Baking and Cooling the Lemon Meringue Pie
Spread every bit of that glorious meringue over the hot lemon filling. Make sure you seal it right to the edges of the crust; this helps prevent that awful shrinking we sometimes see! Bake it at 350°F (175°C) for about 12 to 15 minutes, just until those sweet peaks turn a lovely toasted gold. This part of the process is one of my best **no weep lemon meringue tips**, because baking sets the structure!
Here’s the last critical instruction: DO NOT put this beauty straight into the fridge. Let it cool slowly on the counter for at least four hours. Rapid cooling is what causes the condensation that leads to weeping. Let it breathe! Then, you can slice into your masterpiece.
Tips for Success with Your Easy Lemon Meringue Recipe
You’ve got a beautiful, **tart and sweet pie** sitting on your counter, but let’s talk about avoiding those last-minute kitchen crises! When you follow an **easy lemon meringue recipe** that’s rooted in tradition, you minimize surprises, but a few little secrets always help ensure that gorgeous **zesty lemon dessert** holds up perfectly.
Troubleshooting Common Issues
If you end up with weepiness—that awful watery layer between the filling and the topping—I guarantee you missed the ‘grease-free’ rule for the egg whites. Seriously scrub that bowl! Any trace of fat prevents those proteins from whipping up strong enough to hold their shape. It’s the number one culprit!
Now, if your lemon filling is runny? That usually means you didn’t cook the cornstarch mixture long enough before you tempered the yolks. You need to bring that starch mixture right up to a full, rolling boil for a solid minute to activate its thickening power. If you have a slightly runny filling but a good meringue, check out what they are doing over at Hayley’s Recipes for backup ideas on stabilizing the curd! But honestly, boiling that starch properly is the secret handshake for a thick filling.
Variations on the Lemon Meringue Theme
Now that you’ve mastered the grand showstopper that is the full pie, maybe you want to change things up a bit! It’s fun to take a classic flavor profile and apply it to different shapes for smaller gatherings, or maybe you just hate slicing pies. I totally get that!
If you’re planning an elegant tea party, definitely try making mini lemon meringue tarts instead. They look so darling on a tiered stand, and you get perfect meringue-to-crust ratios in every single bite. Alternatively, if you want something you can cube and eat standing up, consider turning the filling and topping into **lemon meringue bars**. They bake up totally differently than a pie, but they deliver all that amazing zesty and sweet punch you love!
Serving Suggestions for Your Classic Lemon Pie
This pie is so bright and tangy, it doesn’t really need much help to shine! It’s the ultimate treat when you need a vibrant **summer citrus dessert**. If you want to tone down the intensity just a touch, a small dollop of plain, unsweetened whipped cream on the side is lovely; it really lets that lemon flavor pop without adding more sugar.
Honestly though? I love serving mine with a scatter of fresh raspberries or thin slices of bright strawberries right on top of the plate. This **classic lemon pie** really sings best when it’s served cool and pairs perfectly with a strong cup of coffee!
Storage and Reheating Instructions for Lemon Meringue
Once you’ve managed to let your pie cool properly—which is the hardest part—how do you keep this beauty fresh? This is where you need to be a little brave! For the absolute best taste and texture, try to serve your **lemon meringue** pie the same day you bake it. The meringue just starts to weep over time, no matter what tips you use.
If you must store it, cover it loosely with plastic wrap (don’t let the plastic touch the meringue, or it sticks horribly!) and keep it at cool room temperature for up to 8 hours. If your kitchen is scorching hot, you can move it to the fridge, but know that it might start shrinking a bit. For longer storage, I often slice off any uneaten meringue—I know, sacrilege!—and store the filling and crust separately for about two days. Then, you can whip up some fresh meringue the next day using that nifty guide from Whisking Up Yum!
Frequently Asked Questions About Lemon Meringue Pie Recipe
I’ve gotten so many questions over the years about this recipe, especially since it seems so intimidating! Having made this classic **lemon meringue pie recipe** dozens of times, I’ve figured out the little quirks. Here are the biggest questions I always get from bakers trying to nail that perfect **tart and sweet pie**.
Can I make the lemon filling ahead of time for my lemon meringue?
Oh, you totally can! And honestly, I often do. Making the lemon filling ahead of time is actually one of the best ways to ensure you have a perfectly cooled base for that meringue. Once the filling is cooked and poured into that blind-baked crust, just press a piece of plastic wrap directly onto the entire surface of the filling—no air pockets allowed! This stops a skin from forming. Pop it in the fridge for a few hours or overnight. The key is that when you pull it out to top with the meringue, it needs to be cool, but not ice-cold, because that sharp temperature shock can sometimes encourage the meringue to shrink later! If it’s fridge-cold, just let it sit on the counter for about 30 minutes before topping.
What is the secret to tall, fluffy meringue topping?
This is the money question! There are three secrets that create a seriously tall, **fluffy meringue topping** that doesn’t flatten out: First, absolute zero grease in your mixing bowl—I mean it, wipe it down with a little vinegar if you have to! Second: room temperature egg whites are your best friend; they whip up with way more volume than cold ones. And third? Don’t skip the cream of tartar. That little bit of acid works like magic to stabilize all those air bubbles you’re creating, keeping them firm while you slowly add the sugar. Follow those three things, and you’ll have peaks that scrape the sky!
Is this recipe suitable for spring baking recipes?
Absolutely! This is my absolute favorite of all the **spring baking recipes**! Lemon just screams sunshine and fresh air after a long winter, doesn’t it? It’s bright, it’s zesty, and it feels wonderfully seasonal without being too heavy. It’s the perfect dish to bring to an Easter brunch or any gathering where you want something light yet impressive. Just remember that the cooler it is outside, the easier it is to cool the pie without refrigeration, which is a bonus for that beautiful meringue!
Estimated Nutritional Data for This Lemon Meringue Dessert
Alright, let’s look at the numbers for this magnificent slice of sunshine. Remember, these figures are just my best estimates based on dividing the standard ingredients across 8 servings—they can shift a little based on how much butter you decide to use in that crust! Since this is a homemade **lemon meringue** delight, it definitely packs a punch in the sugar department, but it balances out with that amazing homemade flavor. You can always read the fine print on our terms of use if you’re looking for more detail, but here’s the snapshot!
- Serving Size: 1 slice
- Calories: Approximately 380
- Total Fat: 18g
- Carbohydrates: 52g
- Protein: 6g
Grandma’s Classic Lemon Meringue Pie from Scratch

Make a showstopping dessert with this classic, homemade lemon meringue pie recipe. You get a buttery crust, a zesty lemon custard filling, and a tall, fluffy meringue topping that balances sweet and tart perfectly.
- Prep Time: 30 min
- Cook Time: 45 min
- Total Time: 5 hours 15 min
- Yield: 8 servings 1x
- Category: Dessert
- Method: Baking
- Cuisine: American
- Diet: Vegetarian
Ingredients
- 1 recipe for Buttery Pie Crust (for one 9-inch pie)
- 1 1/2 cups granulated sugar
- 1/4 cup cornstarch
- 1/4 teaspoon salt
- 1 1/2 cups cold water
- 3 large egg yolks, lightly beaten
- 1/2 cup fresh lemon juice
- 1 tablespoon lemon zest
- 2 tablespoons butter
- 4 large egg whites, at room temperature
- 1/4 teaspoon cream of tartar
- 6 tablespoons granulated sugar (for meringue)
Instructions
- Prepare and blind-bake your 9-inch pie crust according to your preferred recipe. Let the crust cool completely.
- For the lemon filling, combine 1 1/2 cups sugar, cornstarch, and salt in a medium saucepan. Whisk in the cold water until smooth.
- Cook the mixture over medium heat, stirring constantly, until it thickens and boils. Boil for one minute, then remove from heat.
- In a separate bowl, whisk the 3 egg yolks. Slowly temper the yolks by whisking in about 1 cup of the hot sugar mixture.
- Pour the tempered yolk mixture back into the saucepan with the remaining hot mixture. Cook over medium heat, stirring constantly, until the filling thickens again and just begins to bubble. Do not boil vigorously.
- Remove the filling from the heat. Stir in the lemon juice, lemon zest, and butter until the butter melts completely.
- Pour the hot lemon filling immediately into the cooled, baked pie crust.
- For the meringue, place the 4 room temperature egg whites and cream of tartar in a clean, grease-free mixing bowl. Beat with an electric mixer on medium speed until soft peaks form.
- Gradually add the 6 tablespoons of sugar, one tablespoon at a time, beating well after each addition. Increase speed to high and beat until stiff, glossy peaks form. Do not overbeat.
- Spread the meringue over the hot lemon filling, making sure the meringue touches the edge of the crust all around to prevent shrinking. Create swirls and peaks with the back of a spoon.
- Bake at 350°F (175°C) for 12 to 15 minutes, or until the meringue peaks are lightly golden brown.
- Cool the pie completely on a wire rack at room temperature for at least 4 hours before slicing. Avoid placing it in the refrigerator immediately to prevent meringue weeping.
Notes
- To prevent the meringue from weeping, make sure your mixing bowl and whisk are completely free of any grease or fat before whipping the egg whites.
- For a more stable meringue, use the hot filling method described above, which partially cooks the egg whites before they are spread on the pie.
- If you want a truly showstopper dessert, use a kitchen torch to brown the meringue peaks instead of baking.
Nutrition
- Serving Size: 1 slice
- Calories: 380
- Sugar: 45g
- Sodium: 180mg
- Fat: 18g
- Saturated Fat: 9g
- Unsaturated Fat: 9g
- Trans Fat: 0g
- Carbohydrates: 52g
- Fiber: 1g
- Protein: 6g
- Cholesterol: 110mg