
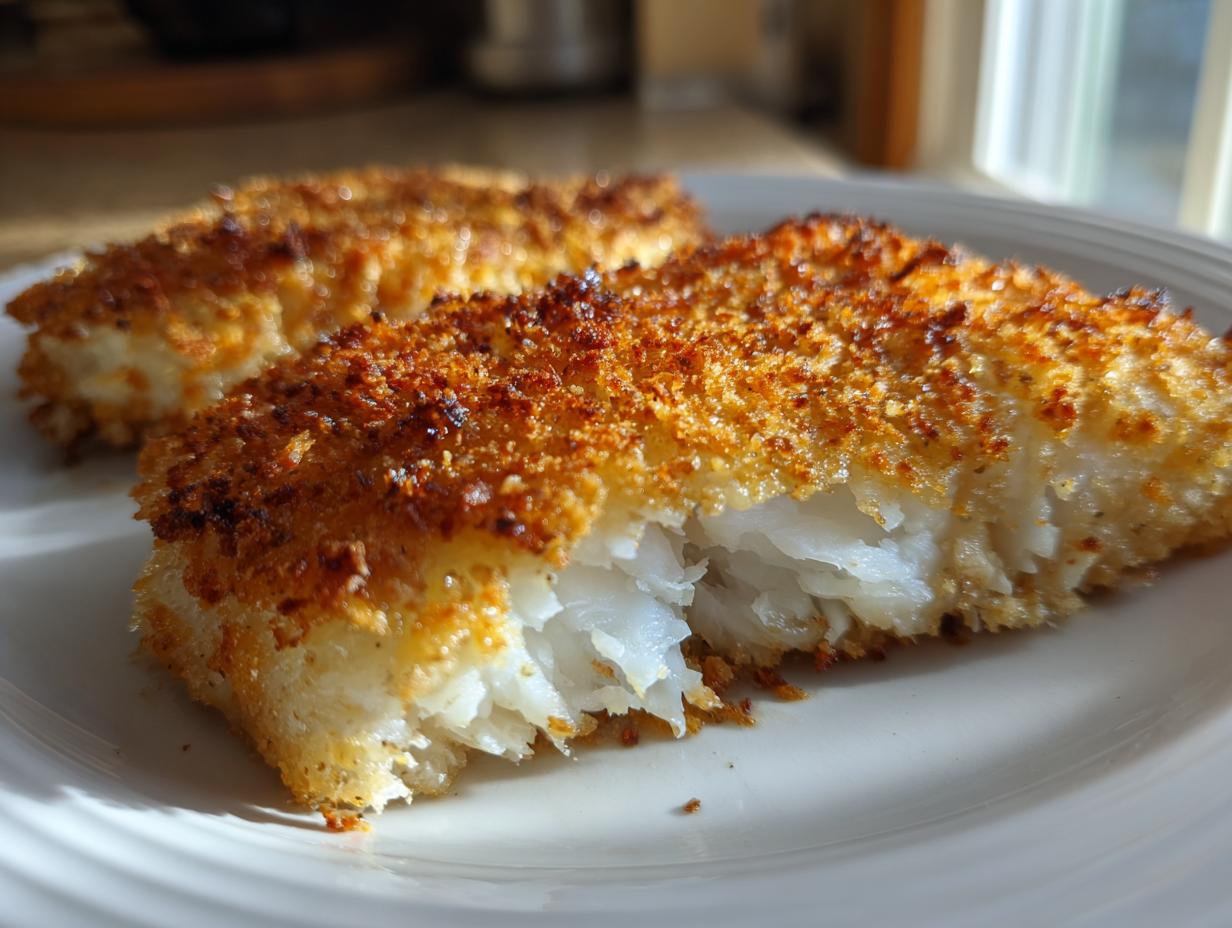
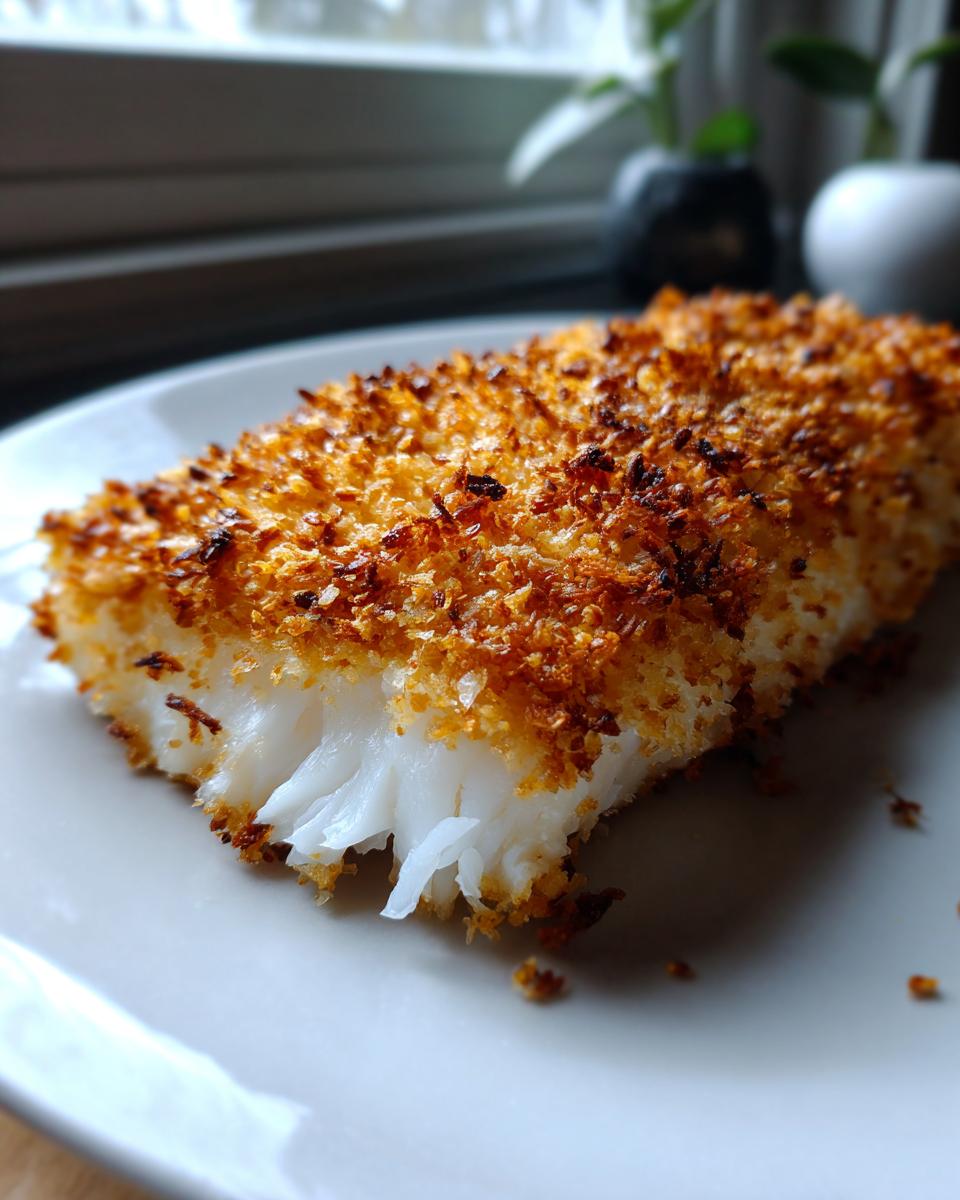
You know how some weeknight dinners feel like a compromise? You want that fantastic crunch you only get from deep frying, but you don’t want the mess, the oil splatter, or the cleanup. Well, my friends, I’m here to tell you that you can absolutely achieve restaurant-quality crispiness right on your regular baking sheet! This is the ultimate Crispy Baked Cod recipe that lets you skip the messy frying part entirely. Here at Rosa’s Tasty Kitchen, we believe that every meal, even your rushed Tuesday night dinner, should be reliable and deeply satisfying. This easy oven cod recipe crispy method is straightforward, uses ingredients you probably have, and gets you flaky, perfectly seasoned fish ready fast. If you are looking for quick weeknight baked seafood that truly impresses, you’re in the right place. Check out my favorite weeknight dinner ideas while you gather your ingredients!
- Why This Crispy Baked Cod Recipe Works So Well
- Gathering Ingredients for Your Crispy Baked Cod recipe
- Step-by-Step: How to Prepare the Crispy Baked Cod recipe
- Tips for Success with Your Easy oven cod recipe crispy
- Flavor Variations for Crunchy baked white fish fillets
- Serving Suggestions for Perfectly flaky cod baked
- Storage and Reheating the Crispy Baked Cod recipe
- Frequently Asked Questions about Crispy Baked Cod recipe
- Share Your Crispy Baked Cod recipe Experience
Why This Crispy Baked Cod Recipe Works So Well
Honestly, people think you need a deep fryer to get that satisfying crunch, but that’s just not true, especially when we’re talking about healthy crispy fish recipes baked. It all comes down to a few easy steps you follow before the cod even sees the oven. We are relying on heat and dryness to do the heavy lifting!
- The absolute game-changer here is using Panko breadcrumbs. They are light, flaky Japanese breadcrumbs that crisp up twice as fast as regular breadcrumbs.
- We use just enough fat—a tiny bit of oil on the fish and melted butter drizzled over the topping—to turn that Panko golden brown, not soggy.
It’s the smartest way to make a dish like this. If you want a delicious, quick healthy lunch idea later in the week, this method holds up surprisingly well!
The Secret to Oven baked cod fish crispy skin
If you skip this step, you’re cooking steamed fish, not crispy fish! Cod has a lot of moisture, just like most delicate fish. Before we add any oil or seasoning, you need to grab paper towels and pat every single surface of that cod fillet bone-dry. Seriously, pat it like you’re drying a baby or you risk a soggy base. Then, we crank that oven way up high—425°F—to shock the exterior instantly.
Achieving a Crunchy baked white fish fillets Texture
This is how we answer the question, “How to get crispy coating on baked fish?” It’s a two-part act. First, the coating—our Panko and Parmesan blend—adheres well because the fish is already oiled. Second, once the fish is carefully placed on the hot sheet, we melt that butter right over the top. That butter is what toasts the Panko beautifully, giving you those glorious, crunchy baked white fish fillets without ever submerging the fish in oil!
Gathering Ingredients for Your Crispy Baked Cod recipe
Okay, this is where the magic starts! Since my philosophy here at Rosa’s Tasty Kitchen is making delicious food achievable every day, you won’t need any specialty ingredients for this. We are keeping it simple, reliable, and focused on texture. We use standard pantry staples, but pay attention to the details, especially the Panko, because that’s the secret sauce for getting that beautiful golden crust. I’ve broken down what you need into two simple groups—the fish prep and the crunchy topping—so you can organize your counter easily. For the full breakdown of everything, remember these quantities are perfect for a family of four.
Best breading for baked cod components
These are the items that form our crunchy shield. Using real Parmesan cheese adds such a lovely salty depth that complements the mild cod perfectly. When you’re shopping, look for the Japanese-style Panko breadcrumbs; they are lighter and flakier than standard stuff, which is crucial for our best breading for baked cod.
Here is what you need for that topping:
- 1 cup Panko breadcrumbs
- 1/4 cup grated Parmesan cheese
- 2 tablespoons melted butter
Seasoning for the Cod Fillets
This blend is super quick and adds just the right savory backbone without overpowering the delicate flavor of the cod fish itself. Before we touch the coating, we need to season the actual fish well. This ensures flavor penetrates all the way to the center, giving you that perfectly flaky cod baked result every time.
Gather these items for seasoning the fillets:
- 4 (6 ounce) cod fillets, about 1 inch thick
- 1 tablespoon olive oil
- 1 teaspoon salt
- 1/2 teaspoon black pepper
- 1/2 teaspoon garlic powder
- 1/4 teaspoon paprika
Step-by-Step: How to Prepare the Crispy Baked Cod recipe
Now we get the pans ready and put this delicious thing together! I promise, this process moves so fast you’ll have this perfect Crispy Baked Cod recipe on the table before the kids even finish setting the table. We just need to work in a few quick stages here to lock in that crunch and ensure safe cooking. Take your time on the drying and coating steps; that’s where 90% of the success comes from in getting a great crunchy baked white fish fillets result.
Prepping the Oven and Fish
First things first, get your oven hot! We need high heat for that crispy exterior, so set it to 425 degrees Fahrenheit. While it’s heating, line a baking sheet with parchment paper. This isn’t just for easy cleanup (though, oh boy, is that a perk!); it also helps the very bottom of the fish cook without steaming. Now for the most important physical step: grab those cod fillets and pat them down with paper towels until they feel completely dry. If there’s surface moisture, our coating won’t stick or crisp up!
Applying the Panko Crusted baked cod
Once the fish is dry, rub that olive oil all over, and then sprinkle on your simple seasoning mix—don’t be shy! Next, take your mixed Panko and Parmesan and press that mixture firmly onto the top surface only. Yes, just the top! We want the bottom to stay clean to develop that initial crispness. Press it down slightly so you have a nice, thick layer of that Panko crusted baked cod topping. Place them on your prepared tray, breaded side up.
Baking Times and Internal Temperature Check
Drizzle that melted butter right over the crumb topping—this helps everything brown nicely! Pop the tray into your preheated 425°F oven. They will bake for about 12 to 15 minutes. Since we are dealing with fish, checking the temperature is essential for both safety and texture. You’re aiming for an internal temperature of 145 degrees Fahrenheit at the thickest point. When it hits that temp, the inside will be perfectly flaky, and your crust will be golden and crunchy. You can quickly check out some easy breakfast recipes for tomorrow while you wait for this dinner to finish!
Tips for Success with Your Easy oven cod recipe crispy
Even following directions perfectly doesn’t stop folks from asking how to push a baked dish just a little bit further toward true crispiness. I get it! We want that satisfying crunch every single time we decide on a quick weeknight baked seafood dinner. Don’t worry, I’ve got a couple of little tricks up my sleeve that I only share with my closest readers—think of these as ways to optimize your technique.
Maximizing Crispiness: The Preheated Pan Trick
This is a little trick I learned from watching professional chefs—and honestly, it works beautifully for this easy oven cod recipe crispy coating. We talked about preheating the oven, but we need to preheat the baking surface too! Before you season anything, stick that lined baking sheet into the oven while it comes up to temperature. When you place the coated cod fillets directly onto that hot surface, it gives the bottom crust a head start, kind of like flash-frying it before it even settles in to bake. Trust me, use this tip for the best results.
Comparing Air fryer cod vs oven baked crispy results
I know the air fryer is popular, and yes, you absolutely can adapt this! But here at the kitchen, this recipe is designed for the standard oven for maximum family serving size. If you do opt for the air fryer, you’ll want to turn the heat down just a tiny bit—think about setting it to 400 degrees—and check it closer to the 10-minute mark. We’re aiming for that golden crunch, regardless of the appliance, but the oven-baked method described here is my go-to for a stunning result.
For more simple weeknight meals that keep cleanup minimal, you have to check out my ideas for easy chicken and green beans dinner pairings!
Flavor Variations for Crunchy baked white fish fillets
Isn’t it fun to take a solid, reliable recipe and just twist it a little bit? Once you master the technique for getting that perfect golden crust on your fish, you can really start playing around with the flavor profile! Since cod is so mild and takes on seasoning so wonderfully, you don’t have to stick to just garlic and Parmesan if you don’t feel like it one night. These little tweaks are what make cooking feel creative and exciting, even when you’re short on time.
Herb and Spice Swaps
If you’re tired of the standard mix, ditch the Parmesan in the Panko blend and try swapping in some dried herbs instead. Dried dill is amazing with white fish, giving it a light, almost slightly Scandinavian feel. Or, if you want to go for a smoky kick, replace the paprika with a teaspoon of smoked paprika and add just a tiny pinch of cayenne pepper to the seasoning rub.
For a brighter flavor, you absolutely must try adding the zest of one fresh lemon right into your Panko mixture—it brightens everything up! And for those who like a little more punch, about 1/2 teaspoon of onion powder mixed with the garlic powder makes a huge difference. If you love those bright, punchy flavors, you should check out my recipe for chicken piccata meatballs sometime soon!
Remember, the key is that the crust itself gets toasted by the butter. So, whatever you mix into that Panko, it’s going to toast up beautifully right there on top of your fish!
Serving Suggestions for Perfectly flaky cod baked
We’ve done the hard work—the fish is flaky, the coating is crunchy, and the kitchen is surprisingly clean! Now comes the fun part: figuring out what goes with it. Since this easy oven cod recipe crispy is so light and flavorful, we want sides that won’t weigh it down. We’re aiming for a complete, healthy meal that still feels quick and fresh, right in line with the best weeknight baked seafood philosophy. You don’t need an hour of side prep to go with your 15-minute cod, trust me!
Best side dishes for crispy baked cod
When I serve this, I like to stick to things that roast up quickly alongside the fish or something simple I can whip up while the cod is in the oven. The goal is to complement the crunch, not cover it up!
- Roasted Asparagus: This is my number one choice for the best side dishes for crispy baked cod. Toss the spears with some olive oil, salt, and pepper. If your cod needs 12 minutes, toss the asparagus in the oven along with it for the last 10 minutes. They’ll be bright green and tender-crisp!
- Simple Lemon Rice Pilaf: If you want carbs, keep them light. A quick pilaf where you toast the rice in a little butter before adding the broth, finishing it with a big squeeze of fresh lemon juice, gives you something fluffy to cut through that crunchy topping.
- Garlic Herb Roasted Veggies: If you happen to have a big batch of my garlic herb roasted veggies ready to go, they pair perfectly—especially if you use broccoli or green beans! Roasted vegetables maintain some texture, which is great next to that perfectly flaky cod baked center.
Keep the sides bright, and you’ll have a fantastic, well-rounded meal!
Storage and Reheating the Crispy Baked Cod recipe
I often cook four servings of this when I make it, because let’s be honest, leftovers taste amazing. But—and this is a big but—we have to treat those leftovers gently, or that glorious crunch vanishes into thin air. Because we aren’t deep-frying, the breading tends to absorb moisture once it cools down.
When it comes to storage, keep it simple. Once the fish has cooled down completely after dinner, transfer the fillets to an airtight container. I like to put a paper towel underneath them first, just to absorb any residual moisture sitting on the bottom of the container. Then, seal it up tight and pop it in the fridge. It holds up beautifully for about two days this way.
The Great Reheating Debate: Oven vs. Microwave
Look, if you use the microwave, you are basically steaming your leftovers, and that gorgeous Panko crust will turn to mush. I absolutely forbid the microwave unless you are truly desperate! If you want to save that texture, you have to go back to dry heat for reheating.
The best way, hands down, is the toaster oven or a regular oven set to a medium heat, about 350 degrees Fahrenheit. Lay the cold cod right on a small piece of foil or directly onto the rack if you’re using the toaster oven. You only need about 5 to 7 minutes. You are warming the fish through and coaxing that coating back to life, essentially giving it a second light, quick bake. It won’t be *exactly* as crunchy as the first time out of the oven, but trust me, it’ll be miles better than any soggy, microwaved seafood!
Frequently Asked Questions about Crispy Baked Cod recipe
I know sometimes you have questions pop up while you’re standing there looking at the fish in your fridge! That’s perfectly normal in a busy kitchen. We’re talking about getting a perfect texture here, so it’s good to be cautious. Here are the top things folks ask me when they are trying out their first batch of this incredibly crunchy baked white fish fillets. If you’re looking for a great dipping partner for your finished cod, you should absolutely look at my recipe for the easy creamy horseradish sauce recipe!
Can I use frozen cod fillets for this recipe?
You totally can, but you cannot skip defrosting them first! Frozen fish holds a ton of water right in its muscle fibers, and if you try to bake it from frozen, that water will leak out onto the parchment paper and you’ll end up steaming the bottom of your beautiful crust. To thaw safely and quickly, leave the fillets sealed in the fridge overnight. If you’re in a serious rush, seal them in a Ziploc bag and submerge that bag in a bowl of cold water. Change the water every 30 minutes until they are completely thawed. Remember, no matter what, you still have to pat them aggressively dry before seasoning!
What is the best type of cod to use for crispiness?
The short answer is: thicker is better for the best flaky interior! I used fillets about an inch thick in this recipe because they give the crust time to brown perfectly before the inside overcooks. Fresh cod is always superior because it has the lowest moisture content, making that initial drying step even easier. However, if you use frozen and thawed cod, make sure it’s thick enough—at least 3/4 inch—so you aren’t left with a paper-thin piece that burns before the Panko browns.
Can I make this a healthy crispy fish recipes baked without butter?
That’s a fair question, especially if you’re watching your saturated fat intake! Butter really helps brown the Panko and creates that lovely, rich flavor, but we can absolutely find a substitute that works for a healthy crispy fish recipes baked version. Instead of the 2 tablespoons of melted butter, try using 2 tablespoons of melted coconut oil. It substitutes beautifully in high-heat applications, or, if you don’t mind a slightly neutral flavor, use olive oil again. Just make sure whatever fat you use is melted so you can drizzle it evenly over the crumb topping. That melted fat is what binds and browns the topping, so don’t skip that step entirely!
Share Your Crispy Baked Cod recipe Experience
Whew! You made it! You successfully navigated the world of high-heat baking to achieve fish that is flaky inside and crunchy outside. That’s a win, my friends, and I want to hear all about it! My whole purpose here at Rosa’s Tasty Kitchen is to make your weeknights simpler and your dinners more delicious, and knowing that one of my recipes worked out perfectly for you is what keeps me motivated every day.
This recipe is built for 4 servings and comes together in just about 25 minutes total, so it’s perfect for a fast turnaround. If you tried this out last night, please take a moment to scroll down and leave a star rating! It lets me know exactly where I need to focus my efforts when adapting things for busy home cooks like us.
Tell Me How It Went!
Did you try the preheated pan trick? Did you swap out the Parmesan for some dried dill? I’m always so curious to see how everyone puts their own little signature touch on the meals. Feel free to leave a comment below sharing your results or snap a picture and tag me on social media! Seeing your beautiful, crunchy white fish fillets makes my day.
If you loved learning about the heart behind the kitchen philosophy here, you can always read a bit more about who I am and why I share these recipes. Happy cooking, and thank you for trusting your busy weeknight dinner to my kitchen!
PrintCrispy Baked Cod Recipe with Panko Crust
Learn how to make perfectly flaky cod with a crunchy, golden exterior using this simple oven-baked recipe. This is a quick weeknight baked seafood option.
- Prep Time: 10 min
- Cook Time: 15 min
- Total Time: 25 min
- Yield: 4 servings 1x
- Category: Dinner
- Method: Baking
- Cuisine: American
- Diet: Low Fat
Ingredients
- 4 (6 ounce) cod fillets, about 1 inch thick
- 1 tablespoon olive oil
- 1 teaspoon salt
- 1/2 teaspoon black pepper
- 1/2 teaspoon garlic powder
- 1/4 teaspoon paprika
- 1 cup Panko breadcrumbs
- 1/4 cup grated Parmesan cheese
- 2 tablespoons melted butter
Instructions
- Preheat your oven to 425 degrees Fahrenheit. Line a baking sheet with parchment paper for easy cleanup.
- Pat the cod fillets completely dry using paper towels. This step is key to getting a crispy coating on baked fish.
- In a small bowl, mix the salt, pepper, garlic powder, and paprika. Rub the olive oil over all sides of the cod fillets, then sprinkle the seasoning mix evenly over the fish.
- In a separate shallow dish, combine the Panko breadcrumbs and grated Parmesan cheese. This makes the best breading for baked cod.
- Dip the top side of each seasoned cod fillet into the Panko mixture, pressing gently so the breadcrumbs adhere firmly.
- Place the fillets on the prepared baking sheet, breaded side up. Drizzle the melted butter lightly over the Panko topping on each fillet.
- Bake for 12 to 15 minutes, or until the internal temperature reaches 145 degrees Fahrenheit and the crust is golden brown and crunchy.
- Serve immediately for a perfectly flaky cod baked meal.
Notes
- For extra crispiness, place the baking sheet in the oven while it preheats for 5 minutes before adding the fish.
- If you prefer a slightly different flavor, substitute the Parmesan with dried herbs like parsley or dill.
- This recipe works well for air fryer cod vs oven baked crispy results, using a 400 degree setting for about 10 minutes in the air fryer.
Nutrition
- Serving Size: 1 fillet
- Calories: 280
- Sugar: 1
- Sodium: 450
- Fat: 12
- Saturated Fat: 5
- Unsaturated Fat: 7
- Trans Fat: 0
- Carbohydrates: 18
- Fiber: 1
- Protein: 26
- Cholesterol: 65