
If you’re like me, sometimes you just crave pizza, but you’re staring down a whole wheat bag that feels way too heavy for a Tuesday night. I get it! After years of juggling school reports and soccer practice, I learned that “healthy” shouldn’t mean flavorless or complicated. That’s why I am so thrilled about this recipe. We’re ditching the yeasty dread and embracing this truly amazing cottage cheese pizza crust. It’s high-protein, wonderfully low-carb, and reliable enough for any crazy weeknight. Trust me, this simple base is about to become your new favorite pizza night secret weapon.
- Why This Cottage Cheese Pizza Crust Is a Weeknight Hero
- Gathering Ingredients for Your Cottage Cheese Pizza Crust
- Step-by-Step: Making the Easy Cottage Cheese Pizza Crust
- Tips for the Ultimate Crispy Cottage Cheese Crust
- Serving Suggestions for Your High Protein Pizza Crust
- Storage and Make Ahead Pizza Base Prep
- Troubleshooting Common Cottage Cheese Pizza Crust Issues
- Frequently Asked Questions About This Cottage Cheese Pizza Crust Recipe
- Nutritional Snapshot of Your Protein Packed Pizza
Why This Cottage Cheese Pizza Crust Is a Weeknight Hero
We shouldn’t have to wait for the weekend to enjoy pizza, right? That’s why I call this the ultimate Quick Weeknight Pizza hack. It transforms dinner time when you’re short on energy. You get all the cheesy, savory satisfaction without the traditional flour fuss. This base is honestly a game-changer for keeping meals balanced and easy. I’m telling you, if you loved the idea of a Flourless Pizza Crust, this comes even greener.
Protein Packed Pizza Base for Satisfying Meals
The best part, truly, is the staying power this crust gives you. Because it’s loaded with protein—we’re talking around 22 grams per serving!—it keeps everyone feeling full and happy until breakfast. For those of us trying to stay on track with healthier eating, this allows for a delicious, Protein Packed Pizza experience without the carb crash later. It feels substantial, not like those flimsy veggie bases that leave you scavenging for snacks 30 minutes later.
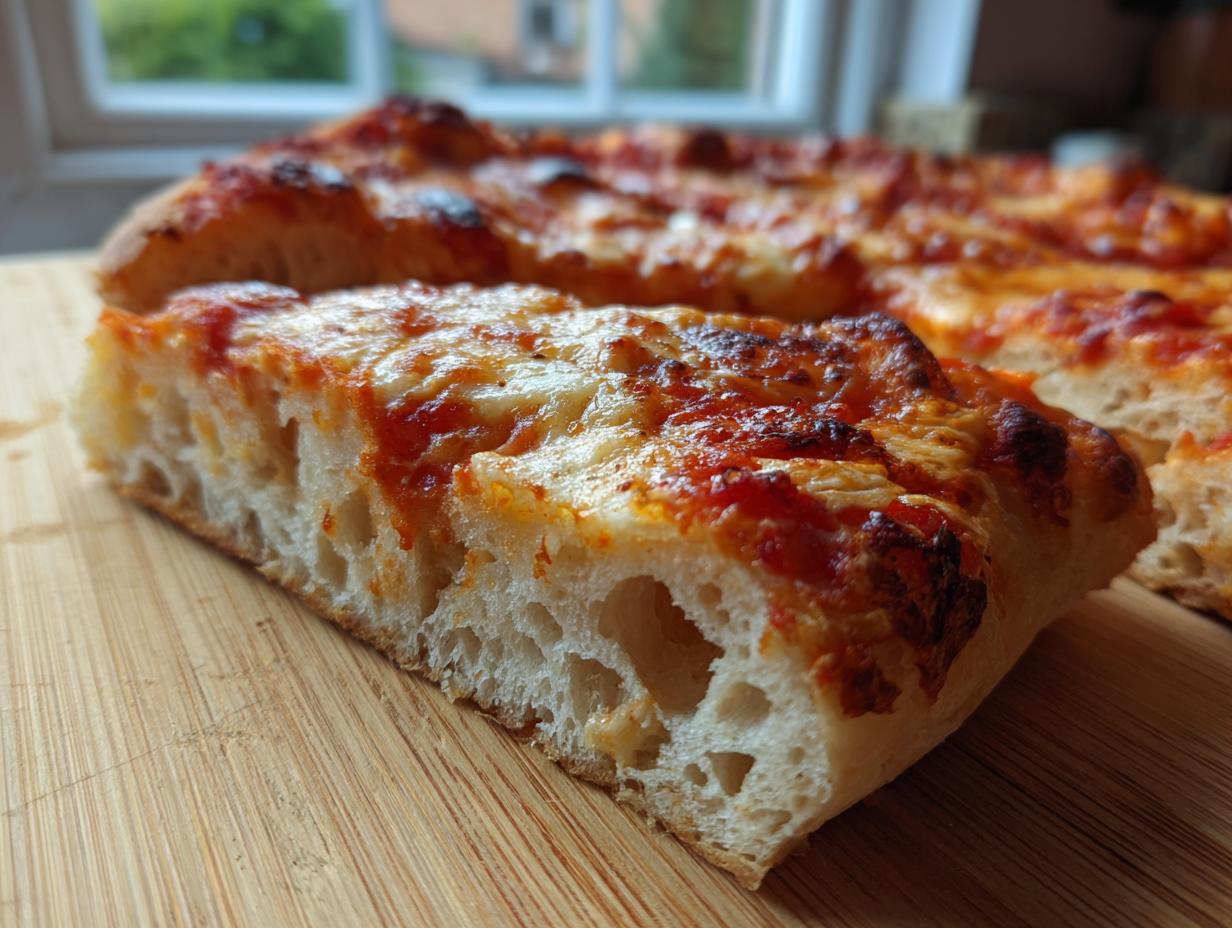
Achieving a Crispy Cottage Cheese Crust Texture
Now, I know what you’re thinking: doesn’t cheese crust equal soggy mess? Not with this technique! That fear of a wet, floppy base is real, but we beat it right at the start. The whole secret to getting that satisfying, semi-Crispy Cottage Cheese Crust texture is making sure every drop of extra moisture leaves the cottage cheese before blending. When you do that, the crust sets up firm underneath all your sauce and toppings. It truly holds up!
Gathering Ingredients for Your Cottage Cheese Pizza Crust
Okay, let’s talk about what you need to make this miracle happen. The beauty of this cottage cheese pizza crust is that the core is ridiculously simple—often just three primary things! But don’t skip the supporting cast, like the seasonings, because they truly make this taste like real pizza, not just warm cheese.
You’ll need that 1 cup of cottage cheese, one egg, and then your flour choice comes in next depending on your goals. I always grab my trusty garlic powder and a pinch of oregano for that classic Italian flavor profile. When you gather these things, remember the most important prep step comes first.
Ingredient Clarity: Draining is Non-Negotiable
Listen to me: you must, must, *must* drain your cottage cheese. I usually opt for the 2% or even whole milk version because the fat helps with crispness, but no matter what you choose, that excess water has to go. If you skip this, your base will spread too thin and stay soggy, guaranteed. Press it well in a fine-mesh sieve; we want thick curds, not watery soup!
Flour Options: Low Carb Pizza Base vs. Traditional
This is where you steer your pizza ship! If you are going strictly low-carb or Keto, you must reach for almond flour. It keeps the carb count down beautifully for that Low Carb Pizza Base. If you’re just looking for a healthier alternative and don’t mind the carbs, all-purpose flour works just fine and gives a *slightly* softer texture overall. Both keep it nice and sturdy once baked, but the almond flour version wins on pure macro friendly points.
Step-by-Step: Making the Easy Cottage Cheese Pizza Crust
Okay, you’ve managed to drain that cheese—fantastic job! Now we move into the easy assembly phase. For those frantic nights, remember that getting this Quick Weeknight Pizza crust ready is the hardest part. The rest is just waiting for the magic to happen in the oven. You’ll need your oven heated up before you even touch the blender, so let’s get that 400°F set right now.
Grab your parchment paper and lay it flat on a baking sheet—seriously, do not try to do this freehand on aluminum foil; we want clean release later! Once everything is prepped, we get blending. It moves fast from here, so stay attentive!
Blending for a Smooth Cottage Cheese Pizza Crust Batter
Pop all your creamy, well-drained cottage cheese, your egg, your chosen flour (almond or all-purpose!), and those lovely seasonings right into your food processor. If you don’t have one, no panic! You can use a standard blender, or even just a sturdy bowl and a heavy whisk, but you’ll need to put some muscle into it. The texture needs to be completely uniform—no lumps of cheese hiding anywhere!
You’ll want to process it until it truly looks like a smooth, thick batter. Stop the machine once or twice to scrape down the sides. We are looking for something that flows slowly, almost like a thick pancake mix, but not watery at all. This is the foundation for your **cottage cheese pizza crust**!
Pre-Baking for the Perfect Crispy Cottage Cheese Crust
Pour that smooth batter right onto your lined baking sheet. Now, use a spatula—and maybe a damp hand if you’re using almond flour—to spread it out into a neat circle. I aim for about 10 inches across, keeping it roughly a quarter-inch thick all the way around. Don’t stress if the edges aren’t razor-sharp; they tend to round out anyway.
Here’s the crucial moment for structure: the pre-bake. Slide that sheet into your 400°F oven for about 15 to 20 minutes. You are looking for the edges to start looking set and just starting to turn a light golden color. When you pull this out, trust me, it will feel solid. This sets up the structure so your crust doesn’t collapse when it meets the sauce and toppings!
Tips for the Ultimate Crispy Cottage Cheese Crust
The base is baked, beautiful, and structurally sound—but we want perfect pizza! Since this cottage cheese pizza crust is a little different from playing with yeast dough, you might need a few insider tricks I picked up researching the best ways to cook this for my own family. Getting that outside edge truly crisp is satisfying, and I’ve found a couple of things really help take it from good to great, especially if you’re aiming for that low-carb feel.
My grandmother always said, “If you rush the structure, you rush the flavor.” While this pizza is fast, we don’t rush that final bake! Once you add the sauce and toppings, the moisture content naturally goes up, so we need that initial bake to be thorough. Remember, this is a reliable crust, but structure is everything!
Baking Variations: Air Fryer Pizza Crust Cottage Cheese Method
If you have an air fryer, or if you’re just making a small single-serving pizza, you have to try this method! Honestly, since I started using my air fryer for things that need a quick, high-heat blast, breakfast and lunch have never been easier. For this base, you don’t need the full baking sheet; you just need the basket.
I take my small, spread-out crust—usually about 7 inches wide for my basket—and I’ll pop it into the air fryer at about 375°F. Because the heating element is so direct, it cooks much faster. You only need about 10 to 12 minutes for this initial set-up bake. Pull it out, top it quickly, and pop it back in for another 5 minutes until that mozzarella is gooey perfection. It gives you the absolute crispiest edges, hands down!
Serving Suggestions for Your High Protein Pizza Crust
The pre-baked base is ready, and now it’s time for the fun part: turning our sturdy High Protein Pizza Crust into a full-blown meal! Since this crust is already quite protein-rich, I like to pair it with toppings that enhance that staying power without weighing us down too much. Think fresh, bright flavors!
For me, pepperoni is always a favorite, but I load it up with thinly sliced mushrooms, onions, and bell peppers. If you go low-carb on the flour, stick to low-carb veggie toppings—no corn or pineapple here for that Keto Pizza Crust Recipe crowd! A light drizzle of pesto instead of heavy cream sauce can also work wonders and keep things feeling fresh.
And honestly, pizza is best balanced with something green on the side. Whenever I make this, I whip up a quick side salad. Something light, like my Authentic Greek Salad Recipe (No Lettuce!), cuts right through the richness of the cheese and pepperoni. It makes the whole meal feel balanced, and you don’t walk away from the table feeling heavy or sluggish.
Remember, that second bake time—the one with the toppings—is shorter, usually just 5 to 10 minutes. We’re just melting the cheese and warming everything through, not drying out our beautiful crust!
Storage and Make Ahead Pizza Base Prep
We’ve all been there—too tired to cook on Wednesday, even though we made this amazing pizza on Monday! The great news is that this cottage cheese pizza crust holds up surprisingly well to make-ahead requests. You absolutely can prepare the base ahead of time, which makes those ultra-busy weeknights feel infinitely calmer. I always try to have one or two of these pre-baked bases tucked away in the freezer.
However, holding onto that perfect crispness is the key challenge with any flourless base. You can’t just wrap up a leftover, fully-topped pizza and expect miracles the next day—it’ll soak up all that sauce moisture. The trick is to only store the crust itself.
To get the best Make Ahead Pizza Base, let the crust cool completely after that first pre-bake. Don’t even think about wrapping it warm, or you’ll end up with condensation and mush! Once it’s room temperature, wrap it tightly in a layer of plastic wrap, and then tuck that whole package into a zip-top freezer bag. It keeps beautifully like this for up to a month.
When you want to use it for another Quick Weeknight Pizza dinner, just unwrap it and pop it right back onto the baking sheet. You don’t even need to thaw it! Bake it at 400°F for about 8 to 10 minutes to warm it through and crisp up the edges again. Then, that’s when you load up the sauce and cheese and finish the bake. It comes back to life! It’s truly the best way to make sure you always have a healthy base ready to go when dinner emergencies strike.
Troubleshooting Common Cottage Cheese Pizza Crust Issues
Sometimes our best intentions don’t line up perfectly with the oven gods, and that’s okay! When dealing with a batter-based crust like this cottage cheese pizza crust, things can sometimes go a little sideways. Don’t you dare throw it out! I’ve been there, holding a spatula full of sad, wet cheese mixture, thinking I’ve ruined dinner. But every problem has a quick fix, especially when you know what messy-baking looks like.
The two main issues I hear about are always the same: it’s too soupy before baking, or it rips when you try to move it onto the regular pan after blending on the parchment. Let’s tackle the wet one first, because that happens before the oven even gets involved!
The Crust Is Too Wet—How to Fix It Before Baking
If, after blending your cottage cheese, egg, and flour, the mixture looks more like heavy soup than thick pancake batter, don’t panic about the draining step; we can fix this right in the food processor bowl. You need an immediate thickener. I always keep both almond flour and regular flour handy for this very reason.
Add an extra tablespoon of your chosen flour at a time, pulsing after each addition. You only want to add enough until the mixture pulls back slightly from the sides of the bowl. Remember, it won’t feel like traditional dough; it should still be spreadable. If it’s too thin to spread into a proper circle, it will just turn into a huge, thin cracker, and we want a proper base!
Moving the Crust: Dealing with Tears and Shifts
This is the move where many home cooks lose faith! Because this base is so delicate before that first bake, trying to slide it off the parchment paper onto a cooling rack or directly into the oven can cause tears. My biggest rookie mistake years ago was trying to build the pizza *on* the sheet pan, and then realizing I needed to center it better.
Here is Rosa Sterling’s golden rule for moving it gracefully: Don’t move it until it has had a good 5 minutes to rest right after spreading. That time allows the wet ingredients to start moisturizing the flour slightly. When you’re ready to bake, just slide the *entire sheet of parchment paper* right onto your hot baking rack or stone. You don’t transfer the crust itself until it’s done baking and sturdy. Once it’s pre-baked for 20 minutes, it’ll be firm enough to lift gently with two spatulas if you need to transfer it to a different pan for the second bake with toppings!
My Crust Burned on the Edges But Not the Middle!
This usually means your oven temperature is running hotter than you think, or your crust was spread too thin on the outer edge. If you see the edges getting dark too quickly, the easiest solution is building a little barrier! When you go in for the second bake (the one with the cheese!), push your sauce and toppings slightly inward, leaving about half an inch of dry crust border showing.
That border acts like a buffer against the direct oven heat. You can even lightly tent the edges with tiny strips of aluminum foil if the cheese melts perfectly but the crust still looks pale near the center. Trust your visual cues over the timer when you see things going sideways. A little adjustment goes a long way toward that perfect Low Carb Pizza Base.
Frequently Asked Questions About This Cottage Cheese Pizza Crust Recipe
I know when I first tried this, I had a laundry list of questions buzzing in my head! It’s such a different approach to pizza night, so it’s smart to check the details before diving in. Below, I’ve gathered some of the most common things people ask me about making this fantastic cottage cheese pizza crust. Hopefully, these will clear everything up so you can get dinner on the table fast!
Can I swap the cottage cheese for Greek yogurt or ricotta?
Oh, that’s a tough one! I always recommend sticking with cottage cheese here. Greek yogurt has too much liquid, even when strained, and ricotta is almost always too fatty and creamy for the structure we need. The goal of this High Protein Pizza Crust is getting firm curds that blend into a structure, not a loose paste. If you use Greek yogurt, you will definitely need way more flour, which defeats the purpose of keeping it lighter. So please, grab the cottage cheese!
Is this a truly Keto Pizza Crust Recipe, especially if I use almond flour?
Yes, when you use almond flour instead of standard all-purpose flour, it absolutely fits into most Keto parameters! Almond flour replaces the gluten with healthy fats and keeps the net carb count very low, making it a wonderful Keto Pizza Crust Recipe. Just be mindful of your toppings! Load it up with cheese and meats, but if you’re adding sugary sauces or high-carb veggies, you’ll need to track those additions separately. Keep the crust itself lean and mean!
Do I have to use a food processor, or can I mix this by hand?
You certainly *can* mix it by hand, but I won’t sugarcoat it—it takes effort! My blender attachment is what gives you that perfectly silky, smooth batter that spreads beautifully into a thin, even circle. If you mix by hand in a sturdy bowl, you might end up with chunks of cottage cheese mixed in. It will still *work*—it just means you have a crust that is definitely more textured, less like a smooth Low Carb Pizza Base and more like a cheesy flatbread. If you’re aiming for that beautiful, smooth circle, the processor is your best friend here.
Can I use this recipe as a Gluten Free Pizza Dough Alternative?
If you use the almond flour option pictured in the main recipe, then yes, it is naturally gluten-free! That’s one of the huge wins for this recipe—it’s an awesome Gluten Free Pizza Dough Alternative right out of the gate, especially for families dealing with sensitivities. If you only have all-purpose flour on hand, then, no, it won’t be gluten-free, but it’s so easy to have both flours on hand for flexibility!
What is the best way to reheat leftovers to keep the crust crisp?
Reheating pizza is where most crusts go to die, right? For leftovers, the microwave is your enemy—it just steams everything back into sogginess. Instead, take your slice and place it directly onto a foil-lined baking sheet. Pop it into a 350°F oven for about 8 to 10 minutes. That dry, moderate heat will crisp up the bottom of the crust again perfectly. Air frying leftovers works wonders too, if you have a small basket!
If you have any other burning questions about mastering your cottage cheese pizza crust, please don’t hesitate to reach out via my contact page. Happy cooking!
Nutritional Snapshot of Your Protein Packed Pizza
Now that you’ve got this amazing, incredibly quick pizza base baked and ready, I know you’re probably curious about what you’re actually sneaking into your diet. Because we’re using almond flour in the main recipe to keep it low-carb, we get an awesome nutritional boost without sacrificing that true pizza feel. This isn’t just empty calories; this is genuine fuel!
It’s always important to remember these numbers are estimates—because I’m not weighing every single dollop of sauce or sprinkle of cheese you add on top! But based purely on the crust recipe, using the almond flour variation, here’s what you’re looking at for a quarter of the recipe (about one slice):
- Calories: About 220
- Protein: A whopping 22 grams! This is why I love this High Protein Pizza Crust so much.
- Total Fat: Around 10 grams
- Total Carbohydrates: Only 15 grams (and that includes that 3g of fiber!)
- Sugar: Just 2 grams—mostly natural sugars from the cottage cheese.
See? That is an excellent trade-out for a standard white flour dough that usually nets you way more carbs and far less protein. This is why I feel so good about whipping up this cottage cheese pizza crust even on a busy weeknight. You’re getting a meal that supports you, keeps you full, and tastes utterly satisfying. Just factor in whatever glorious toppings you pile on when you calculate your final plate!
PrintHigh-Protein, 3-Ingredient Cottage Cheese Pizza Crust

Make a simple, high-protein pizza crust using only three ingredients. This low-carb base bakes up sturdy and is perfect for quick weeknight dinners when you want a healthier pizza alternative.
- Prep Time: 10 min
- Cook Time: 25 min
- Total Time: 35 min
- Yield: 1 large crust (4 servings) 1x
- Category: Dinner
- Method: Baking
- Cuisine: American
- Diet: Low Fat
Ingredients
- 1 cup cottage cheese, drained well
- 1 large egg
- 1/2 cup almond flour (for low-carb/keto) OR 1/2 cup all-purpose flour (for standard)
- 1/2 teaspoon garlic powder
- 1/4 teaspoon dried oregano
- Pinch of salt
Instructions
- Preheat your oven to 400°F (200°C). Line a baking sheet with parchment paper.
- Drain the cottage cheese thoroughly. You need to remove as much moisture as possible for a sturdy crust.
- Place the drained cottage cheese, egg, flour (almond or all-purpose), garlic powder, oregano, and salt into a food processor or blender.
- Process or blend until the mixture is completely smooth. Scrape down the sides as needed.
- Pour the batter onto the prepared baking sheet. Use a spatula to spread the mixture into a 10-inch circle, about 1/4 inch thick.
- Bake the crust for 15 to 20 minutes, or until the edges are set and lightly golden brown.
- Remove the crust from the oven. Add your favorite pizza sauce, cheese, and toppings.
- Return the pizza to the oven and bake for another 5 to 10 minutes, until the cheese is melted and bubbly.
- Slice and serve immediately.
Notes
- For the crispiest crust, ensure you use full-fat cottage cheese and press out all excess liquid before blending.
- If you do not have a food processor, you can mix vigorously by hand in a bowl, but blending yields a smoother texture.
- This recipe works well for an Air Fryer Pizza Crust; cook at 375°F for 10-12 minutes before topping.
Nutrition
- Serving Size: 1/4 crust
- Calories: 220
- Sugar: 2
- Sodium: 350
- Fat: 10
- Saturated Fat: 5
- Unsaturated Fat: 5
- Trans Fat: 0
- Carbohydrates: 15
- Fiber: 3
- Protein: 22
- Cholesterol: 100