

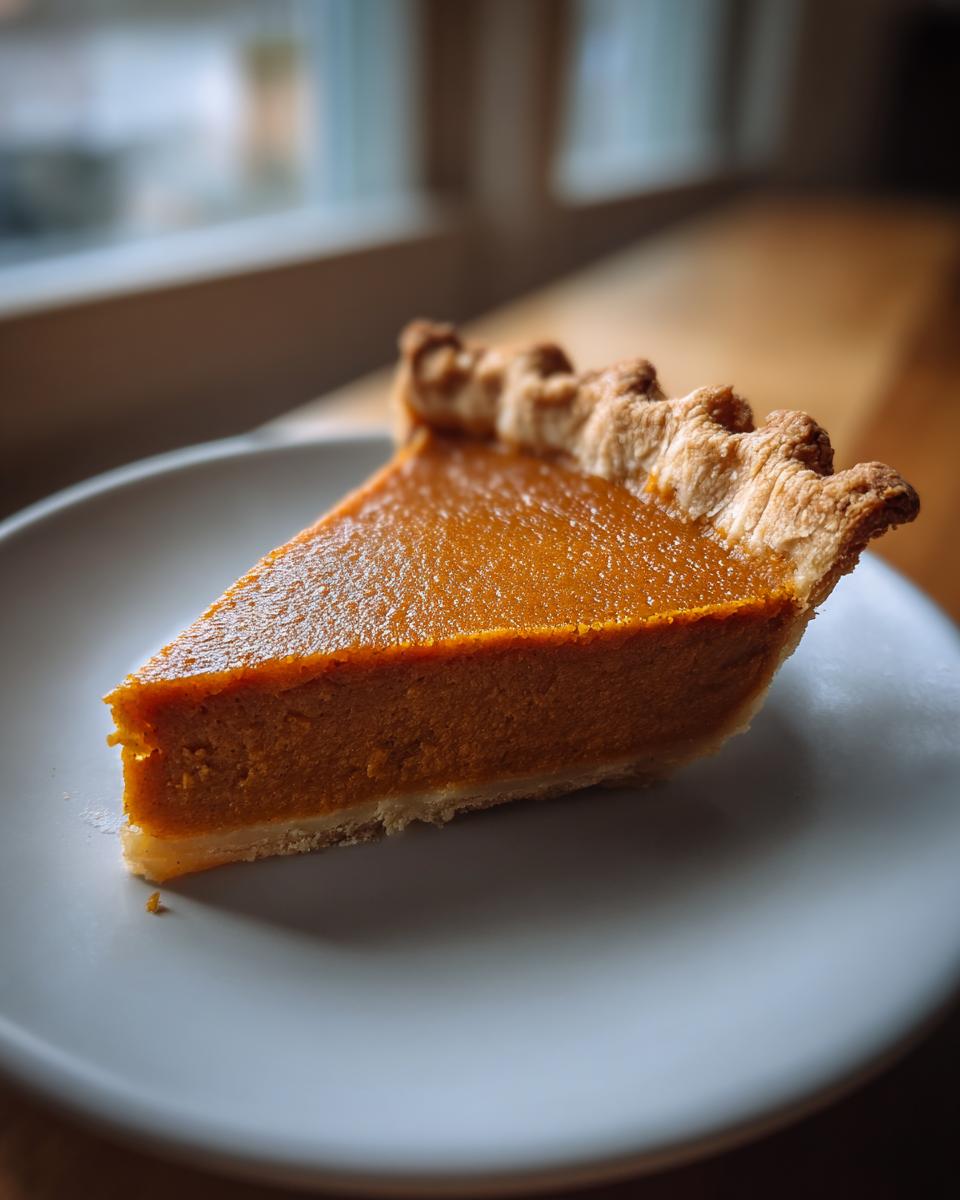
The scent of cinnamon and ginger—that’s the signal that our family traditions are kicking into high gear! I know how precious those holiday baking moments are, especially when you need something reliable when the house is full of people. That’s why I’m handing over my absolute favorite: my **classic pumpkin pie recipe**. When I was juggling teaching full-time while getting three kids through the holidays, I didn’t need complicated steps; I needed results. This filling is completely foolproof and yields the creamiest texture you can imagine. Trust me, as Rosa Sterling, this is the one recipe that never fails, ensuring your Thanksgiving dessert shines.
We are keeping it simple, traditional, and utterly delicious, just like the pie my grandmother always served. You can see all my favorite comfort foods over at my best homemade desserts collection too!
- Why This Is the Best Classic Pumpkin Pie Recipe for Your Holiday Table
- Gathering Ingredients for Your Classic Pumpkin Pie Recipe
- Step-by-Step Instructions for the Traditional Pumpkin Pie Recipe
- Tips for Success with Your Classic Pumpkin Pie Recipe
- Making This Classic Pumpkin Pie Recipe Ahead of Time
- Troubleshooting Common Issues with Your Homemade Pumpkin Pie
- Frequently Asked Questions About This Classic Pumpkin Pie Recipe
- Estimated Nutritional Data for This Spiced Pumpkin Dessert
- Share Your Experience with Rosa's Traditional Pumpkin Pie
Why This Is the Best Classic Pumpkin Pie Recipe for Your Holiday Table
I’ve tested a lot of pies over the years, trying to find the sweet spot between rich flavor and easy prep, especially when I was rushing home from school. This **classic pumpkin pie recipe** really is the champion. It uses ingredients I always keep stocked, meaning no last-minute trips to the store when the guests are arriving!
It’s all about keeping the texture perfect, and these little details make all the difference for a truly memorable Thanksgiving pie.
Foolproof Creamy Pumpkin Filling
The secret weapon here is sweetened condensed milk, not plain evaporated milk or cream. That rich, thick milk is what locks in that luxurious **Creamy Pumpkin Filling**. It actually helps stabilize the eggs so you don’t end up with that awful, slightly grainy or curdled texture that happens if you over-bake things. It guarantees a smooth slice every single time—it’s almost magic!
Traditional Spiced Pumpkin Dessert Flavor
When people ask for an **Old Fashioned Pumpkin Pie**, they mean this blend. We aren’t messing around with new flavors here. We load it up with the classics: plenty of cinnamon for warmth, sharp nutmeg, a little bit of ginger bite, and just a dash of ground cloves for depth. It smells exactly like a cozy fall kitchen should smell.
Gathering Ingredients for Your Classic Pumpkin Pie Recipe
Okay, let’s get down to business! Remember my promise: everything you need for this **classic pumpkin pie recipe** should be waiting for you at your regular grocery store trip. No specialty hunting required! As a busy mom, I couldn’t afford to run out for one obscure item halfway through holiday prep. We rely on simple, quality things to make this dessert taste amazing. I know the exact measurements are important, so make sure you grab a real canned pumpkin puree—not pumpkin pie filling. That’s the first big step for a great result!
You’ll need that unbaked crust, the pumpkin, the sweetened condensed milk, two eggs, and our famous spice blend. If you’re planning the whole Thanksgiving menu, check out my guide on the easy Thanksgiving classic turkey brine to get a head start!
Pie Crust Considerations for a Flaky Crust Pie
Now, about that vessel holding all that creamy goodness—the crust! The recipe calls for one 9-inch unbaked pie crust. Look, if you have the time and energy, I’m a huge advocate for a completely **From Scratch Pie Crust**. It really does make a difference in that final flaky texture. But if time is truly tight and you need an **Easy Pumpkin Pie**, a good quality store-bought crust works perfectly fine, and nobody is going to judge you, I promise! Remember one of my general tips? If you’re using a bottom crust only, pop that pie shell into the freezer for about 15 minutes before you pour in the filling. That extra chill helps keep those edges from slumping down while it bakes. It’s a small trick, but it makes a huge difference for a truly **Flaky Crust Pie**.
Step-by-Step Instructions for the Traditional Pumpkin Pie Recipe
Alright, deep breath! This **Traditional Pumpkin Pie Recipe** is straightforward, but timing is everything, especially that little temperature jump we use. Make sure your oven is fully preheated to 425 degrees F before you do anything else. Get that unbaked pie crust sitting nicely on a baking sheet first—it just makes cleanup easier if anything drips, which, let’s be honest, sometimes happens!
The secret to making sure this pie comes out perfect every year when I’m managing my own hectic schedule is getting the filling mixed exactly right. No rushing this part!
Mixing the Creamy Pumpkin Filling
First things first: grab a big bowl. Whisk your pumpkin puree, that can of sweetened condensed milk, and those two lightly beaten eggs together until you see a completely uniform color. I mean smooth, no streaks. *Then* you add your pre-mixed spices. Mixing the spices separately first ensures they distribute evenly, so you don’t have a patch of pure cinnamon hiding somewhere. Whisk it all again until everything is beautifully blended. Pour that gorgeous mixture right into your waiting pie crust.
The Two-Temperature Baking Method for Perfect Pumpkin Pie
This is the part everyone needs to pay attention to for that no-fail, creamy texture. Pop the pie into that hot 425°F oven for exactly 15 minutes. That initial blast sets the bottom of the crust so you don’t end up with a soggy bottom—nobody likes that! After 15 minutes, *without opening the oven door*, drop the temperature down to 350 degrees F. Then, let it bake for another 35 to 40 minutes. That lower temperature lets the custard fill gently cook and thicken without boiling over or cracking. If you’re curious how the legendary Libby’s recipe handled its bake, this gentle approach is key for structure!
When it’s done, cool it down completely—seriously, patience is virtue here! If you’re looking for more incredibly easy, comforting food to serve alongside your pie, you absolutely must check out my easy creamy chicken alfredo recipe. It’s another one of my tried-and-true family favorites!
Tips for Success with Your Classic Pumpkin Pie Recipe
Baking a **classic pumpkin pie recipe** is mostly about timing and temperature control, which I learned the hard way when I was rushing between grading papers and soccer practice! Don’t worry if you’ve had pie disasters before; I have a couple of Rosa-approved tricks to ensure this **Thanksgiving Pie** comes out beautiful.
If you notice those pretty crust edges starting to get too dark while the filling is still finishing its slow bake at 350°F, just grab a strip of aluminum foil. Wrap it loosely around the rim of the crust. It shields the pastry from the direct heat but lets the filling bake through. It’s a lifesaver, especially when those oven lights are deceiving!
You can find more ways to tackle chilly nights without stress in my easy creamy chicken tortilla soup recipe, but right now, let’s focus on dessert!
Cooling and Serving Your Perfect Pumpkin Pie
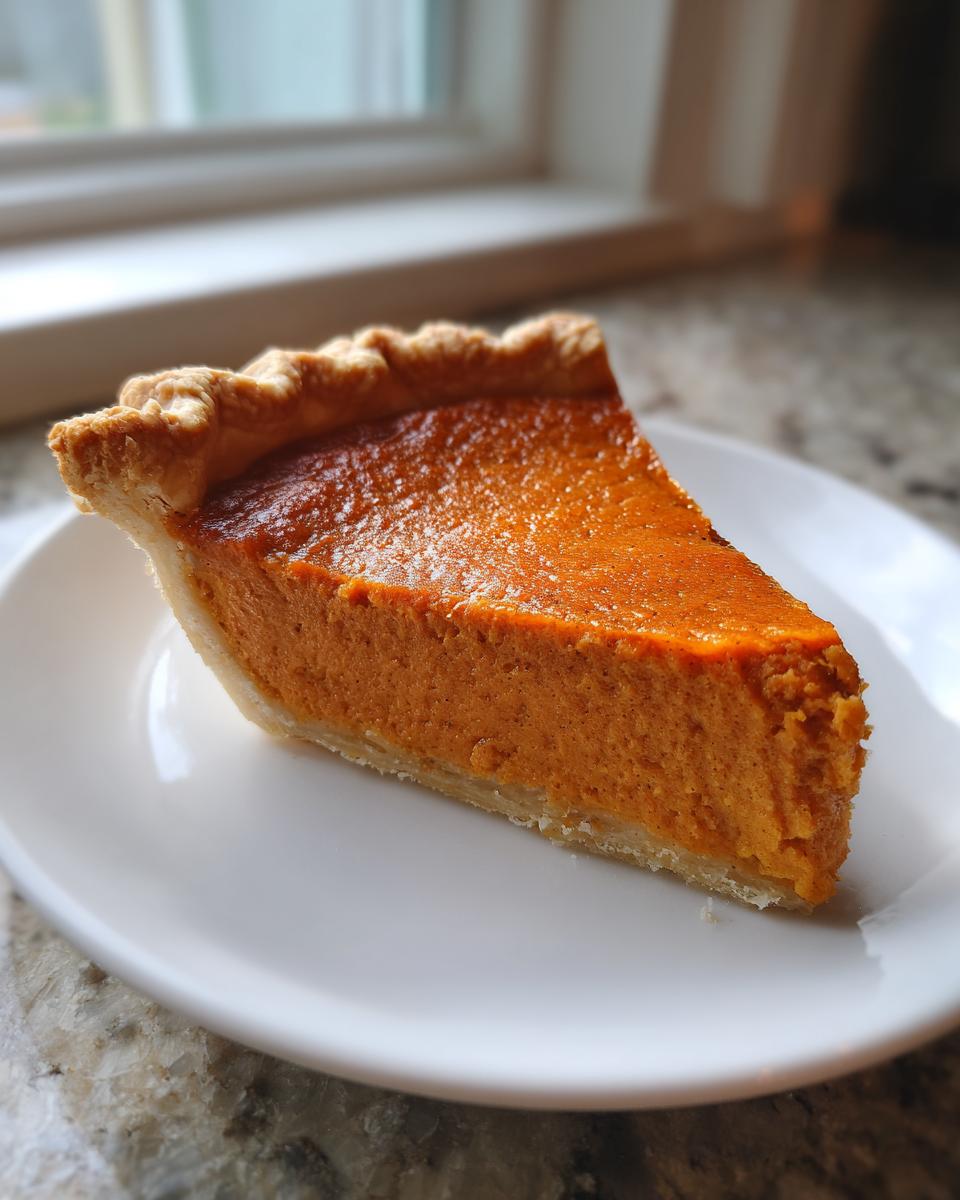
This next part is non-negotiable, folks: cooling! You *must* let this pie cool completely on a wire rack—we’re talking at least two hours. If you try to slice it when it’s even a little warm, all that wonderful creamy structure we worked so hard to build will just deflate into a puddle. It needs that time to fully set up. I often bake mine the day before Thanksgiving just to guarantee it’s firm. Honestly, this pie is wonderful completely chilled, but a big dollop of fresh, slightly sweetened whipped cream on the side makes it absolutely unbeatable. It’s the perfect contrast to the warm spices. If you are looking for more great holiday recipes, check out the amazing tips found on Kristine’s Kitchen blog!
Making This Classic Pumpkin Pie Recipe Ahead of Time
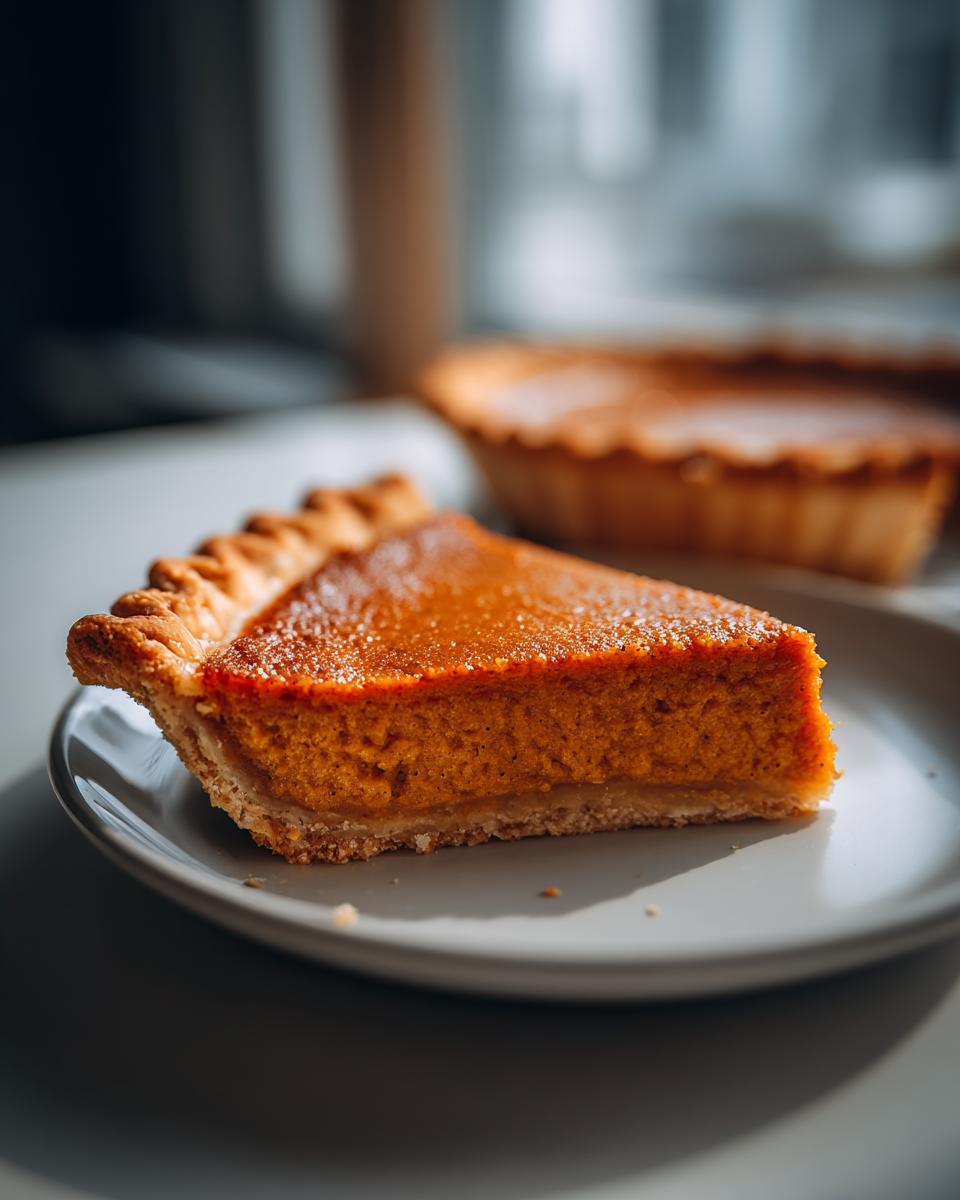
I know the moment the thought crosses your mind: “Can I bake this **Thanksgiving Pie** tomorrow instead of Thursday morning?” Because trust me, as someone who used to teach all day and then had to manage a massive holiday meal prep, planning ahead is everything. Good news! This **classic pumpkin pie recipe** is actually *better* when made a day early!
Since the filling is a rich custard based on eggs and condensed milk, it needs time to fully solidify. If you try to cut into it too early, it won’t hold its shape; you’ll just get soup on your plate. So, pull it out of the oven, let it cool completely on the counter—that takes a couple of hours—and then cover it tightly with plastic wrap and move it to the fridge.
It keeps beautifully for three full days in the refrigerator. Seriously, three days! This means Wednesday night you can have your pie done, settled, and ready to go. All you have to do on Thanksgiving Day is pull it out maybe an hour before serving so it’s not ice cold, maybe whip up some fresh cream—you can find my go-to guide for freezer hacks, which also covers things you can prep days ahead, right here on my baking freezer hacks page. It’s a game-changer for holiday sanity!
It tastes just as incredible on day three as it does fresh, maybe even better because all those warm spices have had a chance to really settle into the creamy pumpkin base. You deserve to enjoy the day, not slave over the oven! Check out the delicious-looking alternatives some other lovely cooks have made over at Aria’s Recipes for inspiration while you’re planning your make-ahead schedule.
Troubleshooting Common Issues with Your Homemade Pumpkin Pie
Even with a tried-and-true **classic pumpkin pie recipe** like this one, sometimes things worry us in the oven! I hear from so many people who are scared of the final product cracking or getting watery. Don’t let that stop you from making this wonderful **Homemade Pumpkin Pie**! Most oven issues come down to two things: how you mixed the filling and how steady your temperature was.
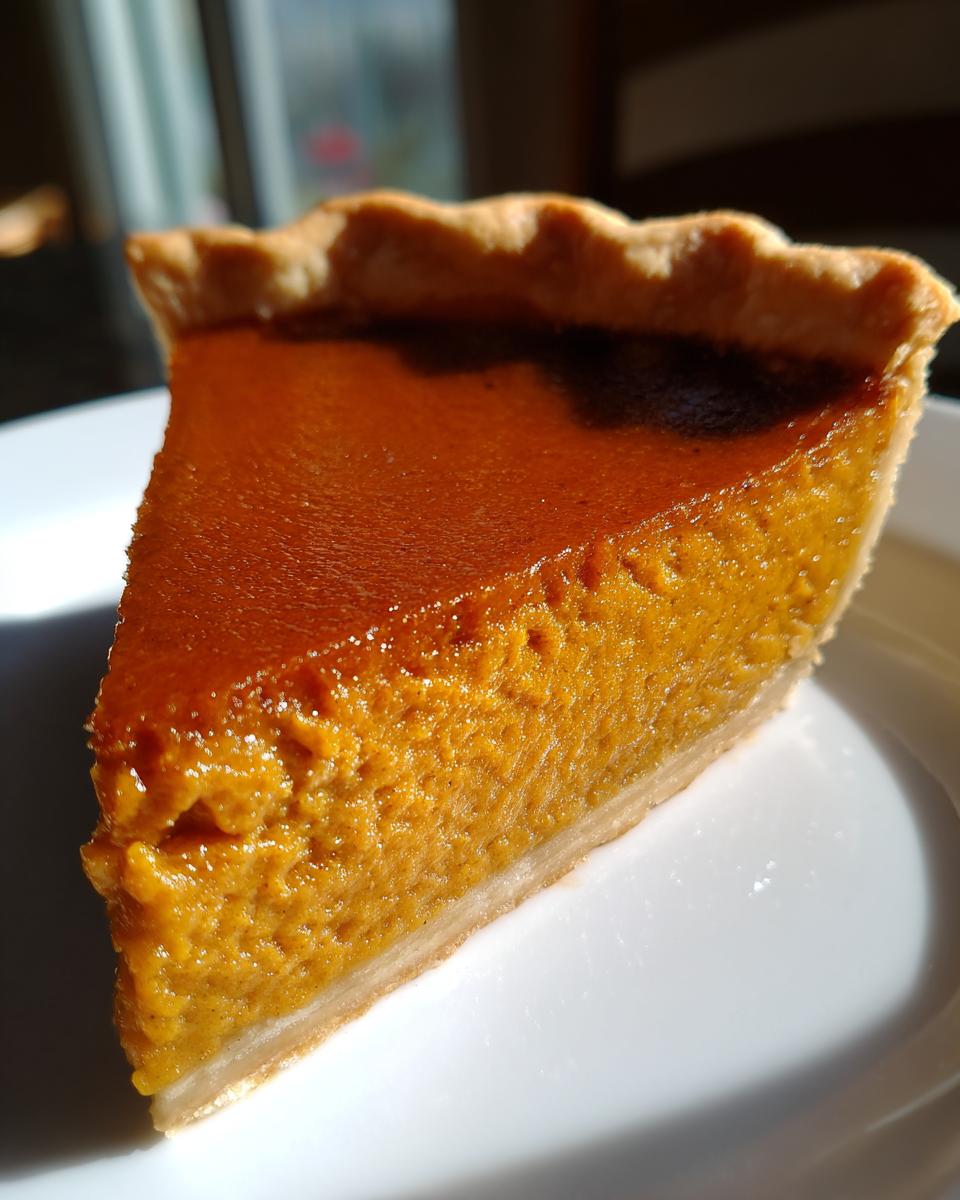
If you end up getting a little crack on the top, honestly, don’t stress about it for one second, especially since we cover it with whipped cream anyway! A tiny crack usually means the filling baked just a hair too long, or the oven temperature fluctuated right at the end. Remember that two-step baking? That’s designed to prevent that, but if it happens, it’s totally cosmetic.
Now, let’s talk about a watery, runny filling—that’s the real disappointment. This almost always points back to the eggs. You only want those eggs *lightly beaten*. If you whisk them too vigorously, you incorporate too much air, and that air expands rapidly when heated, pushing moisture out and creating steam pockets. We want smooth, not foamy. Aim for just combining the yolks and whites without seeing lots of bubbles.
If you follow the time guide exactly and your pie still seems too soft in the very center when you check it, just put it back in the oven for five more minutes, checking every minute after that. It’s better to be slightly over-baked than under-baked when you’re dealing with a custard. If you’re planning other crowd-pleasers, my easy chili recipe is another one that readers tell me they rely on every single year when the weather gets chilly. The main lesson here is to trust the initial high heat to set the edge, then take it slow and low!
Frequently Asked Questions About This Classic Pumpkin Pie Recipe
It’s totally normal to have a few questions pop up as you get ready to bake your **classic pumpkin pie recipe**! I’ve pulled together some of the things my readers ask me most often about perfecting their holiday dessert. Cooking should be fun, not stressful, so let’s clear up any last-minute worries!
If you’re making a big breakfast spread before the main event, don’t forget to check out my easy breakfast recipes for some simple ideas!
Can I substitute the sweetened condensed milk in this classic pumpkin pie recipe?
This is a big one! I really, truly advise against substituting the sweetened condensed milk here. It does double duty: it’s our main sweetener, and because it’s so thick, it acts as the primary stabilizing agent for our **Creamy Pumpkin Filling**. If you try to substitute it with regular milk or evaporated milk, you’ll end up adding too much liquid, and your pie will likely be watery or won’t set properly. If you absolutely can’t find it, you could try mixing full-fat evaporated milk with granulated sugar until it thickens significantly, but honestly, this recipe works so well because of that canned goodness. Stick to the original for that perfect, no-fail result we promised!
How do I know when my pumpkin pie is done baking?
You know how you can tell a cake is done with a toothpick? We use a similar, slightly gentler technique here for this custard pie. After that final slow bake at 350°F, gently insert a thin table knife or a slender metal skewer about an inch from the very center of the pie. If it comes out clean or with just a few *moist crumbs* clinging to it—not wet batter—you are good to go. Also, watch the edge: the pie should look set, but the absolute dead center should still have a tiny wobble, like Jell-O just beginning to firm up. Don’t panic! That center continues to bake and set up beautifully as the pie cools completely on the counter. If you’re using a store-bought crust, remember that a **From Scratch Pie Crust** often cooks more evenly, but the wobble test is universal!
For fantastic examples of other easy holiday pies, take a peek at what’s popular over at Yum Food USA!
What if I want to make this an Easy Pumpkin Pie without any spices?
Oh, bless your heart! While I think the spices are what make this dessert truly *classic*, you certainly can make an **Easy Pumpkin Pie** with just pumpkin and milk if that’s what your family prefers. If you skip all the cinnamon, ginger, nutmeg, and cloves, I’d strongly suggest adding about 1/2 cup of granulated sugar instead of relying only on the sweetness from the condensed milk, just to balance the earthiness of the pumpkin alone. But I hope you try that full spice blend first—it’s what makes it taste like fall!
Can I skip chilling the pie before serving?
No, absolutely not! I know you want to dig in as soon as it smells amazing, but cutting into this pie before it’s fully chilled is how you end up with a runny mess. The custard structure is delicate, and the chilling time (at least two hours, but preferably four) is just as important as the baking time. Store leftovers covered in the fridge. It tastes even better the next day, I promise!
Estimated Nutritional Data for This Spiced Pumpkin Dessert
Now, I need to give you a heads-up here. When I developed this **classic pumpkin pie recipe**, my focus was always on flavor and reliability—not counting calories! Since we are using condensed milk and the ingredients can vary slightly based on the crust, these numbers are just estimates based on a standard 9-inch store-bought pastry shell. This is just a guide, not a strict diet plan!
If you are keeping track of intake, here is the data based on one slice of this comforting dessert:
- Serving Size: 1 slice
- Calories: 320
- Sugar: 28g
- Sodium: 250mg
- Fat: 15g
- Saturated Fat: 7g
- Trans Fat: 0g
- Carbohydrates: 42g
- Fiber: 2g
- Protein: 7g
- Cholesterol: 65mg
See? It’s holiday food, meant to be enjoyed with a little bit of everything else on your plate! If you are trying to balance out the indulgence with healthier options throughout the week, I always recommend my rotation of anti-inflammatory dinners. Those recipes keep us feeling nourished without sacrificing taste. Enjoy your slice guilt-free!
Share Your Experience with Rosa’s Traditional Pumpkin Pie
That’s it! You’ve baked the best **classic pumpkin pie recipe**, the one that tastes just like the holidays should! Now, I truly want to hear from you. Rosa’s Tasty Kitchen isn’t just about my recipes; it’s about the community we build together, sharing the joys and the little successes from our kitchens to ours.
Did you use a store-bought crust or did you make one from scratch? How did your family react to that perfectly **creamy pumpkin filling**? I want to know all the details!
Please, take a moment to leave a rating for this recipe right below—even five stars tells me that this **Traditional Pumpkin Pie Recipe** is going the distance for your family traditions. And if you snapped a picture on your phone of that gorgeous, uncracked top, I’d love to see it! You can reach out to me directly via my contact page to send photos, or just tag me if you share on social media. I read every single note that comes through!
If you’re looking for more inspiration for your next baking adventure after the holidays, you can always check out the wonderful fall recipes shared by Natasha’s Kitchen too, just to see what other delicious ideas are out there. Happy baking, and thank you so much for trusting me with your **Thanksgiving Pie**!
PrintRosa’s Classic Homemade Pumpkin Pie Recipe
Follow this straightforward recipe for a creamy, perfectly spiced, classic pumpkin pie with a flaky crust. This is the traditional Thanksgiving dessert you can rely on for foolproof results.
- Prep Time: 15 min
- Cook Time: 55 min
- Total Time: 70 min
- Yield: 8 servings 1x
- Category: Dessert
- Method: Baking
- Cuisine: American
- Diet: Vegetarian
Ingredients
- 1 (9 inch) unbaked pie crust (homemade or store-bought)
- 1 (15 ounce) can pure pumpkin puree
- 1 (14 ounce) can sweetened condensed milk
- 2 large eggs, lightly beaten
- 1 teaspoon ground cinnamon
- 1/2 teaspoon ground ginger
- 1/2 teaspoon ground nutmeg
- 1/4 teaspoon salt
- 1/4 teaspoon ground cloves
Instructions
- Preheat your oven to 425 degrees F (220 degrees C). Place your unbaked pie crust on a baking sheet.
- In a large bowl, whisk together the pumpkin puree, sweetened condensed milk, and lightly beaten eggs until smooth.
- In a separate small bowl, mix together the cinnamon, ginger, nutmeg, salt, and cloves. Add the spice mixture to the pumpkin mixture and whisk until fully combined.
- Pour the pumpkin filling into the unbaked pie crust.
- Bake at 425 degrees F (220 degrees C) for 15 minutes.
- Reduce the oven temperature to 350 degrees F (175 degrees C). Do not remove the pie from the oven.
- Continue baking for 35 to 40 minutes, or until a knife inserted near the center comes out clean.
- Let the pie cool completely on a wire rack before slicing. Serve plain or with whipped cream.
Notes
- For a flakier crust, chill the unbaked pie shell in the freezer for 15 minutes before filling and baking.
- If the crust edges start to brown too quickly during the lower temperature bake, cover them loosely with aluminum foil strips.
- This pie tastes best after it has fully chilled for at least 2 hours.
Nutrition
- Serving Size: 1 slice
- Calories: 320
- Sugar: 28
- Sodium: 250
- Fat: 15
- Saturated Fat: 7
- Unsaturated Fat: 8
- Trans Fat: 0
- Carbohydrates: 42
- Fiber: 2
- Protein: 7
- Cholesterol: 65