
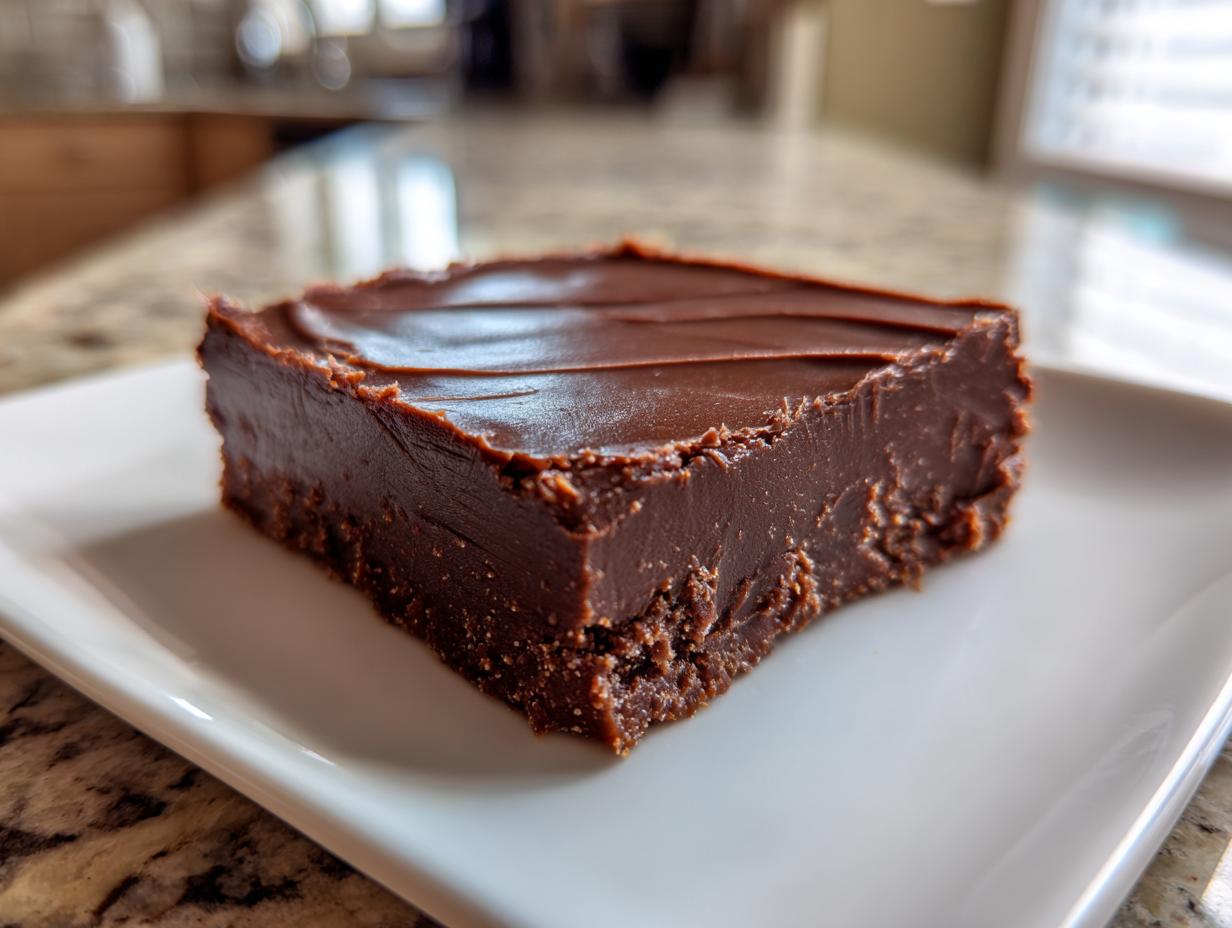
Oh, you know those nights, right? It’s 8 PM, the kids are finally quiet, and suddenly you have this overwhelming, urgent craving for something unbelievably rich, creamy, and chocolatey. But you are NOT turning the oven on. Trust me, I completely get it. That’s exactly why I perfected this ultimate, simple chocolate peanut butter fudge. In this kitchen, we believe the best treats don’t need complexity or hours of baking time; they just need heart and a few brilliant ingredients. This no-bake wonder delivers that decadent dessert punch you need, fast!
This recipe is pure Rosa Sterling magic—taking that time-tested pairing of chocolate and peanut butter and boiling it down to its best, most reliable form. It’s my go-to when I need something truly comforting but have zero time to fuss. If you’re looking for more winners that satisfy that sweet tooth, check out my roundup of the best homemade desserts!
- Why This Easy No-Bake chocolate peanut butter fudge Recipe Works (E-E-A-T)
- Gathering Ingredients for Your Ultimate chocolate peanut butter fudge
- Step-by-Step Instructions to Make Perfect chocolate peanut butter fudge
- Tips for the Best creamy peanut butter treat chocolate peanut butter fudge
- Variations: Making Your chocolate peanut butter fudge Unique
- Storage and Make Ahead Tips for Your chocolate peanut butter fudge
- Frequently Asked Questions about No Bake fudge
- Nutritional Estimates for Simple Fudge Squares
- Share Your Homemade candy Success
Why This Easy No-Bake chocolate peanut butter fudge Recipe Works (E-E-A-T)
When you’re juggling work and family, you need recipes you can trust, and that’s where this chocolate peanut butter fudge shines brightest. See, I learned early on that you don’t need fancy equipment or complicated methods to create something truly special. This is a genuine quick dessert recipe because there’s absolutely no time wasted waiting for an oven to preheat.
We only use four simple ingredients, which means fewer chances for things to go wrong! It sets up beautifully in the fridge so you get those perfect, clean squares every time. People constantly tell me how this fudge is unbelievably rich, yet has that smooth consistency—it truly is a melt in your mouth dessert. It’s reliable, folks. That’s the key to any great recipe, especially when you need that decadent chocolate hit fast.
Gathering Ingredients for Your Ultimate chocolate peanut butter fudge
Look, with only a few ingredients needed, this chocolate peanut butter fudge is practically foolproof. We aren’t messing around with fancy melting points or double boilers here! But precision matters, especially when we want that signature creamy texture. Since this recipe relies on just four simple players, make sure they are the right texture. A perfectly smooth creamy peanut butter treat is essential for making sure your final squares aren’t grainy or crumbly. This is the quick dessert recipe payoff!
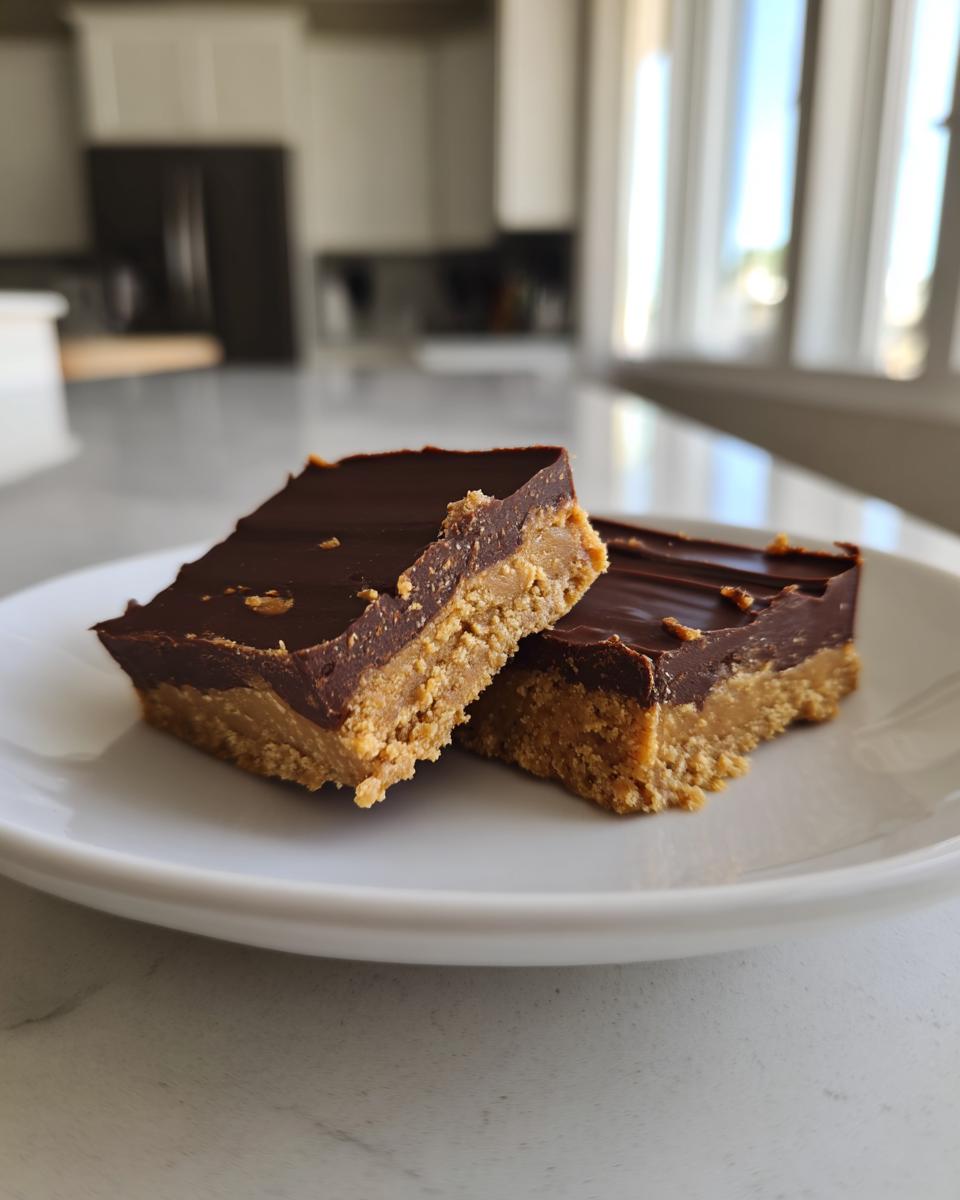
Ingredients for the Two-Layer chocolate peanut butter fudge
Before you even grab a bowl, line that 8×8 inch pan with parchment paper! I mean it—leave that big overhang so you can lift the whole thing out later. That’s step one when I make this treat.
You’ll need:
- 1 cup creamy peanut butter (no natural stuff, please!)
- 1 cup powdered sugar, and make sure you sift it first!
- 1 cup semi-sweet chocolate chips
- 1 tablespoon butter or coconut oil (this helps the chocolate melt smoothly)
That’s it! See how easy that ingredient list is? It’s perfect for last-minute needs.
Step-by-Step Instructions to Make Perfect chocolate peanut butter fudge
I love this part because it feels like alchemy—we’re turning simple ingredients into pure magic with zero heat required! Getting the steps right ensures we get that fantastic texture that makes this chocolate peanut butter fudge the best homemade candy. Remember, the total time, including chilling, is about two hours and fifteen minutes, but the active prep is only about 15 minutes. That’s a huge win!
Preparing the Pan and the Peanut Butter Base
First things first, get that 8×8 inch pan ready. This step is non-negotiable if you want easy release! Line it completely with parchment paper, leaving plenty of slack hanging over the sides. We can use those flaps like handles later.
Next, grab your bowl with the peanut butter and the sifted powdered sugar. You need to mix this together until it’s perfectly uniform. I mean *completely* smooth. If you see any streaks of white, keep working it! Once it looks like thick, light brown velvet, press it firmly and evenly into the bottom of your prepared pan. Don’t skip the firm pressing—that ensures you get those nice, sturdy simple fudge squares later.
Melting the Chocolate and Creating the chocolate swirl fudge
Now for the chocolate layer. Put your chocolate chips and that tablespoon of butter into a microwave-safe bowl. We are melting this gently. Zap it for 30 seconds, pull it out, and stir it like crazy. If it’s still chunky, pop it back in for another 30 seconds. Keep going until it’s glossy and smooth. If you rush this, you’ll burn the chocolate, and trust me, burnt chocolate is a tragedy no one needs.
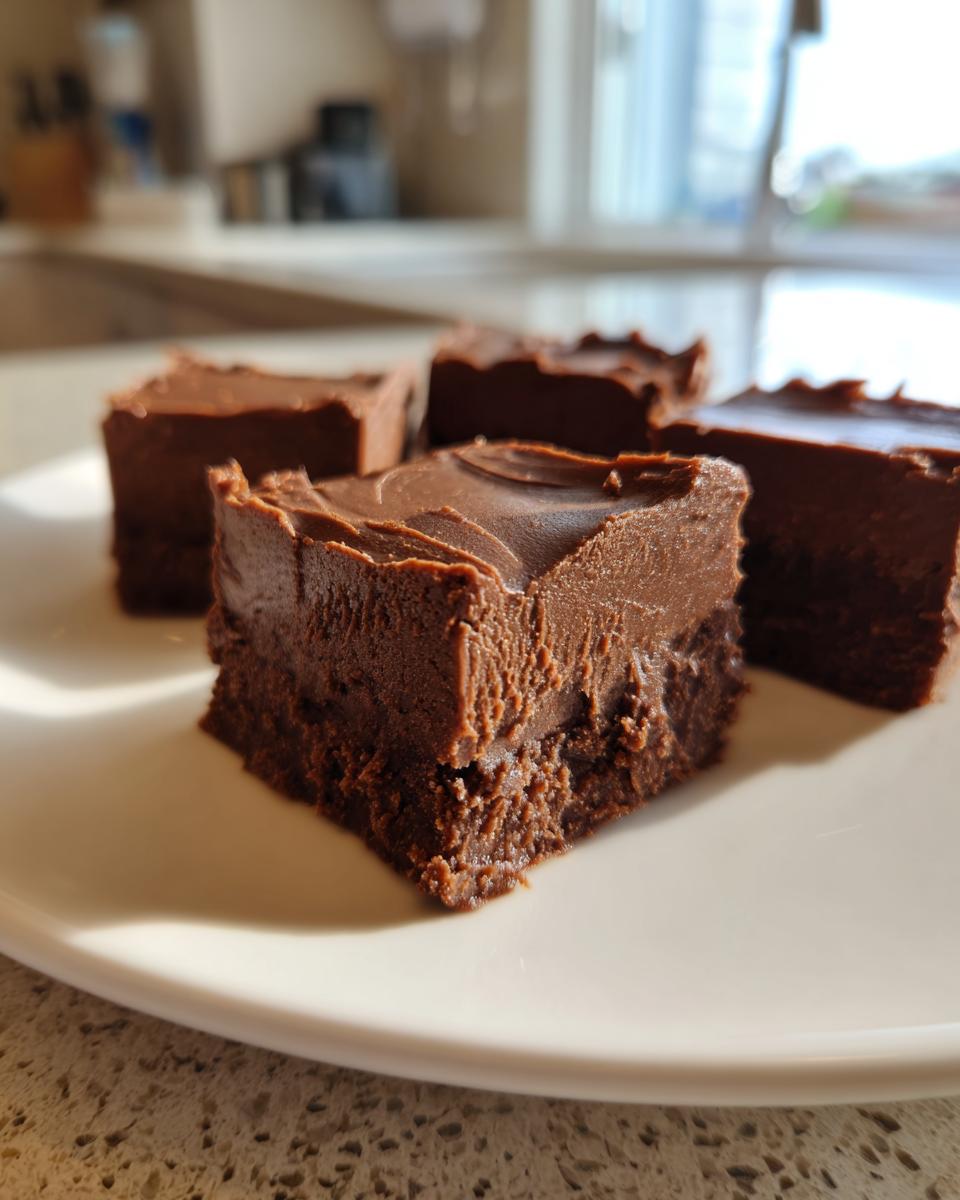
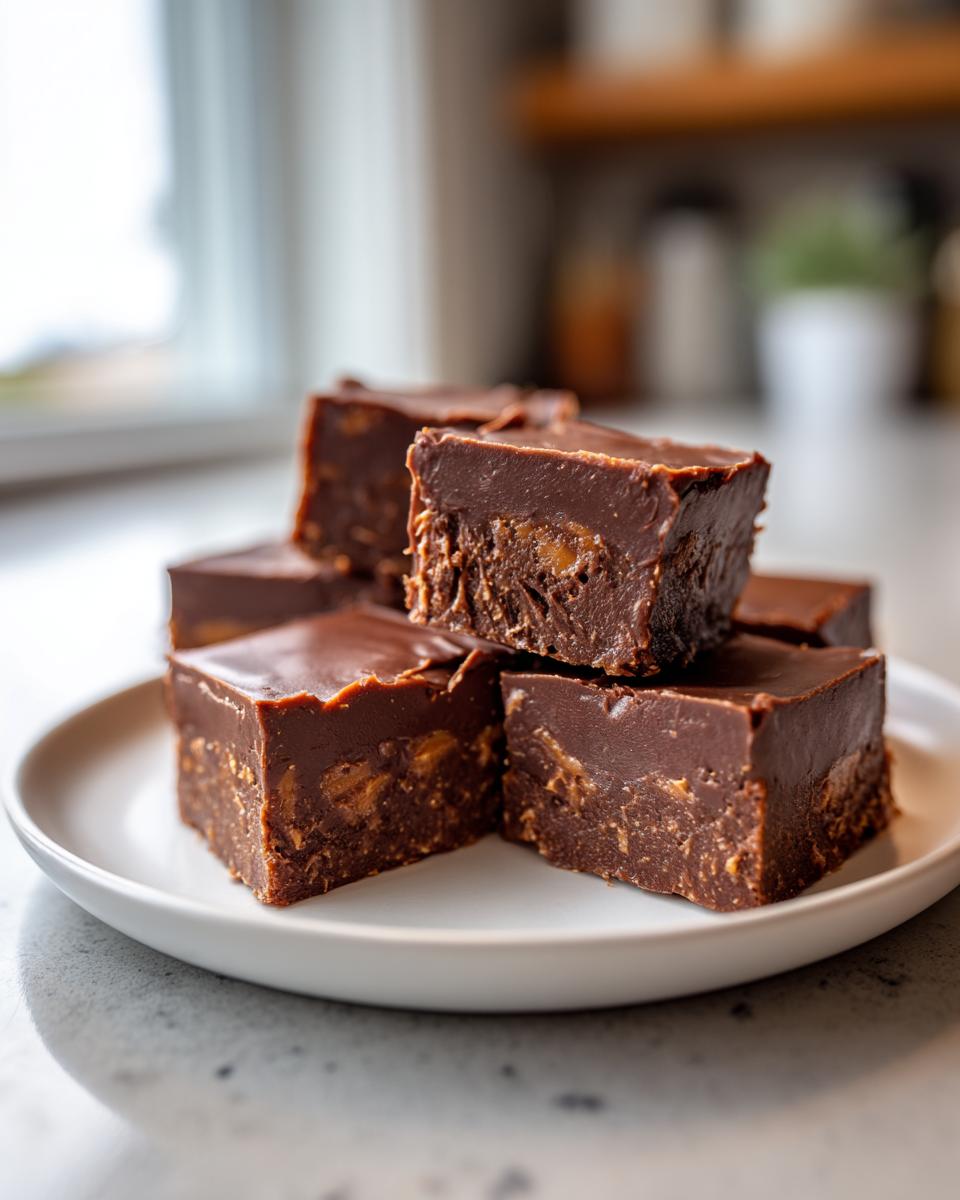
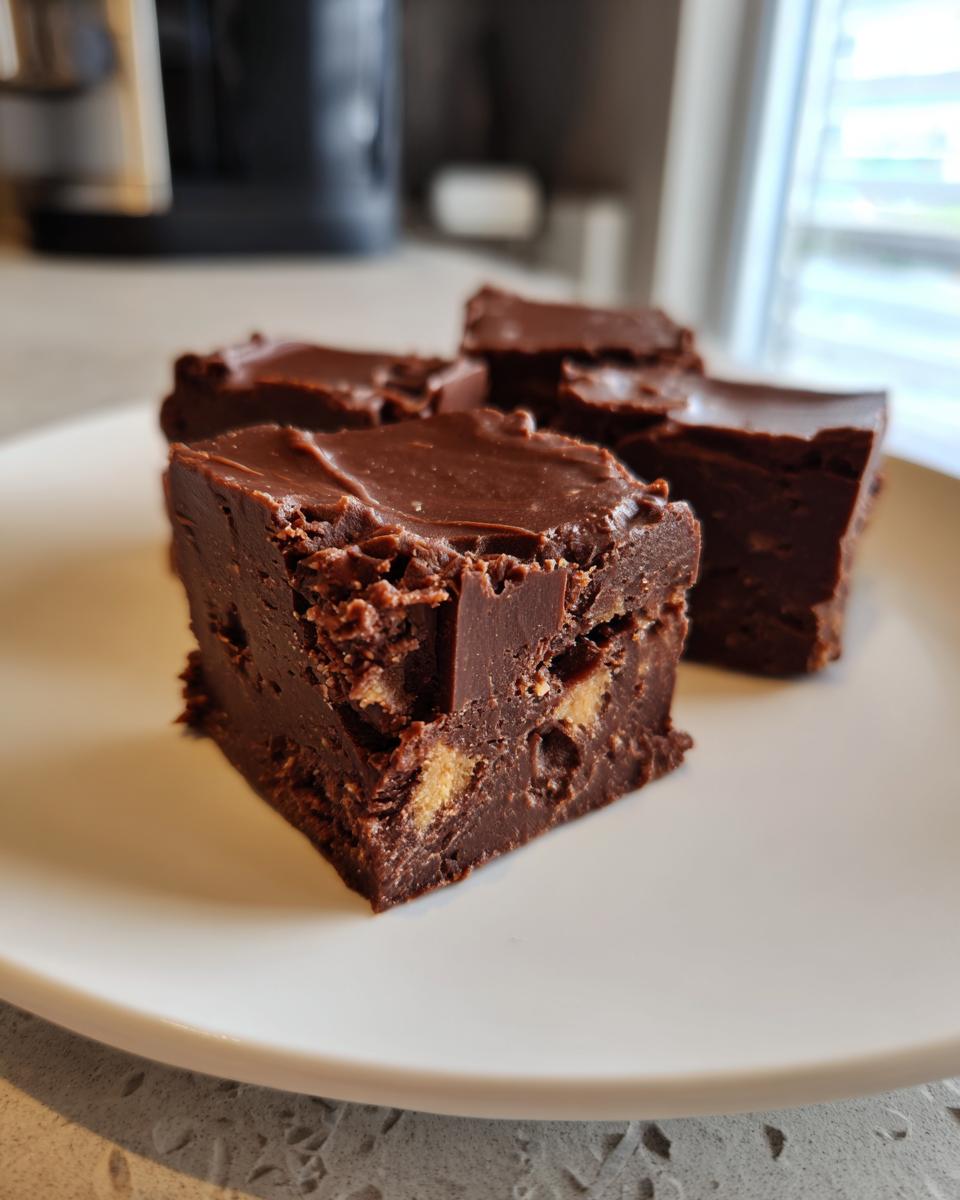
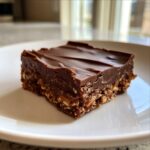
Pour that beautiful melted chocolate right over your peanut butter layer. Spread it evenly to cover every corner. Now, here is where you decide! If you want a clean, two-layer look, just stop here and smooth the top. But if you want that gorgeous chocolate swirl fudge effect, take a butter knife or a toothpick and gently swirl it through both layers just a few times. Don’t overwork it, or you’ll just mix it all together!
Chilling, Cutting, and Serving Your chocolate peanut butter fudge
This is the hardest part: waiting! Slide that pan into the refrigerator. We need it firm, so let it chill for a solid two hours minimum—more is fine if you have the patience. Once it’s rock solid, grab those parchment paper overhangs we left! Lift the entire block of fudge right out of the pan. Set it on a cutting board and use a sharp knife to slice it into 16 or 24 small squares, depending on how rich you want each bite to be.
Tips for the Best creamy peanut butter treat chocolate peanut butter fudge
Now that you have made your first batch of this amazing chocolate peanut butter fudge, I want to make sure every single batch you attempt going forward is just as good, if not better! While this is already considered the best fudge recipe in my house, little tweaks can make your experience even better. Remember those notes that came with the recipe? They hold the secrets to absolute fudge perfection.
First up, let’s talk chocolate. If you want a truly deep, unbelievably decadent dessert experience, swap out those semi-sweet chips for dark chocolate chips. The slight bitterness cuts through the sweetness of the peanut butter layer perfectly, making the whole thing taste richer, somehow.
Also, if you decide you absolutely must have a perfectly defined layer instead of that pretty swirl we talked about, don’t skip the chilling time! Letting that peanut butter base firm up for about 15 minutes before you pour the chocolate over it will keep those two layers separate. It just takes a little more self-control, but it delivers a gorgeous visual effect. This simple method ensures your next batch of this creamy peanut butter treat is picture-perfect!
Variations: Making Your chocolate peanut butter fudge Unique
I always tell folks that once you master this simple foundation, the world of chocolate peanut butter fudge is your oyster! This base recipe for homemade candy is so versatile. If you’re a true lover of that chocolate and peanut butter marriage, you absolutely have to try the Buckeye variation.
How do you get that authentic Buckeye flavor? It’s easy! Instead of marbling or layering, you let the peanut butter layer chill until quite firm, maybe 30 minutes. Then, you pour the chocolate layer over top, but here’s the trick: only spread the chocolate about halfway across the peanut butter layer. Leave some of that creamy peanut butter showing near the edges. When it sets up, it looks just like those famous peanut butter balls!
Another little secret for kicking up the basic flavor? Add a tiny pinch, like just an eighth of a teaspoon, of flaky sea salt to the melted chocolate right before you pour it. That little pop of salt makes the chocolate taste even deeper. For more fun salty-sweet ideas, check out my recipe for peanut butter swirl brownies.
And hey, if you need a little festive sparkle for holiday parties, you can sprinkle some crushed pretzels or even some festive sprinkles on top of the chocolate layer before it sets. It adds texture and makes these little simple fudge squares look fancy enough for any celebration! You can find more ideas for festive baking over in my Christmas sprinkle sugar cookies post, too.
Storage and Make Ahead Tips for Your chocolate peanut butter fudge
The best part about making this amazing chocolate peanut butter fudge is that it’s a dream for planning ahead! Since this is a no-bake dessert, it’s already built for grab-and-go situations. This makes it one of my favorite make ahead dessert solutions for holiday baking prep or when you need quick party sweets.
You should store your fudge in an airtight container right in the refrigerator. It stays fantastic for a full week! Seriously, the flavor seems to deepen a little overnight. If you need to keep them longer than that, wrapping them well and popping them in the freezer is absolutely fine. I’ve stored them that way for almost two months. When you’re ready to serve, just let them thaw on the counter for about 15 minutes, and they come back to that perfect, melt-in-your-mouth texture.
Frequently Asked Questions about No Bake fudge
It’s totally normal to have a few questions when trying a new fudge recipe, especially since this is a no-bake version! I want every batch of this chocolate peanut butter fudge to turn out perfectly for you, so I pulled together the most common things folks ask me about how things should feel, set, and taste. Don’t hesitate to reach out via the contact page if yours isn’t acting right!
Can I use natural peanut butter in this chocolate peanut butter fudge?
Oh, that’s a big one! And my answer is usually no, honey. I know natural peanut butter is trendy, but for this no bake fudge to set up correctly, we really need the stabilized fats found in that regular, creamy peanut butter—like Jif or Skippy. Natural peanut butters tend to separate, and if the oil pools up, your fudge might end up greasy or just won’t firm up properly past a soft mess. Stick to the standard creamy kind for the best results in this creamy peanut butter treat.
How do I get clean, defined layers instead of a swirl in my fudge recipe?
That layered look is gorgeous, isn’t it? It’s slightly trickier than a swirl, but totally achievable. Remember when I said we only need about 15 minutes of active prep time? That extra time is your secret weapon here! After you press that peanut butter base firmly into the pan, put it into the fridge for about 15 minutes. You want it nice and cool, maybe just slightly firm to the touch, but still easily pierced. Then, pour your melted chocolate on top. That small bit of chilling time prevents the warm chocolate from immediately melting into the base, giving you distinct layers perfect for a beautiful presentation!
Nutritional Estimates for Simple Fudge Squares
Now, I want to be totally honest upfront: this is candy, folks! It’s utterly delicious and meant for treating yourself, not for counting calories. Since this is a rich, decadent dessert made with butter and chocolate chips, it definitely packs a satisfying punch of energy. Every bit of this amazing chocolate peanut butter fudge is worth it, I promise!
What you see below are just my estimates based on dividing the total ingredients across 24 squares, as the recipe details suggest. These numbers can change slightly depending on the exact brands of chocolate chips or peanut butter you use, but it gives you a good ballpark idea. Enjoy these simple fudge squares guilt-free, knowing you made them yourself from scratch!
- Serving Size: 1 square
- Calories: Around 180
- Fat: About 12g (with 5g saturated fat)
- Carbohydrates: Roughly 17g
- Protein: About 4g
- Sugar: Roughly 15g
See? It gives you enough substance to really satisfy that craving without feeling too heavy. It’s the perfect balance for a homemade candy treat that you can share at any party!
Share Your Homemade candy Success
Well, that’s it! You’ve done it! You’ve tackled the ultimate chocolate peanut butter fudge and created a batch of pure, no-bake bliss. I truly hope you found this recipe as easy and satisfying as I do every single time I whip these up. They are my favorite for wrapping up as little gifts, too—who doesn’t love a gorgeous piece of homemade candy?
Now, I need your help! When you make these simple fudge squares, please give the recipe a quick star rating right below this section. Also, if you have a photo, put it up in the comments or tag me online! Seeing your results—whether you went for a perfect swirl or a clean layer—makes building this kitchen community worth every second.
Your feedback helps other busy home cooks like you know they can trust this recipe, too. If you have any lingering questions, you can always drop me a line through the contact page. Happy snacking, friends!
PrintEasy No-Bake Chocolate Peanut Butter Fudge Squares
Make this rich, creamy chocolate peanut butter fudge quickly. This no-bake dessert uses simple ingredients and sets up fast, yielding perfect squares for sharing or gifting.
- Prep Time: 15 min
- Cook Time: 0 min
- Total Time: 2 hours 15 min
- Yield: 24 servings 1x
- Category: Dessert
- Method: No-Bake
- Cuisine: American
- Diet: Vegetarian
Ingredients
- 1 cup creamy peanut butter
- 1 cup powdered sugar, sifted
- 1 cup semi-sweet chocolate chips
- 1 tablespoon butter or coconut oil
Instructions
- Line an 8×8 inch baking pan with parchment paper, leaving an overhang on the sides for easy removal.
- In a medium bowl, combine the peanut butter and powdered sugar. Mix well until completely smooth. This forms your peanut butter layer.
- Press the peanut butter mixture evenly into the bottom of the prepared pan.
- In a separate microwave-safe bowl, combine the chocolate chips and butter. Microwave in 30-second intervals, stirring between each, until the chocolate is smooth and fully melted.
- Pour the melted chocolate mixture over the peanut butter layer. Spread it evenly to cover the entire surface.
- For a swirl effect, use a knife or toothpick to gently marble the chocolate and peanut butter layers together before the chocolate sets.
- Refrigerate the fudge for at least 2 hours, or until firm.
- Use the parchment paper overhang to lift the fudge from the pan. Cut into 16 or 24 small squares.
Notes
- For a richer chocolate flavor, use dark chocolate chips instead of semi-sweet.
- If you want a layered look instead of a swirl, let the peanut butter layer chill for 15 minutes before pouring the chocolate on top.
- Store leftover chocolate peanut butter fudge in an airtight container in the refrigerator for up to one week.
Nutrition
- Serving Size: 1 square
- Calories: 180
- Sugar: 15
- Sodium: 65
- Fat: 12
- Saturated Fat: 5
- Unsaturated Fat: 7
- Trans Fat: 0
- Carbohydrates: 17
- Fiber: 1
- Protein: 4
- Cholesterol: 5