
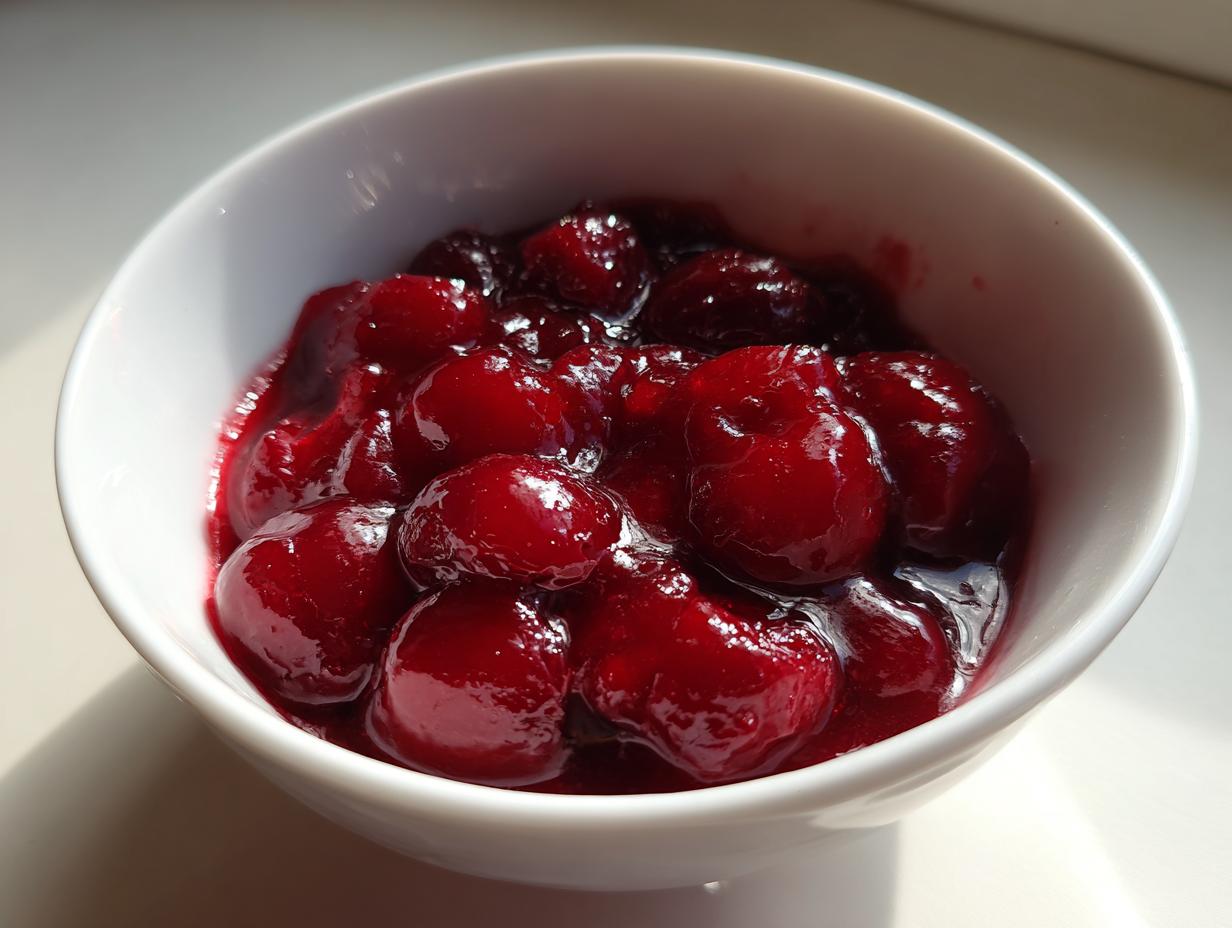
If you’re still reaching for that tin can when you bake, stop right there! I’m begging you. That overly sweet, sometimes runny goo just doesn’t do justice to a beautiful crust, does it? Here at Rosa’s Tasty Kitchen, my mission has always been to give you reliable, flavor-packed components that make home baking shine, even on a chaotic Tuesday night. That’s why my go-to recipe is the ultimate thick & juicy homemade cherry pie filling. In literally 15 minutes, we transform simple cherries into the perfect, stable filling that holds up perfectly in pies, cheesecake swirls, or even just spooned over ice cream. This recipe is now one of my very best homemade desserts components. Trust me, once you make this, you’ll never look back.
- Why This Homemade Cherry Pie Filling Recipe Works (EEAT Focus)
- Gathering Ingredients for Your Cherry Pie Filling
- How to Make Thick Cherry Pie Filling from Scratch
- Versatile Uses for Your Juicy Cherry Pie Filling
- Tips for Perfect Cherry Pie Filling Success
- Storage and Make-Ahead for Cherry Pie Filling
- Frequently Asked Questions About Making Cherry Pie Filling
- Details and Facts on This Cherry Pie Filling Recipe
- Share Your Thick Cherry Pie Filling Creations
Why This Homemade Cherry Pie Filling Recipe Works (EEAT Focus)
I know what you’re thinking: making cherry pie filling from scratch is going to be messy and take forever. Not with this method! This is the gold standard for a thick cherry pie filling recipe because we respect the science behind thickening fruit. The key isn’t just adding cornstarch; it’s all about timing the slurry. We cook the cherries just enough to release their natural juices before slamming in that perfectly mixed starch and water combination. This process ensures you get that gorgeous, juicy cherry pie filling that sets up beautifully—no soupy messes here!
I spent ages testing this in my kitchen when balancing after-school routines, trying to beat that store-bought stuff. My breakthrough came when I learned not to rush the thickening part; letting it simmer for those crucial few minutes is what guarantees a sliceable filling. This expertise means you can trust that when you follow these steps, your pie filling will perform exactly as it should. If you love reliable baking components like this one, be sure to check out my easy moist lemon loaf recipe too!
Quick Pie Filling Recipe: Ready in Under 30 Minutes
Being a busy mom, I prioritize speed when I can, and this recipe delivers! If you have 15 minutes to cook, you have time for this easy cherry pie filling from scratch. Once the cherries are simmering, the cooking stage flies by. You get bakery-quality results in a fraction of the time it takes to drive to the store. You can whip this up while your pie crust is chilling!
Gathering Ingredients for Your Cherry Pie Filling
Okay, let’s get down to the good stuff! Making the best cherry pie filling starts with having the right players on the roster. Since we are aiming for that perfect texture, using accurate measurements here is just as important as that careful cooking we do later. Don’t substitute the cornstarch for flour; it just won’t grab onto the juices the same way!
Here’s what you’ll need for about three cups of filling:
- 3 cups fresh or frozen sweet or sour cherries (make sure they are pitted!)
- 1 cup granulated sugar
- 1/4 cup cornstarch (this is our thickener!)
- 1/4 cup cold water
- 1 tablespoon lemon juice (for brightness)
- 1/2 teaspoon almond extract (my secret weapon for flavor!)
- A tiny pinch of salt
Sweet Tart Cherry Filling: Fresh or Frozen Options
One of my favorite things about this recipe is its flexibility. You don’t have to wait for peak cherry season! If you’re grabbing frozen cherries, don’t bother thawing them out first. Just toss them straight into the saucepan with the sugar. It takes maybe two extra minutes for them to break down, that’s it. This recipe handles both sweet and wonderfully tart cherries beautifully; the sugar balances the tartness perfectly, giving you that classic sweet tart cherry filling profile.
How to Make Thick Cherry Pie Filling from Scratch
Alright, let’s dive into the real action of this best pie filling recipe. This is where we learn exactly how to make cherry pie filling that behaves itself and doesn’t run out everywhere when you cut that first hot slice. We start by giving our fruit a little warm-up massage, so to speak.
Take your cherries and sugar and put them together in that saucepan, setting it aside for about 10 minutes. This step is magic! It lets the sugar draw out all that gorgeous, natural, flavorful juice from the cherries. Don’t skip this rest time; it’s crucial for building flavor before we even turn on the heat.
While that’s happening, whisk up your slurry—that’s the cold water and cornstarch mixed smooth in a little dish. You want absolutely zero lumps, so really stir that until it looks like silky milk. Then, put the cherries on medium heat until they start to bubble gently. Now, listen closely, because this is the most important part of this best cherry pie filling tutorial: slowly drizzle that slurry in while stirring constantly. I mean *constantly*. If you dump it all in at once, you get lumps, and we’re aiming for smooth perfection!
Keep stirring that mixture. You’ll notice it starts to tighten up pretty fast, usually in about two to four minutes. If you need a truly sturdy filling for, say, a beautiful lattice or a fancy tart, you can always add an extra tablespoon of cornstarch next time once you nail this first batch. Since this method is so reliable, I actually use this technique when I make my quick crusty French bread too—just kidding! But honestly, this method just works for thickening. Then, we stir in the tartness from the lemon juice and that hint of almond flavor, and pull it right off the heat. This recipe is so good, I even pinned the instructions from Laura’s Bakery to remind myself how much I love this technique!
Achieving Foldable Cherry Filling Consistency
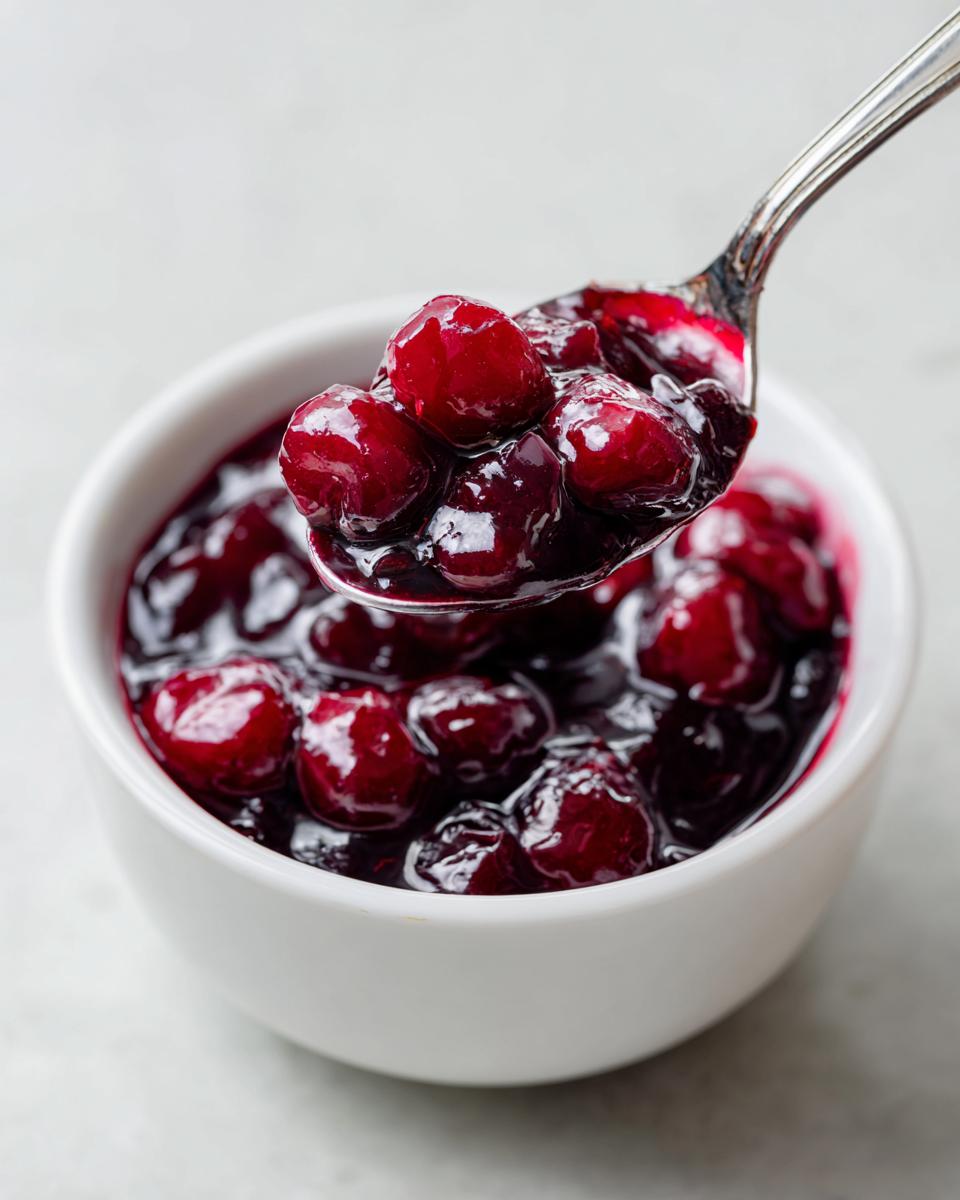
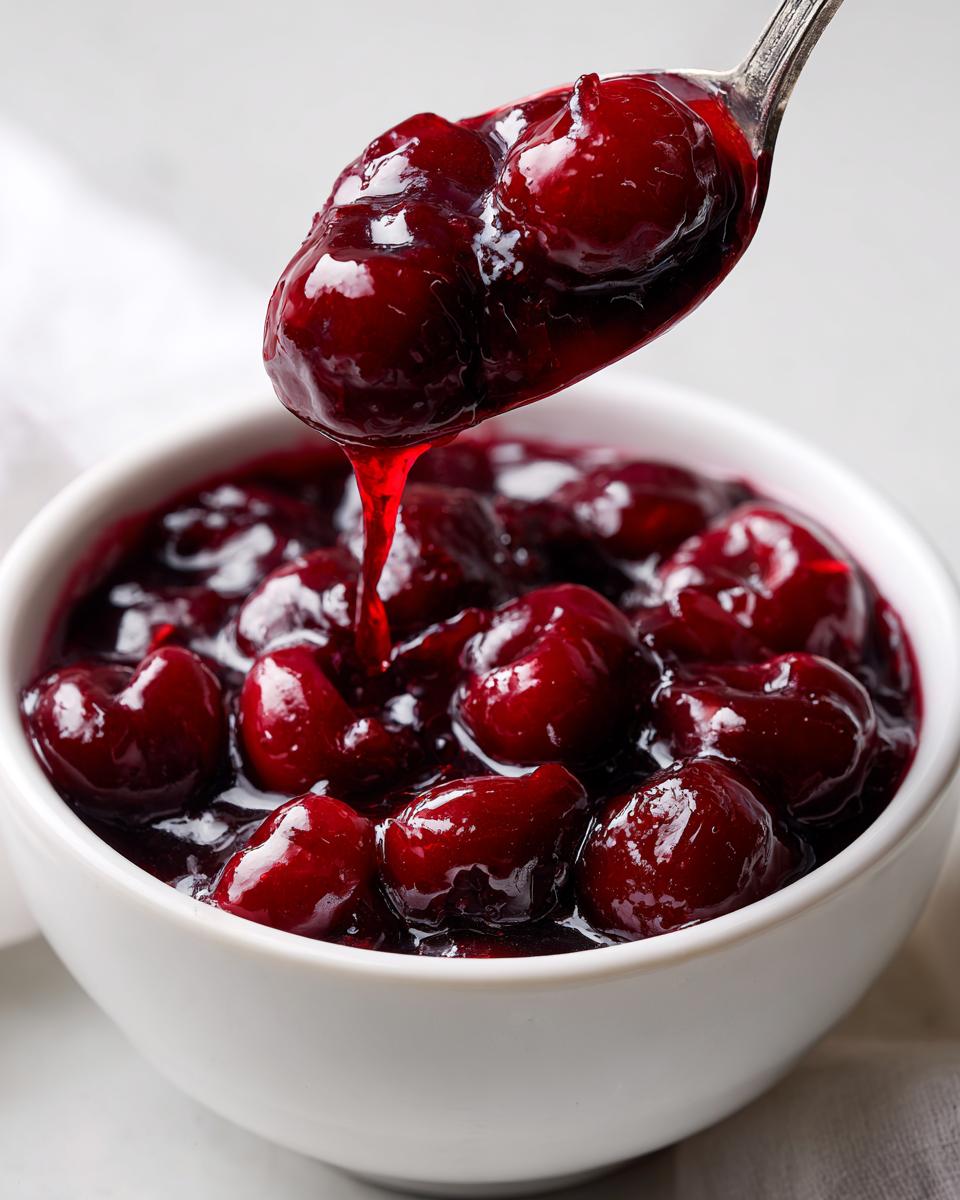
When we talk about that perfect, thick texture, we’re looking for something that hugs the spoon, not slides off it. Visually, you want to dip a spoon in and run your finger across the back of it. If the line stays clean and the filling doesn’t immediately run back together to cover the track, you’ve hit the sweet spot! That means your consistency is almost foldable cherry filling texture—perfect for pouring into your pie shell without it immediately pooling at the bottom.
If you are ever worried, remember the note: you can always use five tablespoons of cornstarch instead of four for an extra-firm set. But generally, once it hits that spoon-coating stage, just kill the heat. That residual heat will keep cooking it slightly as you move on.
Cooling and Resting the Homemade Cherry Pie Filling
This step is where most people get impatient, and it’s what ruins a beautiful filling! You MUST let the homemade cherry pie filling cool down completely before you seal it into a pie or use it in a no-bake treat. Once it’s off the stove, transfer it to a bowl and do this one quick thing: press a piece of plastic wrap directly onto the surface of the filling.
Why? Because if you leave a gap between the wrap and the filling, you get that weird, rubbery skin that forms on top of puddings and sauces. We don’t want that! Chilling for at least an hour—or until cold—gives the cornstarch time to fully activate and lock in that thick, sliceable texture we worked so hard to achieve. If it’s still warm, it will absolutely leak out of your crust.
Versatile Uses for Your Juicy Cherry Pie Filling
Just because we call it cherry pie filling doesn’t mean it’s only for pies! Honestly, if you try to keep this rich, flavorful mixture just for Thanksgiving, you’re missing out on so many easy wins throughout the year. Because we made sure it’s so thick, it works beautifully as a cherry dessert topping for almost anything.
I always make sure I have leftovers specifically for swirls. It’s amazing folded into plain yogurt or mixed into my basic vanilla batter right before baking for a quick strawberry cupcake variation—I just swap the berries for cherries! It’s fantastic swirled on top of cheesecake bars after they cool, or dolloped generously over waffles. And if you’ve ever wanted a gorgeous layer of fruit between cake layers, this is the perfect sturdy cherry filling for cheesecake or cakes. Seriously, this recipe is the MVP of my dessert components file!
Tips for Perfect Cherry Pie Filling Success
Even with the best recipe, sometimes you need a little nudge to get things *exactly* right. Think of these tips as the little extras Rosa throws in to ensure total triumph. When you’re working with fruit, you have to account for how juicy it’s going to be on that particular day, right?
If you find your initial batch is slightly too sweet for your liking—maybe your cherries weren’t very tart—don’t panic! A tiny extra drizzle of lemon juice brightens everything up immediately. The lemon doesn’t just add tartness; it makes those cherry flavors really pop. Conversely, if you want a deeper, richer color, especially if you used lighter frozen sweet cherries, I sometimes take a tip from restaurant bakers and add just one single drop of unsweetened red food coloring. You don’t need much!
Also, remember that note about thickness? If you want that truly sturdy, bakery-style filling that practically stands up on its own—maybe for a triple-layer cake or a very deep pie—just bump up that cornstarch to 5 tablespoons next time. That small increase makes a huge difference in the final set. For more reliable tips on quick recipes, check out my guide for best easy homemade pretzel dogs recipe.
And one last thing that drives me crazy: stirring technique! When you’re cooking this, scrape the bottom of that pan frequently. Cornstarch settles out really quickly when it’s not actively boiling, and burnt cornstarch on the bottom tastes awful throughout your whole cherry pie filling. Stir methodically, keep checking the heat, and you’ll have zero issues. If you want to see why others love this method, check out the tutorial over at Dishicious!
Storage and Make-Ahead for Cherry Pie Filling
One of the best parts about making your own cherry pie filling is that you don’t have to use it all right away! I hate running my oven for just one pie, so I always make a double batch when I’m whipping this up. It gives me a filling ready for my next baking adventure.
Once you’ve followed all the steps and the filling is chilled completely—remember, it needs to be rocked-solid cold to set properly—you can store it in an airtight container in the refrigerator. It keeps wonderfully for about two weeks, maybe even longer! Because the sugar and cornstarch act as great preservatives, it stays vibrant and flavorful.
Now, can you freeze it? Absolutely! This sturdy, thick mixture freezes like a dream. I usually transfer mine into a heavy-duty freezer bag, flatten it out nicely, and squeeze out all that air before sealing it up tight. It lasts beautifully in the freezer for up to three or four months. That means if you make a big batch in the summer when cherries are cheap, you have perfect, ready-to-go filling for holiday pies in the winter! Planning ahead like this is such a game-changer for weeknight baking. For more make-ahead goodness, take a peek at my recipe for easy freezer jam recipe (no canning)!
Frequently Asked Questions About Making Cherry Pie Filling
I know you might have a few last-minute questions bubbling up before you dive into making this incredible cherry pie filling. I’ve gathered the ones I hear most often in my kitchen. Don’t worry if you’re new to making things from scratch; we’re here to make sure every batch is a winner!
Can I use jarred pie filling instead of making homemade cherry pie filling?
You absolutely *can* use a store-bought jar, especially if you’re in a true pinch, but I’m going to be honest with you: it’s just not the same! That canned stuff is usually way sweeter, often thinner, and often has that artificial cherry flavor. Why would you do all that work for a beautiful crust only to smother it in something mediocre? Making this homemade cherry pie filling ensures you get that beautiful balance of sweet and tart, and most importantly, you get the rock-solid, non-runny texture we worked so hard to achieve. If you’re looking for an alternative that’s faster, try my recipe for easy baked chicken cheese chimichangas instead!
What is the best cherry to use for this recipe?
This recipe is wonderfully forgiving, which is why I love it! You can use sweet cherries or tart (sour) cherries, fresh or frozen. The adjustment is simple: if you use very sweet cherries, you might want to bump up the lemon juice just a touch to keep that necessary brightness. If you use sour cherries, you might want to add just a tiny bit more sugar to balance the tartness. The 1 cup of sugar listed in the recipe is a perfect starting point for most commercially available cherries, giving you that classic flavor profile without being sickeningly sweet.
Can I use this filling for a no-bake dessert?
Yes, you certainly can! Because this recipe is designed to set up so thickly with cornstarch, it’s absolutely perfect for a no-bake cherry pie filling. The only crucial step, which I can’t stress enough, is chilling! You must let the filling cool down completely to room temperature and then chill it in the fridge for at least an hour. This lets the cornstarch fully hydrate and set up properly. If you use it warm, it will absolutely deflate whatever cream cheese or whipped topping you layer it with.
Details and Facts on This Cherry Pie Filling Recipe
Sometimes you just need the quick facts without all the chatter, and I totally get that! When I’m scrambling to figure out if I have enough time to make something huge, I just need to see the numbers pulled out clearly. This is the perfect reference block so you can see exactly what you’re committing to when you decide to make this cherry pie filling.
Here is the snapshot of the recipe details. This amount is perfect for a standard 9-inch pie, or you can find more ideas on my weeknight dinner ideas page for using up leftovers!
- Prep Time: 10 minutes (mostly resting time!)
- Cook Time: 15 minutes
- Total Time: About 25 minutes active time, plus chilling
- Yield: About 3 cups of filling
- Category: Dessert Component
- Method: Stovetop Cooking
- Cuisine: American Classics
Share Your Thick Cherry Pie Filling Creations
Now that you’ve got your hands on what I think is the absolute best method for making cherry pie filling—thick, bright, and ready for anything—I really want to hear about it! My kitchen is only one place; the real joy comes when I see what you all create with these foundations.
Did you manage to get that perfect, sliceable thickness when you tested the back of the spoon? Did you use it in a cobbler instead of a pie? Don’t be shy! Drop a comment below and let me know how your batch turned out. I read every single piece of feedback, and community reviews help everyone else know they can trust this recipe, too.
If you ended up taking a gorgeous photo of your lattice or your cheesecake swirl, please share it! You can always tag me or send a note through my contact page. I love seeing this reliable, vibrant filling bring joy to your family gatherings. Happy baking, and thank you for trusting Rosa’s Tasty Kitchen with your cherries!
PrintThe Ultimate Thick & Juicy Homemade Cherry Pie Filling Recipe
Make the best thick and juicy homemade cherry pie filling from scratch in just 15 minutes. This recipe works well with fresh or frozen cherries and creates a non-runny texture perfect for pies, cheesecakes, or cobblers.
- Prep Time: 10 min
- Cook Time: 15 min
- Total Time: 25 min
- Yield: About 3 cups 1x
- Category: Dessert Component
- Method: Stovetop Cooking
- Cuisine: American
- Diet: Vegetarian
Ingredients
- 3 cups fresh or frozen sweet or sour cherries (pitted)
- 1 cup granulated sugar
- 1/4 cup cornstarch
- 1/4 cup cold water
- 1 tablespoon lemon juice
- 1/2 teaspoon almond extract
- Pinch of salt
Instructions
- Combine the cherries and sugar in a medium saucepan. Let the mixture sit for 10 minutes to allow the sugar to draw out some juice.
- In a small bowl, whisk together the cornstarch and cold water until smooth. This is your slurry.
- Place the saucepan over medium heat. Bring the cherry mixture to a gentle simmer, stirring occasionally.
- Once simmering, slowly pour the cornstarch slurry into the saucepan while stirring constantly.
- Continue to cook, stirring, until the filling thickens significantly, about 2 to 4 minutes. It should coat the back of a spoon.
- Remove the pan from the heat. Stir in the lemon juice, almond extract, and salt.
- Transfer the homemade cherry pie filling to a heatproof bowl. Press plastic wrap directly onto the surface to prevent a skin from forming.
- Cool the filling to room temperature, then chill completely in the refrigerator for at least 1 hour before using it in your pie or dessert.
Notes
- For a thicker filling, use 5 tablespoons of cornstarch instead of 4.
- If using frozen cherries, do not thaw them before cooking; add them directly to the sugar.
- This filling is excellent as a cherry cake filling or a topping for waffles and ice cream.
- For a deeper color, add 1 teaspoon of cherry flavoring or a drop of red food coloring if desired.
Nutrition
- Serving Size: 1/2 cup
- Calories: 210
- Sugar: 32
- Sodium: 5
- Fat: 0
- Saturated Fat: 0
- Unsaturated Fat: 0
- Trans Fat: 0
- Carbohydrates: 54
- Fiber: 2
- Protein: 0
- Cholesterol: 0