The Ultimate Thick & Juicy Homemade Cherry Pie Filling Recipe
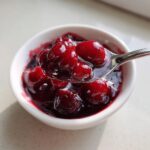
Make the best thick and juicy homemade cherry pie filling from scratch in just 15 minutes. This recipe works well with fresh or frozen cherries and creates a non-runny texture perfect for pies, cheesecakes, or cobblers.
- Prep Time: 10 min
- Cook Time: 15 min
- Total Time: 25 min
- Yield: About 3 cups 1x
- Category: Dessert Component
- Method: Stovetop Cooking
- Cuisine: American
- Diet: Vegetarian
Ingredients
Scale
- 3 cups fresh or frozen sweet or sour cherries (pitted)
- 1 cup granulated sugar
- 1/4 cup cornstarch
- 1/4 cup cold water
- 1 tablespoon lemon juice
- 1/2 teaspoon almond extract
- Pinch of salt
Instructions
- Combine the cherries and sugar in a medium saucepan. Let the mixture sit for 10 minutes to allow the sugar to draw out some juice.
- In a small bowl, whisk together the cornstarch and cold water until smooth. This is your slurry.
- Place the saucepan over medium heat. Bring the cherry mixture to a gentle simmer, stirring occasionally.
- Once simmering, slowly pour the cornstarch slurry into the saucepan while stirring constantly.
- Continue to cook, stirring, until the filling thickens significantly, about 2 to 4 minutes. It should coat the back of a spoon.
- Remove the pan from the heat. Stir in the lemon juice, almond extract, and salt.
- Transfer the homemade cherry pie filling to a heatproof bowl. Press plastic wrap directly onto the surface to prevent a skin from forming.
- Cool the filling to room temperature, then chill completely in the refrigerator for at least 1 hour before using it in your pie or dessert.
Notes
- For a thicker filling, use 5 tablespoons of cornstarch instead of 4.
- If using frozen cherries, do not thaw them before cooking; add them directly to the sugar.
- This filling is excellent as a cherry cake filling or a topping for waffles and ice cream.
- For a deeper color, add 1 teaspoon of cherry flavoring or a drop of red food coloring if desired.
Nutrition
- Serving Size: 1/2 cup
- Calories: 210
- Sugar: 32
- Sodium: 5
- Fat: 0
- Saturated Fat: 0
- Unsaturated Fat: 0
- Trans Fat: 0
- Carbohydrates: 54
- Fiber: 2
- Protein: 0
- Cholesterol: 0