
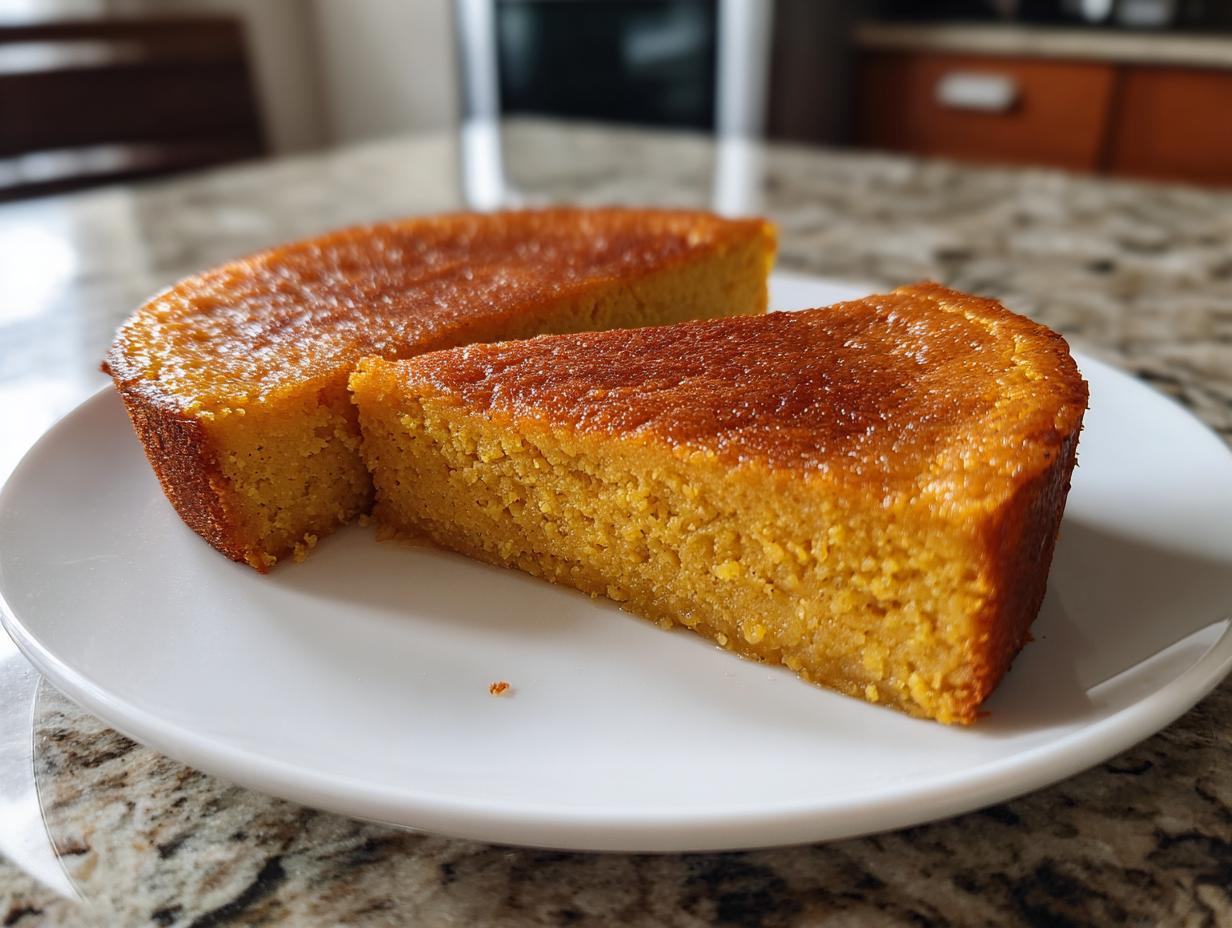
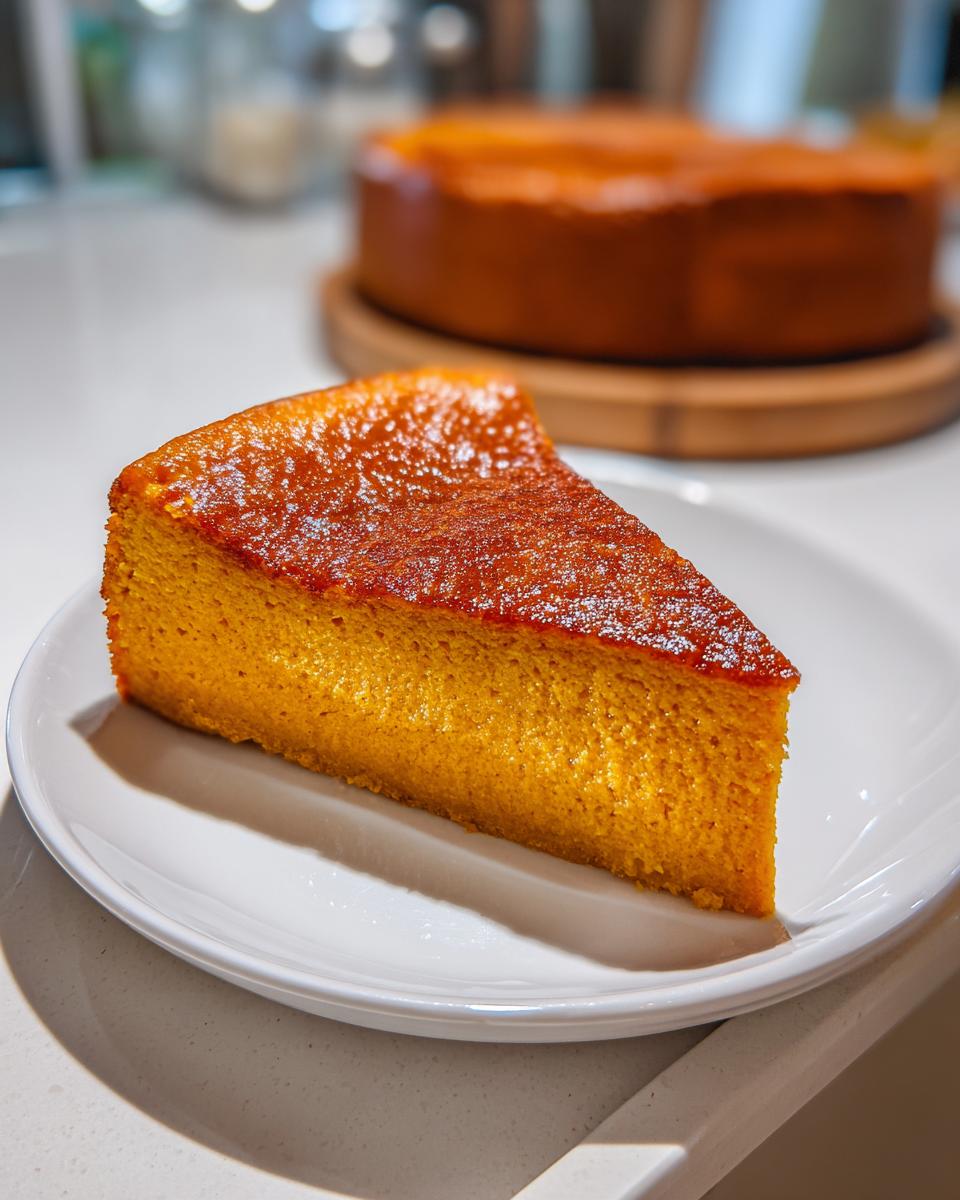
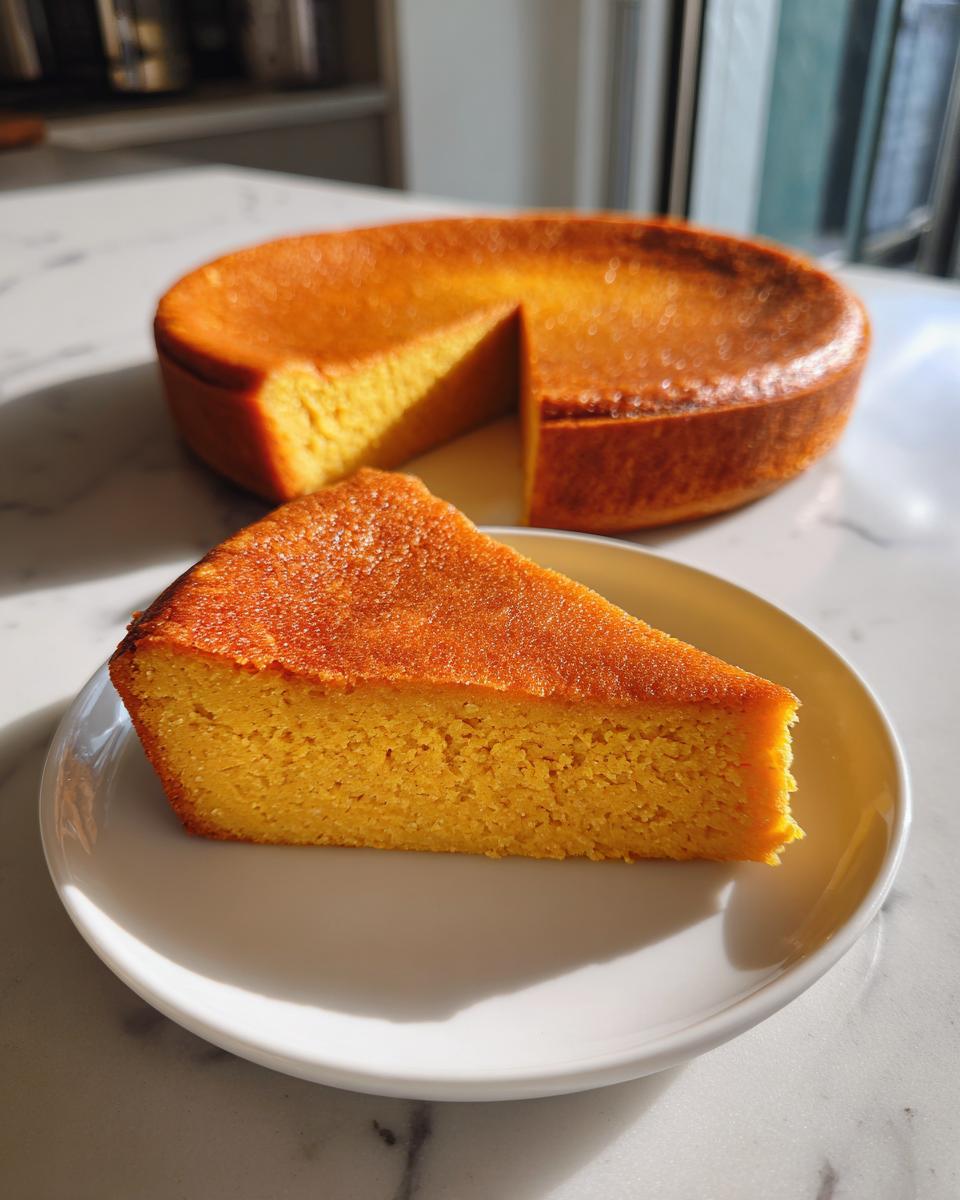
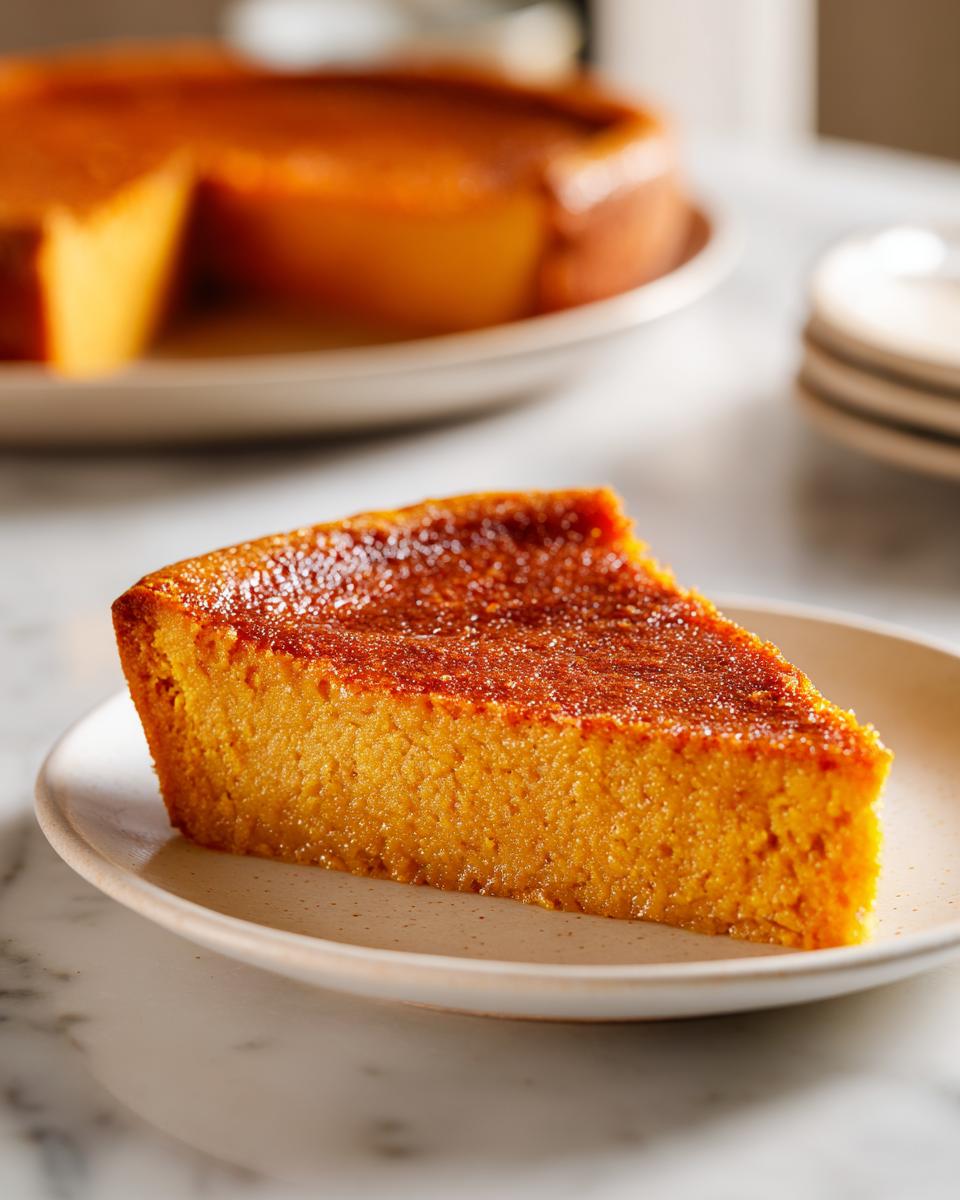
Oh, the holidays approach, and already my stomach is doing flip-flops thinking about the dessert table stress! Everyone wants that iconic Thanksgiving pie flavor, but let’s be honest—who has the time or energy to fuss with a perfect pastry crust? That’s exactly why I adore this recipe. We are talking about a gorgeous, light, perfectly sliceable crustless pumpkin pie that is shockingly easy.
This is the kind of reliable recipe Rosa Sterling perfected while balancing teaching and raising her own busy family. It’s truly a magnificent pumpkin custard that simply sets itself up beautifully without any tricky dough work. It’s naturally gluten free, which is a huge bonus for everyone around the table.
- Why This Crustless Pumpkin Pie is Your New Thanksgiving Staple
- Gathering Ingredients for Your Crustless Pumpkin Pie
- Step-by-Step Instructions for the Perfect Crustless Pumpkin Pie
- Tips for Success with Your Crustless Pumpkin Pie
- Variations: Dairy Free Option and Low Carb Pumpkin Adjustments
- Serving Suggestions for This Thanksgiving Pie
- Storage and Reheating Instructions
- Frequently Asked Questions About Crustless Pumpkin Pie
- Estimated Nutritional Data for This Healthy Pumpkin Dessert
Why This Crustless Pumpkin Pie is Your New Thanksgiving Staple
Seriously, ditch the pie dough drama this year! This wonderfully simple recipe cuts out all the rolling and blind-baking that adds hours to your day. It’s about getting that pure, comforting pumpkin flavor without the fuss. It’s the easiest win on your holiday menu, I promise!
- It offers incredible convenience, especially when you’re juggling a dozen other things on Thanksgiving morning.
- It sets up beautifully firm, meaning those clean, gorgeous slices everyone fights over are guaranteed.
- It’s naturally gluten free pumpkin pie, making it a fantastic option for so many of your guests.
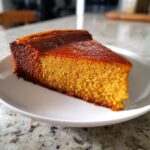
Perfect Texture for Clean Slicing
What you end up with is a silky, creamy pumpkin custard. It’s firm enough to hold its shape beautifully when you lift it out of the pan—no slumping here! But don’t think it’s rubbery; that custard bakes up incredibly smooth. The secret, of course, is that long, required chill time.
Making a Healthy Pumpkin Dessert
Because we skip the buttery, flour-based crust, this automatically feels lighter, right? It fits so well if you’re aiming for a more wholesome spread. Plus, since we aren’t adding much else, it’s a naturally gluten free pumpkin pie that keeps the sugar slightly more controlled than your grandma’s old-school recipe.
Gathering Ingredients for Your Crustless Pumpkin Pie
One of the best things about skipping the crust is that we only need simple pantry staples for this amazing pumpkin custard! You won’t be hunting through specialty stores for weird flour blends. Every single item for this satisfying, healthy pumpkin dessert can be grabbed on your regular grocery run, which is just how Rosa likes it.
Essential Components for the Pumpkin Custard
Here is everything you need to grab. You’ll notice we are using standard canned pumpkin, which gives us that consistent texture every time. I’ve added a simple note for those of you who need a dairy free option, too!
- 1 (15 ounce) can pure pumpkin puree
- 1 (12 ounce) can evaporated milk (If you need a dairy free option, swap this out for an equal amount of full-fat coconut milk—it tastes fantastic!)
- 3 large eggs
- 3/4 cup granulated sugar
- 1 teaspoon ground cinnamon
- 1/2 teaspoon ground ginger
- 1/4 teaspoon ground nutmeg
- 1/4 teaspoon salt
- 1 teaspoon vanilla extract
Step-by-Step Instructions for the Perfect Crustless Pumpkin Pie
Alright, this is where the magic happens! Because we aren’t dealing with delicate pastry, the method is super streamlined. When I first made this crustless pumpkin pie, I was shocked how little time it took before it went into the oven. Just remember, the bake time is only half the story—the chilling period is essential for that perfect slice!
Preparing the Pan and Preheating
First things first, get that oven warmed up to 350 degrees Fahrenheit. You don’t want to waste a second! Then take your 9-inch pie plate and give it a generous greasing. We want this beautiful pumpkin custard to slide right out when it’s ready, so don’t be shy with the butter or non-stick spray.
Mixing the Smooth Pumpkin Custard Base
Now, grab your biggest bowl. Whisk the pumpkin puree, your milk choice (evaporated or coconut!), and those three eggs together first. You need this part really smooth—no streaks allowed! Once that’s looking uniform, you can add in your sugar and all those lovely spices like cinnamon and nutmeg. Whisk it thoroughly until the sugar seems to have completely vanished into the mixture. We want zero graininess!
Baking and Setting the Crustless Pumpkin Pie
Carefully pour that gorgeous orange mixture into your prepared dish. It bakes for about 50 to 60 minutes. You’re looking for the center to be mostly set—a knife inserted near the middle should come out clean, not wet. Once it passes that test, pull it out to cool down completely on a rack. Trust me on this next part: you absolutely must chill it for at least four hours, but overnight is how you nail those really clean slices!
Tips for Success with Your Crustless Pumpkin Pie
When dealing with a delicate custard like this, a tiny bit of extra attention goes a long, long way toward success. We want that smooth, unblemished top, not a cracked surface, right? This is where leaning into the reliability of this recipe really helps!
Achieving the Best Set and Texture
The biggest mistake people make with any custard pie is over-baking it! Trust me, when you see that knife come out clean, pull it from the oven immediately. The center will still be wobbly—that’s good! It continues to set up as it cools on the counter.
If you’re worried about making this the healthiest pumpkin dessert choice, remember you can dial back that sugar to 1/2 cup if you like. But no matter what, that mandatory chill time is non-negotiable for a perfect crustless pumpkin pie slice. Four hours minimum in the fridge, but overnight is when it becomes truly stunning.
Variations: Dairy Free Option and Low Carb Pumpkin Adjustments
I absolutely love how easy it is to tweak this recipe to fit different needs around the table. Since we are already skipping the crust, we’ve got a great head start on making this a lighter treat overall! Whether you need a dairy free option or are watching the sugar total, this crustless pumpkin pie handles customizations like a dream.
For anyone avoiding dairy, the swap is super simple: just use the same 12 ounces of full-fat coconut milk from a can instead of the evaporated milk. It adds a lovely richness! If you are working towards a lower sugar profile, remember back in the notes, I mentioned you can safely drop the granulated sugar down to just 1/2 cup. It yields an equally delicious pumpkin custard, just less sweet.
Serving Suggestions for This Thanksgiving Pie
Because this crustless pumpkin pie is so pure and focuses entirely on that creamy pumpkin custard, you don’t want to overload the top with heavy stuff. Rosa always kept it simple—and I found simple is best!
She usually just served it chilled with a light dollop of freshly whipped heavy cream right on top. If you’re leaning toward that dairy free option, whipped coconut cream is amazing; it gets so firm and tastes wonderful against the spice blend. A tiny sprinkle of fresh cinnamon right before it hits the table is my favorite finishing touch. It looks sophisticated but takes zero extra minutes!
Storage and Reheating Instructions
This crustless pumpkin pie is actually one of the best desserts you can make ahead of time! That’s a huge relief when you’re prepping for a massive meal like Thanksgiving, isn’t it?
Since the structure relies on that deep chill to hold its shape, we want to treat it gently in storage. Once it’s completely cooled down—and I mean totally cool, not even warm in the middle—cover the pie plate loosely with plastic wrap or foil. Make sure the covering doesn’t actually touch the surface of the pumpkin custard, or you might dent it!
Pop it into the refrigerator. It needs that cold environment to fully set into a firm sliceable dessert. It stays perfectly good like this for up to three or even four days, which means you can honestly make your pumpkin custard two days before the big event!
Now, reheating? Honestly, don’t bother! This is meant to be served cold or maybe slightly cooler than room temperature. If you let it sit on the counter for about 20 minutes before serving, it softens just a touch, making it gooey in the best way, but you never want to heat this back up. It will ruin that beautiful set we worked so hard for.
Frequently Asked Questions About Crustless Pumpkin Pie
I always get a ton of questions about this recipe because it’s different from a traditional baked item. People worry about the set, which is totally fair when you are trying to impress at Thanksgiving! Here are the things I hear most often when folks make their first crustless pumpkin pie, especially those trying it out as a healthy pumpkin dessert.
Can I use fresh pumpkin puree instead of canned?
That is a great question! While I stick to canned because it’s so reliable for gauging moisture, you absolutely can use fresh puree if you have roasted your own pumpkin. Just be aware that fresh puree is often looser or more watery than the canned stuff. If you use fresh, you might want to reduce your evaporated milk by about 2 or 3 tablespoons, or run your fresh puree through a fine sieve first! That way, your pumpkin custard doesn’t end up too runny.
What is the best way to ensure a smooth pumpkin custard?
Smoothness comes down to one thing: patience when combining your liquids. Seriously, don’t just dump everything in the bowl at once! I always whisk the eggs, then the milk alternatives, and the vanilla until they are perfectly blended together first. Once that base is uniform, *then* you add the sugar and spices. If you try to whisk the sugar into thick pumpkin puree first, it’s never going to fully dissolve, and you’ll end up with a slightly grainy texture. That initial whisking step is critical for a silky texture!
We also link to our privacy policy right here, just so you know we keep your data safe while you’re busy baking!
Estimated Nutritional Data for This Healthy Pumpkin Dessert
We preach transparency here at Rosa’s Tasty Kitchen, because you deserve to know exactly what you’re sharing with your family! Since this crustless pumpkin pie isn’t loaded down with a crust soaking up butter and flour, the numbers are delightfully reasonable for a holiday treat.
Now, remember—these figures are just my best estimate taken from standard pantry brands. If you use a different type of sugar or a full-fat coconut milk instead of evaporated milk, things might shift just a bit. But this gives you a fantastic baseline for this light pumpkin custard.
- Serving Size: 1 slice
- Calories: 185
- Fat: 6g
- Saturated Fat: 3g
- Trans Fat: 0g
- Carbohydrates: 28g
- Fiber: 3g
- Protein: 6g
- Sugar: 22g (This is where you save big by skipping the crust!)
As you can see, it’s a simple, satisfying slice of holiday goodness. It’s an honest number for a delicious, naturally gluten free pumpkin pie, and I feel great serving it!
PrintSimple Crustless Pumpkin Custard Pie
A light, gluten-free pumpkin custard that sets firm without a crust, perfect for clean slicing at Thanksgiving. This recipe offers a balanced spice profile and can be made dairy-free.
- Prep Time: 15 min
- Cook Time: 60 min
- Total Time: 75 min
- Yield: 8 servings 1x
- Category: Dessert
- Method: Baking
- Cuisine: American
- Diet: Vegetarian
Ingredients
- 1 (15 ounce) can pure pumpkin puree
- 1 (12 ounce) can evaporated milk (or use full-fat coconut milk for dairy free option)
- 3 large eggs
- 3/4 cup granulated sugar
- 1 teaspoon ground cinnamon
- 1/2 teaspoon ground ginger
- 1/4 teaspoon ground nutmeg
- 1/4 teaspoon salt
- 1 teaspoon vanilla extract
Instructions
- Preheat your oven to 350 degrees Fahrenheit. Lightly grease a 9-inch pie plate.
- In a large bowl, whisk together the pumpkin puree, evaporated milk (or coconut milk), and eggs until smooth.
- Add the sugar, cinnamon, ginger, nutmeg, salt, and vanilla extract to the pumpkin mixture. Whisk until all ingredients are fully combined and the sugar is dissolved.
- Pour the custard mixture into the prepared pie plate.
- Bake for 50 to 60 minutes, or until a knife inserted near the center comes out clean. The center should be mostly set.
- Remove the pie from the oven and let it cool completely on a wire rack.
- Chill the crustless pie in the refrigerator for at least 4 hours, or preferably overnight, before slicing and serving.
Notes
- For a dairy-free version, substitute the evaporated milk with an equal amount of full-fat coconut milk from a can.
- This custard sets best when fully chilled; plan to make it the day before your gathering for the cleanest slices.
- If you prefer a lower sugar dessert, reduce the granulated sugar to 1/2 cup.
Nutrition
- Serving Size: 1 slice
- Calories: 185
- Sugar: 22
- Sodium: 190
- Fat: 6
- Saturated Fat: 3
- Unsaturated Fat: 3
- Trans Fat: 0
- Carbohydrates: 28
- Fiber: 3
- Protein: 6
- Cholesterol: 75