
You know those nights when you’re craving something elegant—something you usually only see at beautiful seaside bistros? Well, I’m here to tell you we can nail that restaurant-quality experience right here in our own kitchen, without needing hours of prep! This guide shows you exactly how to make Seared Ahi Tuna that’s foolproof. We’re aiming for that incredible, dark crust that locks in all the flavor, leaving the middle cool and tender. That’s the magic, and it’s quick! This recipe fits perfectly with Rosa Sterling’s mission: giving you reliable, absolutely flavorful meals even when life is rushing past you. Trust me, this stunning gourmet tuna is easier than you think.
- Why This Seared Ahi Tuna Recipe Delivers Gourmet Tuna Every Time
- Essential Ingredients for Perfect Seared Ahi Tuna
- Equipment Needed for Your Seared Ahi Tuna
- Step-by-Step Instructions for Seared Ahi Tuna
- Tips for Success When Making Seared Ahi Tuna
- Serving Suggestions for Your Asian Tuna Recipe
- Storage and Reheating Instructions for Seared Ahi Tuna
- Frequently Asked Questions About Seared Ahi Tuna
- Share Your Perfect Seared Ahi Tuna Experience
Why This Seared Ahi Tuna Recipe Delivers Gourmet Tuna Every Time
I know what you’re thinking: Ahi tuna sounds fancy, right? But truly, it’s the technique and the quality of the fish that make all the difference here. If you treat your sushi grade tuna right, you’ll get restaurant results. This whole Asian tuna recipe comes together faster than ordering takeout, making it a fantastic choice whenever you need a quick, yet impressive, healthy dinner option. We focus on creating that signature crust without ever overcooking the inside.
Key Benefits of Our Seared Ahi Tuna
- You get a beautiful, dark crust thanks to super simple high-heat searing.
- It’s incredibly fast! Total cook time is seriously under five minutes.
- The ingredient list is short but the flavor payoff is massive.
- Hello, protein punch! It’s a wonderfully light and satisfying meal.
Essential Ingredients for Perfect Seared Ahi Tuna
Okay, let’s talk about what you need to gather. You can’t fake quality when it comes to this fish! Since this is a quick sear, the marinade needs to be potent enough to flavor the outside fast. You’ll notice the list is short—that’s how you know it’s truly a gourmet tuna treatment! We really need the best quality here. Make sure you are buying actual sushi grade tuna; if you can find lovely yellowfin tuna fillets, grab those!
Here is exactly what you need for two servings:
- Two 6 ounce portions of that perfect sushi grade tuna steaks.
- Two tablespoons of soy sauce.
- One tablespoon of sesame oil.
- One teaspoon of freshly grated ginger—please use fresh, it smells amazing!
- One clove of garlic, minced super fine.
- One tablespoon of vegetable oil (this is important for the heat).
- One tablespoon of sesame seeds, if you want that pretty crust.
- A little salt and pepper for seasoning the outside.
Ingredient Notes and Substitutions
Listen closely to me, because this is where people mess up this quick seafood recipe! That marinade is strong, so you absolutely must stick to a 10-minute bath time at room temperature. Any longer and the soy sauce starts to chemically cook your beautiful fish—we call that curing—and we want rare, not cooked!
For the oil, I specify vegetable oil because it has an incredibly high smoke point. That means it can handle the crazy high heat we need to get that dark crust without burning right away. Don’t play around with low-temp oils here! And the final warning: If you can’t find decent, reliable sushi grade tuna, honestly, just wait until you can. It’s not worth risking it with lower-quality fish for this particular method.
Equipment Needed for Your Seared Ahi Tuna
This isn’t a complicated dish, thank goodness! But there are two pieces of equipment that you really shouldn’t try to substitute, because they make or break that gorgeous crust on your Seared Ahi Tuna. If you don’t have these, you might want to wait until you can grab them!
First up is the pan. You absolutely need a heavy-bottomed skillet. My go-to? A good old cast iron pan. Seriously, nothing holds heat like cast iron! That heat needs to transfer instantly and powerfully when the tuna hits the surface, and flimsy pans just can’t handle the job; they cool down way too fast.
Other than that, you only need a small shallow dish for the marinade—just big enough to lay the steaks flat for their quick bath. And maybe a very sharp knife for slicing later on. That’s it! No fancy gadgets required for this impressive gourmet tuna.
Step-by-Step Instructions for Seared Ahi Tuna
Alright, let’s get down to business! This is the part where we move fast. Since we are dealing with such high heat, preparation is everything. Before you even look at the stove, have your plate ready for the rested fish and your sharpest knife ready to go. Oh, and one critical pro-tip that makes the crust unbelievable: take those marinated tuna steaks out and pat them *really* dry with paper towels before they hit the pan. Seriously, the drier the surface, the better the sear. This step is non-negotiable if you want that dark exterior!
Preparing the Marinade and Coating the Yellowfin Tuna
First, grab that shallow dish and whisk together the soy sauce, sesame oil, garlic, and ginger. That’s your flavor bomb! Next, drop your gorgeous yellowfin tuna in there and swirl them around so every inch gets a nice coating. Remember what I said? Set a timer for exactly 10 minutes. That’s it! No sneaking in an extra five minutes; we don’t want pickled tuna!
If you’re using sesame seeds, now is the time to press them gently onto the sides of the steaks. Season the top and bottom surfaces with a little salt and pepper after the seeds are on. Then, let them sit while we get the pan ready.
Achieving the Perfect High-Heat Sear for Seared Ahi Tuna
Place your cast iron skillet over ridiculously high heat and pour in that vegetable oil. You need to wait until that oil just starts to shimmer and perhaps let off just the slightest wisp of smoke. If it’s not screaming hot, you’re not searing; you’re steaming!
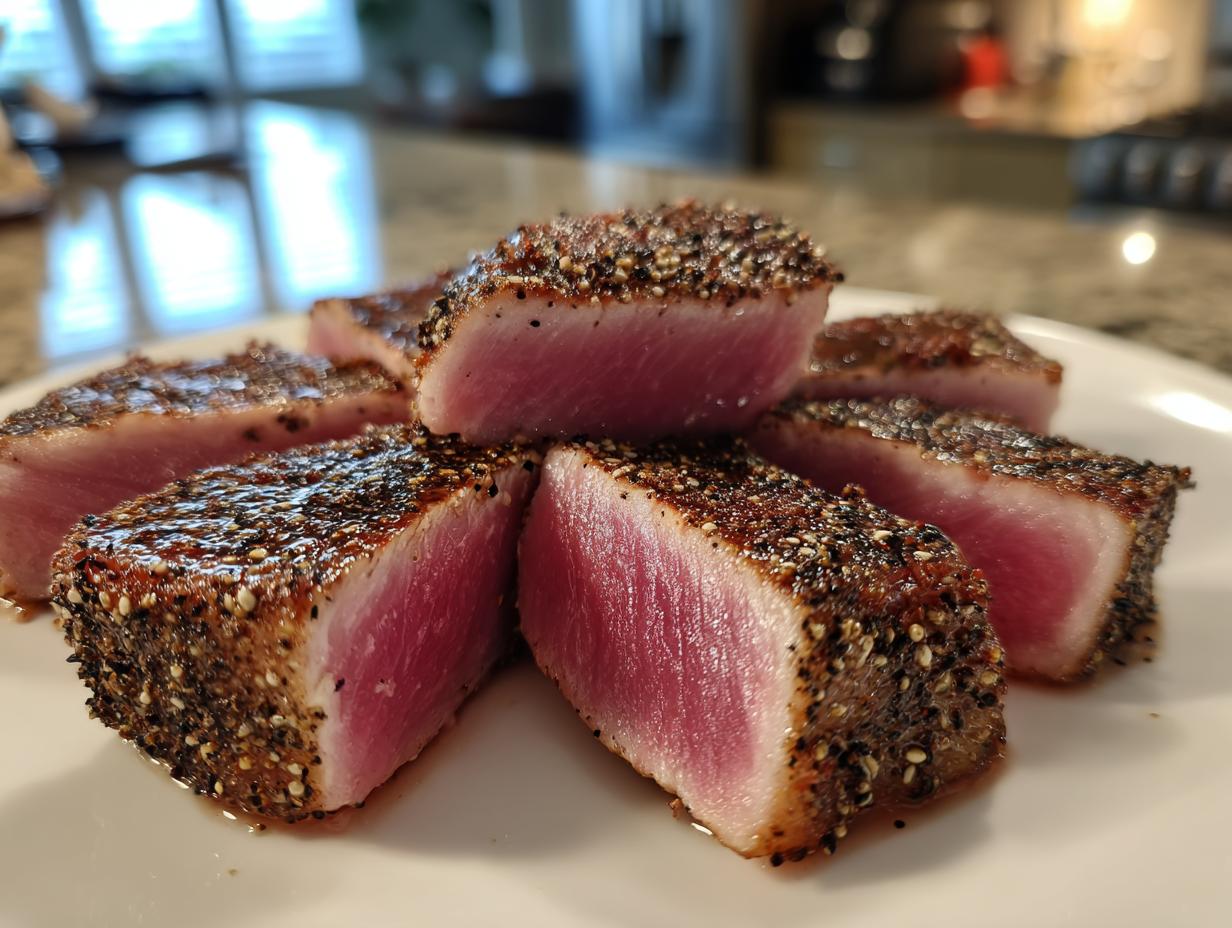
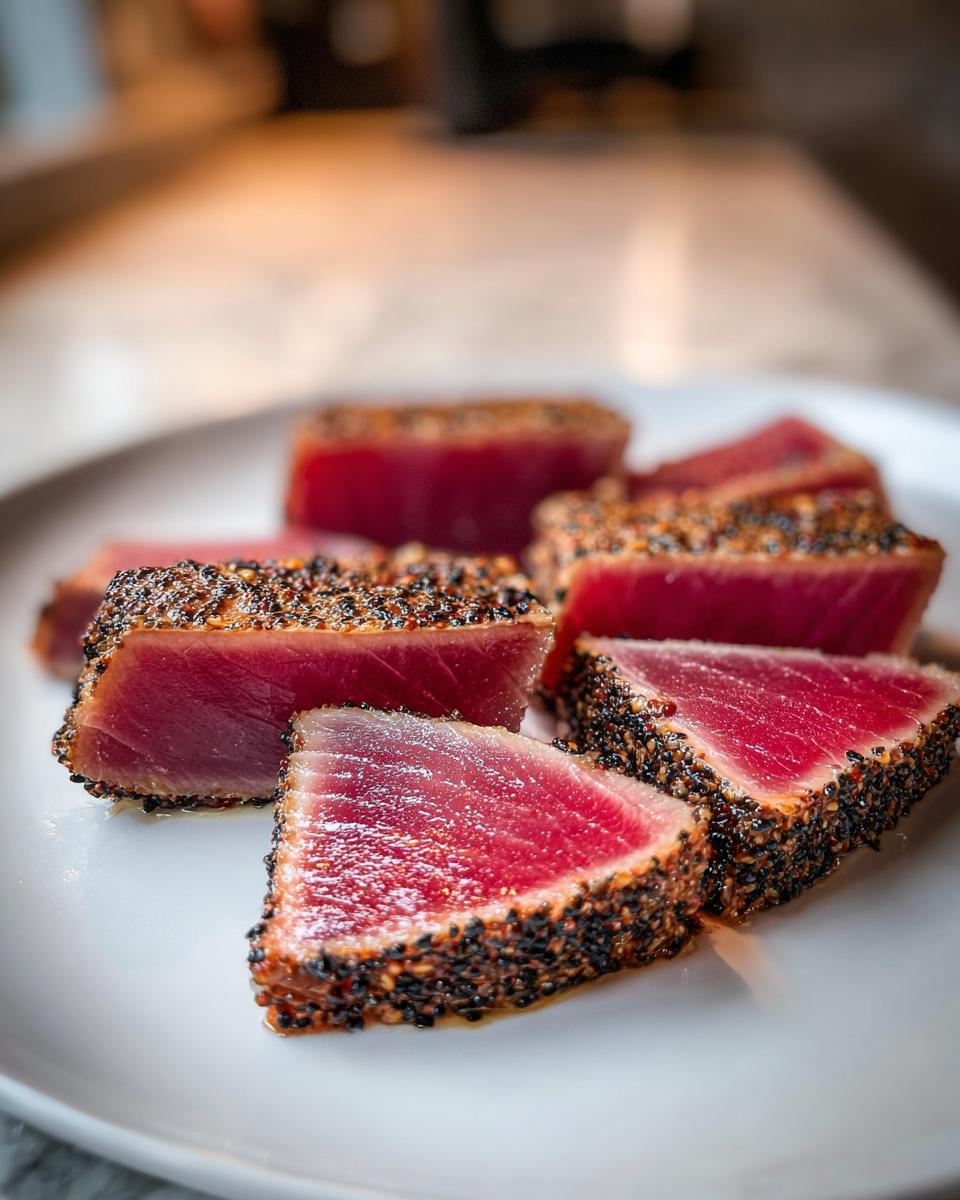
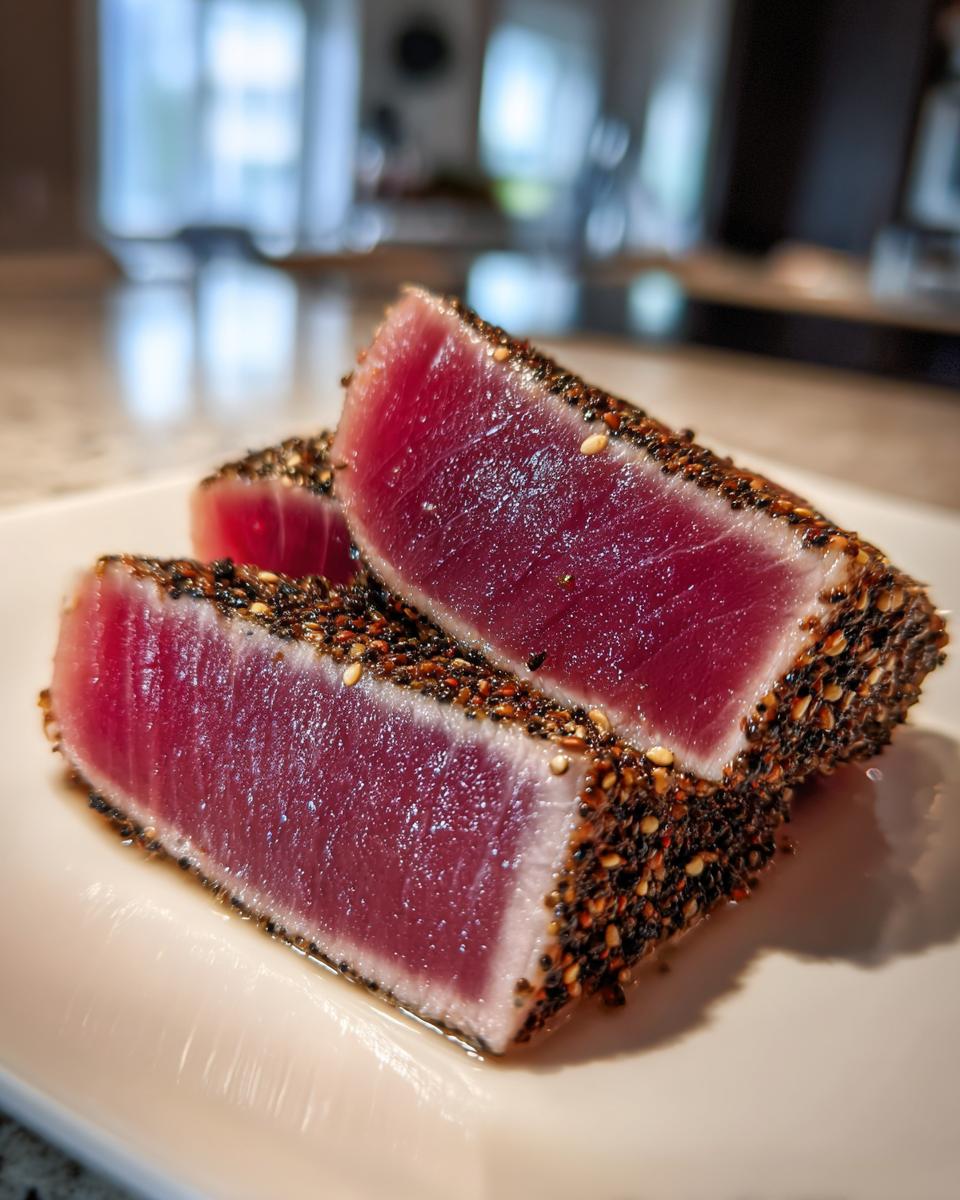
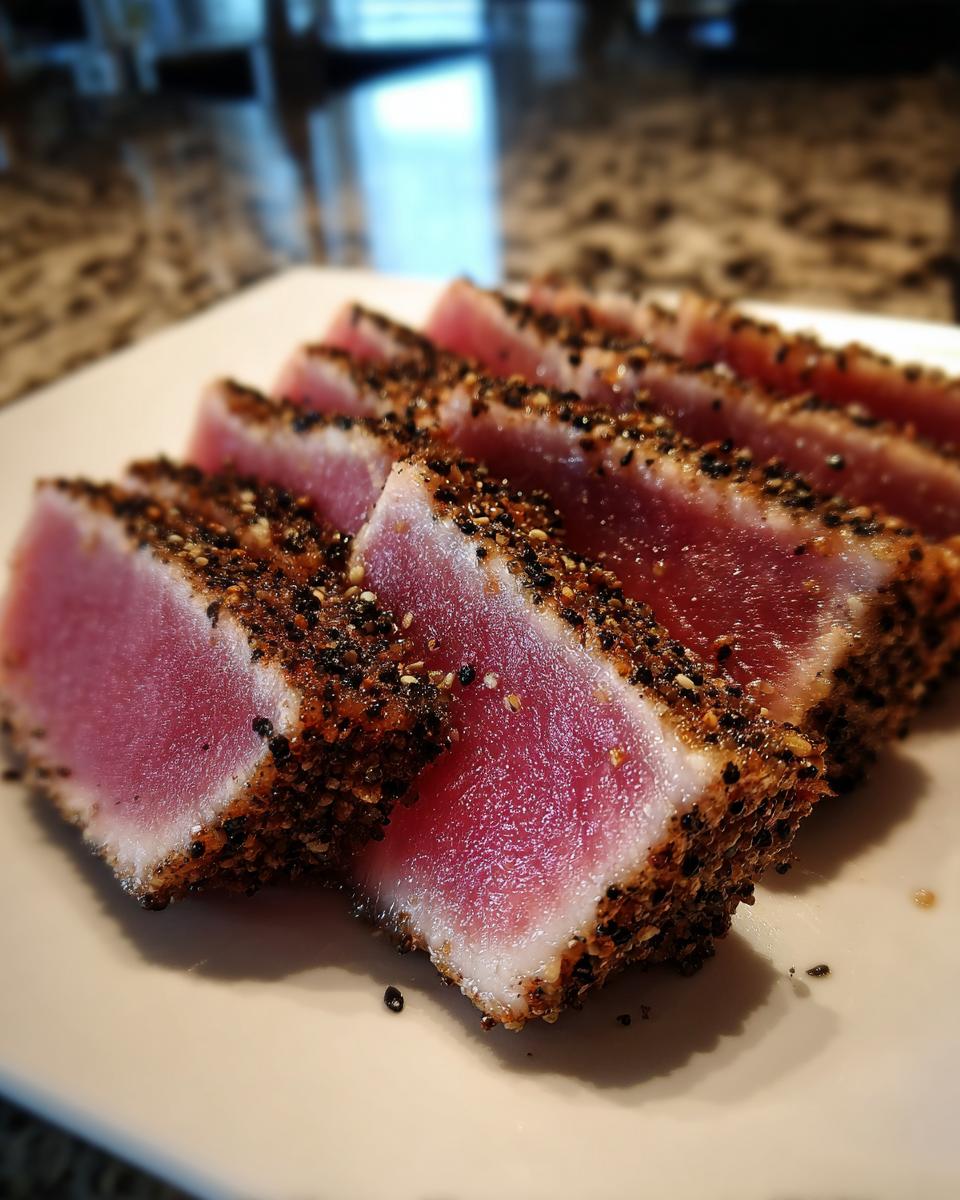
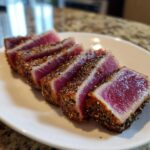
Carefully place the tuna in the pan. You should hear an immediate, satisfying sizzle. For that perfect rare center an authentic Seared Ahi Tuna needs, sear for only 60 to 90 seconds per side. If you prefer it just a touch more cooked, maybe go for 2 minutes max per side. The goal is a dark crust, not gray fish! Pull it out of the heat the second your timer goes off.
Resting and Slicing Your Gourmet Tuna
Now, don’t be tempted to cut into that beautiful steak right away! It needs to rest for about 5 minutes on a cutting board. This lets those juices settle back into the center of the fish instead of running all over your board when you slice it. It keeps your gourmet tuna tender.
Once rested, use a very sharp knife and slice against the grain into half-inch thick pieces. Slicing against the grain is what keeps the texture velvety smooth. Serve it up right away!
Tips for Success When Making Seared Ahi Tuna
I want you to feel totally confident serving this to your guests, so here are a few extra nuggets of wisdom I’ve picked up over the years of making quick Asian-inspired dishes. Getting this perfect Seared Ahi Tuna down is all about respecting the heat and the quality of the fish.
First, let’s go back to the star player: your tuna. I cannot stress this enough—you must start with the highest quality, sushi grade yellowfin tuna you can find. If it smells fishy, send it back! Truly fresh tuna should smell clean and almost sweet. This high-quality fish is what guarantees that cool, almost raw center you want within that firm crust.
Speaking of the crust, if you are having trouble getting that deep brown sear, two things might be happening. One: your pan wasn’t hot enough. I mean *hot*. You need that instantaneous sizzle. Two: you forgot to pat the tuna dry after marinating. Surface moisture is the enemy of a good sear! It steams the fish instead. Make sure those paper towels soak up every bit of liquid before it touches the hot oil.
And if, oops, you accidentally left the tuna in a second or two too long and it went medium-rare instead of rare? Don’t panic! It still tastes wonderful. Just make sure you always slice it thinly against the grain, as that slight overcooking can make the muscle fibers tighter, and slicing correctly keeps it velvety smooth. This simple recipe proves you don’t need hours to make a truly gourmet tuna meal.
Serving Suggestions for Your Asian Tuna Recipe
So, you’ve mastered the sear and you’ve got those gorgeous slices of high-quality tuna resting perfectly. Now what? We might call this a quick seafood recipe, but that doesn’t mean we can’t make the whole plate look fantastic! Since the tuna itself is powerful and flavorful, you want sides that complement it without fighting for attention.
From the original notes, my absolute favorite way to serve this is to create a super simple, complete plate. Grab some fluffy steamed rice—it soaks up any extra marinade flavors beautifully—and pair it with some bright green beans that you blanch quickly until they are crisp-tender. That combination immediately turns this into a balanced, wonderful healthy dinner.
But if you want to mix things up a bit, here’s another easy win: thinly sliced cucumbers tossed in a tiny bit of rice vinegar and a pinch of sugar. The coolness and the crunch of that cucumber salad are just amazing against the warm, savory crust of the Seared Ahi Tuna. You’re basically building gorgeous layers of texture and flavor, and the whole thing takes just minutes to plate up!
Storage and Reheating Instructions for Seared Ahi Tuna
This is the hard truth about beautiful Seared Ahi Tuna: it demands to be eaten right away! I mean, you worked so hard to get that lovely crisp crust and that cool, rare center—that texture is fleeting, isn’t it? It’s the star feature of this delicious quick seafood recipe. So if you have leftovers, you have to treat them gently because the cooking process has already started to change that perfect texture.
For the best experience, I highly recommend only cooking exactly what you plan to eat! If you absolutely have extras, you need to get them cooled down fast. Pop the slices into an airtight container and stick them in the coldest part of your fridge right away. They’ll keep okay for about a day, maybe two at the absolute max. Honestly, the crust will soften up considerably, and the inside won’t be that beautiful cool pink anymore.
Now, for reheating—and I hesitate even to mention this!—but sometimes you just need warm fish. Do not, under any circumstances, put these leftovers back into a hot skillet or, heaven forbid, the microwave! That high heat is just going to cook the rest of the steak through, turning your lovely yellowfin tuna into something closer to canned tuna. If you just have to warm it a touch, try placing the already-sliced pieces on a plate and covering them loosely with foil in a *very* low oven (maybe 200°F) for just a few minutes until they lose the chill. But honestly, I prefer them chilled! A cold slice of this tuna straight from the fridge with a little extra soy sauce? That’s my favorite way to eat the leftovers.
Frequently Asked Questions About Seared Ahi Tuna
I feel like people always have questions when they try searing fish for the first time, especially when it’s such a beautiful piece of sushi grade tuna! I’ve gathered the ones I hear most often. Hopefully, these clear up any last bits of doubt so you can get cooking!
Can I use frozen tuna for this Seared Ahi Tuna recipe?
You know, technically you *can* thaw frozen tuna, but I really, really advise against it if you want that incredible texture for this Seared Ahi Tuna recipe. When tuna thaws, especially if it was previously frozen commercially, it changes the moisture content right near the surface. That moisture is exactly what’s going to steam your fish instead of giving you that gorgeous, dry crust we worked hard for.
If you absolutely have no other choice, you need to thaw it slowly—ideally overnight in the refrigerator, never on the counter! And then, once it’s totally thawed, you need to treat it like a wet sponge. Pat it down with paper towels until you think it couldn’t possibly get any drier. But trust me, starting with fresh, high-quality fish always wins here.
What temperature should the pan be before adding the tuna?
This is the secret sauce for getting that beautiful color! You need the pan—your cast iron, remember?—to be blisteringly hot. We aren’t looking for “hot” like when you sauté onions; no, we need “smoking.” You want the vegetable oil you added to look shimmering, like it’s about to break, and maybe even give off a tiny little wisp of smoke when you hold your hand over it.
The reason for that extreme heat is all about the crust! When the tuna hits that temperature, the outside instantly caramelizes and sears before the heat can penetrate deeply enough to cook the inside through. If your pan isn’t hot enough, you’ll just sit there watching the tuna turn gray slowly, and that’s just sad! Get that pan roaring hot!
Is Seared Ahi Tuna considered a healthy dinner option?
Oh, definitely! This is one of my favorite components of this Asian tuna recipe—it’s practically the definition of a healthy dinner built for speed. Tuna, especially the high-quality, sushi grade tuna we use, is one of the best sources of lean protein out there. It’s packed with muscle fuel but keeps the fat relatively low, and there are hardly any carbs in the fish itself.
Since we are only using a tiny bit of sesame oil for the marinade and just enough high-heat oil for searing, the overall calorie count stays wonderfully low. You get complex flavor from the soy sauce and ginger without loading up on heavy sauces or breading. It’s proof that elegant food can absolutely be healthy food!
Share Your Perfect Seared Ahi Tuna Experience
Now that you’ve mastered the high-heat sear and plated up that stunning Seared Ahi Tuna, I really want to know how it went!
This is what Rosa’s Tasty Kitchen is all about—sharing reliable recipes that make you proud. If you followed those steps, patting the fish dry and keeping that pan roaring hot, then I bet you achieved perfection. If you did, please come back here and give this recipe a solid five stars! Your rating helps another busy cook feel confident trying my favorite Asian tuna recipe.
And honestly, I’d love to see the results! So many times we cook amazing meals and forget to take a picture. If you shared your beautiful plate of gourmet tuna on social media, tag us! Let’s keep sharing the joy of making simple, impressive meals at home. If you have any lingering questions or just want to share a success story, hop over to the contact page. We are so happy you decided to cook with us today!
PrintPerfectly Seared Ahi Tuna Steaks
Learn how to quickly sear sushi-grade ahi tuna to achieve a flavorful crust and a rare, cool center.
- Prep Time: 10 min
- Cook Time: 3 min
- Total Time: 18 min
- Yield: 2 servings 1x
- Category: Seafood
- Method: Pan Searing
- Cuisine: Asian-Inspired
- Diet: Low Calorie
Ingredients
- 2 (6 ounce) sushi grade ahi tuna steaks
- 2 tablespoons soy sauce
- 1 tablespoon sesame oil
- 1 teaspoon grated fresh ginger
- 1 clove garlic, minced
- 1 tablespoon vegetable oil
- 1 tablespoon sesame seeds (optional, for coating)
- Salt and black pepper to taste
Instructions
- In a shallow dish, whisk together the soy sauce, sesame oil, ginger, and garlic. This is your marinade.
- Place the tuna steaks in the marinade. Turn to coat both sides. Let the tuna marinate for 10 minutes at room temperature. Do not marinate longer, as the soy sauce can begin to cure the fish.
- If using, press the sesame seeds onto the sides of the tuna steaks to coat the edges. Season the top and bottom surfaces lightly with salt and pepper.
- Heat the vegetable oil in a heavy-bottomed skillet (cast iron works well) over high heat until the oil just begins to smoke.
- Carefully place the tuna steaks in the hot skillet. Sear for 60 to 90 seconds per side for rare, or up to 2 minutes per side for medium-rare. You want a dark crust.
- Remove the tuna from the skillet immediately. Let the steaks rest on a cutting board for 5 minutes before slicing.
- Slice the tuna against the grain into half-inch thick pieces. Serve immediately.
Notes
- For best results, use high-quality, sushi-grade yellowfin or bigeye tuna.
- If you prefer a spicy crust, mix the sesame seeds with a pinch of red pepper flakes before coating the edges.
- Serve this quick seafood recipe with a side of steamed rice and blanched green beans for a healthy dinner.
Nutrition
- Serving Size: 1 steak
- Calories: 250
- Sugar: 1
- Sodium: 450
- Fat: 12
- Saturated Fat: 2
- Unsaturated Fat: 10
- Trans Fat: 0
- Carbohydrates: 3
- Fiber: 0
- Protein: 32
- Cholesterol: 75