
There is simply nothing that beats the smell of real bread being toasted on a Saturday morning, right? For me, that smell means slowing down, pouring a big mug of coffee, and planning out a wonderful, hearty breakfast. If you’ve ever felt intimidated by sourdough baking, I want you to take a deep breath and relax. We’re starting with something truly special but surprisingly simple: the ultimate homemade **sourdough English muffins**.
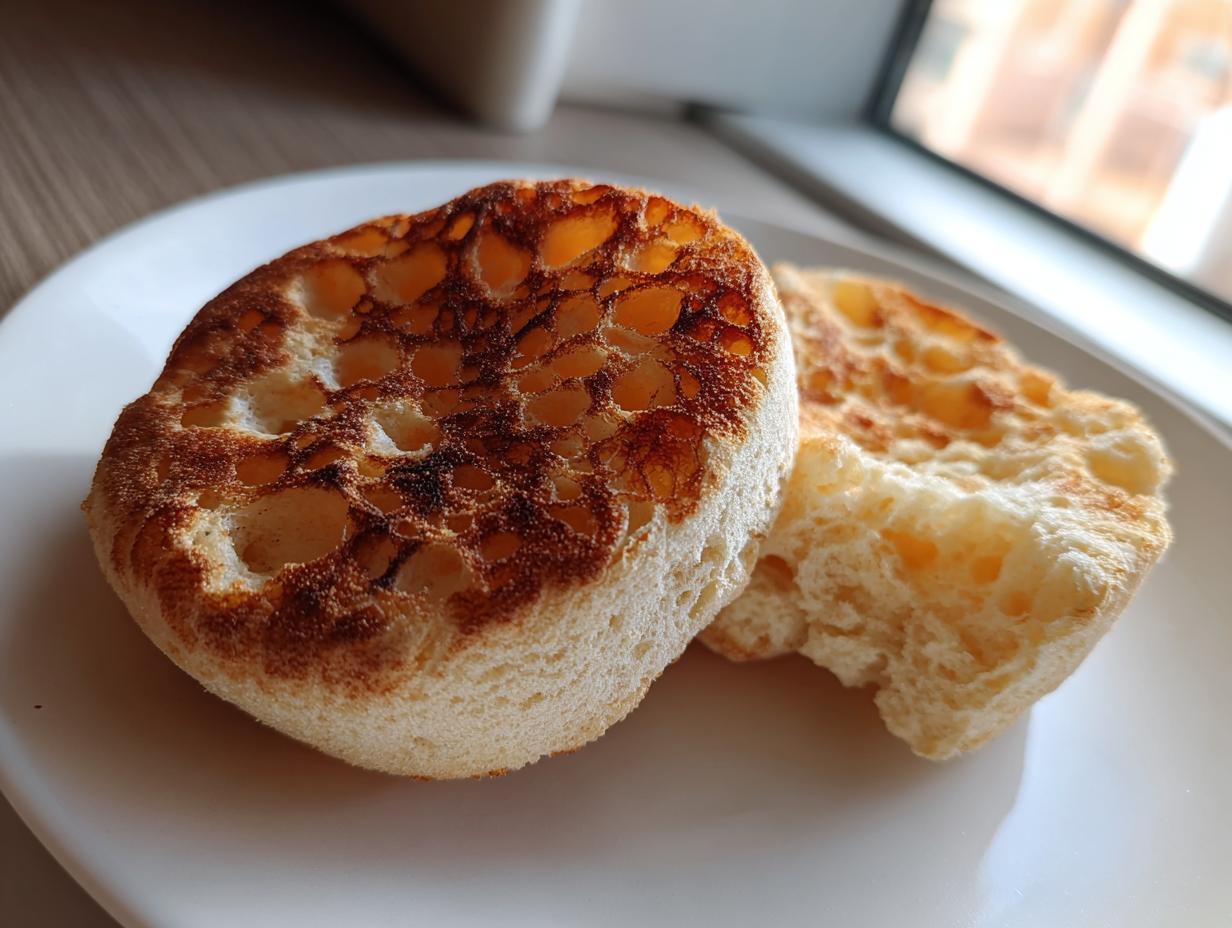
Forget those flat, sad store-bought ones! My goal here is to give you the secret to those trademark, beautiful, hole-filled insides—you know, the famous ‘nooks and crannies’ that catch all the melted butter. This overnight recipe is built to work whether you have a heap of active starter bubbling away or just need a good way to use up that extra sourdough discard. Trust me, these become your new favorite easy sourdough breakfast staple!
- Why This is the Best Sourdough English Muffins Recipe
- Ingredients for Perfect Sourdough English Muffins
- How to Make Homemade English Muffins Using This Overnight Method
- Tips for Making Fluffy English Muffins Every Time
- Serving Suggestions for Your Sourdough English Muffins
- Storage and Freezing Sourdough English Muffins
- Frequently Asked Questions About Sourdough English Muffins
- Nutritional Estimate for Your Sourdough English Muffins
- Share Your Artisan Breakfast Bread Creations
Why This is the Best Sourdough English Muffins Recipe
I know you’re looking for that perfect muffin—fluffy, chewy, and absolutely loaded with holes. That’s what we spent months perfecting in my kitchen. This recipe is incredibly reliable; it works almost magically every time, even if you’re just starting out with sourdough!
- It guarantees that delicious, open texture, so forget flat breakfast disappointments!
- The overnight rest means more flavor and less work when it’s time to actually cook.
- It’s forgiving! You can use what you have on hand without running to the store.
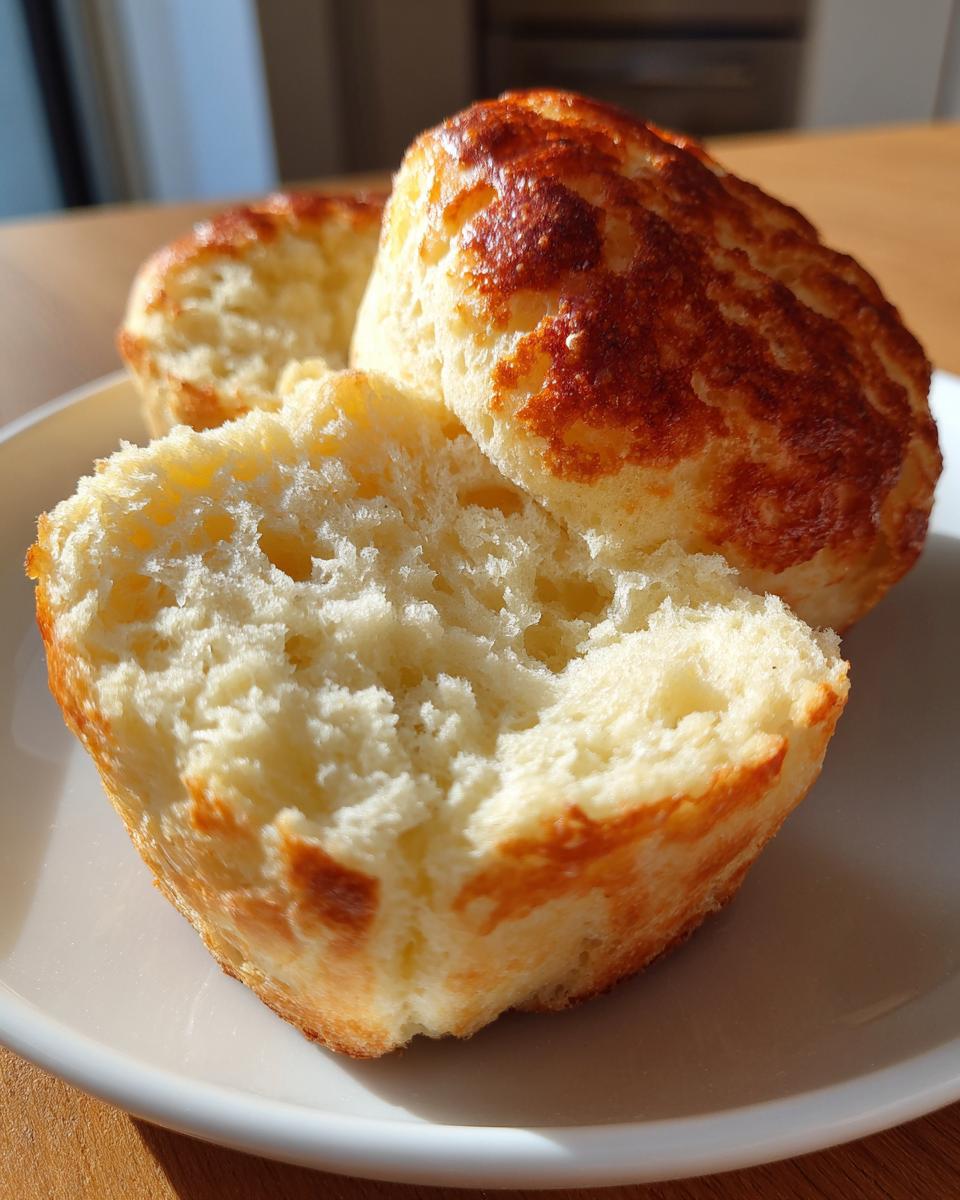
Achieving Fluffy Texture
The real secret to those amazing holes isn’t complicated mixing; it’s all about patience during the cook. By letting the dough rest overnight, we build structure in the dough itself. Then, when we cook it low and slow on the stovetop, those air bubbles trapped inside have time to expand before the outside sets. Minimal handling is key! We treat that dough like delicate spun sugar.
Using Active Starter or Sourdough Discard for Your Sourdough English Muffins
This is what I love most about this recipe—it’s a true kitchen workhorse. You absolutely can use an active, ready-to-go starter, which will give you a stronger, more pronounced tangy flavor. If you just fed your starter yesterday and have a cup of discard sitting in the fridge, that works brilliantly too! The discard just mellows out the tang ever so slightly, which some of the kids prefer for their breakfast sandwiches.
Ingredients for Perfect Sourdough English Muffins
When you’re relying almost entirely on wild yeast for your lift, the quality of your few ingredients really shines through. In my kitchen, we learned that the little things matter! This list is short, which means every item pulls its weight in flavor and texture. You’ll need:
- 1 cup active sourdough starter or sourdough discard
- 1 cup warm milk
- 2 tablespoons honey or sugar
- 1 teaspoon salt
- 2 tablespoons unsalted butter, melted
- 3 cups all-purpose flour, plus more for dusting
- 1 teaspoon baking soda
- Extra flour or cornmeal for dusting the griddle
Ingredient Notes and Substitutions for Sourdough English Muffins
For the softest result, please stick to all-purpose flour. Bread flour tends to absorb too much moisture and can make these chewier than we want. As for sweetener, I use honey because I love that slight background earthiness, but standard granulated sugar works just as perfectly well if that’s what you have!
Now, listen close about the griddle dusting. You can use flour, which keeps the flavor pure, but I highly recommend using a mix of flour and cornmeal. That little bit of cornmeal gives the outside the classic, barely gritty texture that just screams ‘authentic homemade English muffin’ when you bite into it. It’s a small step, but trust Rosa: it makes a huge difference!
How to Make Homemade English Muffins Using This Overnight Method
Alright, this is where we turn simple ingredients into legendary breakfast history. Since this is our easy breakfast recipes go-to base, we are keeping things gentle. Remember what I said? We want texture, not tough bread!
Mixing and the Overnight Ferment for Sourdough English Muffins
First, mix up that wet base—the starter, warm milk, honey, salt, and butter. It should look a little messy, which is fine! Then, toss in your flour and baking soda. You’re aiming for a shaggy, sticky dough here. Seriously, stop mixing when it just barely comes together. If you overwork it, you crush all the potential air pockets before they even have a chance to form. Cover that bowl tight and stick it in the fridge for at least ten hours, up to a full day. That long, cold rest develops that lovely, deep, tangy muffins flavor we are looking for!
Cutting and Preparing for Stovetop Griddle Baking
The next morning, don’t punch that dough down! That’s sacrilege in this recipe! Just gently scrape it onto a lightly floured counter. Pat it or roll it out carefully until it’s about half an inch thick. Now, for the cutting—this matters big time. Use a 3-inch cutter, and when you press down, press straight down. Do not twist the cutter around! Twisting seals the edge shut, and we need those open edges to steam and create holes later. Place the rounds on a generously dusted sheet and let them sit for 30 minutes to warm up just a touch.
The Key to Perfect Nooks and Crannies Muffins: Low and Slow Cooking
The single most important rule for getting those fantastic **nooks and crannies muffins** is the heat beneath your griddle. Set your skillet or cast iron to medium-low. Yes, medium-low! If it’s too hot, they’ll burn on the outside while remaining gummy and dense inside, and you won’t get those legendary holes. Cook them slowly for about 8 to 10 minutes a side. You’re looking for a light golden surface. We want them cooked all the way through, gently, to encourage all that wonderful internal bubbling. Trust me, learning to manage that heat is the biggest secret to awesome **sourdough English muffins**.
Once they look perfectly pale golden, take them off and let them cool completely before you even *think* about slicing them open. You can check out wonderful visual steps for this whole process over at this wonderful recipe source for even more guidance!
Tips for Making Fluffy English Muffins Every Time
I’ve seen so many beautiful muffins go wrong right at the very end, and honestly, it breaks my heart! We’ve done all the hard work—the overnight ferment, the careful shaping, the slow cooking—so we need to finish this perfectly. Getting that fluffy texture isn’t just about the dough; it’s about how you treat the final product once it’s cooled down.
If these are going to be the soft and chewy muffins I know they can be, you have to resist the urge to slice them like a regular piece of bread. My grandmother always taught me that slicing flattens the structure you worked so hard to build!
Splitting Your Sourdough English Muffins Correctly
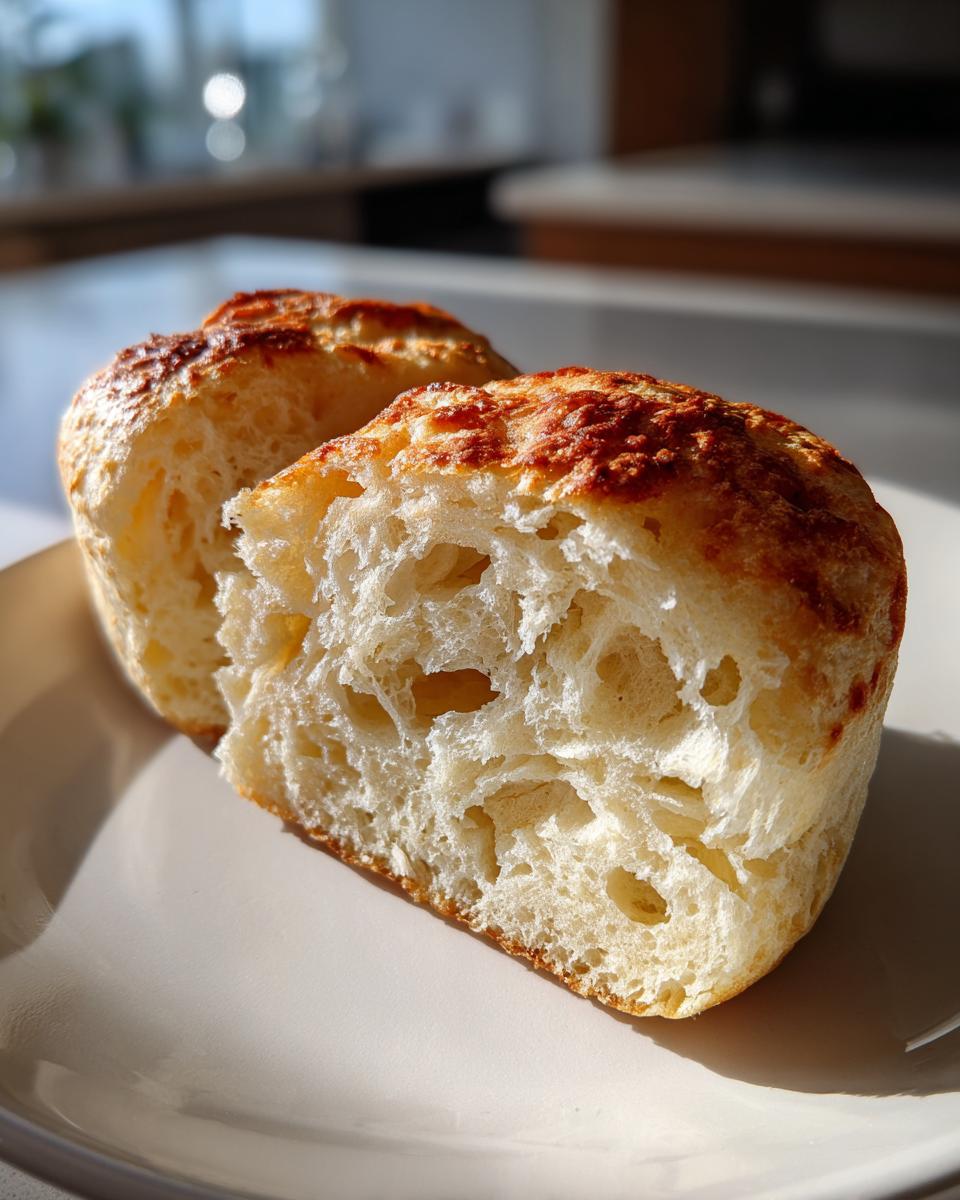
This is my number one non-negotiable tip for maximizing those holes. Do not use a knife! A knife cuts across the air tunnels, squishing the delicate walls and leaving you with a smooth surface instead of craggy goodness. When the muffins are completely cool, take a sturdy fork—yes, a fork—and gently pierce the edge near the center line.

Use the fork tines to gently pull the two halves apart. You’ll see them tear inward, creating thousands of little peaks and valleys ready to soak up butter or hold your poached egg. That fork-split surface is what truly defines a successful batch of homemade English muffins!
Serving Suggestions for Your Sourdough English Muffins
Okay, you’ve got the perfect batch of **sourdough English muffins** resting on the counter, split open to reveal those unbelievable holes. What now? Well, yes, toasting them with real butter that melts right into every crevice is mandatory, but these beautiful rounds are way too versatile to stop there!
Because we cooked these low and slow, they have a structure that stands up to heavy toppings. They don’t collapse or get soggy like flimsy store-bought versions. This means they are absolute perfection when used as **breakfast sandwich buns**. Forget the drive-thru; you can build a skyscraper-sized breakfast stack at home!
Think about going savory! They are incredible when topped with a fried egg, cheese, and Canadian bacon for a homemade McMuffin experience. Or, if you made them a little extra tangy, they shine next to richer flavors. I even love using them for cold sandwiches; they are sturdy enough to hold a scoop of creamy chicken salad without falling apart when you try to eat it.
Sweet toppings work too, of course! Try a thin layer of toasted almond butter and sliced bananas, or simply classic jam and cream cheese. The slight sourdough tang cuts through the sweetness beautifully, making every bite satisfying enough for an artisan breakfast bread.
Storage and Freezing Sourdough English Muffins
One of the major perks of taking the time to make a whole batch of these is that you don’t have to eat them all in one day! That overnight rest pays off again because these **homemade English muffins** freeze beautifully. Since they are a bit drier than a regular loaf of sourdough bread, they hold up really well.
Once your muffins are completely cool—and I mean stone cold, otherwise you risk getting that funny condensation and stickiness—you want to store them properly. If you plan to eat them within three or four days, just pop them into a Ziploc bag and keep them on the counter. They stay plenty soft that way.
For the long haul, freezing is where it’s at. The best way I’ve found is to split them open first. That’s right, split them before you freeze them! Lay them out on a baking sheet in a single layer for about an hour so they can harden up a bit—this stops them from freezing into one giant, hole-filled brick.
Once they are firm, transfer them into a freezer-safe airtight bag or container. They keep perfectly well for up to three months. The neatest trick, and this is great for busy mornings, is that you can toast them directly from frozen!
Just pop that frozen half right into your toaster, or if you prefer the griddle method (which I highly recommend for reheating), just throw them on a warm skillet for just a minute or two per side. They come back to life looking like they just came off the stovetop!
Frequently Asked Questions About Sourdough English Muffins
When you’re entering the world of sourdough, the questions just never stop, do they? I totally get it! Baking is all about getting those little tweaks just right, especially when it comes to achieving the perfect airy structure in these **sourdough English muffins**. Here are the things I get asked about most often!
Can I make Sourdough English Muffins without an overnight rest?
You absolutely can, though I really, really discourage it! If you are in a rush and need an **Easy Sourdough Breakfast** *today*, you can let the dough rise on the counter for about three to four hours instead of the long cold ferment. However, you’ll notice two big differences. First, the flavor won’t have that lovely complexity and tanginess we worked so hard to develop overnight. Second, the texture might be slightly denser because the starter hasn’t had enough time to condition the flour properly. For the best, fluffiest results, the long rest is worth the planning!
Why are my Homemade English Muffins flat?
Oh, this is a tough one, but it usually comes down to one of two culprits, and both relate back to crushing those air pockets! If your **homemade English muffins** turn out flat like pancakes, you likely mixed the dough too vigorously. Remember, we want shaggy and sticky, not smooth and elastic. The second reason is cooking temperature. If your griddle is blazing hot, the outside sets instantly, trapping all the air inside, which then puffs up and collapses when it cools. Always cook low and slow—that’s the secret to lift!
For more troubleshooting tips, like what to do if your muffins taste too sour, check out this great guide here!
Nutritional Estimate for Your Sourdough English Muffins
Now, I want to be totally upfront with you about nutrition. In my kitchen, we focus on flavor and tradition first, so I’m no nutritionist! But because I know many of you track what you eat, I wanted to give you a breakdown of what we see here. This is a homemade item, relying on wild yeast and simple flour, which is usually much better than what comes in a plastic bag at the store!
The numbers below are my best estimate for one whole muffin, split open, based on the ingredients I listed (using honey, for example). Please remember that these values can bounce around quite a bit depending on how active your sourdough starter was, what kind of flour you used, or if you added a tablespoon more butter!
- Serving Size: 1 muffin
- Calories: 185
- Fat: 4g
- Saturated Fat: 2g
- Carbohydrates: 33g
- Fiber: 1g
- Protein: 5g
- Sugar: 2g
- Sodium: 310mg
- Cholesterol: 10mg
Think of these as wonderfully satisfying, slightly tangy treats perfect for fueling a busy morning. They are definitely vegetarian-friendly! Enjoying one hot off the griddle, split open with a dollop of butter, is well worth every single happy calorie, I promise you that!
Share Your Artisan Breakfast Bread Creations
Well, we made it! I am so proud of you for tackling these **sourdough English muffins**. Since we skipped the commercial yeast and relied on that long, slow ferment, what you have made is truly an artisan breakfast bread, cooked right on your stovetop!
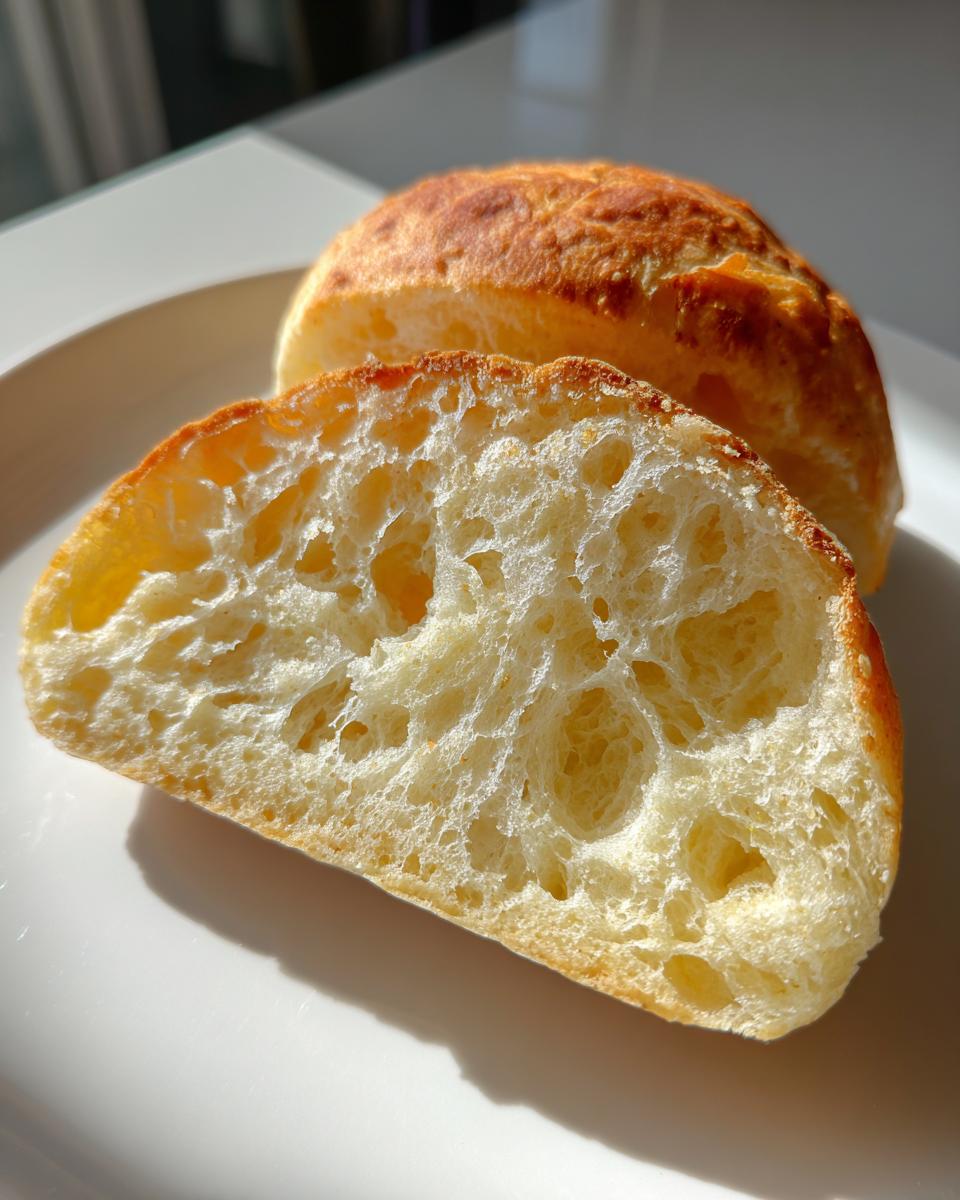
Now that you have peeked inside and seen all those glorious nooks and crannies, I would absolutely love to know how they turned out. Did you manage that perfect fork-split? Are they ready to handle a jumbo egg for your breakfast sandwich? Please tell me!
Head over to the comments section below and leave your rating. If you made these, snap a picture! I love seeing what everyone is baking up. Tag me on social media so I can drool over your perfectly toasted, butter-soaked treasures. Seeing your success is truly the best part of running this kitchen.
I hope this becomes a beloved, reliable tradition in your house, just like the ones I learned long ago. If you’re already looking for what to bake next, maybe try finding another comfort classic to master, like some of my favorite best homemade desserts!
PrintUltimate Sourdough English Muffins with Perfect Nooks and Crannies

Make soft, fluffy sourdough English muffins using your active starter or discard. This overnight recipe delivers the classic texture ideal for toasting or breakfast sandwiches.
- Prep Time: 20 min
- Cook Time: 20 min
- Total Time: 10 hr 40 min
- Yield: 10 muffins 1x
- Category: Breakfast
- Method: Stovetop Griddle Baking
- Cuisine: American
- Diet: Vegetarian
Ingredients
- 1 cup active sourdough starter or sourdough discard
- 1 cup warm milk
- 2 tablespoons honey or sugar
- 1 teaspoon salt
- 2 tablespoons unsalted butter, melted
- 3 cups all-purpose flour, plus more for dusting
- 1 teaspoon baking soda
- Extra flour or cornmeal for dusting the griddle
Instructions
- In a large bowl, combine the sourdough starter, warm milk, honey, salt, and melted butter. Mix until just combined.
- Add the flour and baking soda to the wet ingredients. Mix with a wooden spoon or spatula until a shaggy, sticky dough forms. Do not overmix; you want a high-hydration dough for holes.
- Cover the bowl tightly with plastic wrap. Place the dough in the refrigerator for an overnight cold ferment, at least 10 hours or up to 24 hours. This develops the flavor and texture.
- The next morning, lightly flour a clean work surface. Gently scrape the dough out of the bowl. Do not punch the dough down.
- Lightly dust the top of the dough with flour. Gently pat or roll the dough out to about 1/2 inch thickness.
- Use a 3-inch round cutter (or a biscuit cutter) to cut out the muffins. Do not twist the cutter when cutting; press straight down to help seal the edges, which aids in hole formation.
- Dust a baking sheet generously with flour or cornmeal. Place the cut rounds on the sheet, leaving space between them. Cover loosely with plastic wrap and let them rest at room temperature for 30 minutes.
- Heat a large cast-iron griddle or heavy skillet over medium-low heat. You want the surface hot enough to cook slowly without browning too fast.
- Lightly dust the griddle surface with cornmeal or flour. Place the dough rounds onto the hot griddle.
- Cook for 8 to 10 minutes per side. The muffins should cook slowly until they are cooked through and lightly golden brown. If they brown too quickly, reduce the heat.
- Remove the cooked muffins from the griddle. Repeat with the remaining dough, re-dusting the griddle as needed.
- To achieve the classic ‘nooks and crannies,’ cool the muffins completely on a wire rack. Once cool, split them open using a fork, not a knife.
- Toast the split sides before serving with butter or making your favorite breakfast sandwich.
Notes
- For the best ‘nooks and crannies,’ cook the muffins low and slow on the griddle. High heat cooks the outside before the inside can fully set, preventing hole development.
- If you use sourdough discard, the flavor will be milder. If you use active starter, the muffins will have a more pronounced tangy flavor.
- These freeze well. Store cooled muffins in an airtight bag and toast directly from frozen.
Nutrition
- Serving Size: 1 muffin
- Calories: 185
- Sugar: 2
- Sodium: 310
- Fat: 4
- Saturated Fat: 2
- Unsaturated Fat: 2
- Trans Fat: 0
- Carbohydrates: 33
- Fiber: 1
- Protein: 5
- Cholesterol: 10