
Hanukkah is just around the corner, and honestly, I live for the smell of oil sizzling on the stove! It’s the best time of year because we get to celebrate the miracle by frying foods, and nothing says tradition like a perfect batch of potato latkes. I’ve spent years trying out my family’s old methods to make sure these aren’t just good, but truly magnificent—golden brown and impossibly crispy on the outside.
If you’ve ever ended up with greasy, floppy pancakes, don’t worry! My goal here is to pass on a totally reliable recipe that captures that wonderful savory flavor. Trust me, once you master this squeeze technique, you’ll be frying up the best potato latkes you’ve ever had, guaranteed.
- Why This Potato Latkes Recipe Honors Tradition
- Ingredients for Perfect Crispy Potato Latkes
- Mastering the Technique for Crispy Fried Latkes
- Tips for Achieving the Best Potato Latkes Every Time
- Serving Suggestions for Your Hanukkah Potato Pancakes
- Storing and Reheating Leftover Potato Latkes
- Frequently Asked Questions About Potato Latkes
- Estimated Nutritional Information for Potato Latkes
- Share Your Traditional Potato Latkes Experience
Why This Potato Latkes Recipe Honors Tradition
You simply can’t make potato latkes any other way, right? It just wouldn’t feel right! We fry these beautiful little pancakes specifically to commemorate that incredible miracle of the oil that lasted for eight days. That’s why skimming on the frying step just won’t cut it for us in the kitchen. This isn’t just another side dish; it’s a genuine Jewish holiday dish carrying deep meaning.
I truly believe in keeping these traditions alive, but making them simple enough for a busy weeknight. That’s where Rosa Sterling’s mission really comes into play. She’s all about taking those time-honored kitchen lessons and adapting them so we home cooks can succeed without needing a whole day off. You can read more about her focus on making heritage recipes achievable over at Rosa’s Tasty Kitchen philosophy. This crispy latke method is proof—it honors the past while fitting perfectly into our modern rush.
Ingredients for Perfect Crispy Potato Latkes
Creating the absolute best potato latkes starts right here—with simple, honest ingredients you can grab at any regular grocery store. When you’re cooking from the heart, you don’t need anything fussy! We’re using everyday staples, but paying close attention to exactly *what* kind we choose, because that totally changes the final texture.
You’ll need Russets, the right kind of oil, and just a few binders. Grab your box grater, and let’s check out the lineup that guarantees that beautiful crunch we’re aiming for.
Ingredient Clarity and Preparation Notes
Listen, the potato choice is everything! You absolutely must use Russet potatoes. They have that high starch content that acts like natural glue once we squeeze the water out, which is the secret handshake for crispy latkes. Don’t try swapping them for waxy potatoes; they just won’t bind the same way.
Also, when it comes to the oil, since these are being fried hot and fast, we need something stable. I always use a high smoke point oil like vegetable or plain canola oil in my big cast iron skillet. You want that oil HOT so the latkes sizzle immediately, not sit there getting soggy. That right oil choice makes all the difference between success and a greasy mess!
Mastering the Technique for Crispy Fried Latkes
Okay, we’ve got our starchy potatoes and onion grated—wow, that’s an arm workout! Now we get to the most important part of making any worthy potato latkes: getting rid of every last drop of water. If the mixture is wet, you are frying up steamed potato mush, not crispy pancakes. Trust me on this one; skipping the squeeze is a rookie mistake that leads to sad, floppy latkes.
You’ll want to pile that entire grated mess into the center of a clean, thin kitchen towel or a few big squares of cheesecloth. Kneel down, twist that towel tight above a bowl, and squeeze with everything you’ve got! I mean it—squeeze until your knuckles turn white and you feel like you’re wringing out a sponge that’s been soaking for days. That clear liquid you see draining out? That’s the enemy of crispiness!
The Essential Step: Removing Potato Moisture
Seriously, give that potato and onion mixture everything you can. You’re aiming for a dry, fluffy-looking pile when you unpack the towel. If you leave moisture in there, it’s going to turn into steam when it hits the hot oil. Steam equals mushiness! We want that water gone so the potato starches can do their job and glue the shredded pieces together while frying hard on the outside.
Once squeezed dry, you toss the mixture with your egg, flour (or matzo meal if you prefer that traditional binder), salt, and pepper. Mix it super gently—just until things are coated. If you stir too long, you develop gluten from the sparse flour, and again, that makes them tougher instead of light and crispy.
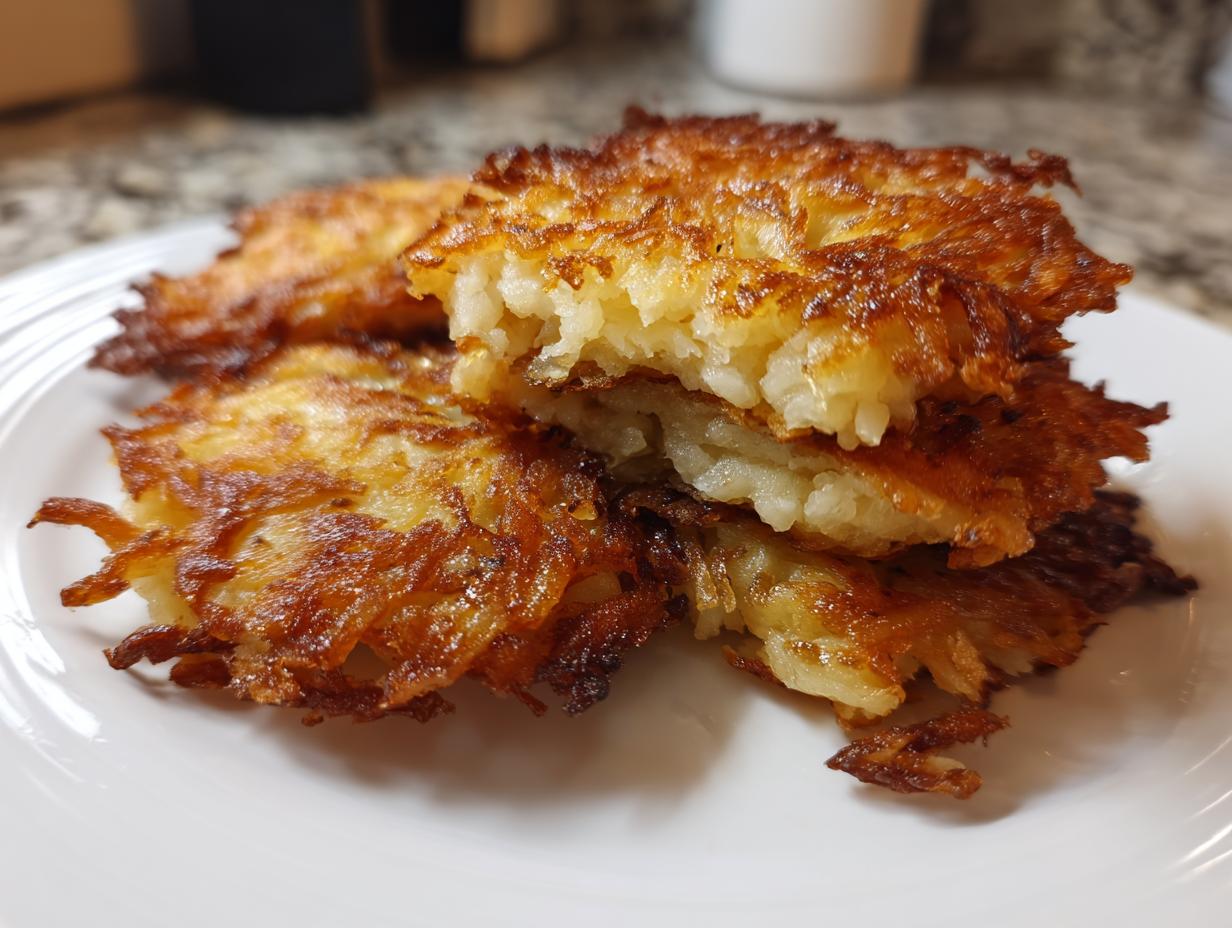
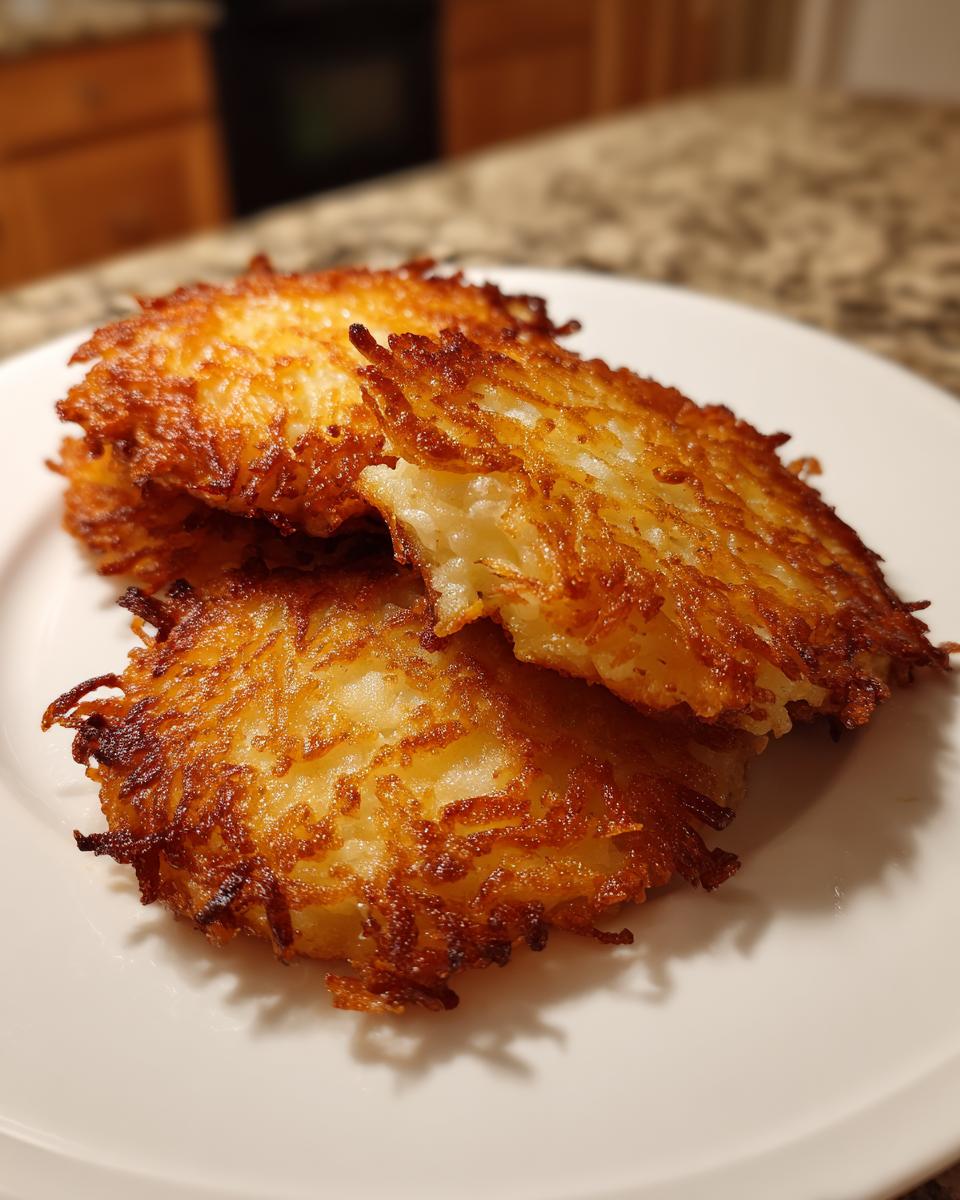
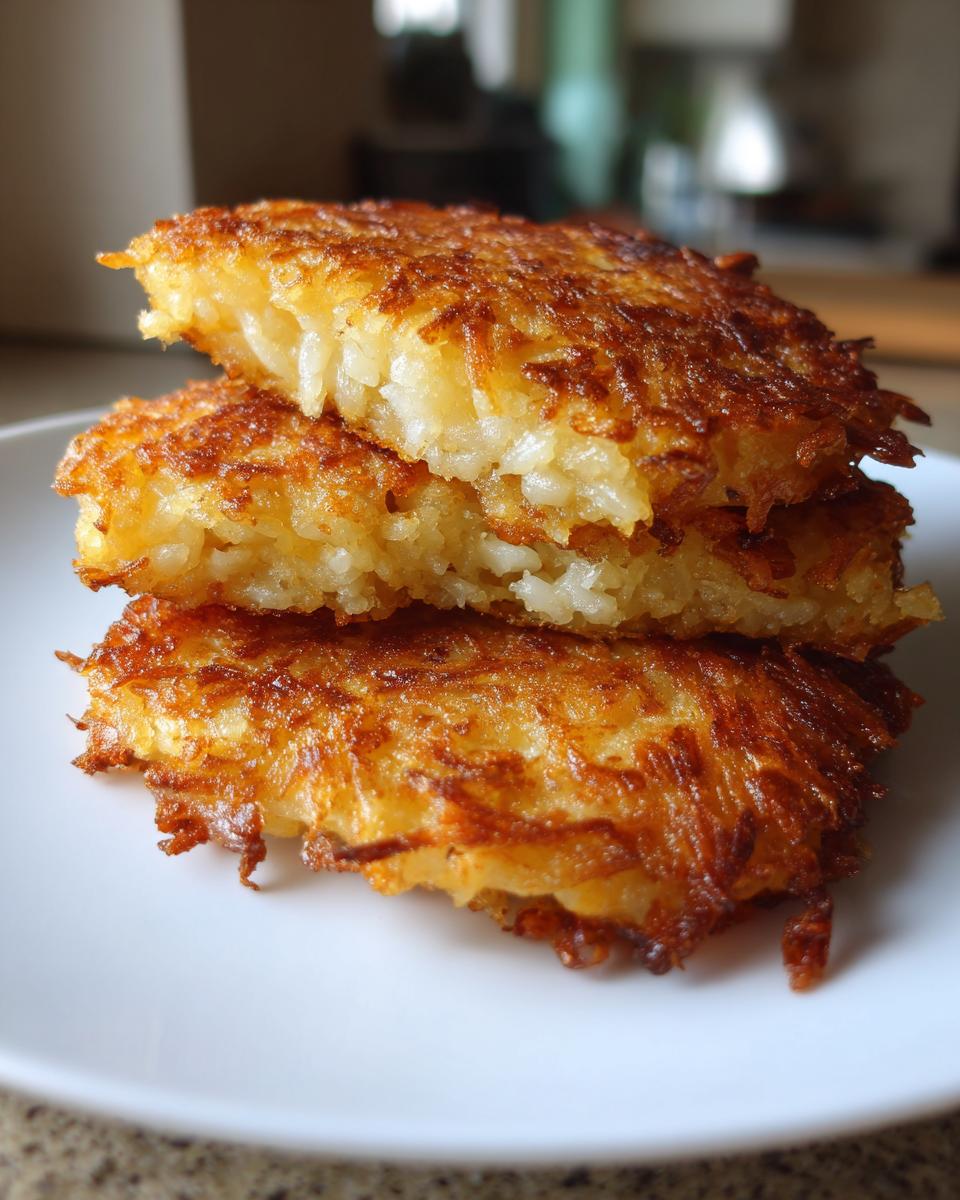
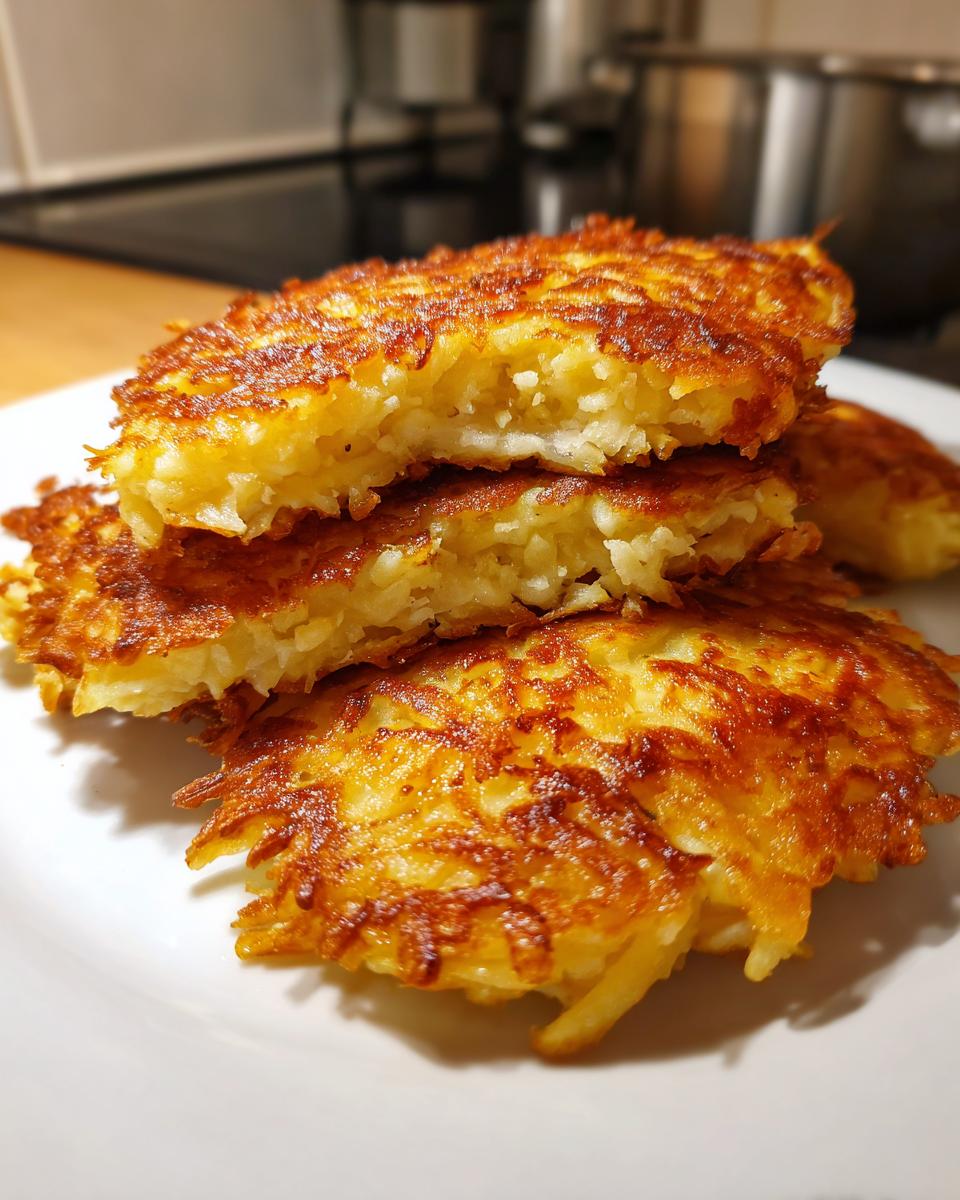
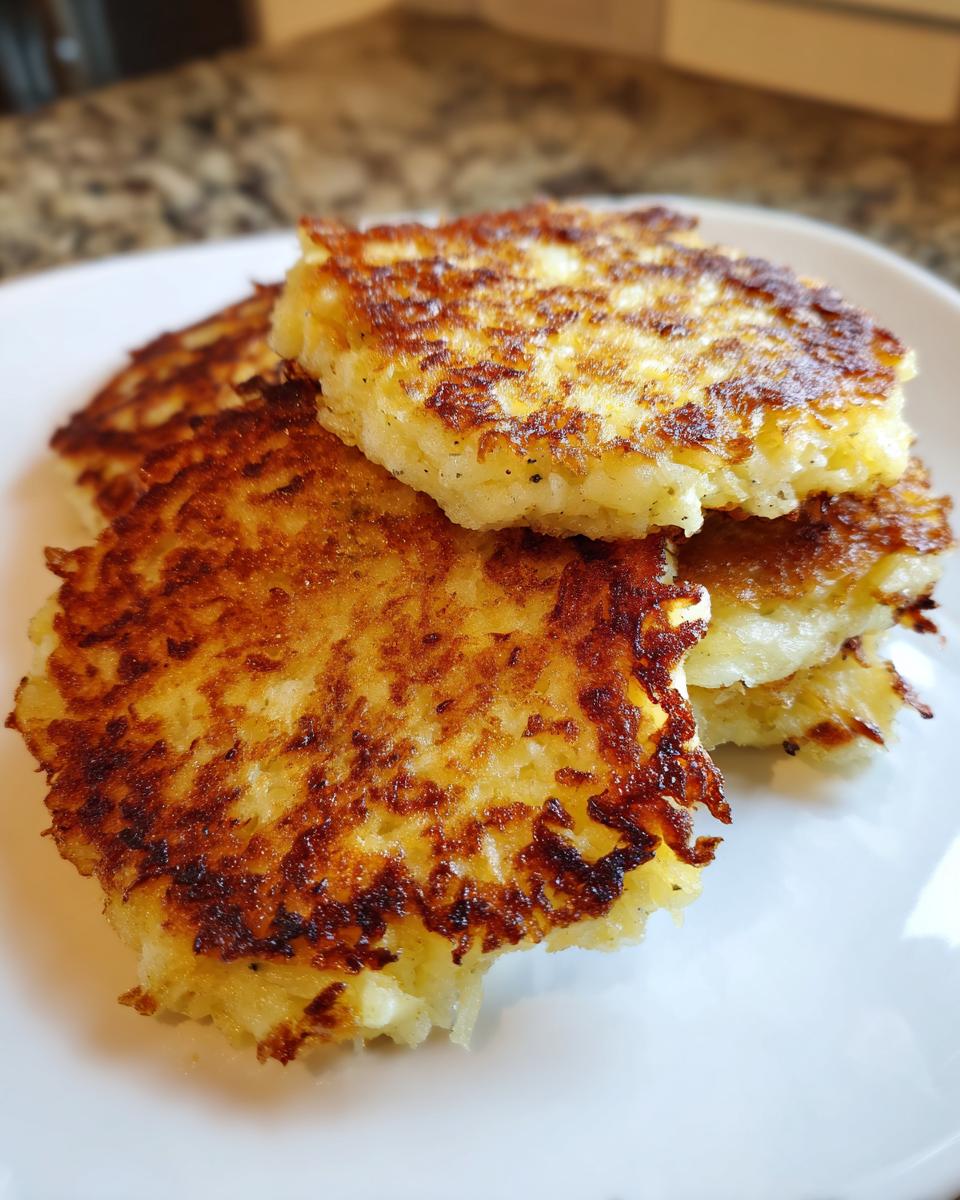
Frying Your Potato Latkes to Golden Perfection
Now for the fun part—the frying! You need a good inch of oil in your heaviest skillet, like cast iron, and you absolutely need to hover near the stove because temperature control is everything here. We’re looking for 350 degrees Fahrenheit. If you drop the batter in and it doesn’t immediately start bubbling happily around the edges, the oil isn’t hot enough, and you’re going to end up with greasy crispy fried latkes that soak up too much oil.
Drop big spoonfuls into the hot oil, being careful not to crowd the pan. If you put too many in, the oil temperature instantly drops, and we are back to mush city—nope! Let them sit undisturbed for about three to five minutes until they look deeply, gorgeously golden brown. Then flip them carefully and cook the second side until it matches. They should sound loud and crinkly when you flip them!
Tips for Achieving the Best Potato Latkes Every Time
We’ve squeezed and we’ve fried, but I have a few final secrets to make sure your potato latkes are just spectacular, not just good. If you want that shatteringly crisp exterior, you can’t just let them cool on a plate. Forget paper towels, too! You must drain them on a wire rack set over a baking sheet.
Why a rack? Because even though we squeezed hard, a little steam is always released when they finish cooking. That rack lets air circulate entirely around the bottom, stopping the steam from condensing and making the bottoms soggy right when you take them out of the oil. Keep that heat high—around 350°F—through the entire process. If the temperature drops even slightly between batches, the next round will drink up that oil way too fast.
Also, here’s a little advanced tip I learned from watching my Mom: only mix your wet ingredients into those dry grates right before you are ready to scoop them into the oil. If the potato and onion mixture sits around after adding the egg and binder, it starts turning grayish brown. We want beautiful, golden latkes, not gray ones, so timing is truly everything!
Serving Suggestions for Your Hanukkah Potato Pancakes
There is no time to waste here! The absolute joy of making Hanukkah potato pancakes is getting them right off that wire rack and onto your plate while they are piping hot. If you wait even five minutes, they lose just a tiny bit of that perfect crackle. You have to serve them immediately where everyone can grab one!
And the traditional toppings? Forget fancy gourmet things—we stick to the classics because they just work. A dollop of cool, tangy sour cream is mandatory for cutting the richness, and you absolutely need tart, sweet applesauce to balance the savory flavor of the potato and onion. Honestly, watching everyone pile on their preferred topping is half the fun of the whole holiday!
Storing and Reheating Leftover Potato Latkes
Okay, what if you actually have leftovers? That hardly ever happens at my house, but let’s pretend we showed some restraint! The most important thing to remember about leftover potato latkes is that they will lose their crispness quickly once they cool down and are stored incorrectly. Don’t you dare put them in a tight, airtight container right after frying. That traps moisture and guarantees a soggy mess by morning.
Instead, let them cool completely on that wire rack first. Once they are room temperature, store them in a container with a piece of paper towel tucked in with them, or just use a Ziploc bag left slightly open. This lets them breathe.
The big question is reheating, and I have one firm rule: absolutely no microwave! That just turns them rubbery. For the best results—bringing back that beautiful, crispy fried texture—pop them onto a baking sheet in a 375-degree oven for about ten minutes. If you have an air fryer, even better! They crisp up beautifully in about five minutes in the basket. Serve them piping hot, and nobody will even know they weren’t just made!
Frequently Asked Questions About Potato Latkes
I know you’ve got questions! When you are making a traditional recipe, especially one tethered to such an important holiday, you want absolute certainty. I’ve answered some of the things folks always ask me whenever I bring my batch of potato latkes to a gathering. Hopefully, this helps you feel super confident when you start frying!
Can I bake these potato latkes instead of frying?
Oh, I get the desire to skip the oil, especially when you’re worried about splatter, but honestly? For these Hanukkah potato pancakes, frying is the main event! Baking them will certainly cook them through, but you completely lose that delicate, airy crispness you get from the hot oil. More importantly, we fry them to commemorate that beautiful historical miracle of the oil lasting so long—so skipping the frying really misses the whole festive point!
What is the best potato to use for crispy latkes?
This is a question I love answering because it’s all about starch! You absolutely must grab Russet potatoes. They are my go-to choice every single time. Russets have much higher starch levels compared to other varieties, and that starch is what acts like that super-strong natural binder once you’ve squeezed all the liquid out. That starch is what helps your latkes fluff up and get gorgeously crispy when they hit the pan. Don’t mess around with waxy potatoes here if you want the real deal!
Why do my latkes turn brown before they get crispy?
That usually means your oil temperature is too low, or you’re frying way too many at once. If the oil isn’t smoking hot (that sweet spot around 350°F), instead of instantly crisping the outside, the batter sits there simmering, absorbing oil and turning that sad gray-brown color before it ever gets that nice golden crunch. Remember what I said? Work in small batches and check that temperature often!
Can I substitute matzo meal for the flour?
Yes, you totally can! Matzo meal gives them a slightly different, maybe a bit heavier, binding texture, but it’s traditionally correct for many families. Both flour and matzo meal work fine as long as you don’t use too much—remember, we just want enough to hold the shreds together. Adding too much binder will kill the crispy texture faster than anything else!
Estimated Nutritional Information for Potato Latkes
Now, look, I’m not a scientist, and while these are made with love, they are fried, so they aren’t exactly a health food! But still, I know some of you want to have a general idea of what you’re eating once the frying is done. The numbers below are just rough estimates based on the recipe serving about 16 potato latkes.
Please know this is just based on the standard ingredients listed—if you use extra oil or add more salt than I suggested, those numbers will definitely shift around. This is more of a fun guideline than a strict count, so enjoy them guilt-free!
- Serving Size: 1 latke
- Calories: 110
- Fat: 6g (Remember most of this is absorbed during frying!)
- Carbohydrates: 12g
- Protein: 2g
- Sodium: 150mg
- Sugar: 0.5g
As you can see, they are naturally low in sugar, which is nice, but they are definitely a treat because of the frying method. That’s why we only make them once a year!
Share Your Traditional Potato Latkes Experience
Whew! We made it through the grates, the squeeze, and the hot oil, and now you have a beautiful platter of perfectly potato latkes! I truly hope they come out golden and wonderfully crispy for you. This recipe has been tested and double-tested here in my kitchen, and I’m so excited for you to share them with your family.
Now, I’d love to hear all about it! Did they turn into your family’s new favorite way to make these Hanukkah potato pancakes? Did you stick to applesauce, or is your family weird and uses ketchup (just kidding… mostly!)? Please drop a rating below so others can see how reliable this recipe is! And if you took a picture of your beautiful, non-soggy stack, please share it on social media—it truly makes my day to see my recipes in your home.
Remember that every time you make these, you are continuing a beautiful tradition, and I’m honored you chose my recipe to be part of your celebration. You can always check our Terms of Use if you have questions about sharing content. Happy Hanukkah, everyone!
PrintClassic Crispy Potato Latkes

Make traditional, golden-brown potato latkes for Hanukkah. This recipe focuses on achieving a crispy exterior and tender interior, perfect for serving hot with your favorite toppings.
- Prep Time: 20 min
- Cook Time: 25 min
- Total Time: 45 min
- Yield: About 16 latkes 1x
- Category: Side Dish
- Method: Frying
- Cuisine: Jewish
- Diet: Vegetarian
Ingredients
- 2 lbs Russet potatoes, peeled
- 1 medium yellow onion, peeled
- 2 large eggs, lightly beaten
- 1/4 cup all-purpose flour or matzo meal
- 1 teaspoon salt
- 1/4 teaspoon black pepper
- Vegetable oil or canola oil, for frying
Instructions
- Grate the potatoes and onion using the large holes of a box grater or a food processor attachment.
- Place the grated potato and onion mixture into a clean kitchen towel or several layers of cheesecloth. Wrap tightly and squeeze out as much liquid as possible over a bowl. Discard the liquid.
- Transfer the dried potato and onion mixture to a medium bowl.
- Add the beaten eggs, flour or matzo meal, salt, and pepper to the potato mixture. Mix gently until just combined. Do not overmix.
- Pour about 1 inch of oil into a large, heavy-bottomed skillet (like cast iron) and heat over medium-high heat until the oil reaches 350 degrees Fahrenheit.
- Carefully drop heaping tablespoons of the potato mixture into the hot oil, flattening them slightly with the back of the spoon to form pancakes about 1/2 inch thick. Work in batches to avoid crowding the pan.
- Fry for 3 to 5 minutes per side, until deep golden brown and crisp. Adjust the heat as needed to maintain the oil temperature and prevent burning.
- Remove the latkes from the oil using a slotted spoon or spatula and place them on a wire rack set over a baking sheet lined with paper towels to drain excess oil.
- Serve immediately while hot with applesauce and sour cream.
Notes
- Squeezing the liquid from the potatoes thoroughly is the key to crispy latkes that are not greasy.
- Keep the oil temperature consistent; if the oil is too cool, the latkes will absorb too much oil and become soggy.
- For extra crispiness, you can dust the drained latkes lightly with a tiny bit of flour before serving.
Nutrition
- Serving Size: 1 latke
- Calories: 110
- Sugar: 0.5
- Sodium: 150
- Fat: 6
- Saturated Fat: 1
- Unsaturated Fat: 5
- Trans Fat: 0
- Carbohydrates: 12
- Fiber: 1
- Protein: 2
- Cholesterol: 30