
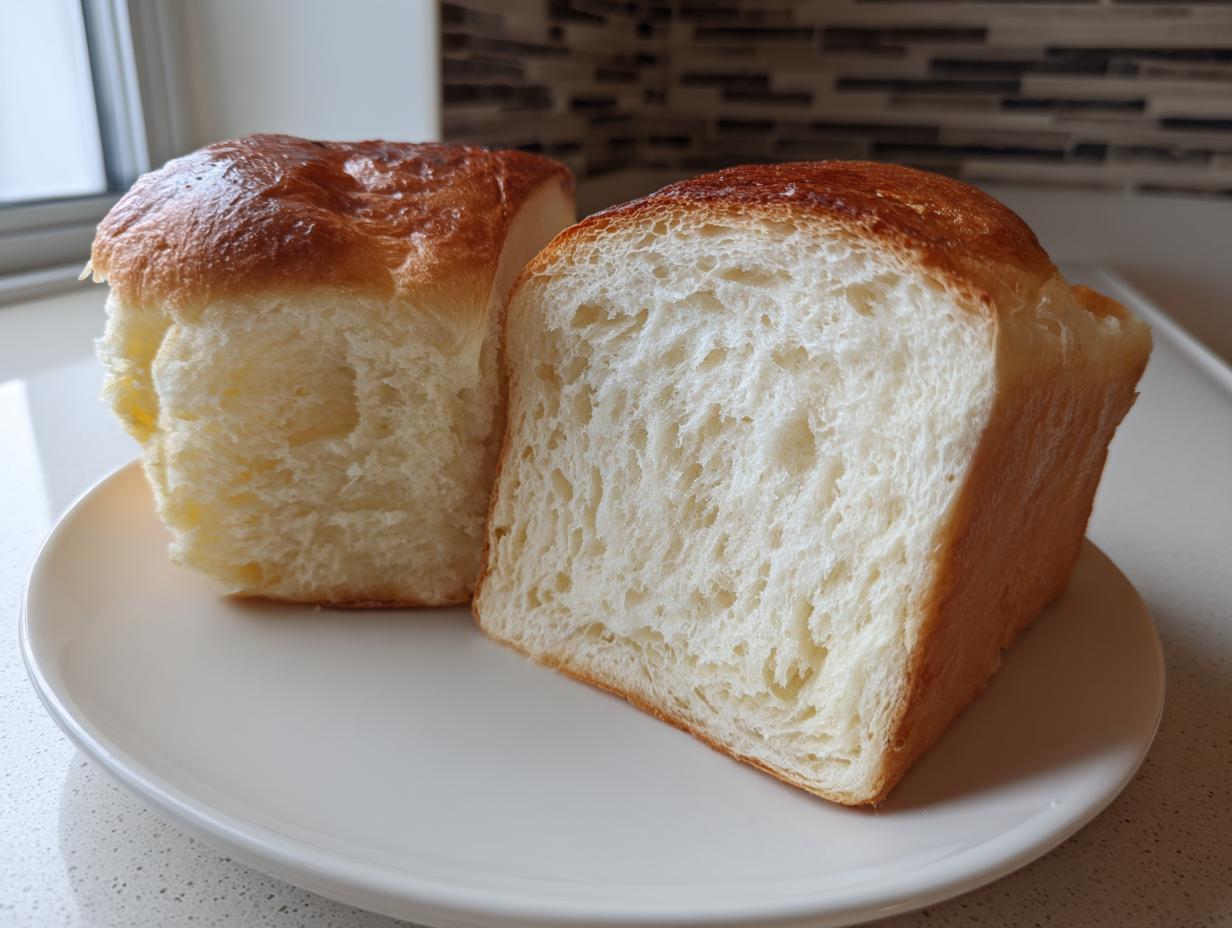
If you’ve ever dreamed of peeling apart a slice of bread so soft it feels like you’re tearing apart a cloud, then stop scrolling! I know that heavenly, pillowy texture—the kind you only find at the best Asian bakeries—seems intimidating to recreate at home. But trust me, after years in the kitchen balancing teaching and feeding my own family, I’ve adapted the technique. This is my definitive, beginner-friendly **japanese milk bread** (Shokupan) recipe. We unlock that incredible sponginess using something called the Tangzhong method. It’s the secret weapon that keeps this loaf moist and perfect, even on busy weeknights. For more incredibly simple baking success, check out my guide on how to make soft, fluffy naan bread!
- Why This Beginner-Friendly japanese milk bread Recipe Works (E-E-A-T Focus)
- Gathering Ingredients for your japanese milk bread
- Step-by-Step japanese milk bread Instructions
- Tips for Success When Making japanese milk bread
- Storage and Keeping your japanese milk bread Fresh
- Serving Suggestions for this Fluffy Bread Recipe
- Frequently Asked Questions About japanese milk bread
- Estimated Nutritional Data for japanese milk bread
- Share Your Cloud-Like japanese milk bread Creations
Why This Beginner-Friendly japanese milk bread Recipe Works (E-E-A-T Focus)
I get it—when you see a picture of Shokupan, you think, “I could never make that.” But the magic truly isn’t in complicated folding; it’s in preparation! I wrestled with dry, crumbly loaves for ages until I fully committed to the Tangzhong method. Once I nailed that, the texture transformed. This recipe is my tried-and-true version, simplified for those of us who are juggling work, school pick-ups, and dinner!

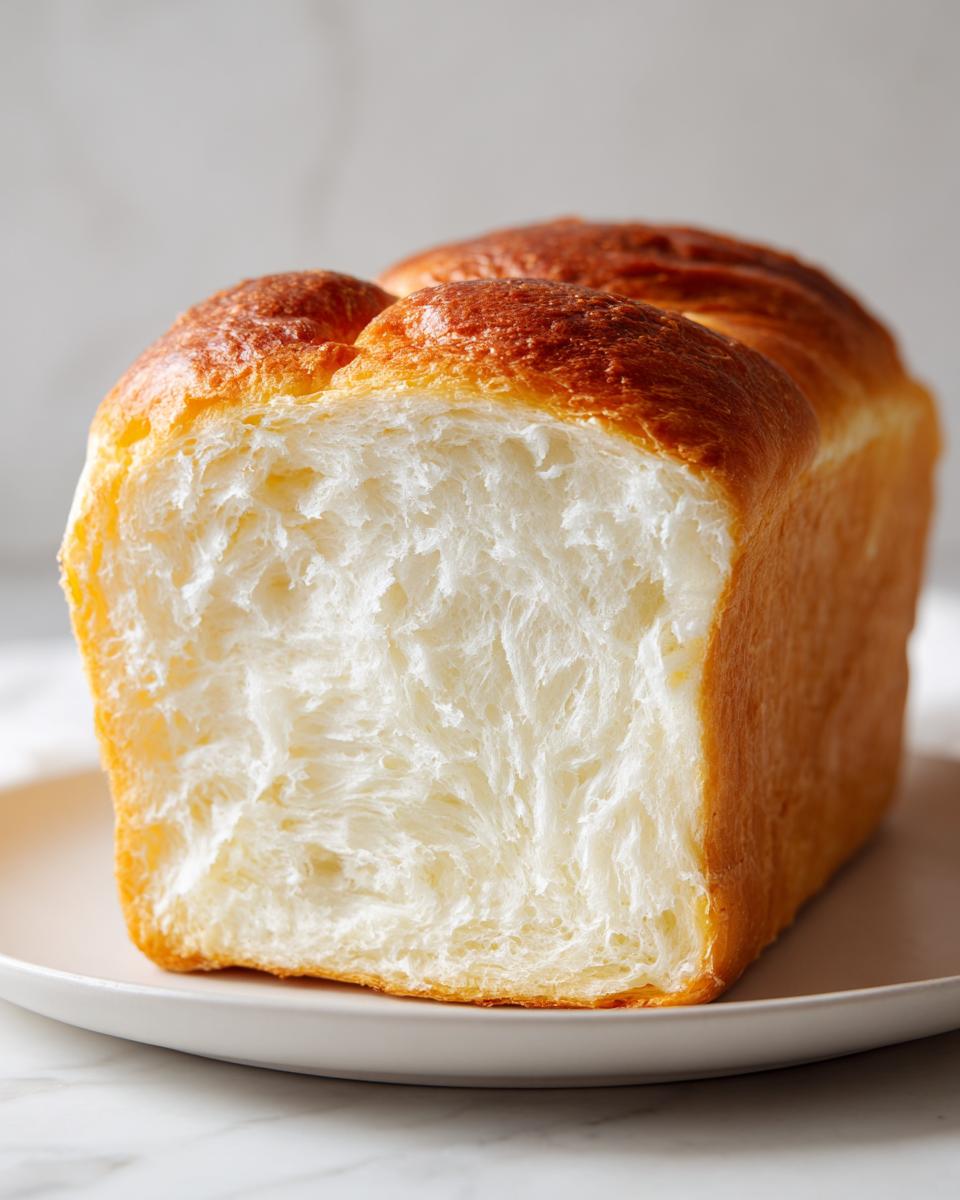
Mastering the Tangzhong Method bread Secret
The Tangzhong is just a little cooked paste made from flour and milk, but wow, does it work miracles! It traps moisture inside the dough before the baking even starts. This is why your loaf stays unbelievably soft for days—it’s the key to that sought-after, almost mochi texture bread. It sounds fancy, but it’s easier than making gravy, I promise!
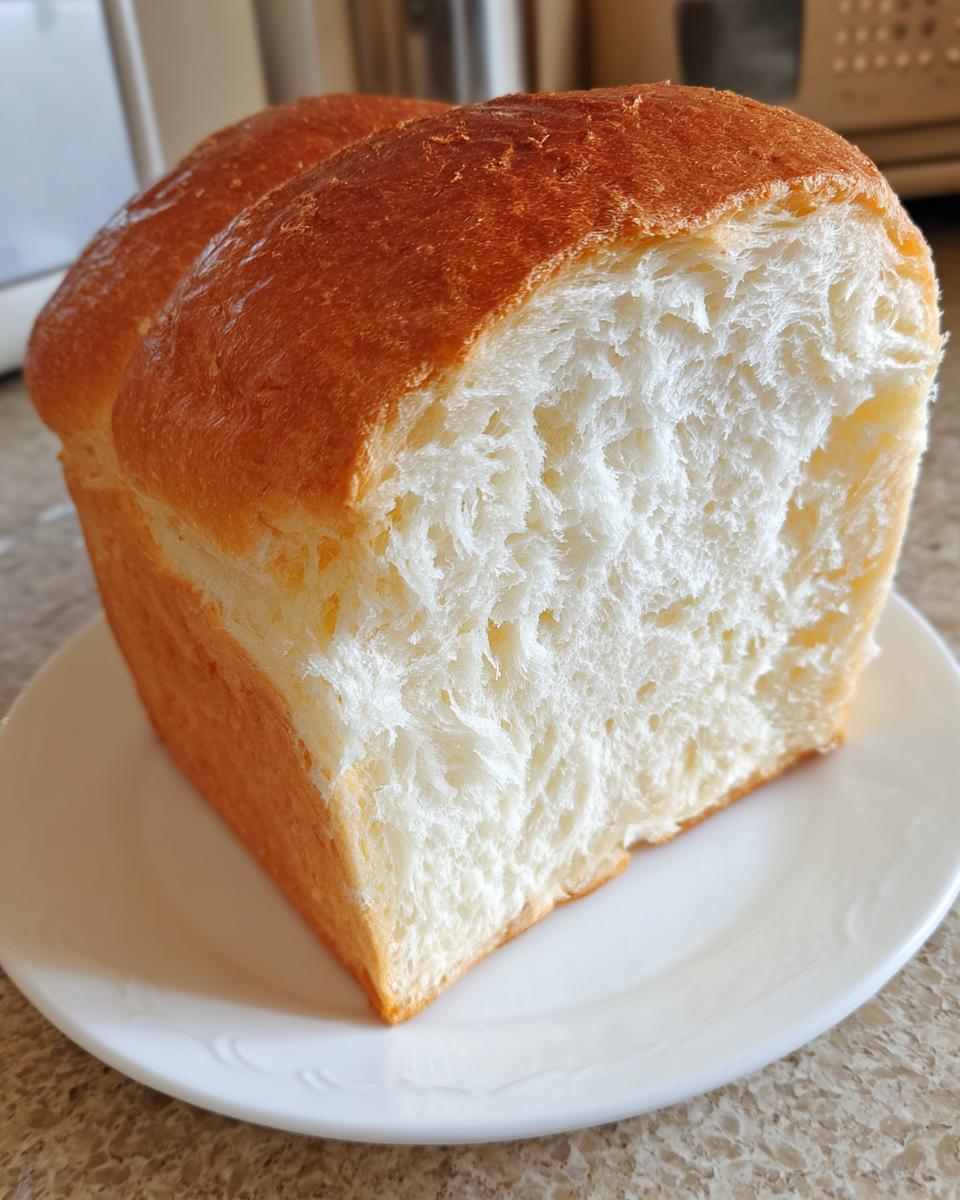
Achieving that Pillowy Soft Loaf Texture
Beyond the paste, the texture depends on two things I always stress: using bread flour, which has the right protein for stretch, and kneading until you can see light through the dough. When you hit that point, you know you’ve developed the structure needed for a truly fluffy bread recipe. This patient work is what separates home baking from getting that authentic homemade Asian bakery bread right in your own kitchen.
Gathering Ingredients for your japanese milk bread
Okay, the fun part! Getting the ingredients together is half the battle, and honestly, you probably have most of this stuff already. The Japanese milk bread is famous because it uses pantry staples, but the precision in amounts matters—especially since we are using the Tangzhong paste. Before you start mixing, remember my rule: room temperature ingredients are non-negotiable for happy yeast!
For the main dough, you’ll need:
- 1/2 cup Milk, whole (this feeds the Tangzhong!)
- 1 large Egg, making sure it’s room temperature
- 1/4 cup Heavy Cream
- 2 tablespoons Unsalted Butter, softened slightly
- 1 teaspoon Salt
And for the Tangzhong itself, we only need about 1/4 cup of bread flour and 1/2 cup of milk. Don’t let that scare you; it’s literally just making a mini roux first.
For the yeast activation (we call this blooming the yeast!), grab:
- Warm Water, specifically about 105-115°F (it should feel warm, not hot, on your wrist!)
- 2 tablespoons Granulated Sugar, divided (some for the yeast, some for the dough)
- 2 1/4 teaspoons Active Dry Yeast
Finally, you’ll use about 3 cups of Bread Flour, divided carefully between the paste and the main mix, plus one large Egg Yolk and 1 tablespoon of Milk for that gorgeous final egg wash before baking.
Ingredient Notes and Substitutions for Shokupan recipe
Listen, I tried using skim milk in the Tangzhong once because I was out of whole milk, and I regretted it immediately. Whole milk gives the paste the richness and structure it needs to properly trap steam later. Don’t skimp there! Also, make sure your egg isn’t straight from the fridge; cold eggs can shock the yeast when you add them in the mixing stage.
When it comes to the flour, you MUST use bread flour if you want that amazing stretch. All-purpose flour just doesn’t have the high protein content required for this kind of structure. If you want to try adding flavor, you could use a little less sugar and add a tiny splash of vanilla extract to the wet ingredients, but keep the flour count strict for this soft pretzel bites texture we are aiming for!
Step-by-Step japanese milk bread Instructions
This is where we put all that prep work to good use! Don’t rush these steps, especially the rising times, and you’ll have truly exceptional bread. You are going to follow the process I laid out in the instruction cards exactly, I promise, it makes all the difference when you are aiming for that bakery style bread at home feel.
Preparing the Tangzhong: The Moisture Foundation
First things first: the Tangzhong! In a small saucepan, whisk together 1/4 cup of your bread flour and that 1/2 cup of milk until it’s totally smooth—no lumps allowed. Now, heat it over medium-low heat. This takes focus! You have to stir constantly until it gets thick, almost like a strange wallpaper paste, hitting about 170°F if you’re checking with a thermometer. As soon as it slaps thick on your spoon, pull it off the heat immediately, dump it into a small bowl, and slap plastic wrap right on the surface. We need it cool before we add it to the yeast, so set it aside to chill out!
Mixing and Kneading for the Softest Bread Ever
While that cools, let’s get the yeast happy. Mix your warm water and 1 teaspoon of sugar in your stand mixer bowl—or a large bowl if you’re kneading by hand like my grandma used to! Sprinkle the yeast on top and just let it foam up for about five minutes. Once frothy, dump in the rest of the sugar, that cooled Tangzhong paste, the whole egg, heavy cream, and almost all your flour. Mix low until it clumps together. Now, step four is key: add the softened butter and salt, then knead! You need to run that mixer on medium-low for about 8 to 10 minutes. You are looking for the dough to look smooth and pull away from the sides. If you gently stretch a piece, it should form a thin film without tearing right away—that’s the magic windowpane test!

Proofing and Shaping Your Pillowy Soft Loaf
Let the dough take a nap! Place it in an oiled bowl, cover it, and leave it alone for an hour to an hour and a half until it’s doubled. Once it’s puffy, gently punch it down and evenly divide it into three same-sized balls. Roll each ball into a tight log—really smooth those ends! Line your greased 9×5 pan, place the three logs side-by-side, making sure the sealed seams are all facing down against the bottom of the pan. Cover it again loosely and let it rise a second time until it peaks about an inch over the top edge. This second rise is what guarantees that beautiful, airy lift, so don’t rush it!
Baking the japanese milk bread
Time for the oven! Get it super hot, 350°F (175°C). Mix that leftover egg yolk with a tablespoon of milk until combined—that’s our beautiful wash. Gently brush it over the top of your dough. Bake for 30 to 35 minutes. If you see the top getting too dark too fast—which happens easily with these sweet breads—just cover it loosely with foil right over the top. We are done when it’s deep golden brown and hits 200°F internally. Don’t leave it in the pan! Get it onto a wire rack immediately to cool completely before you dare slice into this amazing French bread masterpiece!
Tips for Success When Making japanese milk bread
Baking this bread is rewarding, but even I run into hiccups sometimes! I remember one fall when my kitchen was just a little too cool, and my first rise barely moved. I almost gave up, but I remembered my teacher’s advice: check the environment! Make sure you are proofing your dough in a warm spot—maybe near a sunny window or *very* briefly in a turned-off oven with the light on. It makes all the difference for this easy milk bread for beginners.
Troubleshooting Common Issues in this Shokupan recipe
If your dough feels too sticky to handle when you turn it out, don’t panic and dump in cup after cup of flour! Remember, this dough *should* be soft. Just lightly dust your hands and the counter, not the dough itself. If you find your dough just isn’t rising, your yeast is likely the culprit. Always check that your water temperature is correct—too hot kills it, too cold puts it to sleep. Fresh yeast and warm water are your best friends for achieving that lift unique to Hokkaido milk bread!
Storage and Keeping your japanese milk bread Fresh
Oh, the agony of waiting for the loaf to cool! But trust me, slicing into this sweet white bread while it’s even slightly warm is a huge mistake. It messes up the structure we worked so hard to build with the Tangzhong. Once it’s completely cool—and I mean completely cool, maybe run your hand over it a few times to check—you have to wrap it up tight. This is the secret to having that bread that stays fresh for days.
I use a couple of methods depending on how long I need it to last. For anything less than two days, wrapping the tightly cooled loaf in plastic wrap, pressing out all the air, and then wrapping it again in foil works wonders. It locks in all that moisture we cooked into the flour.
If you’re trying to keep this pillowy soft loaf for up to a week, you should totally freeze it! Slice the entire loaf first, and then wrap individual slices or two slices together tightly in plastic wrap, then put those into a freezer bag. When you want a piece, just microwave that single slice for about 10 to 15 seconds, and it comes back to life like it was just baked this morning! That little hit of microwave steam wakes up the starches perfectly.
Serving Suggestions for this Fluffy Bread Recipe
Now that you have carefully crafted the absolute softest bread ever, what do you even do with it? Honestly, I sometimes just tear off a piece standing by the cooling rack before it’s even fully cool—don’t judge! This bread is wonderful just as it is, but it truly shines when treated right.
Since this is the ultimate bread for sandwiches, it elevates even the simplest lunch. Try slicing it thicker than you normally would for grilled cheese; the melted butter and crispy outside contrast beautifully with the moist, almost creamy interior.
For breakfast, you cannot beat it toasted! Because it’s so rich, you don’t need much spread. A swipe of high-quality salted butter that melts right into the spongy structure is pure heaven. I also love spreading it with thick, homemade fruit jams—the slight sweetness of the Shokupan really complements the tartness of the berries. It’s also fantastic simply served alongside a big bowl of soup for dinner; it’s soft enough to soak up every last drop without turning immediately soggy!
Frequently Asked Questions About japanese milk bread
Is the Tangzhong method really necessary to make fluffy bread recipe loaves?
Oh, I push this because it works! While you *could* try making this without it, the Tangzhong method is what guarantees you get that authentic, cloud-like softness that makes this bread so famous. Without it, you’re just making a rich white bread, not a true Shokupan recipe. My experience shows that for the melt-in-your-mouth quality, that cooked starch paste is the crucial first step for achieving the softest bread ever.
What is the difference between this recipe and Hokkaido milk bread?
That’s a great question! To be honest, they are incredibly close cousins. Most recipes labeled “Hokkaido milk bread” already use the Tangzhong or the similar Yudane method—they just might differ slightly in the amount of dairy used, like maybe adding more heavy cream for extra richness. My version focuses purely on delivering that perfect sponge using the Tangzhong because it’s the most straightforward way for a beginner to master the technique. You’ll end up with that beautifully pillowy soft loaf either way!
Can I use all-purpose flour instead of bread flour for this?
I strongly advise against it, friend! When you want the stretch and the incredible height for your homemade Asian bakery bread, you need the high protein content found in bread flour. All-purpose flour can certainly work in a pinch if you are making simple rolls, but for a towering loaf that pulls apart perfectly, AP flour tends to lead to a shorter, less resilient crumb. Stick to the bread flour for your first try!
How do I know if my bread is done baking?
The color is a good indicator—it should be deeply golden brown on top. But seriously, rely on your thermometer if you have one! Aim for an internal temperature of 200°F (93°C). If you don’t have a thermometer, gently tap the top; it should sound hollow, and if you gently press down with a clean finger, the indentation should slowly spring back. That’s the sign of perfectly baked bread baking techniques done right.
Estimated Nutritional Data for japanese milk bread
I know when you’re baking something as wonderfully rich as this milk bread, you want to have a general idea of what’s in it. Remember that this bread is made with cream and butter, so it’s certainly a treat! I always like to point out that these numbers are just estimates—my flour bags might be slightly different from yours, and how thick you slice it makes a huge difference when you eat this sweet white bread recipe.
Based on the ingredients listed, here is a general nutritional breakdown per slice:
- Serving Size: 1 slice
- Calories: 180
- Sugar: 5g
- Sodium: 150mg
- Fat: 5g
- Saturated Fat: 3g
- Unsaturated Fat: 2g
- Trans Fat: 0g
- Carbohydrates: 29g
- Fiber: 1g
- Protein: 5g
- Cholesterol: 25mg
A quick note from my kitchen: Please treat these figures as helpful guidelines, not gospel! The final nutritional content can change based on the fat content of your specific milk or cream, and if you decide to use a different sugar. But hey, at least we know it’s made with real love and butter, and that’s what matters most when enjoying this fluffy bread recipe!
Share Your Cloud-Like japanese milk bread Creations
It honestly makes my whole week when I hear from you all! You’ve gone through the steps, mastered the Tangzhong, and now you have this unbelievably soft loaf cooling on your counter—I want to see it!
This journey to making the best homemade desserts is so much more fun when we do it together. Once your japanese milk bread has fully cooled and you’ve sliced into that incredible, springy crumb, please come back here and leave a rating. Did it pass the windowpane test for you? What did you serve it with?
If you snapped a photo of your perfect Shokupan—maybe you used it for a towering toast creation or cut perfect squares for sandwiches—I would absolutely love for you to tag me on social media! Seeing your bakes reminds me why I spend my evenings teaching these techniques developed in my own Midwest kitchen.
Your success stories help other home bakers feel confident enough to try this recipe next time. Happy baking, and thank you from the bottom of my heart for inviting my kitchen into yours!
PrintThe Definitive, Beginner-Friendly Japanese Milk Bread (Shokupan)
Make the softest, fluffiest Japanese Milk Bread using the Tangzhong method. This foolproof recipe yields a pillowy loaf that stays fresh for days, perfect for sandwiches or toast.
- Prep Time: 45 min
- Cook Time: 35 min
- Total Time: 3 hours 20 min
- Yield: 1 loaf 1x
- Category: Baking
- Method: Baking
- Cuisine: Japanese
- Diet: Vegetarian
Ingredients
- 1/2 cup Milk, whole
- 1/4 cup Water, warm (105-115°F)
- 2 tablespoons Granulated Sugar, divided
- 2 1/4 teaspoons Active Dry Yeast
- 3 cups Bread Flour, divided
- 1 large Egg, room temperature
- 1/4 cup Heavy Cream
- 2 tablespoons Unsalted Butter, softened
- 1 teaspoon Salt
- 1 large Egg Yolk, for egg wash
- 1 tablespoon Milk, for egg wash
Instructions
- Make the Tangzhong: Whisk together 1/4 cup of the bread flour and 1/2 cup of milk in a small saucepan until smooth. Heat over medium-low heat, stirring constantly, until the mixture thickens significantly, resembling a thick paste (about 170°F). Remove from heat and transfer to a small bowl. Cover the surface directly with plastic wrap and let it cool completely to room temperature.
- Activate the Yeast: In a large bowl or the bowl of a stand mixer, combine the warm water and 1 teaspoon of the sugar. Sprinkle the yeast over the top and let it sit for 5 to 10 minutes until foamy.
- Mix the Dough: Add the remaining sugar, the cooled Tangzhong paste, the egg, heavy cream, and the remaining 2 3/4 cups of bread flour to the yeast mixture. Mix on low speed until a shaggy dough forms.
- Knead: Add the softened butter and salt. Increase the speed to medium-low and knead for 8 to 10 minutes until the dough is smooth, elastic, and passes the windowpane test. The dough will be very soft.
- First Rise: Place the dough in a lightly oiled bowl, turning to coat. Cover and let it rise in a warm place until doubled in size, about 1 to 1.5 hours.
- Shape the Loaf: Gently punch down the dough. Divide it into three equal pieces. Roll each piece into a tight log. Place the three logs side-by-side in a greased 9×5 inch loaf pan, ensuring the seams face down.
- Second Rise: Cover the loaf pan loosely and let it rise again in a warm spot until the dough has crested about 1 inch above the rim of the pan, about 45 to 60 minutes.
- Bake: Preheat your oven to 350°F (175°C). Whisk the egg yolk and 1 tablespoon of milk together for the egg wash. Gently brush the top of the dough with the wash.
- Bake for 30 to 35 minutes, or until the top is deep golden brown and the internal temperature reaches 200°F (93°C). If the top browns too quickly, loosely tent it with foil.
- Cool: Immediately remove the bread from the pan and let it cool completely on a wire rack before slicing.
Notes
- For the softest texture, use the Tangzhong method as described; it traps moisture, which is the secret to this bread staying fresh.
- If you do not have a stand mixer, you can knead this dough by hand for about 15 minutes until smooth.
- This bread is excellent sliced thin for sandwiches or toasted with butter.
Nutrition
- Serving Size: 1 slice
- Calories: 180
- Sugar: 5g
- Sodium: 150mg
- Fat: 5g
- Saturated Fat: 3g
- Unsaturated Fat: 2g
- Trans Fat: 0g
- Carbohydrates: 29g
- Fiber: 1g
- Protein: 5g
- Cholesterol: 25mg