
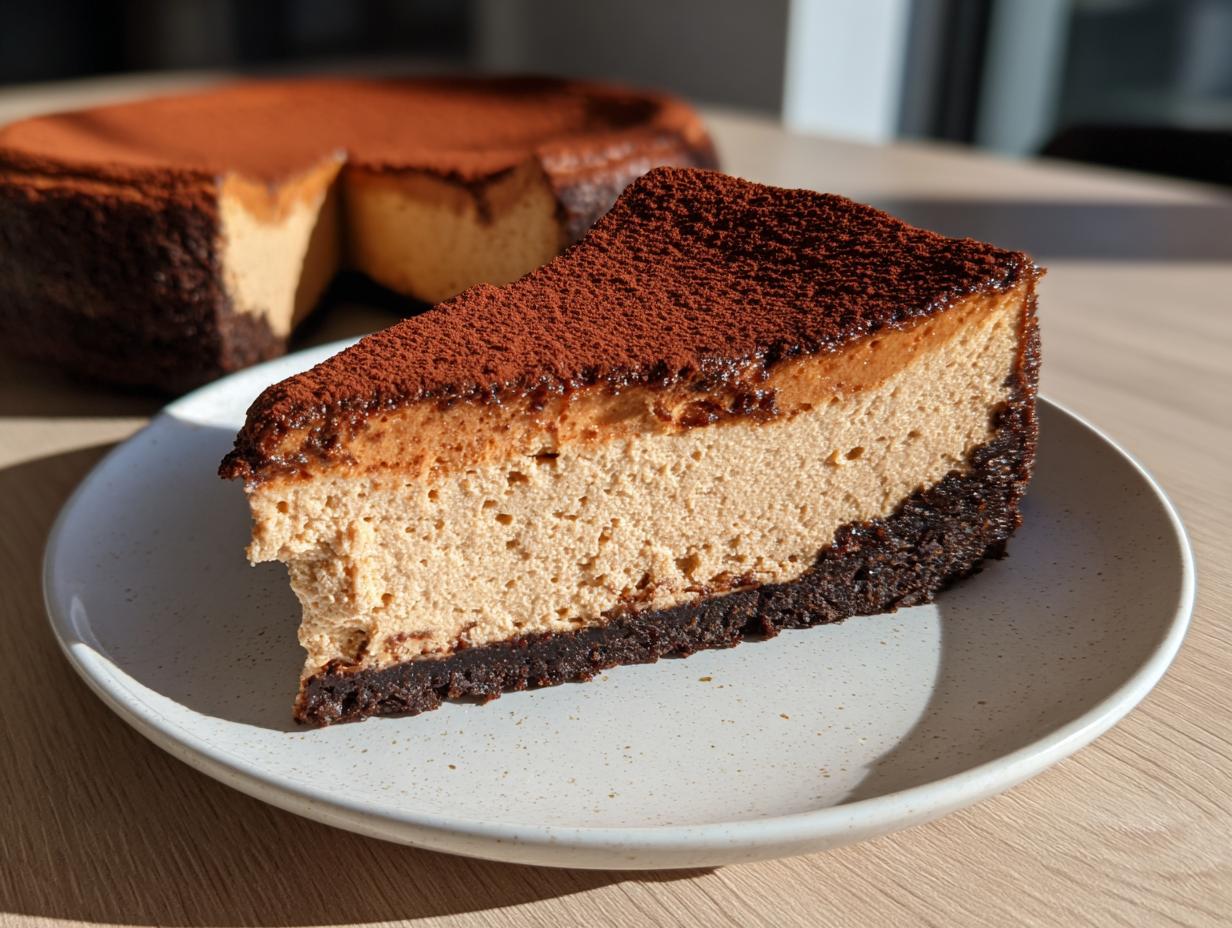
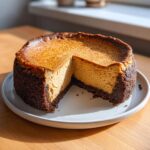
There’s just nothing quite like the satisfaction of cutting into a dessert that looks absolutely perfect—that smooth, cool slice that promises indulgence. For years, my family has asked for something truly special when we gather, and I finally landed on my absolute favorite: a rich, deeply flavorful coffee cheesecake. When I first tried combining that smooth tang of classic cheesecake with the robust aroma of strong espresso, I knew I had hit gold. It took a few tries—we don’t want bitter, we want bold!—but I figured out the secret to getting that perfect balance for our holiday gatherings. If you loved my famous sugar cookie cheesecake, get ready for something even more sophisticated. Trust me, this baked version is reliably creamy and utterly decadent every single time you make it.

- Why This Baked Coffee Cheesecake Recipe Works So Well
- Gathering Ingredients for Your Creamy Coffee Cheesecake Recipe
- How to Prepare Your Homemade Coffee Flavored Cheesecake
- Tips for Deep Coffee Flavor Cheesecake Success
- Baked vs No Bake Coffee Cheesecake Options
- Serving Suggestions for Your Gourmet Coffee Dessert Inspiration
- Storing and Reheating Your Coffee Cheesecake
- Frequently Asked Questions About Making Coffee Cheesecake
- Estimated Nutritional Data for This Weekend Baking Coffee Treat
Why This Baked Coffee Cheesecake Recipe Works So Well
When I developed this creamy coffee cheesecake recipe, reliability was my main goal. I needed something that tasted gourmet but didn’t require a culinary degree. Here’s why this method is my go-to for any special occasion:
- The texture is reliably smooth and never grainy.
- We nail that perfect espresso-to-cream cheese flavor ratio every time. No bitterness allowed!
- The essential water bath technique ensures a crack-free top, making it look stunning.
It truly makes for a show-stopping centerpiece among all your decadent coffee dessert recipes. If you’ve ever tried my Bailey’s Trifle, you know I love a rich profile like this one.
Gathering Ingredients for Your Creamy Coffee Cheesecake Recipe
Okay, before we even think about turning on the mixer, let’s talk quality. Making a truly great coffee cheesecake means using good ingredients—especially that coffee! If you are using instant powder, make sure it’s a good brand because that flavor really pops through. Remember that your success as a home baker really hinges on getting your cream cheese softened completely; cold cream cheese is the enemy of smooth cheesecake, period. Gather everything up, set your butter out early, and brew that espresso concentrate. When you have everything ready to go, the actual mixing part flies by! You can check out my favorite cinnamon roll cheesecake recipe for another must-have ingredient list.
Crust Components
- 1 1/2 cups graham cracker crumbs
- 1/4 cup granulated sugar (for crust)
- 6 tablespoons unsalted butter, melted
Smooth Cheesecake Filling Ingredients
- 3 (8 ounce) packages cream cheese, softened (this is key!)
- 1 1/2 cups granulated sugar (for filling)
- 1/4 cup all-purpose flour
- 1 teaspoon vanilla extract
- 1/2 cup strong brewed espresso or 2 tablespoons instant espresso powder dissolved in 2 tablespoons hot water
- 3 large eggs
- 1/4 cup sour cream
How to Prepare Your Homemade Coffee Flavored Cheesecake
Alright, let’s get baking! This step-by-step process is what guarantees you get that perfectly smooth, creamy result for your homemade coffee flavored cheesecake. Don’t rush the steps, especially when it comes to the water bath—that steam is pure magic for keeping things silky. If you’ve been looking for a reliable cheesecake bar recipe, this technique will translate well!
Building and Pre-Baking the Crust
First things first, get that oven warmed up to 325°F. Wrap your 9-inch springform pan super tight in heavy foil—we’re going to use the water bath method, and we absolutely cannot have leaks! Mix your crumbs, sugar, and melted butter until it looks like wet sand, then press it firmly into the bottom of the pan. A flat-bottomed glass works great for packing it in tight. Pop that base into the oven for just 10 minutes, then take it out to cool while you tackle the filling.
Mixing the Rich Mocha Cheesecake Filling
In a big bowl, beat that softened cream cheese until it’s totally smooth—no lumps allowed! *Then* slowly beat in your sugar and flour. Now, mix in that potent cooled espresso. The most important part is the eggs: add them one by one, mixing gently just until they disappear. If you mix too fast or too long here, you’ll whip air in, and that’s how cracks start! Finish by folding in the sour cream gently.
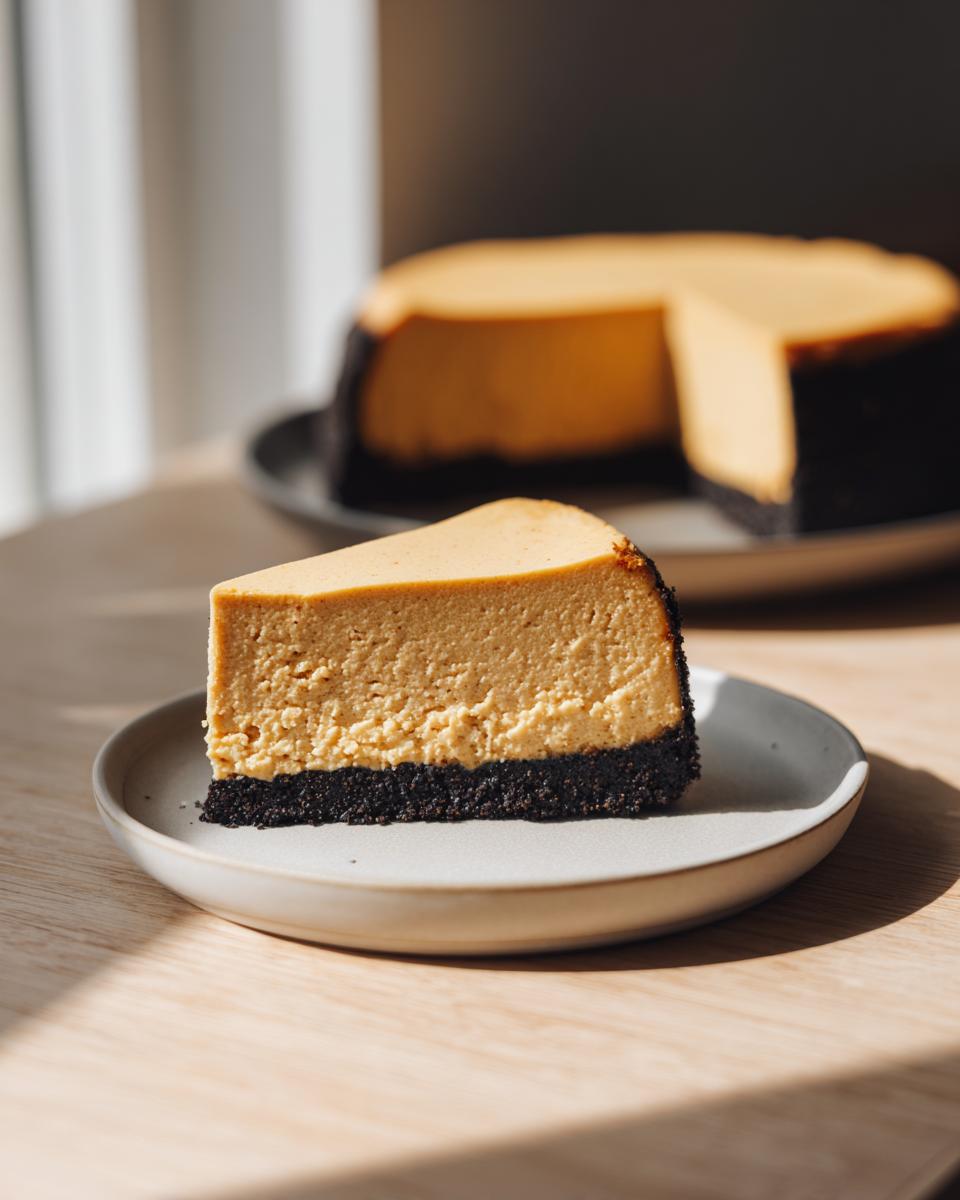
Baking the Coffee Cheesecake with a Water Bath
Pour that gorgeous batter over your pre-baked crust. Now for the security blanket: place the foil-wrapped springform pan inside a larger roasting pan. Carefully pour hot water into the outer roasting pan until it comes halfway up the side of the springform. Bake this setup for about 55 to 65 minutes. You’ll know it’s nearly done when the edges look set, but the very center still has a slight wobble when you nudge the pan.
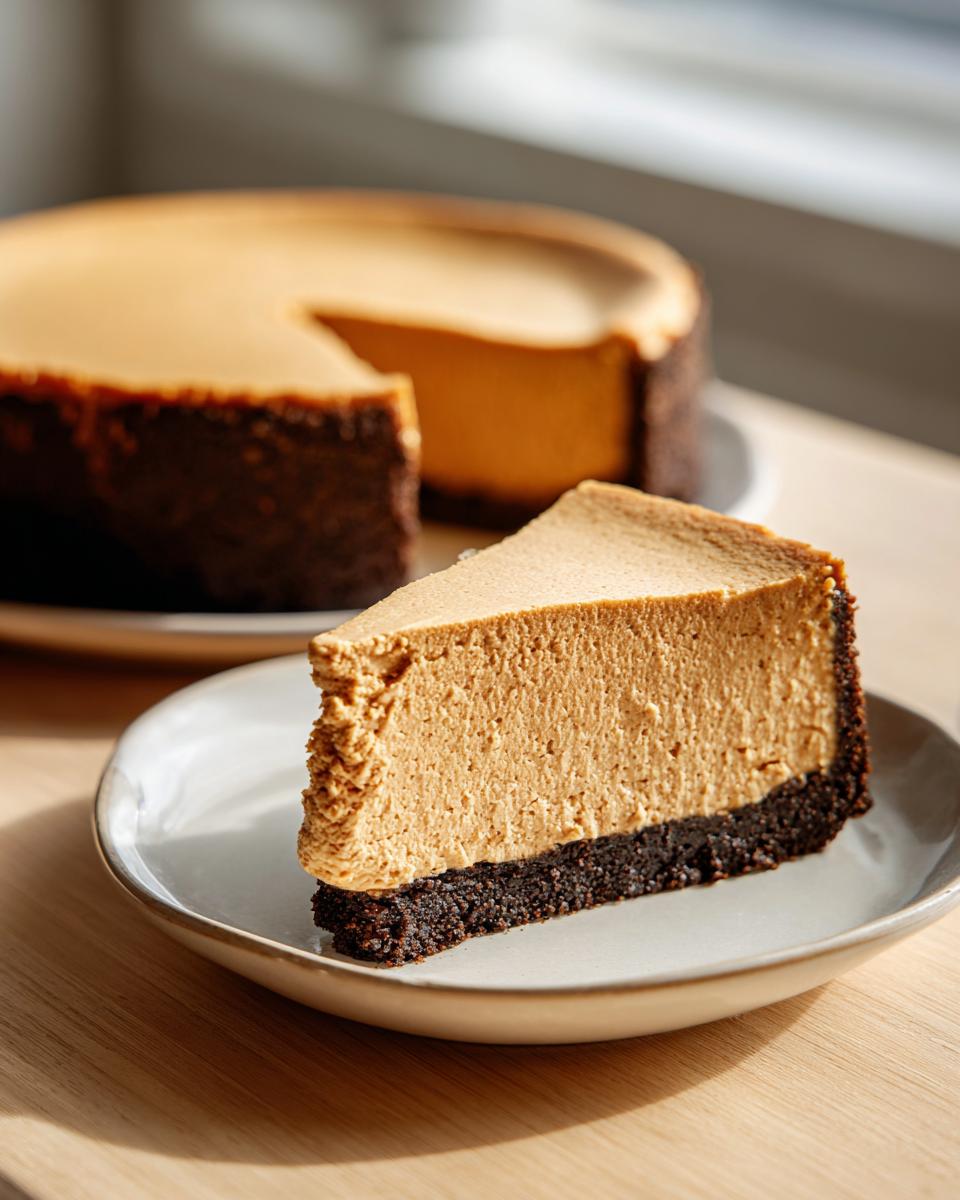
Cooling and Chilling for Perfect Texture
Listen, this is where most people rush, and that’s why they get cracks! Turn your oven off, crack the door open just a bit, and let the cheesecake chill in that warm, steamy environment for a full hour. Seriously, don’t skip this transition time! After that hour, pull it out, let it cool on the counter completely, and then move it to the fridge for a minimum of six hours, but overnight is always best for that firm, incredible texture.
Tips for Deep Coffee Flavor Cheesecake Success
The secret to a truly unforgettable coffee cheesecake isn’t just about sticking to the recipe; it’s about knowing how to tweak that wonderful coffee note to your taste. I learned early on that the quality of your beans makes all the difference when baking with coffee in cheesecake. If you can splurge on a really high-quality espresso, do it! The smoothness really comes through.
For those of you who like that deep, almost intense java kick, I’ve got an easy insider trick from my notes. If you want to intensify that glorious flavor without changing the liquid ratios too much, bump that espresso powder up. The recipe calls for two tablespoons, but if you’re aiming for a really rich mocha cheesecake experience, try three tablespoons dissolved in your hot water. Wow, does that sing!
Also, a quick note on chilling: these robust flavors actually deepen as the cheesecake rests. That six-hour minimum chill time is really when the coffee flavor marries perfectly with the tang of the cream cheese. Don’t be tempted to cut it short! You can explore some other amazing coffee flavors with my pistachio coffee cake recipe if you want more caffeine inspiration.
Baked vs No Bake Coffee Cheesecake Options
Now, I know what some of you busy bees are thinking: Can I skip the water bath and just chill this magnificent dessert? Yes, you absolutely can! While this recipe is structured for baking, that little note in my recipe card gives us a shortcut. If you skip the entire oven part, you’re heading toward an easy no bake coffee dessert.
The main difference is texture. Baked gives you that dense, silky structure we worked so hard for. No-bake is lighter, fluffier, and relies on chilling completely, usually needing about 8 hours in the fridge after pouring the filling over that crust. You can check out my thoughts on other quick chilled treats, like my no-bake bourbon balls, if you prefer speed!
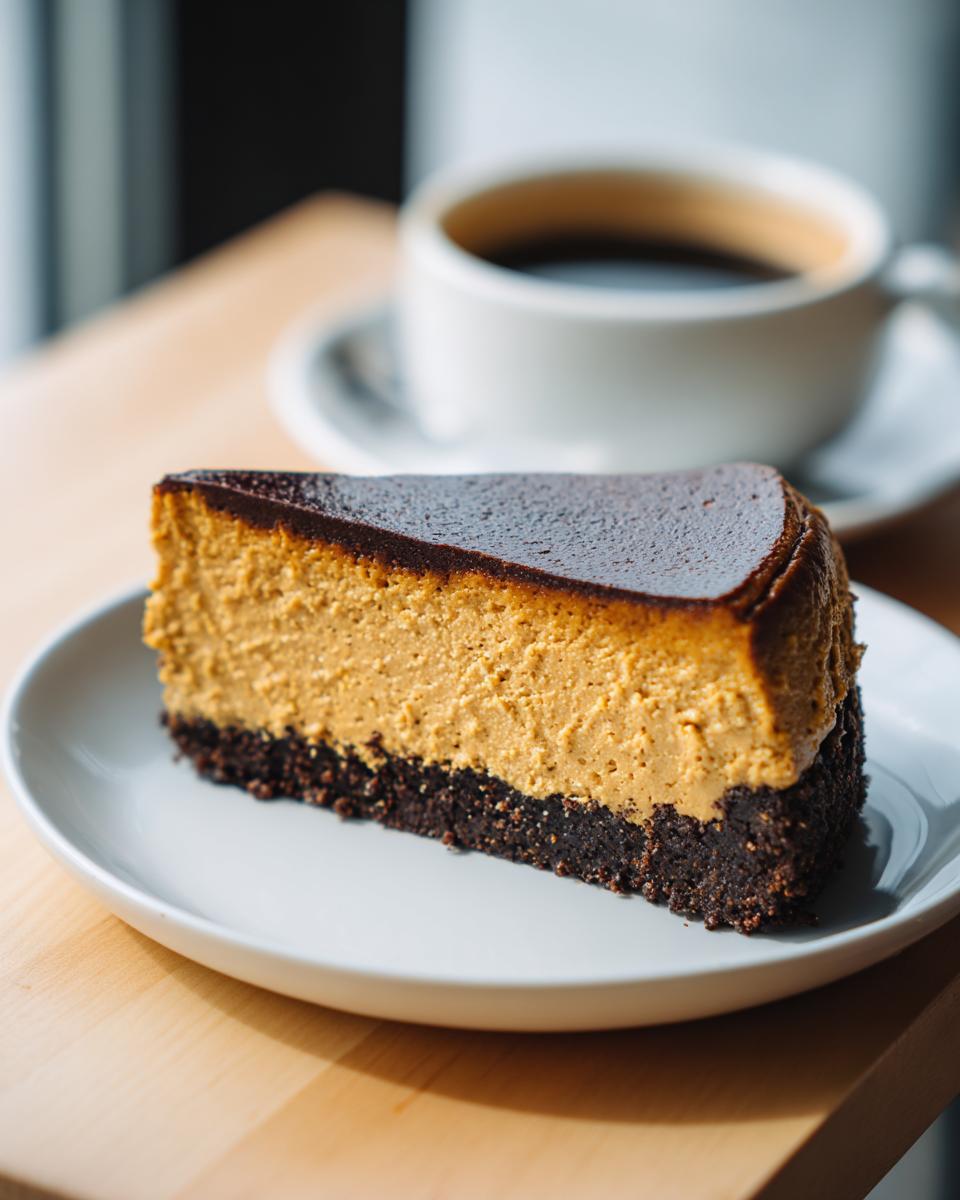
Serving Suggestions for Your Gourmet Coffee Dessert Inspiration
The best part of making a truly great dessert is deciding how to present it! This coffee cheesecake is rich enough to stand on its own, honestly, but it loves a little companion. I mentioned earlier how a light chocolate ganache drizzle really transforms this into a beautiful rich mocha cheesecake idea. Just melt good quality dark chocolate with a touch of heavy cream and let it drizzle artfully over the top.
If you aren’t feeling chocolate, a fresh dollop of unsweetened whipped cream cuts through that richness perfectly. For a little elevation in your next holiday gathering, try sprinkling some shaved dark chocolate or even a few crushed roasted coffee beans right before serving. It looks stunning next to my chocolate eclair cake on a dessert platter!
Storing and Reheating Your Coffee Cheesecake
Once you’ve managed to resist eating the entire thing, storing your beautiful coffee cheesecake is easy. Make sure it’s fully chilled first! Cover the springform pan tightly with plastic wrap or transfer slices to an airtight container. It stays perfectly fresh in the fridge for up to five days—that’s why it’s such a great make-ahead dessert for a weekend baking coffee treat. Honestly, though, nobody ever has leftovers!
If you must reheat a slice, let it sit on the counter for about 15 minutes to take the deep chill off; I’ve never needed to actually warm a slice of this creamy beauty up, as it’s best enjoyed straight from the cold.
Frequently Asked Questions About Making Coffee Cheesecake
I get so many questions about this recipe since I first shared my tips for a truly deep coffee flavor! It’s so exciting that so many of you are trying this homemade coffee flavored cheesecake. Here are some of the things I hear most often down in the comments section, including some advice on finding the best homemade desserts for your next big event.
Can I use regular brewed coffee instead of espresso in this creamy coffee cheesecake recipe?
That’s a great question about flavor intensity! Yes, you can definitely use regular brewed coffee, but you have to make it *strong*. Think of it like a highly concentrated shot of flavor. If you use your standard coffee maker drip, the final cheesecake might taste a little weak or watery. I usually recommend using half the amount of liquid and brewing what you do use very strong. If you are worried about testing flavors, stick to the instant espresso powder for foolproof results. It really helps achieve that perfect flavor profile found in my creamy coffee cheesecake recipe.
What is the best crust pairing for a rich mocha cheesecake?
For this specific recipe, the graham cracker crust I listed really works because its mild sweetness lets the coffee shine through. But if you want to lean into that dark, rich experience and make it a true rich mocha cheesecake idea, you absolutely have to try using chocolate wafer cookies or Oreos! Just replace the graham cracker crumbs with the same amount of crushed chocolate cookies, and you have an instant, darker base that complements the cocoa notes beautifully.
How do I prevent my cheesecake from cracking during baking?
Ah, the dreaded crack! This is the single most common fear when making a baked cheesecake, but honestly, my espresso cheesecake tutorial covers the two non-negotiable steps for a smooth top. First, use that water bath—the steam ensures even cooking, preventing the surface from drying out and pulling apart. Second, the slow cool-down period is huge! Turning the oven off and letting it sit inside for an hour is my secret weapon. That slow temperature adjustment is the key to avoiding those telltale fissures!
Estimated Nutritional Data for This Weekend Baking Coffee Treat
I always feel a little bit guilty sharing these numbers because cheesecake is definitely an indulgence, but I know some of you lovely readers like to keep track! Remember, these figures are just estimates based on the ingredients listed for this rich, baked coffee cheesecake. If you use full-fat sour cream or add a thick chocolate drizzle, those numbers will shift a bit. I always keep a copy of the recipe handy when planning out meals for the week, especially when planning a big weekend breakfast!
Here is exactly what the breakdown looks like for one generous slice:
| Nutrient | Amount Per Serving |
|---|---|
| Calories | 410 |
| Fat | 28g |
| Saturated Fat | 17g |
| Carbohydrates | 35g |
| Sugar | 32g |
| Protein | 7g |
| Cholesterol | 115mg |
Rich Baked Coffee Cheesecake Recipe
Follow this straightforward tutorial to make a creamy, baked cheesecake infused with deep coffee flavor. This recipe balances rich espresso notes with a smooth, tangy filling.
- Prep Time: 20 min
- Cook Time: 65 min
- Total Time: 7 hours 25 min
- Yield: 12 servings 1x
- Category: Dessert
- Method: Baking
- Cuisine: American
- Diet: Vegetarian
Ingredients
- 1 1/2 cups graham cracker crumbs
- 1/4 cup granulated sugar (for crust)
- 6 tablespoons unsalted butter, melted
- 3 (8 ounce) packages cream cheese, softened
- 1 1/2 cups granulated sugar (for filling)
- 1/4 cup all-purpose flour
- 1 teaspoon vanilla extract
- 1/2 cup strong brewed espresso or 2 tablespoons instant espresso powder dissolved in 2 tablespoons hot water
- 3 large eggs
- 1/4 cup sour cream
Instructions
- Preheat your oven to 325 degrees F. Wrap the outside of a 9-inch springform pan tightly with heavy-duty aluminum foil.
- Prepare the crust: Mix graham cracker crumbs, 1/4 cup sugar, and melted butter in a bowl. Press the mixture firmly into the bottom of the prepared springform pan. Bake for 10 minutes. Let cool slightly.
- Prepare the filling: In a large bowl, beat the softened cream cheese with an electric mixer until smooth. Gradually beat in the 1 1/2 cups sugar and flour until just combined.
- Mix in the vanilla extract and the prepared espresso liquid. Beat on low speed until smooth.
- Add the eggs one at a time, mixing just until each egg is incorporated. Do not overmix. Gently stir in the sour cream.
- Pour the filling over the cooled crust. Place the springform pan into a larger roasting pan. Carefully pour hot water into the roasting pan until the water reaches halfway up the sides of the springform pan (this is a water bath).
- Bake for 55 to 65 minutes, or until the edges are set but the center still jiggles slightly when gently nudged.
- Turn off the oven, crack the oven door open, and let the cheesecake cool inside the oven for 1 hour. This prevents cracking.
- Remove the cheesecake from the water bath and cool completely on a wire rack. Chill in the refrigerator for at least 6 hours, or preferably overnight, before serving.
Notes
- For a deeper coffee flavor, use 3 tablespoons of instant espresso powder dissolved in the water.
- If you prefer a no-bake version, skip the oven steps and chill the filling for 8 hours after pouring it over the crust.
- Use high-quality cream cheese for the best creamy texture.
- Serve this decadent coffee dessert with a light chocolate ganache drizzle for a mocha cheesecake finish.
Nutrition
- Serving Size: 1 slice
- Calories: 410
- Sugar: 32
- Sodium: 280
- Fat: 28
- Saturated Fat: 17
- Unsaturated Fat: 11
- Trans Fat: 0
- Carbohydrates: 35
- Fiber: 1
- Protein: 7
- Cholesterol: 115