
If you’ve been on the internet at all lately, you’ve seen it: that gorgeously dark, dramatically rustic dessert that looks both perfectly baked and slightly chaotic all at once. I’m talking about the famous Basque Cheesecake! It’s everywhere, and honestly, I get the hype. But when you’re balancing school pickups and dinner prep, you don’t need complicated water baths or finicky crusts. That’s why I spent weeks perfecting this crustless, incredibly creamy center version right here in my home kitchen. Trust me, making this show-stopping Spanish Cheesecake is surprisingly simple, and I promise it will be your new favorite no fuss dessert.
- Why This Easy Basque Cheesecake Recipe Works Every Time
- Ingredients for Your Perfect Basque Cheesecake Recipe
- How to Make Basque Cheesecake: Step-by-Step Instructions
- Tips for Success with Your Basque Cheesecake
- Storage and Serving Suggestions for Creamy Cheesecake
- Troubleshooting Common Issues in Making Basque Cheesecake
- Frequently Asked Questions About This Easy Cheesecake Recipe
- Nutritional Estimates for Basque Cheesecake
- Share Your Creamy Basque Cheesecake Creations
Why This Easy Basque Cheesecake Recipe Works Every Time
I know it looks like something you’d only find at an expensive bakery in San Sebastian, but that’s the magic of this Basque Cheesecake. It’s designed for home cooks who want maximum wow factor with minimal effort. We skip tricky steps, like making a graham cracker crust, which means less mess for me! Here’s why this approach is foolproof:
- It relies on high heat for the signature look, not long baking times.
- Every ingredient needs to be warm, which helps everything blend beautifully.
- You mix just enough to combine—no whipping air into this cake!
Achieving the Signature Caramelized Top Dessert
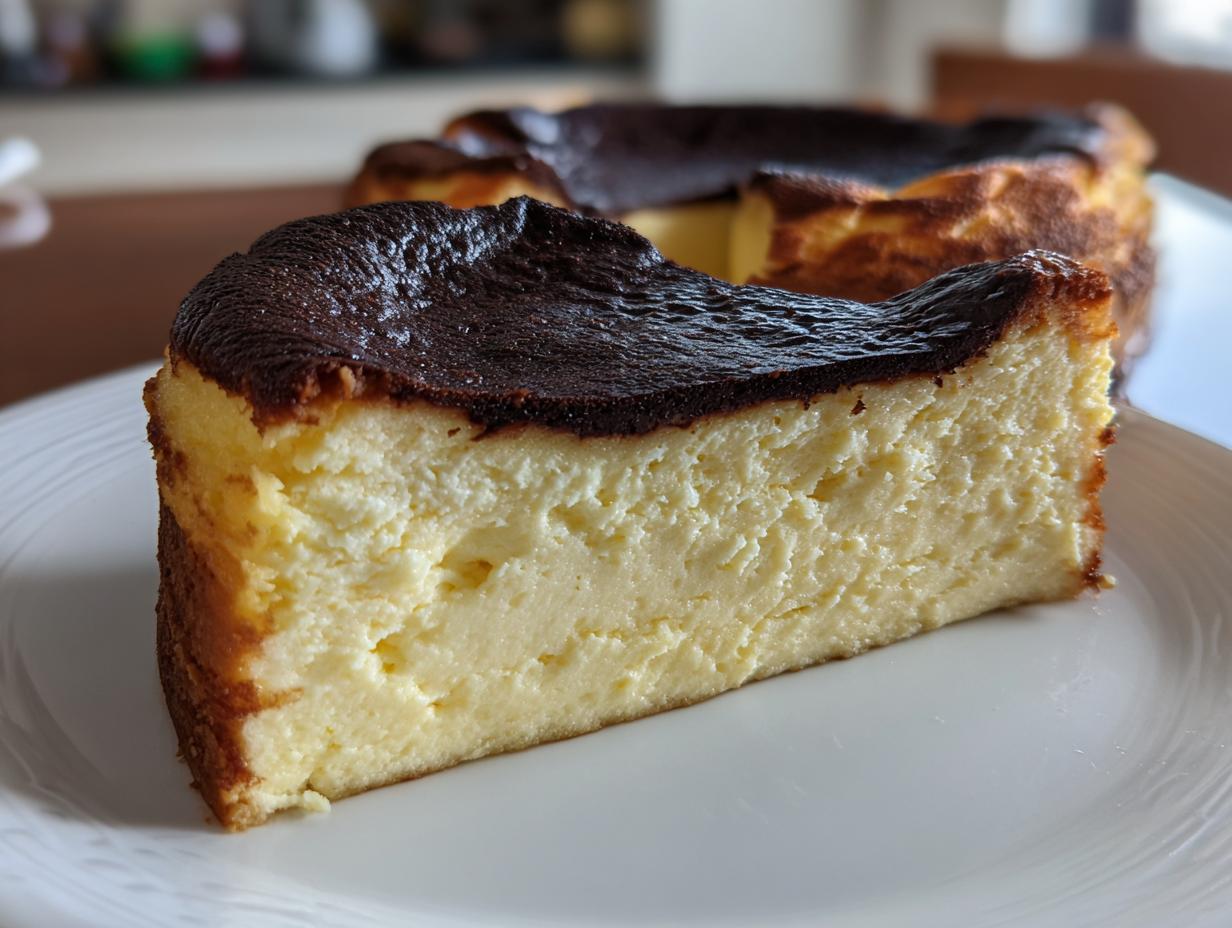
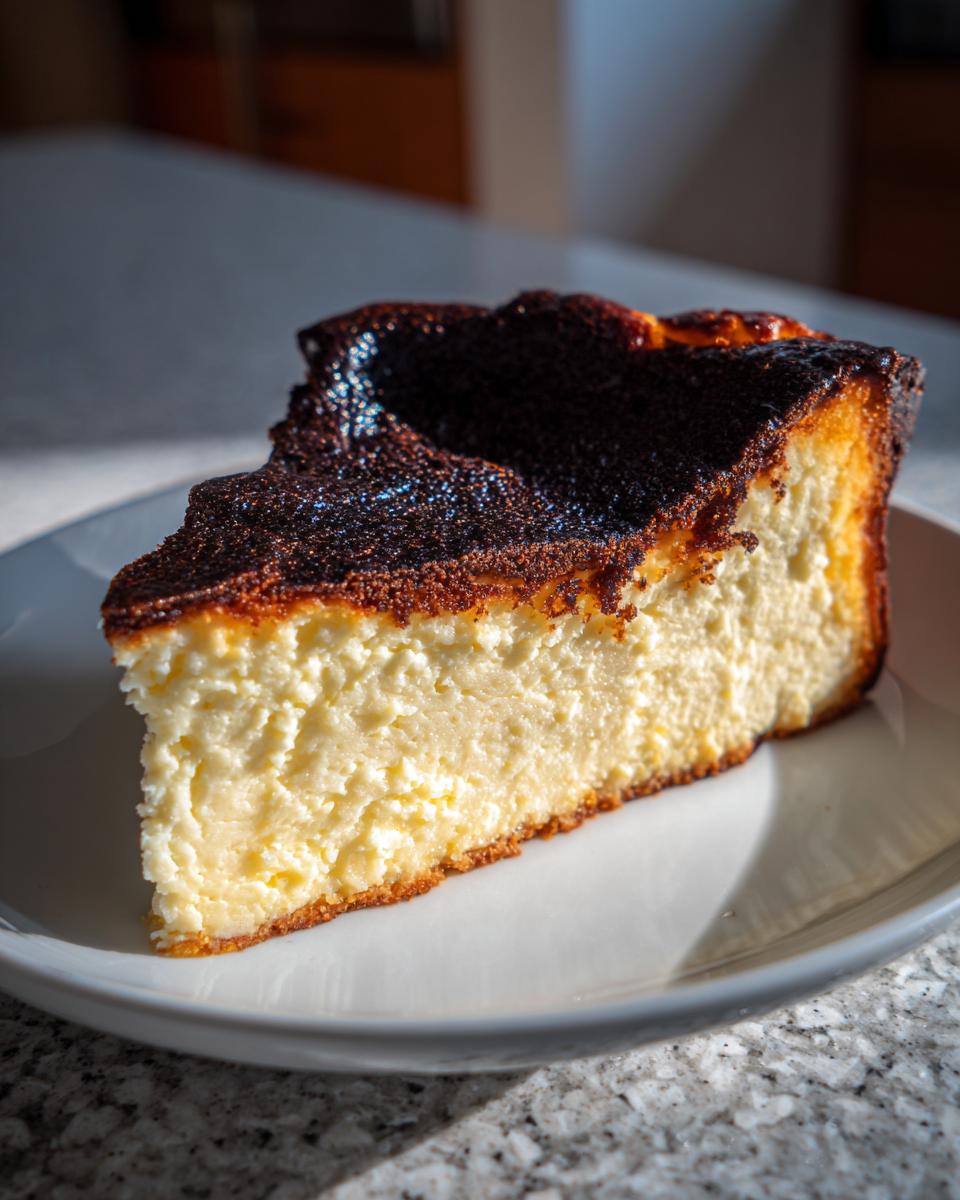
The truth is, if the top of your cheesecake isn’t dark brown, almost black in spots, you haven’t made a true Basque style dessert! Don’t panic when you see that color coming out of the oven. That deep caramelization gives it that slightly smoky, bittersweet contrast to the sweet, rich inside. We achieve this look by using a super hot oven. It’s all about managing the high heat so the outside darkens quickly while the inside stays liquid and custardy. It’s an expert trick made totally accessible here.
The Secret to a Truly Creamy Cheesecake Center
The difference between a good cheesecake and an amazing, silky one is air—or rather, the *lack* of it! For this creamy cheesecake, you need to treat your cream cheese and eggs like they are precious. Make sure they are fully at room temperature before you start mixing. If you beat them too hard, those tiny air bubbles get incorporated, and you end up with a structure more like a New York Cheesecake, not the luscious Spanish Cheesecake interior we are aiming for. Low and slow mixing is your friend here!
Ingredients for Your Perfect Basque Cheesecake Recipe
Okay, friends, let’s look at what you need for this showstopper. The great thing about this specific Basque Cheesecake Recipe is that you probably have half this stuff already! Because we aren’t managing a crust, all our focus goes into getting that filling absolutely perfect. I always lay my ingredients out on the counter while the oven preheats just so I don’t forget the note about room temperature.
Essential Components of a Crustless Cheesecake
Remember, the quality of the dairy really matters here since there are so few ingredients to hide behind! When shopping, grab the very best full-fat cream cheese you can find. Low-fat just won’t give you that signature creamy melt we love in a San Sebastian Cheesecake.
Here is what I measure out:
You’ll need 1.5 lbs (that’s 680 grams) of full-fat cream cheese, and make absolutely sure it’s softened, softened, softened! For sweetness, grab 1 cup (200 grams) of regular granulated sugar. We use four large eggs here, and yes, they must also be at room temperature for that smooth batter flow. Liquids include 1 1/4 cups (300 milliliters) of heavy cream and just 1 teaspoon of vanilla extract for flavor.
Lastly, for structure, we need just a touch of binder: 1/4 cup (30 grams) of all-purpose flour. I always remind folks to sift that flour right over the bowl so you don’t end up with little flour pockets in your smooth batter! And don’t forget a pinch of salt to wake everything up.
How to Make Basque Cheesecake: Step-by-Step Instructions
Alright, here is where we turn those beautiful ingredients into the famous Basque Cheesecake! Don’t let the high oven temperature scare you; that’s the key to getting that beautiful burnt look we want. We are going to move quickly during the mixing stage, which is why having everything ready beforehand is so important. Follow these steps exactly, and you’ll have that dreamy, custardy texture from the San Sebastian region in your own oven.
Preparation: Lining the Pan for Rustic Basque Cheesecake
First things first: the oven needs to be seriously hot! Go ahead and set it to 400°F (that’s 200°C). Now, for the pan. You need a 9-inch springform pan, but we aren’t doing a crust, so the paper is our friend. I use two big sheets of parchment paper—and I mean *big*. Layer them over the pan so they cross in the middle, letting the paper stick up way over the edges. Don’t try to smooth it out! Let those sheets wrinkle and crinkle up the sides naturally. That rustic, uneven look is exactly what you want for an authentic appearance. It keeps the cake looking homemade, which is far superior to anything perfectly neat, in my opinion.

Mixing the Batter for a Smooth Custard Style Cheesecake
Grab your mixer, but remember what I always say: we are mixing, not whipping! We want a Custard Style Cheesecake, not an airy sponge. Start with your totally softened cream cheese in a large bowl. Beat it until it’s completely smooth—no lumps allowed! Scrape down those sides, even if you think you don’t need to.
Next, add your sugar and beat it in quickly, just until it looks creamy. Now, introduce the eggs. This is important: add them one at a time, and only move to the next egg once the previous yolk has completely disappeared into the batter. Keep the mixer speed low! After the eggs, gently pour in the heavy cream and vanilla. Mix gently until it all looks familiar.
Finally, sift your flour and salt right over the top of that creamy mess. Mix on low speed one last time until you see no white streaks of flour left. Stop right there! If you keep mixing, you’ll introduce too much air, and that ruins the silky texture that makes this Basque Cheesecake so famous.
Baking and Cooling the San Sebastian Cheesecake
Pour that beautiful, smooth batter into your paper-lined pan. It’s time for the intense heat! Slide that pan into your preheated 400°F oven and let it bake for 50 to 60 minutes. You are looking for a top that is deeply browned—I mean *dark*, almost charred perfection along the top. You need that caramelization!
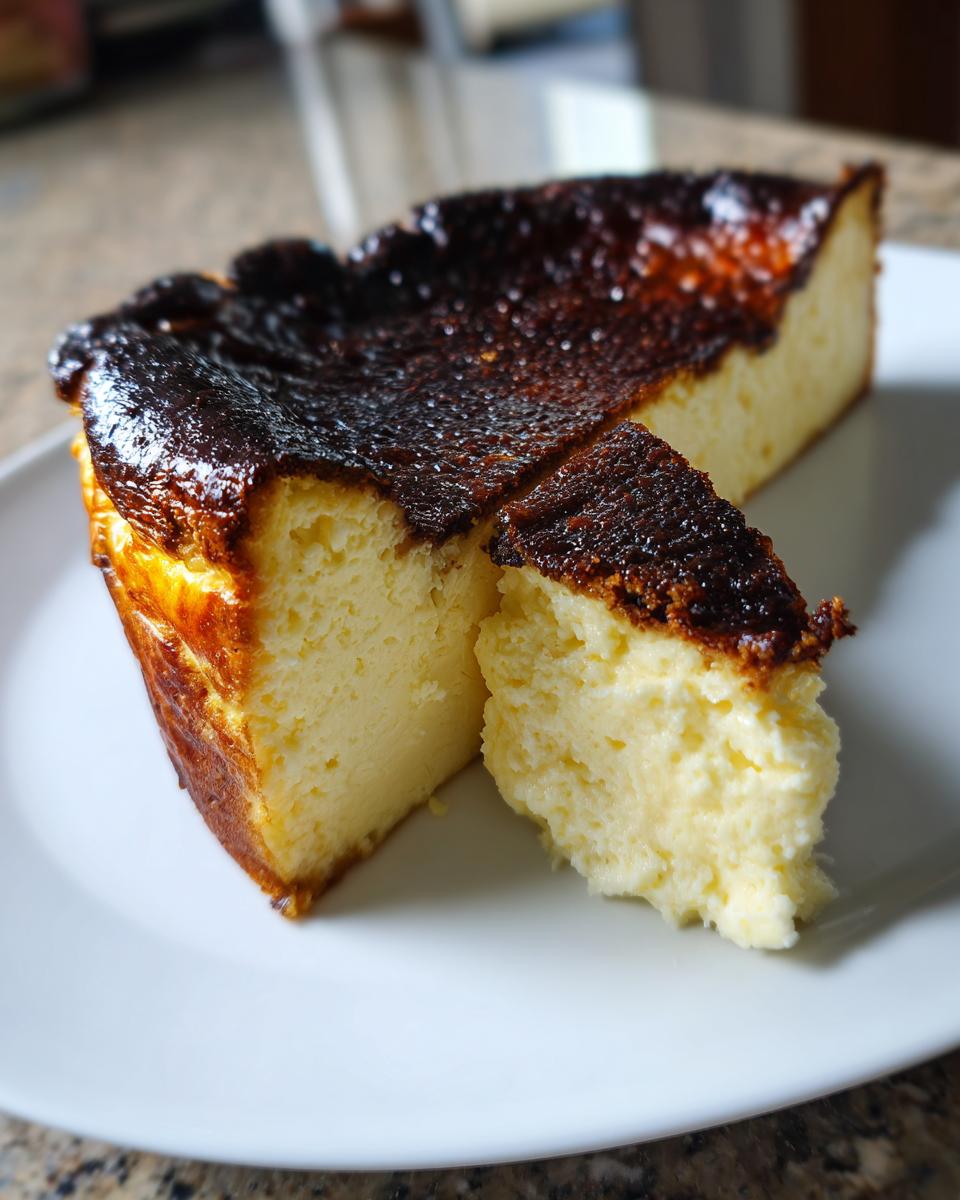
When you think it’s done, give the pan a gentle shake. The edges should look set, but the very center should still have a noticeable, wobble-y jiggle. That means it’s cooked perfectly inside. Once it comes out, put it on a wire rack and let it sit on the counter at room temperature for a good two hours. Yes, two hours! The cake will sink dramatically in the middle as it cools down; don’t worry, that’s exactly what the San Sebastian Cheesecake does. After that initial cool down, cover it loosely and put it into the fridge for at least 6 hours, or even better, overnight. That chilling time is crucial for the texture to fully set into that gorgeous, soft interior we crave.
Tips for Success with Your Basque Cheesecake
You’ve mastered the mix and you know to crank that oven up high, but there are always a few little things that take this incredible Basque Cheesecake from great to absolutely unforgettable. These little checks ensure you get that ultra-creamy experience every single time you bake it. We want perfection, right?
First, and I cannot stress this enough—I have been guilty of rushing this step myself! All your dairy needs to be at true room temperature. I mean, let the cream cheese sit out while you run errands. If the cream cheese is even slightly cold when you start mixing, you will get lumps. Lumps mean you’ll mix longer, mixing longer means more air, and more air means a dryer baked cheesecake, not the gooey treasure we are aiming for. Don’t fight the temperature!
Second, about that parchment paper. My favorite part of this recipe is how rustic it is, and that comes from the paper. Do not try to press it perfectly flat into the pan. Let it crinkle! I usually just lay two large pieces over each other in an ‘X’ shape and let it fold up the sides naturally. Those crinkles are going to look so chic when you serve this Burnt Cheesecake; it shows you made something truly artisanal.
Third, when it comes to tasting, you need to trust your eyes more than your timer for the final minute. The timer gets you close, but the look of the top is the real indicator. You want it highly caramelized—dark brown, almost black spots scattered around. If you pull it out and it looks like a pale blonde cheesecake, it’s undercooked for the signature style. Remember, that beautiful “burnt” look is the flavor booster we want in our Basque Cheesecake!
Storage and Serving Suggestions for Creamy Cheesecake
Okay, we’ve done the hard part—the baking is done! Now comes the part that drives me a little crazy, but I promise it’s worth the wait: cooling and chilling. This part is non-negotiable if you want that luxurious, melt-in-your-mouth texture. Don’t even think about slicing into this beautiful Basque Cheesecake when it’s still warm from the oven. You’ll end up with a soupy mess, and we worked too hard for that!
Remember how I told you to let it cool on the counter for two full hours after it comes out? That’s step one. After that, you absolutely must cover the pan loosely with some plastic wrap or foil and move it to the refrigerator. This Creamy Cheesecake needs a minimum of six hours in the cold to fully set up. Six hours sounds like forever when you’re staring at that caramelized top, I know! But honestly, if you can leave it overnight, you will be rewarded tenfold. The chilling process turns that wobbly, custardy center into what I call ‘set velvet.’
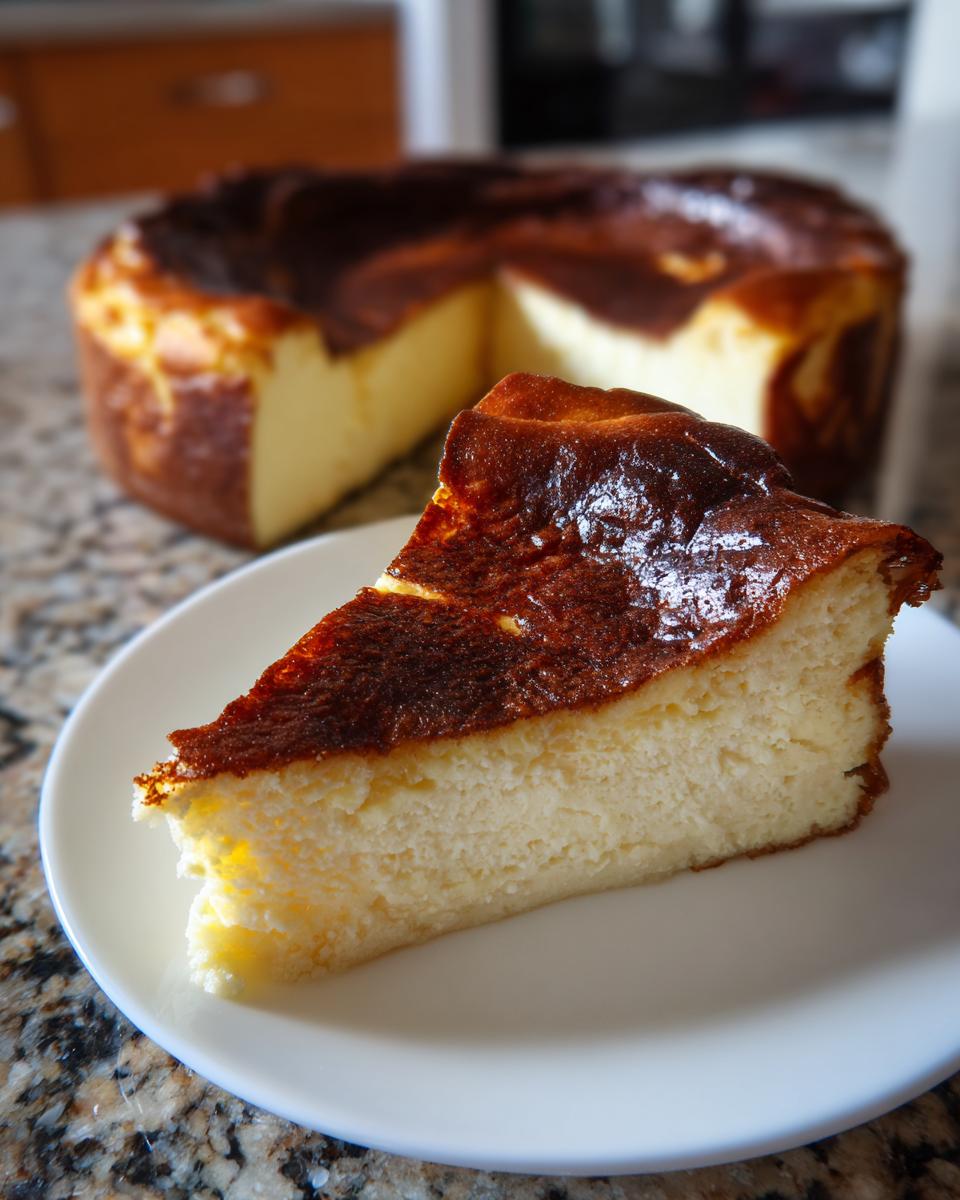
When it’s time to serve this rustic dessert, the presentation is super simple because the parchment paper does all the heavy lifting for you. Just carefully tear away those crinkly, tall sides of parchment paper. You don’t need any fancy topping, either. This San Sebastian Cheesecake is dynamite all on its own! If you feel like dressing it up, a scattering of fresh raspberries or blueberries works wonders because the bright fruit cuts through the richness perfectly.
Another way I love serving it, especially in the summer when things feel lighter, is with a drizzle. We talked about how simple things shine here, so don’t overcomplicate it. A light dusting of confectioner’s sugar is lovely, or a small bowl of lightly sweetened whipped cream on the side is always a hit. If you happen to be making my watermelon smoothie for dessert, that light, refreshing flavor contrasts beautifully with the deep caramel notes of the cheesecake. It’s all about balance, my friends!
Troubleshooting Common Issues in Making Basque Cheesecake
Even though I told you this Basque Cheesecake is forgiving, sometimes baking just throws us a curveball, right? Don’t you worry one bit about that! Anytime I’ve had a reader panic because their cake didn’t come out exactly like the picture, it usually boils down to three small things. We know the goal is that creamy center with the rustic, caramelized top dessert, and these tips will get you there. It drives me crazy when people think they’ve failed, but usually, it’s just a tiny tweak.
Here are the few things that sometimes trip people up when making this Spanish Cheesecake at home:
Why is my top too pale and not burnt enough?
This is probably the most common panic attack in the kitchen! If your top isn’t dark enough—I mean really deeply caramelized—it means your oven wasn’t hot enough, or maybe your rack placement was too low. Remember, we are going for high heat! If you notice it just isn’t darkening by the 45-minute mark, scoot the rack up closer to the broiler element (but keep a super close eye on it—we want burnt, not actually charred to ash!). I always recommend checking your oven temperature with a separate thermometer because I find many home ovens run cooler than they say. Trust me, getting that dark, bold color brings out the best flavor contrast in this Burnt Cheesecake.
Why did my center crack or sink too much?
If you see a giant crack across the top, it usually means one of two things happened during the mixing phase. Either you over-mixed the batter—remember, we want to incorporate almost zero air—or you over-baked it just a little bit. If you bake it until the center is completely firm, it will likely crack when it cools and contracts. For that perfect, set-but-wobbly middle, pull it out when the center still jiggles like Jell-O. It will firm up perfectly during the long chill time. If you’re worried about cracking, a little tip I learned from checking out other Burnt Basque Cheesecake recipes is to add a small dollop of sour cream right into the batter at the end—it adds insurance against dryness.
My batter looked too thin, even after adding the flour!
For this Easy Cheesecake Recipe, the batter is supposed to be much looser and thinner than a standard New York style cheesecake batter—it’s part of what makes it so creamy later. However, if it seemed watery, double-check your flour measurement. Did you scoop it straight from the bag, which packs it in? You must sift it first, as noted in the recipe, and measure it lightly. Too little flour and your cake won’t hold its shape enough during the bake, resulting in a puddle rather than a gently sinking dome. If you suspect the flour amount was off, unfortunately, the best fix is usually just starting over since the dairy ratios are so specific. But hey, even a wonky-looking Basque Cheesecake tastes amazing once chilled, so don’t toss it out!
If you used my guidance and still have questions, feel free to reach out via my recipe contact page here!
Frequently Asked Questions About This Easy Cheesecake Recipe
It’s so fun seeing everyone tackle this recipe! The Basque Cheesecake is definitely a showstopper, but when you’re dealing with high heat and a custardy interior, questions pop up. I’ve gathered the ones I get most often about this San Sebastian Cheesecake process. Don’t hesitate to ask more if you can’t find your answer below!
Can I use a different size pan for my Basque Cheesecake?
That is a really common question, especially if you don’t have a 9-inch springform pan handy! The short answer is yes, you absolutely can change the pan size, but you *must* adjust your baking time, and sometimes the temperature too. If you use a smaller pan, say a 7-inch one, the batter will be deeper, so it needs more time to set up in the middle. If you use a bigger pan, it spreads out thinner, and it cooks faster! For example, if you use a 9×13 inch pan, you might only need 35 to 40 minutes at that high heat. Just remember the rule: a deeper cake needs longer cooking time because heat has farther to travel to the center! For the best results, stick near the middle size, but if you go smaller, check it about 10 minutes sooner than the time listed in the recipe.
Why is my Burnt Cheesecake center still runny after chilling?
Oh, sweetie, if your center is runny after chilling, I need you to take a deep breath! First, let’s talk about the test when it comes *out* of the oven. Remember, even when it’s done baking, that center should still have a distinct, almost liquid jiggle. It’s supposed to look undercooked then! If it looks completely set when you pull it out, it will be firm and dry once chilled. Second, and most importantly: did you give it enough time in the fridge after cooling on the counter? Chilling is non-negotiable for this dessert because it’s a true Creamy Cheesecake, not a dense New York style one. It needs at least 6 hours, but overnight is truly the gold standard. That long, cold rest allows the custard to firm up into that perfect, silky texture. If it’s still runny after 12 hours in the fridge, then yes, you definitely under-baked it initially, but usually, overnight solves 99% of those “runny center” worries!
If you want to check out some other amazing tips for keeping this cake spot-on, I found a few great folks who know their stuff, like this guide on Basque Burnt Cheesecake from the experts.
If you’re looking for other foolproof easy cheesecake recipes that don’t require the high heat method, I have a few lighter ones on the site to try next, too!
Nutritional Estimates for Basque Cheesecake
Now, I know when we’re baking with cream cheese and sugar, we aren’t exactly aiming for diet food, are we? Ha! But I always feel like it’s important to have a general idea of what we are diving into. When you’re enjoying this rich, decadent treat—especially that deeply caramelized top dessert flavor—it’s good to know where you stand.
The estimates below are based on the recipe provided, assuming 8 generous slices. Remember, because this is a home-baked item with full-fat dairy, these are just educated guesses, not something you’d find on a certified ingredient label. Use these figures as a handy guide when planning your meals!
For one slice of this incredible Creamy Cheesecake, you’re generally looking at:
- Calories: About 450 per slice
- Fat: Roughly 35 grams (where most of that rich flavor comes from!)
- Carbohydrates: Around 25 grams
- Sugar: About 35 grams
- Protein: Approximately 7 grams
It’s certainly a show-stopper for a special occasion, not an everyday snack, that’s for sure! If you’re looking for something a little lighter on the macros but still satisfying, you might want to check out my recipe for the High-Protein Cheeseburger Bowl next week for a complete meal contrast!
Share Your Creamy Basque Cheesecake Creations
Oh, my goodness, seeing your bakes is truly the best part of my day! When I spend hours in my kitchen ensuring a recipe like this Basque Cheesecake is utterly dependable and delicious, knowing it makes it onto your family tables is why I do this whole thing. That perfectly caramelized top dessert contrasting with the creamy center? I just love seeing your versions of it!
Once you’ve let your cheesecake chill completely—and trust me, resisting that urge to cut into it early is the hardest part of this Easy Cheesecake Recipe—I would absolutely love for you to come back and leave a rating. If this recipe gave you that easy, rustic elegance you were hoping for, please tap those five stars! It really helps other home cooks find reliable recipes around here.
And if you took a stunning photo of your slice, perhaps showing off that gorgeous, silky interior, please tag me on social media! I try my best to keep up with all your shares. Knowing that my test kitchen advice helped you nail that tricky high-heat bake makes all the difference to me. If you have any lingering questions after using all the troubleshooting advice, don’t hesitate to send me a note through the contact page. Happy baking, everyone!
PrintEasy Basque Burnt Cheesecake Recipe: Creamy and Crustless
Make the famous Spanish San Sebastian Cheesecake at home. This recipe delivers a rich, creamy, custardy interior and a signature caramelized top without needing a crust. It is simple and beginner-friendly.
- Prep Time: 15 min
- Cook Time: 60 min
- Total Time: 75 min
- Yield: 8 servings 1x
- Category: Dessert
- Method: Baking
- Cuisine: Spanish
- Diet: Vegetarian
Ingredients
- 1.5 lbs (680g) full-fat cream cheese, softened to room temperature
- 1 cup (200g) granulated sugar
- 4 large eggs, room temperature
- 1 1/4 cups (300ml) heavy cream
- 1/4 cup (30g) all-purpose flour, sifted
- 1 teaspoon vanilla extract
- 1/4 teaspoon salt
Instructions
- Preheat your oven to 400°F (200°C). Line a 9-inch springform pan with two large sheets of parchment paper, letting the paper overhang significantly on all sides to create a rustic, crinkled edge.
- In a large bowl, beat the softened cream cheese with an electric mixer until completely smooth. Scrape down the sides of the bowl.
- Add the sugar to the cream cheese mixture and beat until just combined and creamy. Do not overmix.
- Add the eggs one at a time, mixing on low speed after each addition until the yolk disappears into the batter.
- Pour in the heavy cream and vanilla extract. Mix on low speed until just incorporated.
- Sift the flour and salt over the batter. Mix briefly on low speed until no streaks of flour remain. You want a smooth batter, but avoid incorporating too much air.
- Pour the batter into the prepared parchment-lined pan.
- Bake for 50 to 60 minutes. The top should be deeply caramelized, almost black in spots, and the center should still have a noticeable jiggle when you gently shake the pan.
- Remove the cheesecake from the oven. Let it cool completely on a wire rack at room temperature for about 2 hours. The center will sink as it cools.
- Once cool, cover the pan loosely and chill the Basque Cheesecake in the refrigerator for at least 6 hours, or preferably overnight, before serving.
- To serve, carefully remove the parchment paper sides and slice.
Notes
- Ensure all dairy ingredients, especially the cream cheese and eggs, are at true room temperature for the creamiest texture.
- Do not worry about the dark top; this caramelization is essential for the authentic flavor of this Spanish Cheesecake.
- For a truly rustic look, do not smooth the parchment paper perfectly into the pan; the crinkles are part of the charm.
Nutrition
- Serving Size: 1 slice
- Calories: 450
- Sugar: 35
- Sodium: 250
- Fat: 35
- Saturated Fat: 22
- Unsaturated Fat: 13
- Trans Fat: 0.5
- Carbohydrates: 25
- Fiber: 0
- Protein: 7
- Cholesterol: 180