
Are you tired? Seriously, I mean really tired of standing over a hot griddle, spatula in hand, flipping pancake after lonely pancake while the first ones you made get cold? That was my life every weekend! But since I started teaching full-time, I needed a serious upgrade for family breakfast. That’s why mastering sheet pan pancakes became my personal mission. Trust me, this baked pancakes recipe is the ultimate hack for turning out a beautiful, fluffy breakfast for a crowd without ever having to flip a single bite. It’s the quickest way I know to get everyone fed and sitting down to eat at the same time! If you are looking for more quick morning wins, check out my other easy breakfast recipes.
- Why You Will Love These Easy Sheet Pan Pancakes
- The Ultimate Ingredients for Fluffy Sheet Pan Pancakes
- How to Prepare Hassle Free Pancakes: Step-by-Step Instructions
- Making Sheet Pan Pancakes Using Mix: A Quick Morning Breakfast Hack
- Tips for Success with Your Baked Pancakes Recipe
- Variations: Sheet Pan Blueberry Pancakes and More
- Meal Prep Pancakes and Storage for Sheet Pan Pancakes
- Serving Suggestions for Your Sheet Pan Breakfast Bake
- Frequently Asked Questions About Sheet Pan Pancakes
Why You Will Love These Easy Sheet Pan Pancakes
When someone asks me why I ditched my enormous skillet for a baking sheet, I just point to this list. Honestly, this method changed my weekend mornings entirely!
- Zero Flipping Required! This is the big one. We call these oven pancakes because you just pour the batter in and let the oven do the heavy lifting. Seriously, no more juggling hot batter!
- Breakfast for a Crowd Made Simple: We’re talking about feeding 12 to 16 people with one standard half-sheet pan. Perfect for holidays or when grandparents stop by unexpectedly.
- Incredibly Quick Morning Breakfast: Prep time is only about 10 minutes, and then it’s hands-off time while it bakes. You can actually sit down and enjoy your coffee while these cook!
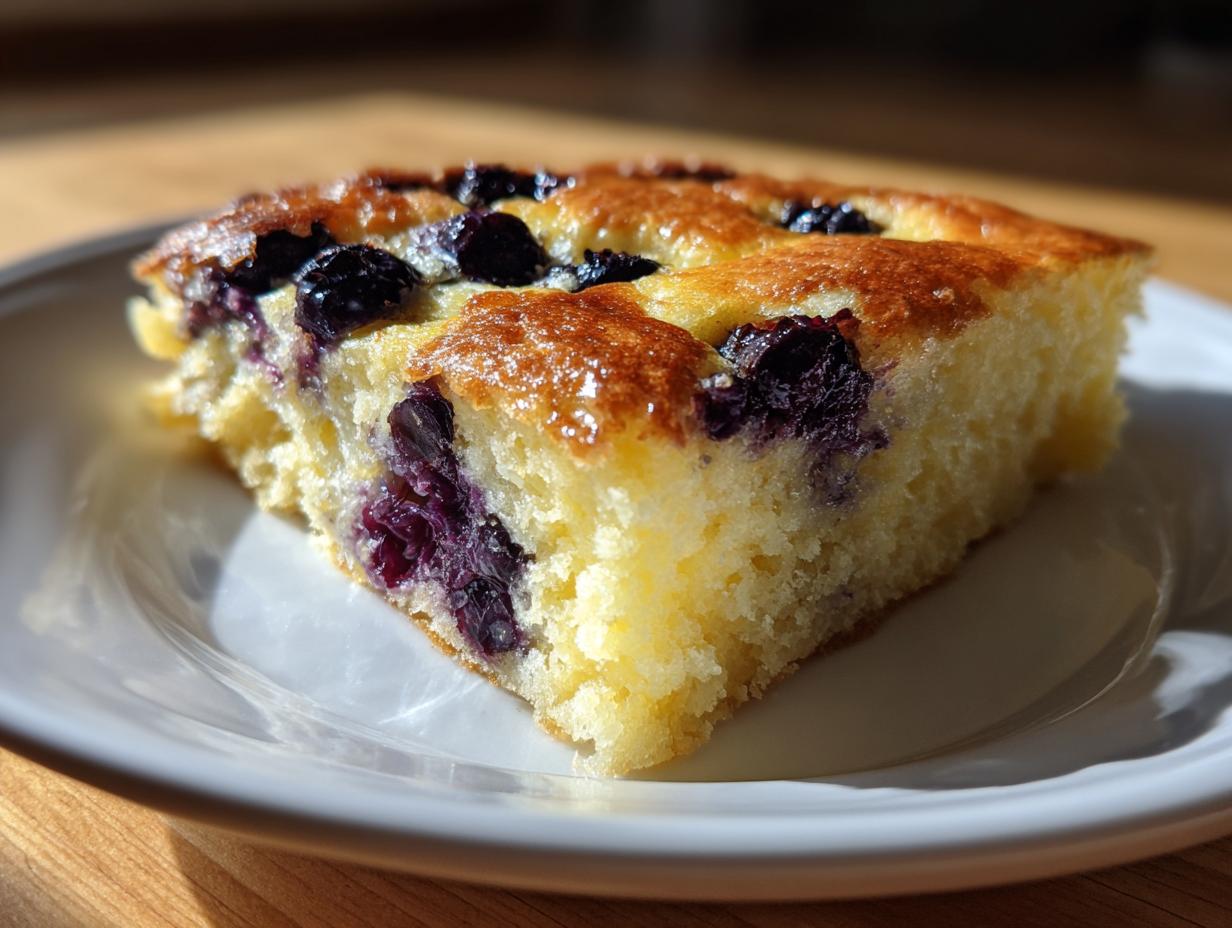
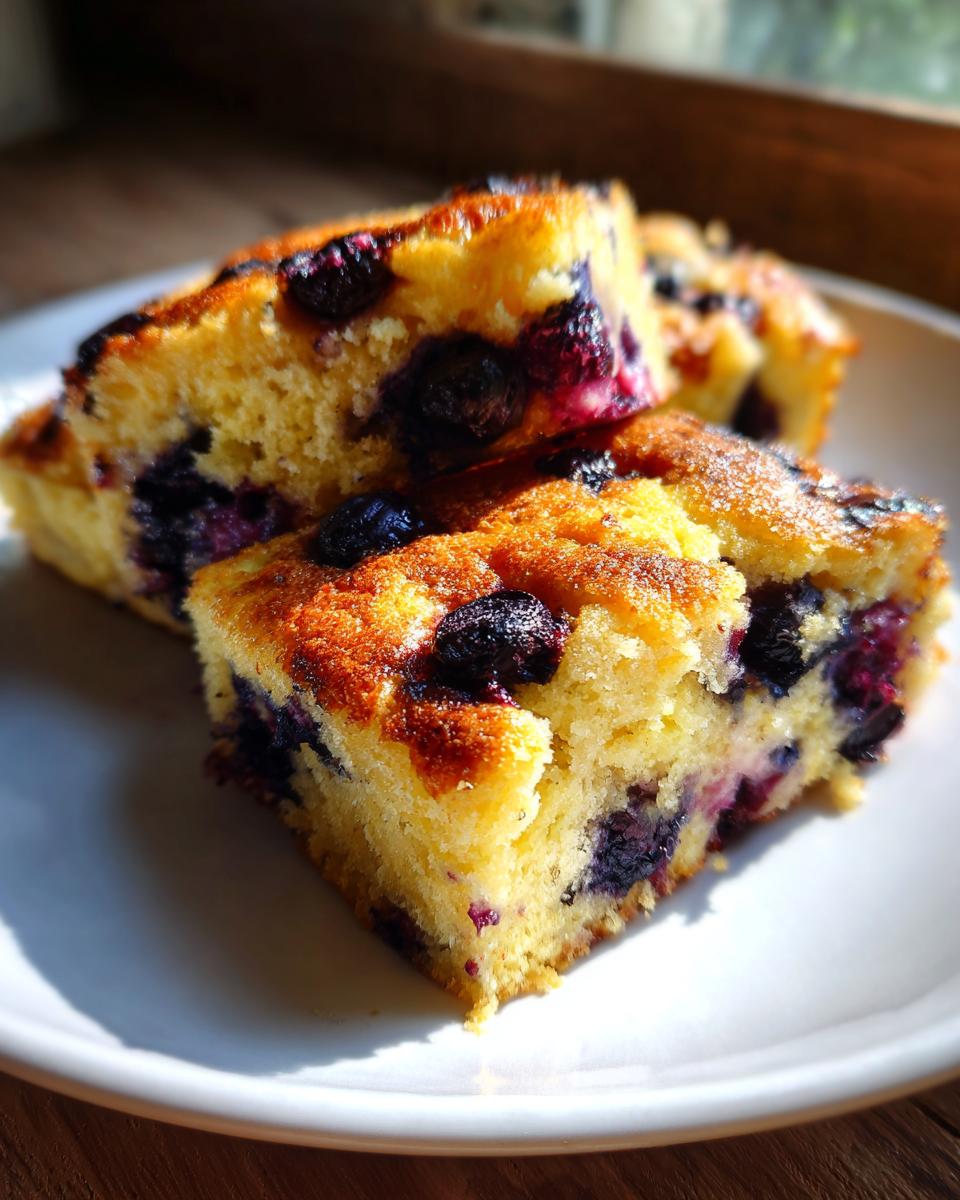
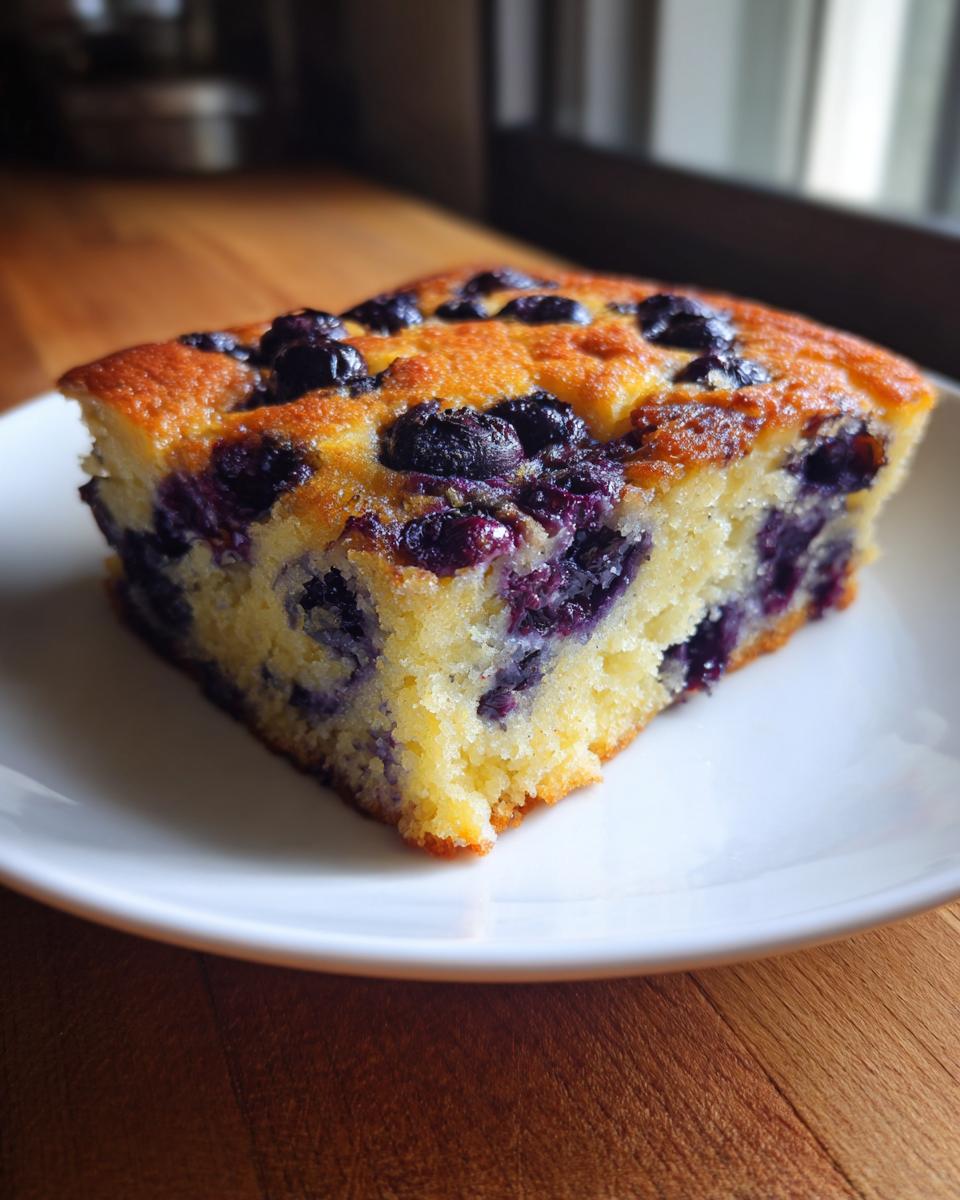
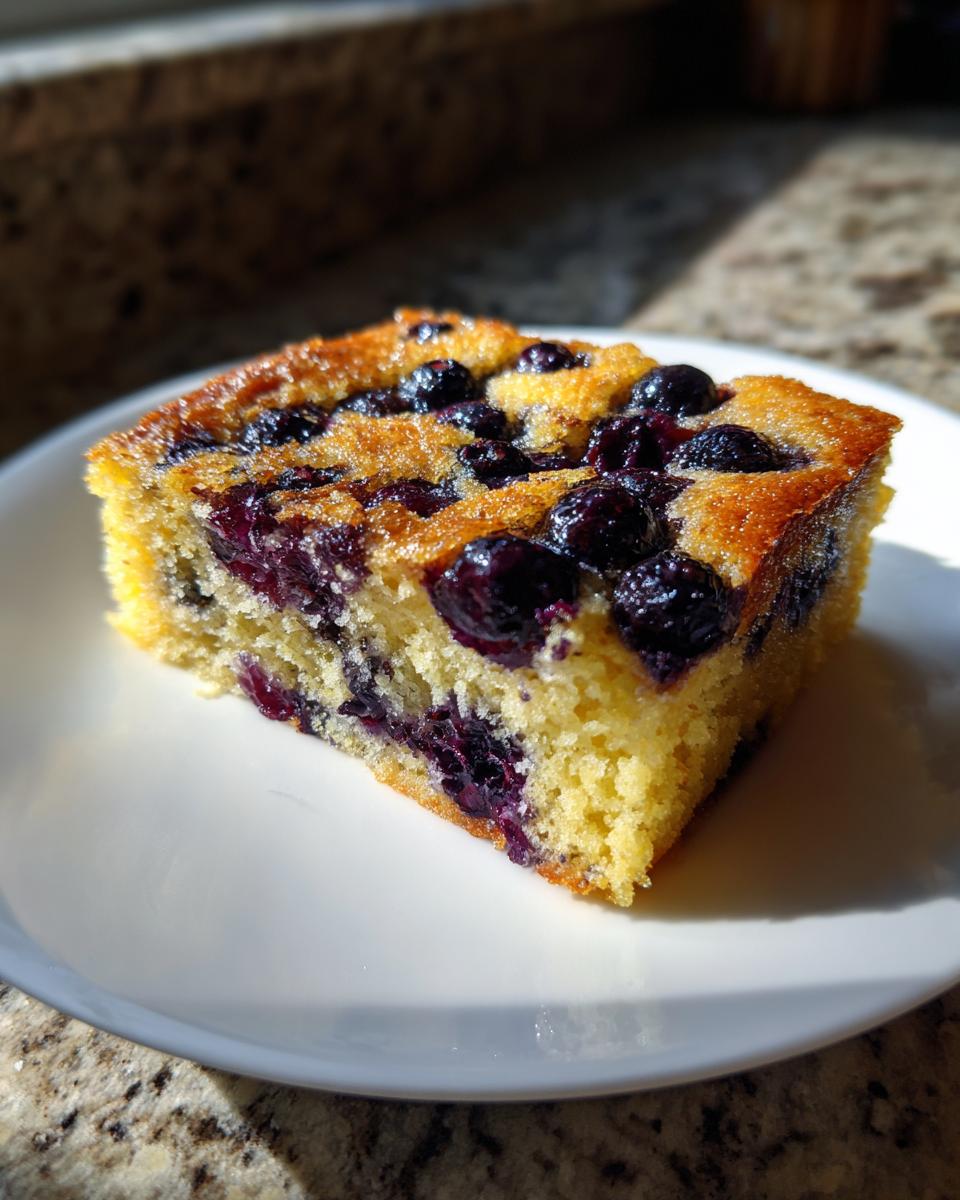
- Perfectly Fluffy Texture: Even though they are baked, these are not dense hockey pucks! They come out wonderfully light and golden brown across the entire surface.
- Built-In Customization: Since the whole thing bakes at once, you can divide your pan into sections—half chocolate chips for the kids, half blueberries for me. Everyone wins!
- Fantastic for Meal Prep: You make one big batch, slice it up, and suddenly you have ready-to-go breakfast squares for busy weekdays. Talk about an easy win!
The Ultimate Ingredients for Fluffy Sheet Pan Pancakes
I want these sheet pan pancakes to be your new go-to, so quality matters! Since we’re not flipping them individually, the batter has to perform perfectly in the oven. Make sure your baking powder is fresh; if it’s old, your fluffy sheet pan pancakes will end up sad and flat. If you used a boxed mix, that’s fine too, but starting from scratch like this gives you the best texture. Remember, everything you mix here goes onto a standard 13×18 inch half sheet pan!
From Scratch Sheet Pan Pancakes Base
Keep these simple items ready to go. If you’re using the mix shortcut, just skip this part and refer to my notes later!
- 2 cups all-purpose flour
- 2 tablespoons granulated sugar
- 4 teaspoons baking powder (Don’t skimp here!)
- 1 teaspoon salt
- 2 large eggs
- 1 3/4 cups milk
- 1/2 cup melted butter, plus extra for greasing that pan!
- 1 teaspoon vanilla extract
Mix-In Options for Sheet Pan Pancakes with Fruit
This is where you get to play! I love dividing the batter so half the pan is one thing and half is another. You’ll use about 1 cup total of whatever you choose.
- Blueberries (frozen work great if you toss them in a little flour first)
- Chocolate chips (semi-sweet are my favorite)
- Sliced bananas (use ones that are ripe, but not mushy!)
How to Prepare Hassle Free Pancakes: Step-by-Step Instructions
Okay, this is where the magic happens, and why these are such great easy breakfast recipes. Forget standing over the stove—the oven does all the work here. Follow these steps closely, and you’ll have perfect, golden oven pancakes squares ready to go!
Prep Work for Your Sheet Pan Pancakes
First thing’s first: crank that oven up to 400°F (200°C). While it’s heating up, you need to treat your 13×18 inch baking sheet like gold. You absolutely must grease it generously—I mean generously—with softened butter or a good spray. This step is why we don’t have to deal with any stuck spots, keeping these the ultimate No Flip Pancakes.
Mixing the Batter for Fluffy Sheet Pan Pancakes
Grab your biggest bowl for the dry stuff—flour, sugar, baking powder, and salt—and just whisk them together until they look friendly. In a separate bowl, totally whisk your eggs, milk, melted butter, and vanilla until they are happy campers. Then, pour the wet into the dry ingredients. Now, listen to Aunt Rosa: Mix gently until it just comes together. Don’t you dare overmix this batter! A few lumps are perfectly fine; in fact, they’re a sign you’re doing it right and avoiding tough pancakes.
Baking and Slicing Your Oven Pancakes
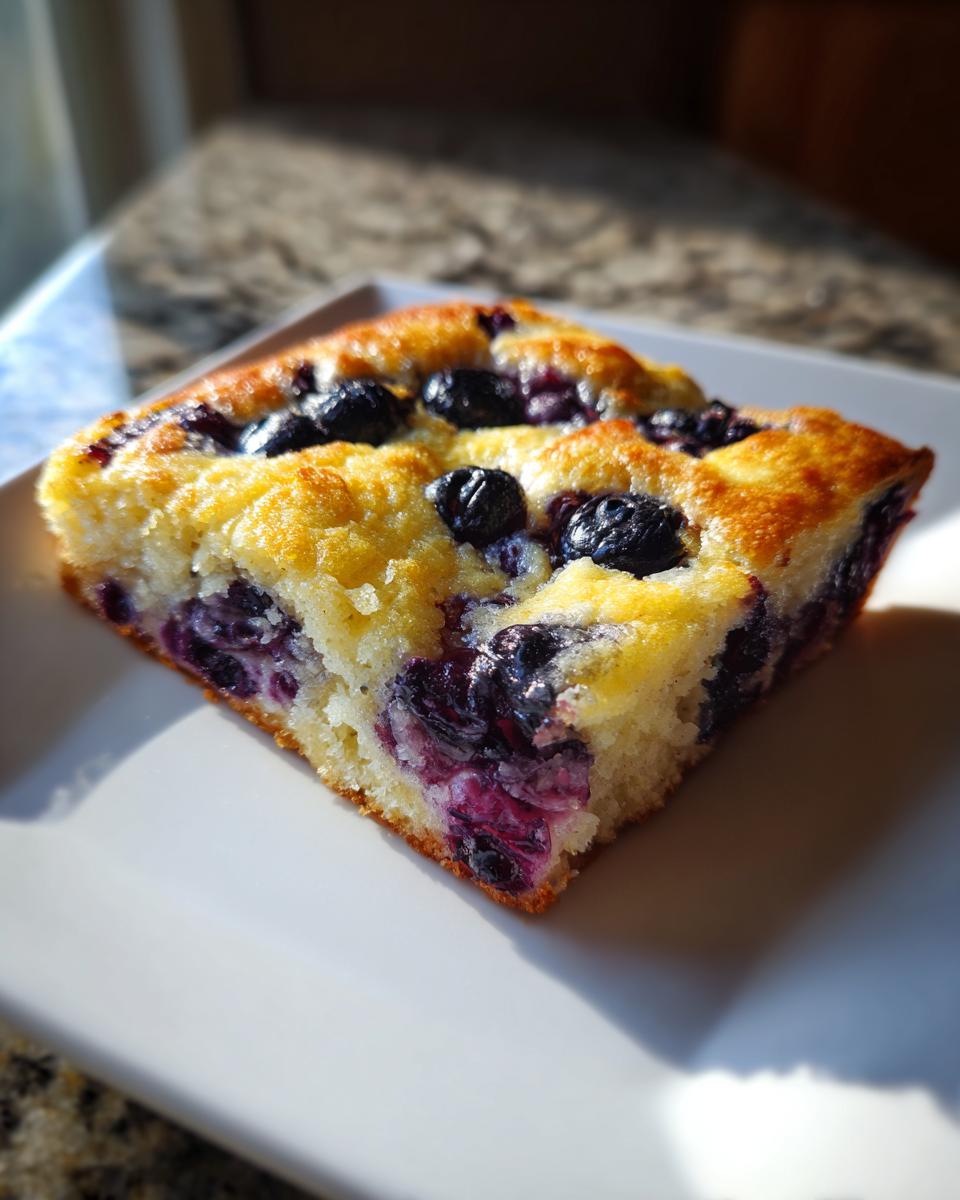
Pour that lovely batter right onto your prepared sheet pan and give it a little nudge to spread it out evenly. Now scatter your blueberries or chocolate chips on top and press them down just a touch. Bake this creation for 12 to 18 minutes. Yours might take longer or shorter depending on your oven, but you know it’s done when the edges look set and the center springs back if you poke it lightly. Let it sit for exactly five minutes—no more, no less—then grab a pizza cutter and slice it into squares. Breakfast for a crowd, done!
Making Sheet Pan Pancakes Using Mix: A Quick Morning Breakfast Hack
I know what you’re thinking: what if I don’t want to measure out all that flour and baking powder? I totally get it, especially on a Tuesday when you need a quick morning breakfast! This recipe is designed to be incredibly flexible, which is why I included the note about using pancake mix.
If you have a favorite box mix—Bisquick, Kodiak Cakes, whatever you have stocked—you can absolutely use it for your sheet pan pancakes. It’s an amazing time-saver when you’re totally out of time.
Here’s the rule of thumb, based on the recipe notes: Instead of using 2 cups of flour and the dry ingredients listed, just use 3 cups of your standard pancake mix. Then, you mix in the required amount of eggs and milk that the *box* tells you to use for that quantity. Don’t use the milk/egg amounts listed in my scratch recipe—always follow the box instructions for the liquid components!
You still want a thick batter, so if the mix seems too thin after adding the wet stuff, add just a little more powder until it looks right for spreading, but don’t worry too much about perfection. Pour it onto your buttered pan, add your toppings, and bake it exactly the same way, around 12 to 18 minutes at 400°F. It’s such a brilliant hack for making sheet pan pancakes from mix, and it saves me scrubbing measuring cups!
Tips for Success with Your Baked Pancakes Recipe
Look, even genius methods like this one can hit a snag if you aren’t careful! Over the years, I’ve learned a few little secrets that guarantee these sheet pan pancakes turn out perfectly fluffy and golden every single time. Remember, baking is chemistry, even when it’s breakfast chemistry, so a little precision goes a long way!
The very first thing I have to stress again is: Do Not Overmix! I know I said it before, but it bears repeating. When you mix the wet and dry ingredients, you are developing gluten, and too much gluten makes your pancakes chewy and flat. We want light and airy! Mix it until you see just a few streaks of dry flour remaining. Those last few lumps will smooth out as the batter sits there baking anyway. Seriously, stop mixing before your brain tells you to stop.
Also, you need to respect the pan size. You need that proper 13×18 inch half sheet pan for this recipe to bake correctly. If you try to cram this batter into a smaller 9×13 pan, you’ll end up with a thick, doughy center that takes ages to cook through, and the edges will be overbaked and dry. We are looking for a nice, even 1/2-inch to 3/4-inch thickness, which that large pan gives us.
If you’re worried about the edges getting too crisp while the middle catches up, try this little trick: once the pancakes have cooked for about 10 minutes and the middle looks mostly set (but still a little wet), go ahead and loosely drape a sheet of aluminum foil over the top. This just shields the top from too much direct heat while the inside finishes cooking completely. It’s a simple step that makes a huge difference in ending up with tender squares across the whole sheet!
For even more ways to simplify your routine, check out my full collection of easy breakfast recipes. Happy baking!
Variations: Sheet Pan Blueberry Pancakes and More
While the basic recipe for these **sheet pan pancakes** is already fantastic—it’s essentially a giant, perfect pancake, after all—the real fun starts when you decide what to mix in! Because we are baking this batch all at once on one sheet, it’s super easy to create customized flavor zones. You can dedicate one corner to chocolate and another to fruit, or you can fold everything right into the batter evenly. It’s up to you how wild you want to get!
We already talked about tossing in blueberries or chocolate chips, but you have so many options for customization if you want to move beyond those classics. I always tell people that if you can put it on a regular pancake, you can put it on this big sheet! If you’re looking for something a little richer later on, I actually have a wonderful sugar cookie cheesecake recipe that gives that same indulgent feeling, but for now, let’s stick to breakfast!
Here are a few of my favorite ways to dress up this **baked pancakes recipe**:
- Nutty Crunch: Add about 1/2 cup of chopped pecans or walnuts along with your berries. They toast up beautifully in the 400-degree oven!
- Savory Twist (If you’re brave!): Yes, you can go savory! Drain and pat dry small pieces of pre-cooked sausage and sprinkle them over the top with a little shredded cheddar cheese during the last five minutes of baking. You have to adjust your syrup serving, obviously!
- Making Cinnamon Swirl Sheet Pan Pancakes: This is my favorite for holidays. Take about 1/4 cup of your finished batter and mix it in a separate small bowl with 1 teaspoon of cinnamon and 1 tablespoon of brown sugar until it’s swirled together. Drizzle this mixture right over the main batter on the sheet pan before it goes into the oven. You can see a great example of this technique over at The Diary of a Recipe Collector!
Honestly, once you see how easy it is to bake a whole batch of pancakes together, you realize all those other methods just feel like a huge waste of time. These hassle free pancakes are definitely the way to go for feeding a large group!
Meal Prep Pancakes and Storage for Sheet Pan Pancakes
This is where the sheet pan pancakes really become a superhero recipe for busy families like mine. Remember how I talked about how great these are for feeding a crowd? Well, the leftovers—if you actually have any—are even better because they store like a dream! This cuts down on so much morning stress when you realize you can grab a square right out of the freezer for a quick bite.
The secret to successful meal prep pancakes is cooling them down completely before you try to package them up. If you stack them warm, you’ll end up steaming them inside the container, and that moisture leads to gummy pancakes, which we definitely want to avoid!
Here is exactly how I handle storage so they taste fresh all week long:
- Cool Completely: Once the pan comes out of the oven and sits for that initial 5 minutes, slice the entire thing into squares right on the pan. Leave the squares on the hot pan or transfer them to a wire rack to cool completely. I usually aim for room temperature before I even think about putting them in a bag.
- The Freezer Trick: Once they are completely cool, layer them in a heavy-duty, airtight freezer bag or container. Here’s the critical part: place a small piece of parchment paper (or wax paper) between each pancake square. This stops them from sticking together, so you can easily pull out just one or two at a time without wrestling with a giant sticky pancake block.
- How Long They Last: These keep beautifully in the freezer for up to two months. You can also keep them in the fridge for about 3 or 4 days if you plan to eat them right away, though I prefer freezing them for long-term convenience.
When you are ready to eat those prepped squares, you have a few fantastic options. The microwave works for speed, but honestly, I find it can make them a little soft. For the best texture, I recommend either popping them into a toaster oven for a few minutes until they just start to crisp up slightly, or heating them in a regular oven at about 350°F until warm through. If you want more ideas to save time during the week, check out my thoughts on weeknight dinner ideas—we all need those on busy days!
Serving Suggestions for Your Sheet Pan Breakfast Bake
Okay, you have this massive, beautiful, golden sheet pan of pancake squares cooling down, and now it’s time for the fun part—dressing it up! Since this is such a huge batch, I love making it interactive, kind of like a build-your-own station. It makes the presentation look amazing, especially if you have family coming over for an easy weekend brunch. It truly transforms these easy pancake squares into something special!
Forget serving one sad plate at a time. Lay that big sheet pan right on the counter (maybe on a pretty wooden board if you want to get fancy!) and set out the toppings buffet-style. Presentation is half the battle for making a simple breakfast feel like an event.
Here are my must-have toppings that always disappear first:
- Maple Syrup (The Real Stuff!): You just can’t fake that flavor. Warm up your pure maple syrup slightly—it pours so much better over the squares when it’s warm.
- Fresh Berries Galore: Even if you baked some berries in, having extra fresh sliced strawberries, raspberries, or a mix available is essential for that bright contrast.
- Whipped Cream Station: I always have a can of the aerosol kind on hand for emergencies, but if you have time, whipping your own heavy cream with just a tiny pinch of powdered sugar makes a huge difference in taste and texture.
- A Little Nutty Crunch: Toasted pecans or walnuts are amazing sprinkled right on top after you’ve drizzled the syrup. They add a necessary textural pop.
And don’t forget what you’re serving with the cake! Since one sheet pan is so filling, you want side dishes that feel light and refreshing to balance things out. I usually whip up a huge bowl of fresh fruit salad—anything with melon, pineapple, and citrus works well to cut through the richness of the pancakes. Honestly, pairing this with a nice, cool glass of my watermelon smoothie recipe makes for the perfect effortless brunch setup.
When you are making big breakfast bakes like this, keeping the sides simple means you get to enjoy the chaos-free morning you worked for!
Frequently Asked Questions About Sheet Pan Pancakes
I know sometimes when you try a new method, even if it seems foolproof, you still have little questions hanging around! That’s okay! Cooking should be fun, not stressful, so let’s clear up any lingering doubts about making these easy sheet pan pancakes. If you still need more pointers after these, check out my main easy breakfast recipes page!
What size sheet pan works best for this Baked Pancakes Recipe?
This is key for getting that perfect, fluffy texture we are looking for! You really need to use a standard 13×18 inch half sheet pan. Why that size? Because it helps keep the batter a nice, even thickness—usually between a half-inch and three-quarters of an inch deep. If you use a smaller pan, like a 9×13 inch, the batter has nowhere to go but up! That means a much thicker center which takes way longer to bake and often results in the middle being gummy while the edges are rock hard. For perfect oven pancakes, stick to the biggest flat sheet you have!
Can I make these Sheet Pan Pancakes From Scratch using whole wheat flour?
You absolutely can make these sheet pan pancakes from scratch using whole wheat flour, or even a mix of white and whole wheat! Whole wheat flour just tends to be a bit denser and it absorbs liquid differently than all-purpose flour does. If you substitute all your white flour for whole wheat, I’d recommend adding just a tablespoon or two of extra milk to the wet ingredients just to make sure the batter isn’t too stiff when you pour it. It might make them slightly less lofty than the all-white-flour version, but they’ll still be delicious and filling!
How do I prevent the edges of my sheet pan pancakes from getting too brown?
That’s a classic oven issue, especially when you’re baking something this large! The edges cook fastest because they are directly exposed to the heat surrounding the pan. If you notice your edges looking perfectly golden brown but the center still needs a few more minutes, here is my favorite trick for those final few minutes: very gently lay a large piece of aluminum foil loosely over the top of the entire pan. Don’t tent it like a tent; just lay it flat enough to block some of that top-down radiant heat. This protects the edges while letting the center finish cooking through. It’s how I guarantee perfectly uniform color on my hassle free pancakes!
PrintEasy Sheet Pan Pancakes: The Ultimate No-Flip Breakfast for a Crowd
Make a large batch of fluffy pancakes all at once using your oven. This sheet pan pancakes recipe eliminates stovetop flipping, saving you time on busy mornings or for weekend brunch.
- Prep Time: 10 min
- Cook Time: 18 min
- Total Time: 28 min
- Yield: 12-16 servings 1x
- Category: Breakfast
- Method: Baking
- Cuisine: American
- Diet: Vegetarian
Ingredients
- 2 cups all-purpose flour
- 2 tablespoons granulated sugar
- 4 teaspoons baking powder
- 1 teaspoon salt
- 2 large eggs
- 1 3/4 cups milk
- 1/2 cup melted butter, plus more for greasing
- 1 teaspoon vanilla extract
- 1 cup mix-ins (blueberries, chocolate chips, or sliced bananas)
Instructions
- Preheat your oven to 400°F (200°C). Grease a standard 13×18 inch half sheet pan generously with butter or cooking spray.
- In a large bowl, whisk together the flour, sugar, baking powder, and salt.
- In a separate bowl, whisk together the eggs, milk, melted butter, and vanilla extract until combined.
- Pour the wet ingredients into the dry ingredients. Mix gently until just combined; do not overmix. A few lumps are fine.
- Pour the batter evenly onto the prepared sheet pan. Gently spread it to cover the bottom.
- Scatter your chosen mix-ins (like berries or chocolate chips) over the top of the batter. Gently press them slightly into the surface.
- Bake for 12 to 18 minutes, or until the edges are set and the top is golden brown and springs back when lightly touched. Baking time depends on your oven and the thickness of the batter.
- Remove the pan from the oven. Let it cool for 5 minutes before slicing into squares using a pizza cutter or knife.
- Serve immediately with maple syrup or your favorite toppings.
Notes
- For an even easier method, substitute the dry ingredients with 3 cups of your favorite pancake mix, adding the required liquid and eggs according to the mix instructions.
- This recipe is great for meal prep; cool completely, slice, and freeze the squares in an airtight container. Reheat in the toaster oven or microwave.
- To make cinnamon swirl sheet pan pancakes, reserve 1/4 cup of the batter, mix it with 1 teaspoon of cinnamon and 1 tablespoon of brown sugar, then drizzle over the main batter before baking.
Nutrition
- Serving Size: 1 square
- Calories: 220
- Sugar: 6g
- Sodium: 350mg
- Fat: 8g
- Saturated Fat: 4g
- Unsaturated Fat: 4g
- Trans Fat: 0g
- Carbohydrates: 32g
- Fiber: 1g
- Protein: 6g
- Cholesterol: 55mg