
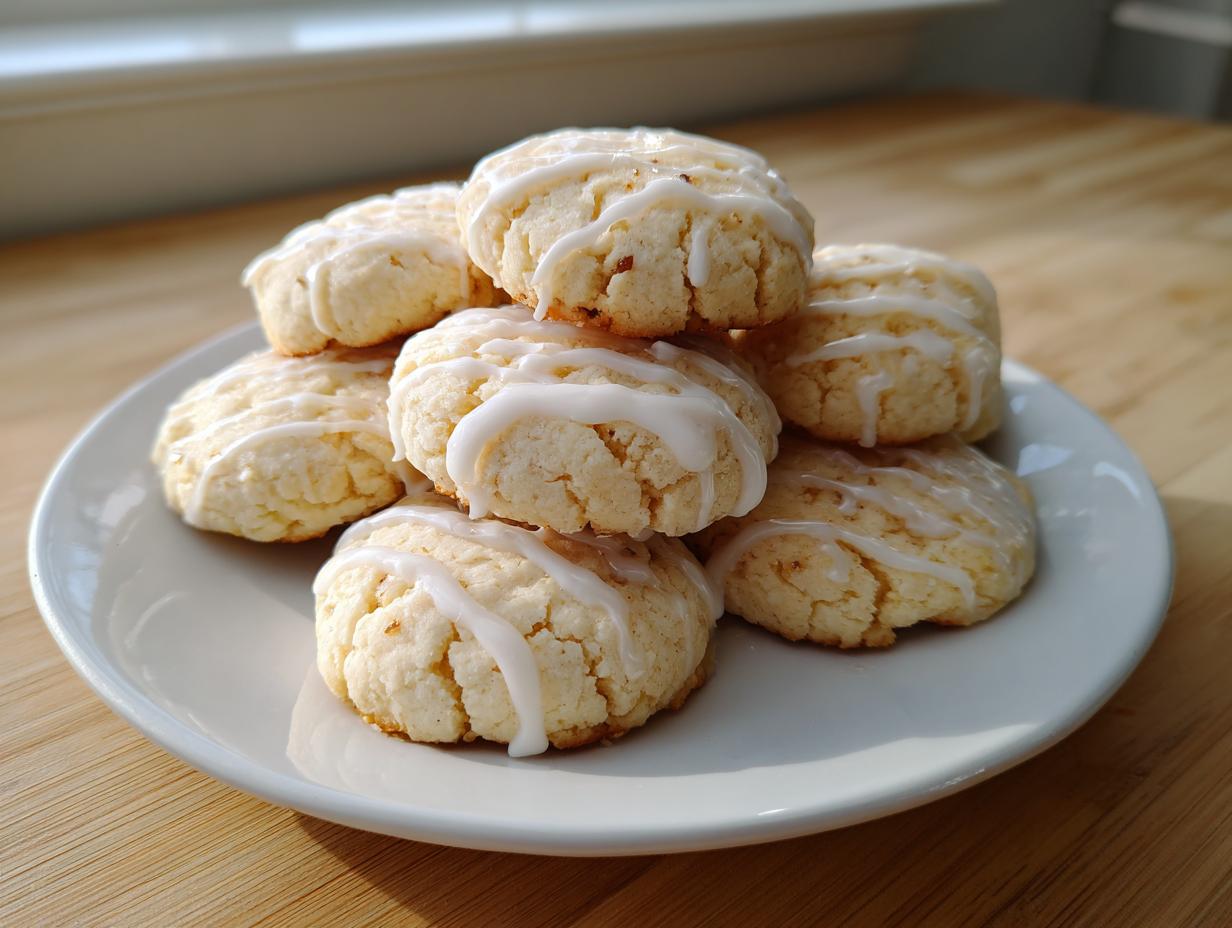
When the day is long and you just need a little bit of comforting sweetness that feels like a hug, forget dry, crumbly treats. We are going straight for that soft, pillowy goodness that just melts away. That’s exactly what happens when you make classic ricotta cookies. Here at Rosa’s Tasty Kitchen, my whole goal is making that bakery-quality flavor easy for your home kitchen, and these cookies? They are textbook easy. They are honestly the softest, melt-in-your-mouth cookies you will ever whip up, perfect for a busy weeknight treat or piled high for a special event. You won’t believe how simple these wonderful homemade desserts are!
- Why These are the Best Soft Ricotta Cookies You Will Make
- Gathering Ingredients for Perfect Ricotta Cookies
- Step-by-Step Instructions for Making Ricotta Cookies
- Tips for Success When Baking Authentic Italian Cookies
- Storage & Reheating Instructions for Your Ricotta Cookies
- Serving Suggestions for Your Glazed Italian Cookies
- Frequently Asked Questions About Ricotta Cookies
- Nutritional Estimate for Classic Italian Ricotta Cookies
- Share Your Soft Ricotta Cookies Experience
Why These are the Best Soft Ricotta Cookies You Will Make
I know there are a million cookie recipes out there, but when people ask me what makes this one special, I always talk about that texture. Seriously, these aren’t just good; they are truly Melt In Your Mouth Cookies. They have that delicate, airy quality that just dissolves when you eat them. Trust me, once you master these Soft Ricotta Cookies, you’ll be asked to bring them to every single gathering you attend! If you love soft, tender treats, you’ll want to check out my pudding cookie recipe too!
This recipe is designed exactly for my busy lifestyle—I know yours is busy too! I developed these to come together fast, meaning you get maximum flavor with minimum fuss, which is the cornerstone of Rosa’s Tasty Kitchen philosophy.
Achieving the Pillowy Ricotta Treats Texture
The secret sauce, or rather, the secret dairy item, is the ricotta cheese itself. It adds a magical amount of moisture that butter or oil just can’t replicate perfectly. Because the ricotta is so high in moisture, it keeps the crumb incredibly light and tender. It transforms the dough into something almost cakey, but in the very best way possible!
Simple Drop Cookies for Quick Cookie Baking
And the best part? No fancy rolling or cutting here! These are Simple Drop Cookies, which means once the dough is mixed, you just scoop them right onto the sheet. There’s no need to chill the dough for hours like some fussy holiday cookies require. This feature makes them perfect for when you realize last minute you need something wonderful for dessert. It really is quick cookie baking at its finest!
Gathering Ingredients for Perfect Ricotta Cookies
The beauty of these ricotta cookies, adhering to my philosophy here at the kitchen, is that you don’t need to drive all over town for specialty items. Everything here is straightforward and readily available when you do your regular shop. When we bake, we want reliable results, not complicated sourcing! Let’s look at what we need to bring these melt-in-your-mouth treats to life.
Essential Components for the Ricotta Cookies Dough
For the cookie base, grab the following items. Make sure that butter is truly softened—this makes such a difference when creaming!
- 1 cup (2 sticks) unsalted butter, softened
- 1 cup granulated sugar
- 2 large eggs
- 1 cup whole milk ricotta cheese (don’t skimp on the whole milk variety!)
- 1 teaspoon vanilla extract
- 1 teaspoon lemon zest (optional, but it adds a lovely brightness)
- 3 cups all-purpose flour
- 1 teaspoon baking powder
- 1/2 teaspoon baking soda
- 1/4 teaspoon salt
Creating the Ricotta Cookie Glaze Ideas
The glaze comes together in a snap, and this step is where we customize the flavor profile. You are aiming for a thick, but still drizzly, consistency. Go slow with the added liquid!
- 2 cups powdered sugar
- 3-4 tablespoons milk or fresh lemon juice (your choice!)
- 1/2 teaspoon almond extract or lemon extract
Step-by-Step Instructions for Making Ricotta Cookies
Alright, now for the fun part! This is where we turn those simple ingredients into something truly special. Don’t feel intimidated; these steps are straightforward, and if you just follow along, you’re going to end up with those perfect, soft ricotta cookies everyone raves about. I’ve found the key here is to not rush the mixing stages, but also to stop mixing when you’re supposed to stop!
Mixing the Wet and Dry Ingredients for Ricotta Cookies
First, get your oven warmed up to 350°F (175°C) and get those baking sheets lined with parchment paper—that makes cleanup a total breeze! Now, grab your biggest bowl. Cream that softened butter and sugar together until it’s looking light and fluffy. Next, add your eggs one at a time; make sure the first one is incorporated before you drop in the second. After that, mix in your whole milk ricotta, vanilla, and that optional bit of lemon zest if you’re using it.
In a separate bowl, you’ve got your dry stuff: flour, baking powder, baking soda, and salt, whisked together. Now, slowly introduce the dry mixture into the wet. This is where we pull back! Mix it on low speed until it is *just* combined. Seriously, stop! If you see a few streaks of flour left, that is totally fine. Overmixing here is the quickest way to lose that pillowy texture we love so much.
Baking and Cooling These Glazed Italian Cookies
Time to scoop! Use rounded tablespoons of the dough and drop them onto your lined sheets, giving them about two inches of space because they will spread out a tiny bit. Pop them into the preheated oven for just 10 to 12 minutes. You are looking for the edges to be just barely golden. Crucially, the centers should still look soft when you pull them out. Do not fool yourself into baking them longer!
Let them rest right on the baking sheet for about five minutes. This helps them firm up just enough so you can move them. Then, gently transfer them to a wire rack to cool completely. They must be totally cool before we hit them with the glaze, or you’ll end up with sweet soup!
Applying the Final Ricotta Cookie Glaze
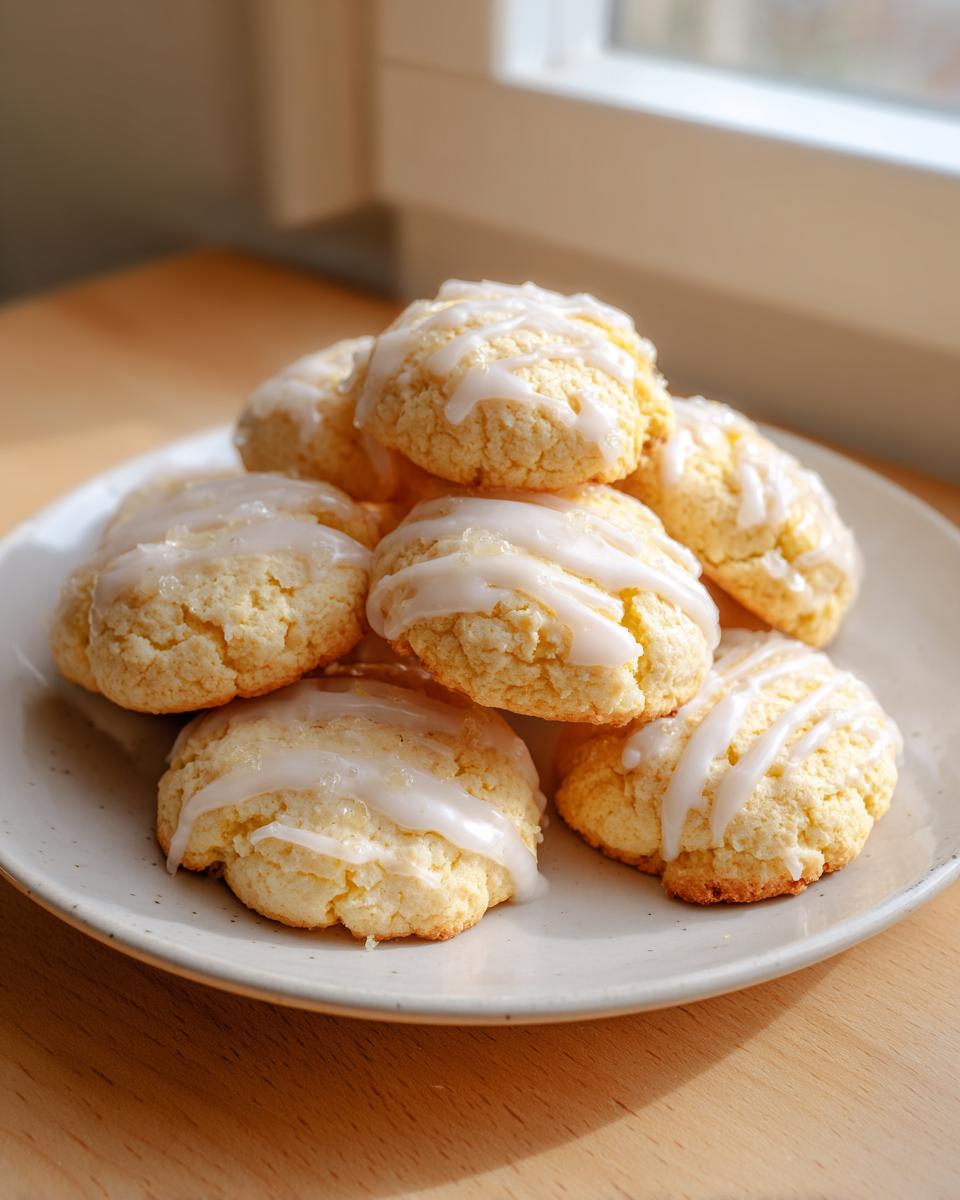
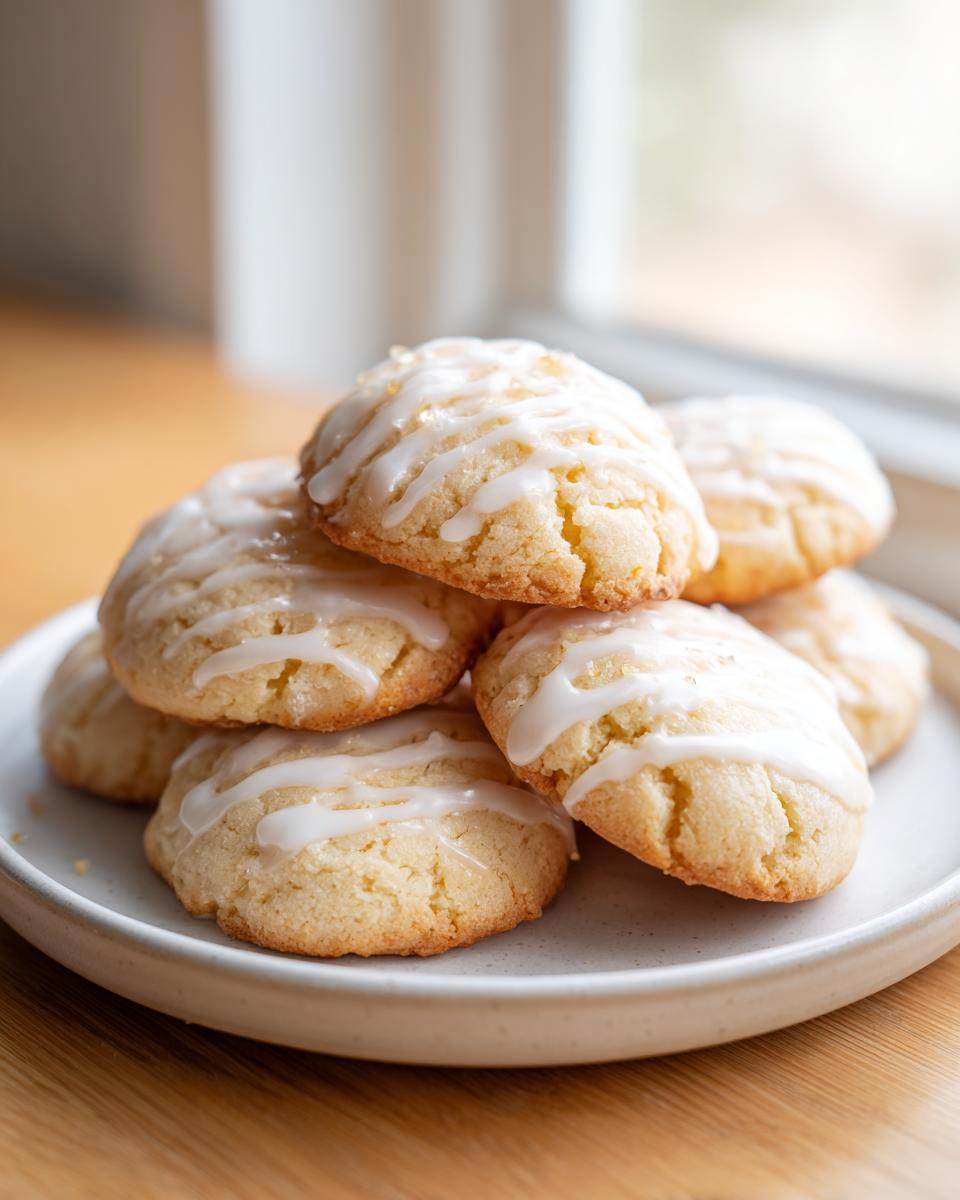
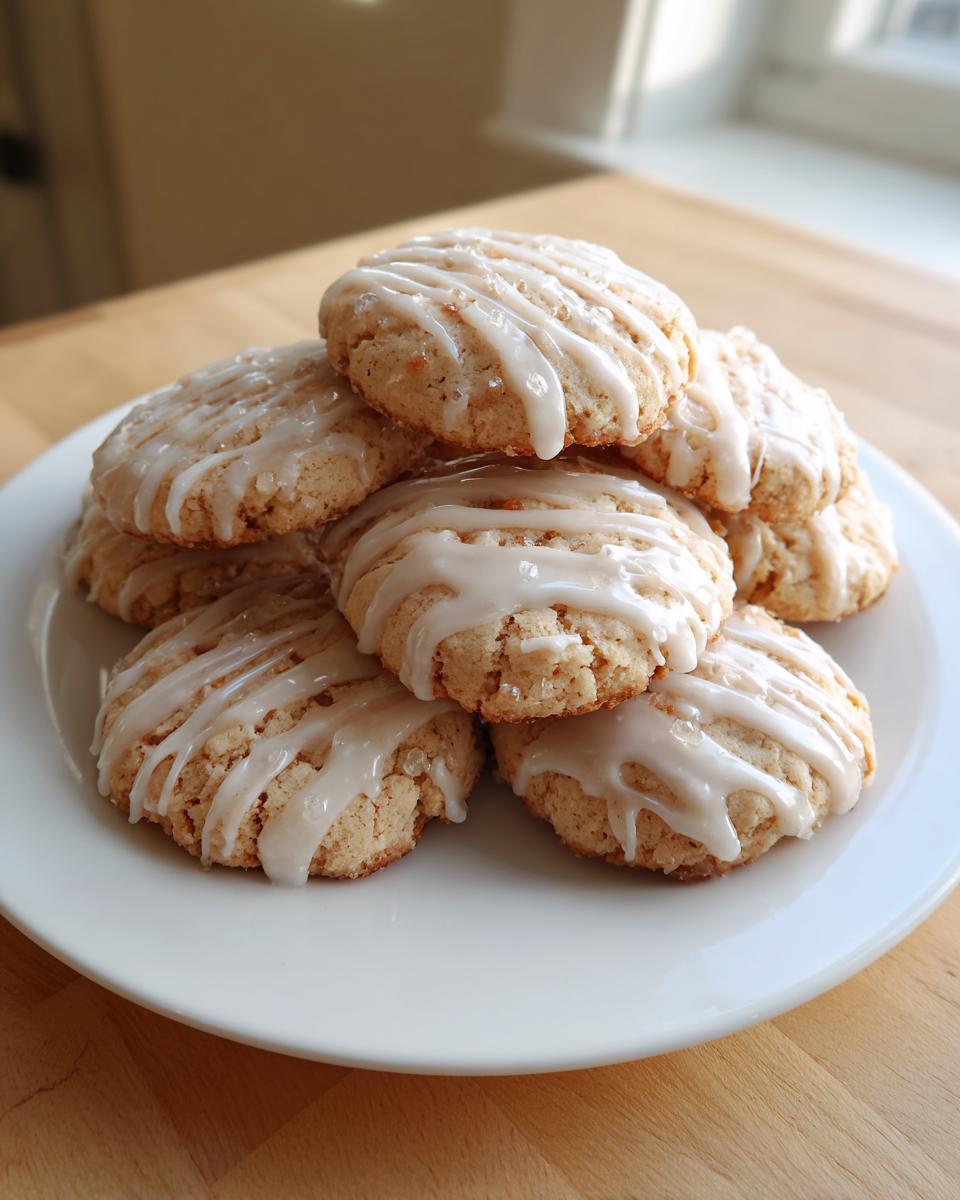
While those treats are cooling down, whip up your glaze. Whisk the powdered sugar with your liquid (milk or lemon juice) and your chosen extract until it’s smooth. Remember, you want it thick but still pourable—if it’s too stiff, add a *tiny* splash more liquid. Once the cookies are rock solid cool, drizzle them with the glaze. For a fun look perfect for holidays, you can sprinkle on some colorful nonpareils right after dipping them. Pop over here for another easy drop recipe!
Tips for Success When Baking Authentic Italian Cookies
Making Authentic Italian Cookies at home feels wonderful, but there are a few small things I always do to make sure they turn out exactly like the ones my Italian neighbors used to make. Remember, baking is chemistry, but it’s also all about that personal touch! If you’re looking for another rich, comforting baked item, you absolutely have to try my brown butter chocolate chip recipe, though these have a much lighter personality!
Flavor Variations: Lemon Ricotta Cookies and More
While the classic vanilla and almond are divine, I know many of you search for that bright, zesty flavor. If you want to veer into Lemon Ricotta Cookies territory, it’s so easy to do! The trick is boosting that citrus in the finishing touch.
Instead of using milk or almond extract in the glaze, swap it out entirely for fresh lemon juice. You might need a tablespoon or two more of powdered sugar to keep the consistency right, but that tangy glaze poured over the soft cookie is simply breathtaking. It gives them that vibrant, sunny flavor that is just divine with an afternoon coffee. Also, don’t forget that sprinkle tip I mentioned earlier—when the glaze is wet, a dusting of colorful nonpareils makes these treats feel instantly festive, regardless of the holiday!
Storage & Reheating Instructions for Your Ricotta Cookies
You’ve made a huge batch of these dreamy, soft cookies, and now you’re wondering how long they’ll last. That’s the smart way to bake! Because these are so moist, they stay soft and tender longer than your average crispy cookie. But, like any homemade treat, proper storage is key to keeping that melt-in-your-mouth quality intact, especially if you’re planning ahead for big get-togethers.
Make-Ahead & Freezer Tips for Holiday Cookie Recipes
If you are baking these for the chaotic holiday season or just want to save some for a rainy day—which, let’s be real, happens often—my best advice is to hold off on the glaze!
- Glazed Cookies: Once the glaze is set, store the cookies in an airtight container at room temperature. They should hold up beautifully like this for about four to five days. Try not to stack them too high or they might squish!
- Freezing Tip: For the ultimate make-ahead convenience, these cookies freeze beautifully *before* you even think about glazing them. Place your completely cooled, plain cookies in a freezer-safe, airtight container. You can keep them frozen for up to three months. When you thaw them out, they taste just as fresh as the day you baked them!
When you’re ready to serve your Holiday Cookie Recipes batch, you just pull them out, let them come to room temperature (that takes maybe an hour or two), and then whip up a quick batch of glaze. It’s the perfect way to stay ahead of the game!
Serving Suggestions for Your Glazed Italian Cookies
Now that you have these absolutely perfect, soft, glazed little bites, what do you serve them with? These Italian Dessert Recipes are so versatile! They are delicate enough to feel special but simple enough to enjoy with your morning coffee, and that’s exactly how I like them. They don’t need much fuss to shine.
For a lovely mid-morning or afternoon moment, skip the fancy coffee bars and keep it simple. A strong, fresh cup of brewed coffee or even a beautiful, hot cup of Earl Grey tea is the perfect companion. The slight bitterness of the coffee or the tannic structure of the tea cuts right through the sweetness of that glaze beautifully. It’s just divine!
If you are putting together a bigger spread—maybe for Easter, Christmas, or just because you had a great week—these pair wonderfully with other simple Italian treats. Think about putting them alongside some crisp biscotti or even small bowls of fresh fruit when you’re serving dessert. They also look fantastic next to a tall, cool drink. Speaking of cool drinks, if you happen to be entertaining adults and want something bright and zesty to balance out all that sweetness, you should totally check out my recipe for a classic lemon drop martini—it brings the same citrus lift that the lemon variation of these cookies offers!

Honestly, though, my favorite way to enjoy one of these Glazed Italian Cookies is standing in the kitchen, trying to sneak one before dinner! They never last long enough to need fancy plating, trust me on that one.
Frequently Asked Questions About Ricotta Cookies
I always get so many questions when people try this recipe for the first time because they are worried they won’t achieve that magic, soft result! Texture is everything with these ricotta cookies, so let’s clear up any remaining doubts you might have before you bake your next batch. If you’ve got your coffee ready, you can check out my favorite simple breakfast recipes while you read!
Can I substitute the ricotta cheese in these ricotta cookies?
This is the big one, isn’t it? Look, if you want that true, authentic, Melt In Your Mouth Cookies experience, you really should stick with whole milk ricotta cheese. It has the specific moisture and fat content needed to create that perfect soft structure. If you use part-skim, they might turn out a little denser.
Now, if you are totally out, I’ve heard whispers about people using thick Greek yogurt as a substitute, but I have to be honest—it changes the flavor and the texture leans way more toward a standard cakey cookie. For these specific Pillowy Ricotta Treats, I always say don’t mess with the dairy!
How do I prevent my ricotta cookies from becoming cakey texture cookies?
Ah, the fear of becoming too much like plain cake! This absolutely comes down to mixing technique and the power of the leavening agents. The most important thing, which I stressed above, is to stop mixing the second you incorporate the flour. Overmixing develops gluten in the flour, which leads to chewiness or, worse, that hard cakey texture.
Also, make sure your baking powder and baking soda are fresh! They are the key to getting that lift without making the cookie tough. If your agents are old, the cookies will spread too flat and dense, losing that beautiful loft we are looking for in these Classic Italian Baking wonders.
Are these ricotta cookies suitable for kids, making them Kid Friendly Cookie Recipes?
Oh, absolutely! These are fantastic Kid Friendly Cookie Recipes! They aren’t overly complicated, they are soft for little teeth, and they aren’t too heavily spiced or flavored unless you choose to make them that way. If you’re baking for picky little ones, you can easily skip the lemon zest in the dough entirely and just use plain vanilla extract in both the cookie and the glaze. They love sneaking a peek while the glaze is still wet, waiting for the sprinkles to go on!
Nutritional Estimate for Classic Italian Ricotta Cookies
Now, I know some of you look at recipes and immediately want to see all the hard numbers—calories, sugar count, all that jazz! And while I totally get wanting to track what you’re eating, I have to keep it real with you about the math here.
Because we are cooking with love and not with lab equipment, the exact nutritional breakdown for these ricotta cookies can vary wildy depending on the brand of butter you use, the exact moisture content in your ricotta, or how thick you make that gorgeous glaze. These are authentic, homemade treats, not something pre-packaged!
So, please treat any specific nutritional data you might find floating around online as just a rough guideline. My focus here at Rosa’s Tasty Kitchen is always on that incredible flavor and achieving that perfect soft texture; the ingredient list is kept simple so you can focus on the joy of baking, not the measuring of milligrams! If you need precise tracking, your best bet is entering the exact brands and amounts you used into your preferred tracking tool.
Share Your Soft Ricotta Cookies Experience
Well, there you have it! You’ve gone from seeing a simple pantry list to baking some of the most wonderfully soft, pillowy ricotta cookies you will ever taste. That melt-in-your-mouth texture is all yours now, and I am so thrilled you’re taking this little piece of Italian baking joy into your own kitchen!
I absolutely live to hear about your baking adventures! When you pull those beautiful glazed treats out of the oven, please snap a photo and share it on social media—tag me so I can see your lovely work. Knowing that my mission of keeping great flavor accessible is working makes every recipe development worth it!
And here’s a little challenge for you! Since you absolutely nailed this classic vanilla version, I hope you’ll be back soon for the tangy upgrade. Next time you need a bit of sunshine in your dessert lineup, make sure you try out the Lemon Ricotta Cookies variation we talked about. That bright lemon glaze is just everything!
If you loved how easy and delicious these turned out, please come back to this recipe and leave a star rating! Your feedback helps other home cooks like us know that these are the simplest, most reliable, Best Soft Cookies Ever out there. Happy baking, friend!
PrintSoft Italian Ricotta Cookies with Simple Glaze

Bake these soft, pillowy Italian Ricotta Cookies. They are easy to make and deliver a melt-in-your-mouth texture perfect for any celebration.
- Prep Time: 20 min
- Cook Time: 12 min
- Total Time: 32 min
- Yield: About 3 dozen 1x
- Category: Dessert
- Method: Baking
- Cuisine: Italian
- Diet: Vegetarian
Ingredients
- 1 cup (2 sticks) unsalted butter, softened
- 1 cup granulated sugar
- 2 large eggs
- 1 cup whole milk ricotta cheese
- 1 teaspoon vanilla extract
- 1 teaspoon lemon zest (optional, for brightness)
- 3 cups all-purpose flour
- 1 teaspoon baking powder
- 1/2 teaspoon baking soda
- 1/4 teaspoon salt
- For the Glaze: 2 cups powdered sugar
- For the Glaze: 3-4 tablespoons milk or lemon juice
- For the Glaze: 1/2 teaspoon almond extract or lemon extract
Instructions
- Preheat your oven to 350°F (175°C). Line baking sheets with parchment paper.
- In a large bowl, cream together the softened butter and granulated sugar until light and fluffy.
- Beat in the eggs one at a time, mixing well after each addition. Stir in the ricotta cheese, vanilla extract, and lemon zest, if using.
- In a separate medium bowl, whisk together the flour, baking powder, baking soda, and salt.
- Gradually add the dry ingredients to the wet ingredients, mixing on low speed until just combined. Do not overmix the dough.
- Drop rounded tablespoons of dough onto the prepared baking sheets, leaving about 2 inches between each cookie. They will spread slightly.
- Bake for 10 to 12 minutes, or until the edges are lightly golden. The centers should remain soft.
- Remove cookies from the oven and let them cool on the baking sheets for 5 minutes before transferring them to a wire rack to cool completely.
- Prepare the glaze: Whisk together the powdered sugar, milk or lemon juice, and extract until smooth. Add liquid slowly to reach a thick but pourable consistency.
- Once cookies are completely cool, drizzle or dip the tops into the glaze. Let the glaze set before serving.
Notes
- For a classic Italian look, top the wet glaze with colorful nonpareils or sprinkles immediately after dipping.
- If you prefer a stronger citrus flavor, substitute the almond extract in the glaze with fresh lemon juice.
- These cookies freeze well before glazing. Store cooled, plain cookies in an airtight container for up to three months.
Nutrition
- Serving Size: 1 cookie
- Calories: 160
- Sugar: 18g
- Sodium: 95mg
- Fat: 7g
- Saturated Fat: 4g
- Unsaturated Fat: 3g
- Trans Fat: 0g
- Carbohydrates: 23g
- Fiber: 0g
- Protein: 3g
- Cholesterol: 30mg