
Oh, friends, when the air turns just that perfect crisp color and you start craving those heavy sweaters, what’s the first thing you want to smell? For me, it’s cinnamon and warm fruit mingling together. That’s why I’m sharing what I honestly think is the ultimate cozy fall baking project: the baked apple. Forget fussy desserts that keep you chained to the counter!
This recipe isn’t about complexity; it’s about heart. I perfected this method when balancing teaching and wrangling my own hungry kids—we needed something warm, sweet, and utterly reliable. It’s incredibly versatile, too! Serve it warm straight from the oven for a wonderful dessert, pop some slices on your morning oatmeal for breakfast, or just enjoy a tender, spiced cup of *baked apple* as a midday snack. Trust me when I say, this recipe delivers maximum comfort for minimal fuss.
- Why This is the Best Baked Apple Recipe for Your Family
- Gathering Ingredients for Your Homemade Baked Apples
- How to Bake Apples: Step-by-Step Instructions
- Tips for the Perfect Oven Baked Apples
- Serving Suggestions for Your Warm Apple Dessert
- Storage and Reheating Instructions for Leftover Baked Apple
- Frequently Asked Questions About Baked Apples
- Understanding the Nutrition in Your Simple Baked Fruit
- Share Your Autumn Apple Treats Experience
Why This is the Best Baked Apple Recipe for Your Family
When I was teaching full-time and trying to get dinner on the table for my own family, I didn’t have time for fussy techniques. That’s why I can confidently say this is the best baked apple recipe you’ll find for a busy home cook. It truly is the definition of easy baked apples because it requires almost no constant watching. You put it in the oven, and your kitchen immediately starts smelling like the coziest fall baking imaginable. It’s pure nostalgia in a dish!
This recipe has saved me countless times when I needed a simple, wholesome dessert that everyone—even my pickiest eater—would actually finish. It’s simple, dependable, and smells incredible while it does its magic.
Quick Prep Time for Easy Baked Apples
Look at the details: only about 10 minutes of prep time! Seriously, you can have every ingredient measured, mixed, and placed in the baking dish faster than you can clean up the spice measuring spoons. This speed means I can whip this up right after school lets out, and it’s ready before homework even gets started. That’s real life for you!
Flavor Profile: Cinnamon Baked Apples Perfection
The flavor here is nothing fancy, which is why it’s so good. We rely on the tried-and-true combination of brown sugar and lots of cinnamon. A little whisper of nutmeg is my secret touch that makes these cinnamon baked apples taste like they simmered all day long. The fruit breaks down just enough so it’s buttery soft, but it still holds its shape beautifully upon serving. I’ve got more ideas over at my guide to homemade desserts, but this one always wins for fall comfort.
Gathering Ingredients for Your Homemade Baked Apples
Making truly wonderful homemade baked apples starts with having the right lineup ready to go. Honestly, gathering these items takes five minutes, and I always have them on hand during the autumn months. We aren’t messing around with obscure pantry items here; this is straightforward baking that lets the fruit shine! I have a fantastic recipe for Jewish Apple Cake that uses similar cozy spices, but this baked apple recipe is quicker!
Here is what you’ll need for our baked apple magic:
- 4 medium baking apples (I swear by Honeycrisp or Fuji for standing up to the heat!)
- 1/4 cup packed brown sugar
- 1 full teaspoon of ground cinnamon
- Just a tiny pinch—1/4 teaspoon—of ground nutmeg
- 2 tablespoons of unsalted butter, cut into small little cubes
- 1/4 cup of plain water to help create that lovely syrupy base
Apple Selection and Preparation Notes
Choosing your apples is really important here because we want them to get tender without turning into complete mush. If you want that classic, beautiful presentation, go for whole apples, using an apple corer to scoop out the center but leaving the bottom intact—like a little basket! If you’re in a bigger rush, slicing them thin works great too, especially if you are planning to pour the results over a bowl of yogurt. Either way, wash them well first!
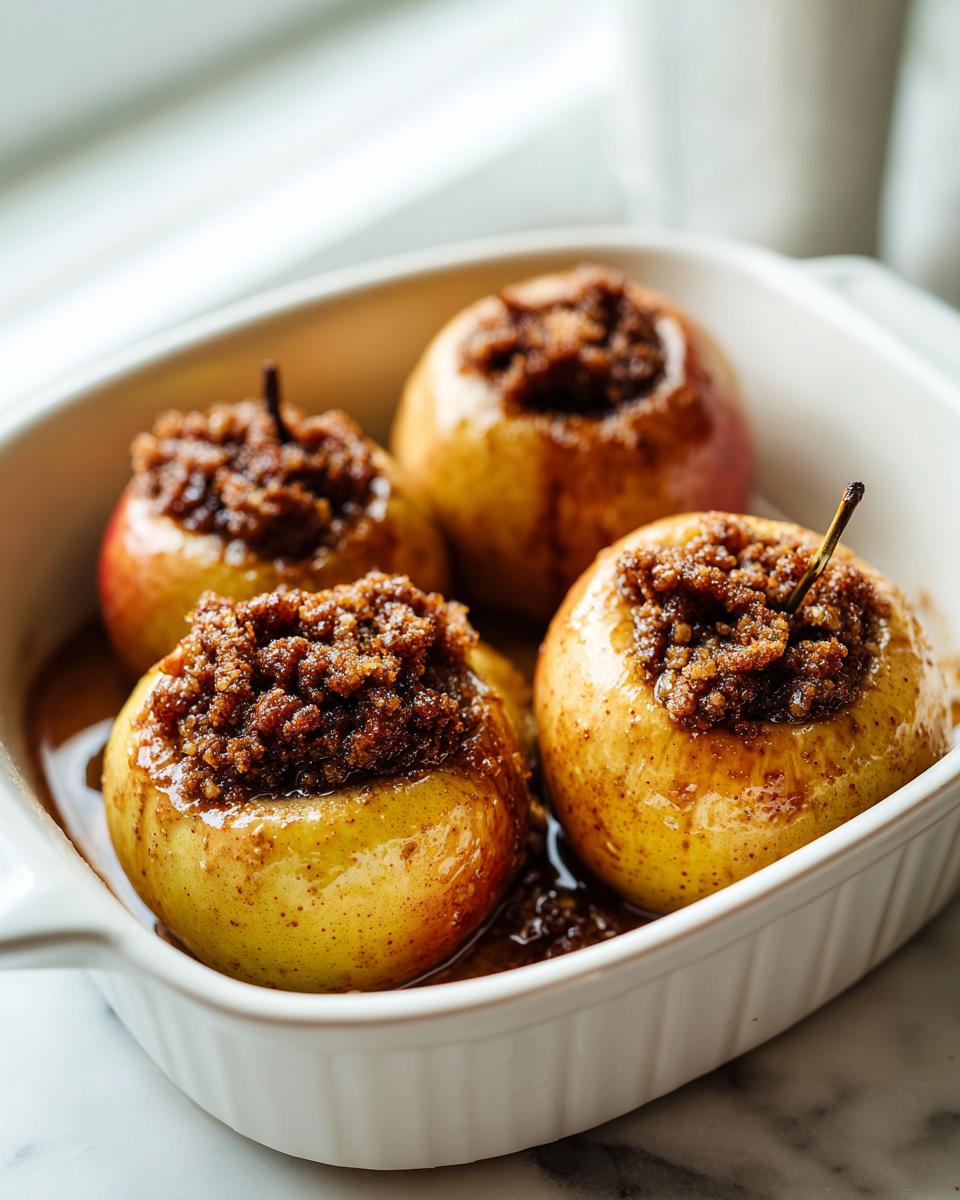
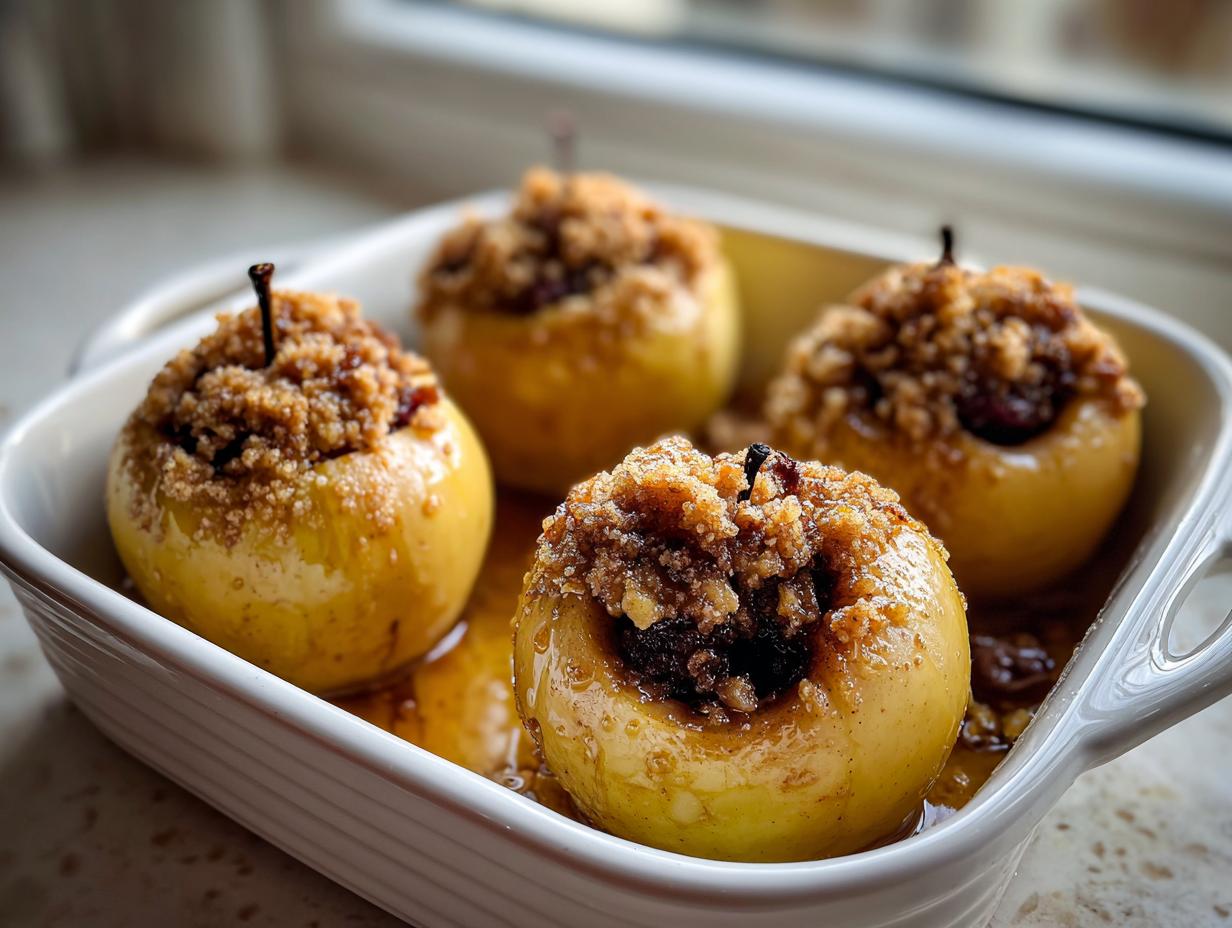
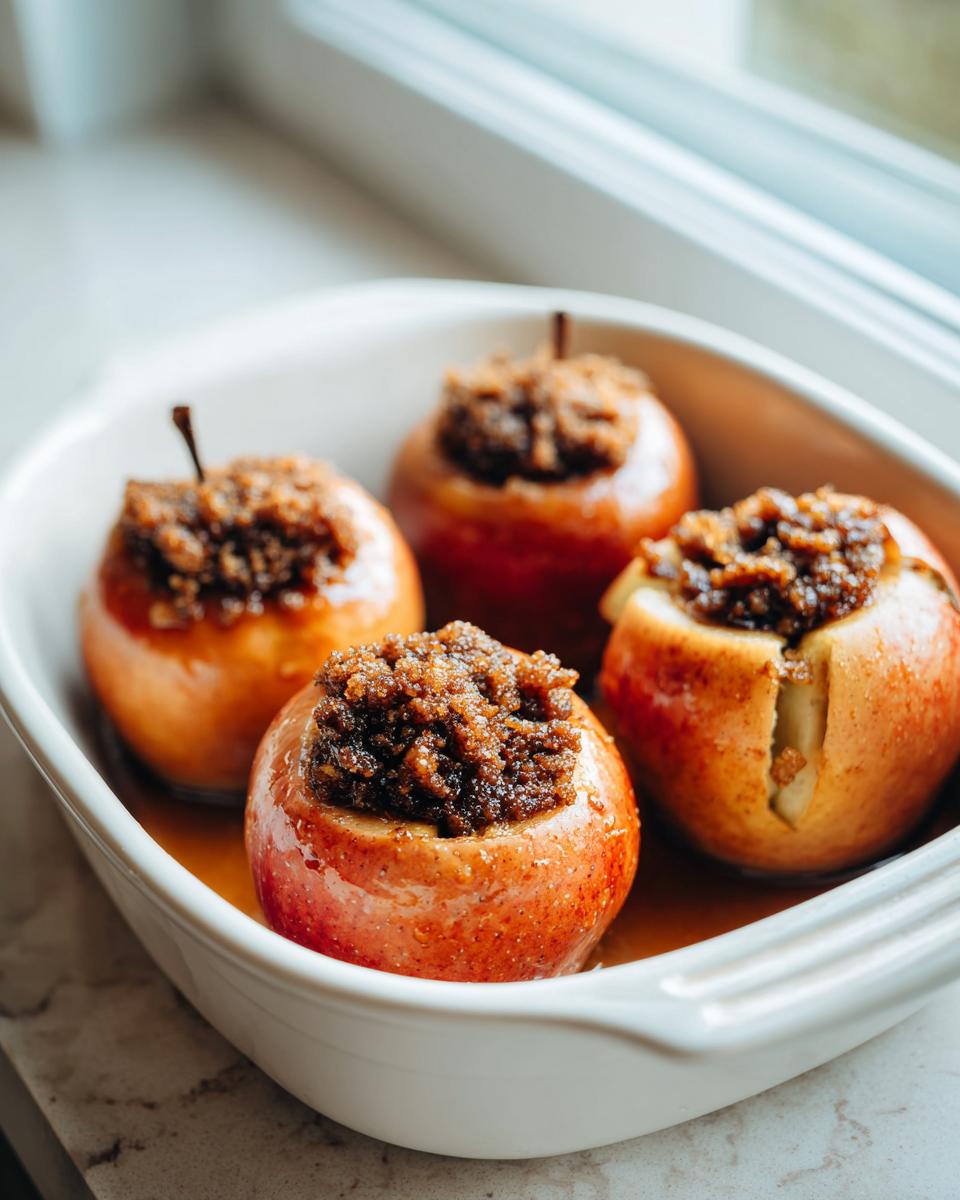
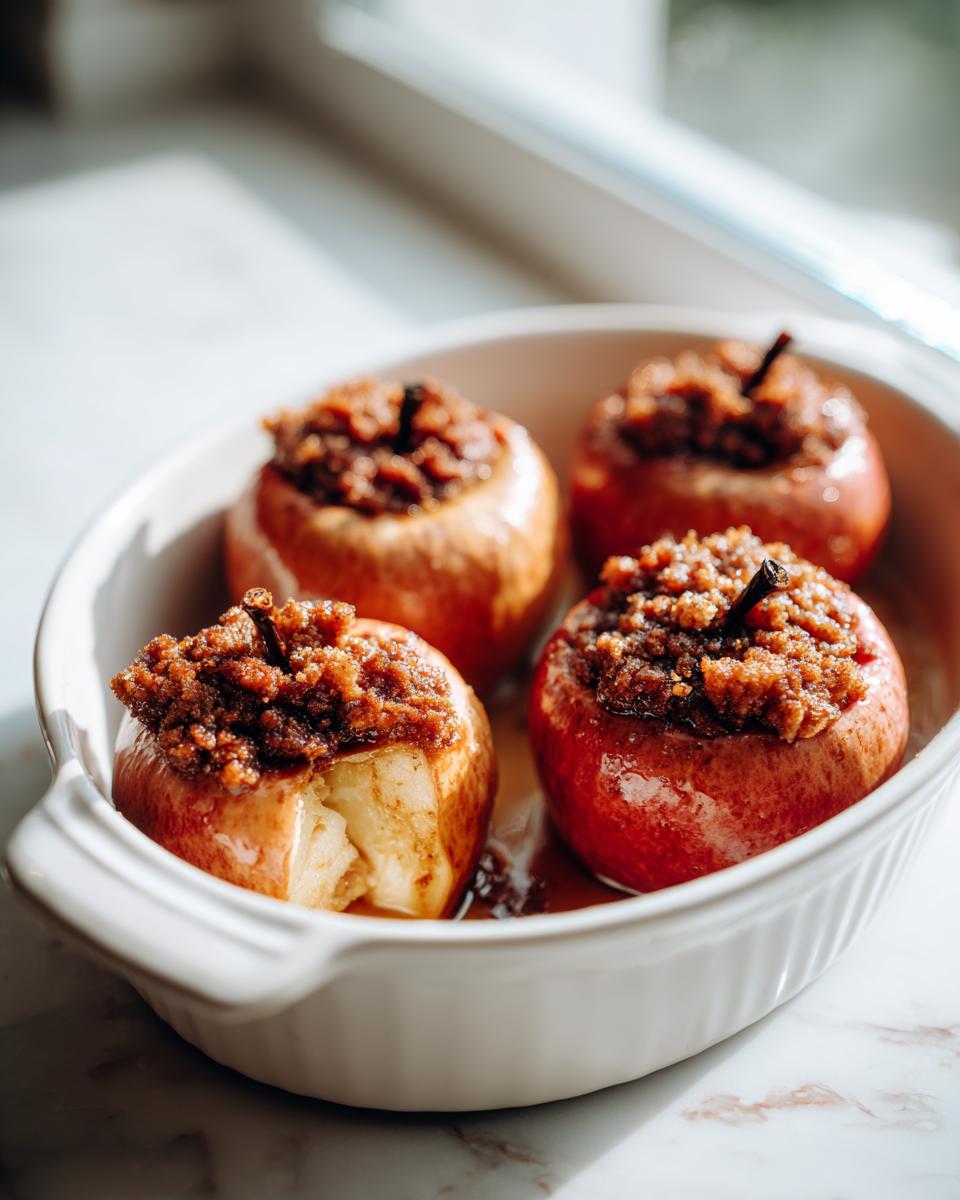
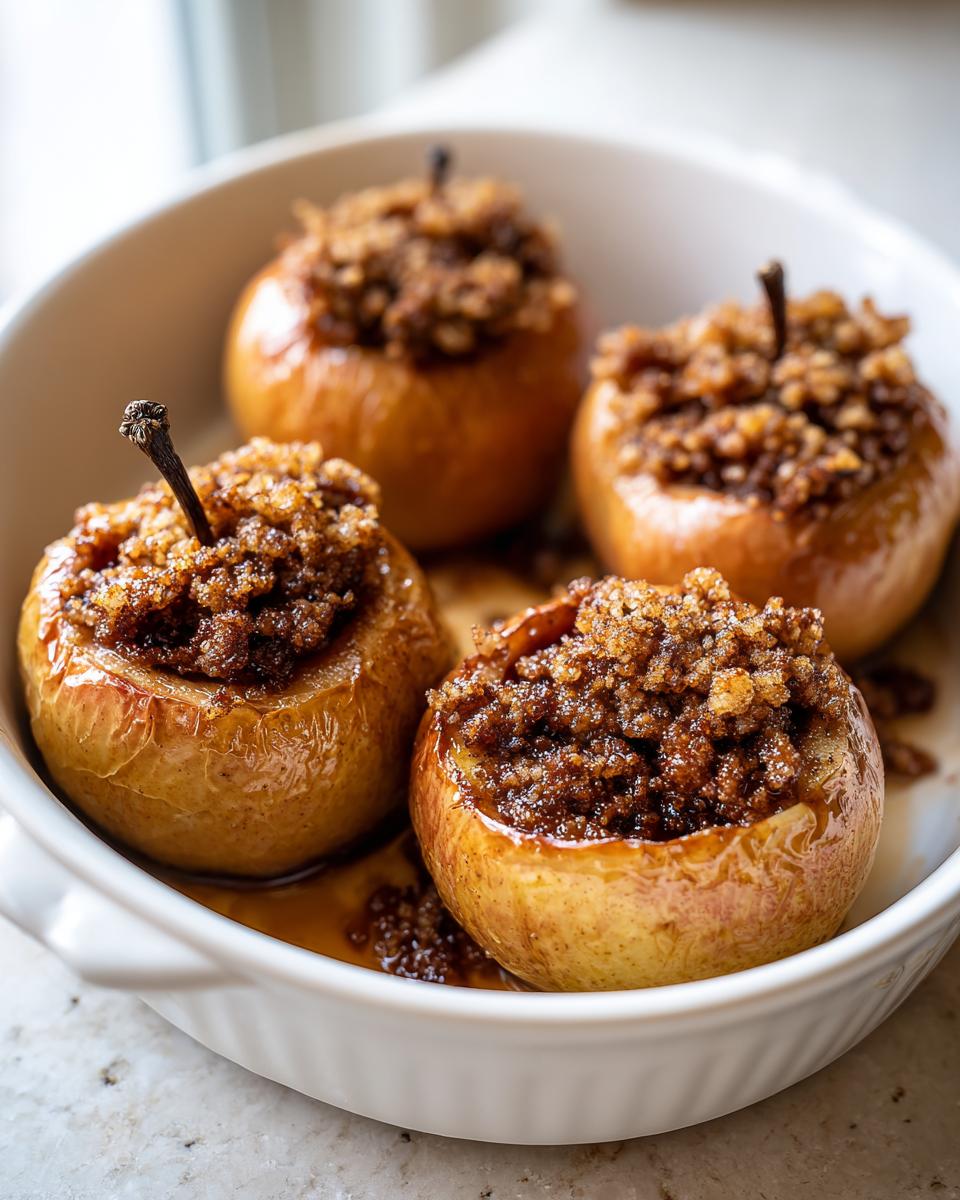
How to Bake Apples: Step-by-Step Instructions
Okay, grabbing the ingredients is the easy part! Now let me walk you through exactly how to bake apples so they turn out perfectly tender every single time. Remember, we are preheating our oven to 375 degrees Fahrenheit first, and you need to lightly grease that 8×8 baking dish. Don’t skip that greasing step, or you’ll be chipping bits of fruit out of the pan later!
The beautiful part is that you can pivot on the fly depending on how much time you have. Whether you’re making the whole apple centerpiece or quick slices, the initial steps are the same: core and prep those beauties!
Preparing the Brown Sugar Baked Apples Filling
Inside a small bowl, get that filling ready. You just whisk the brown sugar, cinnamon, and nutmeg together until they are fully combined. If you are making the whole baked apple, you’re going to lovingly stuff that sweet mixture right into the core cavity—and don’t forget to put those little cubes of butter right on top! They melt down into that sugar mixture and that’s where the richness comes from. If you opted for slices, just toss those with the sugar mixture until they are coated, spread them out nice and flat in the dish, and dot them with the butter.
Crucially, before they go in, pour that 1/4 cup of water into the bottom of the dish. This steam is essential for keeping things moist!
Baking Times for Whole vs. Sliced Baked Apple Slices Recipe
Here’s where you decide your commitment level! The whole apples need about 40 to 50 minutes in the oven—they take their time getting velvety soft. But if you made the baked apple slices recipe, you’re looking at 20 to 25 minutes total. You can stir those slices halfway through baking to make sure they cook evenly. No matter which version you chose, the test for doneness is always the same: if a fork slides right into the apple with no resistance, they are done. They should be super yielding! After that, grab my recipe for easy stovetop cinnamon applesauce to see another great way to treat your fruit!
Tips for the Perfect Oven Baked Apples
Even though this recipe is super simple, I always have a few tricks up my sleeve to make sure your oven baked apples turn out absolutely divine every time. Remember, even small tweaks can make a big difference in your final cozy fall dessert! If you love fall baking, you should check out my apple cobbler recipe too—it’s also a winner!
Making This a Healthy Baked Apple Snack
I know some of you are watching sugar intake, and I totally get that! We can easily turn this into a fantastic healthy baked apple snack without losing that warmth. My notes say you can cut the brown sugar down to just 2 tablespoons and use a zero-calorie sweetener for the rest if you want. Or, heck, just skip the added sugar altogether and let the natural sweetness of a good Fuji apple do all the heavy lifting. They are still sweet and soft, just less decadent!
Also, a helpful swap: If you are out of plain water for the bottom of the dish, definitely splash in some apple juice instead. It just adds one more layer of rich apple flavor as it steams upwards. Amazing!
Serving Suggestions for Your Warm Apple Dessert
Once your baked apple is out of the oven, the fun really begins! Serving this up warm is the whole point—it just hits differently when it’s steaming hot, right? These are fantastic all on their own, especially if you used lots of cinnamon. But if you want to turn this simple side into a show-stopping warm apple dessert, you’ve got options!
I almost always grab a scoop of vanilla bean ice cream because the cold melting into that warm, spiced cinnamon sugar is just heaven. If you’re aiming for a slightly lighter touch, dollop some thick Greek yogurt on top. It gives you the creaminess but adds a pleasant tang. If you’re eating them for breakfast, a drizzle across a bowl of my creamy stovetop rice pudding makes it feel super indulgent. Enjoy every warm, comforting bite!
Storage and Reheating Instructions for Leftover Baked Apple
Now, what happens if you actually manage to have leftovers? That’s a rare occasion in my house, but it happens! Storing your baked apple is simple, which is another reason why this recipe is such a lifesaver. You want to keep them in an airtight container once they have cooled down a bit, naturally. They should keep just fine in the refrigerator for about three to four days.
Honestly, the microwave is the quickest way to reheat them if you’re just grabbing one for a quick snack. Just pop the whole apple or a few slices in a microwave-safe bowl and heat them for about 30 to 45 seconds. That gets them nice and warm quickly!
However, if you are serving these slices or apples as a proper dessert again, I highly recommend the oven. Pop them onto a baking sheet covered in parchment paper—you can find my favorite easy freezer jam recipe notes often include parchment tips, too! Heat them at about 350 degrees for maybe 8 to 10 minutes. The oven gently warms them and keeps that beautiful, soft texture intact, instead of making them a little rubbery like the microwave sometimes can. Either way, they taste just as comforting the second day!
Frequently Asked Questions About Baked Apples
It’s natural to have questions when you’re trying a new, cozy recipe like this! I always want you to feel confident walking into the kitchen, so let’s tackle some common things folks ask about making these simple fruit desserts. If you decide to make these for breakfast, you should absolutely check out my guide to easy breakfast recipes too!
Can I make a keto version of this baked apple recipe?
That is such a great question, especially now that so many of us are trying different ways of eating! While the standard recipe relies on brown sugar, you can absolutely adapt this to be a keto baked apple. The key is that substitution for the sweetener. You can use your favorite granular keto-friendly sweetener—just swap it out 1:1 for the brown sugar measurement. You might lose a tiny bit of that sticky caramelization you get from the molasses in brown sugar, but the apple itself will still be tender and flavorful! It turns into a wonderful, healthy option.
What is the best way to use up extra apples with this baked apple recipe?
If you buy apples in bulk because you love that crisp autumn air, you’ll definitely have extras! The best way to handle a big haul is ditching the whole apple preparation entirely and focusing only on the slices. When you make baked apple slices, they cook much faster—only about 20 minutes—and you can easily double or triple the batch to fit a larger pan. Those slices are perfect because you can use them on top of pancakes, stir them into oatmeal the next morning, or even top them with that cider glaze mentioned in some of the newer recipes out there. Slices are the most flexible!
I always try to bake a double batch of slices when apples are on sale. It saves my sanity later in the week!
Understanding the Nutrition in Your Simple Baked Fruit
Even though this dessert tastes like pure indulgence, I always like to give you a little peek at what’s inside our simple baked fruit. Now, remember, these numbers reflect the recipe exactly as written—with the full amount of brown sugar and butter. If you use my healthier tips mentioned earlier, those numbers will drop, especially for sugar and fat!
For one whole baked apple serving, here is the estimate:
- Calories: 240
- Sugar: 45g
- Fat: 6g
- Carbohydrates: 48g
This calculation is using the details provided, so treat it as a great starting point when planning your meals. For more ideas on keeping things light during the week, check out my thoughts on quick, healthy lunch ideas!
Share Your Autumn Apple Treats Experience
That’s it, my friends! You’ve made a truly comforting, completely delicious baked apple dessert that smells like everything wonderful about the season. Now, that’s where the Rosa’s Tasty Kitchen community comes in. My whole philosophy is built on sharing the joy of making food that feeds the heart, and that means hearing from you!
When you try these Autumn apple treats, please, please leave a rating right below this section. Did the slicing method work best for your family? Did the kids devour the slices over ice cream? Let me know in the comments! Hearing how you adapted the recipe or what you served it with helps everyone else who comes along looking for that perfect autumn recipe.
If you snapped a photo of your gorgeous, tender apples, tag me on social media! I love seeing how my recipes look in your bustling home kitchens. Your success is the whole reason I share these simple, heartfelt recipes. If you’re looking for more quick inspiration for your weeknights, swing by my guide to weeknight dinner ideas while you wait for your apples to cool down!
PrintEasy Baked Cinnamon Apples: A Cozy Fall Dessert

Make tender, sweet baked apples filled with cinnamon and brown sugar. This simple recipe works for whole apples or slices, making it a perfect warm fruit dessert or snack.
- Prep Time: 10 min
- Cook Time: 45 min
- Total Time: 55 min
- Yield: 4 servings 1x
- Category: Dessert
- Method: Baking
- Cuisine: American
- Diet: Vegetarian
Ingredients
- 4 medium baking apples (like Honeycrisp or Fuji)
- 1/4 cup packed brown sugar
- 1 teaspoon ground cinnamon
- 1/4 teaspoon ground nutmeg
- 2 tablespoons unsalted butter, cut into small pieces
- 1/4 cup water
Instructions
- Preheat your oven to 375 degrees Fahrenheit. Lightly grease an 8×8 inch baking dish.
- Wash the apples. If making whole baked apples, use an apple corer or small knife to remove the core from the top, leaving the bottom intact. If making slices, core and slice the apples into 1/2 inch thick pieces.
- In a small bowl, mix the brown sugar, cinnamon, and nutmeg together.
- If using whole apples, divide the sugar mixture evenly and stuff it into the center cavity of each apple. Place the butter pieces on top of the filling. Arrange the apples in the prepared baking dish.
- If using slices, toss the apple slices with the sugar mixture until coated. Spread the slices in a single layer in the baking dish. Dot with the butter pieces.
- Pour the water into the bottom of the baking dish around the apples.
- Bake whole apples for 40 to 50 minutes, or until tender when pierced with a fork. Bake slices for 20 to 25 minutes, stirring halfway through, until tender.
- Serve the warm baked apples immediately.
Notes
- For a healthier baked apple snack, reduce the brown sugar to 2 tablespoons and use a sugar substitute for the remaining amount, or skip the sugar and rely on the natural sweetness of the apple.
- You can use this method for baked apple slices, which cook faster and are great for topping oatmeal or yogurt.
- If you do not have water, you can substitute apple juice for a richer flavor.
Nutrition
- Serving Size: 1 whole apple
- Calories: 240
- Sugar: 45
- Sodium: 2
- Fat: 6
- Saturated Fat: 3.5
- Unsaturated Fat: 2.5
- Trans Fat: 0
- Carbohydrates: 48
- Fiber: 6
- Protein: 0.5
- Cholesterol: 8