
Oh, the sheer joy of pulling off a show-stopping dessert when the house is already baking from the summer heat! When I was teaching full-time and trying to wrangle my own little crew, I needed desserts that worked every single time without me having to fire up the oven. That need birthed my absolute favorite recipe: **the ultimate creamy no bake peanut butter pie**. Seriously, this recipe is the definition of ‘quick yet decadent.’ It comes together fast—I promise, it’s ready for the fridge faster than you can decide what movie to watch later. It’s the kind of reliable, easy peanut butter pie that I’ve perfected over years of balancing family life, and now I’m sharing that secret with you.
If you are looking for a ridiculously simple, make-ahead treat, you’ve found your winner. Feel free to check out some of my other tried-and-true favorites over at my homemade desserts page!
- Why This is the Best No Bake Peanut Butter Pie Recipe You Need
- Ingredients for Your Ultimate No Bake Peanut Butter Pie
- How to Make the Easiest No Bake Peanut Butter Pie
- Tips for the Best No Bake Peanut Butter Pie Success
- Variations for Your Chocolate Peanut Butter Pie No Bake
- Serving Suggestions for this Simple Make Ahead Dessert
- Storage and Making Ahead with Your No Bake Peanut Butter Pie
- Frequently Asked Questions About the No Bake Peanut Butter Pie Recipe
- Estimated Nutrition for This Decadent No Bake Treats
Why This is the Best No Bake Peanut Butter Pie Recipe You Need
When people ask me for a dessert that never fails, especially during the summer when the last thing I want is a hot oven, I immediately point them to this recipe. It’s my go-to **Easy Peanut Butter Pie** because the flavor payoff is huge for almost zero effort. I use a secret combo of cream cheese and thawed whipped topping that creates the most magical pillow-soft peanut butter layer. That’s why I proudly call this my best **Creamy No Bake Dessert**.
This pie is proof that you don’t need complicated steps for incredible results. It really comes together in a flash, and isn’t that what we all need at dinnertime?
Quick Prep Time for Your No Bake Peanut Butter Pie
I timed myself recently—and even while answering texts—I had this filling mixed and into the crust, ready for the fridge, in under 20 minutes. Twenty minutes! If you have a store-bought crust ready to go, you are practically done before the kettle even boils. It truly is a lifesaver for spontaneous sweet cravings.
Achieving the Fluffy Peanut Butter Filling Recipe
The secret to that airy texture we all crave isn’t just the peanut butter; oh no, that’s too simple! It’s the way the softened cream cheese balances the richness of the peanut butter against the lightness of the whipped topping and heavy cream. When beaten together properly, you get that perfect **Fluffy Peanut Butter Filling Recipe** that melts in your mouth. It’s decadent without being heavy.
If you love easy, creamy desserts, make sure you check out my recipe for easy pumpkin fluff too!
Ingredients for Your Ultimate No Bake Peanut Butter Pie
When gathering what you need for the no bake peanut butter pie, I always tell people to measure twice, especially for the cold liquids! You want the filling to be perfectly rich and smooth, which means paying attention to the condition of your ingredients when you start mixing.
You’ll need your creamy peanut butter, of course, along with 8 ounces of cream cheese that has been sitting out long enough to be genuinely soft—we don’t want lumps! Powdered sugar sweetens our base, and a splash of vanilla extract never hurts. Then comes the magic: cold heavy whipping cream and cold milk to create that airy volume, along with the thawed frozen whipped topping.
Crust Options: Peanut Butter Pie Graham Cracker Crust vs. Oreo Crust
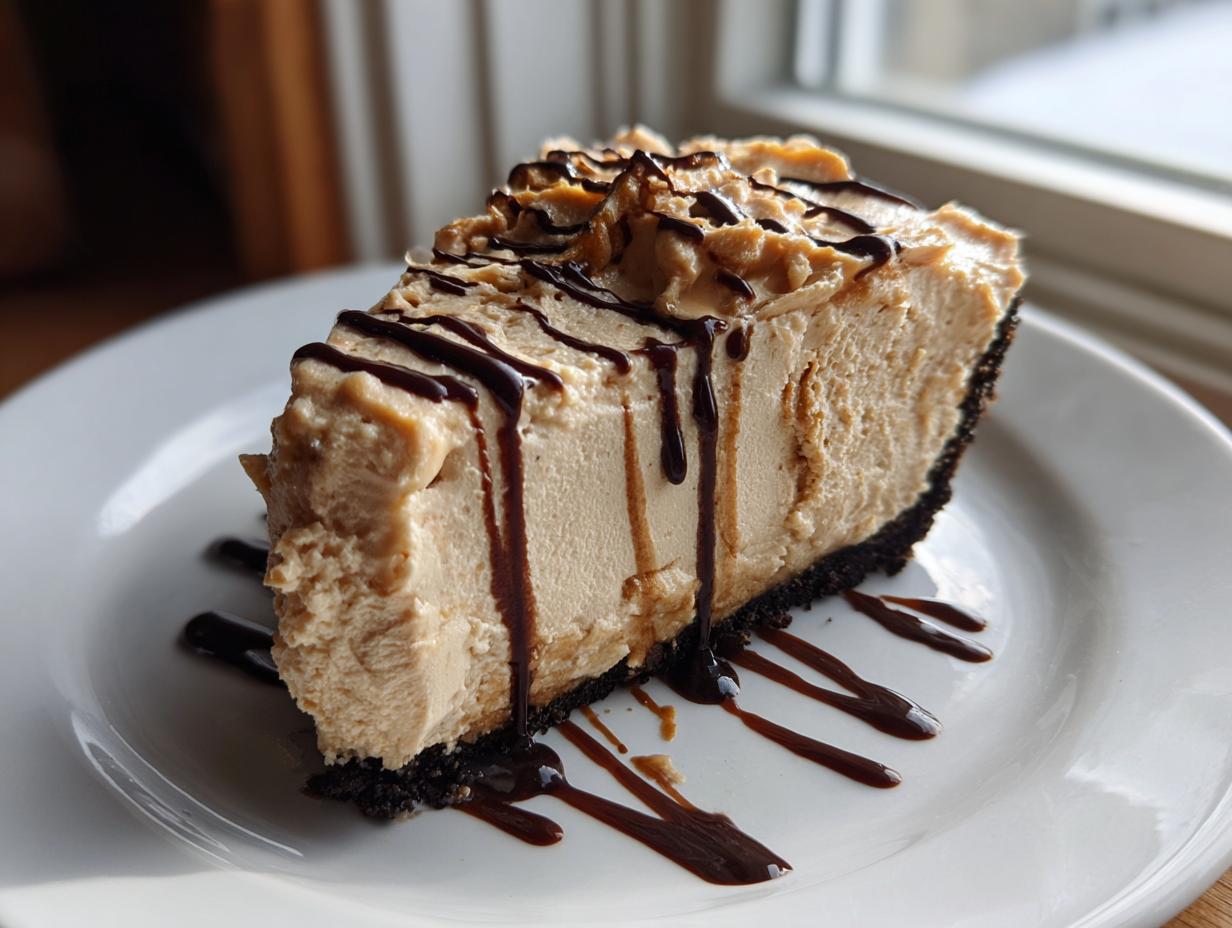
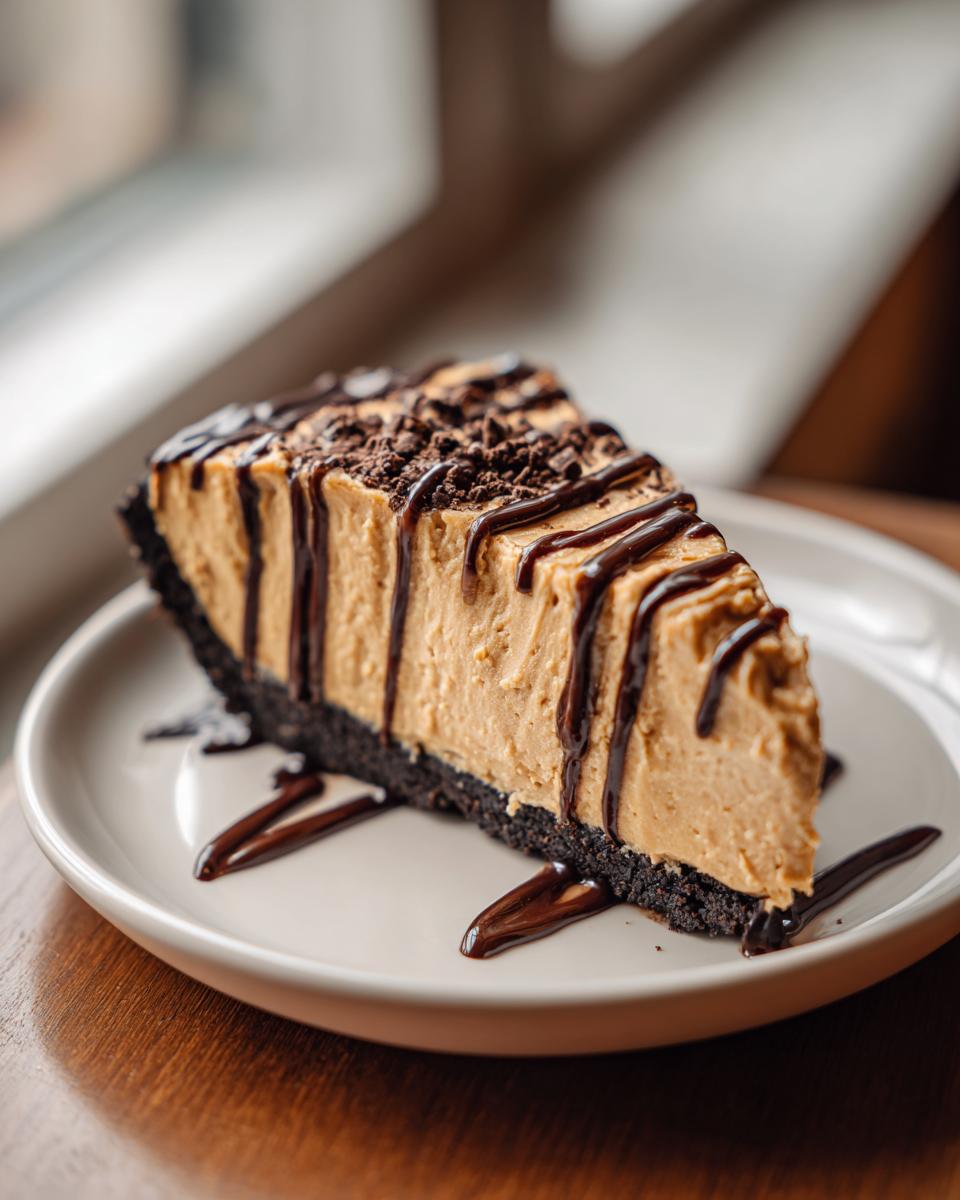
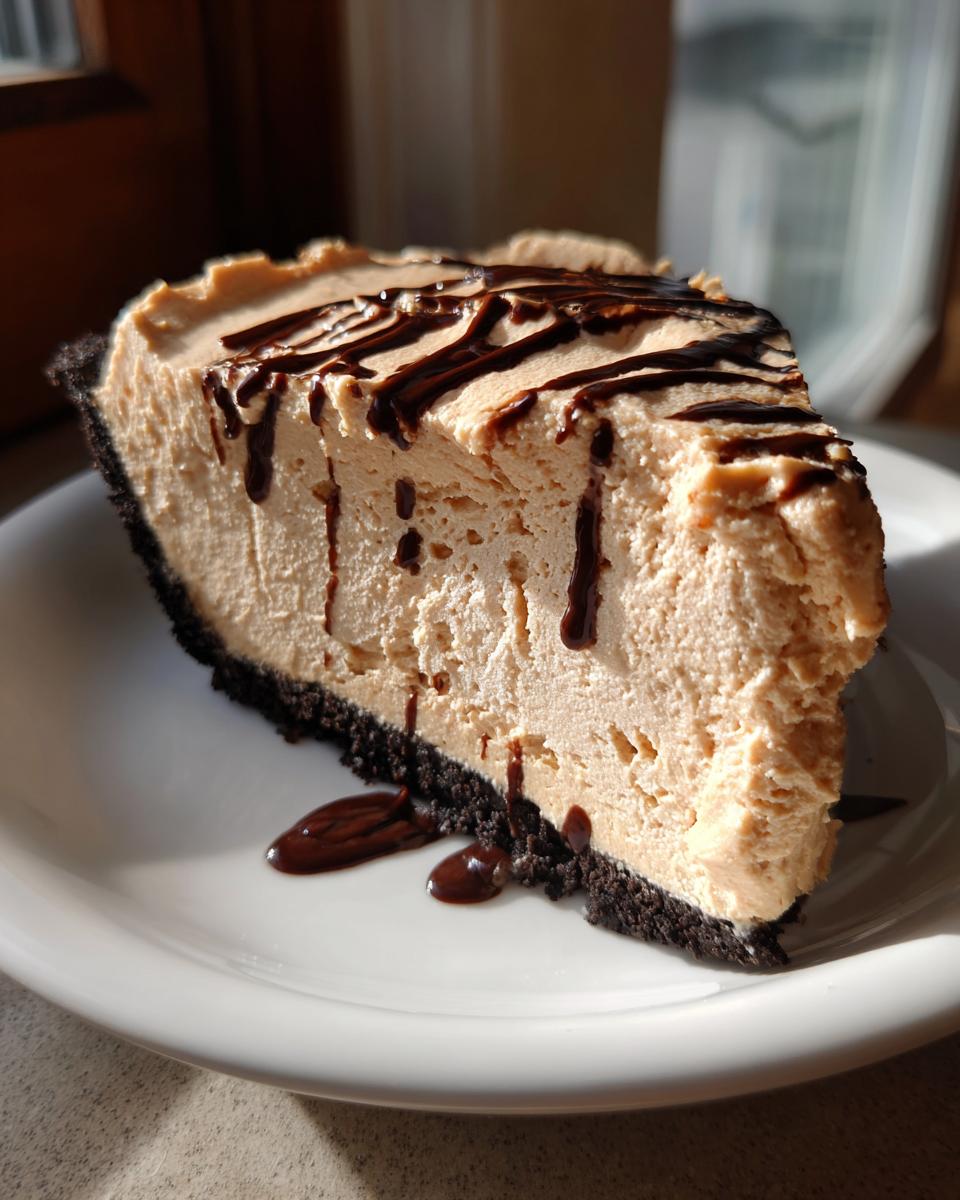
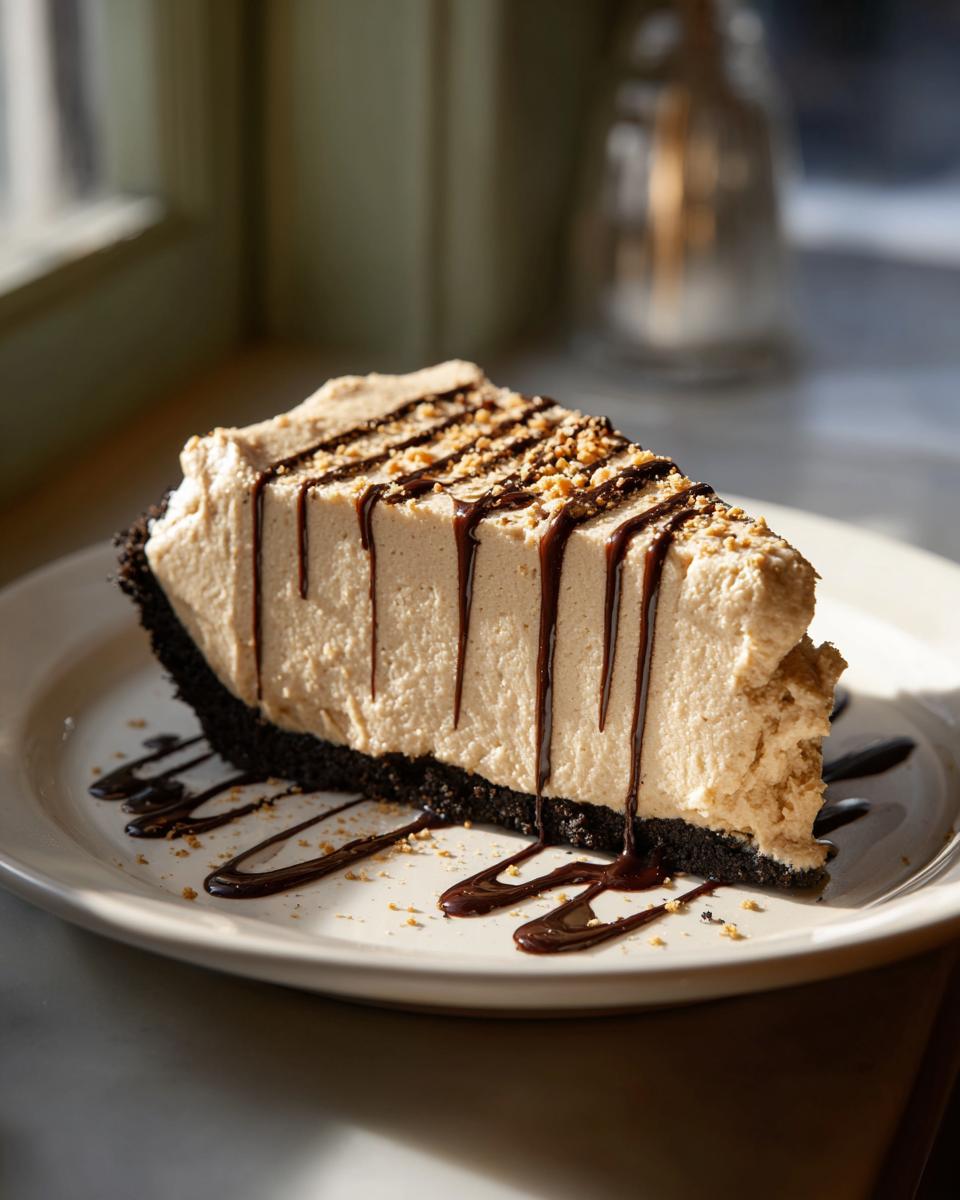
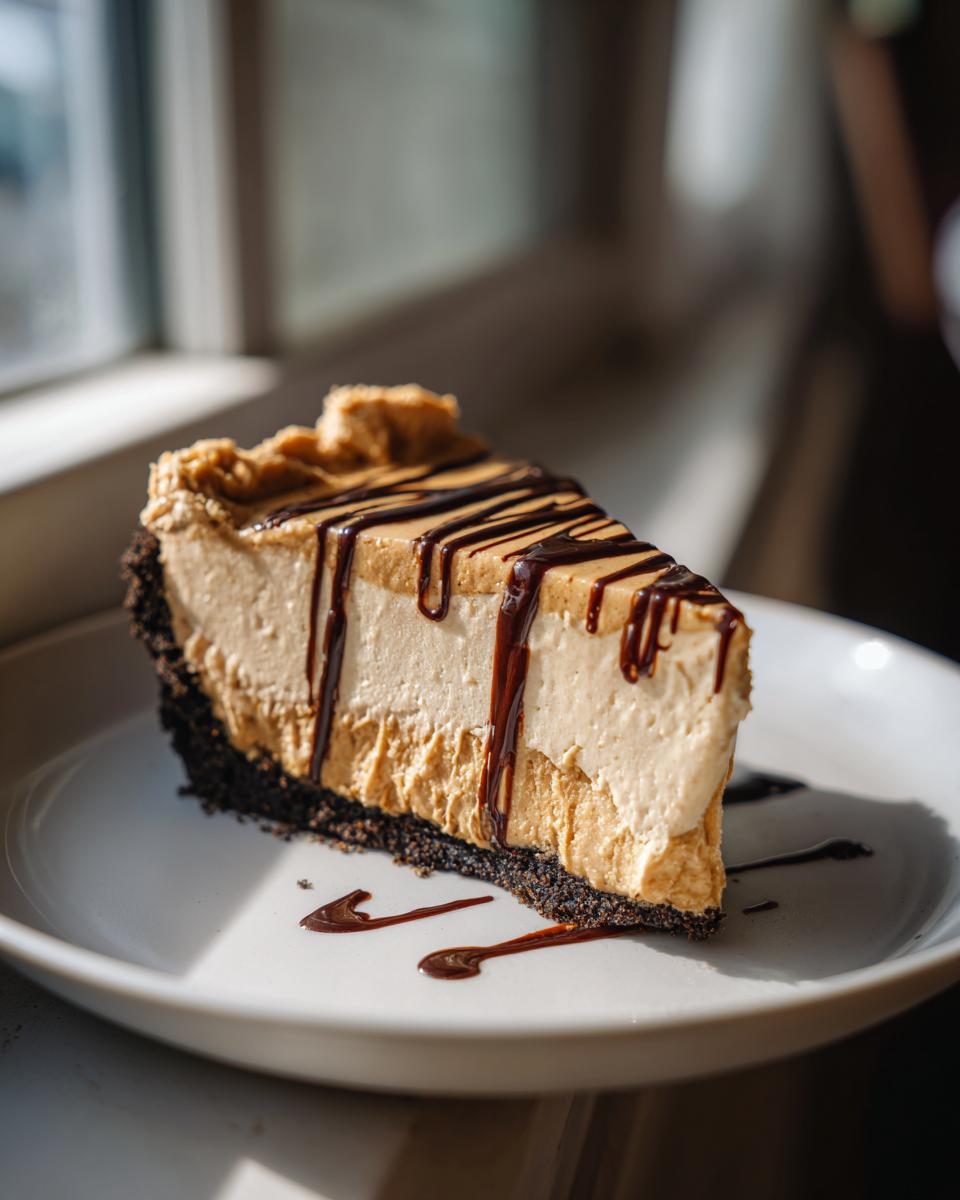
This is where personal preference really takes over! If you love a classic, slightly salty-sweet contrast, go for a store-bought Peanut Butter Pie Graham Cracker Crust. It lets the peanut butter flavor sing loudest. Now, if you want to lean into decadence—and honestly, I often do—go for the chocolatey crunch of the Peanut Butter Pie with Oreo Crust. They are both fantastic, but the Oreo crust adds a real boost of deep, comforting chocolate flavor that pairs so well with the peanut butter filling.
I sometimes grab my recipe for homemade mayonnaise just to remind myself how important it is to start with quality base ingredients, even in desserts like this! You can see that simple recipe right here.
How to Make the Easiest No Bake Peanut Butter Pie
Okay, let’s get down to business. Making this pie is wonderfully straightforward, but a couple of little techniques will ensure you get that perfect slice every time for your **no bake peanut butter pie**. First things first: that crust!
If you’re using store-bought, just set it on your serving plate. If you are making an Oreo crust from scratch—which I totally recommend for the best deep flavor—crush those cookies and mix them with melted butter. Press it firmly into the pie plate and slide it into the freezer to chill while you work on the filling. That chill time is important!
Now for the filling base. Grab your big bowl and beat the peanut butter, cream cheese, and powdered sugar until they look completely smooth. I can’t stress this enough: make sure that cream cheese is perfectly smooth *before* adding anything else! I learned the hard way in my early days trying to balance four kids that rushing the beating step means you end up with little cream cheese chunks in your dessert. Don’t do that!
Whipping the Cream for a Light No Bake Peanut Butter Pie Filling
We need air, air, air! The heavy whipping cream must be COLD. Stick your mixer bowl in the freezer for 10 minutes before you start if you need to. Beat that heavy cream until it forms those lovely, soft peaks you see in commercials. Set that aside gently. In another bowl, combine your milk and thawed whipped topping, then gently fold *that* into your main peanut butter base. The final, crucial step is to fold in your independent whipped cream. You have to be gentle here—use a spatula and sweep from the bottom up. We are keeping all that air we just whipped in there to keep the filling light and fluffy!
Setting the No Bake Peanut Butter Pie: Essential Chilling Time
This is the part where your patience pays off, sweet friend. Once all that gorgeous, fluffy peanut butter filling is smoothed into the crust, cover the pie lightly with plastic wrap. Put it in the fridge and forget about it! The absolute minimum chill time for this **no bake peanut butter pie** is four hours. Honestly, if you can fight the urge and let it chill overnight, you will be richly rewarded with a filling that holds its shape perfectly when sliced.
If you’re looking for other simple baking projects that still impress, you have to see how easy my homemade naan bread is to master!
Tips for the Best No Bake Peanut Butter Pie Success
To ensure your pie is crowned the Best No Bake Pie on the table, we have to talk about temperature and technique. This isn’t a hard science, but baking is chemistry, even when you’re not turning on the oven! My biggest tip for this **no bake peanut butter pie** involves that cream cheese. It absolutely must be completely softened. If you try to beat cold or even cool cream cheese into the peanut butter, you end up with little white lumps that just distract from the otherwise smooth filling. Microwave it for ten seconds if you forget to take it out early, but test it first!
Also, remember what I said about folding? When you bring the whipped cream into the base—that’s where the air lives. You must be gentle. I rushed this once when my son had a last-minute soccer party needing a dessert pronto, and I folded too aggressively. The pie set up, yes, but it was dense, almost like fudge, not the cloud-like texture I was aiming for. It still tasted good, but it wasn’t the fluffy delight it should have been. Patience in the final folding step saves the texture!
If you’re looking for other desserts that stay soft and delicious for days, you have to try my recipe for pudding cookies. They are another foolproof favorite!
Variations for Your Chocolate Peanut Butter Pie No Bake
Part of the fun when you have a simple, fantastic base recipe like this one is figuring out how to make it even more ridiculously indulgent! Since this is a no bake peanut butter pie, we don’t have to worry about oven interference, which means we can load up on decadent toppings.
If you are chasing that rich, crave-worthy flavor profile, you should absolutely turn this into a Chocolate Peanut Butter Pie No Bake creation. That creamy peanut butter filling is the perfect foil for deep, dark chocolate.
My favorite trick for a quick, elegant topping is to gently warm up some good quality chocolate chips with a splash of heavy cream or even just a spoonful of butter until it’s glossy and pourable. That slight drizzle of homemade chocolate ganache on top changes the whole game!
But, let’s be real, sometimes you need maximum kid appeal. On those nights, I chop up a bag of Reese’s peanut butter cups and sprinkle them generously over the top right before the final chill. Or, if you’re feeling extra, swirl in some peanut butter sauce right before you serve it. Honestly, you can’t mess this up. If you love chocolate pairings, you must check out my chocolate peppermint cookies recipe—perfect flavors fighting for attention!
Serving Suggestions for this Simple Make Ahead Dessert
Because this pie is so incredibly straightforward, it’s my favorite thing to bring to any gathering—it truly shines as one of those perfect potluck desserts easy to transport!
When the weather heats up, this shines as one of the best Summer Pies No Bake recipes you can have in your back pocket. It’s always a welcome sight when everyone else is dragging out heavy, oven-baked items.
For garnishing, a dusting of cocoa powder or a swirl of extra melted chocolate works wonders. If you are serving it after a big meal, a small cup of strong, black coffee is the perfect pairing. The slight bitterness cuts through the richness of that amazing peanut butter filling beautifully!
Storage and Making Ahead with Your No Bake Peanut Butter Pie
One of the features I truly adore about this pie is how perfectly it works as a Simple Make Ahead Dessert. Listen, you just need to chill it properly, and it waits! After it has set for those crucial 4 to 6 hours, or preferably overnight, you cover it up tightly with plastic wrap. Then, tuck it right into the refrigerator.
This wonderful no bake peanut butter pie will keep beautifully for about three to four days in the fridge. Because it’s such a fabulous No Oven Dessert, you never have to worry about juggling oven space; it just chills quietly until party time! If you want to see another great make-ahead idea, check out my recipe for easy freezer jam!
Frequently Asked Questions About the No Bake Peanut Butter Pie Recipe
I’ve gathered some of the most common questions I get about this pie when people try it for the first time. It’s such a simple recipe, but sometimes a little clarification goes a long way to making it the absolute best no bake pie!
Can I use crunchy peanut butter in this no bake peanut butter pie?
Oh, you certainly can, but you’ll change the experience! Remember, the goal here is often that super smooth, almost cloud-like texture that melts away. If you use crunchy, you are going to introduce little pockets of nuts throughout the filling. It still tastes amazing, of course—I love crunch!—but it won’t be the ultra-smooth, velvety slice we are aiming for in this specific no bake peanut butter pie recipe.
What if I don’t have heavy whipping cream for the fluffy peanut butter filling?
Don’t panic if the heavy whipping cream isn’t in your fridge! The cream is just in there to help create that airy lift for the fluffy peanut butter filling. If you swap it out, you should substitute it with one extra cup of thawed whipped topping (like Cool Whip). Now, the texture won’t be quite as light and airy because you miss the structure that the whipped cream provides on its own, but it will still set up nicely and taste delicious!
Can this be frozen as a simple make ahead dessert?
Yes, absolutely! This is one of the things I love most about it being a simple make ahead dessert. Once the pie is fully set in the fridge (after at least 6 hours), wrap it really well—plastic wrap, then foil is my go-to security layer—and pop it in the freezer for up to about a month. When you want to serve it, just move it to the refrigerator the day before you need it. Thawing slowly in the fridge keeps that filling beautifully stable. If you reach out with any other questions, you can always find my contact form right here!
Estimated Nutrition for This Decadent No Bake Treats
Now, I’m not a nutritionist, I’m just a home cook trying to make yummy things for my family, so take these numbers as a good guideline! Based on the standard ingredients for this rich dessert, here’s what one slice of this decadent treat works out to be. Remember, this assumes you’re using the standard recipe and not going overboard with chopped peanut butter cups on top!
- Calories: 450
- Fat: 30g
- Sugar: 35g
- Protein: 10g
- Carbohydrates: 40g
These estimates are based on using a standard graham cracker crust and average ingredient measurements. Enjoy every bite guilt-free!
PrintThe Best Easy No Bake Peanut Butter Pie
Make this creamy, decadent no bake peanut butter pie with a crunchy crust. It comes together quickly, requires no oven, and is perfect for potlucks or summer gatherings.
- Prep Time: 20 min
- Cook Time: 0 min
- Total Time: 4 hr 20 min
- Yield: 8 servings 1x
- Category: Dessert
- Method: No Bake
- Cuisine: American
- Diet: Vegetarian
Ingredients
- 1 pre-made 9-inch graham cracker crust or Oreo cookie crust
- 1 cup creamy peanut butter
- 8 ounces cream cheese, softened
- 1 cup powdered sugar
- 1 teaspoon vanilla extract
- 1/2 cup cold heavy whipping cream
- 1/2 cup cold milk (whole or 2%)
- 8 ounces frozen whipped topping (like Cool Whip), thawed
- Optional Topping: Chocolate syrup or chopped peanut butter cups
Instructions
- Prepare your crust: If using a store-bought crust, place it on a serving plate or pie dish. If making an Oreo crust, crush 24 Oreos and mix with 6 tablespoons melted butter, then press into the pie plate and chill while you make the filling.
- In a large bowl, beat the peanut butter, softened cream cheese, and powdered sugar together until the mixture is smooth and fully combined. Add the vanilla extract.
- In a separate, chilled bowl, whip the heavy cream until soft peaks form. Set aside.
- In another bowl, combine the cold milk and the thawed whipped topping. Gently fold this mixture into the peanut butter and cream cheese base until just combined.
- Gently fold the whipped cream into the peanut butter mixture until the filling is light and fluffy. Do not overmix.
- Spoon the fluffy peanut butter filling evenly into the prepared crust. Smooth the top with a spatula.
- Cover the pie loosely with plastic wrap and chill in the refrigerator for at least 4 hours, or preferably overnight, to allow the filling to set completely.
- Before serving, top with chocolate syrup, whipped cream, or chopped peanut butter cups, if desired. Slice and serve cold.
Notes
- For an extra rich flavor, use a pre-made Oreo crust.
- If you do not have heavy whipping cream, you can substitute it with an additional 1 cup of thawed whipped topping, though the texture will be slightly less airy.
- This pie sets best when chilled for a full 6 hours. Plan ahead for the best texture.
Nutrition
- Serving Size: 1 slice
- Calories: 450
- Sugar: 35g
- Sodium: 320mg
- Fat: 30g
- Saturated Fat: 10g
- Unsaturated Fat: 20g
- Trans Fat: 0g
- Carbohydrates: 40g
- Fiber: 2g
- Protein: 10g
- Cholesterol: 35mg