
There’s a special kind of kitchen magic that happens when you have the patience to wait for something good. Forget the rush of weeknight cooking for just a moment—I’m talking about drawing out pure, natural sweetness from something as sharp as an onion! That’s why I’m thrilled to share what I honestly believe is the best way to caramelize onions you’ll ever try. As a former teacher and current mom running this kitchen, I know you need methods that work reliably for busy schedules, but boy, does low-and-slow deliver restaurant style caramelized onions. This guide has everything you need to create those deep, rich, jammy onions that transform even the simplest meal. If you’re looking for ways to upgrade dinner without adding complexity, check out my favorite weeknight dinner ideas, but first, trust me, this technique is the secret weapon you need in your back pocket!
- Why You'll Love This Caramelized Onions Recipe
- Essential Equipment for Perfect Caramelized Onions
- Ingredients for Deep Flavor Caramelized Onions
- The Best Way to Caramelize Onions: Step-by-Step Instructions
- Tips for Achieving Sweet Caramelized Onions Every Time
- How to Use Your Gourmet Caramelized Onion Topping
- Storage and Reheating for Your Caramelized Onions
- Frequently Asked Questions About Caramelized Onions
- Nutritional Estimates for Caramelized Onions
- Share Your Perfect Caramelized Onions
Why You’ll Love This Caramelized Onions Recipe
Honestly, once you nail this technique, you’ll stop seeing onions as filler and start seeing them as the main event! I promise you, making these perfect is so satisfying, and the result lasts for days.
- It turns sharp onions into sweet caramelized onions that taste like candy—pure natural sugar is released!
- You get that incredible, deep flavor onions texture that tastes like it cooked all day, even if you use my quicker method.
- This technique is incredibly simple; it mostly just requires your patience, not constant stirring.
- The resulting onions are perfect as a versatile, gourmet onion topping for almost anything savory.
- This caramelized onions recipe is extremely budget-friendly—it’s truly inexpensive flavor!
That’s why I’ve made sure the steps below are crystal clear, whether you have an hour to dedicate or just thirty minutes!
Essential Equipment for Perfect Caramelized Onions
You don’t need fancy, complicated gadgets for truly amazing caramelized onions. Really, it’s about using the right foundational tools so the heat can do its job without burning everything up. As a mom who cooks daily, I rely on basics that last!
- A large, heavy-bottomed skillet: This is non-negotiable! A thin pan will scorch your onions before they ever get a chance to brown evenly. You need that heavy metal to spread the heat around.
- A sharp knife and cutting board: The success of this onion cooking technique starts with even slices. If some pieces are thick and others are paper-thin, you end up with crunchy bits mixed with mushy ones.
- Silicone spatula or wooden spoon: We need something sturdy to scrape up all those tasty brown bits—that’s called the fond—from the bottom of the pan as we cook down.
- Patience (Yes, I’m counting this as equipment!): I know, I know, but seriously, this is your most important tool for achieving those deep flavor onions.
When you have the right pan, you’re already halfway to mastering the best way to caramelize onions!
Ingredients for Deep Flavor Caramelized Onions
Okay, let’s talk about what actually goes into these beauties. Since we are focusing on developing maximum flavor here, we keep the core ingredients super simple. This lets those onions really shine and turn into those gorgeous, sweet caramelized onions we’re aiming for. Don’t worry about stocking up on specialty items; most of this is probably in your pantry right now!
Here is exactly what you need to get started on this simple yet impressive caramelized onions recipe:
- 3 large yellow onions: These are my absolute go-to! They have the best balance of sugar and acidity for caramelizing. Make sure you slice them thinly and as uniformly as possible. Trust me, that prep work makes a huge difference in the end texture!
- 2 tablespoons unsalted butter or olive oil: You usually need a little bit of fat to start coating the onions and help them sweat down gently. Sometimes I even use half butter, half oil for the flavor boost from the butter!
- 1 teaspoon salt: Don’t skip this! Salt helps draw the moisture out of the onions so they can start to brown instead of just steaming.
- 1 teaspoon sugar (optional, for faster browning): This is my little trick if I’m in a hurry and need quick caramelized onions. A tiny bit of sugar feeds the browning process faster, but if you have the time, you can totally skip it and let nature (and low heat) do the work.
That’s it for the basics! You see? It’s so straightforward. We’ll talk about the flavor boosters, like balsamic, later on when we get to the actual technique.
The Best Way to Caramelize Onions: Step-by-Step Instructions
Now for the part everyone asks about! Honestly, this is where the magic happens, and you have two paths you can take depending on how much time you have while working on your jam recipe or whatever else you’re baking!
Prep Work: Slicing and Initial Sweating
First things first: uniform slicing. I know it sounds fussy, but if your onion slices aren’t about the same thickness, they won’t cook at the same speed. Get them thin! Pop your sliced onions into a big, heavy skillet over medium-low heat with your fat. We cook them for about 15 minutes, stirring maybe every five minutes for now, until they are soft and you can practically see right through them. That’s the sweating part—we’re getting the water out so the sugar can come forward.
Mastering the Slow Cooked Onions Technique
If you have the time, this is the route you want to take! After the initial sweat, drop that heat to low, add your salt, and just let them chill out. For truly glorious, deep flavor onions, you need about 30 to 50 minutes total here. The goal is gorgeous, dark brown, almost sweet patches sticking to the bottom of the pan—that’s the fond, darling! Make sure you scrape those bits up every 5 to 7 minutes. These slow cooked onions develop that amazing richness!
Achieving Quick Caramelized Onions
Look, I get it—sometimes you need that deep flavor *now*. If you’re rushing, crank the heat up slightly to medium-low after the 15-minute sweat. You’ll need to stir much more often, probably every two or three minutes, because they will want to burn! This gets you closer to done in about 20 to 25 minutes total. They won’t be quite as complex as the slow ones, but these quick caramelized onions are still miles better than anything you get out of a jar. You can find some neat tricks over at this blog on cutting down the time, too!
Once they look perfect—no matter which method you chose—add a splash of balsamic vinegar or sherry if you like, scrape those bottom bits one last time, and pull them off the heat immediately! For more inspiration on quick cooking, check out my applesauce recipe.
Whether you use one method or the other, you’ll want to read more over at Running to the Kitchen for even more authoritative tips on how to caramelize onions.
Tips for Achieving Sweet Caramelized Onions Every Time
Even when you follow the steps perfectly, sometimes the onions just don’t get that deep, mahogany color we’re craving. But don’t worry, becoming the master of sweet caramelized onions is totally achievable!
If you notice they are starting to brown too fast and look like they might burn before they’ve softened completely—this happens a lot when you’re trying to get quick caramelized onions—just throw a tablespoon of water in the pan. It sounds crazy, but that blast of steam cools things down just enough to scrape up those stuck-on bits without burning them. That’s pure flavor being saved!
Remember that little bit of optional sugar or the salt? That’s key to drawing out the moisture so we can get to the good part. And seriously, don’t forget that final splash of balsamic vinegar I mentioned—it really punches up the natural sweetness. You can find some fantastic advice on making these at home over at Simple Recipes.
For even richer sauces or toppings, you need a good binder! Maybe try this homemade mayo recipe to fold these gorgeous onions into next time you’re thinking about a sandwich upgrade.
How to Use Your Gourmet Caramelized Onion Topping
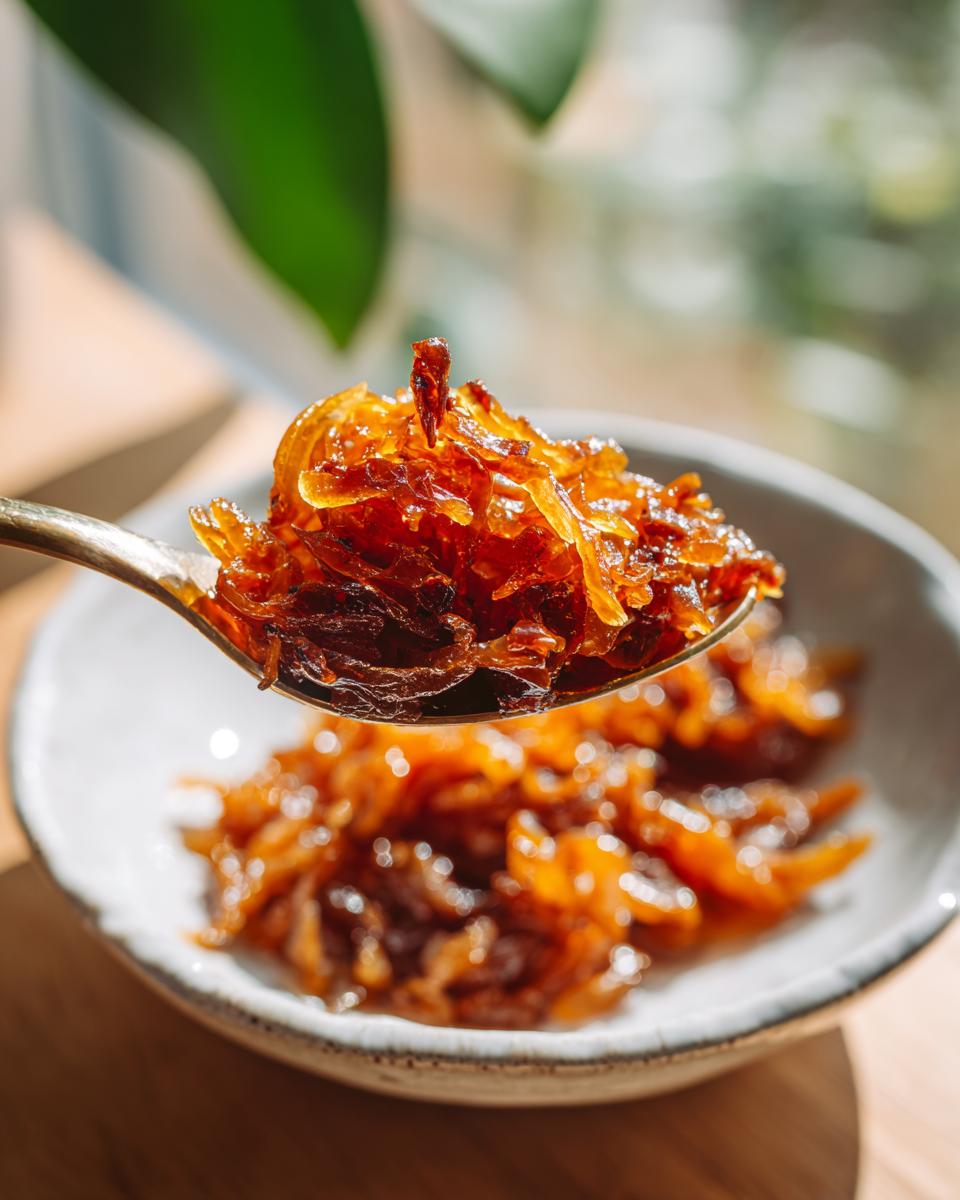
So, you’ve got a batch of beautiful, deep brown, jammy onions cooling on the counter. Now what? The fun part is putting these gems to work! They are wonderful just spooned right onto steaks or burgers, but they truly shine when they become the star of an appetizer or a main course. I always think of these as my little secret ingredient that takes simple recipes with caramelized onions from zero to hero in about sixty seconds. For appetizer bliss, you can even fold them into a lovely brie and onion dip base, like the one I saw from Pure Flavor Recipes!
Making a Classic Caramelized Onion Dip
If you are having people over, you absolutely have to try transforming these into a dip. Once cooled, fold these sweet onions right into a base of cream cheese, maybe some sour cream, and a little garlic powder. The depth they bring to a simple caramelized onion dip is unbelievable! It feels so fancy, but it’s just a few extra steps. You can see a great example of a base pairing over at Family Table Vibes, though I usually just stick to cream cheese!
Incorporating Caramelized Onions into Pasta Dishes
My absolute favorite way to use these, especially when I’m in the mood for comfort food, is in pasta. You wouldn’t believe the viral success some of those creamy caramelized onion pasta dishes have had lately, and it’s all down to the richness of the onions! I love folding them into a simple garlic and Parmesan sauce or even stirring them into a creamy pesto like in my creamy pesto pasta recipe. For a real showstopper, I whip up a batch of cheesy bread dip and mix a little bit of the onions in for a savory surprise.
If you want to see how others are using them, check out how they do it in their famous French Onion Pasta recipe over at Carlsbad Cravings. It’s decadent!
Storage and Reheating for Your Caramelized Onions
The best part about making a huge batch of these flavorful onions is that you don’t have to use them all at once! Seriously, making a massive batch should be your goal because they freeze like an absolute dream. I always make double what I need because future Rosa will definitely thank past Rosa for saving her about 45 minutes on a night when she’s too tired to cook but knows she wants something good.
For refrigerator storage, pop your finished onions into an airtight container. They will keep beautifully like this for about a week. I usually put them in one of those small glass containers that stack nicely in the fridge door. They stay soft and flavorful the whole time.
If you are planning on keeping them longer—say, for holiday uses or just stocking up—freezing is the way to go. Scoop your caramelized onions into small portions, maybe just enough for one recipe, and freeze them flat in a zip-top bag. Once they’re frozen solid, you can store them stacked up. They last for about three months this way, easy peasy!
When it comes time to use them, reheating is just as important as the cooking, so we don’t dry them out. If they are coming from the fridge, just pop them back into that same heavy skillet on very low heat with half a teaspoon of water or broth. You want to gently warm them through until they are glistening again, not fry them hard. If they are coming straight from the freezer, do the same thing: low heat and a tiny bit of liquid. Give them a stir every minute or so until they are pliable again, and they’ll taste just as fresh as the day you made them!
Frequently Asked Questions About Caramelized Onions
I know you’re going to have questions when you first try this technique—it seems too simple to take so long! But I’ve answered the ones I get asked most often when I teach my friends how to caramelize onions. Don’t hesitate to reach out if you have one that isn’t covered here; you can always check out my About Page for more about my kitchen philosophy!
Can I skip the sugar when making caramelized onions?
Absolutely, you can! Remember, I marked that teaspoon of sugar as optional, right? If you are in absolutely no rush and you let those onions cook low and slow for the full 45 to 50 minutes, the natural sugars in the onion will come out beautifully on their own. The sugar is just a little helper, or a baking cheat code, if you will, to speed up the browning process a bit when you’re aiming for those quick caramelized onions mentioned earlier. If you let them go slow, skip it!
What is the difference between sautéed and caramelized onions?
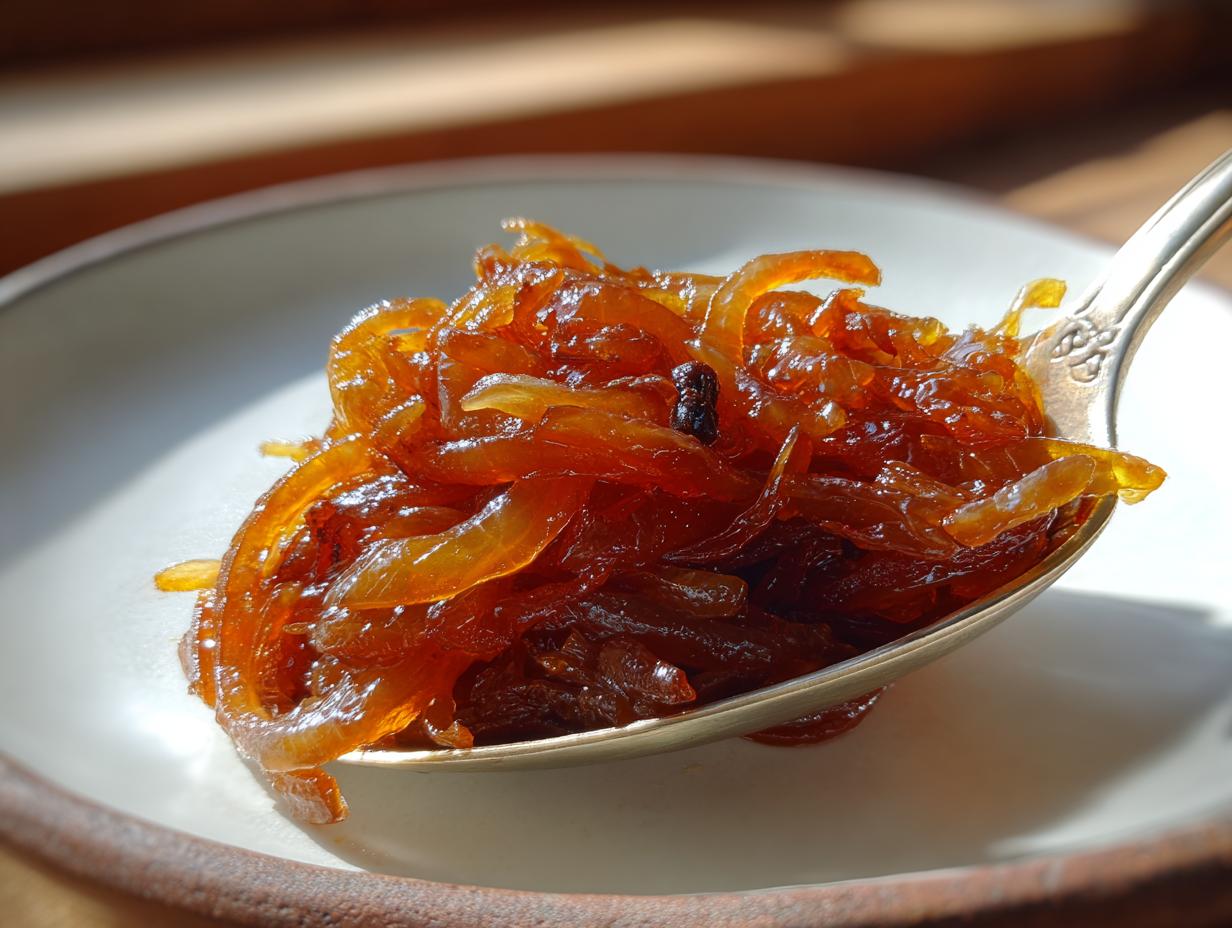
This is a great technical question! Sautéed onions are cooked quickly—maybe 8 to 10 minutes—until they are soft and translucent, but they still taste mostly like onions. Caramelized onions, though? That’s where we wait for that beautiful Maillard reaction to happen. We cook them long enough over low heat that the sugars completely break down, creating that deep, rich, mahogany color and a flavor profile that is incredibly sweet, almost savory, like a thick savory jam. Sautéed onions are soft; caramelized onions are jammy and profoundly flavorful!
What type of onion is best for caramelizing?
My go-to, tried-and-true choice is the yellow onion. They have a fantastic balance of moisture and sugar, which means they brown evenly and get wonderfully sweet. If you want to experiment, red onions work beautifully too—they keep their color a little bit and are naturally a touch sweeter, but just know they can sometimes bleed their color onto each other if you’re making a huge batch. White onions work, but they can sometimes brown a little unevenly compared to the yellow ones. Stick with yellow for your first time mastering this technique!
Nutritional Estimates for Caramelized Onions
Now, I know some of you are tracking everything, and some of you just want to eat delicious food—and that’s totally fine! But I always try to give a rough estimate of what you’re getting when you make a batch of these onions. Because we are using butter (or oil) and focusing on the natural vegetable sugars, the numbers aren’t too scary, especially considering how much flavor you get for your effort!
Keep in mind that this is just an estimate for a standard serving size, based on using equal parts butter and onion yield. If you cook yours longer, the sugar content might vary slightly, but the overall profile stays pretty consistent for this fantastic caramelized onions recipe.
- Serving Size: 1/4 cup
- Calories: 85
- Sugar: 10g (This is mostly natural from the onions themselves, concentrated!)
- Sodium: 150mg
- Fat: 4g
- Saturated Fat: 2g
- Carbohydrates: 12g
- Protein: 1g
Remember, these are estimates based on the standard ingredients listed in the recipe, where we used butter and skipped adding extra balsamic vinegar. If you use oil instead of butter, or if you add that splash of homemade mayo base to make a dip later, the fat content will change, of course! But for the onions themselves, this is what you’re looking at. Enjoy that sweet, savory goodness!
Share Your Perfect Caramelized Onions
Well, that’s it! You are now equipped with the knowledge to make truly incredible caramelized onions, whether you have an extra hour to go slow and deep, or you need them quickly for a last-minute topping. This process, taking simple vegetables and turning them into gold, is exactly what Rosa’s Tasty Kitchen is all about: making achievable joy in your home.
I sincerely hope that when you dig into a spoonful of those sweet, jammy onions, you feel that same flicker of pride I get when I see the rich brown color forming in my pan. Did you try the slow cook method? Or did you stick to the quicker version because dinner was calling your name? I want to hear about the time commitment you made and how you used them!
Please, take a moment and leave a rating and a comment below. Tell me how long it took you and if you used them in a pasta dish or maybe even tried making a delicious onion dip. Did you give them a final drizzle of balsamic? Your feedback helps the next home cook feel brave enough to try this technique, and that’s what community is all about!
If you have pictures of your beautiful, golden onions, I would absolutely love to see them! Feel free to reach out through my Contact page; sharing our cooking successes is what makes this kitchen feel like home.
PrintHow to Caramelize Onions: The Ultimate Guide for Deep Flavor
Learn the best way to caramelize onions using both slow and quick methods to achieve sweet, jammy onions perfect for any gourmet topping or side dish.
- Prep Time: 10 min
- Cook Time: 45 min
- Total Time: 55 min
- Yield: About 1.5 cups 1x
- Category: Side Dish
- Method: Stovetop Sauté
- Cuisine: American
- Diet: Vegetarian
Ingredients
- 3 large yellow onions
- 2 tablespoons unsalted butter or olive oil
- 1 teaspoon salt
- 1 teaspoon sugar (optional, for faster browning)
Instructions
- Slice the onions thinly and uniformly. Uniform slices help them cook evenly.
- Place a large, heavy-bottomed skillet over medium-low heat. Add the butter or oil.
- Add the sliced onions to the skillet. Stir to coat them completely with the fat.
- Cook slowly for 15 minutes, stirring occasionally, until the onions soften and become translucent. This is the initial sweating phase.
- Reduce the heat to low. Add the salt and the optional sugar. Stir well.
- Continue cooking for 30 to 50 minutes for the traditional slow method, stirring every 5 to 7 minutes. You are looking for a deep, rich brown color. Scrape up any brown bits (fond) from the bottom of the pan as you stir.
- For the quick method: Increase the heat slightly to medium-low after the initial 15 minutes. Cook for 20 to 25 minutes total, stirring more frequently (every 2-3 minutes) to prevent burning while encouraging faster browning.
- When the onions reach your desired deep brown color and jammy texture, remove them from the heat immediately to stop the cooking process.
- Use these perfect caramelized onions as a gourmet onion topping for burgers, dips, or pasta dishes.
Notes
- For an even deeper flavor, add 1 tablespoon of balsamic vinegar or a splash of dry sherry during the last 5 minutes of cooking.
- If the onions start sticking too much before they brown, add a tablespoon of water to the pan and scrape the bottom.
- You can easily double or triple this recipe; caramelized onions freeze well for later use.
Nutrition
- Serving Size: 1/4 cup
- Calories: 85
- Sugar: 10
- Sodium: 150
- Fat: 4
- Saturated Fat: 2
- Unsaturated Fat: 2
- Trans Fat: 0
- Carbohydrates: 12
- Fiber: 2
- Protein: 1
- Cholesterol: 5