
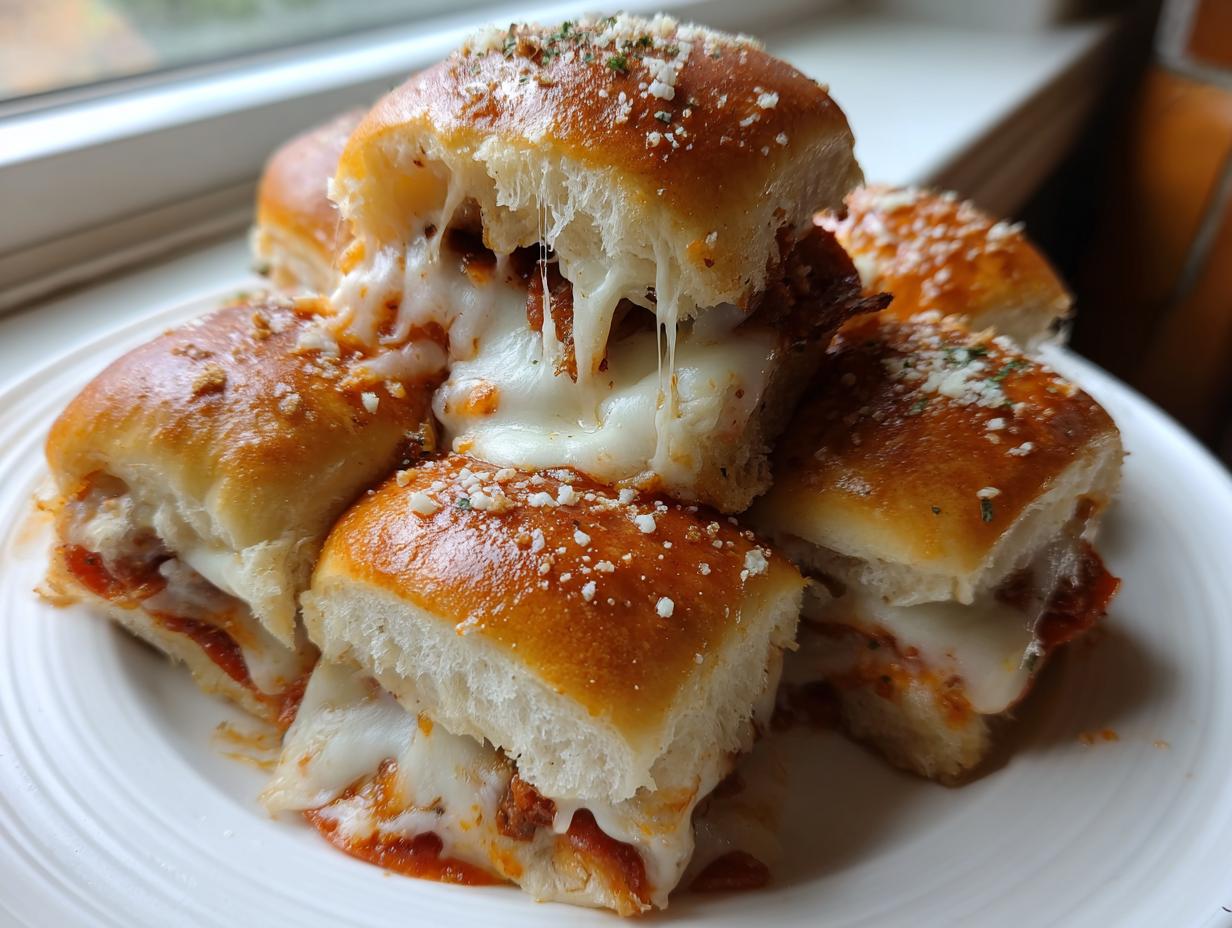
Oh, I know that feeling! It’s 5 PM, everyone is hungry, and the thought of making a full, complicated meal feels impossible. That’s when my freezer stash of Hawaiian rolls saves the day! I’m Rosa, and if you are looking for a total crowd-pleaser that comes together faster than calling delivery, you have found your new favorite recipe. We are talking about the ultimate quick, pull-apart pizza sliders made right on those wonderfully soft Hawaiian rolls. These little handheld bites are cheesy, savory, and they magically solve the weeknight dinner chaos or the big game day appetizer problem all at once. Trust me, when you see how easy these are, you’ll be rushing to whip up a batch every week.
If you’re struggling to get dinner on the table during the busy rush, make sure you check out my list of weeknight dinner ideas for more dependable meals like this!
- Why These Easy Pizza Sliders Recipe Are a Home Cook Favorite (Primary Keyword Focus)
- Gathering Ingredients for Your Hawaiian Roll Sliders
- How to Prepare Your Crowd-Pleasing Pizza Sliders
- Pro Tips for Perfect Pizza Sliders Every Time
- Customizing Your Savory Slider Recipes: Topping Variations
- Serving Suggestions for Game Day Appetizers
- Storage and Reheating Instructions for Leftover Pizza Sliders
- Frequently Asked Questions About Pizza Sliders
- Understanding the Nutrition in These Cheesy Baked Sliders
- Share Your Experience Making These Pizza Sliders
Why These Easy Pizza Sliders Recipe Are a Home Cook Favorite (Primary Keyword Focus)
When I’m developing recipes for the blog, reliability is my absolute top priority because I know you’re counting on me to deliver when time is short. This recipe for pizza sliders is a five-star winner because it takes humble, easy-to-find ingredients and transforms them into something everyone craves. They just work—whether you’re feeding four hungry kids or twenty friends watching the big game.
- They are impossibly fast; you’ll be shocked at how quickly they go from the counter to the oven.
- They yield consistently perfect results, meaning no sad, sinking feeling when they don’t turn out right.
- They are totally customizable, which means even picky eaters are happy!
If you are looking for other quick appetizers that score high marks at family events, you simply must try my recipe for baked jalapeno poppers!
Quick Assembly Time for Your Pizza Sliders
Honestly, it only takes about ten minutes to get this dish fully layered and ready for the oven. Ten minutes! That’s usually less time than it takes to search for the menus of three different pizza places. This speed is why I often keep an extra pack of Hawaiian rolls tucked away for unplanned guests or those nights when I realize I haven’t prepped anything yet.
The Pull Apart Pizza Sandwiches Appeal
Let’s be real: the texture is half the fun. Cutting one large sandwich into twelve smaller portions is simple, but pulling apart these pull apart pizza sandwiches is where the real joy is. They stay warm and gooey underneath the foil while they bake, and the edges get slightly crispy—it’s the best texture contrast!
Gathering Ingredients for Your Hawaiian Roll Sliders
The beauty of making these pizza sliders is that you aren’t running around town searching for fancy ingredients. Everything here, from the sweet rolls to the mozzarella, should be waiting for you at your regular grocery run. That’s part of my philosophy—great food doesn’t need complicated sourcing! I’ve made sure the quantities are clear so you can grab exactly what you need for a successful batch.
So, let’s look at what you need for a standard 12-count tray:
- You absolutely must start with one full package (that’s 12 count!) of those sweet Hawaiian rolls. They give the best balance of savory and sweet, which really sets these apart from using plain white buns.
- You’ll need one cup of your favorite pizza sauce. Use something thick rather than watery because we don’t want any sogginess creeping in!
- Two cups of shredded mozzarella are non-negotiable for that perfect cheese pull. Don’t skimp here!
- About one cup of sliced pepperoni is my reigning favorite, but you can certainly use whatever meats or veggies you adore.
- We need exactly four tablespoons of unsalted butter, and it has to be melted down before we use it.
If you love the sweet and savory combination of these rolls, you really should take a look at my ham and cheese sliders recipe next time. It uses the exact same base!
Garlic Butter Sliders Topping Mix
This topping is what truly elevates these from okay to absolutely *must-make-again*. It’s so simple, but those sharp, savory notes cut through the richness of the cheese. When you mix this up, it smells incredible—a hint of what’s coming!
You are just combining three dry things with our melted butter:
- The four tablespoons of melted unsalted butter.
- One teaspoon of garlic powder. Make sure it’s powder, not fresh minced garlic for this step, as fresh garlic can burn quickly under the broiler.
- One teaspoon of dried Italian seasoning. This adds all those warm herb notes we associate with classic pizza.
- Finally, generously sprinkle on a 1/4 cup of grated Parmesan cheese right over the top of the butter mixture. This Parmesan crisps up beautifully in the oven, giving the tops such a nice texture.
How to Prepare Your Crowd-Pleasing Pizza Sliders
Okay, time to put this amazing little assembly project together! The beauty of this recipe is that the oven does all the heavy lifting. First things first: get your oven preheated to 350 degrees Fahrenheit before you even think about touching the rolls. While that comes up to temp, lightly grease a 9×13 inch baking dish. Seriously, do this first so you aren’t scrambling later!
Now, for the slicing—this is the technique that makes these pizza sliders truly pull-apart friendly. You have two options: you can slice the entire block of rolls horizontally, keeping the top connected to the bottom via the uncut sides, or you can slice them completely apart and layer them individually. I prefer slicing the whole block in half horizontally because it feels cleaner and ensures the final pieces line up perfectly.
Place the bottom half of the rolls gently into that greased dish. Don’t press them down too hard yet; we want to keep some air in there!
Assembling the Layers for Cheesy Baked Sliders
This layering process is key to getting that intensely satisfying, cheesy flavor in every single bite of your cheesy baked sliders. Think like you are building a real pizza, just horizontally!
- Start with your cup of pizza sauce. Spread it out evenly right over the bottom layer of rolls. Make sure you get sauce all the way to the edges, but don’t drown the bread—remember, no one likes a soggy bottom!
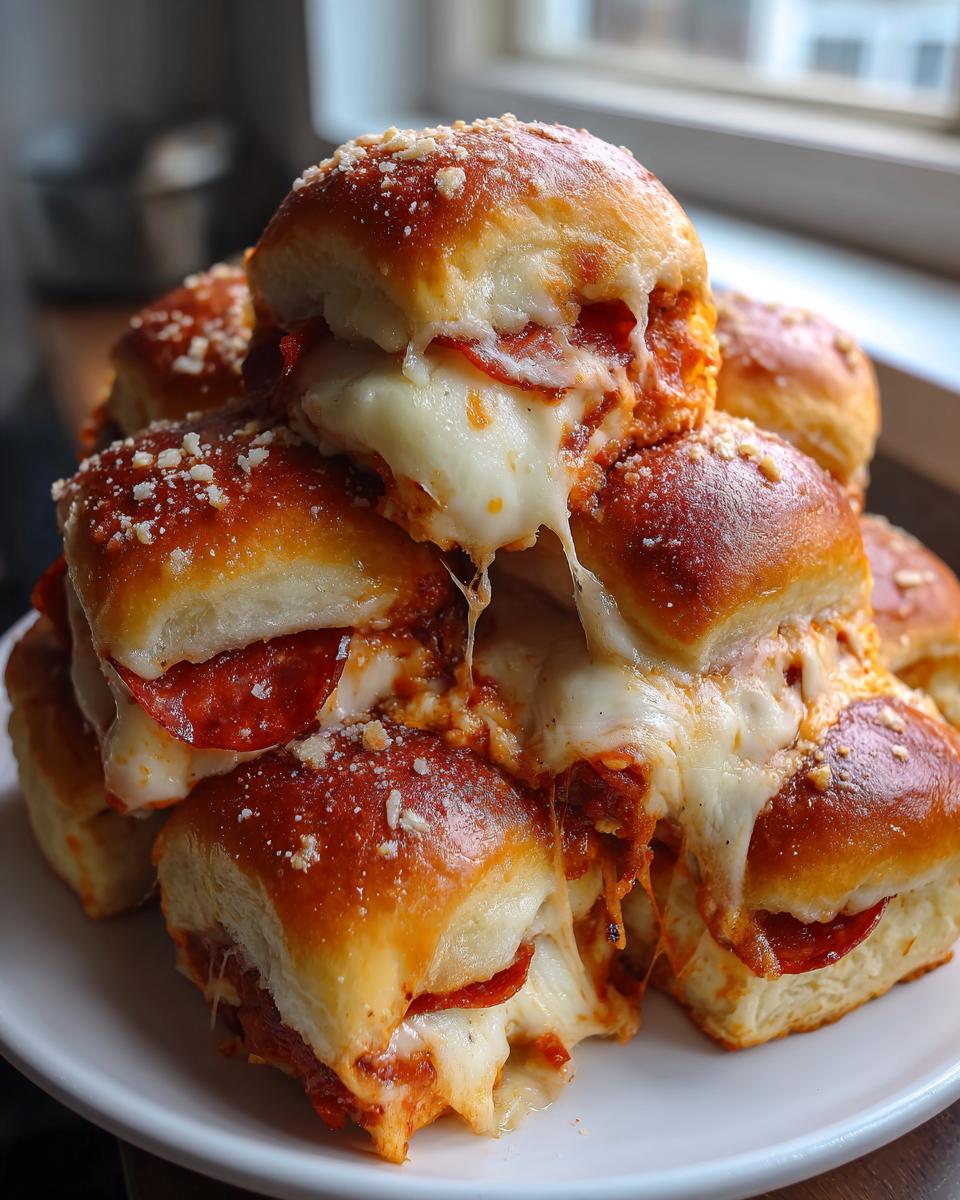
- Generously distribute your two cups of mozzarella cheese right over that sauce layer. Seeing that bright white cheese reminds me of an empty canvas waiting for color!
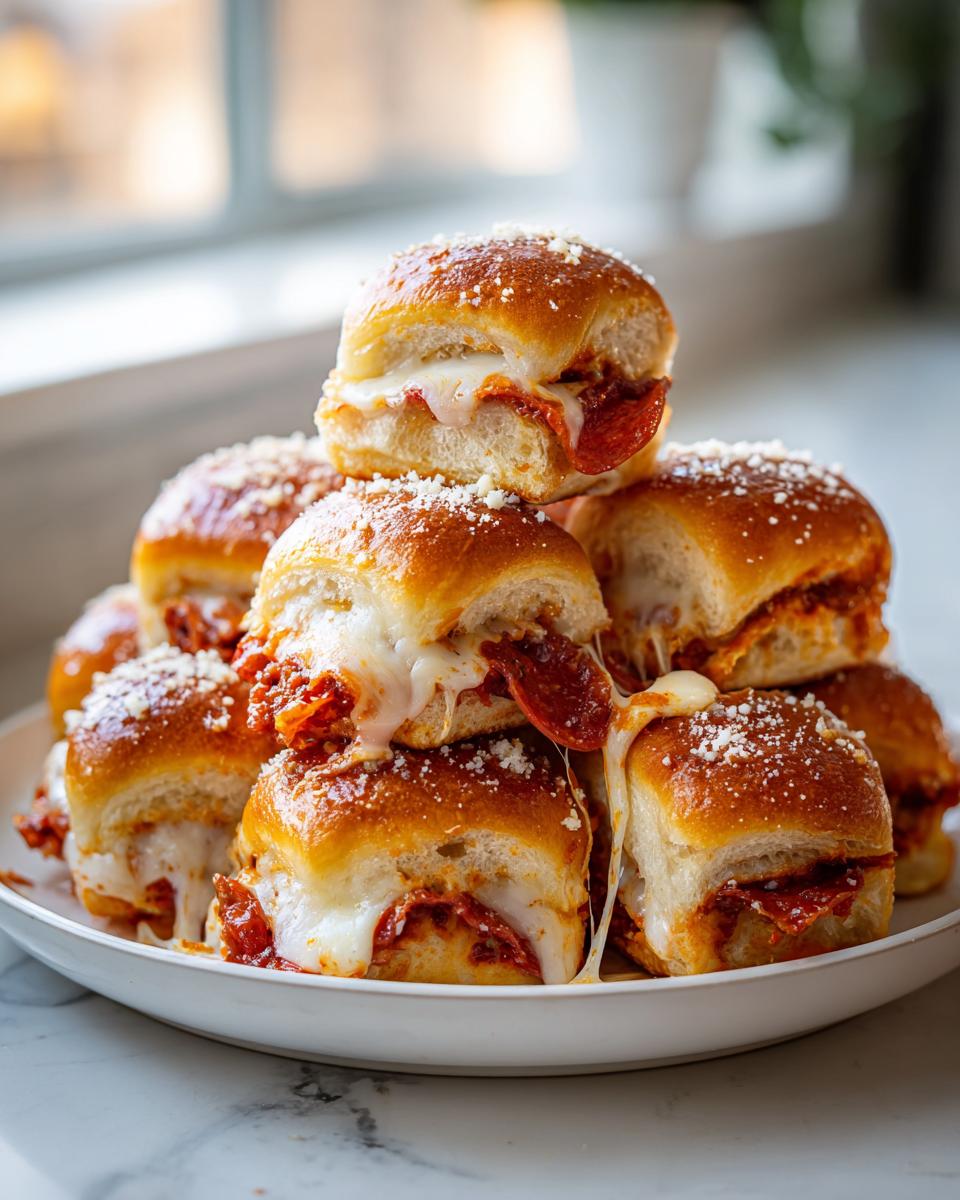
- Now, strategically place your pepperoni slices or whatever toppings you decided on. I try to distribute them evenly so every slider gets a little bit of meatiness.
- Finally, place the top half of the rolls gently over your beautifully layered toppings. Again, try to align them nicely with the bottom layer so they bake evenly.
The Butter Brush and Baking Process
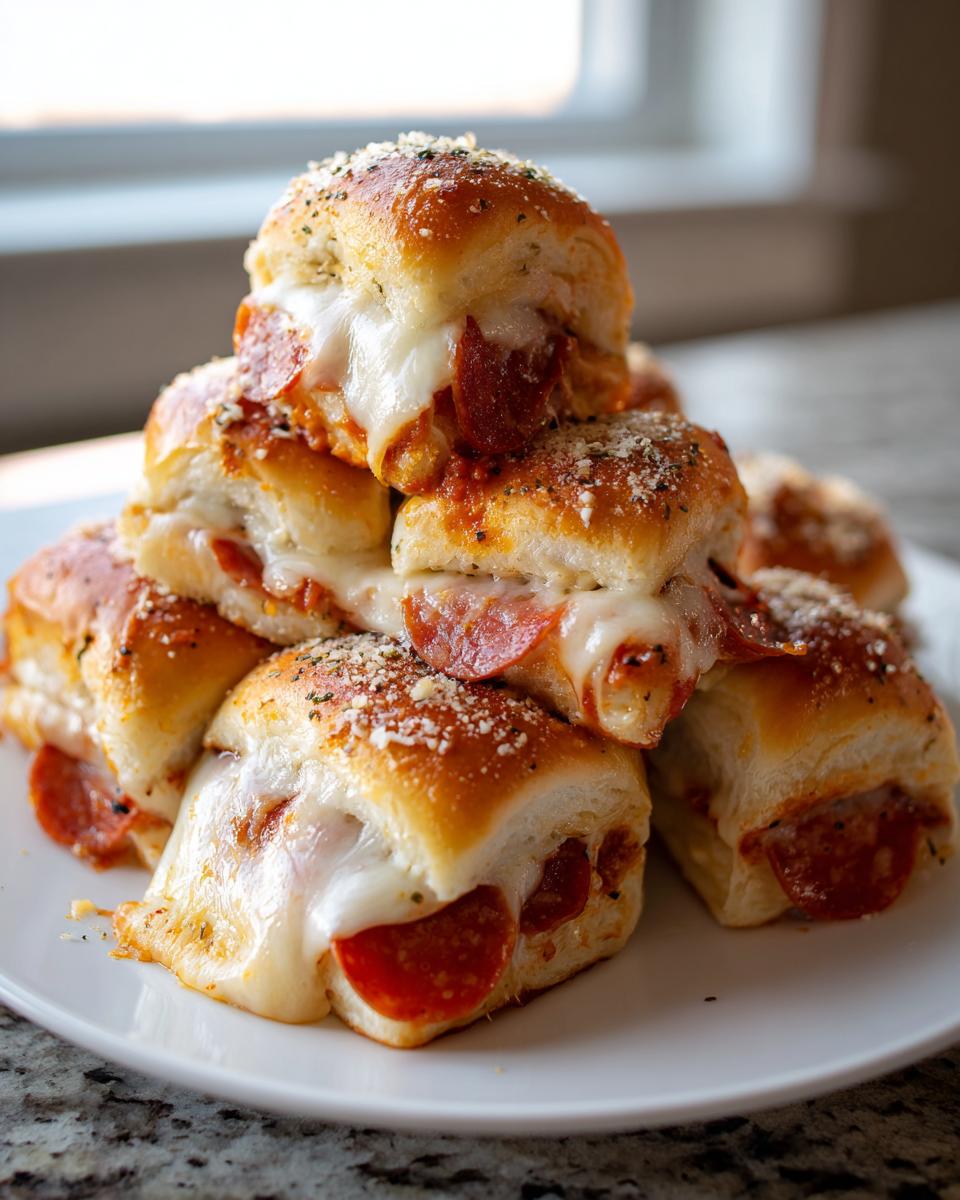
This is my favorite part! Grab that small bowl where you mixed up your garlic, seasoning, and Parmesan butter topping. Using a pastry brush, paint that savory mixture generously all over the top surface of the entire block of rolls. Make sure you hit every little nook and cranny so every top gets that crisp, seasoned finish we talked about.
Once brushed, give the whole top a final dusting of that grated Parmesan cheese. Cover the whole dish tightly with aluminum foil. This is super important! We need to trap that steam so the rolls soften up and the cheese melts perfectly without burning the tops.
Bake covered for exactly 15 minutes at 350°F. After that time, carefully remove the foil. This allows the tops to get golden and just a little bit crispy for that extra texture. Pop it back in, uncovered, for another 5 to 10 minutes. You’re looking for the cheese to be completely bubbly and the tops to be beautifully golden brown—they should feel soft to the touch, not hard.
When they come out, resist the urge to slice immediately! Let them rest for a solid 5 minutes. This lets the cheese settle just a hair so you can slice between the buns cleanly and serve these warm beauties right away.
If you need more straightforward recipe inspiration that cuts down on cleanup, swing by my easy appetizer ideas list!
Pro Tips for Perfect Pizza Sliders Every Time
Even though these are incredibly straightforward, I picked up a few tricks over the years—especially when I was testing these for game day spreads year after year. These simple additions make a huge difference and really show you why taking just a few extra seconds pays off when serving a crowd. Reliability comes from knowing these little secrets!
Preventing Soggy Bottoms on Your Sliders
This is probably the biggest problem people run into with any recipe that involves sauce and bread baked together, and I absolutely cannot stand a wet, soggy bottom on my sandwich! To save your beautiful Hawaiian rolls from turning into mush, you need a super quick, early step. Once you’ve placed the bottom layer of rolls into your greased dish, but *before* you add any sauce or cheese, pop that bottom layer into the 350°F oven for about three minutes completely naked.
It sounds extra, but trust me! This quick blast of dry heat dries out the bread surface just enough to create a tiny barrier against the pizza sauce. It keeps the rolls soft on the inside but gives them just enough structural integrity to hold up all that delicious cheese and topping weight. It’s my number one rule for making sure these pizza sliders are perfect through and through.
Also, remember that you can prep these ahead of time! The recipe notes say you can assemble them up to four hours early and refrigerate them. If you choose that route, just be sure to add about 10 extra minutes to that initial covered baking time when you finally decide to pop them in the oven for dinner or the party.
If you’re looking for more meals that save you time during the hectic afternoon rush, check out my quick hacks for quick and healthy lunch ideas that can sometimes double as light dinners!
Customizing Your Savory Slider Recipes: Topping Variations
While I stand by the classic pepperoni for my go-to pizza sliders—because who doesn’t love that crisp pepperoni cup?—the best part about using pull-apart bread is how easily you can customize them for different tastes. This recipe is a fantastic base for whatever pizza theme you’re feeling that day. It’s all about taking that simple foundation and piling on the savory treats you already have in your fridge. Don’t feel locked into just one topping, especially when you’re making a big batch for a party!
If you’re looking for ways to make a big batch feel like several different meals, mixing up the toppings is the way to go. These savory flavor profiles are easy to manage when you’re baking a single tray. For something heartier, I’ve also got my absolute favorite easy chili recipe that is perfect for topping things like nachos or hot dogs if you need another crowd-pleaser!
Ideas for Supreme and Hawaiian Pizza Sliders
We can run through a couple of popular variations right here. Instead of just topping with pepperoni, you can easily turn this into a full-blown Supreme experience or go tropical with a Hawaiian twist. Just remember that anything that releases a lot of water needs a little extra attention!
For incredible Supreme pizza sliders, incorporate the following right on top of your base layer of mozzarella:
- Cooked and crumbled sausage—I strongly suggest using Italian sausage seasoned with fennel for the best flavor!
- Diced green peppers—chop them small so they cook through properly in that short bake time.
- Thinly sliced or chopped mushrooms.
Now, if you’re aiming for that sweet and salty combination with Hawaiian pizza sliders, you need ham pieces and pineapple chunks. Here is my crucial tip for the pineapple: you must drain canned crushed pineapple until you think it’s dry, and then drain it one more time! Soggy pineapple means soggy bread, and we already covered how important it is to keep those bottoms dry. Squeeze the juice out, pat them dry with a paper towel, and *then* scatter them across the cheese. Trust me on draining that fruit!

Serving Suggestions for Game Day Appetizers
When the big game is on or you’ve got a whole crew over for a party, these cheesy baked bites are the star players, but even super stars need a good supporting cast, right?
Since these little sandwiches are rich, cheesy, and packed with savory pepperoni flavor, you want sides that offer a little contrast—something fresh or something tangy just to cut through the decadence. They are perfect finger food, so everything else should also be easy to grab!
You don’t want to be bogged down making complicated side dishes when the real action is happening on the screen, so here are a few easy pairing ideas that I love:
- A Simple Salad: Honestly, a big bowl of mixed greens with sliced cucumbers and a light balsamic vinaigrette works wonders. It adds that necessary fresh crunch against the soft rolls.
- Extra Marinara for Dipping: Even though the sauce is inside, having a ramekin of warm pizza sauce on the side for dipping the edges is so satisfying. It’s like getting a bonus little breadstick bite!
- Veggies and Ranch: Keep it simple with some carrot sticks, celery, and bell peppers served alongside your favorite creamy ranch dressing. It’s easy for everyone to graze on between plays.
If you are looking for another hearty option that still feels like comfort food but adds a different texture to the spread, you might want to check out my recipe for easy creamy chicken tortilla soup. It’s amazing how delicious comfort food can be, even when you need it fast!
Storage and Reheating Instructions for Leftover Pizza Sliders
We all know these beauties are best fresh out of the oven, right? That cheesy pull and the perfectly crisp, buttery top are unmatched! But if, by some miracle, you actually have leftover pizza sliders—maybe you made an extra-large batch because company showed up unexpectedly—don’t throw the rest out! We need to treat leftovers right so they don’t turn into sad, squishy triangles the next day.
Here is how I manage keeping these savory treats delicious for later. I often use freezer hacks like the one I developed for my bran muffins to save things, and these sliders benefit from similar low-moisture storage techniques.
For refrigeration, just store any leftovers tightly wrapped in foil or inside an air-tight container. They should be good in the fridge for about 3 to 4 days. Don’t leave them sitting out all night! If you think you might have more than you can eat in four days, it’s better to freeze them.
Reheating for Maximum Cheesiness
If you are reheating just a couple, the microwave is the fastest option, I get it. But, oh boy, the microwave turns that beautiful, crispy top layer into chewy rubber almost instantly. If you want to maintain that comforting texture of the rolls, you absolutely must use the oven or an air fryer for reheating.
Here is my preferred method for bringing those leftover pizza sliders back to life:
- Preheat your oven to a lower temperature—say, 325°F. We are warming them through, not cooking them again.
- Place the remaining sliders on a baking sheet lined with parchment paper—this helps keep the bottoms from getting steamy.
- Cover the entire pan loosely with foil. Foil is key here because it traps the heat and steams the bun back to softness without drying out the insides.
- Bake for about 8 to 10 minutes for refrigerated sliders, or up to 15 minutes if they are straight from the freezer.
Check them around the 7-minute mark. Once the cheese is melty and the rolls feel warm all the way through, pull them out. They’ll taste almost brand new, and you get to enjoy that savory flavor without starting from scratch!
Frequently Asked Questions About Pizza Sliders
I always get so many great questions after readers try these for the first time! It’s wonderful to see how everyone adapts them to fit their own family’s schedule and tastes. Since these are so reliant on that sweet roll base, I get a lot of questions about substitutions and timing. Here are some of the most common things folks ask when making these super easy appetizers.
If you’re ever looking for something totally different for breakfast—something that doesn’t involve pizza sauce, of course—you should check out my favorites in my easy breakfast recipes collection!
Can I use rolls other than Hawaiian rolls for these sliders?
That’s a fantastic question! The answer is yes, you certainly can, but just know the flavor profile changes a bit. Hawaiian rolls are famous for that noticeable hint of sweetness, which balances the salty pepperoni and savory sauce perfectly. If you use standard white dinner rolls or King’s Hawaiian plain slider buns (the less-sweet kind), you’ll still end up with wonderful, cheesy baked sliders, but you might miss that signature sweet/savory contrast.
If you use non-sweet rolls, sometimes I add just a tiny pinch of sugar to my garlic butter topping to try and mimic that classic flavor we love so much!
Are these pepperoni pizza bites suitable for a quick dinner?
Absolutely! While I listed them as the ultimate game day appetizers, these little pepperoni pizza bites are honestly one of my favorite last-minute weeknight meals. Think about it: the prep time is only 10 minutes, and the total cook time, including resting, is around 35 minutes. That’s faster than most frozen meals!
They are incredibly popular with my own kids because they feel like a fun, informal version of pizza night. They are so easy to scale up or down depending on how hungry everyone is, making them a truly reliable kid friendly pizza alternative for those busy evenings.
Understanding the Nutrition in These Cheesy Baked Sliders
As a mom who tries hard to balance convenience with knowing what my family is eating, I always get asked about the nutritional rundown for these types of recipes. I want everyone to feel confident making these, so I ran the numbers based on the ingredients list—using standard brands for the Hawaiian rolls and average pepperoni.
Keep in mind, since we’re using sweet rolls and pepperoni, these are definitely best enjoyed as an appetizer or party food rather than a main course every night. But knowing the facts helps you plan! For serving size, we are looking at one single slider bite after you slice them all apart.
- Serving Size: 1 slider
- Calories: Around 280
- Fat: Approximately 14g (with about 7g coming from saturated fat)
- Carbohydrates: About 26g
- Protein: Around 12g
- Sugar: Roughly 8g (mostly from the sweet rolls!)
A quick note from me: Because ingredient brands vary so much—and how much cheese or pepperoni you pile on can really change things—these numbers are just estimates. They give you a good ballpark figure, but they aren’t a guarantee! If you’re focused on dinners that offer more long-term health benefits, I keep a whole section dedicated to anti-inflammatory dinners that might spark some new ideas for your meal rotation.
Share Your Experience Making These Pizza Sliders
Seriously, that’s it! You’ve conquered the easiest, cheesiest, most satisfying party food to ever grace a casserole dish. I am so genuinely thrilled that you’ve taken the time to bake up this recipe, and now the best part begins: the tasting!
Once you’ve tried these, please come back and leave a rating below. Were they a smash hit at your house? Did the kids devour them before the adults even had a chance? I want the full report! Knowing how these pizza sliders performed at your table helps me feel connected to you and ensures I’m only sharing reliable recipes.
And if you customized them—maybe you went wild with olives, or tried a spicy sausage mix—please tell me about it in the comments! I’m always collecting new twist ideas to try out next time I’m prepping for a big event, like cheering on my favorite team during the Super Bowl snacks marathon.
If you ever have questions as you’re baking or just want to give feedback directly, don’t hesitate to reach out through my contact page. Happy cooking, and enjoy eating every single cheesy bite!
PrintEasy Hawaiian Roll Pizza Sliders for Game Day

Make these pull-apart pizza sliders using soft Hawaiian rolls. They are quick to assemble, cheesy, and perfect for parties or a fast family dinner.
- Prep Time: 10 min
- Cook Time: 25 min
- Total Time: 35 min
- Yield: 12 sliders 1x
- Category: Appetizer
- Method: Baking
- Cuisine: American
- Diet: Vegetarian
Ingredients
- 1 package (12 count) sweet Hawaiian rolls
- 1 cup pizza sauce
- 2 cups shredded mozzarella cheese
- 1 cup sliced pepperoni or desired toppings
- 4 tablespoons unsalted butter, melted
- 1 teaspoon garlic powder
- 1 teaspoon dried Italian seasoning
- 1/4 cup grated Parmesan cheese
Instructions
- Preheat your oven to 350 degrees Fahrenheit. Lightly grease a 9×13 inch baking dish.
- Keep the sweet rolls connected in their original package or slice the entire block of rolls horizontally, creating a top half and a bottom half. Place the bottom half of the rolls into the prepared baking dish.
- Spread the pizza sauce evenly over the bottom layer of rolls.
- Distribute the mozzarella cheese over the sauce layer.
- Arrange the pepperoni slices or your chosen toppings over the cheese.
- Place the top half of the rolls over the toppings.
- In a small bowl, combine the melted butter, garlic powder, and Italian seasoning. Brush this mixture evenly over the top of the rolls.
- Sprinkle the grated Parmesan cheese over the buttered top layer.
- Cover the baking dish tightly with aluminum foil. Bake for 15 minutes.
- Remove the foil and bake for an additional 5 to 10 minutes, or until the cheese is fully melted and the tops are lightly golden brown.
- Let the sliders rest for 5 minutes before slicing between the rolls. Serve warm as game day appetizers or a quick dinner.
Notes
- To prevent soggy bottoms, lightly toast the bottom layer of rolls in the oven for 3 minutes before adding sauce and toppings.
- For Supreme pizza sliders, add pre-cooked sausage, diced green peppers, and mushrooms.
- For Hawaiian pizza sliders, use ham pieces and crushed pineapple (ensure pineapple is well-drained).
- You can assemble these cheesy baked sliders up to 4 hours ahead of time; cover and refrigerate, then add 10 minutes to the covered baking time.
Nutrition
- Serving Size: 1 slider
- Calories: 280
- Sugar: 8
- Sodium: 550
- Fat: 14
- Saturated Fat: 7
- Unsaturated Fat: 7
- Trans Fat: 0.2
- Carbohydrates: 26
- Fiber: 1
- Protein: 12
- Cholesterol: 30