
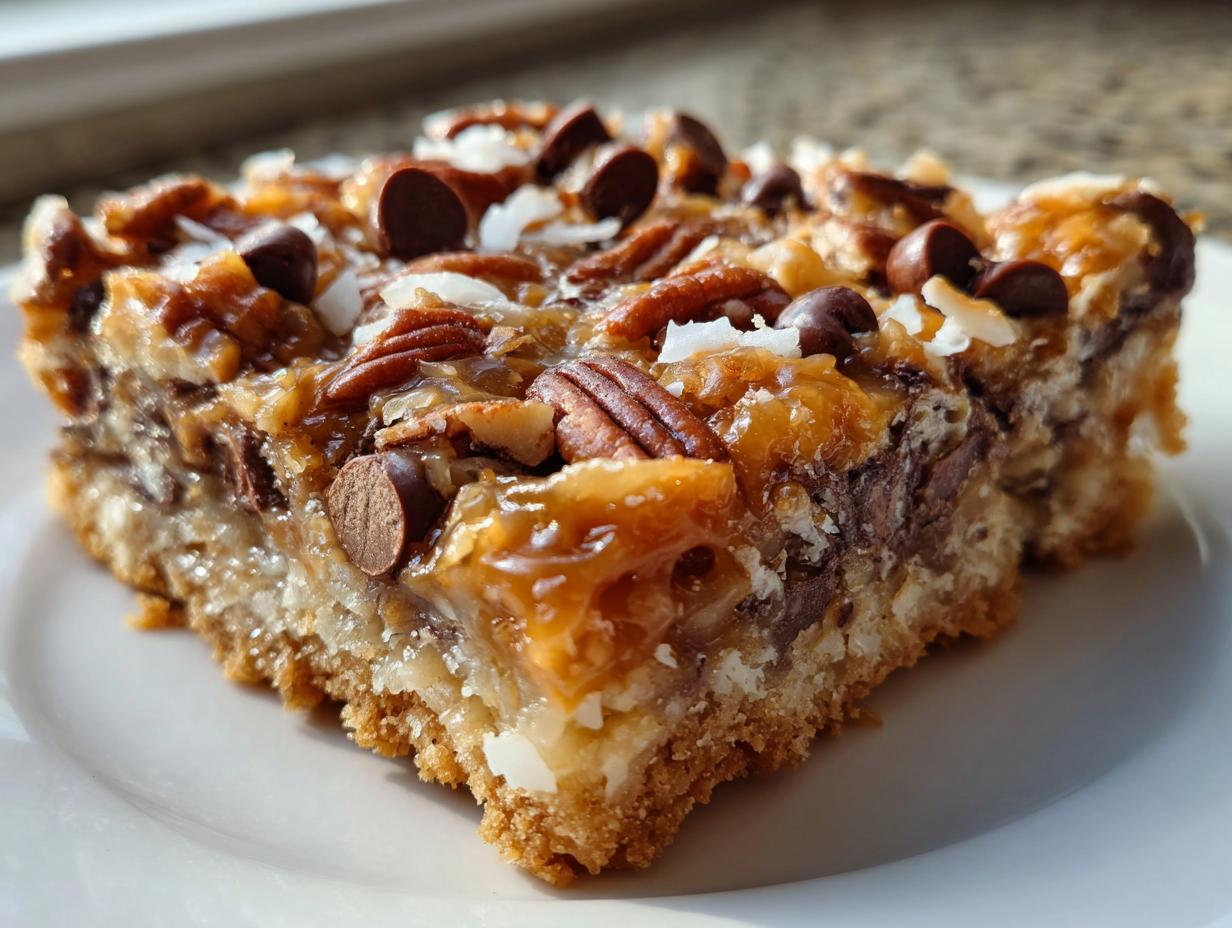
Oh, sometimes you just need a dessert that looks like you spent hours fussing over it, but really, you just dumped ingredients in a pan. That’s where these magic cookie bars come in, folks! Seriously, this recipe is my absolute lifeline when I need something impressive, way beyond what my schedule usually allows. For those times, I turn to my collection of best homemade desserts because they rely on simple truths. These bars deliver that dreamy, chewy texture everyone craves because they’re layered just right—we’re talking those classic seven layers of pure deliciousness. I promise you, the results are show-stopping, and the effort is next to nothing. This isn’t some fancy pastry chef trick; this is real, honest cooking from my kitchen to yours. I learned early on that heart matters more than haute cuisine when feeding my family!
- Why These Are the Ultimate Magic Cookie Bars Recipe
- Gathering Ingredients for Classic Magic Cookie Bars
- Step-by-Step Instructions for Perfect Magic Cookie Bars
- Tips for Success with Your Seven Layer Bars Ultimate Recipe
- Variations for Classic Holiday Cookie Bars
- Storage and Serving Suggestions for Homemade Magic Bars
- Frequently Asked Questions About Magic Cookie Bars
- Estimated Nutritional Data for These Simple Dessert for Beginners
- Share Your Family Favorite Dessert Bars
Why These Are the Ultimate Magic Cookie Bars Recipe
When people talk about needing a go-to sweet treat that never fails, they are talking about recipes exactly like this one. If you need reliable baking that turns heads at potlucks, this is your winner. I want you to see why these magic cookie bars have earned their famous name.
Forget complex creaming methods or fussy folding; these are designed for real life. I keep my recipe cards for these bars right next to my weeknight dinner ideas because they are just as quick to resolve!
Key Features of Our Easy Layered Dessert Bars
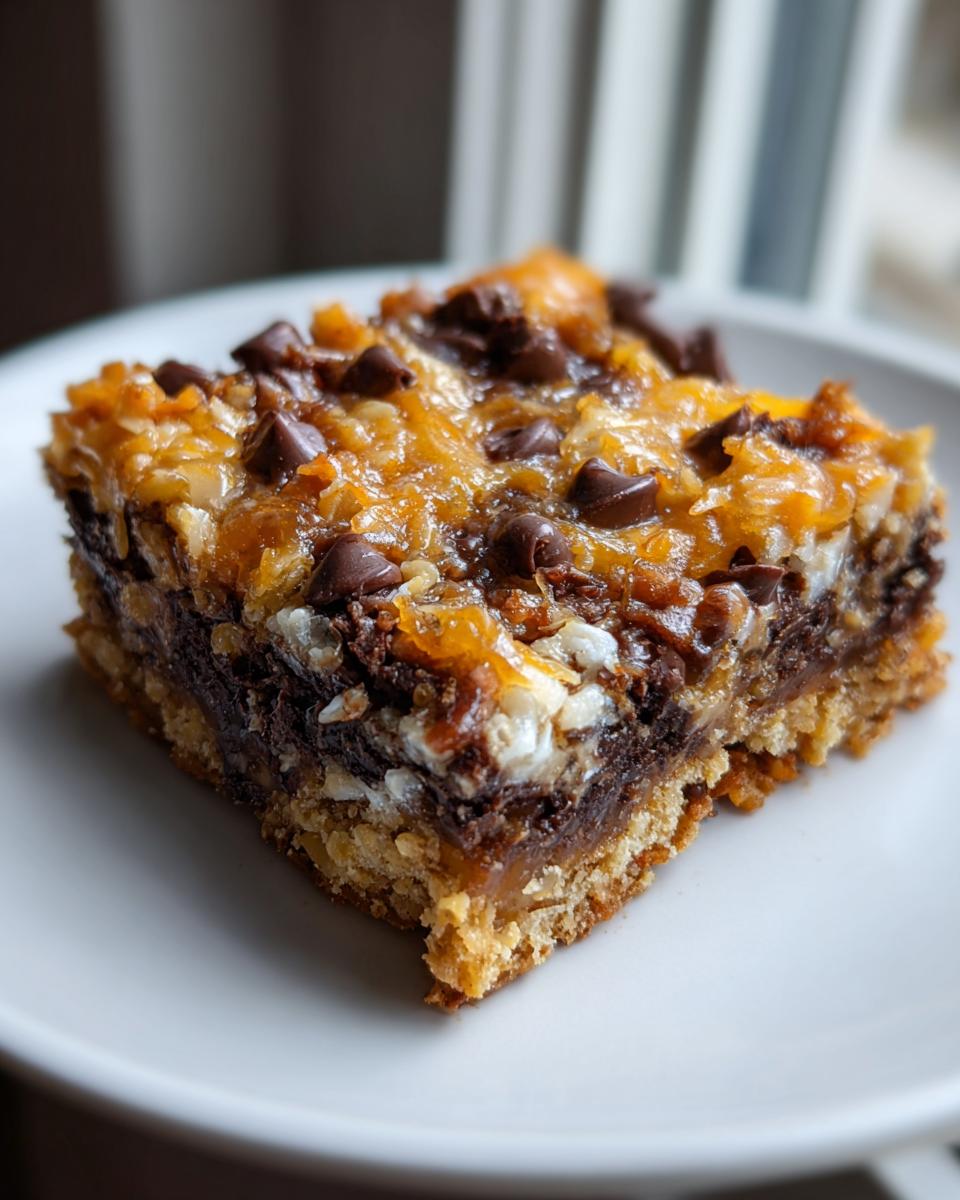
- They are undeniably packed with amazing textures—that satisfying crunch next to the melt-in-your-mouth center.
- Seriously, you don’t need a mixer for this! The crust is just pressed. That’s it.
- We officially call them the ultimate layered dessert bars because they deliver every time.
- Whether you call them Seven Layer Bars or even Hello Dolly Bars, the result is the same: pure, gooey perfection.
Gathering Ingredients for Classic Magic Cookie Bars
The beautiful thing about whipping up a batch of these magic cookie bars is how few actual “cooking” steps there are. Most of the time is spent just assembling the layers! You probably have most of what you need sitting in your pantry right now. When I pull out these ingredients, I know an irresistible treat is minutes away from being assembled. Remember, these are simple bar cookies—no fancy sourcing needed, just good, whole ingredients waiting to be stacked.
Here’s what you need for that perfect crust and all those wonderful layers:
- 1 1/2 cups graham cracker crumbs
- 1/2 cup unsalted butter, melted
- 1 cup semi-sweet chocolate chips
- 1 cup butterscotch chips (optional, but wow, they add so much flavor!)
- 1 cup flaked coconut, sweetened
- 1 cup chopped pecans or walnuts
- 1 can (14 ounces) sweetened condensed milk
Ingredient Notes and Sweetened Condensed Milk Dessert Bars Tips
Okay, listen up because this is where we build trust and ensure quality! You absolutely, positively need sweetened condensed milk for this recipe. Do not grab evaporated milk by mistake—evaporated milk won’t melt properly and you’ll end up with dry, sad bars instead of those decadent sweetened condensed milk dessert bars we’re aiming for. Also, when you grab the coconut, make sure it says “sweetened” on the bag. The unsweetened kind just doesn’t give you that chewy little hit of sweetness that balances the chocolate chips.
Step-by-Step Instructions for Perfect Magic Cookie Bars
This is where the magic really happens, and honestly, it’s so satisfying watching the layers build up in the pan. The whole process moves along quickly once you get going. We preheat the oven to 350 degrees F, which is standard for these bars. Before we do anything else, grab a 9×13 inch pan and line it with parchment paper. Make sure you leave a little overhang on the sides—this is your secret weapon for a clean lift later when they are done! For those tricky dessert cut-outs down the road, a good lift makes all the difference, though these quick healthy lunch ideas I am always looking for are sometimes even simpler!
Preparing the Graham Cracker Crust Bars Foundation
First things first: the base. Mix your graham cracker crumbs with that melted butter. The key here is the press! You really need to pack this mixture down firmly—like you mean it—into the bottom of your prepared pan. If you leave air pockets, the crust will crumble when you try to slice those beautiful graham cracker crust bars later. I learned that lesson the hard way my first time trying them; I pushed too lightly and ended up with bar pieces everywhere!
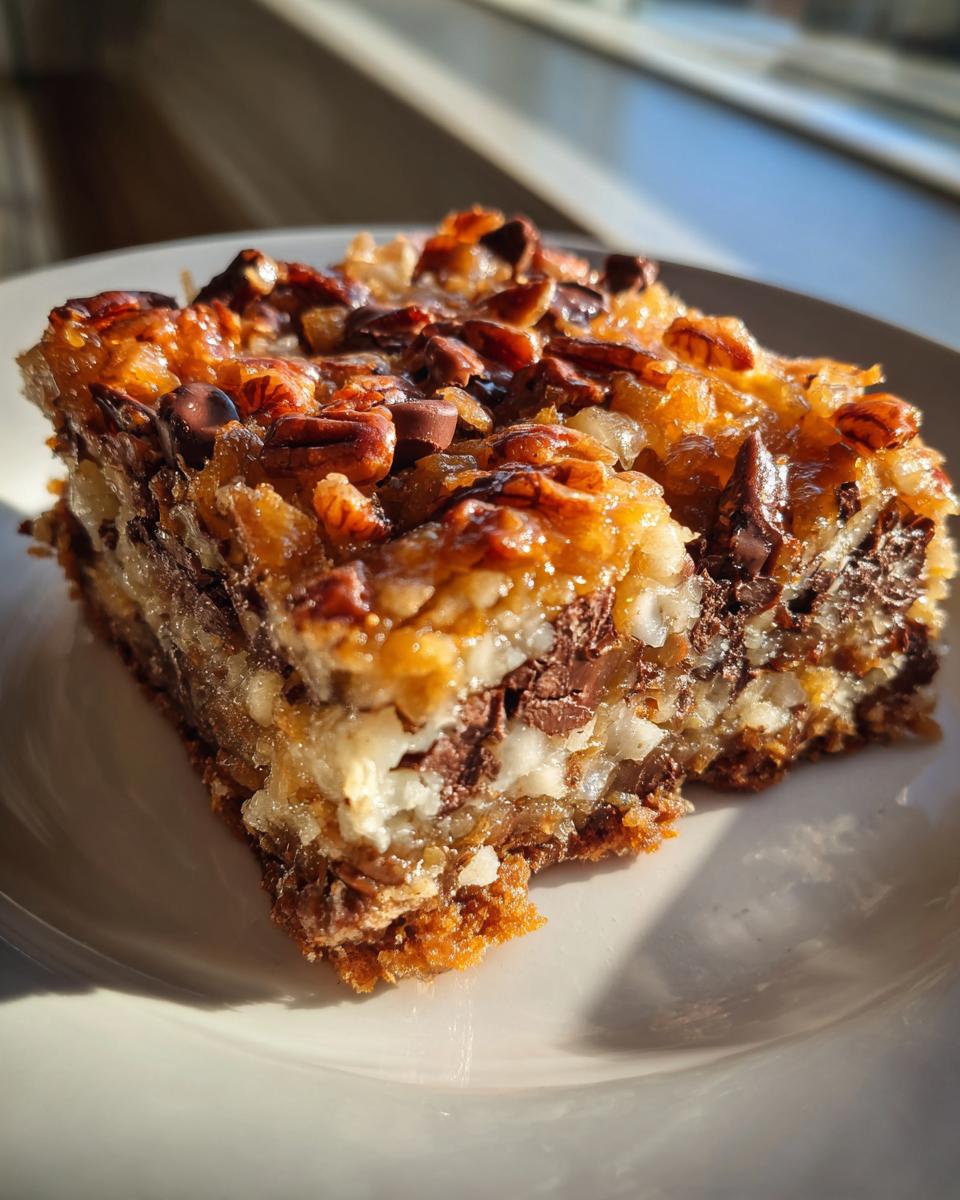
Layering and Pouring for Irresistible Gooey Bars
Now for the fun stacking part! Just sprinkle everything over that crust evenly. Chocolate chips first, then whatever else you chose, like the butterscotch chips if you’re adding them. Then scatter the coconut and nuts. Try to keep the layers even so you get a full taste profile in every bite. The final step is crucial: slowly pour the entire can of sweetened condensed milk right over the top of everything. This liquid gold acts as the binder for our irresistible gooey bars. Don’t stir it—just let it cascade over the top to settle in between all those goodies. Then, pop it in the oven for about 25 to 30 minutes until it’s bubbly and golden.

Tips for Success with Your Seven Layer Bars Ultimate Recipe
Honestly, these magic cookie bars are so simple, but there are a few tiny secrets that make the difference between a good bar and the ultimate bar—you know, the ones that hold their shape when you cut them! The number one thing I always tell people is patience regarding the cooling stage. I know you want to dive right in when that sweet smell fills your kitchen, but if you try to cut these warm, they will definitely fall apart, no matter how perfectly you made the crust foundation.
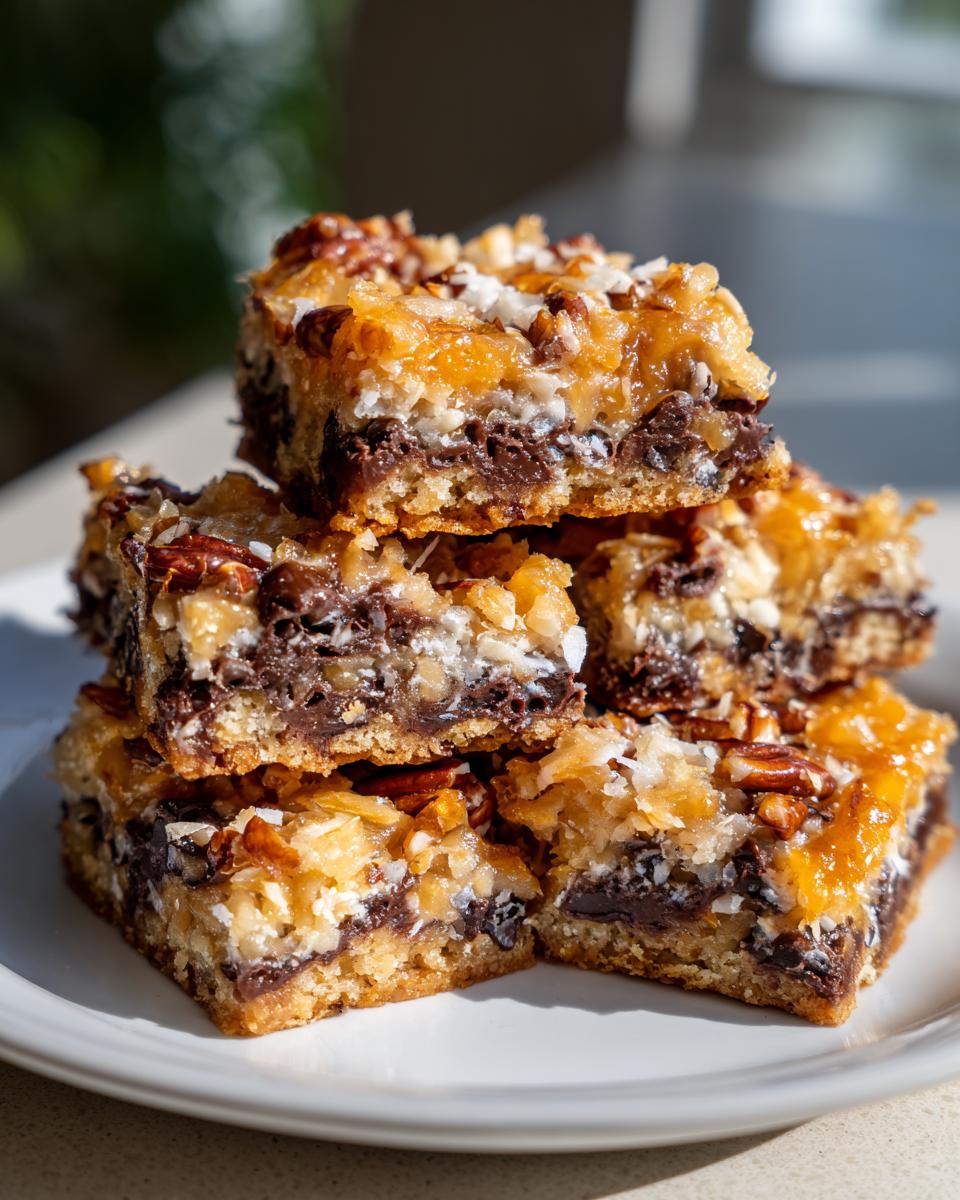
Trust me on the parchment paper overhang. I always cut my paper a little too large in the 9×13 pan; having those little flaps sticking up means you can lift the entire cooled slab out like a giant cookie blanket. Then, you just grab a sharp knife and slice perfect squares. Following that simple technique guarantees you get the clean, beautiful squares needed for your easy breakfast recipes rotation or whatever occasion you are baking for!
If you want the very best results for your Seven Layer Bars ultimate recipe, make sure your layers are dusted thinly and evenly—no big clumps of chocolate! That way, the condensed milk gets in everywhere and bakes up into that glorious, caramelized layer that keeps everything together.
Variations for Classic Holiday Cookie Bars
While the classic recipe is just divine on its own, these **magic cookie bars** are so incredibly versatile, they practically beg you to switch things up for holidays! Since everyone loves finding a new way to present a beloved treat during the busy holiday season, I always keep a couple of easy tweaks in my back pocket. This way, you can serve the same fantastic flavor profile but give your guests something that looks totally new.
For Christmas, which is definitely my favorite time to bake these, I swap out the optional butterscotch chips mentioned earlier for something festive. Instead of those, you grab a cup of bright, colorful M&M’s! They bake up beautifully right into the top layer, giving you stunning colors like red and green peeking through. My kids absolutely lose it when they see those baking. It instantly turns them into my easy Christmas baked treats favorite.
If you aren’t aiming for a specific holiday but just want a slightly different taste profile for your next gathering, try swapping half of the semi-sweet chocolate chips for white chocolate chips. That combination of white chocolate and coconut is just heavenly, and it makes for a paler, prettier bar if you prefer that look! Remember, no matter the variation, the base—that buttery graham crust and the sweet blanket of condensed milk—stays solid. Those are the parts we never mess with!
Storage and Serving Suggestions for Homemade Magic Bars
Once you manage to let these homemade Magic Bars cool down enough to slice—which is a challenge, believe me—you’ll want to know the best way to keep them fresh. Luckily, since these are essentially a baked candy bar, they keep really well! I usually store any leftovers right in the baking pan, covered tightly with plastic wrap, or you can just stack them in an airtight container.
You can keep them perfectly fine at room temperature for about three to four days. Honestly, they taste best within the first two days, though! If you need them to last longer, stick them in the fridge, but I find they get a little stiff chilling out. If you do refrigerate them, let them sit out on the counter for about 20 minutes before serving so they soften up just a bit. They are fantastic either slightly warm or at room temperature. I love grabbing one with my afternoon coffee—it’s like a little break in the middle of making those easy creamy chicken alfredo recipes!
If you want to go all out, one of these chewy coconut chocolate bars with a little scoop of vanilla ice cream melting over the top? Oh my goodness. That combination is pure dessert heaven, so save that special tip for when you have company!
Frequently Asked Questions About Magic Cookie Bars
I always get questions about these bars because even though they are simple, people want to make sure they get that perfect, gooey result every time. It’s like anything else—a little knowledge goes a long way in the kitchen! Don’t stress if you have a quick question; I’ve gathered the most common ones right here to help you conquer your next batch of these magic cookie bars.
Can I make these Quick Bake Desserts without nuts?
Absolutely, you can leave them out! If someone in your house has an allergy, or maybe you just aren’t a fan of walnuts or pecans, it’s no problem at all. Remember, these are quick bake desserts, and flexibility is part of their charm. Just know that the nuts do add a fantastic little bit of textural crunch that contrasts nicely with the creamy layers. If you skip the nuts, maybe add just a tiny bit more chocolate chip or coconut to fill that space!
What is the difference between 7 Layer Bars and Magic Cookie Bars?
This is a fun one! Honestly, for my money, there’s basically no difference between the classic magic cookie bars and the 7 Layer Bars, or even ‘Hello Dolly Bars’ as some folks around here call them. It just depends on what your mom or grandma called them! They all rely on that foundation of graham cracker crust, then chips, nuts, coconut, and finally, the sweet blanket of condensed milk holding it all together. If the recipe calls for those core layers, you’re making the same incredible bar!
Why are my bars runny when I cut them?
If your bars come out runny, nine times out of ten it comes down to one thing: not letting them cool completely! I can’t stress this enough, even though it’s tough when they smell so good. The sweetened condensed milk needs ample time to firm up after baking. Make sure they sit until they are totally cool—I usually leave mine on the counter for at least four hours, sometimes longer if my kitchen is warm. Cooling is non-negotiable for clean slices!
What makes these the Best Simple Bar Cookies?
What truly sets these apart as the best simple bar cookies is the ingredient that does all the heavy lifting: the sweetened condensed milk. It’s what creates that caramel chewiness as it bakes and fuses all the diverse toppings together. Plus, you aren’t dealing with wet batter or complicated mixing bowls; it’s just layering right on top of the buttered crust. That simplicity, combined with that deeply satisfying sweet-and-salty flavor profile, is why everyone loves them decade after decade.
Estimated Nutritional Data for These Simple Dessert for Beginners
Now, I want to be super clear about something important—these magic cookie bars taste absolutely incredible, but they are definitely a treat! Because they rely on rich ingredients like butter and sweetened condensed milk, they pack a wonderful punch of flavor and energy. I always grab a quick peek at the nutritional estimates before I bring a pan full of these home, just so I know what I’m putting out there for my crew. Keep in mind, this is just homework I do for myself, not a strict diet plan!
When I calculate the averages for a batch of these simple dessert for beginners squares, here is what I usually see based on the exact recipe we just made:
- Serving Size: 1 bar
- Calories: 220
- Sugar: 18g
- Sodium: 95mg
- Fat: 13g
- Protein: 3g
See? Rich, sweet, and satisfying! What I always want everyone to remember is that these are estimated nutritional data based on standard product averages. If you use a lighter butter or skip the optional butterscotch chips, those numbers will shift a tiny bit. Because we all use different brands of graham crackers or chocolate chips, the final reality of your bar could vary slightly. Think of this as a helpful guideline, not a guarantee. The most important metric here is the one that says ‘delicious’!
Share Your Family Favorite Dessert Bars
And there you have it! That’s how I put together what I truly believe is the most foolproof, gloriously gooey batch of magic cookie bars you’ll ever want to bake. They’ve been a rock in my dessert rotation since my kids were little, and seeing them disappear during parties always makes me beam.
Now that you’ve baked them up—and I sincerely hope you made a double batch because everyone always wants seconds—I’d absolutely love to hear from you! Did you stick with the classic formula, or did you try switching things up? Did you add extra coconut? Did you add the butterscotch chips like I sneakily suggested?
Please, jump down below and leave me a rating with your stars, and tell me all about your experience in the comments. Seeing your beautiful, layered squares pop up on social media always makes my day. It connects me to you, and that’s what this kitchen is all about—building a community around good, simple food. If you want to know a little more about why I stand by these time-tested, honest recipes, you can always pop over and learn more about our story on the About page!
Thank you so much for baking with me today. Happy baking, and please come back soon for more easy, flavor-packed comfort food!
PrintThe Ultimate Classic Magic Cookie Bars Recipe (7-Layer Bars)
You can make these irresistible Magic Cookie Bars easily. This recipe uses simple ingredients to create a rich, chewy dessert perfect for any gathering or holiday treat.
- Prep Time: 15 min
- Cook Time: 30 min
- Total Time: 45 min
- Yield: 24 servings 1x
- Category: Dessert
- Method: Baking
- Cuisine: American
- Diet: Vegetarian
Ingredients
- 1 1/2 cups graham cracker crumbs
- 1/2 cup unsalted butter, melted
- 1 cup semi-sweet chocolate chips
- 1 cup butterscotch chips (optional, for extra flavor)
- 1 cup flaked coconut, sweetened
- 1 cup chopped pecans or walnuts
- 1 can (14 ounces) sweetened condensed milk
Instructions
- Preheat your oven to 350 degrees F. Line a 9×13 inch baking pan with parchment paper, leaving an overhang for easy removal.
- In a medium bowl, combine the graham cracker crumbs and melted butter. Press this mixture firmly and evenly into the bottom of the prepared pan. This forms your crust.
- Sprinkle the chocolate chips evenly over the graham cracker crust.
- If using, sprinkle the butterscotch chips over the chocolate layer.
- Distribute the flaked coconut evenly over the chips.
- Scatter the chopped nuts over the coconut layer.
- Pour the entire can of sweetened condensed milk slowly and evenly over all the layers. This binds the bars together.
- Bake for 25 to 30 minutes, or until the edges are lightly golden brown and the condensed milk is bubbly.
- Let the bars cool completely in the pan on a wire rack before cutting. Cooling time is important for clean slices.
- Once cool, lift the bars out using the parchment paper overhang and cut into squares.
Notes
- For a variation, you can substitute M&M’s for the butterscotch chips to make these Christmas Magic Cookie Bars.
- Make sure you use sweetened condensed milk, not evaporated milk, for the proper gooey texture.
- Cooling these irresistible gooey bars completely before slicing prevents them from falling apart.
Nutrition
- Serving Size: 1 bar
- Calories: 220
- Sugar: 18
- Sodium: 95
- Fat: 13
- Saturated Fat: 7
- Unsaturated Fat: 6
- Trans Fat: 0.1
- Carbohydrates: 24
- Fiber: 1
- Protein: 3
- Cholesterol: 20