
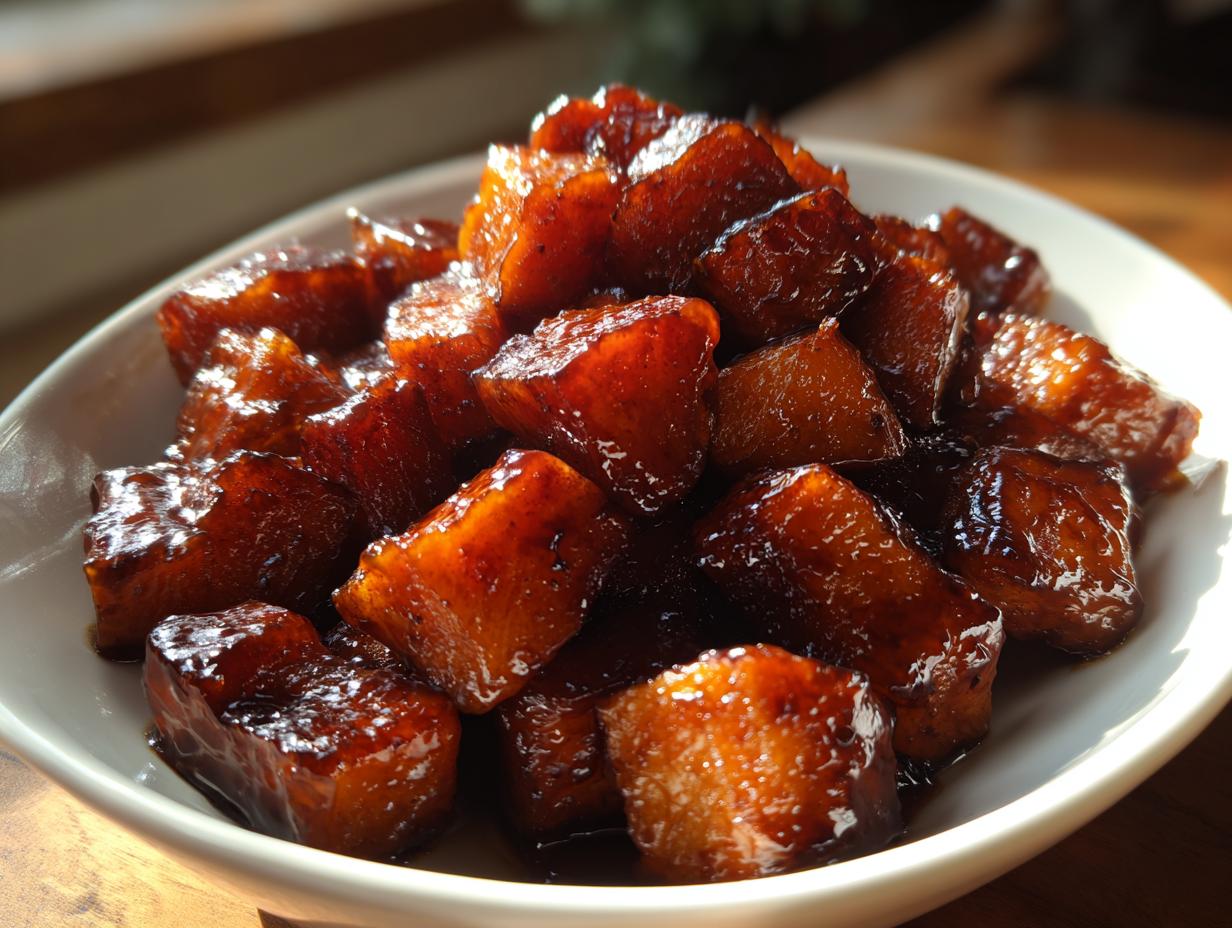
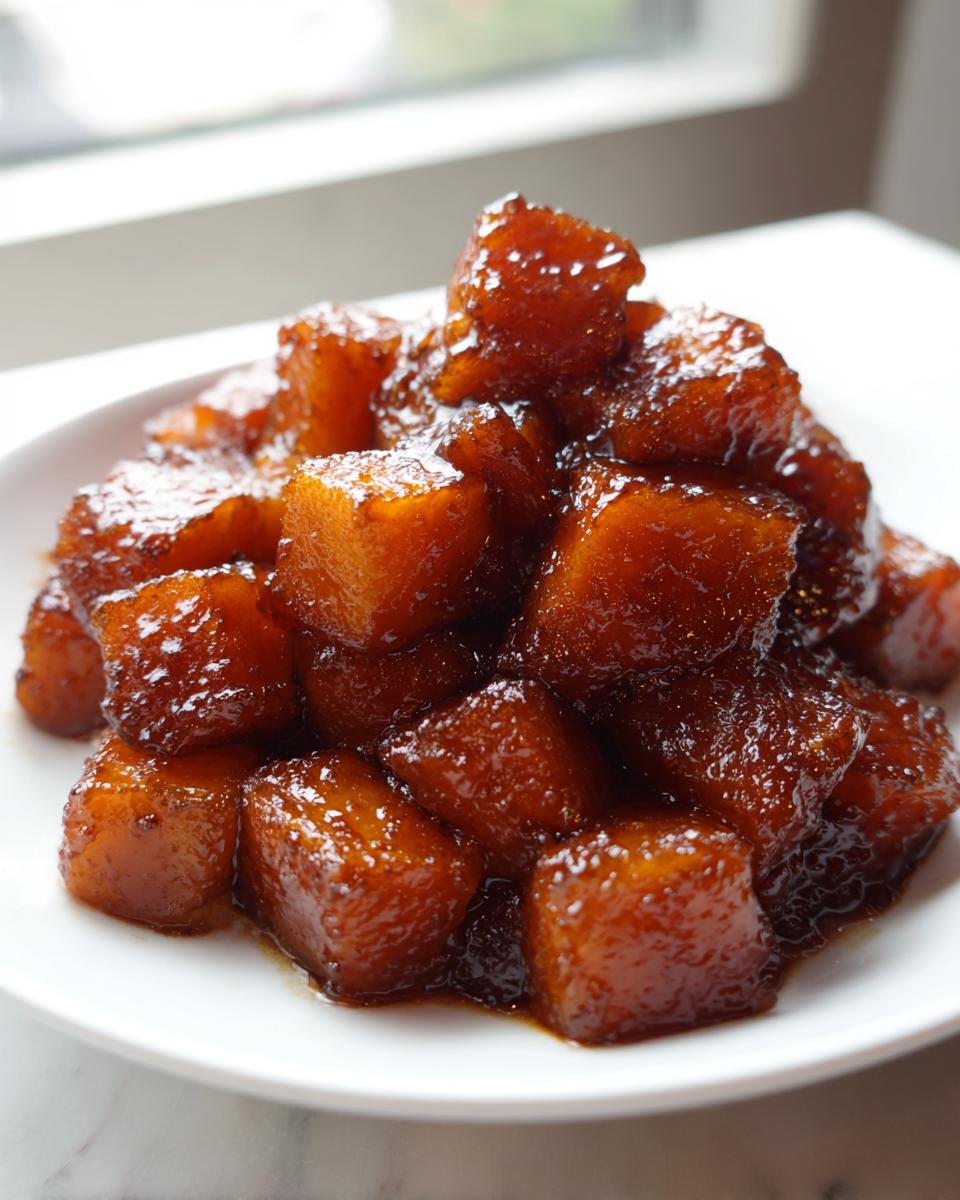
When the air gets crisp, my mind immediately goes to winter squash. Everyone rushes for the oven to roast their butternut. And look, roasted is good! But if you want something truly decadent, something that completely melts in your mouth, you have to try braised butternut squash. Trust me, this method achieves that incredible, fall-apart tenderness that dry heat just can’t match.
Here at Rosa’s Tasty Kitchen, we believe flavor should be big, but the work should be easy. That’s the secret I learned balancing teaching and motherhood—no complicated steps allowed! This simple brown sugar glaze method delivers maximum comfort food flavor with almost no fuss while you catch up on dinner prep. It’s proof that the best results come from focusing on heart, not complexity. If you’re looking for wonderful weeknight dinner ideas, this side dish is a guaranteed winner.
- Why This Simple Brown Sugar Glaze Makes the Best braised butternut
- Gathering Ingredients for braised butternut Squash
- How to Prepare Butternut Squash for braised butternut
- Step-by-Step Instructions: How to braise butternut squash
- Tips for Success with Your braised butternut Side Dish
- Flavor Variations for Savory butternut squash mains
- Serving Suggestions for This braised butternut
- Storage and Reheating Instructions
- Frequently Asked Questions About braised butternut
Why This Simple Brown Sugar Glaze Makes the Best braised butternut
Honestly, this recipe changed how I looked at squash entirely. I used to roast mine, just like everyone else, but the edges always got a little tough, you know? Then one year I was trying to develop a delicious sweet and savory butternut ideas dish for Thanksgiving, and I decided to ditch the oven and try braising. I was testing out different sweeteners, and when I added just a touch of brown sugar to the cooking liquid, wow! It created this incredible, sticky, flavorful coating. This isn’t just any Butternut squash recipe; the combination of the brown sugar and the gentle steam makes this the best brown sugar glazed butternut squash you’ll ever make.
Achieving Tender braised butternut Every Time
The secret is the liquid, my friends. Roasting relies on dry heat, which pulls moisture out as it cooks. But when you braise, you’re cooking the squash submerged halfway in flavorful liquid—stock, in our case—with the lid on tight. The steam does the heavy lifting! This low and slow method breaks down the squash’s structure gently. It softens all the way through, giving you that perfect, fork-tender texture without ever getting mushy or dried out.
Gathering Ingredients for braised butternut Squash
Getting ready for this recipe is so easy because we’re keeping things simple and familiar. For this incredible vegetable recipes using stock dish, you’ll need about three pounds of squash, cut into nice one-inch cubes. We’ll use two tablespoons of butter because flavor matters!
The liquid magic comes from half a cup of stock—use chicken or veggie, whatever you have handy. For that sweet element, pack a quarter cup of brown sugar tightly, plus that crucial apple cider vinegar to cut the sweetness. Don’t forget the cinnamon, salt, and pepper to round everything out!
Ingredient Notes and Substitutions
When you’re buying your squash, look for one that feels heavy for its size; that means it’s full of water and flavor. If you’re in a pinch and don’t have brown sugar, you absolutely can use pure maple syrup instead, but maybe use just slightly less. For a brighter flavor profile that leans less sweet, swap out that cinnamon for a teaspoon of fresh thyme leaves when you add the stock; that gives you fantastic herbed braised vegetables flavor!
How to Prepare Butternut Squash for braised butternut
Okay, let’s be real: cutting a butternut squash can feel like wrestling a small, pointy football. But don’t let that intimidate you; we have a trick to make this the easiest part of the whole process! Before you even pick up your sharpest knife, try this: stick the whole squash in the microwave for about two minutes.
It sounds weird, I know, but microwaving it slightly softens the skin just enough without pre-cooking the insides. This makes peeling so much less of a chore! Once it cools slightly, you can chop off the ends, slice the large body section away from the neck, scoop out those stringy, seedy guts—be generous with that scoop!—and then peel the skin off with your vegetable peeler.
Once peeled, just chop everything up into those lovely, even 1-inch cubes we need. Uniform size is key here for even cooking! We need those cubes to be cooked perfectly tender, and cutting them consistently is a fantastic Butternut squash cooking tips trick.
Step-by-Step Instructions: How to braise butternut squash
Now for the fun part! Learning How to braise butternut squash is easier than you think, and we’re going to start by building flavor right in our heavy pot, like a Dutch oven. First, melt your butter over medium heat. Toss in those gorgeous cubes you just cut up. We’re going to let them sauté for about five minutes, just stirring them around until the edges look like they’re starting to get just a tiny bit soft. This gives us a head start!
While that’s happening, whisk together all your glaze ingredients—the broth, brown sugar, vinegar, and spices—in a small bowl. Pour that sweet, spiced mixture right over the squash in the pot. Bring it up to just a gentle simmer, then immediately turn the heat way down to low, slap that lid on tight, and let it go for 20 to 25 minutes. This is where the tender magic happens.
Developing the Syrupy Glaze
Once the squash is fork-tender, we transition from braising to glazing. Take that lid off and turn the heat up just a little bit, maybe to medium-low. We want that liquid to bubble gently. You need to stir it every minute or so, but be gentle—we want the squash to stay in nice cubes, not turn into baby food! Let it cook uncovered for another five to seven minutes. You’ll see the liquid quickly thicken up into a gorgeous, syrupy coating that sticks right to your savory butternut!
Tips for Success with Your braised butternut Side Dish
I always tell people that even the simplest recipes benefit from a few expert pointers. First, don’t rush the braising time! You absolutely must test for doneness using a fork. If the fork slides in with zero resistance, then you’ve hit that perfect, melt-in-your-mouth spot. If you feel any hard resistance, just cover it back up and give it another five minutes. That fork-tender result is the whole point of this method!
Now, if your day is already packed when you need this on the table, I have a fantastic tip for you. This works wonderfully as a slow cooker butternut squash recipe. Just follow the first two steps on the stovetop (melt butter, sauté squash for 5 minutes). Then, dump everything else in the slow cooker—liquid and all—bring it to a simmer on high for 30 minutes on the counter, and then switch it to low for 3 to 4 hours. Perfect!
Flavor Variations for Savory butternut squash mains
This brown sugar glaze is my go-to comfort version, but this braising technique is so versatile! If you’re looking to pivot this from a sweet side dish into something that feels more like a star, we need to swap out the sweet spices for savory herbs. Think about those hearty flavors we love in fall cooking.
To turn this into one of those amazing Savory butternut squash mains, skip the cinnamon completely. Instead, when you add your liquid, toss in a teaspoon of fresh chopped thyme or dried sage. You’ll also want to swap that brown sugar for just a touch of honey, or even skip the sugar entirely and use a richer, deeply flavored chicken stock instead of vegetable stock.
If you want a little kick, a tiny pinch of smoked paprika or a dash of red pepper flakes while you’re sautéing the squash gives it a wonderful depth. These little twists turn a simple side into something robust enough to build a whole meal around. Check out my tips on making herbed braised vegetables for more inspiration!
Serving Suggestions for This braised butternut
Because this dish is so tender and coated in that rich, sticky glaze, it pairs beautifully with richer, saltier main courses. It’s fantastic right next to a roasted turkey or a juicy baked ham! If you’re looking for something vegetarian, serve it over a bed of fluffy quinoa or wild rice; the rice soaks up all that extra brown sugar and stock left in the bottom of the pot—don’t waste any of that goodness!
This makes my list of favorites for the holidays because it’s an easy dish to keep warm while you’re focusing on the big roast, and everyone loves a sweet vegetable side. You can dress it up even more by tossing in some toasted pecans right before serving for a little crunch. It shines next to savory greens or even alongside pork chops. It’s truly one of the best side dishes for holiday meals because it requires so little last-minute fuss on the stovetop!
Storage and Reheating Instructions
Honestly, leftovers are the best part of cooking, right? Since this is such a moist dish, it keeps beautifully. Store your leftover braised butternut in an airtight container in the fridge for up to four days. When you want to reheat it, don’t just blast it in the microwave! That can make it turn to mush.
Instead, put the squash in a small pan over low heat. I always add just a splash—maybe a teaspoon—of water or stock right to the pan before covering it. This gently steams the squash back to life while keeping that rich glaze from scorching. Give it a gentle stir every minute until it’s warmed through. It’ll taste just as good as the first time, promise!
Frequently Asked Questions About braised butternut
Can I make this a main dish instead of a side dish?
Oh, absolutely! This is one of my favorite ways to stretch a meal. To turn this into a full comfort food vegetable recipe, you need some protein or grain. Try stirring in a can of drained cannellini beans right when the liquid reduces, or add some crumbled Italian sausage during that initial sauté step. Serving a big scoop over fluffy quinoa makes it a satisfying meal!
What is the difference between braised and roasted butternut squash?
It all comes down to moisture! Roasting uses dry heat, so the edges get caramelized and slightly firm while the inside softens—great for texture contrast. Braising, though, uses moisture from the stock. This keeps the squash incredibly tender through and through, making it softer and more fully infused with the glaze flavor. It’s a completely different, melt-in-your-mouth experience!
Should I peel the butternut squash before braising?
Yes, definitely peel it for this specific technique! Since braising cooks the squash completely submerged in liquid, the peel would just get soft and slough off messily. Peeling ensures you get those perfect, clean, flavorful cubes coated entirely in that glossy brown sugar glaze. We leave the skin on when we’re roasting and using high heat, but for this method, the peel has got to go.
PrintSimple Braised Butternut Squash with Brown Sugar Glaze
Learn how to make tender, flavorful braised butternut squash using a simple method perfect for a comforting side dish.
- Prep Time: 15 min
- Cook Time: 35 min
- Total Time: 50 min
- Yield: 6 servings 1x
- Category: Side Dish
- Method: Braising
- Cuisine: American
- Diet: Vegetarian
Ingredients
- 3 lbs butternut squash, peeled, seeded, and cut into 1-inch cubes
- 2 tablespoons unsalted butter
- 1/2 cup chicken or vegetable stock
- 1/4 cup brown sugar, packed
- 1 tablespoon apple cider vinegar
- 1/2 teaspoon ground cinnamon
- 1/4 teaspoon salt
- 1/8 teaspoon black pepper
Instructions
- Melt the butter in a large, heavy-bottomed pot or Dutch oven over medium heat.
- Add the cubed butternut squash to the pot and cook, stirring occasionally, for 5 minutes until the edges begin to soften slightly.
- In a small bowl, whisk together the stock, brown sugar, apple cider vinegar, cinnamon, salt, and pepper.
- Pour the liquid mixture over the squash in the pot. Bring the liquid to a gentle simmer.
- Reduce the heat to low, cover the pot tightly, and let the squash braise for 20 to 25 minutes, or until the squash is fork-tender.
- Remove the lid and increase the heat to medium-low. Cook for another 5 to 7 minutes, stirring gently, until the liquid has reduced to a thick, syrupy glaze coating the squash.
- Serve immediately as a side dish for holiday meals.
Notes
- For easier peeling, you can microwave the whole butternut squash for 2 minutes before cutting.
- If you prefer a less sweet flavor, reduce the brown sugar to 2 tablespoons and add 1 teaspoon of fresh thyme leaves with the stock.
- This recipe works well in a slow cooker; cook on low for 3-4 hours after bringing the liquid to a simmer on the stovetop first.
Nutrition
- Serving Size: 1 cup
- Calories: 185
- Sugar: 22
- Sodium: 150
- Fat: 5
- Saturated Fat: 3
- Unsaturated Fat: 2
- Trans Fat: 0
- Carbohydrates: 34
- Fiber: 5
- Protein: 2
- Cholesterol: 6