
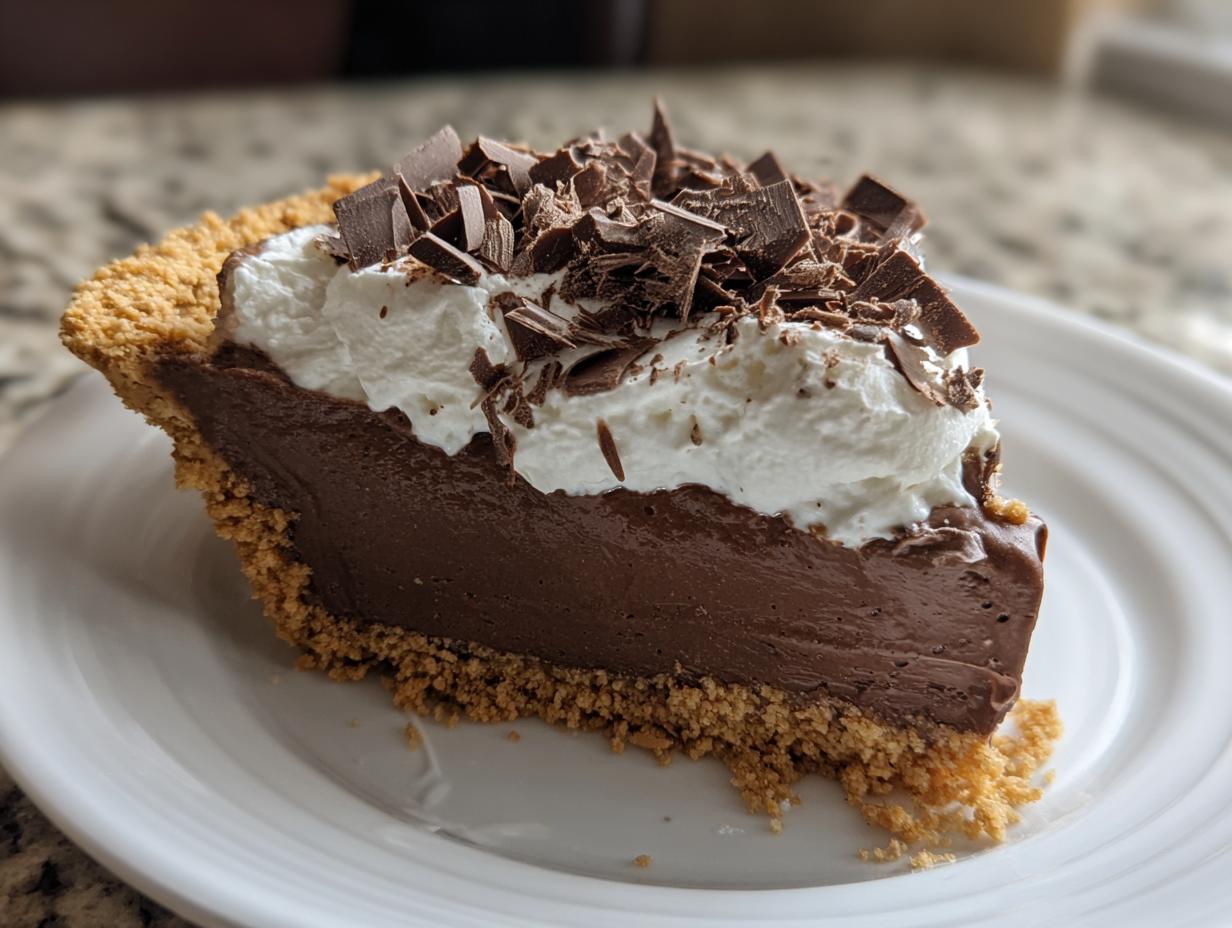
Sometimes you just need that deep, dark chocolate hug in dessert form, right? We all get busy, and honestly, the thought of a fussy, baked pie crust can feel like too much when you just need that creamy comfort right now. That’s why this recipe, The Ultimate Easy No-Bake chocolate cream pie with Graham Cracker Crust, is my absolute go-to for those moments. It delivers that rich, velvety texture you dream about, making truly decadent chocolate cream pie an achievable joy on a Tuesday night. Trust me, this is the simple, show-stopping treat that always brings smiles to my family’s faces, proving the best things are often the easiest to make!
It’s one of my signature recipes for busy families because it requires zero oven time. You can find all the secrets for making the absolute best desserts right here, like my guide to best homemade desserts, but this pie is always first on the list when I need something fast and impressive.
- Why This Chocolate Cream Pie Recipe Is a Weeknight Winner
- Gathering Ingredients for Your No Bake Chocolate Cream Pie
- Step-by-Step Instructions for the Ultimate Chocolate Cream Pie
- Tips for the Best Chocolate Cream Pie Success
- Make Ahead Chocolate Pie and Storage Instructions
- Serving Suggestions for Your Creamy Chocolate Dessert
- Frequently Asked Questions About Making Chocolate Cream Pie
- Sharing Your Chocolate Cream Pie Experience
- Estimated Nutritional Data for This Chocolate Cream Pie
Why This Chocolate Cream Pie Recipe Is a Weeknight Winner
I want you to feel completely confident making this pie, even if you’re staring down a mountain of homework or dinner prep. This easy chocolate cream pie solves so many problems while still delivering that intensely rich, velvety chocolate dessert experience everyone loves.
- No Oven Necessary! That’s right, no heating up the kitchen for a fussy baked crust.
- It’s completely foolproof thanks to the combination of instant pudding mixes.
- You can truly make this ahead of time, which takes all the pressure off the main meal rush.
Quick Preparation Time for Your Chocolate Cream Pie
The prep time is just about 20 minutes, tops. Seriously! You mix the crust, press it in, and then you move straight to the filling stage. Since we aren’t baking anything, you save the hour you’d spend waiting for a crust to bake and cool. If you need a fast holiday pie or just a surprise tonight, this is your answer.
Achieving a Silky Smooth Chocolate Cream Pie Filling
The texture is non-negotiable for me. We aren’t aiming for grainy custard here; we want pure indulgence! The secret to that silky smooth chocolate pie filling that sets up beautifully without any stovetop stirring comes from using both instant pudding mixes and folding in a little bit of cold heavy cream. This technique ensures our chocolate cream pie is thick, airy, and absolutely perfect every single time. It’s so rewarding!
Gathering Ingredients for Your No Bake Chocolate Cream Pie
Okay, now that you know how easy this is, let’s talk supplies! Because this is a no bake chocolate cream pie, our ingredient list stays short and sweet. You don’t need fancy Dutch ovens or whisks that require two hands! Everything here should be easy to find at any grocery store.
It’s important to measure exactly, especially since we aren’t baking this to perfection; we’re relying on the instant mixes to do the heavy lifting! If you love quick, no-fuss treats, you might also want to check out my recipe for my easy no-bake bourbon balls.
Crust Components for the Chocolate Cream Pie
The crust sets up the flavor foundation, and it’s the easiest part. You just need three things:
- 1 1/2 cups graham cracker crumbs
- 1/4 cup granulated sugar (for crust)
- 6 tablespoons unsalted butter, melted
Ingredients for the Creamy Chocolate Dessert Filling
This section is where the magic happens. Remember, we want that foolproof, thick texture that doesn’t go anywhere once it chills!
- 1 package (3.4 ounces) instant chocolate pudding mix
- 1 package (3.4 ounces) instant vanilla or white chocolate pudding mix
- 3 cups cold milk (whole milk works best!)
- 1 teaspoon vanilla extract
- 1/2 cup cold heavy whipping cream (this is vital for stabilization!)
- 1 container (8 ounces) frozen whipped topping, thawed (or homemade whipped cream)
- Chocolate shavings, for garnish
Step-by-Step Instructions for the Ultimate Chocolate Cream Pie
This is where we bring everything together! Since this is a no-bake recipe, the steps are all about mixing things correctly and letting cold do the hard work for us. When you’re done, you’ll have a beautiful, rich chocolate cream pie that looks like it took all day. Remember, every great baker adds their own touch, so feel free to chat with your pie as you mix!
Preparing and Chilling the Graham Cracker Crust Pie Base
First things first, we need that perfectly sturdy base. In a medium bowl, toss your graham cracker crumbs, the small bit of sugar for the crust, and the melted butter together. You need to mix this until everything looks evenly moistened—like wet sand ready to hold a shape.
Now for the crucial part: pressing it into your 9-inch pie plate. And here’s a little piece of wisdom from my years in the kitchen: don’t be shy! Press that mixture down firmly, all along the bottom and making sure you get a good, solid wall up the sides. A loose crust means a crumbly slice later. Once it’s packed tight, pop that pie plate into the freezer for at least 15 minutes. That chill time is just enough time to get your filling ready to go.
Making the Rich Chocolate Pie Filling
Grab a big bowl! We start by whisking together both the instant chocolate pudding mix and the instant vanilla pudding mix dry. Getting rid of those lumps now saves heartache later. Then, pour in the 3 cups of cold milk slowly while you keep whisking, just until it starts to thicken up nicely—usually about two minutes.
Now for that stabilizing trick: gently whisk in that 1/2 cup of cold heavy whipping cream and the vanilla extract. I always do this right before I fold in the rest of the topping. The heavy cream helps structure the whole custard so it doesn’t deflate or weep later on. That little addition makes such a huge difference!
Setting and Finishing Your Chocolate Cream Pie
Take your chilled crust out of the freezer. Now, gently fold in about half of your thawed whipped topping into the pudding mixture until it’s just combined. I mean *gently*—you still want some white streaks in there; that keeps the texture light and fluffy, not dense. Pour this entire, luxurious mixture right into your prepared crust and smooth the top with your spatula.
Cover this loosely with plastic wrap—you don’t want the plastic sticking to the soft filling! Then, it needs patience: refrigerate it for a minimum of 4 hours. Honestly, overnight is even better for the ultimate set! Right before you plan to serve this amazing dessert, smooth the remaining whipped topping over the top and finish it off with a generous sprinkling of chocolate shavings. Now go see how fast it disappears!
If you want to see more reliable recipes that save time without sacrificing flavor, check out my collection of the best dessert recipes.
Tips for the Best Chocolate Cream Pie Success
Even with my easy chocolate cream pie recipe, sometimes you want to customize it a bit, right? That’s where the fun starts! I pulled these little secrets straight from my own notes because getting that perfect, rich flavor, even in a simple pudding pie, is what separates a good dessert from a truly memorable one, like one of my creamy dips. We aren’t just settling for average when it comes to your homemade chocolate custard pie.
Crust Variations: From Graham Cracker to Oreo Crust Pie
While I love the classic texture of graham crackers, I know some folks just adore chocolate on chocolate! If you want to switch it up, the Oreo crust is a dream. You’ll use about 1 1/2 cups of those finely crushed Oreos—don’t worry about scraping out the filling, leave it right in there!
For the Oreo version, you only need 5 tablespoons of melted butter instead of the 6 we used for the graham crackers. That’s just enough to hold the dark crumbs together. Press it in firm just like we did before, and you’re good to go!
Boosting Flavor in Your Chocolate Cream Pie
If you’re a serious chocoholic like me, you might find the instant pudding just a little too mild sometimes. We can fix that instantly! If you want a deeper, darker chocolate cream pie flavor, take about 2 tablespoons of unsweetened cocoa powder and whisk it right into your dry pudding mixes before you add any milk.
You might need an extra dash of milk to get everything incorporated smoothly, but wow, the flavor payoff is huge. It takes that already delicious pie to a whole new level of rich indulgence!
Make Ahead Chocolate Pie and Storage Instructions
This is one of my absolute favorite things about this chocolate cream pie: it’s designed to be a make-ahead dessert! When you’re hosting, or just trying to get ahead for a big weekend, baking that crust and having the entire filling set is a lifesaver. I rely on this heavily before Thanksgiving, for example.
You can absolutely get the pie completely set—meaning, steps 1 through 7 are done—a full day early. That means the crust is chilled, and the creamy chocolate filling is firm. We want that filling to be totally set before we touch it!
However, I strongly suggest waiting until right before you serve it to add the final layer of whipped topping. If you put the whipped topping on too early, especially overnight, it can start to weep or deflate a bit, and we want that beautiful, cloud-like height. So, finish the crust and filling the day before, cover it loosely with plastic wrap, and keep it cold. Then, about 30 minutes before dessert time, spread that final topping on and maybe dust it with your chocolate curls. It’s glorious!
You can find more great tips on getting ahead of the game in my post about make ahead chocolate pie essentials. Keeping this chocolate cream pie covered and clearly labeled in the fridge should see it tasting fantastic for up to three days, though trust me, it never lasts that long in my house!
Serving Suggestions for Your Creamy Chocolate Dessert
This pie is so rich and satisfying that honestly, it doesn’t need much company on the plate, but sometimes pairing it with the right beverage just elevates the whole experience. Because the filling is so decadent, I love balancing that deep chocolate flavor with something bright or a little bitter.
If you’re serving this after a big holiday meal—maybe Thanksgiving or Christmas, when everyone is already stuffed—a nice, strong cup of black coffee or a freshly brewed espresso is fantastic. The slight bitterness cuts right through the sweetness of the filling and the whipped topping.
For a lighter pairing, especially in the summer, think fruit! A small bowl of fresh raspberries or tart cherries served alongside is incredible. The slight acidity they have really wakes up your palate against that smooth, creamy chocolate dessert flavor. Or, if you’re hosting a big crowd, you know I always have a big batch of punch ready to go. You can find my absolute favorite recipe for kicking off any holiday party here!
Really, this pie belongs wherever there is good company. It’s a winner for potlucks, game nights, or just because Friday showed up!
Frequently Asked Questions About Making Chocolate Cream Pie
I know when you’re making something delicate like a chocolate cream pie, you might have a few little questions pop up. Don’t worry! That’s totally normal, and I’ve gathered the ones I get asked most often about my easy chocolate cream pie recipe. We want this to be foolproof, so let’s cover those lingering doubts right now. If you still need a tip, you can always reach out on my contact page!
Can I substitute the graham cracker crust for an Oreo crust pie?
Oh, absolutely you can! That’s one of the best shortcuts for a graham cracker crust pie swap. If you use Oreo crumbs instead— and you’ll need about 1 1/2 cups of the finely crushed cookies—you should reduce the amount of melted butter you use slightly. Instead of 6 tablespoons, just use 5 tablespoons of melted butter with the Oreo crumbs. That dark, chocolatey base is delicious!
What is the secret to a thick, silky smooth chocolate pie filling?
It’s all about the stabilizer! A lot of people think you need cornstarch or cooking it on the stovetop, but for this version, our secret weapon to getting that silky smooth chocolate pie filling that sets up rock-solid in the fridge is folding in that 1/2 cup of cold heavy whipping cream before you add the main batch of thawed whipped topping. It gives the pudding filling just the structure it needs to hold its shape perfectly when sliced.
Is this considered an old fashioned chocolate cream pie?
That’s a lovely question! While this specific recipe skips the stovetop cooking you’d find in a true old fashioned chocolate cream pie, the flavor profile—rich cocoa custard and a cloud of whipped cream—is absolutely inspired by those classic recipes. Think of it as the spirit of the old-fashioned pie, updated for modern speed and convenience. It gives you that nostalgic, comforting slice any holiday table would adore!
Sharing Your Chocolate Cream Pie Experience
Now that you’ve made this truly spectacular, easy chocolate cream pie, I want to hear all about it!
It truly means the world to me when you all try one of my family-approved recipes. Did you stick with the simple chocolate shavings on top, or did you go for cherries or maybe some chopped nuts? Let me know in the comments below what you chose for your final garnish!
And please, if you loved how simple this was and how rich the texture turned out, take a moment to leave a rating for the recipe. A five-star rating really helps other bakers discover this fantastic treat. If you have any questions at all about setting or storage, don’t hesitate to pop over to my main contact page—I monitor it closely, and I’m always happy to help a fellow home cook succeed!
Estimated Nutritional Data for This Chocolate Cream Pie
I always like to give you a heads-up on what you’re getting into—even with the easiest desserts, knowing the basics helps! Please remember that because this is a no-bake recipe using packaged mixes and assembled ingredients, these numbers are an estimate purely based on the component data. They might shift a little based on the exact brands you grab off the shelf.
Here’s the estimated breakdown for one generous slice of your chocolate cream pie:
- Serving Size: 1 slice
- Calories: 380
- Sugar: 32g (Yes, it’s dessert, we expect sugar!)
- Sodium: 310mg
- Fat: 20g
- Saturated Fat: 11g
- Unsaturated Fat: 9g
- Trans Fat: 0.5g (Hardly any, thank goodness!)
- Carbohydrates: 48g
- Fiber: 1g
- Protein: 5g
- Cholesterol: 35mg
It’s a wonderfully rich treat, but because we skip the heavy stovetop custard process, it keeps the cholesterol relatively low, which is a nice little bonus. Enjoy every bite!
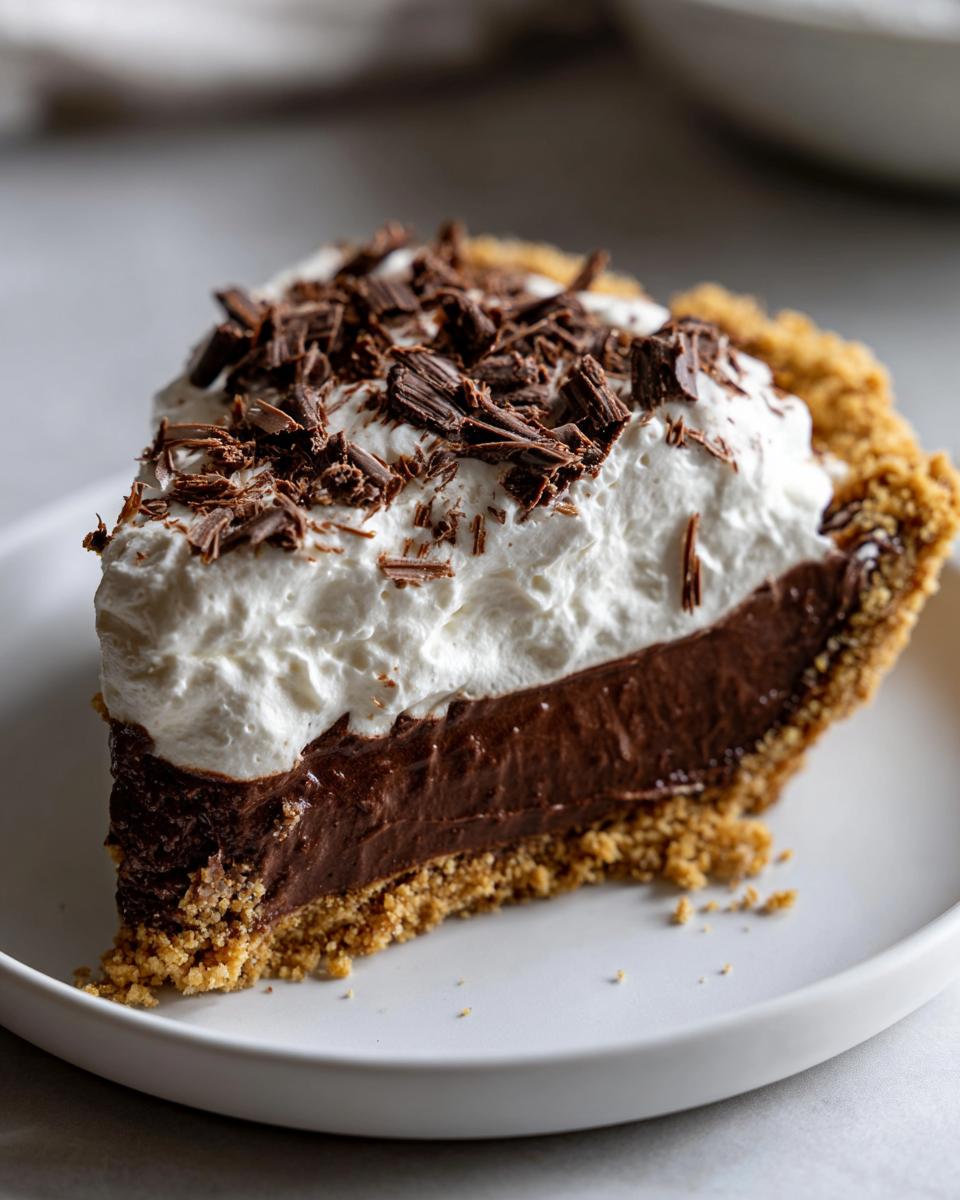
PrintThe Ultimate Easy No-Bake Chocolate Cream Pie with Graham Cracker Crust

Make this rich and velvety chocolate cream pie without turning on your oven. This easy recipe uses a simple graham cracker crust and a silky smooth chocolate filling, topped with fluffy whipped cream.
- Prep Time: 20 min
- Cook Time: 0 min
- Total Time: 4 hr 20 min
- Yield: 8 servings 1x
- Category: Dessert
- Method: No-Bake
- Cuisine: American
- Diet: Vegetarian
Ingredients
- 1 1/2 cups graham cracker crumbs
- 1/4 cup granulated sugar (for crust)
- 6 tablespoons unsalted butter, melted
- 1 package (3.4 ounces) instant chocolate pudding mix
- 1 package (3.4 ounces) instant vanilla or white chocolate pudding mix
- 3 cups cold milk (whole milk works best)
- 1 teaspoon vanilla extract
- 1/2 cup cold heavy whipping cream (for filling stabilization)
- 1 container (8 ounces) frozen whipped topping, thawed (or homemade whipped cream)
- Chocolate shavings, for garnish
Instructions
- Prepare the crust: Mix graham cracker crumbs, 1/4 cup sugar, and melted butter in a bowl until evenly moistened. Press the mixture firmly into the bottom and up the sides of a 9-inch pie plate. Chill the crust in the freezer for at least 15 minutes while you prepare the filling.
- Combine pudding mixes: In a large bowl, whisk together the instant chocolate pudding mix and the instant vanilla pudding mix.
- Add liquid: Gradually whisk in the 3 cups of cold milk and the vanilla extract until the mixture is smooth and starts to thicken, about 2 minutes.
- Stabilize the filling: Gently fold in the 1/2 cup of cold heavy whipping cream into the pudding mixture. This helps give the filling structure.
- Fold in whipped topping: Gently fold in about half of the thawed whipped topping until just combined. Do not overmix; you want streaks of white to remain for a lighter texture.
- Fill the crust: Pour the creamy chocolate filling into the chilled graham cracker crust. Spread the top evenly with a spatula.
- Chill: Cover the pie loosely with plastic wrap and refrigerate for at least 4 hours, or preferably overnight, until the filling is completely set.
- Top and serve: Before serving, spread the remaining thawed whipped topping over the set pie filling. Garnish generously with chocolate shavings. Slice and serve cold.
Notes
- For a richer chocolate flavor, substitute 1/4 cup of the milk with 2 tablespoons of unsweetened cocoa powder whisked into the dry pudding mixes.
- If you prefer an Oreo crust, use 1 1/2 cups of finely crushed Oreo cookie crumbs instead of graham crackers, and use 5 tablespoons of melted butter.
- You can make this pie a day ahead of time. Keep it covered in the refrigerator until you are ready to add the final whipped topping layer.
Nutrition
- Serving Size: 1 slice
- Calories: 380
- Sugar: 32
- Sodium: 310
- Fat: 20
- Saturated Fat: 11
- Unsaturated Fat: 9
- Trans Fat: 0.5
- Carbohydrates: 48
- Fiber: 1
- Protein: 5
- Cholesterol: 35