
Oh, if there’s one dessert that screams pure, uncomplicated comfort, it has to be a perfect baked custard. It reminds me so much of those quiet evenings at my Grandmother’s house when everything felt safe and warm. So many people, though, tell me they’re terrified to even try making an egg custard because they always end up with a cracked or grainy top. Well, I’m here to tell you we are banishing those kitchen worries forever! This recipe, The Ultimate Fail-Proof Silky Egg Custard, uses the same simple, honest ingredients my grandmother taught me, plus one crucial technique that guarantees that melt-in-your-mouth, silky smooth texture every single time. You’re going to love how easy it is to create this nostalgic sweet treat. If you’re looking for more joy in your dessert baking, check out my favorite collection of best homemade desserts!
- Why This Classic Egg Custard Recipe Guarantees Smoothness
- Ingredients for Your Perfectly Set Egg Custard
- How to Prepare The Ultimate Fail-Proof Egg Custard
- Tips for Achieving a Homemade Silky Custard Every Time
- Serving Suggestions for Your Old Fashioned Baked Custard
- Storage and Reheating Instructions for Leftover Egg Custard
- Frequently Asked Questions About Making Egg Custard
- Nutritional Estimates for This Simple Homemade Dessert
- Share Your Perfect Egg Custard Creations
Why This Classic Egg Custard Recipe Guarantees Smoothness
When it comes to an Old Fashioned Baked Custard, texture is everything. You want that delicate, jiggly set, not a sponge or scrambled eggs! That’s why I stand by this method; it’s my go-to foolproof custard technique developed over years of trying to get it just right. Trust me, the science behind it is so simple, yet it makes all the difference in the final result. You are going to be so proud of yourself!
- It relies on the water bath to bake gently, preventing dry edges.
- We use only whole milk to guarantee that rich, creamy mouthfeel.
- The method ensures the final egg custard is perfectly set, not rubbery.
If you want to learn more about the foundations of reliability in my kitchen, you can always read more about my baking journey here.
The Secret to Silky Smooth Custard: Gentle Mixing
Here is the first big secret, and it’s all about air. When you whisk those eggs and sugar, you think you’re just combining them, but nope—you’re actually whipping in tiny air bubbles. Too many bubbles mean that when the custard heats up, those bubbles rapidly expand, erupting on the surface and leaving you with cracks.
So, when mixing the eggs and sugar, just use a fork or a whisk with a light hand. Slow and steady wins the race here! You only want to combine them until they look uniform. If you see froth or tons of foam building up on top, stop! Too much air is the number one enemy when making a beautiful, smooth egg custard.
Ingredients for Your Perfectly Set Egg Custard
The beauty of this Old Fashioned Baked Custard is honestly in its simplicity. When you stick to classic ingredients, you don’t need complicated steps to make it taste amazing. You’ll notice we kept the ingredient list short, which is my motto for reliable family recipes. Everything you need should be right in your cabinet or easily grabbed next time you’re at the store. We rely on three big players here: eggs, sugar, and milk, anchored by lovely vanilla and a whisper of nutmeg.
So, what exactly are we looking for? We need three good, large eggs. We use granulated sugar—just a half-cup that melts perfectly into the milk—and 2 and 2/3 cups of rich whole milk. Don’t try to sneak in the skim milk here, trust me; the fat content in the whole milk is what helps us achieve that beautiful, slow-setting, creamy vanilla custard texture. We finish it with one teaspoon of pure vanilla extract, just a pinch of salt to heighten the sweetness, and that classic touch of nutmeg.
Ingredient Notes and Substitutions for Creamy Vanilla Custard
Listen, you can try to swap out the milk, but you are going to regret taking that shortcut when you see the texture. Whole milk is non-negotiable for this dessert because it gives the final egg custard the body it needs to set correctly without getting watery. If you try to use something lighter, the structure fails—and we are aiming for foolproof!
When it comes to vanilla, please use pure extract if you can. That imitation stuff just doesn’t have the depth of flavor needed to stand up to the warmth of the nutmeg. You’ll notice I don’t include cinnamon, though some recipes do. For this specific classic egg custard recipe, I find the nutmeg sings loudest all by itself. If you’re using this mixture as a baked custard pie filling, using a quality vanilla really makes the crust-to-filling experience top-notch.
How to Prepare The Ultimate Fail-Proof Egg Custard
Okay, now that we have our perfect ingredients ready to go, it’s time for the actual baking, and this is where the “fail-proof” part really comes into play. Making a great egg custard isn’t hard, but it requires us to slow down the process just a little bit. First things first: get that oven humming along at 325 degrees Fahrenheit! While it’s warming up, grab your roasting pan—the big one—and place your pie plate or those cute little ramekins right inside it. We are staging the battleground for perfect custard!
Remember what I said about gentle mixing? After you gently whisk in the warm milk and flavorings, you have to strain that mixture. I mean it! Pour it right through a fine-mesh sieve into a pitcher. This is so important for achieving a homemade silky custard; you catch any bits of unmixed egg white or whatever the nutmeg decided to clump into. Then, carefully pour the smooth liquid into your prepared dishes sitting in that roasting pan. This setup is necessary before we add the water.
If you’re looking for some fantastic breakfast pairings that go well with a sweet treat like this, check out my favorite easy breakfast recipes—sometimes you just need an egg in your life!
Mastering the Egg Custard Water Bath Technique
This water bath, or *bain-marie* as the fancy chefs call it, is your best friend. Why bother with it? Because custard hates sudden temperature changes! If you bake it in dry heat, the edges cook super fast, causing them to seize up, toughen, and crack while the middle is still raw. The water bath acts like a warm, gentle blanket, surrounding your egg custard dish with steamy, even heat. This is the absolute secret to getting that perfectly set custard.
Once your dishes are nestled in the pan, carefully boil some water—it needs to be hot! Then, pour that hot water into the big roasting pan until it comes about halfway up the sides of your ramekins or pie plate. Be super careful not to splash any water into the actual custard mixture. If you splash water in, you’ve added extra liquid, and that messes up our ratio. Slow and steady pouring is the only way here!

Baking Times and Testing for Doneness in Your Egg Custard
The Easy Custard Dessert is famous for being finished right when it seems like it’s not quite done. For a full 9-inch pie, you are looking at 40 to 50 minutes. If you are using individual ramekins, it might only take 35 to 45 minutes. How do you know when to pull them out? You need to watch for the jiggle!
When you gently nudge the oven rack, the edges of the custard should look totally set, firm, and opaque. But the very center—a little silver dollar size spot right in the middle—should still have a distinct wiggle, like loose Jell-O. If it’s completely firm, you’ve overbaked it, and it will be grainy when cold. When you see that slight wobble, pull the whole pan out immediately! Remember, it continues to cook as it cools down in that wonderful water bath.

Tips for Achieving a Homemade Silky Custard Every Time
Now that your egg custard is perfectly baked, the second most important part of the foolproof method begins: patience during cooling! You can’t rush this; if you try to pull those hot dishes out of the water bath right away, they might collapse a little, and that gentle set we worked so hard for can get thrown off. Let them sit right there in the warm bath for a solid 30 minutes after you take the whole roasting pan out of the oven.
Once they’ve cooled down a bit, move the individual ramekins or the pie plate onto a wire rack to finish cooling to room temperature. After that, cover them loosely with plastic wrap—tent it slightly so it doesn’t stick to the potentially moist top—and move them to the refrigerator. I always tell people that this is another one of my Grandma’s rules. When I was first learning to make this Classic Egg Custard Recipe, I snuck a taste when it was merely warm, and it was fine, but I didn’t truly understand the magic until it was perfectly chilled. It needs those 4 hours, minimum, to firm up into that truly silky smooth custard texture.
When I finally mastered the chilling process, it was like unlocking a secret level in baking! The flavor deepens, the nutmeg settles in, and that texture becomes unbelievably creamy. It totally changed how I viewed simple desserts; sometimes the best things take a little time to settle down. If you need some other simple, yet impressive, make-ahead desserts, you might like my tips over on my creamy filling recipes too!
Serving Suggestions for Your Old Fashioned Baked Custard
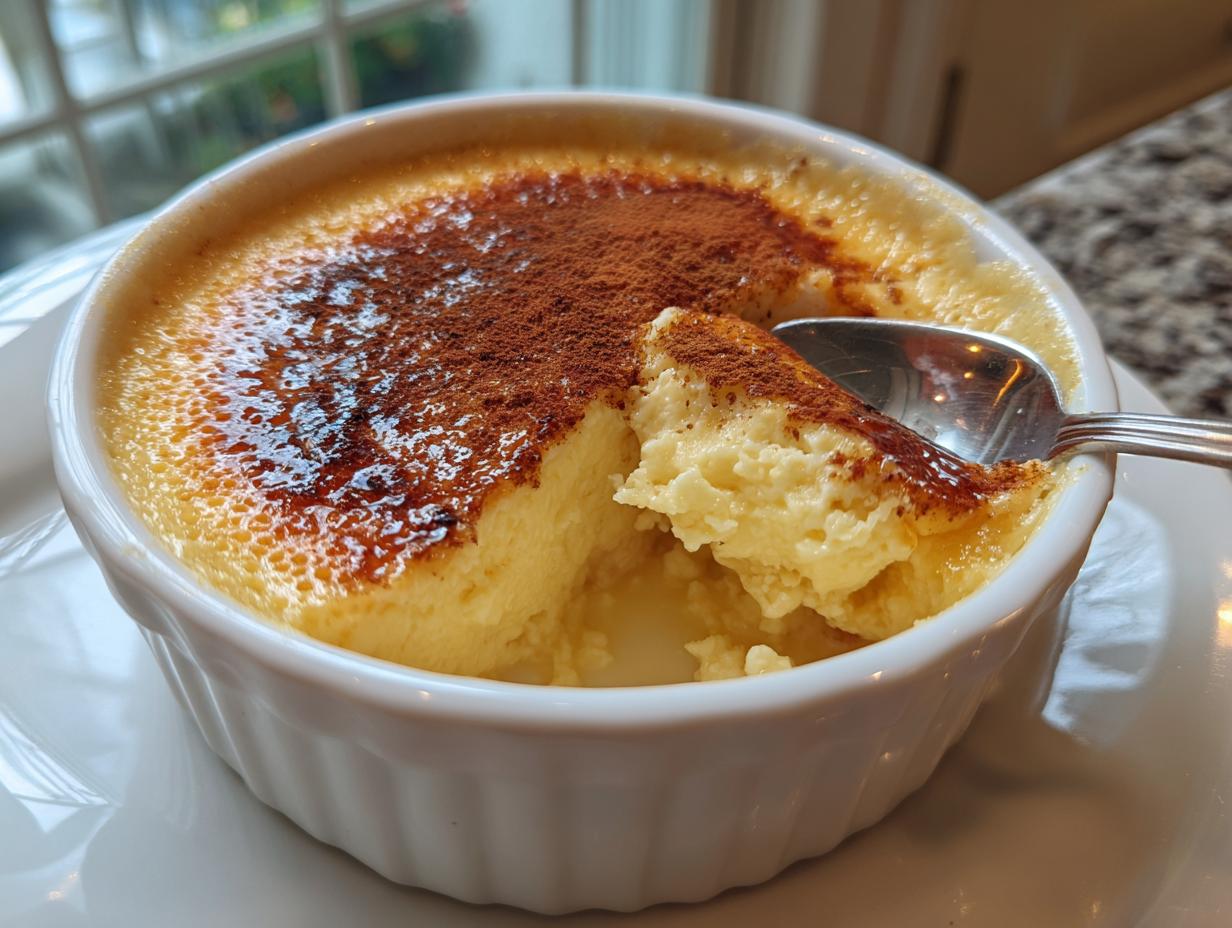
Now that you’ve mastered the technique for a perfectly set, creamy vanilla custard, the fun part is deciding how you want to enjoy your masterpiece! Honestly, this egg custard is stunning all on its own. It’s that classic comfort food dessert, beautifully plain, with just a light dusting of extra nutmeg right before serving. It tastes just like nostalgia, and you absolutely do not need anything else!
However, if you’re serving this easy homemade dessert for a crowd or just want to jazz it up a bit, I’ve got a few easy ideas my own family loves. A few fresh berries—raspberries or sliced strawberries—dramatically brighten up the subtle sweetness of the custard. A little bit of fresh mint leaves sprinkled on top looks really professional, too. It’s simple elegance, nothing fussy.
And remember, if you made this as a baked custard pie filling, you get to decide what goes on top! I usually leave mine simple since the crust provides the texture contrast. But if you’re looking for an excuse to bake something else equally comforting, you should check out my roundup of the very best homemade desserts that our family has collected over the years!
Storage and Reheating Instructions for Leftover Egg Custard
This egg custard is definitely a make-ahead winner, which is perfect for busy weeknights! Because we took such care to make it a beginner friendly dessert that sets beautifully, it holds up really well in the fridge. Once it is completely chilled—and I mean totally cold, not just cool—cover your pie plate tightly with plastic wrap, or if you used ramekins, just pop the lids on them.
It’s perfectly safe to enjoy this comfort food dessert for up to four days in the refrigerator. Honestly, I think the vanilla and nutmeg flavors actually get a little deeper and richer by day two! That’s why I always say it tastes even better the next day.
Now, let’s talk about reheating, because this is where you have to be gentle. Since this custard is set by the delicate balance of eggs and heat, reheating aggressively will absolutely turn it firm or even slightly grainy. If you prefer your creamy vanilla custard warm right out of the oven, I suggest a very low oven temperature, maybe 275 degrees, and just a little warming time. Don’t just pop it in the microwave for a minute, or you’ll end up with a rubbery texture that surprises no one!
If you must microwave it, use 15-second bursts on 50% power, stirring gently in between each burst to encourage even warming. But really, since this is such a simple treat, I find it tastes best served cold, straight from the fridge. It has the silkiest texture when completely chilled!
Frequently Asked Questions About Making Egg Custard
I know when you’re new to baking, the details can feel overwhelming, but I promise you, once you master these few points, you’ll be making the best egg custard around! I’ve gathered up some of the questions I hear most often from folks trying this Classic Egg Custard Recipe for the first time. Knowing these little tricks upfront can save you a lot of worry.
If you’re looking for quick meal ideas to serve alongside your dessert, pop over and see what we’re eating for dinner this week over at my weeknight dinner ideas section!
Can I make this creamy vanilla custard without a water bath?
Oh, honey, the answer is a big, resounding technically yes, but practically, no, you absolutely shouldn’t if you want that beautiful, silky smooth custard! The water bath isn’t just suggestion; it’s essential insurance against curdling. Without that steamy buffer around the dish, the direct heat of the oven cooks the eggs too harshly on the edges, leading to that grainy texture or a cracked top. Save yourself the heartbreak and always use the bath!
What is the difference between this egg custard and crème brûlée?
That’s a great question! They both rely on eggs and cream/milk, but they are treated very differently. Our Old Fashioned Baked Custard is cooked gently until it’s perfectly set throughout, like a firm, creamy pudding that you can eat with a spoon or use as a pie filling. Crème brûlée, on the other hand, is usually baked as a much richer, looser base, and its entire purpose is to be served chilled with a torched, crisp sugar crust right on top. One is smooth all the way through; the other is contrast between crunchy and creamy!
Can I use evaporated milk instead of whole milk for this egg custard?
I really advise against swapping whole milk for evaporated milk in this recipe. Evaporated milk is milk that has had about 60% of its water removed, making it much thicker and more concentrated. If you use it straight, your final egg custard will likely come out dense, overly rich, and it might not set correctly because the liquid ratio is completely off for this standard recipe. If you wanted to try it, you’d have to dilute it significantly with water to get back to the consistency of whole milk, and frankly, that’s just creating extra work when you could just grab a carton of whole milk to ensure you get that perfect baked custard pie filling result!
Nutritional Estimates for This Simple Homemade Dessert
I know some of you read recipes looking for every little detail, and that’s wonderful! While I focus most on flavor and reliability in my kitchen—making sure this simple homemade dessert tastes like love—I always want to provide you with as much information as I can. Since we are using basic, whole ingredients in this egg custard, the counts aren’t too intimidating, which is another win for a great comfort food treat!
Based on the ingredients listed, here are the averages for one slice of pie or one portion if you made individual ramekins. Keep in mind these are just estimates, because the size of your eggs, the brand of milk, and exactly how much nutmeg you sprinkle on top can change things slightly. That’s the nature of real home baking, right? We aren’t factory-made here!
- Serving Size: 1/8 of pie
- Calories: 180
- Sugar: 18g
- Sodium: 75mg
- Total Fat: 7g (with 4g being saturated fat)
- Carbohydrates: 18g
- Protein: 8g
- Cholesterol: 105mg
For a dessert that tastes this rich and comforting, those are fantastic numbers. The sugar provides the immediate satisfaction, but you get good protein from the eggs and milk to keep you feeling satisfied. This is why sticking to the original recipe works so well; it creates a naturally balanced and satisfying creamy vanilla custard without needing a ton of heavy creams or difficult substitutions.
Share Your Perfect Egg Custard Creations
And there you have it! We’ve conquered the biggest fears surrounding egg custard—the cracking, the curdling, the graininess. Now this beautiful, old fashioned baked custard is ready for your oven and, more importantly, your family table. When I started Rosa’s Tasty Kitchen, it was because I wanted to encourage everyone to feel successful and connected through simple, delicious food, and nothing says connection like sharing a perfectly made dessert.
I truly hope you give this recipe a try! Please come back and let me know how it went. Did you make it as a pie filling, or did you stick to creamy individual ramekins? You can leave a rating right below, and if you want to chat directly or show off a picture of your unbelievably silky result, hop over to my contact page. I absolutely adore seeing your creations!
And hey, if you’re looking for more inspiration once you’ve devoured this delicious classic, I always share what other successful bakers are trying over on my social feeds. You might even find another recipe that becomes your new favorite comfort treat! If you’re looking for other highly-rated smooth recipes, you might want to check out this great one I saw from Carla’s kitchen for their own version of a silky egg custard inspiration.
Making this homemade silky custard is proof that you don’t need fancy training or fussy steps to achieve something truly special. Happy baking, friends. I can’t wait to hear all about your success making this beginner friendly dessert!
PrintThe Ultimate Fail-Proof Silky Egg Custard (Standalone & Pie Filling Version)

Achieve a truly silky, creamy egg custard every time you bake. This old-fashioned recipe uses simple ingredients and the essential water bath technique to prevent cracking and guarantee a perfectly smooth texture, whether you serve it alone or as a pie filling.
- Prep Time: 15 min
- Cook Time: 50 min
- Total Time: 65 min
- Yield: 8 servings 1x
- Category: Dessert
- Method: Baking
- Cuisine: American
- Diet: Vegetarian
Ingredients
- 3 large eggs
- 1/2 cup granulated sugar
- 2 2/3 cups whole milk
- 1 teaspoon pure vanilla extract
- 1/4 teaspoon ground nutmeg
- Pinch of salt
Instructions
- Preheat your oven to 325 degrees Fahrenheit. Place a 9-inch pie plate or four 6-ounce ramekins inside a large roasting pan.
- In a medium bowl, gently whisk the eggs and sugar together until just combined. Do not over-whisk; you want to avoid incorporating too much air, which causes bubbles and cracks.
- Warm the milk slightly on the stovetop or in the microwave until it is warm to the touch, but not hot.
- Slowly pour the warm milk into the egg mixture while continuously stirring gently. Stir in the vanilla extract, nutmeg, and salt.
- Pour the custard mixture through a fine-mesh sieve into a large measuring cup or pitcher. This step removes any chalazae or unmixed egg bits, helping you make smooth custard.
- Carefully pour the strained custard mixture into the prepared pie plate or ramekins set inside the roasting pan.
- Place the roasting pan on the center rack of the oven. Carefully pour hot water into the roasting pan until the water reaches halfway up the sides of the custard dishes. This water bath technique is key to a perfectly set custard.
- Bake for 40 to 50 minutes for a pie, or 35 to 45 minutes for ramekins. The custard is done when the edges are set, but the center still jiggles slightly when gently nudged.
- Carefully remove the roasting pan from the oven. Let the custard cool in the water bath for 30 minutes before removing the dishes from the water.
- Chill the egg custard completely in the refrigerator for at least 4 hours before serving.
Notes
- For a pie filling, use a standard 9-inch pie crust and pour the mixture into the unbaked crust before placing it in the water bath.
- If you skip the water bath, you risk a grainy or cracked top. The gentle, even heat from the water bath ensures a silky texture.
- To test for doneness, insert a thin knife near the edge; if it comes out clean, it is ready.
Nutrition
- Serving Size: 1/8 of pie
- Calories: 180
- Sugar: 18
- Sodium: 75
- Fat: 7
- Saturated Fat: 4
- Unsaturated Fat: 3
- Trans Fat: 0
- Carbohydrates: 18
- Fiber: 0
- Protein: 8
- Cholesterol: 105