

Are you tired of ordering takeout and wishing you could recreate that insanely soft, chewy bread we all love? I get it! For years, making restaurant-quality bread felt like something only a professional with a giant clay oven could manage. Well, trust me when I say that’s just not true anymore. Here at Rosa’s Tasty Kitchen, we believe great flavor shouldn’t mean complicated tools. That’s why I perfected this **naan bread recipe**—it delivers the ultimate soft, fluffy, and chewy result, and you cook it entirely on your stovetop skillet! No fancy tandoor required, ever. As a busy mom finding reliable weeknight solutions, I promise this is the easiest, most satisfying Indian flatbread recipe you’ll ever try. Click here for the full rundown on how simple this is!
- Why This Is the Best Naan Bread Recipe for Home Cooks
- Gather Your Ingredients for the Naan Bread Recipe
- Step-by-Step Instructions for This Easy Naan Recipe
- Tips for Perfect Stovetop Naan Bread Every Time
- Variations: Making Garlic Naan Bread and More
- Serving Suggestions for Your Homemade Naan Bread Recipe
- Storage and Reheating Instructions for Naan Bread
- Frequently Asked Questions About This Naan Bread Recipe
- Share Your Homemade Naan Bread Recipe Success
- Estimated Nutritional Data for This Naan Bread Recipe
Why This Is the Best Naan Bread Recipe for Home Cooks
Listen, I’ve made my share of tough, floppy breads over the years. That’s why this homemade naan bread recipe is such a game-changer for me. It keeps all the authenticity of Indian bread but ditches the hassle. This is genuinely the best naan recipe for busy evenings because it’s fast and unbelievably good. You won’t believe the texture!
- It delivers that perfect trio: soft, fluffy, and wonderfully chewy.
- No weird ingredients you have to special order—just pantry staples!
- It works every single time, even if your oven is having an off day.
Achieving Soft Fluffy Naan Bread Texture
The secret to getting that incredible soft fluffy naan bread texture lives in two places: the yeast, which gives the dough that nice lift, and the yogurt. That little bit of dairy tenderizes the gluten perfectly as it rests. It makes all the difference between a tasty flatbread and restaurant-quality bread.

The Quick Naan Recipe Advantage (No Tandoor Needed)
Forget preheating a stone for two hours! This whole process is based around our heavy skillet—the true hero here. It’s a genuine quick naan recipe because the super-high direct heat on the stovetop mimics that tandoor blast. You get those beautiful charred spots instantly. It’s the ultimate recipe for naan without tandoor, pure and simple.
Gather Your Ingredients for the Naan Bread Recipe
Okay, gathering everything is my favorite part—it’s like setting up for a little science experiment that ends in deliciousness! We keep this naan bread recipe simple, but you need to be precise about the yogurt, so stick with the full-fat stuff if you can. These ingredients are what make this bread so tender!
For the Soft Fluffy Naan Bread Dough
- 1 cup water that’s warm—think bath water temperature, not scorching hot (about 105-115°F).
- 1 teaspoon sugar to wake up the yeast.
- 2 ¼ teaspoons active dry yeast—the good stuff!
- 3 cups all-purpose flour, plus extra for dusting when we roll it out.
- 1 teaspoon salt.
- 2 tablespoons olive oil, plus a little extra to coat the bowl.
- ½ cup plain yogurt—full-fat makes the best dough, trust me.
Optional Garlic Butter Topping for Buttery Naan Recipe
If you skip this part, you’re missing out on pure heaven. This is what turns it into that incredible buttery naan recipe we all dream about.
- 2 tablespoons melted butter.
- 2 cloves garlic, minced super fine.
- 1 tablespoon fresh cilantro, chopped up nice and small (optional, but so worth it!).
Step-by-Step Instructions for This Easy Naan Recipe
Now for the fun part! The magic of this naan bread recipe really shines through when you follow these exact steps. Don’t rush through the rising, though; that’s where the fluffiness gets locked in. I’m going to walk you through exactly how I get that restaurant-quality texture right on my stovetop. If you’re looking for other quick bread ideas, I have a great easy no-yeast beer bread recipe you can try later!
Activating Yeast and Mixing the Naan Bread Recipe Dough
First things first, we need happy yeast! In a small bowl, mix your warm water, sugar, and yeast together. Tip: if your water is too hot, it kills the yeast, and your Naan won’t puff! Wait about 5 to 10 minutes until you see a nice layer of foam on top—that’s your green light. In a bigger bowl, whisk the flour and salt. Then, make a little well in the center and pour in your foamy yeast liquid, the olive oil, and that creamy yogurt. Grab a wooden spoon and mix until it looks like a shaggy mess.
Kneading and First Rise for Chewy Homemade Bread
Time to get your hands dirty! Turn that shaggy dough out onto a lightly floured counter. You need to knead this for a solid 5 to 7 minutes. Keep working it until it feels smooth and springy. I know it feels like forever, but this is how we get that wonderful, slightly chewy homemade bread crust! Lightly oil a clean bowl, tuck the dough ball in, cover it up, and let it rest in a warm spot for 1 to 1.5 hours. Seriously, let it double in size. Don’t sneak a peek too early! If you love flavor boosts, check out my recipe for garlic parmesan knots next!
Preparing and Cooking the Stovetop Naan Bread
Once it’s huge, gently punch it down (it’s very satisfying!). Divide that dough into 8 equal pieces and roll them into little balls. Let them chill out covered for just 10 minutes—they need a little break before rolling. While they rest, get your cast-iron skillet ripping hot over medium-high heat. Remember, this is stovetop naan bread, so the pan needs to be screaming hot, but with *no oil* in it yet! Roll each ball into that classic teardrop shape, about 1/8 inch thick. Slap one piece onto the dry, hot pan. Cook for about 1 to 2 minutes until you see big bubbles form. Flip it quickly and cook the other side until spotted! See how easy this easy homemade naan bread recipe is?

Finishing with Garlic Butter for the Perfect Naan Bread Recipe
As soon as that naan comes off the heat, you need to brush it immediately with that decadent garlic butter mixture. Don’t wait! That butter melts right into the hot bread, flavoring every nook and cranny. Stack the finished pieces of naan on a plate and cover them with a clean towel. Stacking them keeps all the steam trapped inside, which is the key to a perfectly flavored finish and keeps them soft until dinner.
Tips for Perfect Stovetop Naan Bread Every Time
Even with the best naan bread recipe, sometimes things don’t go exactly as planned. Don’t panic if your first piece looks sad! That’s normal, especially when you’re learning how to handle a cast iron skillet. Getting that beautiful puff relies entirely on heat. If your bread is coming out flat and sad, nine times out of ten, your pan just wasn’t hot enough. Seriously, let that skillet smoke a little bit before the naan goes in. If you’ve got the heat right but the dough is sticking everywhere, you might have added too much moisture during the mixing stage, or you need a touch more flour when rolling.
Troubleshooting Common Issues with Naan Bread
If your dough is super sticky when you try to roll it, dust your surface generously—but try to keep the flour out of the dough itself, as too much flour can make the final result tough. Remember, we want stovetop naan bread that’s chewy, not brittle. If you roll too thin (under 1/8 inch), you lose the internal steam needed for those big bubbles to form, which results in a cracker instead of a pillow.

Ingredient Flexibility: No Yogurt or Yeast Options
I always preach using the yogurt because it’s magic for texture, but life happens! If you’re out, you can definitely substitute it with an equal amount of milk mixed with a teaspoon of vinegar or lemon juice. That acidity does nearly the same tenderizing job. And if you’re in a huge rush and can’t wait for a full rise? You can try cutting the rise time in half for a decent quick naan recipe, but warn your family—it won’t be quite as pillowy as the full-rise version!
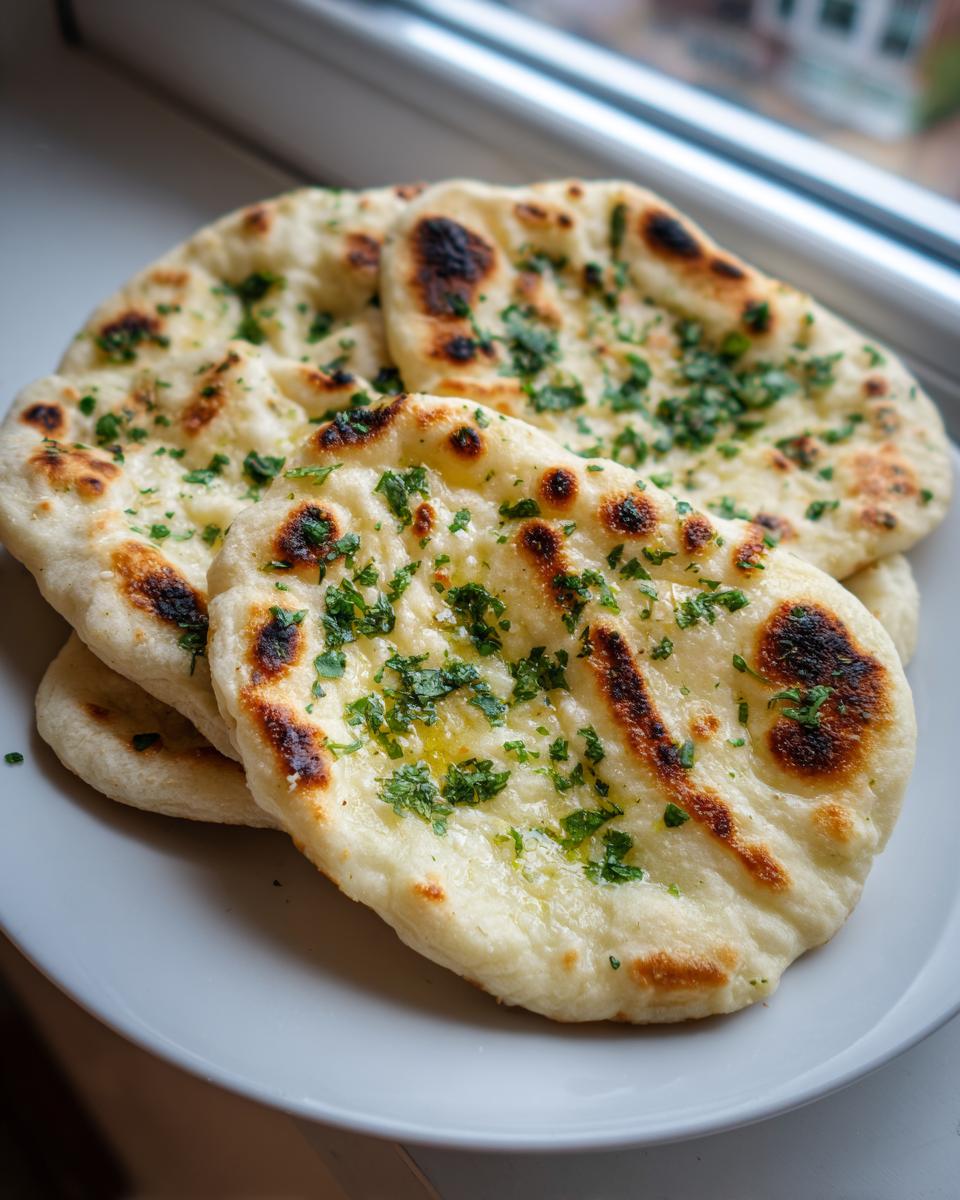
Variations: Making Garlic Naan Bread and More
Honestly, once you master the base naan bread recipe, you have to play around! While the plain, buttery version is amazing, my family absolutely demands the garlic version almost every time now. It’s such a simple step that completely transforms the flavor profile. If you are making the garlic butter topping we talked about earlier, you are already halfway there for this incredible garlic naan bread!
To make it, just follow the recipe exactly as written until the bread comes out of the hot skillet. Instead of just using melted butter, you’ll mix that butter with 2 finely minced garlic cloves and a handful of chopped fresh cilantro. Brush that fragrant mixture generously onto the hot bread immediately. The heat just melts the garlic flavor right into the dough. It smells phenomenal—you’ll want to use this trick for everything!
But don’t stop there! Your stovetop flatbread is a wonderful blank canvas. If you aren’t big on garlic, try adding some chili flakes or nigella seeds (kalonji) directly into the dough mix during the kneading stage for a spicy kick. Or, for a beautiful touch of green, sprinkle some finely chopped parsley or mint onto the bread right before brushing it with butter for a fresh twist. These little experiments are what make cooking fun, and they all stem from our original, reliable base recipe. If you’re looking for other ways to incorporate strong flavors into your dinners, check out this fantastic chicken alfredo lasagna recipe!
If you want to see another fantastic take on that buttery garlic finish, you can see how they top theirs over at this link. Seeing different variations always sparks new ideas for me!
Serving Suggestions for Your Homemade Naan Bread Recipe
Now that you’ve got this warm, pillowy homemade naan bread recipe in hand, the question is: what are we eating it with? Honestly, it’s amazing just pulled straight from the pan, brushed with butter, but it really shines when it’s soaking up something delicious.
It is, naturally, the perfect vehicle for any rich curry you’re making—like a tikka masala or a warming lentil dal. Seriously, don’t even bother with a spoon when you have scoops of this naan bread for curry on the table! But don’t forget it’s fantastic outside of Indian cuisine too. Try using it instead of tortillas for quick wraps, or tear it up and serve it alongside a creamy soup, like my easy crockpot potato soup.
If company is coming over, you absolutely have to serve it with a savory dip. My favorite is a simple olive dip—it feels gourmet but takes five minutes! You can find that recipe right here on my site. Enjoy! That olive dip is addictive!
Storage and Reheating Instructions for Naan Bread
Okay, so the hardest part of making a fresh naan bread recipe is often having leftovers, because they are just too good to stop eating! Luckily, this bread stores really well, but you have to treat it right. You absolutely do not want to just toss them in a plastic bag on the counter; they’ll dry out and turn into cardboard strips real fast.
The best way to keep them soft is to store them in an airtight container once they have cooled just slightly. I usually stack them—maybe three or four pieces high—with a clean cloth kitchen towel layered between them. This traps just enough moisture to keep them soft and pliable for a good 2 to 3 days at room temperature. If you made a huge batch and need them to last longer, store the cooled, stacked naan in a freezer-safe bag for up to a month. They freeze beautifully!
Now, the most important rule for reheating: Never, ever use the microwave if you can help it! A quick zap might make them soft for about ten seconds, but then they get chewy and stiff afterward. It ruins that wonderful texture we worked so hard for.
Instead, reheat them the right way. The absolute best method is getting your skillet back on the burner over medium heat. No oil needed! Just lay the naan directly on the dry, hot pan for about 30 seconds per side. They’ll puff right back up, get those lovely little brown spots again, and be perfectly soft and warm in under a minute. If you’re doing a bunch at once, popping them carefully in a moderate oven (about 300°F) for about 5 minutes will also work wonders, but the skillet method is quicker for just a couple!
Frequently Asked Questions About This Naan Bread Recipe
I always get so many questions once people start baking this at home, which just proves how much everyone loves fresh bread! It’s wonderful seeing how many of you are trying this reliable naan bread recipe. Here are the top things I hear most often from fellow home cooks!
Can I make this naan bread recipe without yeast?
That’s a fantastic question, especially if you’re running short on time! While the yeast is what gives us that beautiful rise and soft texture in the main recipe, you can certainly try a variation if you need a no yeast naan bread. In the notes section, I mentioned that you can drastically reduce the rise time to just 30 minutes, which technically works if you really need it fast, but the dough won’t be as lofty. For a true no-yeast version, you would typically use baking powder and perhaps substitute the yogurt with buttermilk or milk and vinegar. That said, the yeast version truly gives the best result, so I always suggest planning ahead for that full rise!
How do I get my skillet flatbread to puff up correctly?
Honestly, this is 90% dependent on the heat of your pan. Remember we are cooking this skillet flatbread over medium-high heat—it needs to be *hot*. Before you even roll your first piece, put that cast iron skillet on the burner and let it preheat for a full 5 to 7 minutes until it’s smoking a tiny bit. When you lay the rolled-out dough onto that screaming hot surface, the trapped moisture instantly turns to steam, forcing the dough to puff dramatically! If it just sits there slowly cooking instead of bubbling up right away, the pan isn’t ready yet.
Is there a gluten free naan alternative for this recipe?
I know so many of you are looking for ways to adapt recipes for dietary needs, and I totally support that! Our standard recipe uses all-purpose flour, which is wheat-based, so this version isn’t suitable for someone avoiding gluten. If you need a gluten-free option, you will need to search specifically for a gluten free naan alternative recipe that utilizes a commercial GF flour blend. Those blends behave very differently than regular flour during kneading and rising, so swapping ingredients one-for-one usually leads to disappointment. Look for one specifically designed to mimic the yeast-risen, chewy texture!
Share Your Homemade Naan Bread Recipe Success
Now that you’ve got the secret to this incredible naan bread recipe, I absolutely want to know how it turned out for you! Did it puff up perfectly? Did you cover it in that garlic butter we talked about? This is where the real joy of cooking comes in—sharing the results with our kitchen family.
Please, don’t be shy! Leave a comment below and let me know if you made any adjustments. Did you find a clever way to reheat these skillet beauties? I read every single comment, and your feedback helps me keep these recipes reliable for everyone else coming to Rosa’s Tasty Kitchen looking for that perfect, easy bread.
If you snapped a picture of your beautiful, warm homemade naan—especially if you paired it with a rich curry—tag me on social media! I love seeing your success stories. We built this kitchen together, one reliable recipe at a time. You can learn exactly what drives our mission on the About Us page!
Estimated Nutritional Data for This Naan Bread Recipe
I always put the information you need right up front, but I have to give you a little heads-up before you dive into these numbers! Because we are all making this in our own kitchens, using slightly different brands of flour or yogurt, these values are estimates only. They are based on the ingredients listed for one serving (one piece of naan bread) and help give you a general idea of what you’re eating. If you’re tracking things super closely, you might want to input your exact ingredients into your favorite tracker!
- Serving Size: 1 piece
- Calories: 210
- Sugar: 2g
- Sodium: 350mg
- Total Fat: 5g
- Saturated Fat: 2g
- Carbohydrates: 36g
- Fiber: 2g
- Protein: 6g
- Cholesterol: 5mg
See? Not too bad for bread that tastes this rich! That yogurt and the whole-wheat aspects of the flour keep the sugar relatively low, and it packs a punch of protein for a side dish. Enjoy knowing that you made this incredible naan bread recipe yourself!
PrintEasy Homemade Naan Bread Recipe: Soft, Fluffy, and Skillet-Cooked

Learn the simple steps to make incredibly soft, fluffy, and chewy homemade naan bread right on your stovetop skillet. This easy naan recipe requires no tandoor and is perfect for pairing with curry or making quick garlic naan.
- Prep Time: 20 min
- Cook Time: 15 min
- Total Time: 1 hour 45 min
- Yield: 8 servings 1x
- Category: Side Dish
- Method: Stovetop Cooking
- Cuisine: Indian
- Diet: Vegetarian
Ingredients
- 1 cup warm water (about 105-115°F)
- 1 teaspoon sugar
- 2 1/4 teaspoons active dry yeast
- 3 cups all-purpose flour, plus more for dusting
- 1 teaspoon salt
- 2 tablespoons olive oil, plus more for brushing
- 1/2 cup plain yogurt (full-fat recommended)
- 2 tablespoons melted butter (for brushing)
- 2 cloves garlic, minced (optional, for garlic naan)
- 1 tablespoon fresh cilantro, chopped (optional)
Instructions
- Combine the warm water, sugar, and yeast in a small bowl. Let this mixture sit for 5 to 10 minutes until it becomes foamy. This shows the yeast is active.
- In a large bowl, whisk together the flour and salt. Create a well in the center.
- Pour the yeast mixture, yogurt, and 2 tablespoons of olive oil into the well. Mix with a wooden spoon or your hands until a shaggy dough forms.
- Turn the dough out onto a lightly floured surface. Knead for 5 to 7 minutes until the dough is smooth and elastic.
- Lightly oil a clean bowl. Place the dough in the bowl, turning it once to coat. Cover the bowl with plastic wrap or a clean kitchen towel. Let the dough rise in a warm spot for 1 to 1.5 hours, or until it has doubled in size.
- Gently punch down the risen dough. Divide it into 8 equal pieces. Roll each piece into a smooth ball. Cover the balls and let them rest for 10 minutes.
- While the dough rests, prepare your topping: mix the melted butter with minced garlic and chopped cilantro, if using.
- Heat a heavy-bottomed skillet or cast-iron pan over medium-high heat. Do not add oil to the pan.
- Take one dough ball and roll it out on a lightly floured surface into an oval or teardrop shape, about 1/8 inch thick.
- Place one piece of rolled dough onto the hot, dry skillet. Cook for 1 to 2 minutes until large bubbles form on the surface and the underside has brown spots.
- Flip the naan and cook the second side for about 1 minute until it has similar spots. If you see large bubbles that do not brown, gently press them down with a spatula to encourage contact with the heat.
- Remove the cooked naan from the skillet and immediately brush the top generously with the garlic butter mixture.
- Repeat with the remaining dough pieces, stacking the cooked naan and keeping them warm under a clean towel while you finish the batch.
Notes
- For a quick naan bread recipe, you can skip the rising time and let the dough rest for only 30 minutes, though the texture will be slightly less fluffy.
- If you want a buttery naan recipe, increase the amount of melted butter used for brushing after cooking.
- This skillet flatbread works well for making quick naan pizza bases.
- If you do not have yogurt, you can substitute it with an equal amount of milk mixed with 1 teaspoon of lemon juice or white vinegar.
Nutrition
- Serving Size: 1 piece
- Calories: 210
- Sugar: 2
- Sodium: 350
- Fat: 5
- Saturated Fat: 2
- Unsaturated Fat: 3
- Trans Fat: 0
- Carbohydrates: 36
- Fiber: 2
- Protein: 6
- Cholesterol: 5