
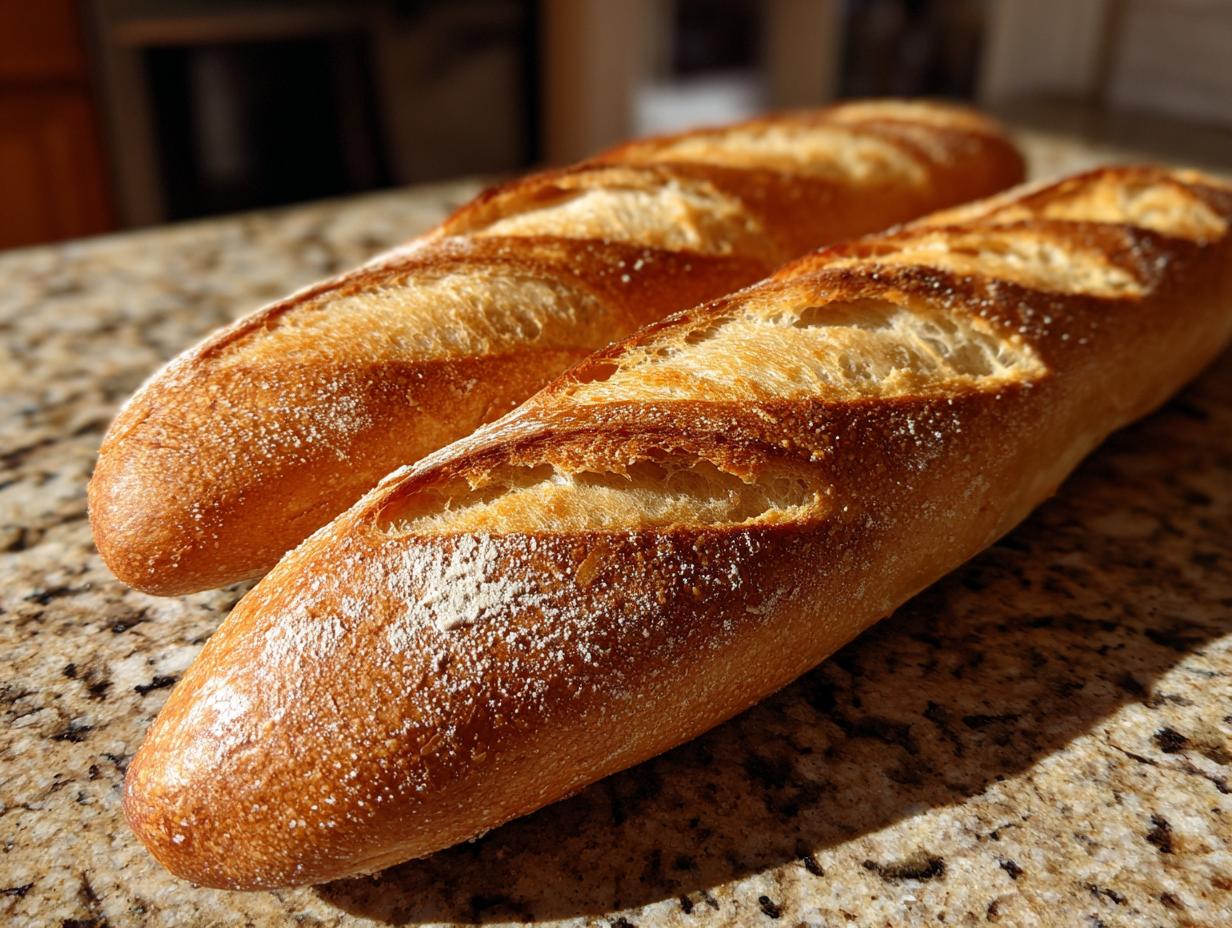
Oh, friends, do you smell that? It’s the aroma of absolute heaven wafting right out of your oven! Nothing beats the sound of that crackling crust when you slice into a fresh loaf. I know you think achieving bakery-style French bread at home is a full-day commitment, but I promise you, Rosa Sterling has cracked the code on getting that gorgeous, shatteringly crisp exterior and a beautifully soft, fluffy inside in under 90 minutes total. This is one of my most reliable, beginner-friendly recipes, perfect for those weeknights when you need something truly special on the table, fast. Trust me, once you try this quick approach, you’ll never look at store-bought loaves the same way again. We are focusing on big flavor without the big time commitment here—that’s what my kitchen is all about!
If you’re looking to perfect your bread-making skills without dedicating an entire afternoon, make sure you check out my tips for easy homemade naan bread too!
- Why This Quick French Bread Recipe Works for Busy Cooks
- Ingredients for Your Crusty French Bread
- Step-by-Step Instructions for Quick French Bread Recipe
- Secrets to Achieve Bakery Style Bread at Home Crust
- Serving Suggestions for Your Fresh French Bread
- Storage and Reheating Instructions for Leftover French Bread
- Frequently Asked Questions About Making French Bread
- Nutritional Estimate for This Homemade French Bread
- Share Your Quick French Bread Success
Why This Quick French Bread Recipe Works for Busy Cooks
When I was teaching full-time and trying to keep up with three growing kids, I needed my weeknight dinners to be comforting but quick. Traditional French loaves always felt like a weekend project, right? That’s why developing this easy homemade bread recipe was so important to me. We’ve streamlined the process significantly. We skip long, complicated kneading sessions and unnecessary second rises. This isn’t one of those complicated no-knead methods that take all day!
The magic of the 90 minute French bread comes from maximizing the yeast activity up front and then using high heat combined with steam for that bakery finish. You get all the satisfaction of artisan bread without having to start baking at 6 in the morning. It’s reliable, uses just basic pantry ingredients, and proves you don’t need hours to make something spectacular.
Ingredients for Your Crusty French Bread
Okay, let’s talk about what you need to make this incredible loaf. The beauty of homemade French bread is that the ingredient list is so basic, you probably have everything sitting on your shelf already! We are using simple all-purpose flour—no need for fancy bread flour here for this quick recipe. The warm water needs to hit that perfect temperature, between 105°F and 115°F, so the yeast wakes up happy and foamy. That activated yeast is doing the heavy lifting!
You’ll also need salt, of course, and just a tablespoon of melted butter. We brush that melted butter right on top before baking, which helps create that gorgeous golden color and adds just a touch of richness to the crust. Remember, simple ingredients handled correctly make the best bread!
Ingredient Notes and Substitutions for Perfect French Bread
Now, pay close attention to the yeast. I call for active dry yeast, which needs that little five-minute warm water bath so you can see the foam—it’s your proof that the yeast is alive! But if you’re in a rush (and I often am!), you can absolutely use instant yeast instead. If you go that route, skip the initial proofing step entirely; just dump the instant yeast right in with the flour and salt. It activates right in the oven.
Stick to all-purpose flour for this recipe. It gives us the balance we need for that quick 5-minute knead. Seriously, don’t overthink the flour; this recipe is designed to be approachable and reliable for anyone trying out their first easy homemade bread recipe.
Step-by-Step Instructions for Quick French Bread Recipe
Alright, let’s roll up our sleeves! This is where the real magic happens, and I want you to remember that this whole process, from mixing to baking, keeps moving quickly. We aren’t waiting around all day for this delicious French bread!
Mixing and Kneading Your French Bread Dough
First things first: water and yeast. Combine your warm water—remember, 105°F to 115°F—with the yeast in your big mixing bowl. Give it a gentle swirl and just let it sit for about five minutes. If you see foam building up on top, congratulations, your yeast is ready to work for us! If it’s totally flat, your water was probably too hot or too cold, and we need to start the yeast over.
Next, toss in your salt and all three cups of flour right on top of that bubbly mixture. Grab a sturdy wooden spoon or a spatula and mix it all together until you can’t see any dry pockets of flour anymore. It’s going to look messy and “shaggy”—that’s exactly what we want at this stage! Don’t worry about perfection yet.
Now, turn that shaggy dough out onto a lightly floured counter. This is the only real workout you’ll get! Because this is a quick French bread recipe, we only need to knead it for about five minutes. You’re looking for it to transition from sticky and rough to smooth and elastic. Unlike some slow artisan breads, you don’t need those 15 minutes of intense kneading; five minutes is enough to develop enough gluten structure for a soft and fluffy interior that contrasts beautifully with the crust.
The Rise Time for Soft and Fluffy Bread Baking
Once the dough is smooth, lightly oil up a clean bowl—I usually just use a little olive oil in the original bowl—and toss the ball of dough in there, turning it so it gets coated. Cover that bowl tightly with plastic wrap or a clean kitchen towel. Now, find the warmest, draft-free spot in your kitchen. We want this dough to proof for about 45 minutes. That’s the longest wait time in this whole recipe!
How do we know when it’s ready? Easy! You gently poke the dough with a floured finger. If the indentation stays put and doesn’t spring back right away, you’ve hit the sweet spot. It should have doubled in size, looking pillowy and relaxed. This short rise is key for our Soft and fluffy bread baking goal!
Shaping and Scoring Your Homemade French Bread Loaves
When the oven is hot—and preheat that oven to 400°F while the dough finishes rising!—gently punch the air out of the dough. Carefully divide it into two equal pieces. Now, this is important for a good crusty French bread tutorial: you shape it. You’re going for that classic narrow, long loaf shape—think of a rustic baguette. Roll it out gently between your palms until you have a neat cylinder.
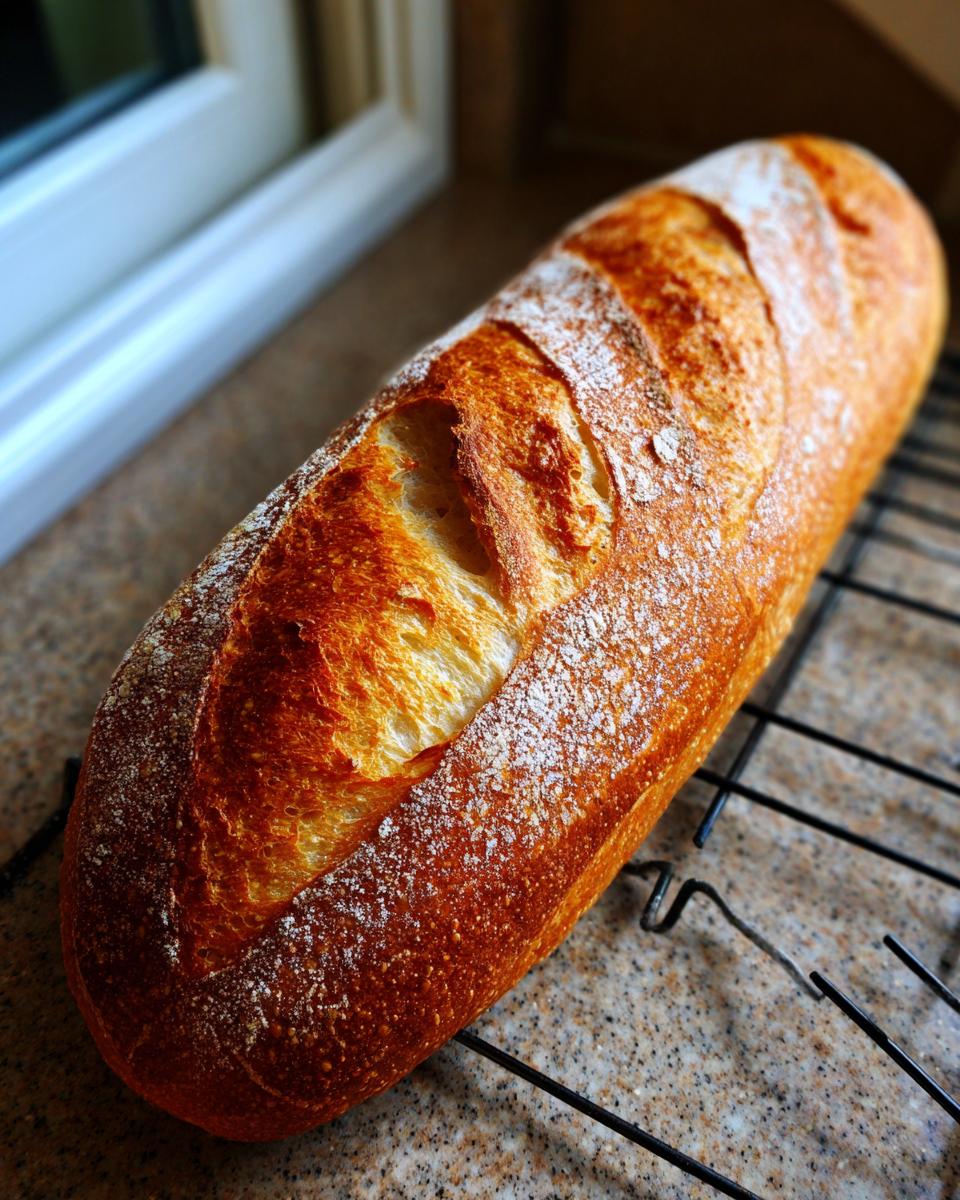
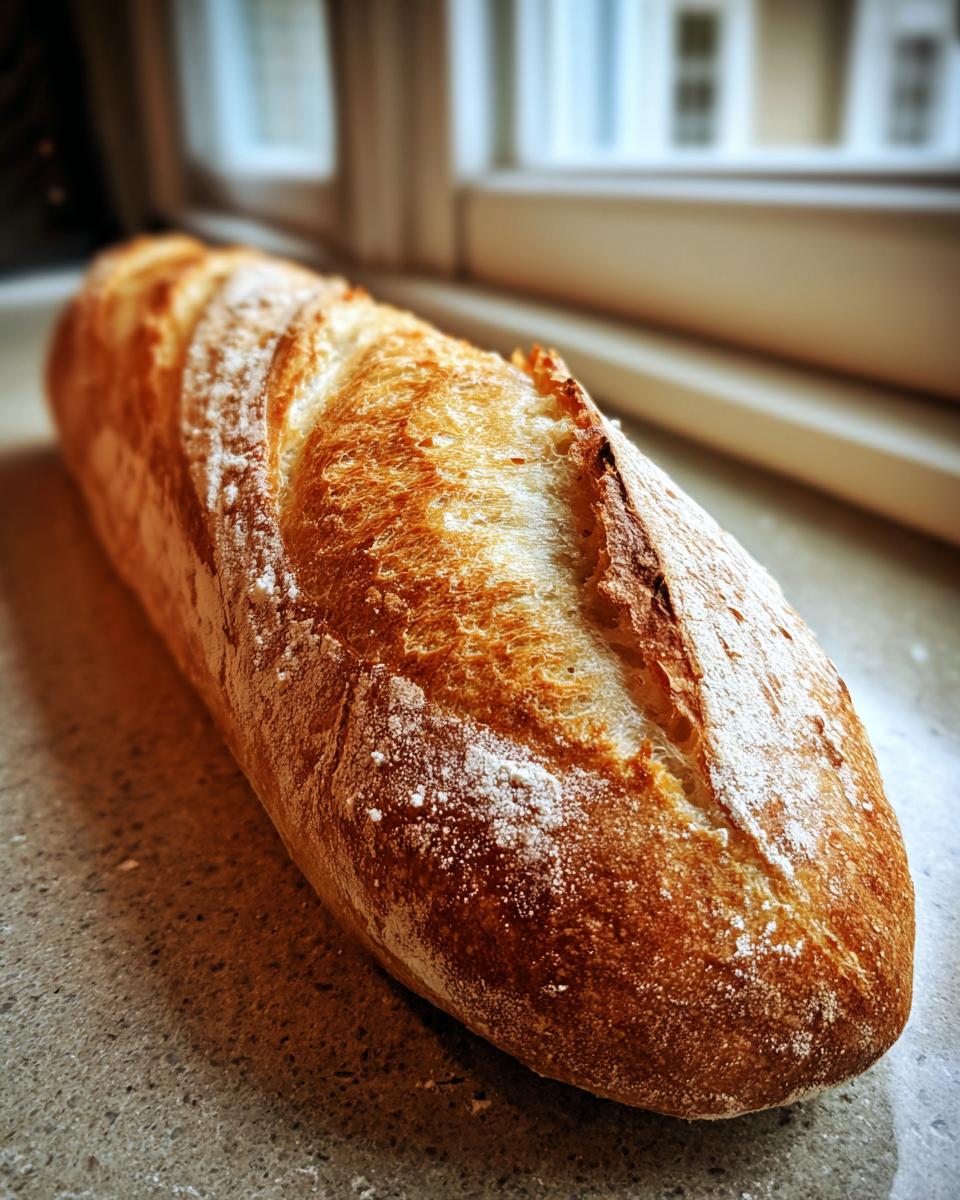
Place the shaped loaves right onto a baking sheet lined with parchment paper. Always use parchment; it makes cleanup a breeze and ensures a nice bottom crust, which is why I love this crusty homemade French bread approach. Before it goes near the heat, take a very sharp knife—a serrated knife works surprisingly well—and give the top of each loaf three swift, diagonal slashes. These scores allow the bread to expand beautifully in the oven instead of tearing unevenly.
Before baking, brush the tops with that reserved melted butter. Then, brace yourself for the next step, which is non-negotiable for that amazing crust—we’re making steam! We need that high heat shock to get the outside brittle and crisp.
Secrets to Achieve Bakery Style Bread at Home Crust
Listen up, because this is the secret handshake for getting that authentic, shatter-on-impact crust on your homemade French bread! Store-bought bread never has this texture, and it all comes down to steam. You did preheat your oven to 400°F, right? Good. Now, before you even slide those loaves in, remember that shallow pan you placed on the bottom rack? That pan needs to hold about a cup of *really* hot water, not just room temperature stuff.
As soon as you slide your loaves onto the middle rack, carefully pour that hot water into the bottom pan. The instant steam created is what keeps the outside of the dough supple long enough to puff up, setting that gorgeous, crusty exterior we are chasing. For truly professional results, here’s my little boost: during the first five minutes of baking, quickly open the door and spray the interior sides of the oven with a fine mist water bottle—careful not to burn yourself!
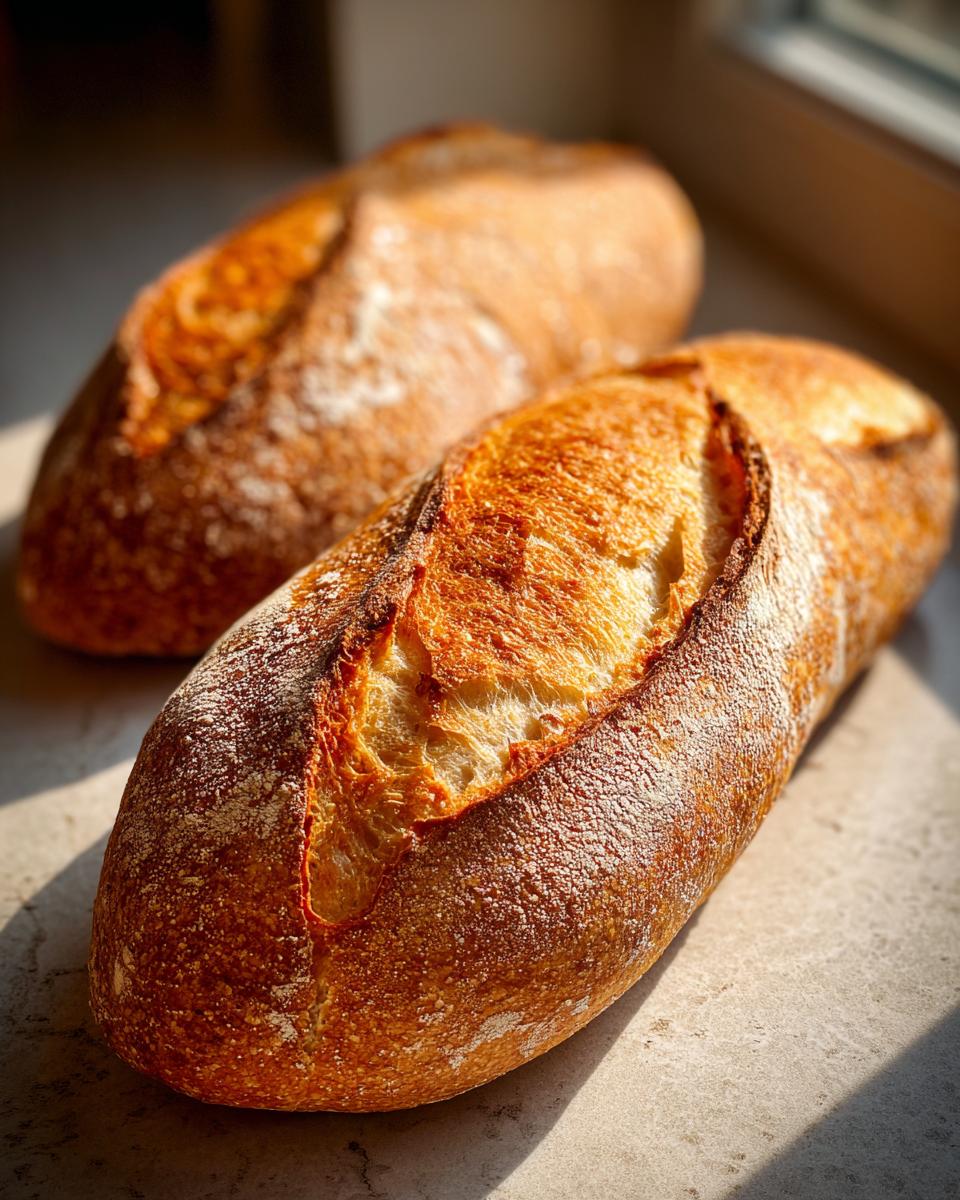
This combination of steam and high heat is the difference between pale, chewy bread and golden, crackling perfection. It’s a trick I picked up years ago, and it makes this bakery style bread at home a staple in our house. Don’t skip the steam if you want that satisfying crunch!
Serving Suggestions for Your Fresh French Bread
Now that you’ve pulled two gorgeous, fragrant loaves of French bread out of the oven—and trust me, you should be incredibly proud of yourself—the question becomes: what do we do with it all before it disappears? This is why I love this recipe as the perfect simple yeast bread for dinner; it pairs beautifully with almost anything!
If you’re keeping it simple, there is nothing better than tearing off a piece while the loaf is still warm, dipping it generously into good olive oil, or just slathering it with salted butter. That crust-to-crumb ratio is just heavenly when it’s fresh.
But let’s talk meals! You absolutely must have this bread when you’re serving soup or stew. It’s perfect for soaking up every last drop of a hearty meal, like my creamy potato and sausage chowder. Seriously, save the last five minutes of your soup eating time just for bread dipping!
And for the serious sandwich lovers out there? This loaf makes the best foundation for almost anything. Think open-faced steak sandwiches, or packing it with good deli meats and sharp cheese. For a comforting main course that uses this bread as the star, try making garlic bread to serve alongside a big, cheesy casserole, like this chicken alfredo lasagna. It holds up so much better than flimsy sandwich bread. The possibilities are endless once you have this magnificent crusty loaf ready to go!
Storage and Reheating Instructions for Leftover French Bread
I hope you managed to save a piece of this amazing French bread, but if you have leftovers, we need a plan! The biggest enemy of this crusty, bakery-style loaf is air exposure, because that glorious crunchy exterior will go soft real fast. Don’t just toss it on the counter in a paper bag; that guarantees a dull crust by morning.
For short-term storage—say, if you’re planning to finish the loaf the next day—the best thing you can do is wrap it tightly in aluminum foil first, and then place that whole package inside a zip-top plastic bag. The foil is key here; it traps just enough moisture inside to keep the interior soft, but the plastic bag slows down the drying process. Store it on the counter, not in the fridge! Refrigeration actually makes bread go stale faster.
Now, for reheating, this is crucial if you want that fresh-baked snap back. Preheat your oven—yes, you have to use the oven, the microwave will turn this bread into a rubber frisbee—to about 350°F. Unwrap the foil-wrapped bread entirely (you want direct heat on the crust now) and pop it right back into the warm oven for about 5 to 8 minutes. You can even skip the foil and give it a quick spritz of water on the crust before baking if you want to mimic that initial steam blast. Pull it out when it’s piping hot and returning to that perfect golden brown color. It will sound and smell just like you pulled it out of the oven moments ago. That’s how you keep enjoying your quick French bread recipe for days!
Frequently Asked Questions About Making French Bread
I always get so many questions once people start baking this recipe, which is wonderful! It just goes to show how much everyone loves fresh French bread. Since this recipe is built around speed, some of the standard rules of bread-making get tiny tweaks. Here are the questions I hear most often from folks trying to master this beginner bread recipes favorite.
Can I skip kneading entirely for this quick french bread recipe?
That’s a tempting thought when you’re rushing, isn’t it? For this particular quick French bread recipe, I really, really advise against skipping that 5-minute knead we talked about. While there are some fantastic no-knead recipes out there, they usually rely on much longer resting times—sometimes 18 to 24 hours—to build structure slowly as the yeast works. Since our goal here is a loaf in under 90 minutes, that 5-minute manual knead is essential! It forces the gluten to cooperate quickly, giving you that soft, fluffy interior texture that contrasts so nicely with the crust. Without that short knead, your loaf might bake up dense and flatter than you want.
What if my dough doesn’t double in 45 minutes?
Oh, that’s usually a temperature issue, sweetie! The yeast is just being a little stubborn. When you mix the warm water and yeast, remember that 105°F to 115°F window? If the water was too cool—say, you used lukewarm tap water instead of heated water—the yeast is slow to wake up. If it was too hot (over 130°F), you might have accidentally killed some of the little guys, which means no rise at all!
If, after that 45 minutes, your dough hasn’t significantly increased in size, don’t panic and don’t throw it out! Find a warmer spot for it. Maybe stick it inside your oven with just the oven light turned on—that creates a perfect little warm cave. Give it another 15 or 20 minutes. As long as it smells yeasty and faintly sweet, it’s usually fine and will pick right up once it gets cozy. This adjustment ensures your french baguette recipe homemade dreams come true, even if your kitchen is a bit chilly!
How can I make these look more like bakery baguettes than just loaves?
That’s a great visual goal! The shaping makes all the difference if you want that classic look. After you punch the dough down, instead of rolling it into a stubby loaf, focus on length. Take your half portion of dough and gently pat it into a rough rectangle. Then, you want to fold the top third down toward the middle, kind of like folding a business letter, and press the seam lightly with your fingertips. Then, fold the bottom third up over that first fold and really seal that central seam tightly with the heel of your hand. Roll it gently back and forth, applying light, even pressure along the length, until it gets long and narrow. That rolling motion is what creates the tight surface tension needed for a beautiful, long baguette shape. Make sure you score those slashes deeply enough so they open up nicely when baking!
Is sugar necessary if I’m not planning on eating this plain?
That’s a smart question, especially if you are worried about making your simple yeast bread for dinner too sweet. In this recipe, we don’t actually add any extra sugar to the dough itself—the yeast is feeding on the tiny amounts of sugars naturally present in the flour. If you were making a sweeter bread, like brioche, you’d add granulated sugar, but for classic French bread, we keep it simple. The crust color comes primarily from the high heat and the steam we create. No added sugar means a savory, perfect base for any meal you pair it with, so rest easy—it’s savory all the way!
Nutritional Estimate for This Homemade French Bread
Now, I know most of us in the kitchen are focused on flavor and making memories, not counting macros, but since we’re providing a full guide, I wanted to give you a quick peek at the general breakdown for this French bread. Please remember that these figures are just an estimate based on the ingredients listed for one serving, which we calculated as one slice from one of the two loaves! Your actual results might vary depending on how thick you slice it or if you brush less butter on top.
Think of this as a baseline for your homemade loaf. It’s wonderful bread that gets you a nice amount of energy for your day.
- Serving Size: 1 slice
- Calories: Approximately 150
- Total Fat: About 2g
- Saturated Fat: Around 1g
- Cholesterol: 0mg
- Sodium: Roughly 250mg
- Total Carbohydrates: Around 30g, with 1g of Fiber
- Protein: About 4g
See? Simple ingredients lead to straightforward nutrition profiles. This lovely loaf is very low in sugar and has zero cholesterol, which I think is a win! Enjoying this crusty French bread tutorial result with your dinner or for a sandwich is definitely something you can feel good about serving your family.
Share Your Quick French Bread Success
Well, we did it! We took simple flour, water, and yeast, and in less than 90 minutes, we produced genuine, bakery style bread at home that’s going to make your dinner table feel like a Parisian cafe. Doesn’t that smell amazing? I truly believe that the greatest satisfaction in cooking comes from sharing what you’ve made with the people you love, and seeing your triumphs in the kitchen!

As you slice into that beautiful crust and pull apart the soft inside, I sincerely hope you feel that feeling of accomplishment that comes from mastering a classic technique quickly. This is the philosophy I try to live by here at Rosa’s Tasty Kitchen: making delicious food reliable and joyful, not stressful!
Please, I’d absolutely love to hear how your French bread turned out! Did the steam trick work perfectly for your crust? Did your family devour it with soup? Don’t keep those wins to yourself! Come down to the comments section below and tell me all about it. Leave a rating for the recipe using the star system—it genuinely helps other busy home cooks see that this easy homemade bread recipe is tried and true.
If you managed to snap a picture of those golden loaves—or even better, the satisfying cross-section—share it on social media and tag me! Seeing your beautiful creations is the greatest compliment you can give. Happy baking, friends. Now go put some butter on that bread!
PrintQuick & Crusty Homemade French Bread (Under 90 Minutes)

Bake bakery-style French bread at home that has a crisp exterior and a soft, fluffy inside. This beginner-friendly recipe uses simple ingredients and takes less than 90 minutes total time.
- Prep Time: 15 min
- Cook Time: 30 min
- Total Time: 90 min
- Yield: 2 loaves 1x
- Category: Bread
- Method: Baking
- Cuisine: French
- Diet: Vegetarian
Ingredients
- 3 cups all-purpose flour
- 1 teaspoon salt
- 2 teaspoons active dry yeast
- 1 1/4 cups warm water (about 105-115°F)
- 1 tablespoon butter, melted (for brushing)
Instructions
- Mix the warm water and yeast in a large bowl. Let it sit for 5 minutes until foamy.
- Add the flour and salt to the yeast mixture. Stir with a wooden spoon until a shaggy dough forms.
- Turn the dough out onto a lightly floured surface. Knead for 5 minutes until the dough is smooth.
- Place the dough in a lightly oiled bowl, turning to coat. Cover the bowl with plastic wrap or a clean towel. Let the dough rise in a warm place for 45 minutes, or until doubled in size.
- Preheat your oven to 400°F (200°C). Place a shallow pan on the bottom rack for steam generation.
- Punch down the risen dough gently. Divide it into two equal pieces. Shape each piece into a long, narrow loaf (a baguette shape).
- Place the loaves on a baking sheet lined with parchment paper. Score the tops of each loaf three times with a sharp knife.
- Brush the tops lightly with melted butter. Carefully pour 1 cup of hot water into the shallow pan in the oven to create steam.
- Bake for 25 to 30 minutes, or until the crust is golden brown.
- Remove the bread from the oven and cool on a wire rack before slicing.
Notes
- For an extra crusty exterior, spray the sides of the oven with water during the first 5 minutes of baking.
- If you do not have active dry yeast, substitute with 1 3/4 teaspoons of instant yeast and skip the initial proofing step with the water.
- This bread is excellent for making homemade sandwiches.
Nutrition
- Serving Size: 1 slice
- Calories: 150
- Sugar: 1
- Sodium: 250
- Fat: 2
- Saturated Fat: 1
- Unsaturated Fat: 1
- Trans Fat: 0
- Carbohydrates: 30
- Fiber: 1
- Protein: 4
- Cholesterol: 0