
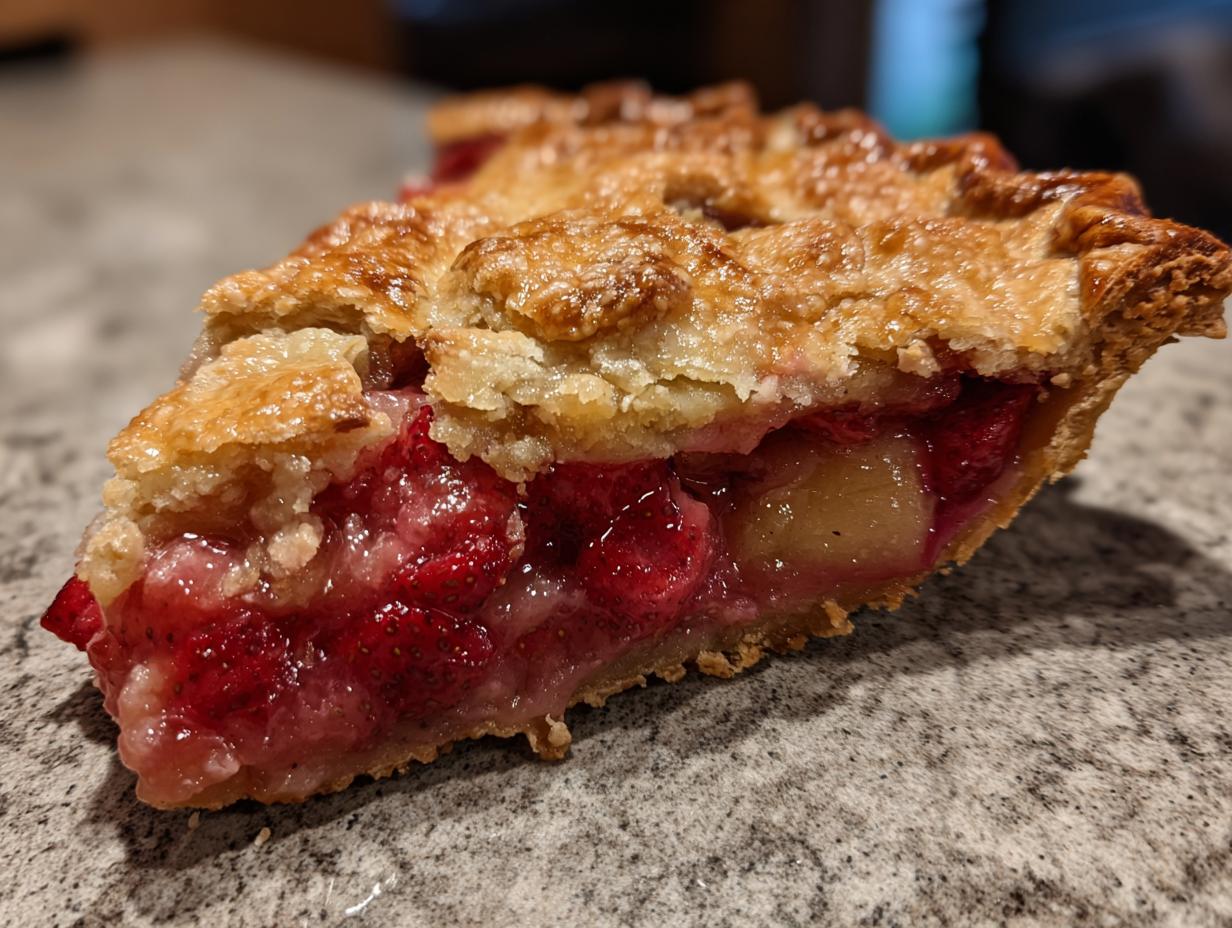
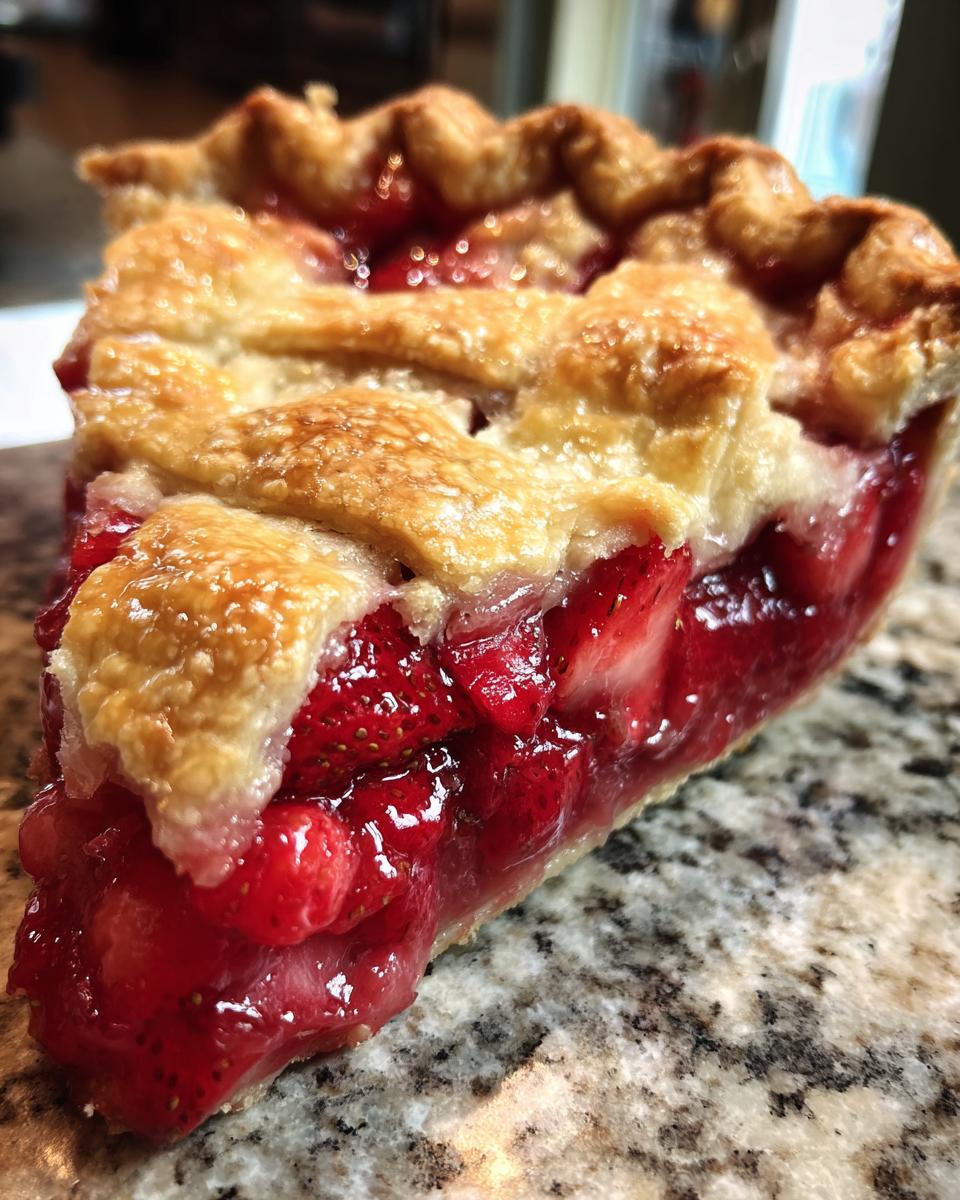
Oh, when the weather starts warming up, my mind immediately goes to fruit pies! There’s just nothing that screams springtime and summer gatherings like that perfect combination of sweet and sharp flavors baked into a golden crust. I absolutely had to share what I consider the best ever pie recipe out there: my ultimate strawberry rhubarb pie. This isn’t some complicated pastry chef creation; this is a real, honest-to-goodness, from-scratch American classic that works every single time. Trust me, getting that beautiful balance between the juicy strawberries and the tart rhubarb is the secret to making this pie a guaranteed family favorite. We aren’t just baking; we’re making memories that taste delicious, and that’s what matters most in my kitchen. If you love this fruity goodness, you absolutely must check out my recipe for classic strawberry shortcake recipe too!
- Why This Strawberry Rhubarb Pie Recipe is Your Best Ever Pie Recipe
- Ingredients for the Ultimate Strawberry Rhubarb Pie
- How to Make Strawberry Rhubarb Pie: Step-by-Step Instructions
- Tips for Success Making Your Strawberry Rhubarb Pie
- Variations for Your Easy Strawberry Rhubarb Bake
- Storage and Reheating Instructions for Classic Summer Pie
- Frequently Asked Questions About How to Make Strawberry Rhubarb Pie
- Nutritional Estimates for Your Classic American Pie Slice
- Share Your Best Ever Pie Recipe Success
- Nutritional Estimates for Your Classic American Pie Slice
- Share Your Best Ever Pie Recipe Success
Why This Strawberry Rhubarb Pie Recipe is Your Best Ever Pie Recipe
I know there are a million recipes out there, but I promise you, my approach to the strawberry rhubarb pie solves the two BIG problems everyone runs into: getting a flaky crust that isn’t tough, and making sure the filling isn’t either soup or sour candy!
- The crust development here guarantees shatteringly crisp layers.
- The filling ratio is precisely calculated for that perfect ‘sweet and tart’ explosion.
- You get a glossy, set filling that lets you slice it beautifully instead of scooping a runny mess.
We focus on simple techniques that make a huge difference. If you’re ready to elevate your dessert game, check out my other ideas for best homemade desserts!
Achieving the Flaky Pie Crust Tutorial Secret
The magic for flakiness is all about coldness. I mean *ice cold*. You want those little pebbles of butter to stay solid all the way through mixing. When they finally hit the oven heat, that cold butter melts and steam pushes those pastry layers apart. That’s your flake!
Here’s my main tip from years of trial and error: Stop mixing when the dough *just* starts to clump. If you knead it even a little too much trying to get a perfect ball, you’re developing gluten, and gluten means toughness. We want tender layers, honey, not heavy cardboard.
Mastering the Sweet and Tart Pie Filling
Rhubarb is naturally bold, right? It needs sweetness to shine, but too much sugar makes it syrupy. That’s why we use both white and brown sugar, which adds a little depth you don’t get with just the white stuff. This recipe uses the right amount of cornstarch to absorb all those beautiful fruit juices.
This blend guarantees you get that truly sweet and tart pie filling heaven. The strawberries mellow the rhubarb perfectly, and the thickener means you don’t end up with a watery catastrophe. It’s pure summer perfection you can rely on!
Ingredients for the Ultimate Strawberry Rhubarb Pie
I wrote this ingredient list out like a blueprint, because in baking, precision matters, especially when we’re going for that flaky pie crust tutorial result! Don’t swap out the cold items for room temperature ones, please, or we’ll have a fight on our hands with runny dough. Everything needs to be ready to go when you are.
For the Dough (Makes two crusts, top and bottom):
- 2 1/2 cups all-purpose flour (nothing fancy here, just plain old reliable flour!)
- 1 teaspoon salt
- 1 cup (which is two full sticks) unsalted butter. Now listen close: this butter must be very cold and cut into small cubes, no bigger than a big olive.
- 1/2 cup ice water, and keep a few extra drops handy just in case your flour is thirsty.
For the Sweet and Tart Pie Filling:
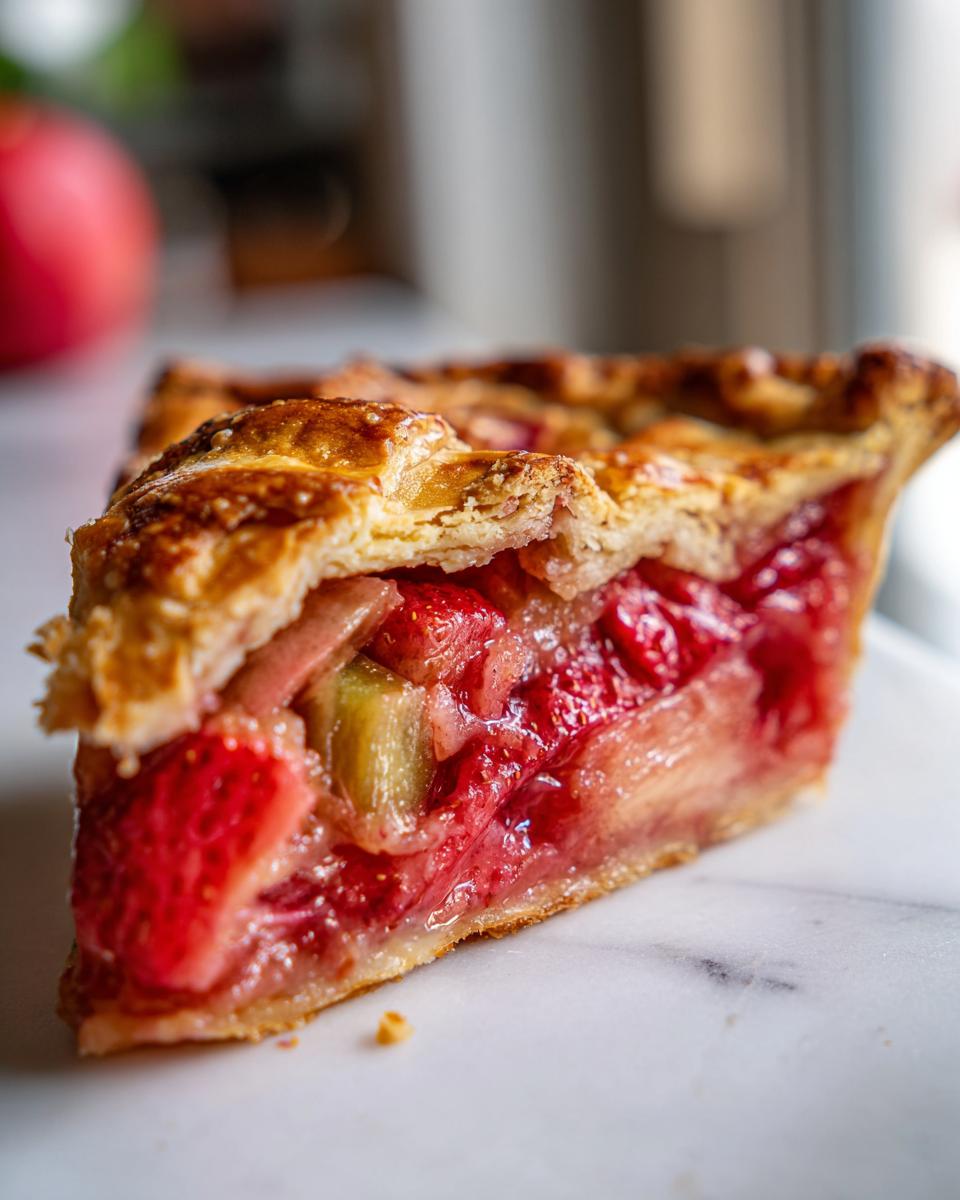
- 6 cups fresh rhubarb, cut nice and neat into exactly 1-inch pieces.
- 6 cups fresh strawberries, hulled and then halved or quartered, depending on how big they are.
- 1 1/2 cups granulated sugar (you can adjust this a tiny bit once you taste your fruit, but start here!)
- 1/2 cup packed light brown sugar for that hint of caramel.
- 1/2 cup cornstarch. This is our secret weapon for thickness, trust me, it works beautifully.
- 1 tablespoon lemon juice—that little bit of acid brightens everything up!
- 1 teaspoon vanilla extract.
For Finishing that Homemade Fruit Pie:
- 1 large egg, beaten stiffly with 1 teaspoon of water for the egg wash.
- 1 tablespoon coarse sugar for sprinkling on top—it gives you that satisfying crunch!
How to Make Strawberry Rhubarb Pie: Step-by-Step Instructions
Alright, this is where the real fun begins! We’re going to turn those cold butter pebbles and sugary fruit into the strawberry rhubarb pie of your dreams. Don’t let the steps intimidate you; just work methodically, and remember that chilling is your best friend here. We need that crust to cooperate!
Preparing the Flaky Pie Crust Tutorial
First things first: make sure your dough disks are still firm from the fridge. Dust your counter lightly with flour. Take your first disk and gently roll it out from the center toward the edges, turning the dough frequently so it doesn’t stick. You want a 12-inch circle for a standard 9-inch pie plate. Gently fold it in half and drape it into the plate. Trim the edge to leave about an inch of overhang, then tuck that under itself around the rim and pop the whole thing back into the fridge while you work on the topping. Keeping that bottom crust cold helps prevent that dreaded soggy bottom!
Mixing the Sweet and Tart Pie Filling
Take your prepared fruit and toss it gently with your mixed dry ingredients—sugar, brown sugar, and cornstarch. Pour in the lemon juice and vanilla. Stir *gently*! We don’t want to smash the strawberries into jam before they even hit the oven. Once everything is mixed, just let it sit on the counter for about 15 minutes. This resting time is important; it lets those juices start releasing so the cornstarch can grab onto them right away when it bakes.
Assembling and Baking Your Homemade Fruit Pie
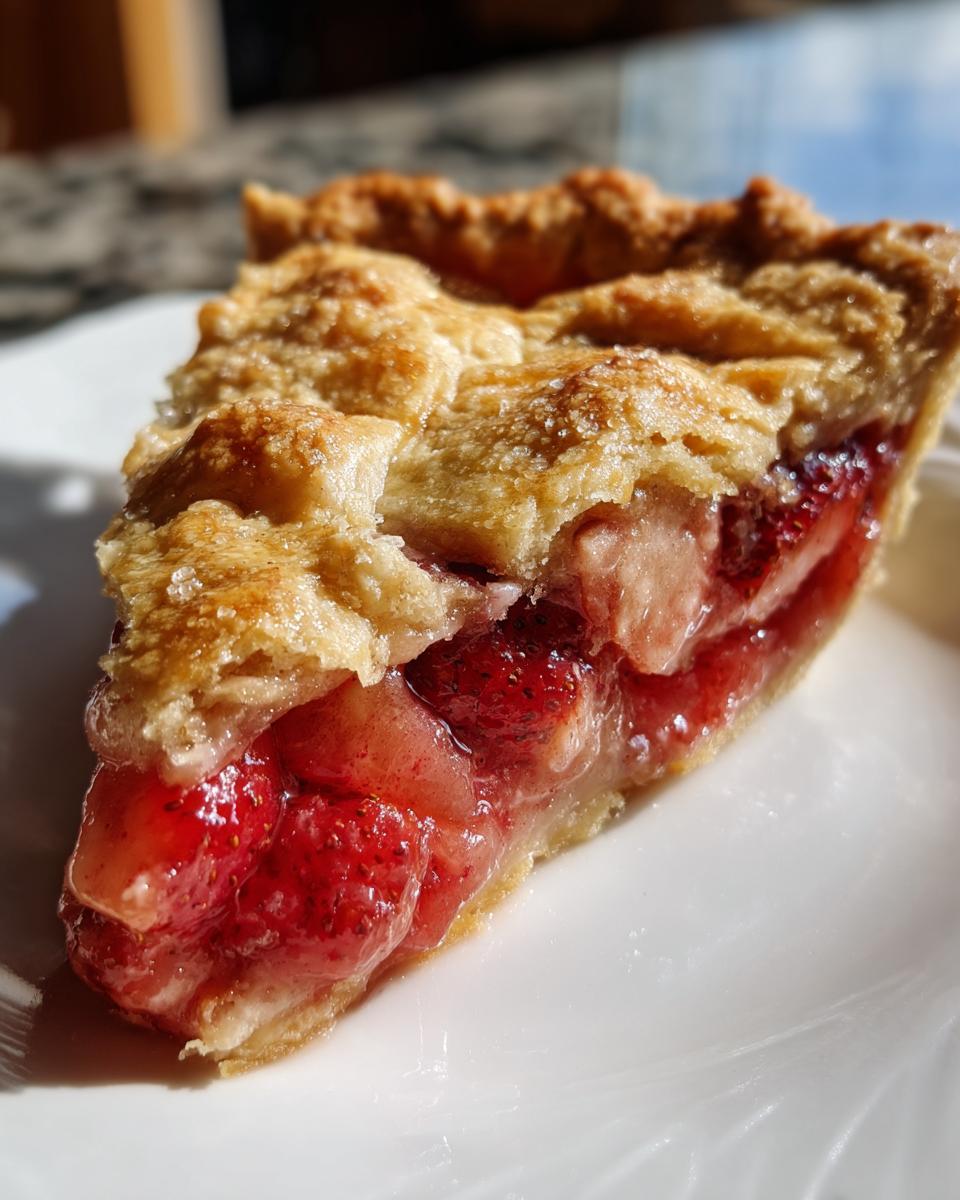
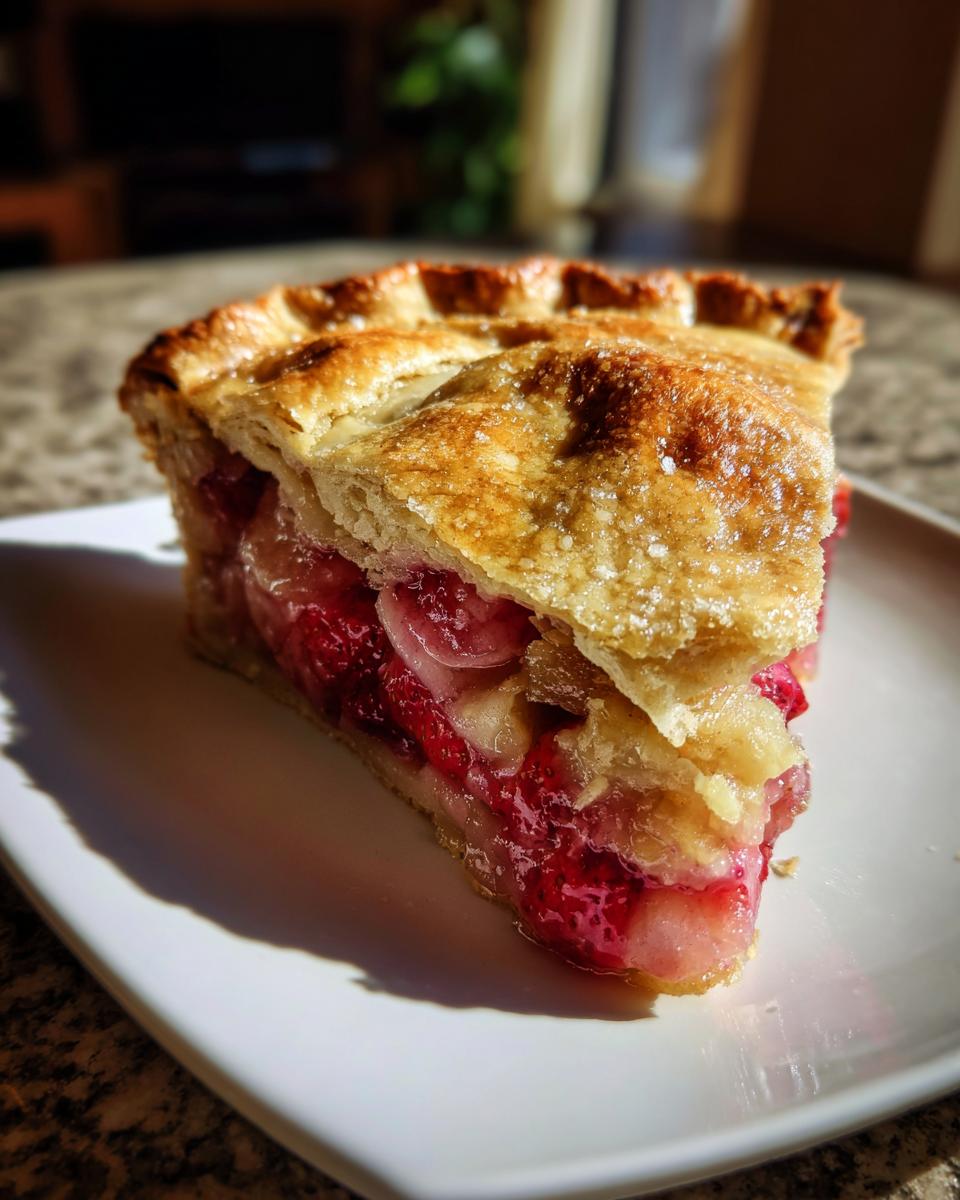
Roll out your second disk. This is where you decide: do you want a full top crust with vents cut in (always cut vents!), or are you going for that gorgeous woven look? For a lattice top, cut even strips for the prettiest Lattice Top Pie Instructions finish. Pour that wonderfully juicy filling into the chilled bottom crust. Place your top crust or lattice over the top. Crimp the edges together tightly—you need a good seal! Brush everything with that egg wash and sprinkle on the coarse sugar.
Now, crank the oven up to 400°F and bake for 20 minutes. This initial blast of heat sets the butter fast for maximum flakiness. Then, drop the heat down to 375°F and bake for another 35 to 45 minutes. Keep an eye on those edges; if they get too dark, grab some foil—that’s my little trick from my kitchen failures—and cover just the rim. You know it’s done when the filling is bubbling fiercely in the center. Then comes the hardest part: cooling it completely! I actually love looking at how my easy no-bake ice cream pie recipe comes together, but this one needs patience to set using the natural heat of the oven and the cooling rack. (If you want to see how someone else tackled this classic, take a peek at The Kitchn’s version for inspiration before you start!)
Tips for Success Making Your Strawberry Rhubarb Pie
You’ve got the fruit mixed, the dough is chilling nicely, and you’re just about ready to put this beautiful strawberry rhubarb pie into the oven. But hold on! I want to share a few lessons I learned the hard way so you don’t have to suffer through a runny or mushy pie. These little secrets are why I guarantee this is the best ever pie recipe!
First, let’s talk about the crust again, because it’s the foundation. My grandma always said: “If your butter is soft, your crust is shot.” It seems drastic, but it’s true! For the absolute flakiest crust, you cannot compromise on keeping that butter rock hard. If you feel it getting sticky while you’re working it, stop! Wrap the whole thing up and put it in the freezer for ten minutes. That chill time is worth every second.
The filling consistency is the other big hurdle for anyone baking with rhubarb. You need that liquid absorbed! If you are worried about your filling looking watery after baking, you can always test it slightly before the final 10 minutes. Gently move the whole pie plate a bit. If the juices aren’t visibly shimmering or slopping around looking like soup under the crust, you are golden. If it looks thin, carefully slip a small piece of foil under an edge and check the bubbling viscosity. Sometimes I even use a clean, thin metal skewer to gently poke through a vent down to the bottom layer to see how thick it is flowing, but only when the 35-minute mark hits!
When you’re done baking, the hardest part is waiting. Seriously! Cutting into this pie when it’s hot is a rookie mistake that leads to a runny mess. Let that pie sit on the cooling rack—just like I do with my amazing best lemon cookies—for a minimum of four hours. That time sets up the cornstarch perfectly. If you need a faster fix, try chilling it for two hours. Trust the process; the flavor actually deepens as it cools down too!
For more great springtime baking wisdom, I recently read a wonderful piece over at Home Cozier about making the best fruit desserts, you might find some inspiration there for your next bake! You will feel like a baking pro after making this incredible pie for your friends and family.
Variations for Your Easy Strawberry Rhubarb Bake
I love that this recipe is solid, but one of the joys of baking from scratch is putting your own little spin on things! Once you’ve mastered the base of this strawberry rhubarb pie—and trust me, once you nail that crust, you’ll want to make everything from scratch—it’s fun to switch things up.
My favorite simple switch happens right on top! Instead of the full lattice or solid crust we used above, you can go for a simple covering if you’re short on time. Just roll out the top piece, brush it with the egg wash, and cut a few generous slits right in the middle so everything can vent properly. If you’re feeling really wild, or if you have a couple of extra minutes, skip the crust entirely and make a crumb topping!
To make a simple crumb topping, just mix 1 cup of flour, 1/2 cup of cold butter (cut up), 1/2 cup of sugar (a mix of brown and white is great here), and maybe a little sprinkle of cinnamon. Use your fingers to mush it all together until it looks like rough sand. Sprinkle that all over your fruit filling instead of the top dough before baking. It creates this lovely, slightly crunchy texture that is so satisfying! It’s a fantastic alternative when you need an easy strawberry rhubarb bake but don’t want to fuss with weaving strips.
Flavor-wise, the fruit combination stands beautifully on its own, but if you want a deeper spice note, try adding about 1/4 teaspoon of ground cinnamon or even a tiny drop (and I mean tiny!) of almond extract to the sugar mixture. It really complements the warmth of the rhubarb beautifully without overpowering the fresh strawberry flavor. I use almond extract in my banana chocolate chip muffins sometimes, and it’s just magical how well it pairs with tart fruit notes!
Sometimes, if the rhubarb harvest is especially tart that year, I’ll actually swap out half the granulated sugar for an equal amount of turbinado sugar, just to give it a little more earthy sweetness without making the filling too syrupy. Experimentation is what makes home cooking so much fun!
Storage and Reheating Instructions for Classic Summer Pie
So you did it! You mastered the strawberry rhubarb pie, and now you’re staring at a beautiful, perfectly set slice. How do we keep it amazing for leftovers? It’s tougher with fruit pies than it is with creamy ones, but don’t worry, I have you covered so that every slice tastes almost as good as the first one.
First things first: storage time. Since the filling sets up nicely when it cools, this pie actually does quite well at room temperature for a day, especially if your kitchen isn’t super hot. Cover it loosely with foil or plastic wrap to keep the air off the crust, but don’t wrap it too tightly, or you risk trapping moisture and softening that beautiful work you did on the pastry! I think it tastes best within the first 24 hours. If you need it to last longer than that, put it in the fridge. It’ll be good for about four days tucked away in there.
Now, for reheating a slice—this is key to keeping that flaky pie crust tutorial victory intact! If you put a slice of pie in the microwave, you might as well be setting it on fire; the crust will turn rubbery almost instantly. Skip that step entirely!
My trusted method for warming up a slice so the fruit gets gooey again without ruining the bottom crust is the oven or toaster oven. Set your oven to 350°F (175°C). Place your slice right on the rack, or maybe on a small piece of foil if you’re worried about drips. Heat it for about 10 to 12 minutes. This gentle heat warms the fruit through and slightly crisps up the crust again. It comes out tasting nearly fresh-baked!
If you want to freeze a whole pie, that is doable too! Wrap that completely cooled pie really tightly in two layers of plastic wrap, and then another layer of heavy-duty foil. It will last a solid two months. When you’re ready to bake it from frozen, you must add an extra 20 minutes to the total baking time, and you might need to put foil over the top sooner since it takes longer to thaw partially.
For making homemade jams later, I highly recommend checking out my instructions for easy freezer jam recipes! It’s another wonderful way to preserve summer flavor.
Frequently Asked Questions About How to Make Strawberry Rhubarb Pie
I get so many lovely messages about pies, and honestly, most questions boil down to the same few things: crust integrity and filling gooiness! I’ve gathered the most common inquiries here on how to make strawberry rhubarb pie so you can feel confident tackling this classic summer pie.
Can I use frozen fruit in this strawberry rhubarb pie recipe?
Yes, you absolutely can! When summer is winding down, or maybe you just have lovely frozen berries on hand, it works just fine for this recipe. The key thing is: do NOT thaw them first. If you thaw them, they release too much water upfront, and that breaks down the structure before the cornstarch even has a chance to work its magic. Just toss the frozen fruit directly into the sugar mixture, add an extra 10 to 15 minutes to your total baking time, and you are good to go. It’s a lifesaver if you ever need to whip up a last-minute dessert!
What is the best thickener for rhubarb pie filling?
For a sweet and tart pie filling that sets up beautifully firm, I stick with straight cornstarch, just like in the recipe. Cornstarch gives you that glossy, almost jelly-like texture that holds its shape when sliced. People sometimes ask about tapioca, and while tapioca works too—it gives a slightly more translucent look—I find cornstarch is more reliable for large volumes of fruit like we use here.
Because rhubarb releases a ton of liquid, you need that starch power. We’re using a half-cup here because it ensures the fruit is coated and thickened without any gritty texture that can sometimes happen if you use too much flour as a thickener. This reliable ratio is what gets you that perfect interior!
How do I prevent the bottom crust from getting soggy?
Oh, the dreaded soggy bottom! We fight that battle hard in my kitchen, because a flaky pie crust tutorial isn’t complete if the bottom is wet. I have two main tricks, and you should probably use both if your baking sheet tends to run cool. First, when you assemble the pie, make sure your bottom crust has been well chilled—that initial cold blast in the oven is crucial for setting the fat before the juices seep in. Secondly, and this is a game-changer for any homemade fruit pie: bake it on a preheated baking sheet! Heat up a sturdy baking sheet in the oven while it preheats. When you put the pie in, place it directly onto that hot sheet. That direct heat helps essentially fry the bottom crust just enough to prevent steaming and sogginess. For more reliable baking tips, I always recommend checking out helpful guides like the one from Eva Bakery when you’re tackling techniques like a flaky lattice crust.
If you’re looking for great ideas for getting dinner on the table during the week, swing by my tips on weeknight dinner ideas—sometimes you just need a break from baking!
Nutritional Estimates for Your Classic American Pie Slice
I always believe in knowing what goes into the wonderful food we share with our families. Here are the estimated nutritional facts for one slice of this Classic American Pie, based on 8 servings. Please remember, since we all use slightly different sized strawberries or perhaps adjust the sugar based on your rhubarb batch, these numbers are an estimate, but they give you a good ballpark figure!
- Serving Size: 1 slice
- Calories: 450
- Fat: 25g (with 15g Saturated Fat)
- Carbohydrates: 55g
- Sugar: 35g
- Protein: 5g
- Sodium: 250mg
Don’t let the sugar scare you off; much of that comes from the natural fruit sugars, but it definitely qualifies as a treat! Everything in moderation, especially delicious, scratch-made pie!
Share Your Best Ever Pie Recipe Success
Now it’s your turn! I poured everything I know about making the best ever pie recipe into these instructions, especially for tackling that beautiful strawberry rhubarb pie. I truly hope this brings a little sunshine and joy to your table, just like it does mine.
Did you try my crust trick? Did you decide on a lattice or a full top? I want to hear all your thoughts! Please take a moment to rate this recipe below—it helps me know what’s working for you all. If you have any questions or want to share a picture of your gorgeous bake, please hop over to my contact page. There’s nothing I love more than seeing my recipes being enjoyed by your families!
PrintThe Ultimate Flaky Crust Strawberry Rhubarb Pie with Perfectly Balanced Sweet-Tart Filling

Bake the best strawberry rhubarb pie, featuring a ridiculously flaky crust and a filling that perfectly balances sweet strawberries with tart rhubarb. This classic American pie is a must-make summer dessert.
- Prep Time: 45 min
- Cook Time: 65 min
- Total Time: 120 min
- Yield: 8 servings 1x
- Category: Dessert
- Method: Baking
- Cuisine: American
- Diet: Vegetarian
Ingredients
- 2 1/2 cups all-purpose flour
- 1 teaspoon salt
- 1 cup (2 sticks) unsalted butter, very cold and cubed
- 1/2 cup ice water, plus more if needed
- 6 cups fresh rhubarb, cut into 1-inch pieces
- 6 cups fresh strawberries, hulled and halved or quartered
- 1 1/2 cups granulated sugar (adjust based on fruit tartness)
- 1/2 cup packed light brown sugar
- 1/2 cup cornstarch (for thickening)
- 1 tablespoon lemon juice
- 1 teaspoon vanilla extract
- 1 large egg, beaten with 1 teaspoon water (for egg wash)
- 1 tablespoon coarse sugar (for sprinkling)
Instructions
- Prepare the Pie Crust: In a large bowl, whisk together the flour and salt. Cut in the cold, cubed butter using a pastry blender or your fingers until the mixture resembles coarse crumbs with some pea-sized pieces of butter remaining. Gradually add the ice water, one tablespoon at a time, mixing until the dough just comes together. Do not overmix. Divide the dough in half, flatten each half into a disk, wrap in plastic, and chill for at least 1 hour.
- Prepare the Filling: In a large bowl, gently combine the cut rhubarb and strawberries. In a separate small bowl, whisk together the granulated sugar, brown sugar, and cornstarch. Pour the sugar mixture over the fruit. Add the lemon juice and vanilla extract. Toss gently until the fruit is evenly coated. Let the filling sit for 15 minutes to allow the juices to release.
- Assemble the Bottom Crust: On a lightly floured surface, roll out one disk of chilled dough into a 12-inch circle. Carefully transfer the dough to a 9-inch pie plate. Trim the edges, leaving a 1-inch overhang. Place the pie plate in the refrigerator while you prepare the top crust.
- Fill the Pie: Pour the fruit filling into the chilled bottom crust. Distribute the fruit evenly.
- Create the Top Crust: Roll out the second disk of dough. You can create a solid top crust (cutting vents) or cut strips for a lattice top. If using a lattice, weave the strips over the filling. Trim the overhang and crimp the top and bottom edges together to seal.
- Chill and Bake: Brush the top crust with the egg wash and sprinkle with coarse sugar. Place the pie in the freezer for 15 minutes before baking. Preheat your oven to 400 degrees Fahrenheit (200 degrees Celsius). Place the pie on a baking sheet to catch any drips.
- Bake: Bake the pie at 400°F for 20 minutes. Reduce the oven temperature to 375°F (190°C) and continue baking for another 35 to 45 minutes, or until the crust is golden brown and the filling is bubbling thickly. If the edges brown too quickly, cover them loosely with foil.
- Cool: Let the pie cool completely on a wire rack for at least 4 hours before slicing. This allows the filling to set properly.
Notes
- For the flakiest crust, keep all butter and water extremely cold. Do not let the butter melt before it hits the oven.
- To check the filling consistency without cutting the pie, gently shake the plate; the center should not look watery.
- If you use frozen fruit, do not thaw it first, but you may need to add 10-15 minutes to the total baking time.
Nutrition
- Serving Size: 1 slice
- Calories: 450
- Sugar: 35g
- Sodium: 250mg
- Fat: 25g
- Saturated Fat: 15g
- Unsaturated Fat: 10g
- Trans Fat: 0g
- Carbohydrates: 55g
- Fiber: 3g
- Protein: 5g
- Cholesterol: 60mg