

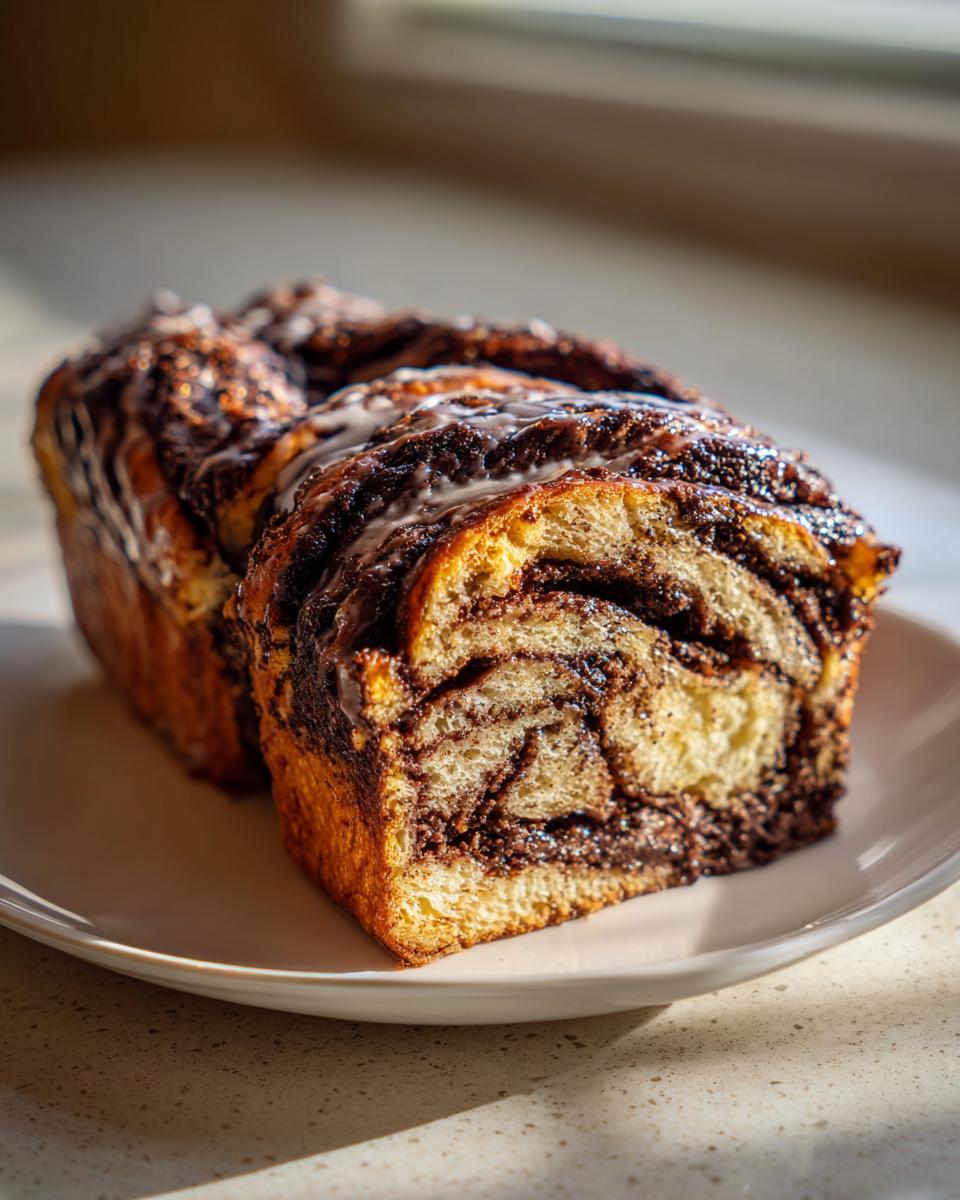
Forget those dry, crumbly loaves you grab in a rush! If you’ve ever dreamed of pulling a perfectly swirled, bakery-quality loaf out of your own oven, today is the day you make that happen. Welcome to Rosa’s Tasty Kitchen—my goal has always been taking those incredible, complex flavors and turning them into reliable recipes we can bust out on a busy weeknight or a cozy weekend. We’re diving deep into making the absolute ultimate chocolate babka. You’re going to see why I spent so much time perfecting this one; it has a soft, buttery brioche dough and a chocolate swirl that just won’t quit, beating anything you can buy pre-made. Trust me, it’s easier than you think!
If you’re looking for reliable comfort food that tastes like you spent all day in the kitchen, skip over to my collection of the best homemade desserts too!
- Why This Ultimate Soft & Swirled Chocolate Babka Recipe Works
- Ingredients for the Best Chocolate Babka Recipe
- Step-by-Step Guide: How to Make Chocolate Babka
- Tips for Success with Your Homemade Chocolate Babka
- Serving Suggestions for Your Chocolate Swirl Pastry
- Frequently Asked Questions about Classic Chocolate Babka
- Estimated Nutritional Data for Chocolate Babka
- Share Your Weekend Baking Project Success
Why This Ultimate Soft & Swirled Chocolate Babka Recipe Works
Look, I know there are tons of sweet bread recipes out there, but making a proper chocolate babka that doesn’t taste like something out of a plastic package takes a few special touches. This isn’t just about mixing ingredients; it’s about creating texture we usually only find at those fancy bakeries. When I was adapting this recipe, I focused obsessively on two things: the dough structure and making sure that chocolate didn’t just disappear!
We get bakery-style results because we respect the dough. If you try to rush it, you’ll end up with a dense brick instead of this beautiful, soft structure. These simple steps, learned from years of trial and error in my home kitchen, are what make the difference.
Achieving Tender Brioche Dough Recipe Texture
The secret to that melt-in-your-mouth texture is letting the butter join the party slowly. We aren’t dumping in a cup of cold butter all at once! By adding the softened butter piece by piece while the mixer runs, we let the dough absorb that fat slowly. That creates that signature rich and tender Brioche Dough Recipe texture. Also, please, please use room temperature eggs and milk. Cold stuff shocks the yeast and ruins the beautiful smoothness we’re trying to achieve.
Gooey Chocolate Swirls from Decadent Chocolate Filling
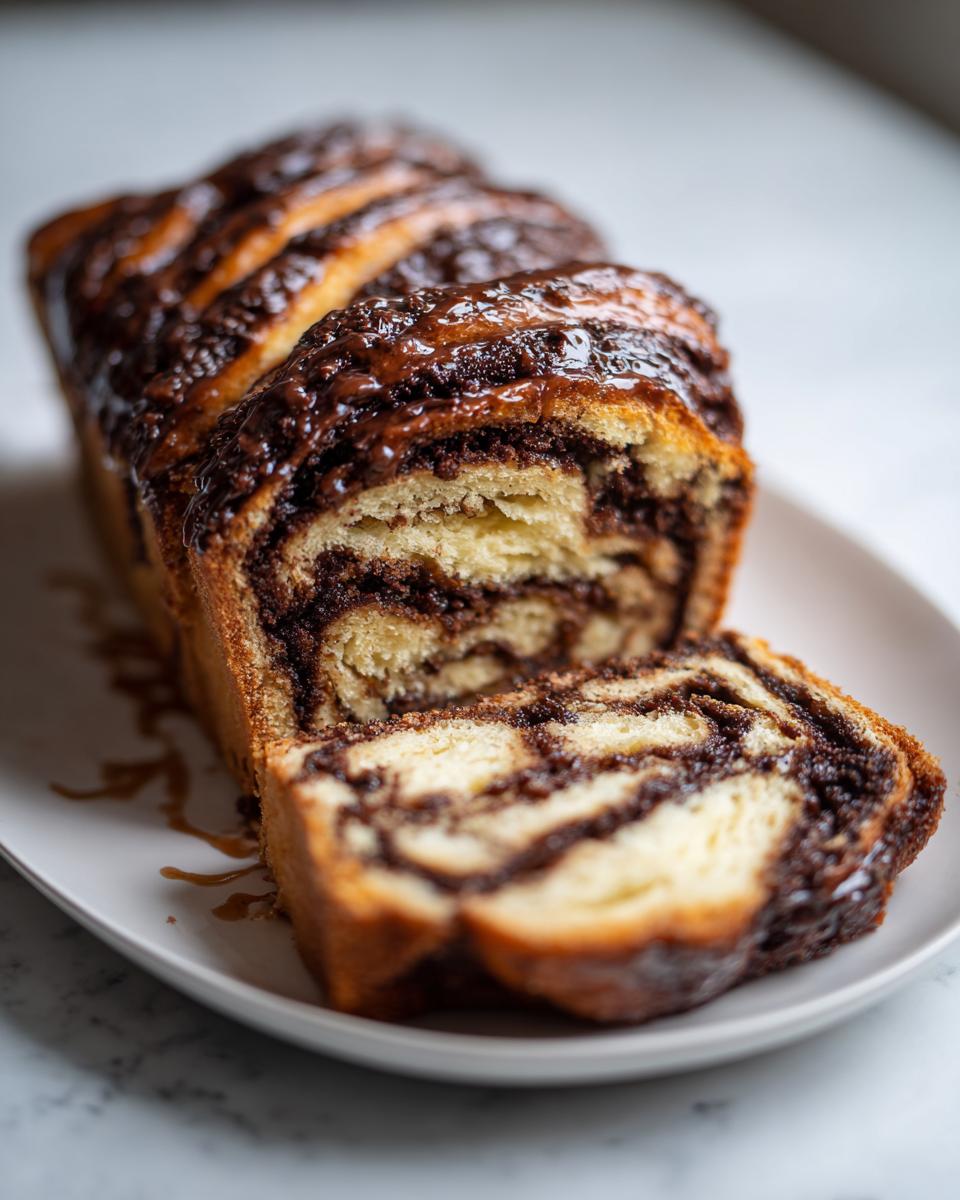
A lot of recipes use just cocoa powder, which results in a dry swirl that cracks when you cut it. Not here! We use both unsweetened cocoa powder for color and deep chocolate flavor, plus actual finely chopped bittersweet chocolate. This combination guarantees those rich, dark, Gooey Chocolate Swirls. This Decadent Chocolate Filling sinks just enough into the dough layers without leaking out during the bake, giving you pockets of pure chocolate in every single slice.
Ingredients for the Best Chocolate Babka Recipe
Okay, let’s get organized! When it comes to baking something this special, setting out your ingredients precisely is half the battle won. I used the exact measurements from my tested recipe card—no guessing allowed here, especially with yeast bread! Making sure your cold item—the butter—is ready for the dough, and your eggs are warmed up just right, sets us up for success. This is how we guarantee that beautiful loaf. You’ll find everything you need listed right here, broken down so you can tackle one component at a time.
For the Rich Buttery Dough Recipe
- 1 cup whole milk, warmed to 105-115°F (This is warm, but definitely not hot—we don’t want to kill the yeast!)
- 2 1/4 teaspoons active dry yeast
- 1/2 cup granulated sugar, divided (We use some for the yeast and the rest for the main dough mix)
- 3 large eggs, room temperature (This helps them incorporate smoothly)
- 1 teaspoon vanilla extract
- 1 teaspoon salt
- 4 cups all-purpose flour, plus more for dusting
- 1 cup (2 sticks) unsalted butter, softened and cut into pieces (Remember what I said? Softened, not melted! This is key for that amazing Rich Buttery Dough Recipe texture.)
For the Decadent Chocolate Filling
- 1 cup powdered sugar
- 1/2 cup unsweetened cocoa powder
- 1/2 cup (1 stick) unsalted butter, melted (This needs to be liquid to turn into a paste!)
- 4 ounces bittersweet chocolate, finely chopped (The better the chocolate, the better the flavor sinks into the dough!)
For the Finishing Syrup
- 1/4 cup water
- 1/4 cup granulated sugar
Once everything is measured out, working with the dough is just a breeze. That sugar syrup at the end might seem like an unnecessary bother, but trust me, drenching your hot chocolate babka with it is what locks in shine and moisture!
Step-by-Step Guide: How to Make Chocolate Babka
Now for the fun part! This is where we turn those lovely ingredients into the beautiful loaf we’ve been dreaming about. Don’t let the braiding intimidate you; I promise, once you see the layers inside, you’ll feel like a baking superstar. The key here is patience, especially during the rise times. This yeast bread needs time to develop that incredibly soft texture.
Making and Rising the Brioche Dough for your chocolate babka
First things first, wake up that yeast! In a small bowl, get your warm milk mixed with a touch of the sugar and the yeast. Let it sit until it’s foamy—that tells us it’s happy and ready to work. Next, toss the flour, the rest of the sugar, eggs, vanilla, and salt into your mixer bowl. Pour in that foamy yeast mixture. Start mixing low until it looks shaggy, then crank it up just a bit. This is the tense moment: add that softened butter one piece at a time. Seriously, wait until the last piece is mostly gone before adding the next one. Keep mixing for about 8 to 10 minutes until it comes together into a smooth, elastic dough. Then, just let it rest! Cover your bowl and give it a good 1.5 to 2 hours in a warm spot until it doubles up. Don’t peek too much unless you have to!
Preparing the Chocolate Swirl Pastry Filling
While that beautiful dough is puffing up, whisk together your filling ingredients. You’re mixing the powdered sugar, cocoa powder, melted butter, and chopped chocolate until you end up with a thick, spreadable paste. Think of a super thick, rich chocolate frosting—that’s what we want. Once the dough is done rising, punch it down gently. Dust your counter and roll that dough out into a big thin rectangle, about 12 by 18 inches. Spread that Decadent Chocolate Filling all over the surface, but leave about an inch bare on one long side. This border is super important for sealing the log!
Mastering How to Braid Babka: The Swirl Technique
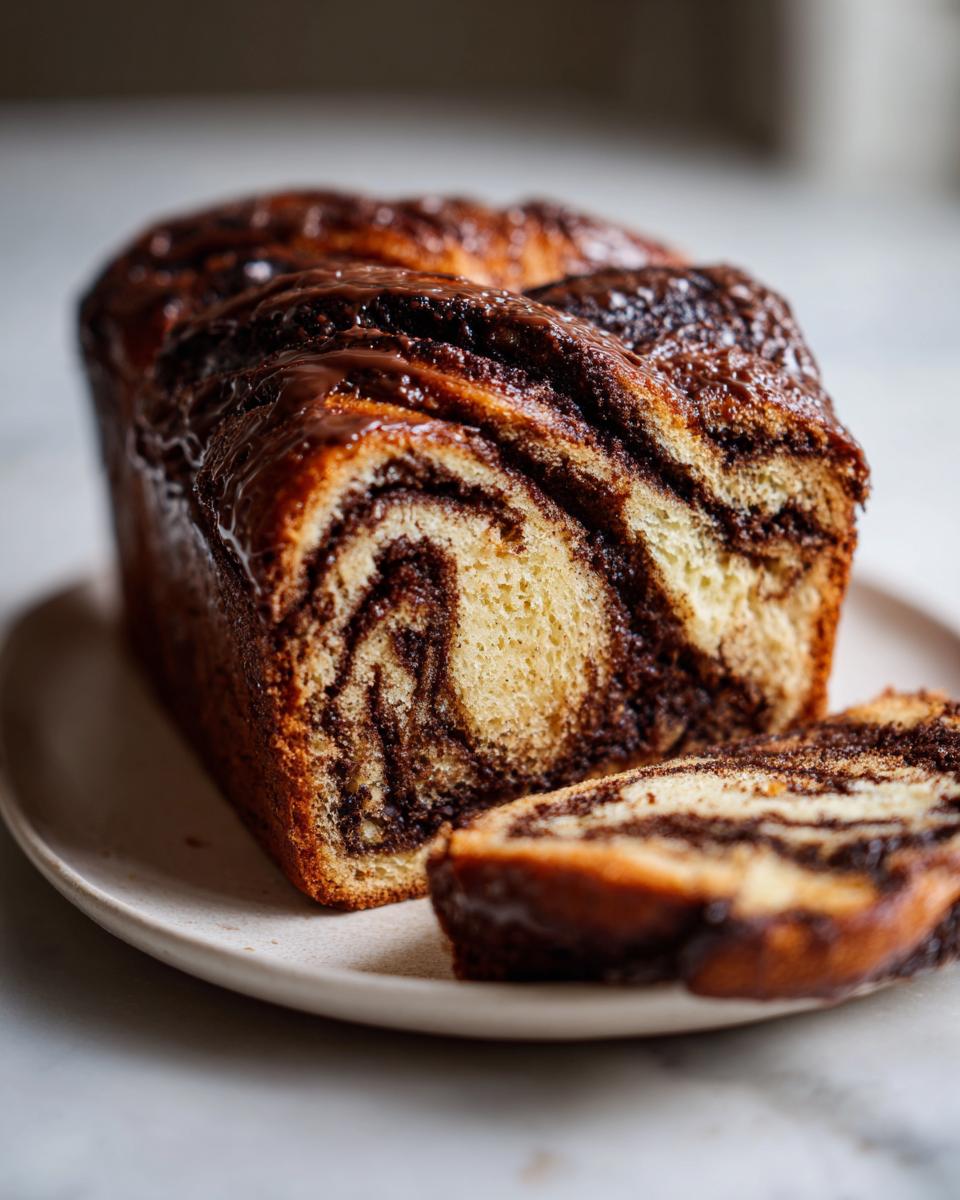
This is the magic trick that makes the chocolate babka look like it came straight from a professional bakery. Starting from the long edge that has the filling reaching the edge, roll that dough up super tightly into a log. Pinch that seam closed at the end! Now, grab a sharp knife—and I mean sharp!—and very carefully slice that log right down the middle, lengthwise. Stop slicing about an inch from the top end so your halves stay attached. Turn those cut sides up so you can see all that gorgeous filling. This is where you master How to Braid Babka: gently twist the two strands around each other, making sure those cut sides stay facing up so the swirls show off! Pinch the ends together tightly.
Baking and Glazing Your Moist Babka Loaf
Carefully move your twisted dough into your greased loaf pan. Cover it loosely and let it puff up again for about 45 to 60 minutes. As that second rise finishes, fire up your oven to 350°F! Bake it for 35 to 45 minutes. If you notice the top getting too dark before the center is done (check it with a skewer first!), just loosely drape a piece of foil over the top. While it bakes, whip up your simple syrup—just boil the sugar and water until clear. The second that chocolate babka comes out of the oven, brush that hot syrup all over the top. This step is non-negotiable if you want that incredible, Moist Babka Loaf that stays soft for days. Let it cool just a touch in the pan before moving it to the rack.
Tips for Success with Your Homemade Chocolate Babka
I’ve learned that yeast doughs can be temperamental, and that’s okay! Baking is chemistry, but it’s also feeling. If this is your first time making a rolled, filled bread like this, don’t stress if your first one isn’t picture-perfect. We learn the most when things get a little messy, and I want you to feel confident pulling this loaf out of your oven, even if it’s not exactly like the magazine covers. Here are a few things I always stress to keep your chocolate babka in top shape. For more ideas on soft, delicious baked goods, check out my collection of chocolate swirl bread tips!
Troubleshooting Common Issues with Chocolate Babka
The main issue I see people run into happens when they roll out the dough for the filling. If the dough starts fighting you and shrinking back, just let it relax! Cover it with a clean tea towel and walk away for 10 minutes. It needs that downtime between rolling and spreading. If your filling starts to smear out when you try to braid it, you probably used too much melted butter in the filling; it needs to be a thick paste, not runny. If you’re worried about the center being done, never skip tenting with foil if the top is getting too brown before 30 minutes is up. No one wants an under-baked center!
Make Ahead Babka and Storage Advice
This is my favorite tip for the busy week: You absolutely can transform this into a Make Ahead Babka! After you finish braiding the loaf, instead of letting it do the final rise on the counter, pop the whole pan (covered tightly!) into the fridge overnight. This cold proofing deepens the flavor beautifully. When you wake up, just let it sit out for about an hour while your oven preheats, and then bake it as directed. To keep your finished loaf soft, wrap it tightly in plastic wrap after it has cooled completely. It stays great on the counter for three days that way!
Serving Suggestions for Your Chocolate Swirl Pastry
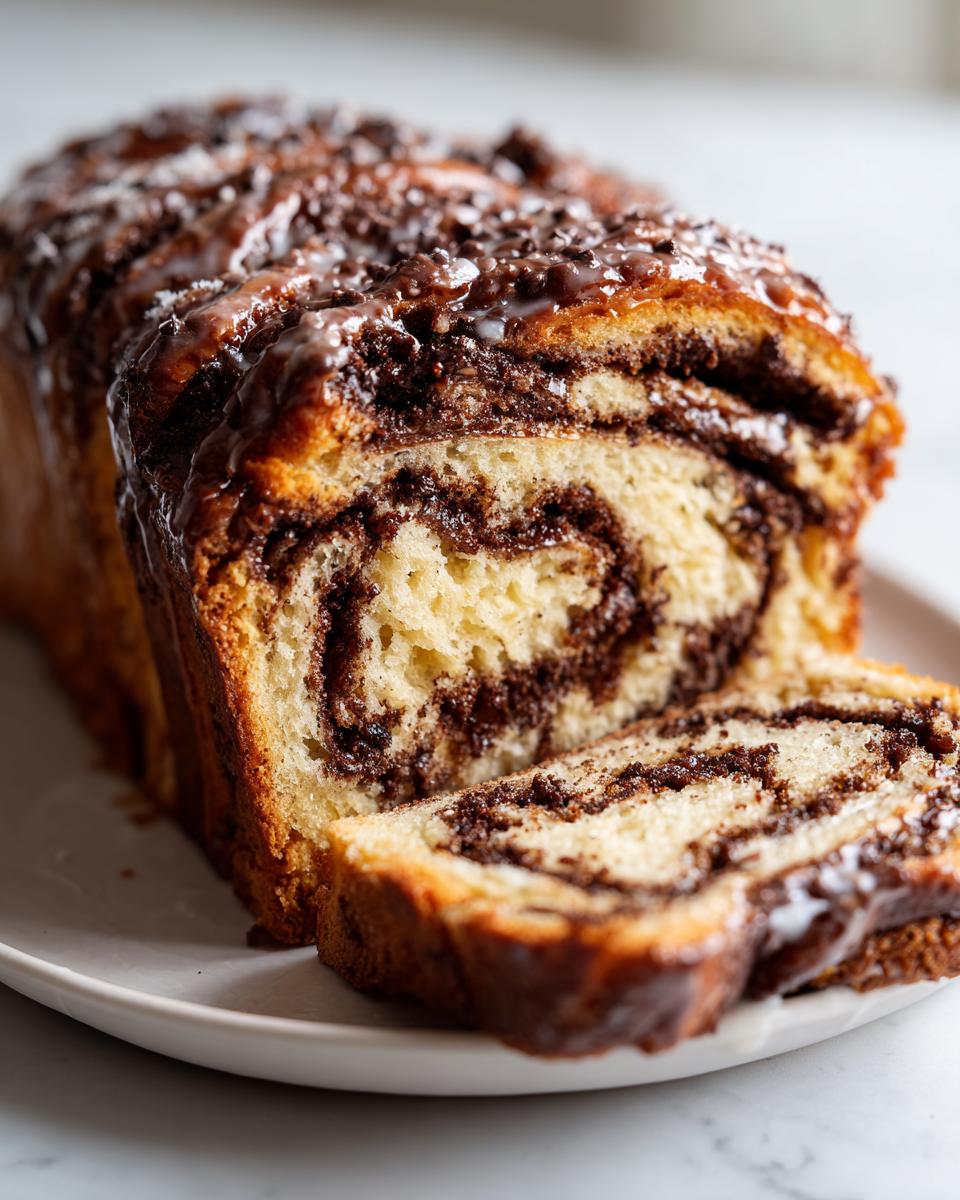
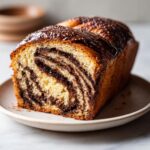
Look at that glorious loaf! You did it! Now comes the best part: slicing into that golden crust and peeling back those rich, dark ribbons of chocolate. What do you do with this masterpiece once it’s cooled? Honestly, I sometimes just stand over the cooling rack and gobble down the end piece while it’s still warm. But if you manage to save a slice, this Chocolate Swirl Pastry is versatile!
For breakfast, it’s fantastic all on its own, maybe with a hot cup of coffee in hand. The sweetness is just right when paired with a slightly bitter beverage. If you’re serving it for dessert, don’t feel like you need a ton of fuss. A light dusting of powdered sugar is pretty, but I occasionally like to serve a slice slightly warmed with a tiny dollop of crème fraîche or maybe a scoop of vanilla bean ice cream, especially if it’s a particularly hot day. It turns this lovely sweet bread into a decadent restaurant-style dessert!
It truly shines over the holidays alongside lighter morning fare, like my favorite fluffy old-fashioned pancakes, because it brings that special, made-from-scratch feeling to the brunch table. Enjoy every gooey bite!
Frequently Asked Questions about Classic Chocolate Babka
I get so many messages asking the same few questions once people sit down to tackle this giant, beautiful loaf. It’s totally normal! Baking with yeast and doing intricate braids can feel a little intimidating at first, but once you know the answers, you’ll feel like a seasoned pro. Don’t worry about getting it perfect the first time; the most important thing is that you tried this gorgeous chocolate babka recipe! For more inspiration for easy mornings, check out my easy breakfast recipes roundup.
Can I use instant yeast instead of active dry yeast for this chocolate babka?
Yes, absolutely! Instant yeast is a little more powerful, so you can usually swap it without issue, though you should cut back just a tiny bit, maybe use 2 teaspoons instead of the 2 1/4 teaspoons called for. The best part? You don’t need to pre-proof it in the milk! You can skip Step 1 entirely and just mix the instant yeast right in with your dry ingredients before adding the wet ones. It’s a great little speed-saver for a weekend bake.
What is the best way to reheat a slice of this tender chocolate loaf?
If you’ve stored your loaf tightly wrapped, it should still be pretty soft, but warming it up just brings the butter flavor right back to the front. If you’re eating just one slice, I zap mine in the microwave for about 10 seconds—just enough to get it pleasantly warm and slightly gooey. If you want to revive a whole loaf, wrap it loosely in foil and bake it at 300°F for about 10 minutes. That makes the whole kitchen smell amazing all over again!
Can I make a cinnamon filling instead of chocolate?
You totally can! If you’re craving a slightly different flavor profile or have cinnamon rolls on the brain, you can use this exact same procedure but substitute the chocolate filling ingredients for a cinnamon-sugar mixture. Just make sure you still use some melted butter in with the sugar and spices, because that butter is what helps the swirl stick to the dough during the braiding process. It’s a wonderful variation on this tender chocolate loaf structure!
Estimated Nutritional Data for Chocolate Babka
Okay, let’s get serious for a second. While I am Rosa Sterling, a busy mom and home cooking enthusiast—not a registered dietitian!—I know you’re curious about what you’re bringing to the table. When you bake something this rich and buttery, those numbers add up, but remember, we only make this glorious chocolate babka for special occasions!
Please keep in mind these values are just rough estimates. They are calculated based on the exact ingredients listed above—using standard measurements for flour, sugar, and standard butter fat content. If you use higher-fat chocolate or a different brand of butter, your final nutritional breakdown might shift a little, so take this as a helpful guide, not gospel!
- Serving Size: 1 slice (which is generous—it’s a big, rich loaf!)
- Calories: Approximately 450
- Fat: Around 25g (Yes, that’s the buttery brioche dough talking!)
- Saturated Fat: Approximately 15g
- Trans Fat: 0g (We keep things clean here!)
- Cholesterol: About 80mg
- Carbohydrates: Approaching 50g
- Fiber: Roughly 3g
- Sugar: About 30g (That dark brown sugar and syrup really add up, but oh, it’s worth it!)
- Protein: About 8g
- Sodium: Approximately 250mg
See? It’s a treat, not an everyday breakfast bread! And that’s perfectly fine by me. Knowing what’s in your food is part of being a confident home cook, and this little peek behind the curtain helps you decide when to treat yourself to this spectacular moist babka loaf.
Share Your Weekend Baking Project Success
Whew! That’s it—you’ve conquered the most impressive loaf in the neighborhood! Seriously, now that you’ve mastered the dough, the filling, and that tricky braiding part, you deserve a standing ovation. Baking bread from scratch, especially something as beautiful as this chocolate babka, is a huge accomplishment, and I couldn’t be prouder that you trusted my kitchen tested recipe!
I absolutely love seeing what you all create. When you pull that perfect, shiny, syrup-brushed loaf out of the oven, I want to know all about it! Please head over to the recipe card and leave a star rating—it helps other home cooks like you feel confident grabbing this recipe for their next big bake. If you managed to snap a picture before everyone devoured it, tag me on social media! I truly cherish seeing my recipes come to life in your homes.
And if you enjoyed tackling this challenge, stick around! There are so many more reliable, flavor-packed recipes coming your way that are designed exactly for the busy home cook like us. Make sure you’re signed up for my newsletter so you don’t miss my next great discovery. We’ll keep turning that everyday chaos into delicious comfort food together. Head over and check out my collection of weeknight dinner ideas while you wait for your babka to cool!
PrintThe Ultimate Soft & Swirled Chocolate Babka Recipe (Easier Than You Think)
Bake the best homemade chocolate babka with a soft, buttery brioche dough and rich, decadent chocolate swirls. This recipe delivers bakery-style results that beat store-bought versions.
- Prep Time: 45 min
- Cook Time: 45 min
- Total Time: 3 hr 15 min
- Yield: 1 loaf (about 10 servings) 1x
- Category: Dessert
- Method: Baking
- Cuisine: Jewish/American
- Diet: Vegetarian
Ingredients
- 1 cup whole milk, warmed to 105-115°F
- 2 1/4 teaspoons active dry yeast
- 1/2 cup granulated sugar, divided
- 3 large eggs, room temperature
- 1 teaspoon vanilla extract
- 1 teaspoon salt
- 4 cups all-purpose flour, plus more for dusting
- 1 cup (2 sticks) unsalted butter, softened and cut into pieces
- 1 cup powdered sugar (for filling)
- 1/2 cup unsweetened cocoa powder (for filling)
- 1/2 cup (1 stick) unsalted butter, melted (for filling)
- 4 ounces bittersweet chocolate, finely chopped (for filling)
- 1/4 cup water (for syrup)
- 1/4 cup granulated sugar (for syrup)
Instructions
- Activate the yeast: In a small bowl, combine the warm milk, yeast, and 1 tablespoon of the sugar. Let stand for 5-10 minutes until foamy.
- Make the dough: In the bowl of a stand mixer fitted with the dough hook, combine the remaining sugar, eggs, vanilla, salt, and flour. Add the yeast mixture. Mix on low speed until a shaggy dough forms.
- Knead the dough: Increase the speed to medium-low and knead for 5 minutes. Gradually add the softened butter, one piece at a time, waiting until each piece is incorporated before adding the next. Continue kneading for 8-10 minutes until the dough is smooth and elastic.
- First rise: Place the dough in a lightly oiled bowl, cover, and let it rise in a warm place for 1.5 to 2 hours, or until doubled in size.
- Prepare the filling: While the dough rises, mix the powdered sugar, cocoa powder, melted butter, and chopped chocolate in a medium bowl until combined into a thick paste.
- Roll and spread: Punch down the risen dough. On a lightly floured surface, roll the dough into a large rectangle, about 12×18 inches. Spread the chocolate filling evenly over the dough, leaving a 1-inch border on one long edge.
- Roll the dough: Starting from the long edge opposite the border, tightly roll the dough into a log. Pinch the seam closed.
- Braid the babka: Using a sharp knife, slice the log lengthwise down the center, exposing the layers. Turn the cut sides up. Twist the two halves around each other, keeping the cut sides facing up to show the swirl. Pinch the ends together.
- Shape and second rise: Carefully transfer the braided dough to a greased 9×5 inch loaf pan. Cover loosely and let rise for 45-60 minutes, or until puffy. Preheat your oven to 350°F (175°C) during the last 15 minutes of rising.
- Bake: Bake for 35-45 minutes, or until golden brown and cooked through. If the top browns too quickly, loosely tent with foil.
- Make the syrup: While the babka bakes, combine the water and sugar in a small saucepan. Bring to a boil, stirring until the sugar dissolves. Remove from heat.
- Glaze: Immediately brush the hot syrup over the top of the hot babka as soon as it comes out of the oven. Let the babka cool in the pan for 15 minutes before transferring it to a wire rack to cool completely.
Notes
- For the softest dough, ensure your butter and eggs are at room temperature before starting.
- You can make the dough a day ahead and let it cold-proof in the refrigerator overnight for deeper flavor.
- Store leftover babka tightly wrapped at room temperature for up to 3 days, or freeze slices for later enjoyment.
Nutrition
- Serving Size: 1 slice
- Calories: 450
- Sugar: 30g
- Sodium: 250mg
- Fat: 25g
- Saturated Fat: 15g
- Unsaturated Fat: 10g
- Trans Fat: 0g
- Carbohydrates: 50g
- Fiber: 3g
- Protein: 8g
- Cholesterol: 80mg