
If you’ve ever spent hours making cute cut-out cookies only to have the icing melt or crack before you could even stack them, trust me, I have been there! It used to drive me absolutely bonkers, especially when preparing big holiday trays for the church bazaar. That’s why I spent way too much time tweaking and testing until I landed on this ultimate sugar cookie icing recipe. This isn’t some fussy, complicated recipe either—it’s simple enough for a beginner, but it dries rock hard, stays perfectly smooth, and gives you that professional, glossy finish every single time. Finally, creating bakery-worthy cookies right here in my own busy kitchen became an achievable joy! If you want the perfect base for all that beautiful decoration, make sure you check out my recipe for the best sturdy sugar cookies too—they hold up beautifully under this amazing glaze.
- Why This is the Best Sugar Cookie Icing Recipe for Decorating
- Gathering Ingredients for Your Sugar Cookie Icing Recipe
- How to Prepare This Easy Cookie Decorating Icing
- Tips for Success with Your Sugar Cookie Icing Recipe
- Making a Royal Icing Alternative Recipe Without Corn Syrup
- Storage and Keeping This Sugar Cookie Icing Recipe Fresh
- Serving Suggestions for Your Beautifully Decorated Cookies
- Frequently Asked Questions About This Sugar Cookie Icing Recipe
- Sharing Your Results with This Sugar Cookie Icing Recipe
Why This is the Best Sugar Cookie Icing Recipe for Decorating
When I used to decorate cookies for school events, I always ran into trouble. The icing was either too runny, or it cracked like dry earth when it set up. That’s not happening anymore! What makes this the best sugar cookie icing recipe is that it delivers exactly what busy home bakers need: reliability. This is truly an icing recipe that hardens beautifully, giving you that professional, almost porcelain look on your cut-out cookies. Trust me when I say you want this for your holiday baking projects, especially if you plan on shipping or stacking them up high.
I learned so much researching different methods, and I found that other recipes are either too complicated or too soft. But this version gives you that perfect, sweet snap without the fuss. For more inspiration on simple decorating, you can check out this great article that helped me understand hardening better when I was testing batches.
Achieving That Hard, Stackable Finish
The secret to hardness is honestly in the liquid, folks! If you need cookies that you can pile into tins for gifting, you have to make smart choices here. Using water instead of milk makes the icing set up much denser and firmer. Milk adds richness and flavor, but water gives you that sturdy shell we are aiming for. It’s a small decision that makes a huge difference when you’re packing up dozens of decorated treats from my cookie icing recipe stash.
Tips for a Smooth Cookie Frosting Tutorial
Nobody wants lumpy icing dripping off their perfectly cut cookies! To get that stunningly glossy icing for cut-out cookies, your very first step has to be sifting that powdered sugar. Don’t even debate it, just do it! I learned the hard way that even the finest sugar has clumps hiding in there. For the best results in this smooth cookie frosting tutorial, mix it gently at first, then beat it until it looks like velvety silk. You’ll know it’s ready when it shines under the kitchen light.
Gathering Ingredients for Your Sugar Cookie Icing Recipe
Now that you know this is truly the sugar cookie icing recipe that will solve all your decorating headaches, let’s talk supplies. The beauty of this mixture is we aren’t dealing with fussy ingredients that require a specialized trip to the store. These are basics you probably already have tucked away in your pantry for when the urge to whip up a batch of treats strikes!
When I need that perfect, reliable base for decorating, I always rely on this small list. Why complicate life when simplicity works this well? Head on over to this guide if you need a backup cookie recipe to frost later!
Essential Components for This Icing Recipe That Hardens
For this glorious, hard-setting topping, you’re going to need the following items ready to go. Remember, we sift that sugar first! You’ll need 4 cups of powdered sugar, sifted thoroughly to make sure we avoid lumps right from the start. Next, you need 1/2 cup of liquid—and here’s a key choice: use milk if you want a slightly softer bite when you take a bite, or use plain water if you truly need that rock-hard set. Finally, I always add 1 tablespoon of light corn syrup. It sounds optional, but trust me, it gives the icing that beautiful extra gloss that makes your cookies look professionally done.
How to Prepare This Easy Cookie Decorating Icing
Getting the right look for your decorations is all about the mixing process, and honestly, it couldn’t be simpler! This is where that magic happens, transforming sugar and liquid into what will soon be the prettiest coating on your holiday treats. If you follow these steps for this sugar cookie icing recipe, you’ll feel like a pro decorator in no time.
Mixing for the Perfect Beginner Sugar Cookie Icing Consistency
First, get your sifted sugar into your mixing bowl. Then, carefully add your liquid—that’s the milk or water, your vanilla, and that little bit of corn syrup if you’re using it for shine. Start your mixer on the absolute lowest speed. We don’t want a sugar explosion all over the kitchen cabinets, right? Just mix until everything is barely combined and you’ve scraped down the sides. Seriously, scrape those sides!
Once it’s all brought together, kick the speed up to medium and let it run for a full two to three minutes. This is what makes it smooth! When you check it, you’re aiming for the ribbon test. For flooding, the icing should drizzle off your whisk in a slow, thick ribbon that sinks back into the bowl completely within about ten seconds. Mastering this consistency is key for a truly beginner sugar cookie icing experience.
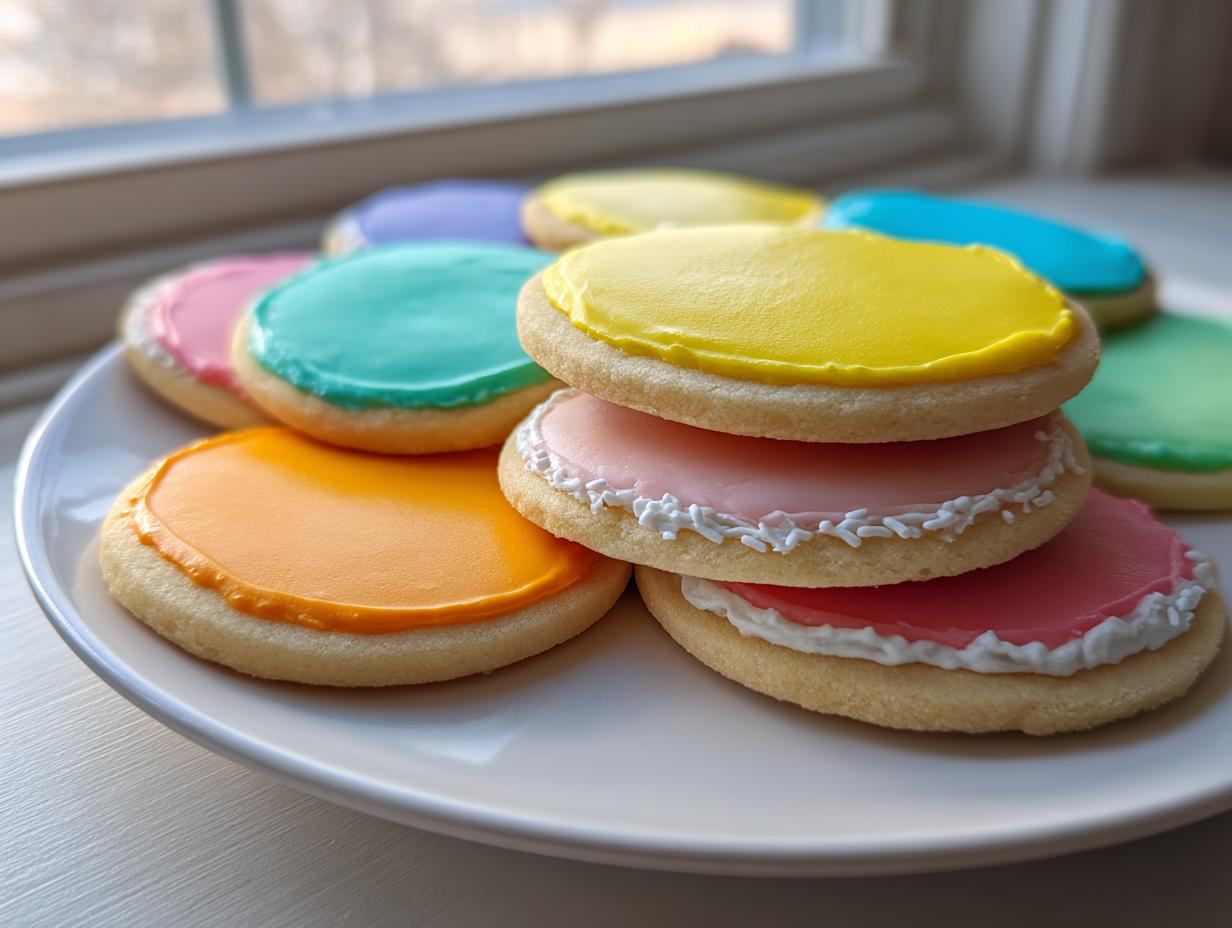
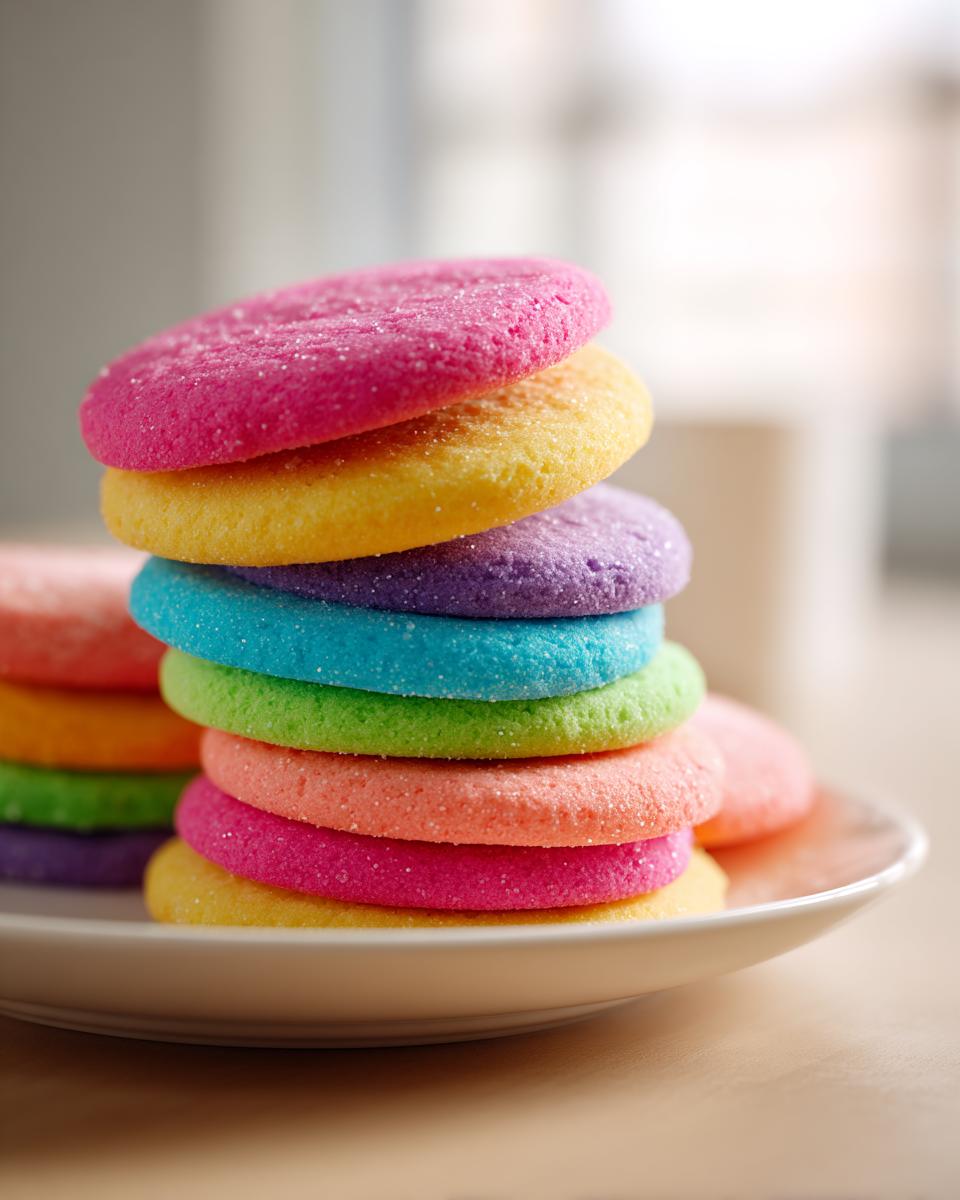
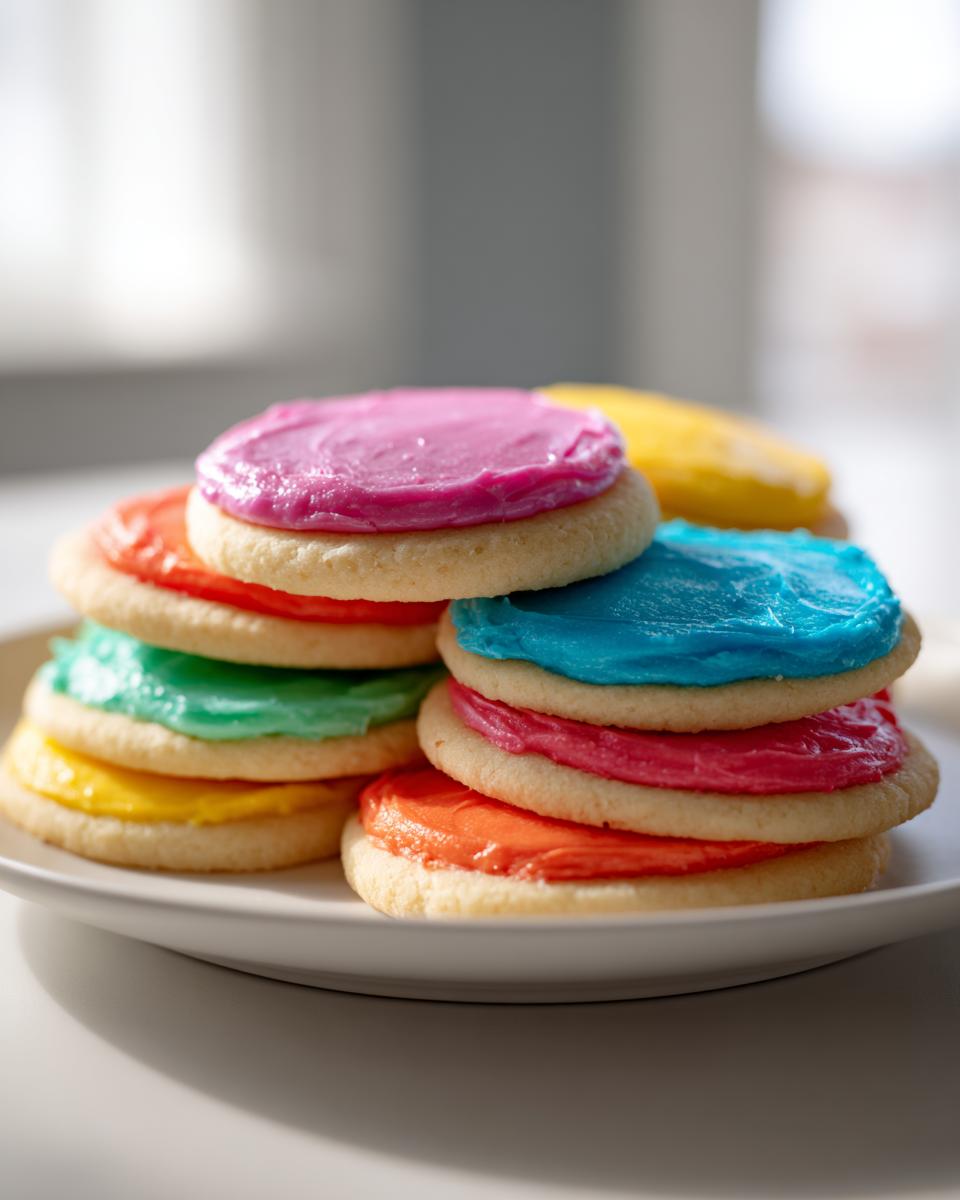
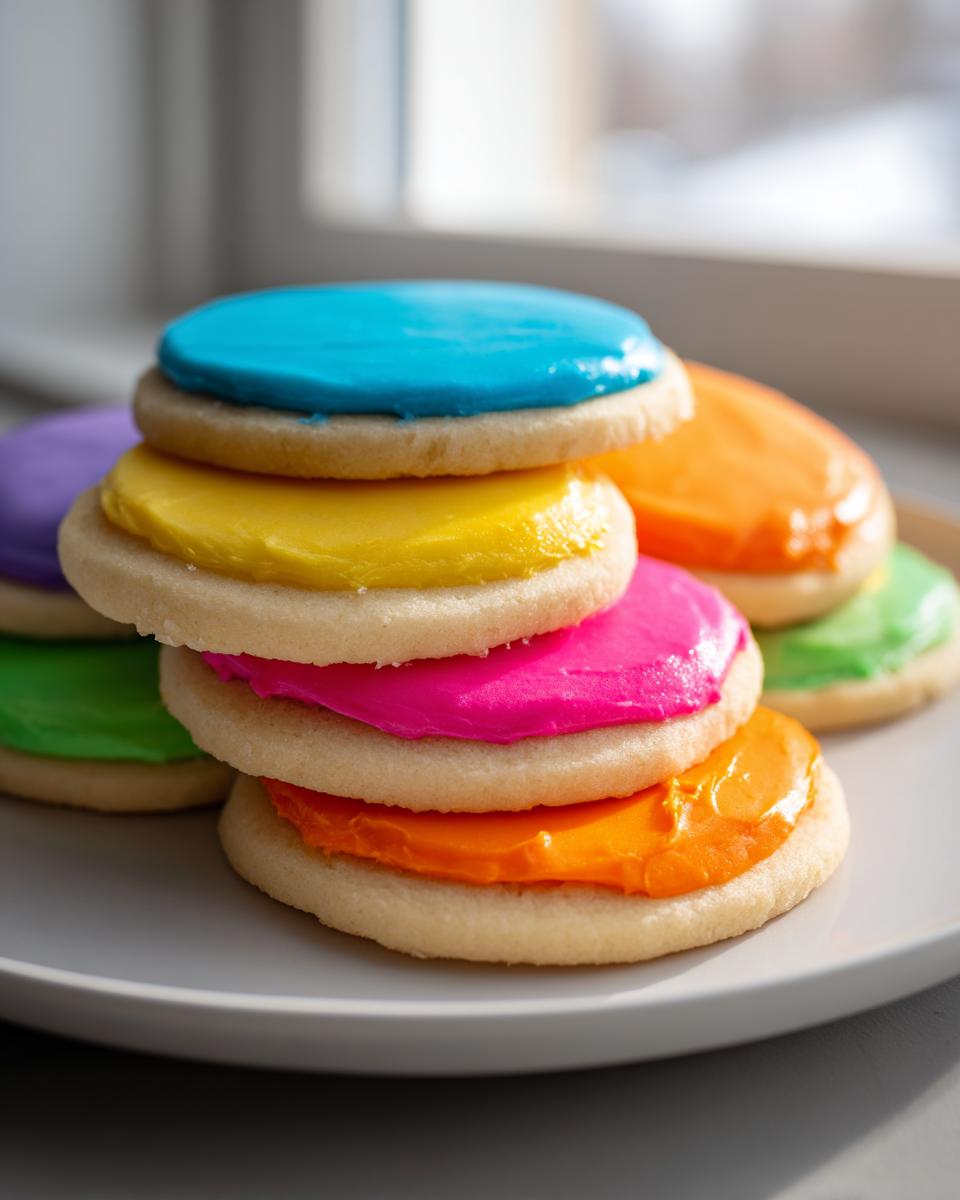
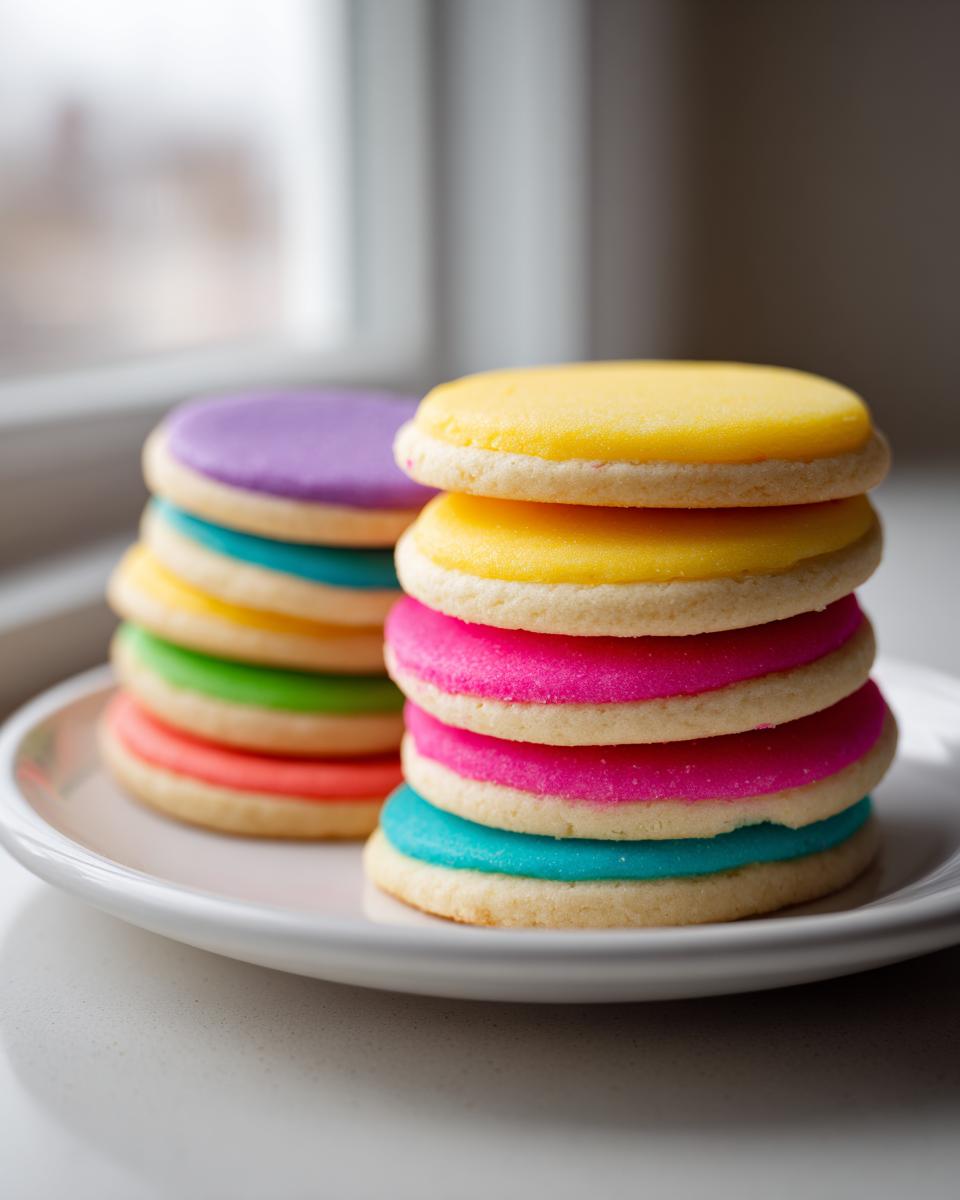
Coloring and Applying Your Glossy Icing for Cut Out Cookies
If you want color, and I hope you do, divide your icing into whatever bowls you need now. Always use gel food coloring here—liquid coloring messes with the consistency we just worked so hard to achieve! Add the color slowly until you hit that perfect shade. If you want the icing to dry super firm, remember that this icing recipe that hardens really benefits from using water instead of milk for the liquid.
Now for application! Remember, decorating is often a two-step dance. Start by outlining all your cooled cookies first. Let that outline crust over for about 10 to 15 minutes—this keeps your flood icing from running outside the lines. Then, use your thinner flood icing to fill the middle. If you see any annoying air bubbles pop up, gently tap the cookie sheet straight down onto the counter a couple of times. Watch those bubbles vanish! This little trick ensures you get that flawlessly glossy icing for cut out cookies resting completely smooth.
Tips for Success with Your Sugar Cookie Icing Recipe
You’ve mixed it, you’ve colored it beautifully, and now you’re ready to decorate! This is where a few little tricks I picked up over the years really save the day. The biggest piece of advice I can give you for this sugar cookie icing recipe is related to the cookies themselves. They must be completely cool! I mean room temperature cool. I learned this the hard way during a hectic Christmas where I was rushing to decorate dozens of gingerbread men like I was making my easy homemade naan bread—just throwing things together too fast! The heat rising off the cookies steamed the icing, making it weep and slide right off. Don’t let my past mistakes haunt your holiday! Cool them completely first.
Now, let’s talk about consistency on the fly. If you have to step away for five minutes to answer the door—and let’s be honest, we always do—the icing will naturally thicken up as those sugars start to crust on the surface. If your piping lines look a little wobbly or thick, don’t panic! Just grab a teaspoon and carefully stir in maybe half a teaspoon of water at a time. Mix it gently until it loosens up just enough to flow nicely again. That little bit of water brings life right back into it.
On the flip side, if you’ve used too much liquid while making your flood consistency, don’t worry. We can save it before declaring defeat! Just whisk in another tablespoon of sifted powdered sugar, slowly, until that ribbon consistency comes back. It’s all about baby steps with adjustments. If you want to see how others handle the hard-set finish, you can always check out this guide on hardening techniques. Keeping your tools clean and your cookie surface cool are the simplest ways to guarantee success with this fabulous icing!
Making a Royal Icing Alternative Recipe Without Corn Syrup
I get asked all the time if you absolutely have to use corn syrup in this mixture. And here’s my honest answer from years of baking: no, you don’t, but you’re making a choice there! Corn syrup is fantastic because it’s what gives us that super glossy sheen and it slightly slows down the drying process, which results in a very slight, almost imperceptible soft bite even when the icing is totally firm. If you’re looking for a strict royal icing alternative recipe that sets up harder than a rock—maybe for cookies that are going into a very humid environment or need to withstand rough handling—you can totally skip the syrup.
To do this, simply follow the recipe exactly as written, but leave out the 1 tablespoon of corn syrup. Instead, you’ll definitely want to use water as your liquid base rather than milk, because milk fat and moisture can prevent that truly rock-hard finish. When you omit the syrup, you might notice the icing looks a touch duller right after mixing, but once it fully dries, it will still look fantastic and handle beautifully. It just won’t have that high-gloss flash that the syrup gives it once it’s set. Both versions are delicious and definitely reliable for decorating your holiday cut-outs, so just pick the one that best suits how you plan to use the cookies!
Storage and Keeping This Sugar Cookie Icing Recipe Fresh
Once you’ve gotten that gorgeous, smooth coating onto your cookies, the next big question is: what do I do with what’s left? We certainly don’t want to waste any of this amazing sugar cookie icing recipe! If you have icing left over in your bowls—perhaps you set some aside for coloring later—you need to seal it up tight. The enemy of this icing is air, because it will dry out quickly on top, making it super crusty. Pop whatever you aren’t using into an airtight container or wrap the bowls tightly with plastic wrap pressed right against the surface of the icing.
It’s best to keep any leftover icing stored right there on the counter at room temperature. Don’t put it in the fridge! Cold air makes the sugar seize up and get hard in a bad way. If you open it up the next day and it seems a little stiff—which it probably will, because it’s designed to dry hard—don’t reach for a big splash of milk. Just grab a teaspoon and stir in the tiniest drops of water, one at a time, until it loosens back up to a nice, useable consistency. This little trick keeps your next batch of decorating simple! If you ever need to store cookie components for longer periods, you might want to peek at my method for storing fruit preserves, like my easy freezer jam recipe—the airtight principles overlap!
Serving Suggestions for Your Beautifully Decorated Cookies
Once you’ve gone to all that beautiful trouble making sure your icing is smooth, shiny, and perfectly set, you want to make sure the cookies get the spotlight they deserve! It’s not just about having a tasty treat; it’s about creating a centerpiece for your gathering. These gorgeous, decorated cut-outs deserve the perfect pairing.
When I put together a holiday dessert platter, I always make sure to mix textures. Surround these crisp, beautifully iced cookies with something soft, maybe some of my favorite fudge or a fluffy brownie. The contrast is just delightful, and it keeps everyone coming back for more.
Of course, the most classic pairing is a warm beverage! There is nothing better than setting out a platter of these beauties next to a steaming mug of coffee on a chilly morning. If the kids or guests prefer something richer, you absolutely must have hot chocolate ready. If you’re serving an adult crowd, I always whip up a batch of my bourbon hot chocolate. The warm spiced chocolate mixes so well with the vanilla sweetness of the icing.
If you need more inspiration on how to display your finished treats or if you are looking for new holiday cookie decorating ideas to try next time, I’ve seen some wonderful suggestions over at Vita Recipe Hub that might give you some more presentation ideas!
Frequently Asked Questions About This Sugar Cookie Icing Recipe
I know when you’re about to start a big decorating project, your brain fills up with little worries! Do I have everything right? Will this work? I put together answers to the questions I get asked most often about making this very specific sugar cookie icing recipe so you can decorate without any stress.
How long does this icing recipe need to dry completely?
This is the big one, right? If you want cookies that you can stack high in a gift box for Christmas or travel safely across town, you need patience here. For a finish that is truly rock-hard and totally safe for stacking, you should plan on letting your cookies sit out undisturbed at room temperature for several hours, or ideally, overnight. This gives the glaze plenty of time to fully set up and cure completely! This method really delivers on that promise to give you an icing recipe that hardens properly.
Can I use this easy cookie decorating icing on gingerbread cookies?
Oh, absolutely! I use this mixture on almost every single sturdy cookie I bake. While it’s branded as a sugar cookie icing recipe, it works wonderfully on gingerbread, shortbread, or any other firm, fully cooled cookie based on butter that you have made. Just make sure the cookie itself isn’t warm at all, or you’ll end up with a lovely puddle instead of sharp lines! It’s such a versatile coating.
What is the difference between this and traditional royal icing?
That’s a fair question! Traditional royal icing usually relies on meringue powder or raw egg whites to get that structure. This recipe is much more forgiving. We skip those—which keeps things simpler and safer for quick batches—and instead rely on the ratio of powdered sugar to milk/water and that touch of corn syrup for stability. Even without the egg whites, this acts as a fantastic, reliable no-fail cookie glaze recipe that holds shape beautifully for outlining and flooding, just like the pros use!
If you want to see how these icings look when paired with my favorite base, you should definitely browse through my fruit pizza sugar cookie recipe portfolio for inspiration!
Sharing Your Results with This Sugar Cookie Icing Recipe
Now that you’ve mastered the mixing, you’ve got to show off those beautifully decorated creations! Honestly, seeing photos of what you all create using this sugar cookie icing recipe is my favorite part of running Rosa’s Tasty Kitchen. Did you go for bright holiday colors, or did you stick to a simple, elegant white glaze this time? I love hearing about your successes, especially if this was your first time trying a recipe that dries hard.
If you give this a whirl—whether for a big gathering or just a quiet afternoon baking session—please swing back here and leave a star rating for the recipe right at the top of the page. It helps other busy home cooks know they can trust this glaze. And if you have a minute, I’d adore a comment describing how well it held up while you were stacking them in the tin!
We all learn best when we share tips, so shout out your best decorating move in the comments below! Maybe you found a neat way to use the leftover icing, or perhaps you have a favorite pairing for your iced cookies. For more ideas on fantastic final products, you can always check out my collection of the best homemade desserts.
PrintEasy Sugar Cookie Icing Recipe That Dries Hard and Smooth

Make the best sugar cookie icing for decorating. This recipe is easy to follow, dries firm for stacking, and gives your cut-out cookies a smooth, glossy finish.
- Prep Time: 10 min
- Cook Time: 0 min
- Total Time: 10 min
- Yield: Covers about 2 dozen medium cookies 1x
- Category: Dessert Topping
- Method: Mixing
- Cuisine: American
- Diet: Vegetarian
Ingredients
- 4 cups powdered sugar, sifted
- 1/2 cup milk or water (use milk for a softer bite, water for a harder set)
- 1 teaspoon vanilla extract
- 1 tablespoon light corn syrup (optional, for extra gloss and slight softening)
Instructions
- Place the sifted powdered sugar into a medium bowl.
- Add the milk or water, vanilla extract, and corn syrup (if using) to the bowl.
- Mix the ingredients with a whisk or electric mixer on low speed until just combined. Scrape down the sides of the bowl.
- Increase the speed to medium and beat for 2 to 3 minutes until the icing is completely smooth and glossy.
- Check the consistency. For outlining cookies, the icing should be thick. For flooding (covering the surface), add a few drops more liquid until it slowly drizzles off the whisk in a ribbon that disappears into the bowl after about 10 seconds.
- Divide the icing into separate bowls if you plan to color it. Add gel food coloring one drop at a time, mixing well after each addition.
- Use the icing immediately to outline your cooled sugar cookies. Let the outline set for 10 to 15 minutes.
- Flood the center of the cookies with the thinner icing. Gently tap the cookie sheet on the counter to release air bubbles and smooth the surface.
- Allow the cookies to dry completely at room temperature for several hours, or overnight, until the icing is firm to the touch.
Notes
- For a royal icing alternative that dries very hard, use water instead of milk and omit the corn syrup.
- If the icing becomes too thick while decorating, stir in 1/2 teaspoon of water at a time until you reach the desired consistency.
- This recipe works well for piping details once it has thickened slightly after resting for 5 minutes.
Nutrition
- Serving Size: 1/4 cup
- Calories: 450
- Sugar: 110
- Sodium: 5
- Fat: 0
- Saturated Fat: 0
- Unsaturated Fat: 0
- Trans Fat: 0
- Carbohydrates: 112
- Fiber: 0
- Protein: 0
- Cholesterol: 0